|
| 1 | +--- |
| 2 | +title: Springboot 系列(九)使用 Spring JDBC 和 Druid 数据源监控 |
| 3 | +toc_number: false |
| 4 | +date: 2019-02-27 23:40:01 |
| 5 | +url: springboot/springboot-09-data-jdbc |
| 6 | +tags: |
| 7 | + - Springboot |
| 8 | + - Druid |
| 9 | + - Spring JDBC |
| 10 | +categories: |
| 11 | + - Springboot |
| 12 | +typora-root-url: ..\.. |
| 13 | +--- |
| 14 | + |
| 15 | +## 前言 |
| 16 | +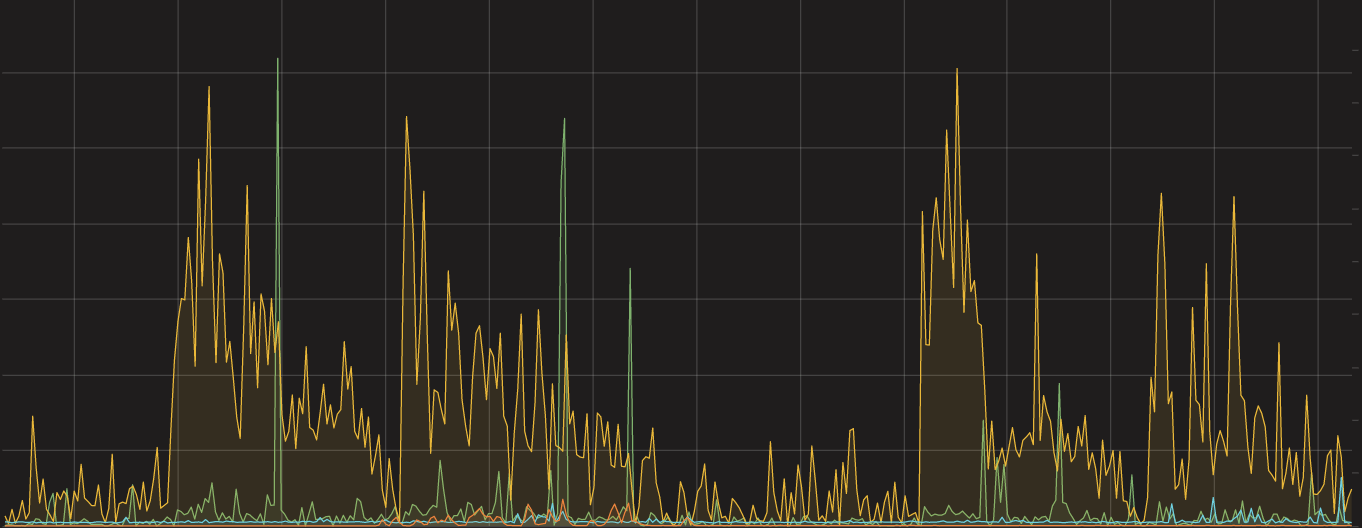 |
| 17 | + |
| 18 | +作为一名 Java 开发者,相信对 JDBC(Java Data Base Connectivity)是不会陌生的,JDBC作为 Java 基础内容,它提供了一种基准,据此可以构建更高级的工具和接口,使数据库开发人员能够编写数据库应用程序。下面演示下 Springboot 中如何使用 JDBC 操作,并配置使用 Druid 连接池,体验 Druid 对数据库操作强大的监控和扩展功能。Alibaba-Durid 官方手册[点这里](https://github.com/alibaba/druid/wiki/%E5%B8%B8%E8%A7%81%E9%97%AE%E9%A2%98)。 |
| 19 | +<!-- more --> |
| 20 | + |
| 21 | +## 1. 数据库准备 |
| 22 | +使用mysql数据库创建数据库 springboot,并在库中新建数据表 user 并新增两条信息。 |
| 23 | +```sql |
| 24 | +CREATE TABLE `user` ( |
| 25 | + `id` int(11) NOT NULL AUTO_INCREMENT, |
| 26 | + `age` int(11) DEFAULT NULL, |
| 27 | + `birthday` datetime DEFAULT NULL, |
| 28 | + `password` varchar(32) NOT NULL, |
| 29 | + `skills` varchar(255) DEFAULT NULL, |
| 30 | + `username` varchar(32) NOT NULL, |
| 31 | + PRIMARY KEY (`id`) |
| 32 | +) ENGINE=InnoDB AUTO_INCREMENT=4 DEFAULT CHARSET=utf8; |
| 33 | + |
| 34 | +# 新增数据 |
| 35 | +INSERT INTO `springboot`.`user`(`id`, `age`, `birthday`, `password`, `skills`, `username`) VALUES (1, 17, '2019-01-12 21:02:30', '123', 'Go', 'Darcy'); |
| 36 | +INSERT INTO `springboot`.`user`(`id`, `age`, `birthday`, `password`, `skills`, `username`) VALUES (3, 23, '2019-01-01 00:11:22', '456', 'Java', 'Chris'); |
| 37 | +``` |
| 38 | +## 2. 添加依赖 |
| 39 | +新建一个 Springboot项目,这里不说。添加依赖如下。 |
| 40 | +```xml |
| 41 | + <dependencies> |
| 42 | + <!-- spring jdbc 操作模版 --> |
| 43 | + <dependency> |
| 44 | + <groupId>org.springframework.boot</groupId> |
| 45 | + <artifactId>spring-boot-starter-jdbc</artifactId> |
| 46 | + </dependency> |
| 47 | + |
| 48 | + <!-- springboot web开发 --> |
| 49 | + <dependency> |
| 50 | + <groupId>org.springframework.boot</groupId> |
| 51 | + <artifactId>spring-boot-starter-web</artifactId> |
| 52 | + </dependency> |
| 53 | + |
| 54 | + <!-- mysql 数据库连接 --> |
| 55 | + <dependency> |
| 56 | + <groupId>mysql</groupId> |
| 57 | + <artifactId>mysql-connector-java</artifactId> |
| 58 | + <scope>runtime</scope> |
| 59 | + </dependency> |
| 60 | + |
| 61 | + <!-- 引入druid数据源 --> |
| 62 | + <dependency> |
| 63 | + <groupId>com.alibaba</groupId> |
| 64 | + <artifactId>druid</artifactId> |
| 65 | + <version>1.1.12</version> |
| 66 | + </dependency> |
| 67 | + |
| 68 | + <dependency> |
| 69 | + <groupId>org.springframework.boot</groupId> |
| 70 | + <artifactId>spring-boot-starter-test</artifactId> |
| 71 | + <scope>test</scope> |
| 72 | + </dependency> |
| 73 | + |
| 74 | + </dependencies> |
| 75 | +``` |
| 76 | +## 3. 配置数据源信息 |
| 77 | +常规的 JDBC 配置不需要配置这么多内容,这里因为使用了 Druid 连接池,所以配置了 Druid 部分。对自动配置不理解的可以查看系列文章[Springboot 系列(二)Spring Boot 配置文件](https://www.wdbyte.com/2019/01/springboot/springboot02-config/#4-%E9%85%8D%E7%BD%AE%E7%9A%84%E4%BD%BF%E7%94%A8)。 |
| 78 | +```yml |
| 79 | +spring: |
| 80 | + datasource: |
| 81 | + username: root |
| 82 | + password: 123 |
| 83 | + url: jdbc:mysql://127.0.0.1:3306/springboot?characterEncoding=utf-8&serverTimezone=GMT%2B8 |
| 84 | + driver-class-name: com.mysql.jdbc.Driver |
| 85 | + type: com.alibaba.druid.pool.DruidDataSource |
| 86 | + |
| 87 | + initialSize: 5 |
| 88 | + minIdle: 5 |
| 89 | + maxActive: 20 |
| 90 | + maxWait: 60000 |
| 91 | + timeBetweenEvictionRunsMillis: 60000 |
| 92 | + minEvictableIdleTimeMillis: 300000 |
| 93 | + validationQuery: SELECT 1 FROM DUAL |
| 94 | + testWhileIdle: true |
| 95 | + testOnBorrow: false |
| 96 | + testOnReturn: false |
| 97 | + poolPreparedStatements: true |
| 98 | + # 配置监控统计拦截的filters,去掉后监控界面sql无法统计,'wall'用于防火墙 |
| 99 | + filters: stat |
| 100 | + maxPoolPreparedStatementPerConnectionSize: 20 |
| 101 | + useGlobalDataSourceStat: true |
| 102 | + connectionProperties: druid.stat.mergeSql=true;druid.stat.slowSqlMillis=500 |
| 103 | +``` |
| 104 | +配置完毕之后,配置信息还不能绑定到 Druid数据源中,还需要新建一个配置类绑定数据源和配置信息。 |
| 105 | +```java |
| 106 | +/** |
| 107 | + * <p> |
| 108 | + * Druid 数据源配置 |
| 109 | + * |
| 110 | + * @Author niujinpeng |
| 111 | + * @Date 2019/1/14 22:20 |
| 112 | + */ |
| 113 | +@Configuration |
| 114 | +public class DruidConfig { |
| 115 | + /** |
| 116 | + * 配置绑定 |
| 117 | + * @return |
| 118 | + */ |
| 119 | + @Bean |
| 120 | + @ConfigurationProperties(prefix = "spring.datasource") |
| 121 | + public DruidDataSource druid() { |
| 122 | + return new DruidDataSource(); |
| 123 | + } |
| 124 | +} |
| 125 | +``` |
| 126 | +到这里,数据源已经配置完毕,编写测试方法测试 druid 连接池是否生效。 |
| 127 | +```java |
| 128 | + |
| 129 | +@RunWith(SpringRunner.class) |
| 130 | +@SpringBootTest |
| 131 | +public class SpringbootDataJdbcApplicationTests { |
| 132 | + @Autowired |
| 133 | + DataSource dataSource; |
| 134 | + /** |
| 135 | + * 测试JDBC数据源 |
| 136 | + * @throws SQLException |
| 137 | + */ |
| 138 | + @Test |
| 139 | + public void contextLoads() throws SQLException { |
| 140 | + System.out.println(dataSource.getClass()); |
| 141 | + Connection connection = dataSource.getConnection(); |
| 142 | + System.out.println(connection); |
| 143 | + connection.close(); |
| 144 | + } |
| 145 | +} |
| 146 | +``` |
| 147 | +运行看到 contextLoads 输出信息。 |
| 148 | +``` |
| 149 | +class com.alibaba.druid.pool.DruidDataSource |
| 150 | +Loading class `com.mysql.jdbc.Driver'. This is deprecated. The new driver class is `com.mysql.cj.jdbc.Driver'. The driver is automatically registered via the SPI and manual loading of the driver class is generally unnecessary. |
| 151 | +2019-02-27 14:14:56.144 INFO 12860 --- [ main] com.alibaba.druid.pool.DruidDataSource : {dataSource-1} inited |
| 152 | +com.alibaba.druid.proxy.jdbc.ConnectionProxyImpl@3e104d4b |
| 153 | +``` |
| 154 | +输出日志中的 com.alibaba.druid 说明 Druid 已经生效。 |
| 155 | +## 4. 使用 Spring-JDBC |
| 156 | +传统的 JDBC 使用中,需要编写大量代码,从构造 PreparedStatement 到查询不胜其烦。面对这样的开发痛点,Spring 封装了 Spring-jdbc. 让我们使用 JdbcTemplate 即可轻松的操作数据库。Spring-jdbc 的详细使用不是这篇文章重点,只简单演示下是否生效。 |
| 157 | +编写控制器,查询一个 user 信息。 |
| 158 | +```java |
| 159 | +@RestController |
| 160 | +public class JdbcController { |
| 161 | + @Autowired |
| 162 | + JdbcTemplate jdbcTemplate; |
| 163 | + @ResponseBody |
| 164 | + @GetMapping("/query") |
| 165 | + public Map<String, Object> map() { |
| 166 | + List<Map<String, Object>> list = jdbcTemplate.queryForList("select * FROM user"); |
| 167 | + return list.get(0); |
| 168 | + } |
| 169 | +} |
| 170 | +``` |
| 171 | +启动spring 项目,请求 /query 接口得到正常响应。 |
| 172 | +```json |
| 173 | +{ |
| 174 | +"id": 1, |
| 175 | +"age": 17, |
| 176 | +"birthday": "2019-01-12T13:02:30.000+0000", |
| 177 | +"password": "123", |
| 178 | +"skills": "Go", |
| 179 | +"username": "Darcy" |
| 180 | +} |
| 181 | +``` |
| 182 | +可见 Spring-JDBC 已经从数据库中取出了数据信息。 |
| 183 | +## 5. 使用 Druid 监控 |
| 184 | +如果使用 Druid 连接池却不使用监控功能,那么就有点暴殄天物了。下面开始配置 Druid 的 SQL 监控功能。在上面写的 DruidConfig 配置类中增加配置 Druid 的 Servlet 和 Filter. |
| 185 | +```java |
| 186 | + /** |
| 187 | + * Druid的servlet |
| 188 | + * @return |
| 189 | + */ |
| 190 | + @Bean |
| 191 | + public ServletRegistrationBean statViewServlet() { |
| 192 | + ServletRegistrationBean bean = new ServletRegistrationBean(new StatViewServlet()); |
| 193 | + Map<String, String> initParams = new HashMap<>(); |
| 194 | + initParams.put("loginUsername", "admin"); |
| 195 | + initParams.put("loginPassword", "123"); |
| 196 | + initParams.put("allow","127.0.0.1"); |
| 197 | + bean.setInitParameters(initParams); |
| 198 | + bean.setUrlMappings(Arrays.asList("/druid/*")); |
| 199 | + return bean; |
| 200 | + } |
| 201 | + @Bean |
| 202 | + public FilterRegistrationBean webStatFilter() { |
| 203 | + FilterRegistrationBean<WebStatFilter> bean = new FilterRegistrationBean<>(new WebStatFilter()); |
| 204 | + HashMap<String, String> initParams = new HashMap<>(); |
| 205 | + initParams.put("exclusions", "/css,/druid/*"); |
| 206 | + bean.setInitParameters(initParams); |
| 207 | + bean.setUrlPatterns(Arrays.asList("/*")); |
| 208 | + return bean; |
| 209 | + } |
| 210 | +``` |
| 211 | +上面配置了 Druid 监控访问路径为 `/druid`、登录用户是 `admin`、登录密码是`123`、允许访问的IP是`127.0.0.1` 本机、不需要监控的请求是 `/css` 和 `/druid` 开头的请求。 |
| 212 | + |
| 213 | +重新启动项目,访问测试 `/query`,然后访问 `/durid` 登录页。 |
| 214 | +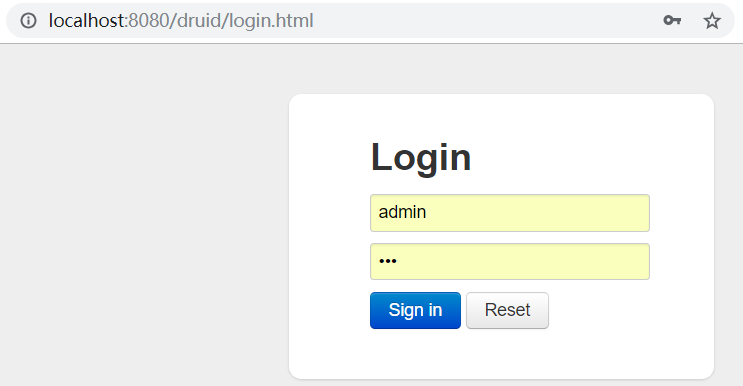 |
| 215 | + |
| 216 | +登录后可以看到 SQL 监控信息和 URL 监控等信息。 |
| 217 | + |
| 218 | +URL 监控。 |
| 219 | +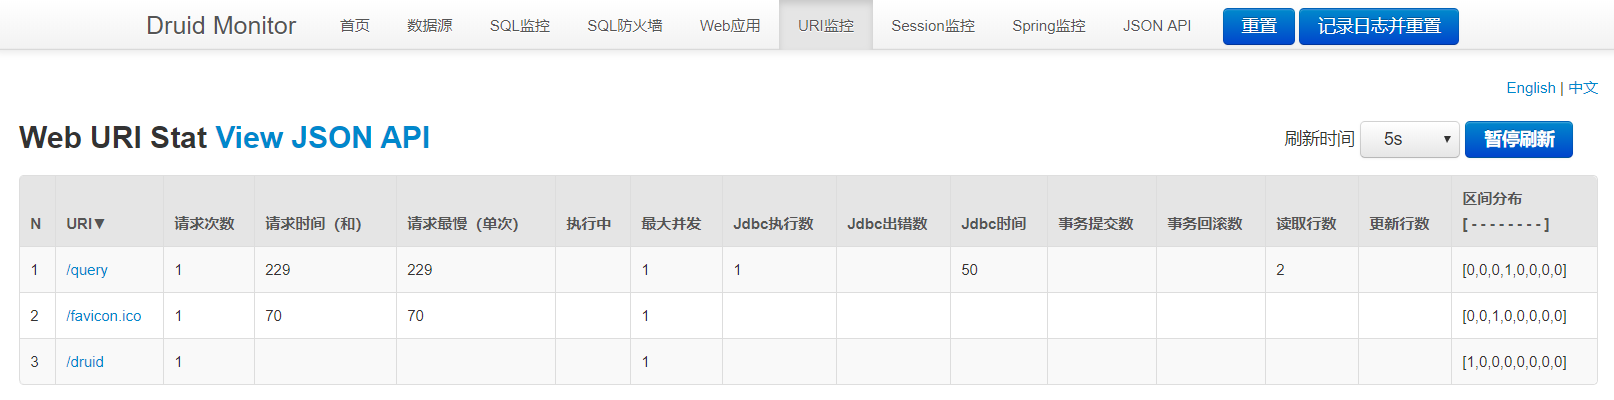 |
| 220 | + |
| 221 | +文章代码已经上传到 GitHub [Spring Boot jdbc](https://github.com/niumoo/springboot/tree/master/springboot-data-jdbc)。 |
0 commit comments