He had arrived at an intersection in the next town over. My cross street does not exist there. I don’t know how he ended up there. The map only shows one location when searching for the cross streets I had given him. I was standing there. He was not. It was strange, and kind of annoying, but he chuckled and apologized and said he would be there in twenty minutes, if I could wait.
There was another man on the corner dealing with bicycle issues. After hanging up, I approached him. Asked what happened. He told me his bike’s derailleur arm had broken. He was removing a length of chain to make it a rideable single-speed. I noticed he was using wire cutters to snip the chain. I asked if he had a chain-breaker. He told me he did not. I asked if he needed any help. He told me he did not. I wished him the best of luck.
Soon after, the man for the game messaged me again. Told me he was outside, perhaps. He was outside, for real, this time. He was more excited about this board game than I would expect. He told me it was no longer being made, that there is a similar version, but it’s not as good, and that for about a decade, he had been searching for it in whatever city he would visit. I told him it had been living with me for about a decade, mostly collecting dust. I told him it had all the pieces, except the die. He told me that was fine. That he was only interested in playing it, not reselling it. I gave him the game. He gave me the money. We went our separate ways.
After the exchange, curiosity convinced me to search for the game online. To see how difficult it is to find. It must have been rare. It was selling for ten times as much as I asked for. Twenty times, if new. The black Jetta was still outside. I imagined the guy in the Jetta looking through the contents of the box, making sure all the pieces were there.
I looked at prices for other games I was selling; nothing special. I chided myself for not being more diligent about what I had. Gave myself mental-lashes to remember to check for next time. Checked if the black Jetta was still there. Then resigned to the fact that in the end, that’s how things work, and the game was moving on to a better life than with me.
After some time, I heard a knock on the door. Rarely, do I receive knocks on my door, so I wondered what could be wrong. To my knowledge, there wasn’t anything missing or wrong with the game. But there was something wrong with my assumption. It wasn’t the man with the Jetta. It was the man with the bike.
He asked if I was the same person that had offered him help earlier. I told him, I was. He asked if I had a chain-breaker after all. I told him, I did not. But I had other tools he was welcome to, one of which, he said, would do.
His hands were as familiar with tools as they were with ink, callouses, and dirt. I watched silently until curiosity got the better of me. I asked him about his past, pointing out that he clearly knew what he was doing. I wanted to ask about his tattoos as well, but that would have been too much.
He told me that he’d recently cut wood in Vancouver. That he’d built some shelving for a shop, but that job was pretty much over with. That he used to have a car that he would work on, but now he only had the bicycle. He told me things were pretty rough these days. That not a lot of people need his kind of work. He looked to me like he was in his late twenties or early thirties.
Having felt the weight of hard time and no work on my own shoulders, I tried to commiserate, but the words fell flat somewhere between the disparity of our current circumstances. Silence filled the gap as I thought about the current state of the world, my past, and how easily things could have found our roles reversed. I’ve been out of work. I’ve gone without food. I’ve lived in my car and on couches. Hard times and I have met a few times before, but never as intimately as I suspect this man has.
When the bike was fixed and the conversation over, I offered him my hand and my name. He took both and returned in kind. Then, he offered me his wire cutters. I refused, seeing as they were the only tool he had in his backpack. He insisted. Told me they’re the kind that bike shops like to use. So I accepted, said goodbye, and went inside.
I stood there, reflecting on the events of the morning. On the two men I had just met, and the self I am still getting to know. The thought crossed my mind, that if I was a better person, I would have given the money for the game in exchange for the wire cutters. That the money would surely have found his pocket to be a better home than my wallet. By the time I looked outside, the man with the bike had left to somewhere I did not know.
After enough time had passed for the man in the black Jetta to get home, I received a message. “Thanks man.” I wanted to comment on the game’s rarity. I wanted to ask about his search coming to a close. I wanted to mention what a good deal he got. “Sure thing. Hope you enjoy it.”
I’m glad the game found a better place to live. I’m sad the money did not.
Today, I made ten dollars and one person happy, but perhaps I could have made more…
Thanks for stopping by my corner of the internet. Here, there are no ads, trackers, paywalls, accounts, etc. It's hard, but worth the better experience. If you'd like to keep this site up, consider hiring me, making a donation, buying something (soon), leaving a comment, or sharing. It helps more than you know. I'm glad you're :)
]]>They are dependable. They are consistent. They have quirky names, and I like that.
Most important, they are limited. They present a narrow scope of options to choose from, which means less to think about. For a simple guy like me, the less to think about, the better.
A while back, I wrote a post putting everything I could ever want to know (and more) about CSS named colors in a single place. If I need to look something up that relates to named colors, I know where to go.
Today’s post is something of a follow-up.
I found that, even with the existing limit of options, there are still too many named colors to remember. So I’ve simplified my life again by reducing the options to nine: black, white, grey, red, orange, yellow, green, blue, and purple. That’s it. Those are my options.
This was not possible at the time CSS module 4 was released, but it is today, thanks to CSS custom properties.
Now, to be fair, using Custom Properties to assign easy-to-remember and easy-to-maintain color palettes is hardly a novel idea. But what if we squish them together with every named color that fits the description?
It’ll be easier if I show you what I’m talking about…
@layer colors {
	:root {
		--black: black; /* black */
		--white: whitesmoke; /* white snow ivory mintcream ghostwhite floralwhite whitesmoke ghostwhite */
		--grey: darkgray; /* darkgray darkgrey grey gray */
		--red: orangered; /* orangered tomato indianred */
		--orange: darkorange; /* orange darkorange */
		--yellow: gold;
		--green: limegreen; /* green forestgreen limegreen */
		--blue: dodgerblue; /* dodgerblue blue  */
		--purple: mediumorchid; /* darkviolet purple rebeccapurple mediumorchid darkmagenta */
	}
}
In this snippet, I create each of my variables and assign them to my preferred named color for that category. After the variable assignment, in a comment block, I include every CSS named color that could also be assigned to its respective variable.
Why does this matter?
For a number of reasons:
- I can copy/paste the same CSS snippet across projects
- I can use the same naming conventions across projects
- I can easily change colors for the project I’m working on
- I can find every available option without leaving my editor
- And last but not least, this…
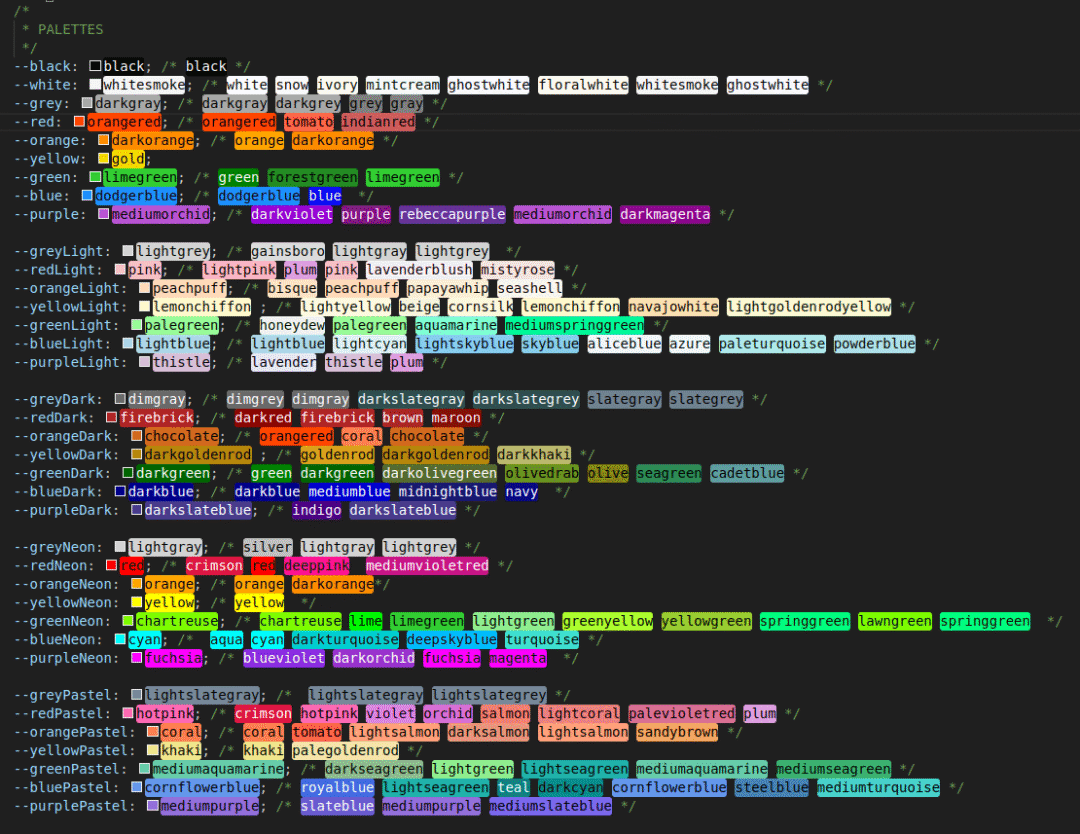
Because my editor shows a visual representation of any color, it’s easy to visually scan the available color options, even the ones in the commented-out blocks. Additionally, the editor shows me which colors work better with white vs. black text.
Ok, I also lied when I said I only use nine color options. As you can see, there are five different palettes with seven colors each, plus black and white, for a total of 37 🤷
Here’s a copy of the full list if you like:
@layer palettes {
	:root {
		/*
		 * PALETTES
		 */
		--black: black; /* black */
		--white: whitesmoke; /* white snow ivory mintcream ghostwhite floralwhite whitesmoke ghostwhite */
		--grey: darkgray; /* darkgray darkgrey grey gray */
		--red: orangered; /* orangered tomato indianred */
		--orange: darkorange; /* orange darkorange */
		--yellow: gold;
		--green: limegreen; /* green forestgreen limegreen */
		--blue: dodgerblue; /* dodgerblue blue  */
		--purple: mediumorchid; /* darkviolet purple rebeccapurple mediumorchid darkmagenta */

		--greyLight: lightgrey; /* gainsboro lightgray lightgrey  */
		--redLight: pink; /* lightpink plum pink lavenderblush mistyrose */
		--orangeLight: peachpuff; /* bisque peachpuff papayawhip seashell */
		--yellowLight: lemonchiffon ; /* lightyellow beige cornsilk lemonchiffon navajowhite lightgoldenrodyellow */
		--greenLight: palegreen; /* honeydew palegreen aquamarine mediumspringgreen */
		--blueLight: lightblue; /* lightblue lightcyan lightskyblue skyblue aliceblue azure paleturquoise powderblue */
		--purpleLight: thistle; /* lavender thistle plum */

		--greyDark: dimgray; /* dimgrey dimgray darkslategray darkslategrey slategray slategrey */
		--redDark: firebrick; /* darkred firebrick brown maroon */
		--orangeDark: chocolate; /* orangered coral chocolate */
		--yellowDark: darkgoldenrod ; /* goldenrod darkgoldenrod darkkhaki */
		--greenDark: darkgreen; /* green darkgreen darkolivegreen olivedrab olive seagreen cadetblue */
		--blueDark: darkblue; /* darkblue mediumblue midnightblue navy  */
		--purpleDark: darkslateblue; /* indigo darkslateblue */

		--greyNeon: lightgray; /* silver lightgray lightgrey */
		--redNeon: red; /* crimson red deeppink  mediumvioletred */
		--orangeNeon: orange; /* orange darkorange*/
		--yellowNeon: yellow; /* yellow  */
		--greenNeon: chartreuse; /* chartreuse lime limegreen lightgreen greenyellow yellowgreen springgreen lawngreen springgreen  */
		--blueNeon: cyan; /*  aqua cyan darkturquoise deepskyblue turquoise */
		--purpleNeon: fuchsia; /* blueviolet darkorchid fuchsia magenta  */

		--greyPastel: lightslategray; /*  lightslategray lightslategrey */
		--redPastel: hotpink; /* crimson hotpink violet orchid salmon lightcoral palevioletred plum */
		--orangePastel: coral; /* coral tomato lightsalmon darksalmon lightsalmon sandybrown */
		--yellowPastel: khaki; /* khaki palegoldenrod */
		--greenPastel: mediumaquamarine; /* darkseagreen lightgreen lightseagreen mediumaquamarine mediumseagreen */
		--bluePastel: cornflowerblue; /* royalblue lightseagreen teal darkcyan cornflowerblue steelblue mediumturquoise */
		--purplePastel: mediumpurple; /* slateblue mediumpurple mediumslateblue */
	}
}
Something else I’ve also been playing with is the idea of creating alternative variables that simply work as convenience improvements by offering multiple, intuitive names for the other variables. For example, both --grey and --gray mean the same thing, as well as “neon”, “loud”, and “vibrant”, and “pastel”, “muted”, and “dull”.
@layer palettes {
	:root {
		/* ... */

		/*
		 * ALTERNATIVES
		 */
		--gray: var(--grey);
		--grayLight: var(--greyLight);
		--grayDark: var(--greyDark);
		--grayBright: var(--greyBright);
		--grayPastel: var(--greyPastel);

		--greyLoud: var(--greyNeon);
		--grayLoud: var(--greyNeon);
		--redLoud: var(--redNeon);
		--orangeLoud: var(--orangeNeon);
		--yellowLoud: var(--yellowNeon);
		--greenLoud: var(--greenNeon);
		--blueLoud: var(--blueNeon);
		--purpleLoud: var(--purpleNeon);
		--greyVibrant: var(--greyNeon);
		--redVibrant: var(--redNeon);
		--orangeVibrant: var(--orangeNeon);
		--yellowVibrant: var(--yellowNeon);
		--greenVibrant: var(--greenNeon);
		--blueVibrant: var(--blueNeon);
		--purpleVibrant: var(--purpleNeon);

		--greyMuted: var(--greyPastel);
		--redMuted: var(--redPastel);
		--orangeMuted: var(--orangePastel);
		--yellowMuted: var(--yellowPastel);
		--greenMuted: var(--greenPastel);
		--blueMuted: var(--bluePastel);
		--purpleMuted: var(--purplePastel);
		--greyDull: var(--greyPastel);
		--redDull: var(--redPastel);
		--orangeDull: var(--orangePastel);
		--yellowDull: var(--yellowPastel);
		--greenDull: var(--greenPastel);
		--blueDull: var(--bluePastel);
		--purpleDull: var(--purplePastel);
	}
}
I’m still workshopping much of this, so consider it a loose concept. Still, it’s been fun to mess around with, and I’d love to hear your thoughts.
Before closing, I should also mention that a lot of my work these days leans towards small, solo-dev projects. Also worth repeating is my strange fascination with CSS named colors. This introduces a unique parameter I imagine most folks don’t care about. What works for me may not work for everyone, but this is easy enough to play around with and see how it feels for you.
Thanks for stopping by my corner of the internet. Here, there are no ads, trackers, paywalls, accounts, etc. It's hard, but worth the better experience. If you'd like to keep this site up, consider hiring me, making a donation, buying something (soon), leaving a comment, or sharing. It helps more than you know. I'm glad you're :)
]]>Biffed it hard on the Marin.
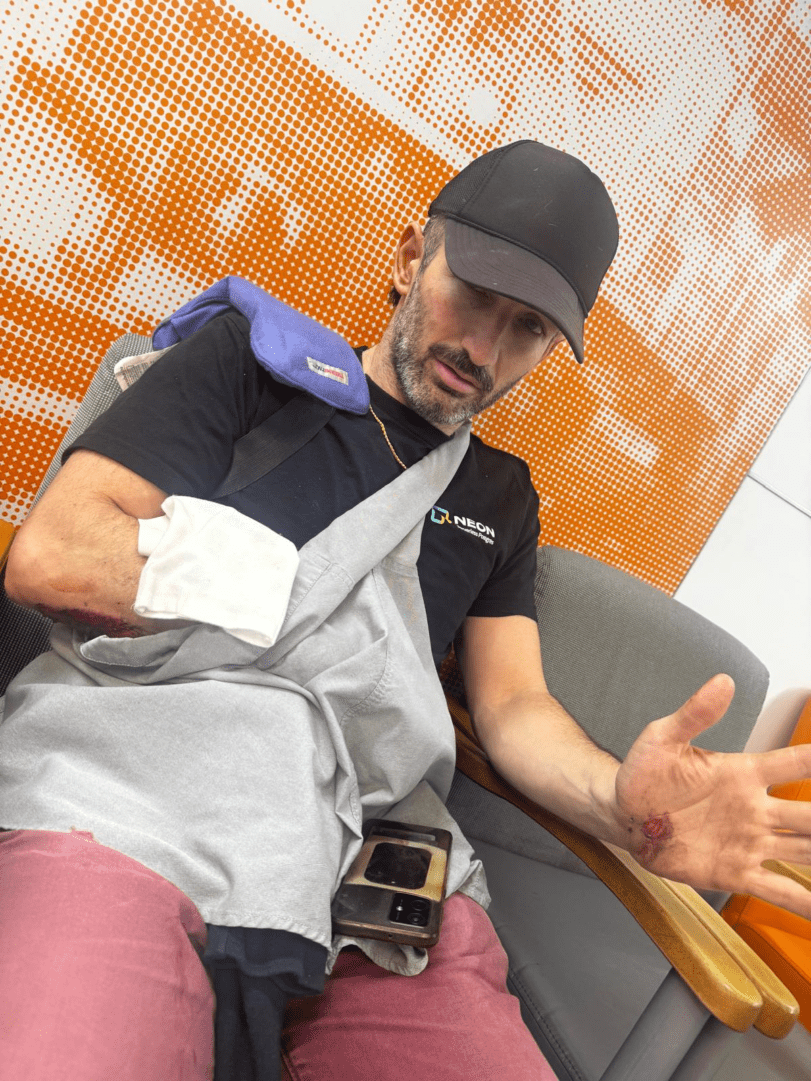


“Anything break?”
Sure did…


“You broke your neck!?”
No. The ‘radial neck fracture’ refers to the “neck” of the radius, one of the two bones in the forearm. The radius is the bone that sits on the thumb side of the forearm. You can remember that fact by holding out both arms, curling both hands into fists, sticking both thumbs up into the air and yelling, “the radius is rad, brother!”
Turns out, I also fractured the other forearm bone, the ulna. You can recognize the ulna by its little “U” shaped head that wraps around the humerus bone in the upper arm, forming the elbow joint. Hitting the spot between the ulna and humerus just right can strike a nerve, causing a strange sensation, often referred to as “hitting the funny bone”.
Anyway…
“What was ‘the trick’?”
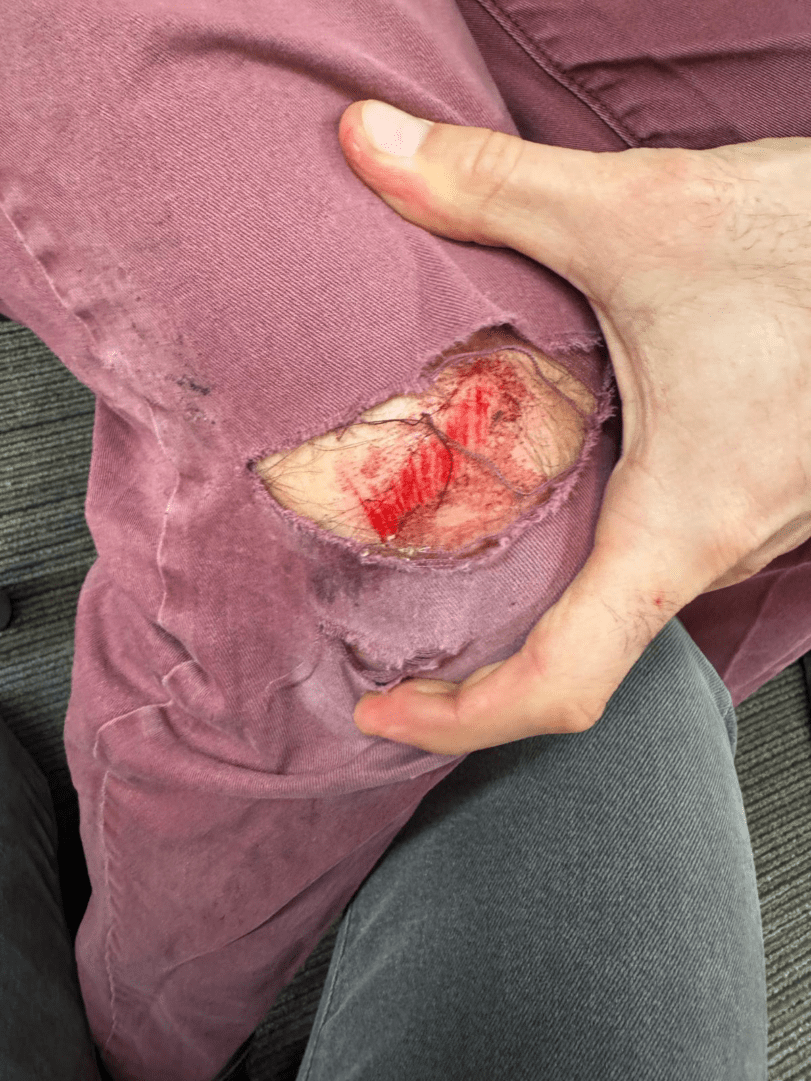
There’s a section of sidewalk right outside Houndogs Bar & Grill in Portland that’s just begging for some love. It’s like a 10ft gap between two driveways, with a gutter on the left, and a telephone pole on the right…
In theory, one could roll over the ‘up ramp’ with the front wheel, pop one’s weight forward when the rear tire hits the ‘up ramp’ lifting rear tire into air (“pop an Endo”), ride on just the front wheel between the gutter and telephone pole (“thread the needle”), clear the ‘down ramp’ with the front wheel, and bring the rear wheel down as close to the top of the ‘down ramp’ as possible (“stomp the landing”), and keep rollin’ on to beers, tacos, or whatever.
I was trying to pop an Endo, thread the needle, and stomp the landing, but forgot one important thing. Endo is short for ‘end-over-end’, which is an important/crappy/unavoidable part of the learning process.
“You good?”
Clearly not good enough…

“Was it worth it?”
Hell yeah! Nine reasons why:
- The bike seems fine.
- In the past, I’ve played around doing things with my non-dominant arm, just to see how it feels. Turns out, it was good practice.
- Electric toothbrushes and bidets exist for the rest.
- It could have been a lot worse. I’m lucky to still be walking. Helmets are cool.
- “Pain is weakness leaving the body.” – Chesty Puller via Coach Gator
- “What does not kill me makes me stronger.” – Friedrich Nietzsche via Coach Roggerman
- “Pain heals. Chicks dig scars. Glory lasts forever.” – Shane Falco via Keanu Reeves
- “I never view mistakes as failures. They are simply opportunities to find out what doesn’t work.” – Thomas Edison
- I learned how not to do it. Bet I’ll get it next time…
Thanks for stopping by my corner of the internet. Here, there are no ads, trackers, paywalls, accounts, etc. It's hard, but worth the better experience. If you'd like to keep this site up, consider hiring me, making a donation, buying something (soon), leaving a comment, or sharing. It helps more than you know. I'm glad you're :)
]]>
Thanks for stopping by my corner of the internet. Here, there are no ads, trackers, paywalls, accounts, etc. It's hard, but worth the better experience. If you'd like to keep this site up, consider hiring me, making a donation, buying something (soon), leaving a comment, or sharing. It helps more than you know. I'm glad you're :)
]]>any keyword.
This post is not about Generics on their own. If you do not have experience with them, you should consult the Generics documentation first.
An issue with Generics is that sometimes we know the rough shape of the data that we’re working with, for example, a function argument that will surely have a length property. In this case, a normal Generic might cause the compiler to complain:
function loggingIdentity<Type>(arg: Type): Type {
  console.log(arg.length); // Property 'length' does not exist on type 'Type'.
  return arg;
}
As per the documentation, this issue can be solved with Generic Constraints, where you provide TypeScript with more details about the Generic. For the example above, we can tell TypeScript that our Generic Type actually extends another interface:
interface Lengthwise {
  length: number;
}
function loggingIdentity<Type extends Lengthwise>(arg: Type): Type {
  console.log(arg.length); // Now we know it has a .length property, so no more error
  return arg;
}
Working with JSDocs
Because I’m often copying code from one codebase to another to the browser to another runtime, etc., I prefer writing my type annotations with JSDocs. However, I sometimes run into scenarios with complex types where I don’t know how what the equivalent syntax is for TS in JSDocs, and nowhere on the internet can I find it.
For TypeScript Generic Constraints in JSDocs, now I can!
The same solution we had with Generic Constraints above can be achieved in JSDocs like so:
/**
 * @typedef {{
 *  length: number
 * }} Lengthwise
 */
/**
 * @template {Lengthwise} Type
 * @param {Type} arg
 * @returns {Type}
 */
function loggingIdentity(arg) {
  console.log(arg.length); // Also no complaints
  return arg;
}
We can create a Generic in JSDocs using the @template keyword, and by providing it with a type definition in the curly brackets, we get a Generic Constraint.
The secret is @template {Lengthwise} Type, where @template tells the compiler you are creating a Generic, {Lengthwise} provides the Constraint, and Type (in this case) is the name of the Generic. It can be whatever you like. Often in TypeScript files you will just see T.
Real World Example
I’ve been using Drizzle ORM in my applications lately. It’s awesome!!! They have great documentation that includes good, relevant examples, like how to build dynamic queries.
In their examples, they include a utility function that can extend a normal query to add pagination:
function withPagination<T extends PgSelect>(
	qb: T,
	page: number = 1,
	pageSize: number = 10,
) {
	return qb.limit(pageSize).offset((page - 1) * pageSize);
}
The project I’m working on uses Drizzle in a JavaScript file and while I could rewrite it in TyeScript, I opted to learn how to accomplish the same thing with JSDocs and write about it instead.
/**
 * @template {SQLiteSelect} T
 * @param {T} qb
 * @param {number} page
 * @param {number} perPage
 */
export function withPagination(qb, page = 1, perPage = 10) {
  return qb.limit(perPage).offset((page - 1) * perPage);
}
(My example uses SQLiteSelect instead of PgSelect, but you get the idea)
Hope you found this helpful. If you did, please let me know in the comments, share, or do whatever feels right.
Thanks for stopping by my corner of the internet. Here, there are no ads, trackers, paywalls, accounts, etc. It's hard, but worth the better experience. If you'd like to keep this site up, consider hiring me, making a donation, buying something (soon), leaving a comment, or sharing. It helps more than you know. I'm glad you're :)
]]>Nature, wildlife, gravel, rivers, houses I’ll never afford but like fantasize about living in, roads I suspect were not originally made with bikes in mind, unnecessary loops, options to short-cut, options to cut it short, sprawling views, sketchy road crossings, things to catch air off, seasonal colors and decorations, a secret sombrero, reasons to feel proud of PBOT, reason to feel disappointed in PBOT, opportunities to make questionable interpretations of traffic law based on arbitrary rules in my head which change depending on circumstance, bridges, skate parks, urban art, highways, mountains, railroads, power plants, moments where it feels like I’ve left reality behind, grass, more grass, cute tourist attractions, people in parks, people going to work, people shopping, people going about their day, people from all sorts of economic states, political views, and housing circumstances making up this awesome city, reasons to go fast, reasons to slow down, and reasons to stop to take it all in.
(Keep scrolling past the map for section descriptions)
Sections
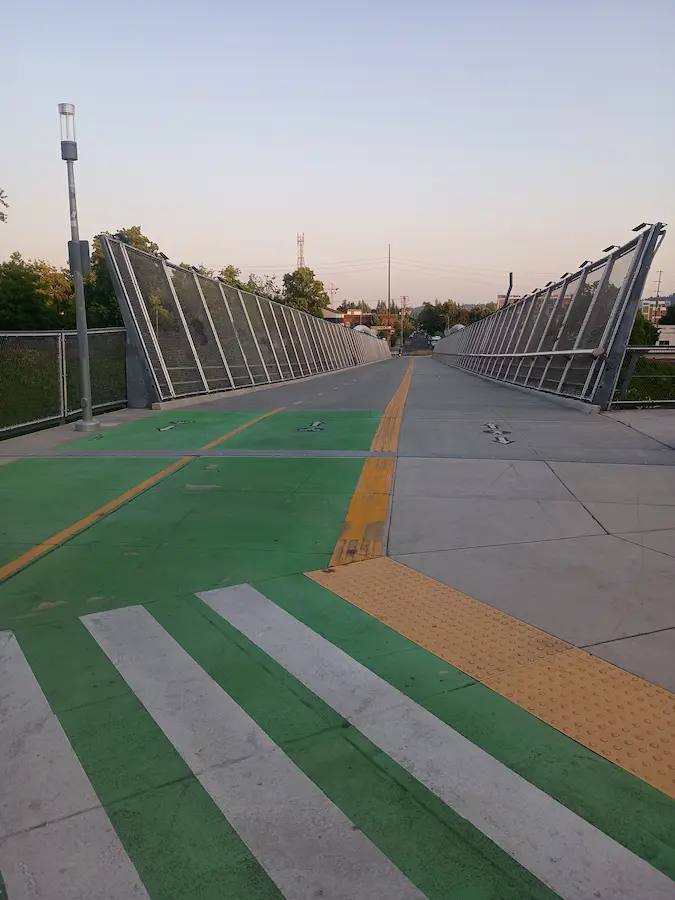
Nice, Neat, Naito!

Start at the Caruthers Street cul-de-sac because the Tilikum is a sex symbol. This mellow beginning includes urban art, pretty trees, a submarine, OMSI, views of the river, a beautiful bridge, and occasinal dragon boat racers. Watch out for pedestrians.
Crossing the Hawthorne bridge avoids some of the traffic on the Eastbank Esplanade and ties in some fun curlies. After the bridge, as you turn onto Naito, there’s a little jump off the curb onto the bike lane.
Naito is fun because there’s no stops and lots of cars. Great for a good sprint.
At the Japanese memorial plaza, cross over to the river side, burm some boulders, or read poems on the rocks on the way. In spring time, you can catch cherry blossoms in bloom (along with a shitload of people taking pictures). This is another high pedestrian area.
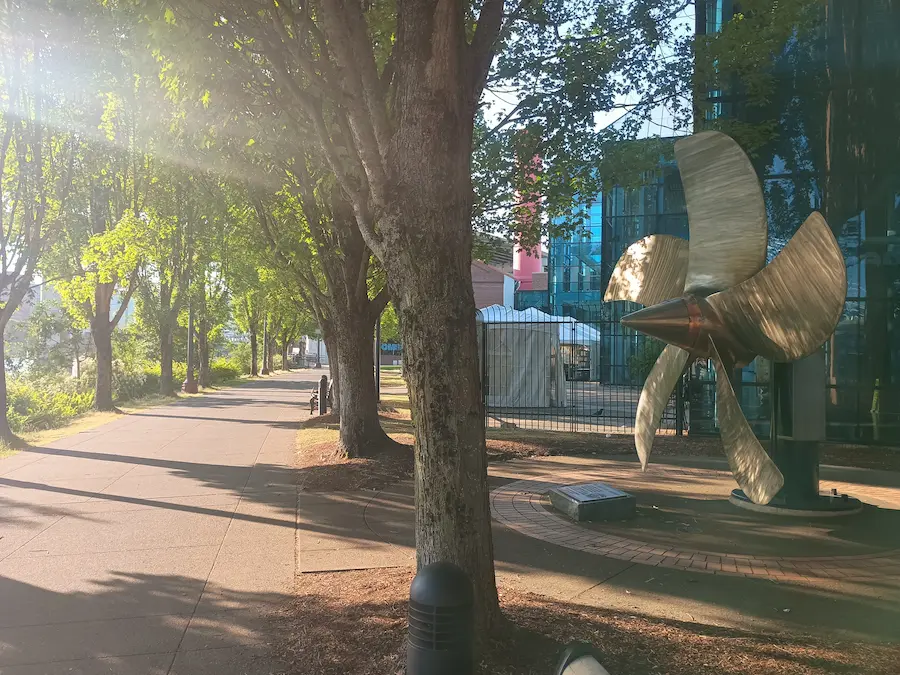
Cross Steel Bridge to the East Side. As a shining example of urban beauty, Steel is my favorite bridge, and from this direction you can look to the right unto the fantastical glass spires of the of the Portland Convention Center, and whatever the fuck that big grey thing is the the left. Try to pick find a favorite tag.
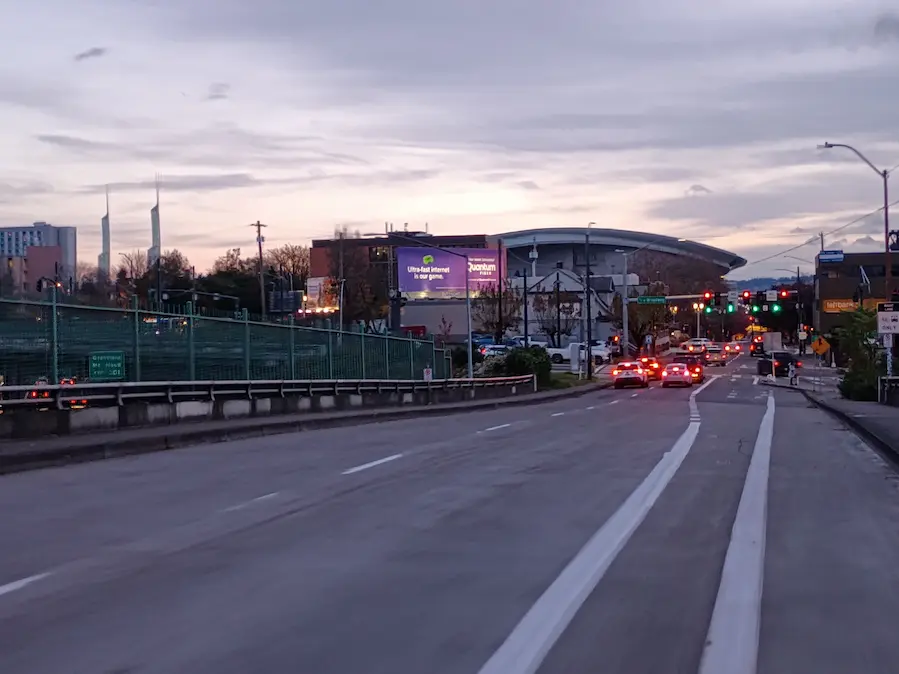
On the far end, zig zag up to the hill. The public transit terminal, basketball stadium, and convention center, means there’s a lot of activity and people watching to be had here.
Barrel Race
After a few traffic signals is a long, straight uphill. Maybe it’s the neighborhood, the trees, or the grade of the hill, but this section drags. That is, until Dawson Park. The hill starts to flatten out, the buildings get taller, the path gets narrower, and the bustle of shops and restaurants picks up.
It highlights one of my joys of riding bikes. Going as fast as I can; feeling the wind rushing, swerving around obstacles, jumping red lights, a slight burn in my legs and lungs, sweat. With the right music, everything else disappears.
The last part of the Williams climb, however, is annoying as the moment ends. Right around the time my legs gas out, the road opens up, the hill gets steeper, and the cars become harder to keep up with. It takes effort to make the final push, but the end is worth it. At the top of the climb is a break as the hill flattens out, before dropping into the Piedmont neighborhood.
Piedmont has very little car traffic, many cute houses, few stop signs, and a beautiful church. It’s a long, mostly straight downhill that requires little pedaling and even less focus. Enjoy the break!
Near the bottom, as you crest over the train tracks, look to the East/right. On a clear day enough, you can see Mt. Hood.
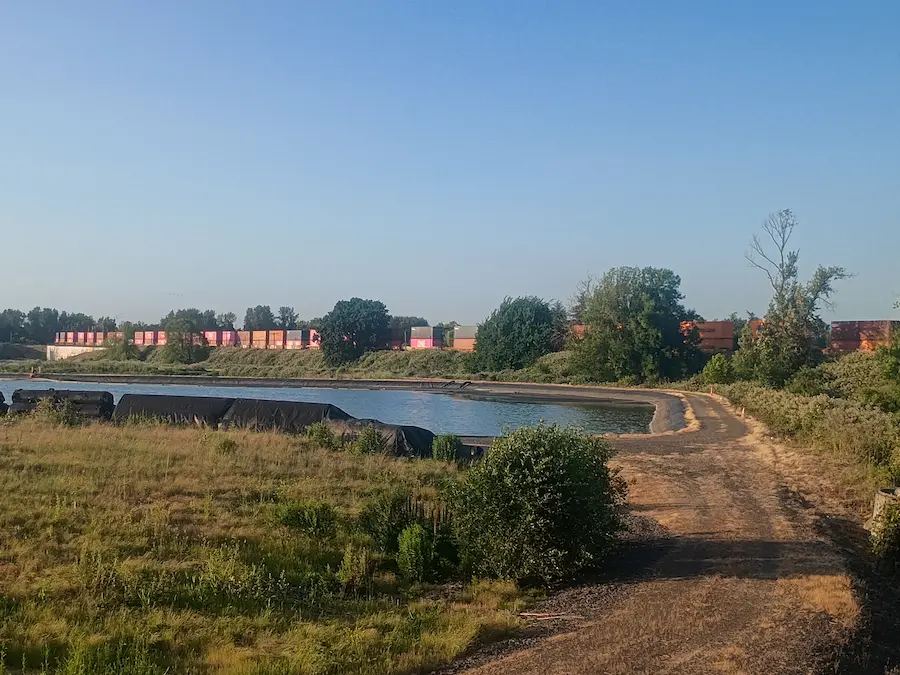
Nice and Slough

Grass. Water. Nature. What’s not to love? The Columbia River slough is a flat, winding bike path along the river that always offers good views and opportunity for nature/wildlife experiences. I’ve seen herons, osprey, turtles, a 100-goose flock of geese, and more. Enjoy it.
The first half has a well maintained paved path with water on one side and industrial warehouses on the other. On the second half, warehouses give way for the Portland International Raceway (PIR) and Heron Lakes Golf Course. It also feels like the paved path decided to try being a gravel path for the day, and doesn’t do a very good job at being either.
Keep an eye out for raptors in the tall grass.
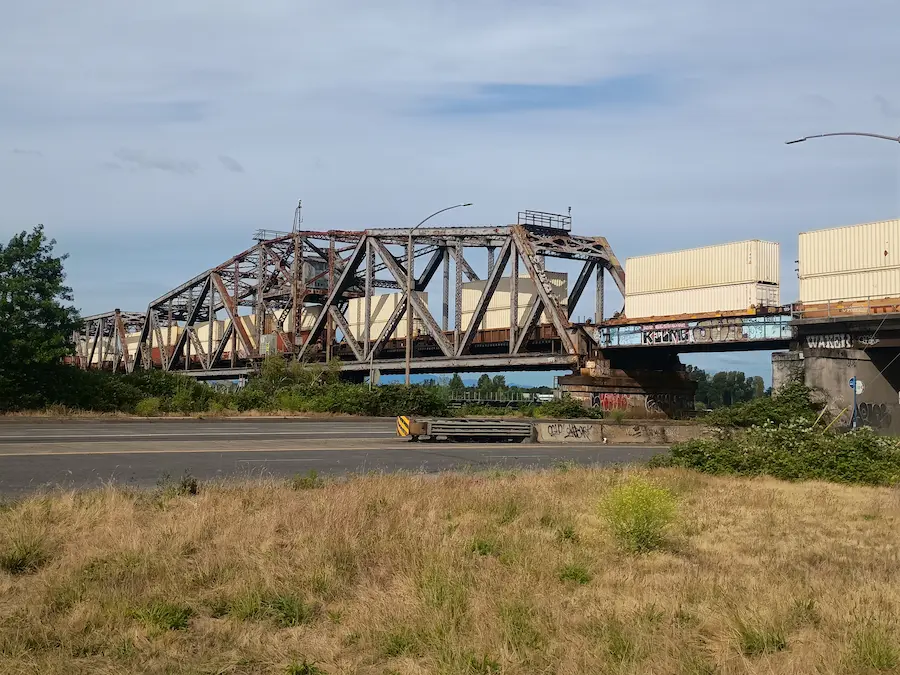
This section finishes with a train track underpass, graffiti, a short section of pine trees, then a long straight transition overgrown with plants that want to reach out and touch you. Hit the jump!
Psyche!
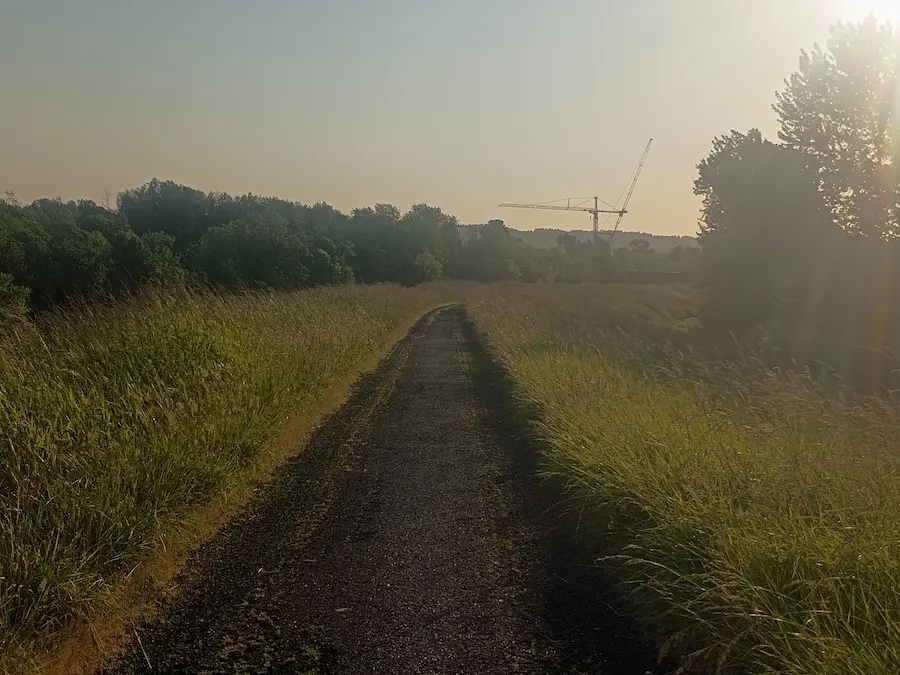
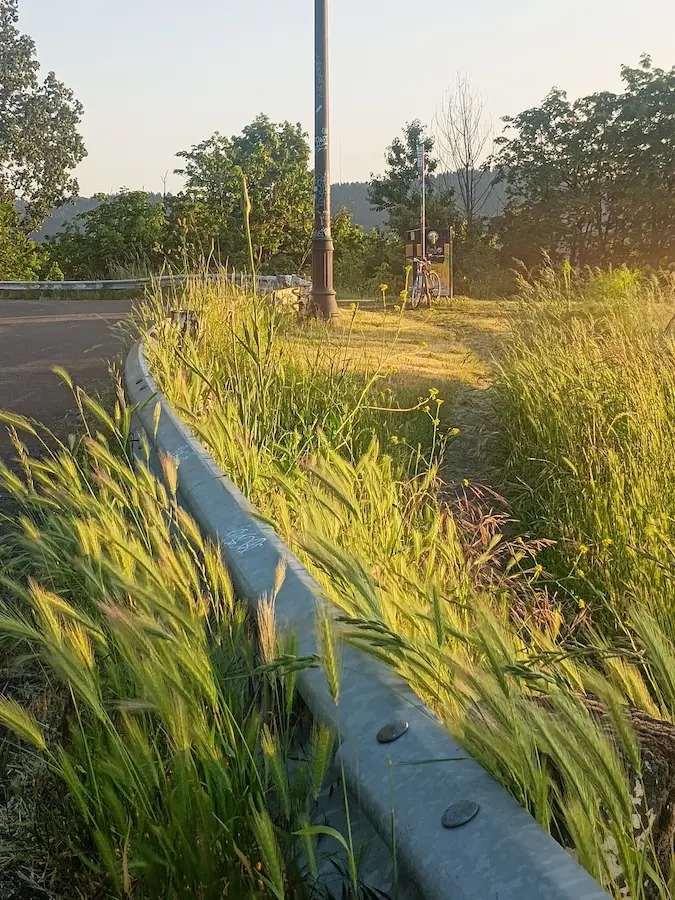
Doubling back along the iconic Marine Drive Trail puts the bike path figuratively and literally above cars. From the elevated path, there’s a great view of Hayden Island, beautiful bridges, cute lil house boats, a rusty old ship yard, and some big honkin cranes (machinery).
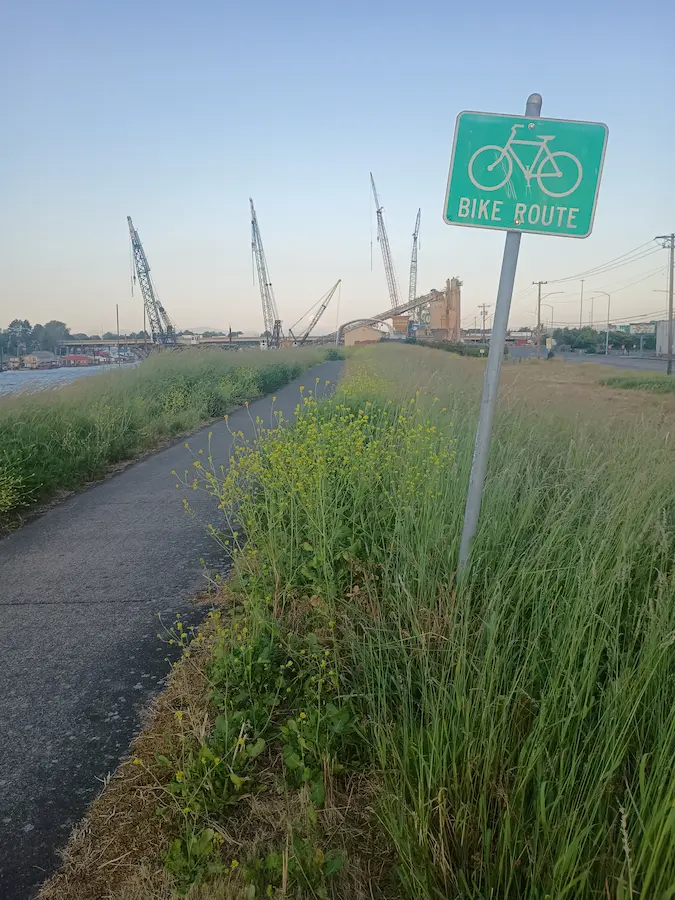
On a clear day, there’s a wondrous view of Mt. Hood, straight ahead. On a not-clear day, you can imagine a wondrous view of Mt. Hood, straight ahead. Either way, this section is very pretty. Also, there’s a gaggle or two of geese that like to hang out here (hissss).
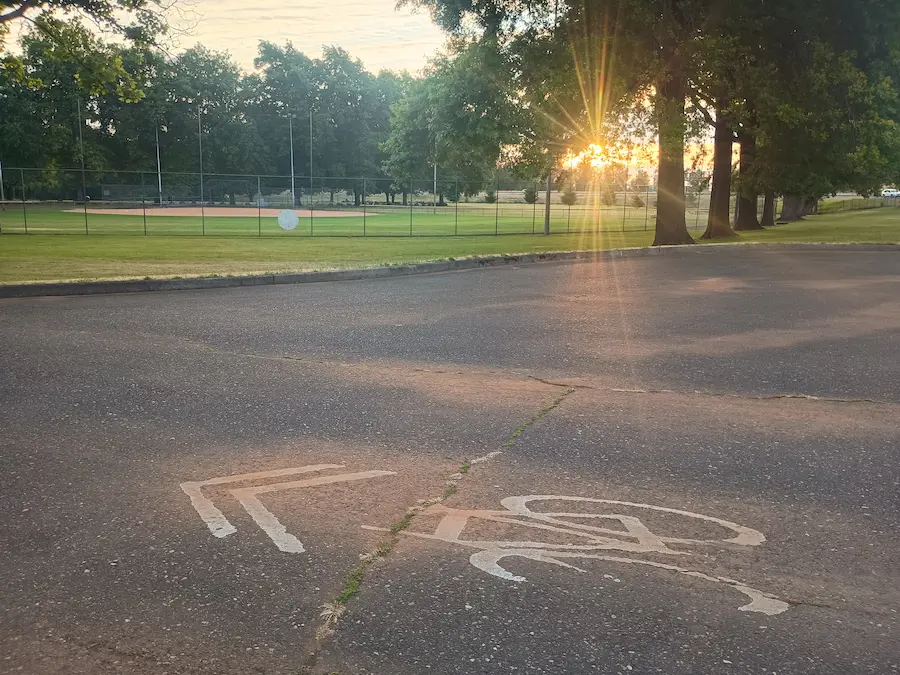
The transition away from the river features two highway underpasses, one elegant S-turn and no stops until Delta park. Enjoy the elm(?)-lined, car-free road, and people playing sports.

The transition from Delta Park onto North Whitaker Road offers a choose-your-own-adventure. Is it a sprint? Is it a slalom? Is it both!? You devilish dog!
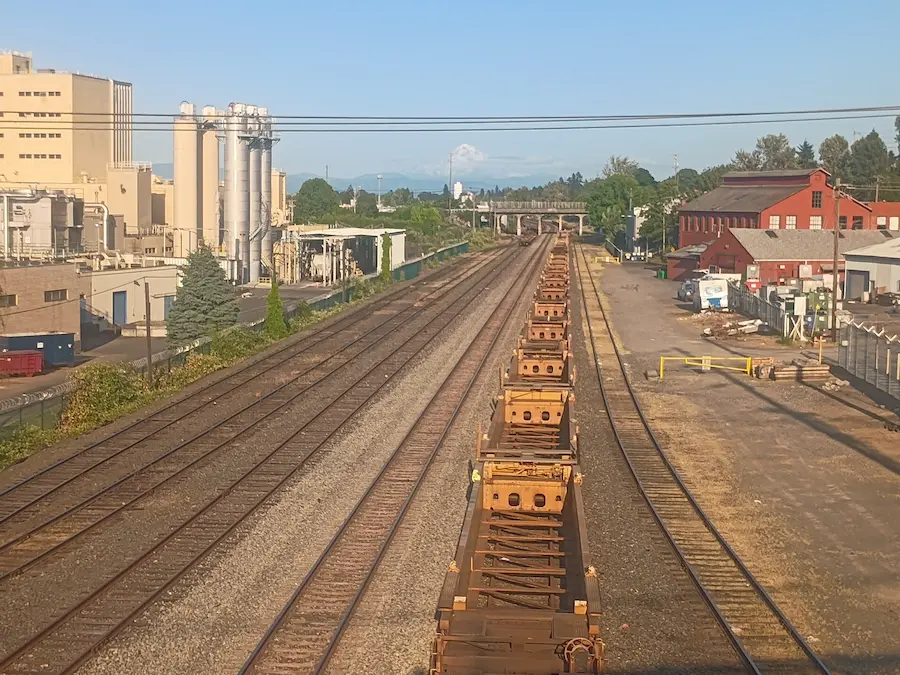
Trainspotting
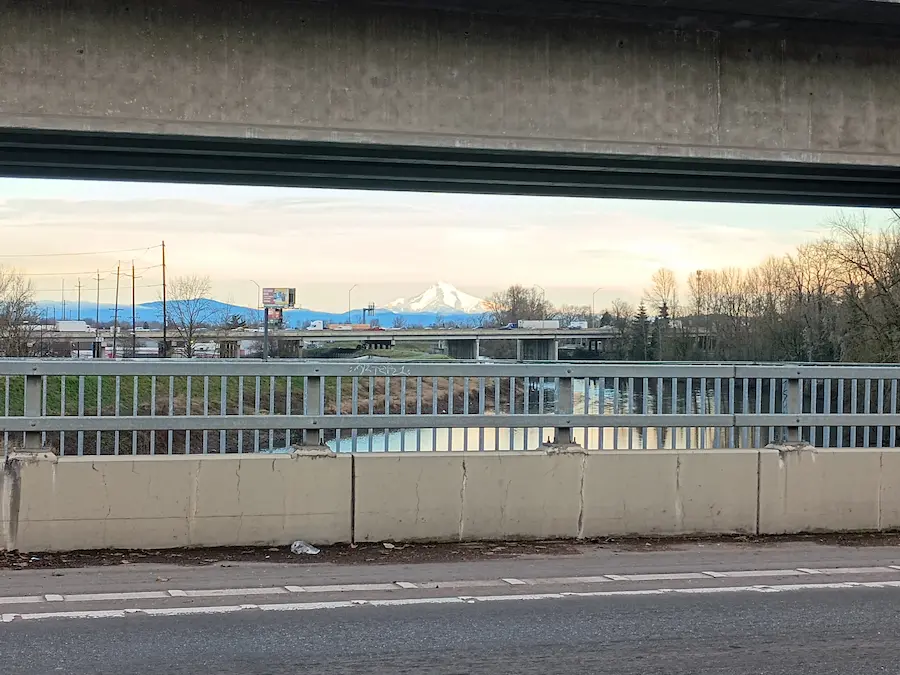
Crossing south over the Colombia Slough on Interstate provides a cool concrete-framed view of Mt. Hood to the left. To the right is a pretty view of the old Colombia Wool Scouring Mills building.

The route enters the Kenton neighborhood just long enough to wave at the giant Lumberjack and turn right onto Argyle Street. There’s a fun little downhill past Kenton park, then it’s recommended to hop onto the left sidewalk before reaching Columbia Boulevard. Otherwise…well, you’ll see.
The wrong-side sidewalk along Columbia Boulevard serves up some fun rolling hills and windy sidewalks along. Look out for pedestrians, cute dogs, darting squirrels with a death wish, and the occasional feeling that a vehicle might turn into you at each intersection.
The North Columbia Boulevard Path turns into the Peninsula Crossing Trail at an easy-to-miss intersection. Try not to miss it. This section is lined with grass and trees on both sides. Getting caught here during a cottonwood blizzard is surreal.
This section ends with sleepy little climb, before POWER STATION (left)…WATER-TOWER (right)!
ALT: There’s a shorter route option by cutting through Kenton on North Denver Avenue or staying on North Interstate.
Triomphe Négligé
North Willamette Boulevard passes by University of Portland which is a lot of fun during graduation season. It’s also a nice place to go off course and make your own little path through the campus or take a break on a garden bench to look out and contemplate.
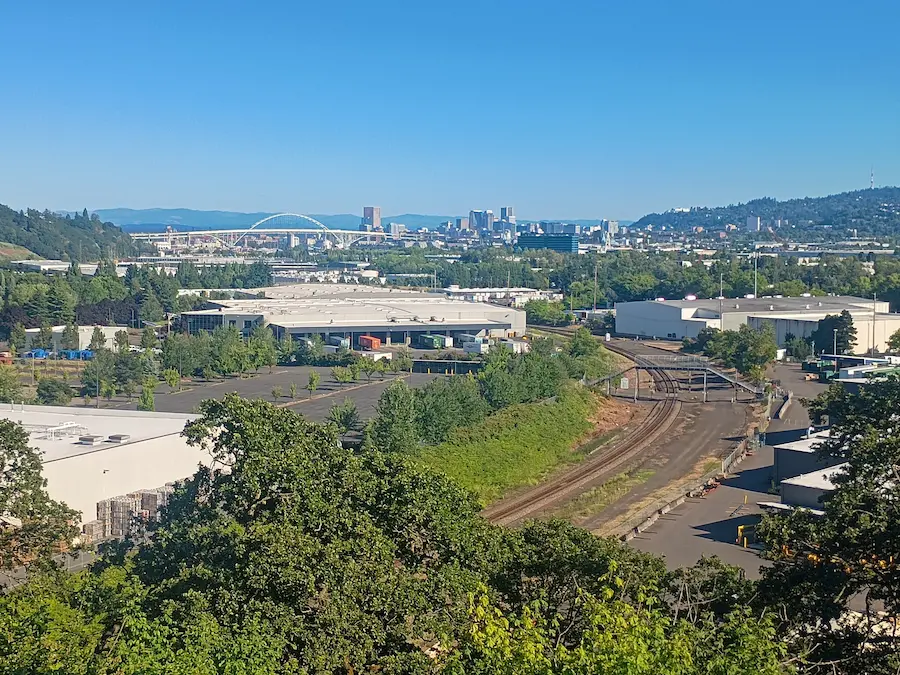
The arced section has no stops and lots of cars, making it another fun sprint. The best part is how rewarding it is with the sweeping, gold-medal view over industrial warehouses, train tracks, Fremont Bridge, and the Portland skyline in the distance.
The victory lap, runs through a windy, no-cars street in a cute neighborhood. The remainder of this section includes a couple of curlicues that lend for a good skrrrt and drop you off at Skidmore bluffs.
Trail Blazers
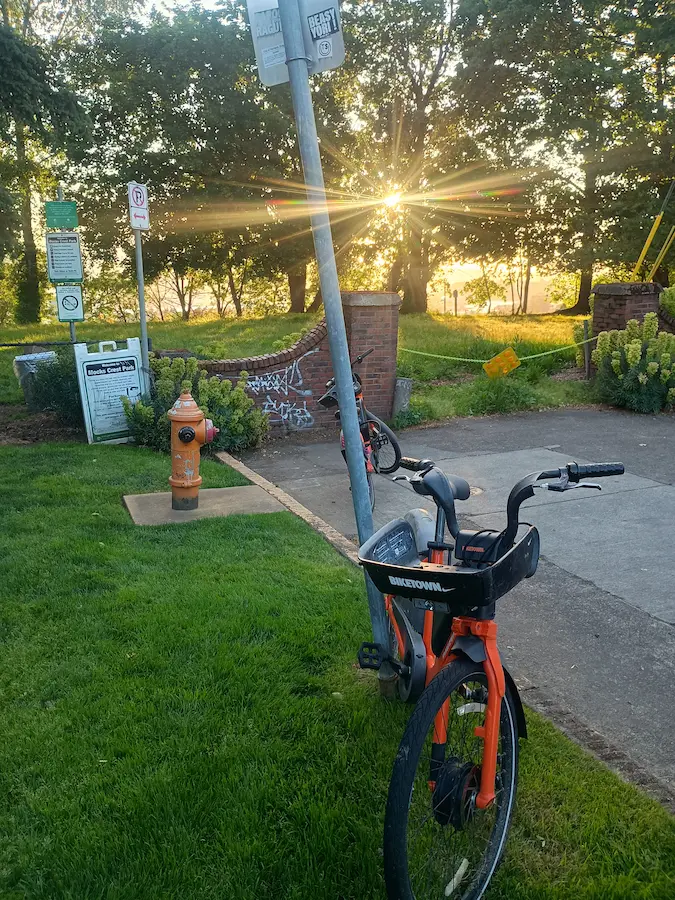
After the bluffs, it’s a transition to another sprint down Vancouver Avenue. This time you get to cash out on the gravity bank. Fun bendies between Dawson Park and Russell Avenue, a straightaway that opens up to the Trail Blazer’s stadium (especially beautiful at dusk), a fast curve along traffic wands, and a fun the loop around the stadium.
TIP: If you catch the red light at Broadway, you can sidle over to the freeway exit ramp. That light turns green first.
This section ends with a small curve, a small hill, and a downhill section that gives me a huge Blumenauer. It’s a fun little stop, go, stop, go, left, right, left, right, with traffic wands at Sandy that you can get squirrly with.

The Gallery
This section is meant to go slow and really take in all the amazing urban art that Portland has to offer. Some pieces are paid for by tax dollars and sourced by the Portland Street Art Alliance, some are murals commissioned by building/business owners, and many are your classic guerrilla art.
The ride is capped off with the Taylor Electric Building. A collection of murals by local and international artists, where 40% of the art turns over every year. If you haven’t been in a while, there might be new stuff.
After all that, it’s a short trip back to where it all began.

That’s it. That’s the ride. I hope you enjoy :)
Bonus Points
I heard someone say they like bonus points. It was me. I like bonus points.
- +1 do a little, unnecessary loop
- +1 blow Vera a kiss
- +1 turn something into a jump
- +1 get wet
- +1 each photo op:
- Mill Ends
- The Portland Old Town sign
- The Kenton lumberjack
- Tilikum Bridge
- Vera Katz
- +1 read a poem
- +1 each one you spot:
- Train
- Bus
- Light rail
- Air tram
- Plane
- Helicopter
- Police car
- Ambulance
- Firetruck
- Crane (bird)
- Dragonfly
- Duck
- Heron
- Hawk
- Goose
- Egret
- Good dog
- Squirrel
- Osprey
- Bat
- Coyote
- Crane (machinery)
- Your dream house
- Mt. Hood
- Uter
- Gats
- Dentist
- Lords
- +1 beat traffic
- +1 find the secret sombrero
- +1 ride over a train
- +1 ride under a train
- +1 ride alongside a train
- +1 each skrrrt
- +1 accidentally eavesdrop on a personal/dramatic/spicy conversation
- +1 successfully avoid a hazard
- +1 fail to avoid a hazard
- +100 report a road hazard to PBOT 24/7 Maintenance Dispatch by emailing or calling:
[email protected]
503-823-1700 - +1 forget you live in a city
- +1 each photo you send to a someone you’ve been meaning to reach out to
- +1 catch a bug (+5 in the mouth)
- +1 fix a flat (+50 someone else’s)
- +1 coerce a semi truck driver to honk the horn
- +1 investigate something off-route
- +1 free curb score
- +1 each accessory:
- Bell
- Pet
- Rack you don’t really use but keep around “just in case”
- Full repair kit
- Party light
- A sticker you love
- +1 play good music at the right time
- +1 play bad music at the right time
- +1 play weird music at the right time
- +1 play nothing at the right time
- +1 each time you see someone attempt:
- Kick flip
- Bunny hop
- Make out
- Karaoke song
- Parallel park
- Being funny
- +1 give/receive a gimme-five
- +1 give/receive a up-high
- +1 give/receive a down-low
- +1 give/receive a too-slow
- +1 each tasty you:
- Eat
- Hear
- See
- Feel
- Smell
- +1 have fun
- +1 learn something new
- +1 make a friend
- +5 each person you share this route with
Thanks for stopping by my corner of the internet. Here, there are no ads, trackers, paywalls, accounts, etc. It's hard, but worth the better experience. If you'd like to keep this site up, consider hiring me, making a donation, buying something (soon), leaving a comment, or sharing. It helps more than you know. I'm glad you're :)
]]>Be it friend or foe, you cannot say. All you know is that to continue on your quest, you must get beyond it.

What do you do?
- Search your pack for an item that might win its favor, possibly even joining your party.
- Attempt to overpower (strength check), outsmart (intelligence check), or outrun (dexterity check) it.
- Go back from whence you came, and try the long way around through the Dark Forest.
- Other (put it in the comments)
Thanks for stopping by my corner of the internet. Here, there are no ads, trackers, paywalls, accounts, etc. It's hard, but worth the better experience. If you'd like to keep this site up, consider hiring me, making a donation, buying something (soon), leaving a comment, or sharing. It helps more than you know. I'm glad you're :)
]]>Say, for example, we wanted a very simple component (simple for the sake of convenient blogging) that provides a greeting, but whose content can also be customized. We’ll use the canonical example for “Hello World!”
We want the API for this component to work like this:
- By default, the component will print “Hello World!”
- The target of the greeting (‘World’) can be customized by providing content inside the component slot.
- The greeting (‘Hello’) can be customized by providing content inside the component tags, and marking it as a named slot.
The experience might look like this:
<Greet />
<!-- Hello World! -->

<Greet>Austin</Greet>
<!-- Hello Austin! -->

<Greet>
  <q:template slot="greeting">Que onda</q:template>
  Miguel
</Greet>
<!-- Que onda Miguel! -->
Admittedly, that last one is less than ideal, but hang with me. First off, Qwik uses the <q:template /> tag as placeholder. It gets removed during transpilation which is how we get the resulting plain text, Que onda Miguel! We could use a span instead of q:template, which would look nicer, but would result in <span>Que onda</span> Miguel! Sometimes, you don’t want that. Also, for this contrived example, it would make more sense to use a prop, but this post is about slots. It’ll make sense in the end :)
Qwik Component Background
Like many JavaScript frameworks, Qwik uses JSX for templating. A basic JSX component can look like this:
export default (props) => {
  return <div>Hello World!</div>;
};
Technically, this works in Qwik. However, one of the major things that sets Qwik apart is the way it “automagically” handles performance improvements (such as lazy-loading components). It does this via the Qwik Optimizer which relies on wrapping a traditional JSX component (above) inside a function called component$.
import { component$ } from '@builder.io/qwik';

export default component$(() => {
  return <div>Hello World!</div>;
});
This is what allows the necessary code transformations at build time to allow for the smart lazy loading that Qwik offers. It also plays into their concept of Resumability.
More from the docs:
The
component$function, marked by the trailing$, enables the Optimizer to split components into separate chunks. This allows each chunk to be loaded independently as needed, rather than loading all components whenever the parent component is loaded. Note:index.tsx,layout.tsxinroutesfolder,root.tsxand all entry files needexport default. For other components, you can useexport constandexport function.
Building Our Component
With the component background out of the way, we can start to build our Qwik component. We can use the component above, but in order to support the API design for customization, we’ll want to use slots.
Conveniently, Qwik provides a <Slot /> component that makes it easy to insert the slotted content exactly where we need it to go.
We can use a default slot for the target, and a named slot for the greeting (we also need a non-breaking space character to separate the two):
import { component$, Slot } from '@builder.io/qwik';
export default component$(() => {
return <div>
<Slot name="greeting" />
<Slot />
!
</div>;
});The Challenge: Default Content
The component above will work fine as long as we explicitly provide content for the ‘greeting’ slot and default slot, but our API design falls back to “Hello” for the greeting if none is provided, and “World” for the target (default slot) if none is provided.
If you’ve worked with frameworks like Vue.js or Svelte, you may be familiar with the concept of fallback content when using slots. It allows you to provide fallback or default content for a slot if none is provided when the component is in use:
<slot>Show this if the slot is not used</slot>Unfortunately, Qwik does not support this :(
The Problem: No Children
Qwik’s <Slot/> component sadly does not support fallback content, but the problem could still be solved with conditional rendering.
If our component is provided content between its tags (<Greet>like this</Greet>), we could examine the properties of that content by checking props.children.
Or at least, we could do that with JSX. However, another limitation here is that when we use Qwik’s component$ function, we no longer have access to props.children.
It has something to do with the concept of Projection which I’ll skip, but you can read about here.
I guess we could solve the issue by using a regular JSX component, but then we’d lose all the benefits of the Qwik Optimizer.
The Fix: Inline Components
Fortunately, a solution was presented to me by Jack Shelton, one of the core contributors to Qwik, and a moderator of the Qwik Discord server.
We could use a JSX function component to access the props (and children), then wrap that parent component around a standard Qwik component using the component$ function. In this way, the child could have access to the parent’s props, while still having the benefits of the Qwik optimizer.
A simplified version might look like this:
export default (parentProps) => {
  console.log(parentProps.children) // Slot content :)

  const ChildComponent = component$((childProps) => {
    return <div>
      content
    </div>
  })
  return <ChildComponent {...parentProps} />
}
Notice that this is a functional component that creates within it, its own child component, then returns that child component with the parent’s props applied to it. This is effectively the same as just creating a single component. Both child and parent component receive the same props and output the same results, but there’s one important distinction.
Because the parent component is an inline component, it has access to the children property of props, which allows us to add some conditional logic to the child based on the state of the children.
(I hope that made sense)
Conditionally Rendering Slots
Now that we have access to the component’s slot content, we need to sort out the logic of what to show when. Let’s look at some options. Keep in mind that our <Greet> component has one named slot (“greeting”) and the default slot:
No Children Defined
If the component is used without any slot content (or children) it should render the fallback content for the named slot and the default slot:
<Greet />
<!-- Hello World! -->
Default Child/Children Defined
If anything is placed inside the tags that is not marked as a named slot, it should replace the greeting target. Note that I explicitly mention child vs children because a default slot can contain zero, one, or many child nodes. This will be relevant later.
<Greet>Austin</Greet>
<!-- Hello Austin! -->
<Greet>
<b>Austin</b>
&
<i>nugget</i>
</Greet>
<!-- Hello Austin & Nugget! -->Named Slot Child Defined
If the component has a child intended for the named slot (there can be only one), it should render that child instead of the fallback.
<Greet>
  <q:template slot="greeting">What a wonderful</q:template>
</Greet>
<!-- What a wonderful World! -->
Quick Note on Children
From the inline component, if you were to console.log(props.children), you will get varying results:
- If the component has no slot content, you will get
undefined. - If there is a single element or text in the component, you will get that child, but:
- If it’s just text without wrapping tags, you will see just a string.
- If it’s wrapped in a tag, you will see a
JSXNodeobject.
- If there are more than one child, you will see an array of
JSXNodeobjects and strings for any unwrapped text.
Loggign the children in this example:
<Greet>
  <q:template slot="greeting">Que onda</q:template>
  Miguel
</Greet>
Would produce this result:
[
  JSXNodeImpl {
    type: 'q:template',
    props: {},
    immutableProps: { slot: 'greeting' },
    children: 'Que onda',
    flags: 3,
    key: null,
    dev: {
      stack: 'STACK_TRACE_STRING',
      lineNumber: 204,
      columnNumber: 11
    }
  },
  'Miguel'
]
The key thing to note here is that sometimes we’re dealing with no children, sometimes it’s a single child, sometimes a list of children. Sometimes the children will be strings, and sometimes they may be objects.
In the case of objects, we will have access to a list of objects with the following information.
immutableProps: { slot: 'greeting' }The Solution: <SlotWithFallback/>
Now, we could write all of that logic into our component everywhere we would otherwise use a <Slot>, but that would be tedious and makes for a good opportunity for abstraction. In other words, ANOTHER COMPONENT!!!
/**
 * @typedef {import("@builder.io/qwik").JSXNode & {
 * immutableProps: { slot: string }
 * }} Child
 * @type {import("@builder.io/qwik").FunctionComponent<{
 * parentProps: { children?: Child | Child[] },
 * name?: string,
 * children: import("@builder.io/qwik").JSXOutput
 * }>}
 */
const SlotWithFallback = ({ name, parentProps, ...props }) => {
  const fallback = props.children
  let children = parentProps.children

  if (!children) {
    return fallback
  }
  // If there is only one child, children will be an object, not an array
  if (!Array.isArray(children)) {
    children = [children]
  }

  if (name) {
    // For named slots, return only named slot content or fallback
    const namedSlotContent = children.find(child => {
      if (typeof child === 'string') {
        return false
      }
      return child.immutableProps.slot === name
    })
    return namedSlotContent ?? fallback
  }
  // For unnamed slots, return only unnamed slot content or fallback
  const defaultSlotContent = children.filter(child => {
    if (typeof child === 'string') {
      return true
    }
    return !child.immutableProps.slot
  })

  return defaultSlotContent.length ? defaultSlotContent : fallback
}
This function expects to receive a parentProps prop which may contain a children property. This is where the default slot and named slot content may come from. It may also have its own props.children, which serves as the fallback content.
If a name prop is defined, we know this is the named slot, and therefore should show ONLY the child content intended for the named slot, OR the fallback content for the named slot if no matching child is found.
If the name prop is not defined, we should try to chow all children that are not tagged for a named slot, or show the fallback.
After all of this, we can use this new slot component inside our parent/child mutant hybrid to simplify the logic. We’ll need to and provide the JSX props from the inline parent to this new slot component’s parentProps prop. We can also provide some fallback content inside the component tags in case custom content is not provided when consumed.
In the end, our <Greet/> component could look something like this:
export default (parentProps) => {
const ChildComponent = component$((childProps) => {
return <div>
<SlotWithFallback name="greeting" parentProps={parentProps}>
Hello
</SlotWithFallback>
<SlotWithFallback parentProps={parentProps}>
World
</SlotWithFallback>
!
</div>
})
return <ChildComponent {...parentProps} />
}Limitations
Inline component provide a handy solution for today’s issue, but they are not without their trade-offs. As per the docs:
Inline components come with some limitations that the standard
component$()does not have. Inline components:
- Cannot use
use*methods such asuseSignaloruseStore.- Cannot project content with a
<Slot>.As the name implies, inline components are best used sparingly for lightweight pieces of markup since they offer the convenience of being bundled with the parent component.
Real World Example: Dynamic Slot Names
This was a lot of work for a relatively contrived example. In a real world app, you’d probably solve this issue with a more simple and straightforward solution. But there is a reason I came down this rabbit hole in the first place.
I was building a table component to display rows and columns of data. I wanted to be able to loop over the data, but I also wanted each cell (or column in my case) to support custom templates defined in the parent.
This was a perfect use-case for named slots.
The issue was that I wouldn’t actually know what they slot names would be. They would be dynamically generated based on the data in the table.
Here’s the part of my code that does that. The key line being name={column.${column.key}}
<tbody>
  {items.map((item, index) => (
    <tr key={index}>
      {headers.map((column) => (
        <td key={column.key} class={cellStyles}>
          <SlotWithFallback parentProps={props} name={`column.${column.key}`} >
            {item[column.key]}
          </SlotWithFallback>
        </td>
      ))}
    </tr>
  ))}
</tbody>
In this way, I can use my custom <Table> component and customize the table columns by targeting the specific column via slot.
<Table
  headers={[
    { key: 'email', content: 'Email' },
  ]}
  items={[userRef.value]}
>
  <q:template slot="column.email">Custom Content!</q:template>
</Table>
Closing
This SlotWithFallback component is pretty cool, and it could easily be adapted to work with other JSX-based frameworks like React. I haven’t tested, but in theory, they should be close.
Sadly, this component is not 100% ideal. Yes, we can overwrite the slot content with some fallback content, but in my example above with dynamic slots from a list of data, I would want to customize the slot content based on the current item in the iteration. In JSX, you might solve this with a render prop. Qwik doesn’t support this, due to its server-first architecture. It’s also annoying that you still have to jump through some hoops to get things working with that inline component and the parentProps prop, but there’s good news.
My discussion on the Discord server also caught the attention of Wout Mertens that chimed in to say that the default <Slot> component from Qwik will support fallback content in the next major version.
So, I guess I hope you found this helpful, interesting, and useful for the time being :)
Thanks for stopping by my corner of the internet. Here, there are no ads, trackers, paywalls, accounts, etc. It's hard, but worth the better experience. If you'd like to keep this site up, consider hiring me, making a donation, buying something (soon), leaving a comment, or sharing. It helps more than you know. I'm glad you're :)
]]>


On my way home, I was taking a photo at steel bridge and this guy, Robert from East LA came up to me and asked if I was a photographer.
We talked about photography, and he showed me his artwork, then Bo Bronco came up to us with a really nice rock he found while rock hunting under the bridge.
He showed us his collection, then walked me through his spiritual journey through various religions. He’d been through paganism, Buddhism, Christianity, and now he’s settled on Norse.
His mom is a pagan witch that blessed a crystal he keeps in his pocket to placate his autism behaviors.
It sounded like he’d lived a hard life. His brother got shot in the head three times by a 45 magnum, before the killer shot himself. It happened a few years back. He also got hooked on meth but has been off it for a year.
As it was getting time to leave, Robert was playing with Bo’s rock collection, admitting he was high. Bo decided it was time to go back under the bridge and get high.
He offered a very nice rock he found to Robert, who politely declined, and so he gave it to me as a parting gift. He let me snag a photo.
Thanks for stopping by my corner of the internet. Here, there are no ads, trackers, paywalls, accounts, etc. It's hard, but worth the better experience. If you'd like to keep this site up, consider hiring me, making a donation, buying something (soon), leaving a comment, or sharing. It helps more than you know. I'm glad you're :)
]]>Williams Avenue is always a fun hill. It’s just enough incline to make you notice work, but not so much that it’s defeating. In fact, it’s a fun challenge to try to keep up with the pace of the cars, especially when a song like Beastie Boys’ “Intergalactic” comes on. The right song always helps me find some extra gas in the tank. I can only hold on to the pace of traffic for so long before my legs are burning, and I’m gasping for air, but always in that inevitable defeat, I find myself smiling. What a joy!
Especially when the reward is a nice view. This evening’s ride treated me to the view from Mock’s Crest, a cute little park at the end of North Skidmore street, overlooking the Port of Portland, a big train yard, the Northwest industrial zone, Portland’s downtown, and of course, the Willamette. I took photos of none of it.
I did, however, snag a photo, rushing down Vancouver Ave. Macklemore & Kesha’s “Good Old Days” was playing from my speakers, and there’s just something about a catchy beat that makes the legs push harder.

As I crossed the bridge over Interstate 5, the trees and buildings cleared from view right in time to catch sunset over the Moda Center.

By now, Bruce Springsteen’s “Thunder Road” has come on. It’s almost like your playlist is having as much fun as you are. Dipping between cars and traffic poles, while avoiding slimy patches of leaves, you hit your top speed around the Moda Center downhill bend just in time for the song’s crescendo around the three-minute mark.
The music cools off to an instrumental outro, life spits you out to a view of the beautiful Steel Bridge crossing over the Willamette.


East Bank Esplanade is another wonderful biking section, and it’s make better by the whimsical tune of Billy Joel’s “Piano Man”. Who doesn’t like “Piano Man”?? It hits especially nice as the Portland skyline twinkles across the river.


Passing OMSI, the sun has gone for the day, leaving just enough light in its wake to paint the sky purple, at least for a little while longer.


The last thing to do before settle in for the evening is bid good night to the Tilikum Bridge.


Thanks for stopping by my corner of the internet. Here, there are no ads, trackers, paywalls, accounts, etc. It's hard, but worth the better experience. If you'd like to keep this site up, consider hiring me, making a donation, buying something (soon), leaving a comment, or sharing. It helps more than you know. I'm glad you're :)
]]>