Across regions, local data centers and hosting providers are stepping up to offer public cloud services — giving customers the agility of AWS or Azure, but with local data residency, transparent pricing, and personalized support.
More importantly, this shift is being fueled by the rise of the sovereign cloud.
Nations and enterprises today demand that sensitive data remain within their borders — ensuring compliance with local data protection laws and maintaining control over digital assets. Governments, financial institutions, and regulated industries now prioritize data sovereignty, security, and compliance over generic global infrastructure.
This evolution has created a powerful opportunity for regional providers. With their existing infrastructure, local expertise, and proximity to customers, they can offer sovereign public cloud services that deliver enterprise performance while aligning with national compliance and security requirements.
If you already have the hardware and connectivity, you are halfway there.
What you need is the right platform and roadmap to transform that infrastructure into a fully operational, sovereign public cloud business — and that’s where this transformation begins.
Evaluate Your Readiness for Public Cloud
Before diving in, assess your business and operational foundation.
Consider three key areas:
- Infrastructure: Do you have scalable compute, storage, and network capacity?
- Operations: Can your team handle provisioning, billing, and customer support efficiently?
- Market Demand: Which industries or regional customers are seeking local or sovereign cloud options?
StackBill cloud management portal helps providers assess readiness with architecture planning, deployment templates, and automation frameworks built around Apache CloudStack.
Build on a Proven Open-Source Foundation
Apache CloudStack has become the preferred choice for public cloud providers because it offers:
- Production-grade stability
- Simplified management compared to OpenStack and other open source foundation
- Multi-hypervisor and multi-tenant support
- Rapid deployment and strong API compatibility
StackBill cloud management portal extends CloudStack with a modern, intuitive portal, automated billing, and built-in monitoring — giving providers the foundation to launch faster and operate efficiently.
Design Your Public Cloud Offerings
Your cloud business starts with well-defined service plans.
Decide what your customers can consume via self-service:
- Virtual Machines (Compute Instances)
- Object & Block Storage
- Load Balancing and Networking
- Backup, Disaster Recovery, and Managed Add-ons
With StackBill CMP, you can customize service plans, billing rules, and usage-based pricing — enabling you to compete directly with global clouds while maintaining your sovereign and local advantage.
Automate Operations and Improve Service Quality
Public cloud success depends on delivering speed, reliability, and consistent performance.
StackBill’s automation ensures that:
- Resources are auto-provisioned within seconds
- AI-driven monitoring detects and resolves issues proactively
- Customers enjoy a white-labeled self-service portal for independence
- Usage and billing are tracked seamlessly in real time
This level of automation reduces operational complexity, enhances uptime, and gives customers a world-class experience — helping you operate with the efficiency of hyperscalers while maintaining full sovereignty.
Build a Go-to-Market and Monetization Strategy
Once your cloud is live, focus on revenue generation and differentiation.
Here’s how to establish a competitive go-to-market strategy:
- Offer usage-based billing (per CPU, RAM, storage, or IOPS)
- Introduce SaaS and managed services on top of IaaS
- Emphasize local data compliance and sovereignty as core differentiators
- Target niche segments — developers, SMBs, or regulated verticals
StackBill’s billing engine and brandable marketplace make it simple to launch new service plans under your own brand — without complex integrations or delays.
Scale with Automation, Analytics, and AI
As demand grows, scalability and insight-driven decisions become critical.
With StackBill CMP, providers can:
- Expand to multi-region infrastructure effortlessly
- Use AI-based analytics for capacity planning and cost optimization
- Implement self-healing automation to minimize downtime
- Integrate DevOps and API workflows for advanced enterprise users
StackBill evolves with your growth — enabling you to move from a single data center to a multi-region, sovereign public cloud brand with operational excellence.
Real-World Success: Empowering a Leading Data Center with StackBill CMP
A leading data center in Brazil faced challenges managing manual billing, delayed provisioning, and limited visibility across tenants.
After adopting StackBill CMP, they automated their Apache CloudStack billing workflows, achieved real-time usage visibility, and reduced operational overhead by 40%.
Today, they have scaled their public cloud services efficiently while offering transparent billing, faster provisioning, and a superior customer experience — proving how infrastructure owners can successfully transform into cloud providers.
Turn Your Infrastructure into a Profitable Cloud Business
The shift from owning infrastructure to operating a profitable public cloud business is not just an upgrade — it’s a transformation in value creation.
By combining your infrastructure expertise with an automation-ready platform like StackBill CMP, you can:
- Launch your own branded sovereign public cloud
- Attract enterprise and SMB customers seeking local options
- Build predictable, recurring revenue
- Compete confidently with global cloud providers on agility and compliance
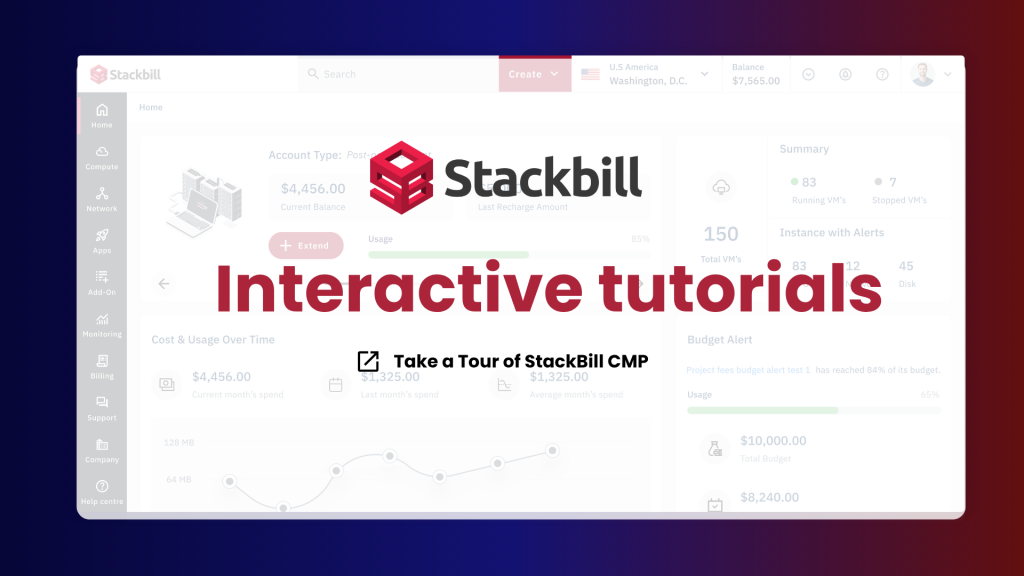
Take a Tour of StackBill CMP:
Ready to build your public cloud business?
Discover how StackBill CMP accelerates your transformation from infrastructure to cloud success. Book a Demo Today | Take a Tour of StackBill CMP
Don’t forget to read our next blog article : How StackBill CMP is the Best Choice for Public Cloud Service Providers
Public cloud providers today face a tough reality: complex infrastructures, unpredictable costs, and rising customer expectations. Managing Apache CloudStack at scale is powerful — but without the right business layer, it quickly becomes overwhelming.
This is where StackBill CMP steps in: not just a management tool, but a business enabler tailored for data centers, telecoms, and enterprises running Apache CloudStack.
StackBill Cloud Management Portal empowers public cloud providers with simplified Apache CloudStack management, automated billing, and customer-ready features to drive growth. Let’s explore in detail.
Challenges Public Cloud Providers Face with Apache CloudStack
Public cloud service providers are under constant pressure to deliver reliable infrastructure, competitive pricing, and exceptional customer experiences. Managing large-scale Apache CloudStack deployments is powerful, but challenges remain:
- Manual billing processes create delays and errors
- Complex orchestration drains time and resources
- Customers demand transparency and self-service
- Multi-tenant management requires strict isolation and compliance
This is where StackBill CMP bridges the gap — helping providers turn infrastructure into business success.
What Makes StackBill CMP the Ideal Apache CloudStack Billing Platform?
StackBill CMP is a white-label cloud management and billing portal built on top of Apache CloudStack. Designed for public cloud providers, data centers, and telecom companies, it simplifies daily operations, automates billing workflows, and enhances the end-user experience.
Think of it as the business layer on top of Apache CloudStack — making your cloud not just run, but scale profitably.
Benefits of Using StackBill CMP for Apache CloudStack Providers
- Streamlined Orchestration with Apache CloudStack
- Centralized management of resources
- Automated provisioning and scaling
- Optimized resource allocation
Automated Cloud Billing Platform with Multi-Currency Support
Billing should be a growth enabler, not a bottleneck. StackBill CMP provides:
- Pay-per-use, prepaid, and postpaid models
- Real-time usage tracking
- Automated invoicing and payment processing
- Multi-currency and multi-tax support
Self-Service Cloud Portals for End Users
In competitive cloud markets, customer stickiness matters. StackBill empowers you to deliver:
- Self-service portals for end users
- Detailed usage reports and analytics
- Customizable catalogs and pricing plans
Secure Multi-Tenant Cloud Management
For data centers and telcos, security and isolation are non-negotiable. StackBill offers:
- Robust multi-tenancy support
- Isolated client environments
- Granular access controls
Scalable Cloud Management for Growing Providers
Your business evolves — StackBill grows with you.
- Supports large-scale CloudStack deployments
- High-performance resource management
- Flexible architecture for expansion
White-Label Cloud Portal with API Integrations
No two providers are the same. StackBill adapts with:
- APIs for third-party integrations
- Plugin support for business-specific extensions
- White-label customization to match your brand
Increase Cloud Revenue with StackBill’s Marketplace Add-Ons
Beyond orchestration and billing, StackBill opens new revenue streams:
- S3 object storage integration
- DNS as a Service
- Reseller module for multi-tier sales
- StackWatch monitoring and alerts
Real-World Success: Empowering a Leading Data Center with StackBill CMP
One of Brazil’s leading data centers faced challenges with manual billing, delayed provisioning, and lack of visibility into usage across tenants.
After implementing StackBill CMP, they automated their Apache CloudStack billing workflows, achieved real-time usage visibility, and reduced operational overhead by 40%.
Today, they have scaled their public cloud operations efficiently while delivering transparent billing and seamless customer experiences.
24/7 Reliable Expert Support
Cloud never sleeps, and neither does StackBill support.
- Round-the-clock expert assistance
- Proactive issue resolution
- Dedicated customer success team
Conclusion
For public cloud providers, telcos, and data centers running Apache CloudStack, StackBill CMP isn’t just another portal — it’s the missing piece that transforms infrastructure into a profitable cloud business.
Ready to scale your Apache CloudStack business? Discover how StackBill CMP helps cloud providers automate billing, simplify management, and grow profitably. Book a demo today.
A Site to Site VPN connection is used to provide secure communication between a business datacenter and cloud infrastructure. This allows us to make secure connections between two VPC networks in our environment. Using this feature, we avoided VPN connections for individual instances.
The primary distinction between Site-to-Site VPN and Remote VPN connections is that Site-to-Site VPN allows us to connect entire networks to one another. For example, if we need to link one of your office branch networks to the headquarters network, which is in a different location, we can do so using Site-to-Site VPN.
The host does not need to employ VPN client software in this technique because all TCP/IP traffic sent and received is routed through the VPN gateway.
To link two VPC networks via site-to-site VPN, the two networks must be in distinct network ranges. For example, VPC-A (10.1.0.0) and VPC-B (10.2.0.0).
We now have two VPC networks with different ranges, and we have established VMs from those networks, which will connect with each other using Site-to-Site VPN.
Step1:
Here we have created two VPC network ,
VPC-A:192.168.3.0/24
VPC-B:10.1.0.0/24

VPC-B:

Step2:
We now need to create a network tier for both VPC networks. Here, we are subnetting the VPC networks 192.168.3.0/24 into two subnets as "192.168.3.0/25" and creating a new tier as Tier1 with the details shown in the screenshot.
Similarly, we are subnetting the VPC-B network 10.1.0.0/24 into two subnets, 10.1.0.0/25
To construct a network tier in VPC, go to Home > Networks > VPC > VPC-A > Networks.


You can use the online subnet calculator for subnetting at https://www.calculator.net/ip-subnet-calculator.html.
In the similar approach, we have constructed a network tier in the VPC-B.

Step3:
Once the network was properly created , we launched each VM from the associated VPC networks.

Steps -4:
Now we'll allow VPN access for the public IP address of the VPC network in cloudstack.
From the CloudStack home page, click on VPC in the Network section and enable Remote VPN access for the public IP address.
Home > Network > VPC > VPC-A > Public IP address > Choose the Public IP address (Source NAT) > VPN > Enable Remote Access VPN


Once the VPN is enabled, Cloudstack will generate the IPSec per-shared key.
Repeat the process in VPC-B to enable VPN access.
Step5:
We have now created a VPN Customer Gateway for both VPCs in order to establish a connection between them.
A VPN client gateway is a virtual representation of a device or service that serves as the starting point for VPN connections.It acts as the endpoint for VPN tunnels, allowing secure communication between the two VPC networks in our configuration.

Based on the screenshot above, we constructed the VPN customer gateway for the VPC-A.
Gateway: The public IP address of the VPC-A where we have enabled VPN remote access.
The CIDR List specifies the range of IP addresses that the remote client can access from VPC-A.
IPSec per-shared key: The key obtained in step 3 from the VPC-A
We have already constructed a VPN client gateway for VPC-A; now we will create one for VPC-B.

Based on the screenshot above, we constructed the VPN customer gateway for the VPC-B.
Gateway: The public IP address of the VPC-B where we have enabled VPN remote access.
The CIDR List specifies the range of IP addresses that the remote client can access from VPC -B.
IPSec per-shared key: The key obtained in step 3 from the VPC -B.
Step6: Enable VPN Gateway
Enabling the VPN gateway in the VPC allows for secure and encrypted communication between cloud resources.
We can enable the VPN connection in Apache Cloud stack from the location listed below.
1. Sign in to the CloudStack UI as an administrator or end user.
2. In the left navigation, select Network.
3.In the Select view, choose VPC.All of the VPCs that we have created will be displayed there.Select VPC-A and then click the VPN gateway option in the right navigation.
4.Click the Create site-to-site VPN gateway button to create and enable the VPN gateway.
Home > Network > VPC > VPC-A > VPN gateway.
Follow the same steps to enable the VPN gateway in the VPC-B.
Once the VPN gateway is enabled, we can establish a VPN connection between two VPC networks.
Step-7:
To establish a VPN connection in VPC-A, follow the steps below.
1. Log in to the CloudStack user interface.
2.In the left navigation, select Network.
3.In the Select view, select VPC-A, then click the VPN connection tab on the right navigation.
4.Then, create a site-to-site VPN connection. Since we are creating a VPN connection for VPC-A, select the VPC-B gateway.

Here, VPC-B gateway refers to the VPN customer gateway that we created from the VPC-B network by selecting this gateway as an active VPN connection in VPC-A. This allows the VPC-B network to communicate with the VPC-A network.
To establish a VPN connection in VPC-B, follow the steps below.

1.In the Cloudstack UI, select the VPC -B network under the Network tab.
2. In the VPC-B network, from the right navigation, select the VPN connection option.
3.Click on Create a Site-to-Site VPN Connection.We are creating a VPN connection for VPC-B, so select the VPC-A gateway with Passive mode.
VPC-A gateway refers to the VPN customer gateway that we created from the VPC-A network by adding it as an passive VPN connection in VPC-B. This allows the customer on the VPC-A network to communicate with the VPC-B network.
Here, VPC-B is active, which means it will establish a VPN connection, whereas VPC-A is passive, meaning it will accept the VPN connection.
Step8:
Now that communication between these two VPC networks is established, we can ping the VMs in VPC-A from the VMs in VPC-B.
For example, we initially created two VMs using these two VPC networks.I can now ping these two VMs, which confirms that communication between these networks is working fine using a site-to-site VPN connection.


The site-to-site VPN connection between the two VPC networks has now been successfully configured.
]]>
In this guide, we will walk you through the process of creating a ubuntu template from the existing Virtual machine in KVM.
Follow the below steps mentioned in the Documentation to create the Template from the Volume.
Step 1:
- Launch a VM instance with the desired operating system, ensuring the presence of DHCP network and an LVM disk partition.
- For example, we created a VM in Ubuntu 20 with a DHCP network and a 20GB LVM partition. Additionally, we allowed the necessary ports to access the server publicly.
The Below mentioned steps is for centos and Ubuntu

Step 2:
- After successfully launching the VM, next perform the following steps based on the operating system:
CentOS:
~~~
yum update -y
Reboot
~~~
Ubuntu:
~~~
sudo -i
apt-get update
apt-get upgrade -y
apt-get install -y acpid ntp
reboot
~~~
Explanation:
- Install “acpid” for Advanced Configuration and Power Interface.
- Install “ntp” for Network Time Protocol.
- Configure the template network interface for DHCP:
For CentOS:
- Set the hostname for the server.
~~~
hostname localhost
echo “localhost” > /etc/hostname
~~~
Step 3:
- Install and configure Cloud-init on the server.
CentOS:
~~~
yum install -y cloud-init wget
~~~
Ubuntu:
~~~
apt-get install -y cloud-init wget
~~~
2. Set up cloud-init to dynamically identify the Cloudstack data source at runtime.
- To achieve this, specify the data source location for cloud-init by including a specific configuration in a file named “99_cloudstack.cfg” within the “/etc/cloud/cloud.cfg.d/” directory.
~~~
datasource_list: [ ConfigDrive, CloudStack, None ]
datasource:
CloudStack: {}
None: {}
~~~
3. Enable password management:
- When Cloudstack is connected to the “cloud-init set_passwords” tool, it can automatically give a password to each new virtual machine created from the main template. Consequently, this enhances the efficiency of the setup process. Additionally, this also makes it possible to change the user’s password using a visual interface.
- Enable set_passwords module on every boot.
- By default, the set_passwords module will run only on the first boot. However, we need to configure it to run during every boot.
Command:
~~~
sudo sed -i s/” – set[_|-]passwords”/” – [set_passwords, always]”/g /etc/cloud/cloud.cfg
~~~
4. Specify the managed user:
- Cloudstack can create a user account, set its password, and modify the password as necessary. To enable this functionality, you must modify the settings in a file named “80_user.cfg” found in the “/etc/cloud/cloud.cfg.d/” directory.
- Kindly Utilize the following configuration:
- If there is an existing sudo user, you can update the username in the “name” section. Alternatively, if there is no sudo user, you can use the name “root” in the “name” section.
~~~
system_info:
default_user:
name: root
lock_passwd: false
sudo: [“ALL=(ALL) NOPASSWD:ALL”]
disable_root: 0
ssh_pwauth: 1
~~~
5. Disable Cloud-init regenerating host certificates:
~~~
echo “ssh_deletekeys: false” > /etc/cloud/cloud.cfg.d/49_hostkeys.cfg
~~~
6. Configure disk partition:
- Cloud-init has the capability to automatically detect and resize one or more existing partitions upon reboot. To enable this functionality, the first step is to install the Growpart module.
For CentOS:
~~~
yum install cloud-utils-growpart -y
~~~
For Ubuntu:
~~~
apt-get install cloud-initramfs-growroot -y
~~~
- Once we have installed the growpart in the VM, we then need to check the root disk setup. Based on that, we are going to configure it.
- Locate the root partition by using the “lsblk” command,

- If the disk partition setup is like in the above image,then use the growpart as below by defining only the root(vda2) partition in “/etc/cloud/cloud.cfg.d/50_growpartion.cfg”
~~~
growpart:
mode: auto
devices:
– /dev/vda2
ignore_growroot_disabled: false
~~~
- If the output of the “lsblk” is like in the below screenshot,use the growpart as below by defining the empty(vda1), /boot(vda2) and root /(vda3),

~~~
growpart:
mode: auto
devices:
– “/dev/vda1”
– “/dev/vda3”
ignore_growroot_disabled: false
~~~
- To extend the physical volume, volume group, and root LVM section, employ the following configuration. Locate the LVM using the command lvdisplay. The output is presented as follows:

- From the output of the above mentioned screenshot, in our scenario,the LV path is :/dev/ubuntu-vg/ubuntu-lv and the “/” root partition is (/dev/vda3).

- Define partition configurations in “/etc/cloud/cloud.cfg.d/51_extend_volume.cfg” based on the file system of the root partition.
~~~
runcmd:
– [ cloud-init-per, always, grow_VG, pvresize, /dev/vda3 ]
– [ cloud-init-per, always, grow_LV, lvresize, -l, ‘+100%FREE’, /dev/ubuntu-vg/ubuntu-lv ]
– [ cloud-init-per, always, grow_FS, resize2fs, /dev/ubuntu-vg/ubuntu-lv ]
~~~
NOTE:If the file system of the “/” is xfs then use xfs_growfs or if it is ext4 then use resize2fs
7.Enable autoresize on every boot:
- By default cloud-init runcmd module executes defined commands on first boot only.
- If both runcmd and user-scripts modules are configured to run on every boot then only all the commands will run on every boot.
~~~
sudo sed -i s/” – runcmd”/” – [runcmd, always]”/g /etc/cloud/cloud.cfg
sudo sed -i s/” – scripts-user”/” – [scripts-user, always]”/g /etc/cloud/cloud.cfg
~~~
Step 4:
- SSH Configuration:
- Enable Direct root login in SSH configuration
~~~
Permitrootlogin yes
~~~
2. Start & Enable the Cloud-int services:
Commands:
~~~~~~~
Enable the service:
systemctl enable cloud-final.service &&
systemctl enable cloud-init.service &&
systemctl enable cloud-config.service &&
systemctl enable cloud-init-local.service
Start the service:
systemctl start cloud-final.service &&
systemctl start cloud-init.service &&
systemctl start cloud-config.service &&
systemctl start cloud-init-local.service
Status of the service:
systemctl status cloud-final.service &&
systemctl status cloud-init.service &&
systemctl status cloud-config.service &&
systemctl status cloud-init-local.service
~~~~~~~~
3. VM Hypervisor
- If the VM is running in the KVM hypervisor .
- Install the KVM tools, qemu-guest-agent and start the service
~~~
systemctl enable qemu-guest-agent &&
systemctl start qemu-guest-agent &&
systemctl status qemu-guest-agent
~~~
- If the VM is running in the Xenserver
- Install the Xenserver tools, xe-guest-utilities and start the service
~~~
systemctl enable xe-daemon.service &&
systemctl start xe-daemon.service &&
systemctl status xe-daemon.service
~~~
In some case,if any of the user-data given the disk resize will not be executed.So in order to overcome this,we need to run a script at every boot.
Create a file as mentioned below,
~~~
vi /var/lib/cloud/scripts/per-boot/runcmd
~~~
Add this script in the above created file:
~~~
#!/bin/sh
pvresize -y -q /dev/vda3
lvresize -y -q -r -l +100%FREE /dev/ubuntu-vg/ubuntu-lv
xfs_growfs /dev/ubuntu-vg/ubuntu-lv
exit 0
~~~
Change the permission to execute
~~~
chmod +x /var/lib/cloud/scripts/per-boot/runcmd
~~~
Step5:
Cleanup Process:
After finishing all tasks, it is essential to remove all executed commands on the server. Failing to clear these commands will result in them being displayed in the history section when creating a new VM from the template.
Commands:
~~~
rm -rf /var/lib/cloud/data/ /var/lib/cloud/handlers/ /var/lib/cloud/instance /var/lib/cloud/instances/ /var/lib/cloud/seed/ /var/lib/cloud/sem/
rm -rf /etc/sudoers.d/*
rm -f /etc/udev/rules.d/70*
rm -f /var/lib/dhcp/dhclient.*
rm -f /etc/ssh/*key*
cat /dev/null > /var/log/wtmp 2>/dev/null
logrotate -f /etc/logrotate.conf 2>/dev/null
rm -f /var/log/*-* /var/log/*.gz /var/log/*.1 2>/dev/null
truncate -s 0 /var/log/* &> /dev/null
truncate -s 0 /var/log/*/* &> /dev/null
truncate -s 0 /var/log/*/*/* &> /dev/null
truncate -s 0 /var/log/*/*/*/* &> /dev/null
> /root/.bash_history
history -c
~~~
Creating a Template from an Existing Virtual Machine
- We’ve set up the required components in the virtual machine. Now, it’s time to turn this VM into a template.
- There are two methods for creating a template, and we’re going to use the one that involves creating a template from an existing virtual machine using the Volume.
- After making the necessary modifications to the running VM, it needs to be stopped.
- Please be patient as the VM may take some time to stop. Wait until the VM is completely stopped.

- Navigate to the “View Volumes” options and choose the Volume with the “ROOT” type.

- Select the option to create a template by clicking on the corresponding icon,

- Then proceed to update the following details:
- Name : Provide a name for the volume; in this case, I’ve named it “ubuntu20 Template.”
- Description : Include a description for the volume, outlining its purpose or content—for example, “Ubuntu20 with Apache.”
- OS type : Specify the operating system (OS) type. In CloudStack, it’s crucial to accurately select the OS type associated with the volume. In this instance, we’ve chosen “ubuntu20” as the OS type.
- Public: For the “Public” setting, opt for “Yes” if you want to make this template accessible to all users within the CloudStack installation. This means the template will be visible in the Community Templates list.
- Password Enabled: If your template includes the CloudStack password change script, select “Yes” for “Password Enabled.” This option is applicable when adding password management to your templates.

- After updating the required parameters, click “OK.” The template creation process will commence, and it will take some time to complete. Please be patient during this period.
- The template has been successfully created, and now it’s time to generate a VM from this template.
- Navigate to the “Instance” section, and beside the zone, you’ll find the “Template/Iso” option. Within this, locate the recently created template and select it.

- Proceed by choosing the desired network and disk configurations according to your specifications. Then, click on the “Launch Instance” option to initiate the creation of the VM using our template
- Upon successful VM creation, you will receive a notification indicating the completion of the process along with the password for the newly created VM.
- Subsequently, assign a public IP address to the VM, and configure the firewall to allow access through the desired ports. This step ensures that you can access and interact with the VM as needed.
- Now, we can access the Server SSH by using the assigned public IP address and the newly generated Password displayed in the Cloudstack UI.

- The recently created VM will be automatically assigned a Private IP address, and the disk resizing has been successfully added to the newly created VM.
- The virtual machine we initially created had a root disk of only 20GB. However, when I created a new VM using the template I made, I selected a 35GB root disk size. Consequently, the VM was created with the specified 35GB root disk

Congratulations! You have successfully created a template from the existing virtual machine in CloudStack.
Wrapping Up
Thank you for taking the time to read our blog. This blog “Create a Ubuntu Template from the Existing VM in KVM” was written by our cloud engineer Mr. kanagaraj. We hope you found the information valuable and insightful. If you find any issues with the information provided in this blog don’t hesitate to contact us ([email protected]).
Take a look our next article : How to Create VM using Default Network in ACS?
In this guide, we will walk you through the process of creatinga Virtual Machine (VM) using the default network in Apache CloudStack.
Firstly, let’s outline the process of creating a Virtual Machine (VM) using the default network in Apache CloudStack.
Prerequisites
Before you begin, ensure that you have the following:
Access Credentials: Ensure you have the necessary credentials to log in to the CloudStack management interface.
Step 1: Log in to CloudStack Management Console
To begin, open your web browser and navigate to the CloudStack Management Console. Then, log in with your credentials.
Step 2: Navigate to “Instances”
Once logged in, next, navigate to the “Instances” section. This is where you’ll manage your virtual machines.

Step 3: Initiate Instance
Select the “Add Instance” option to commence the creation of a new instance.

Step 4: Choose the “Default” Zone
– Select the “Default” zone from the available zones. The default zone usually represents the basic configuration for CloudStack.
Step 5: Choose the Template
– Select a template for your VM. The template contains the operating system and other configuration details. Ensure that the template is compatible with the default network.
(Optional): Add ISO for Installation
If you need to install an operating system using an ISO image, follow these additional steps:
– Navigate to the “Templates” section on the left-hand navigation bar.
– In Select View, choose ISOs.
– Click on “Register ISO.”
– On the “Add ISO” screen, input the following details:
– URL: The URL hosting the ISO image.
– Name: A brief identifier for the ISO image
. – OS Type: Choose the operating system type.

Step 6: Select the Compute Offering
Choose a Compute offering that suits your requirements. The Compute offering defines the compute resources (CPU, memory, etc.) allocated to your VM.
Step 7: Select the Data disk Offering
Choose a Disk Offering that suits your requirements.

Step 8: Configure Network Settings
In the network settings, Click create new network and add the network details in the isolated section
Provide the following information for creating an isolated Network:
– Name: Specify the name for the network.
– Description: Provide a description for the network.
– Zone: Indicate the zone where you are configuring the guest network.
– Network offering: select Offering for isolated networks with Source Nat service enabled and click OK button.

Step 9: Fill details
Provide the instance name and activate the “Start instance” option. To initiate the instance, click on the “Launch Instance” button.
CloudStack will now start creating your virtual machine. Monitor the progress in the CloudStack interface. Once the VM is successfully deployed, you’ll see its status as “Running.”

Step 10: Manage Public IP Addresses
- Once Vm is deployed need to add firewall and port forwarding to the allocated IP address.
- Navigate to the “Public IP Addresses” section in the CloudStack Management Console.
Add Firewall Rule:
– Add a new firewall rule to permit the desired traffic to and from your VM. Specify protocols, ports, and source/destination details as needed.

Set Up Port Forwarding:
– Create a port forwarding rule to direct external traffic to specific ports on your VM. Input details such as public and private ports, protocol, and the associated VM.

Add Egress Rules:
– Navigate to the “Network” section using the left navigation menu.
– Under “Select view,” option for “Guest networks,” then select the desired Guest network.
– Access the “Egress Rules” tab to add rules specifying the type of traffic permitted to exit instances in this guest network.
CIDR: (Specify via CIDR only) Direct traffic exclusively to IP addresses within a specific address block by entering a CIDR or a list of CIDRs separated by commas. The CIDR denotes the base IP address of the destination (e.g., 192.168.0.0/22). To allow all CIDRs, set it to 0.0.0.0/0.
Protocol: Indicates the networking protocol used by instances for outgoing traffic. TCP and UDP are commonly employed for data exchange and end-user communications, while ICMP is typically used for error messages or network monitoring data.
Start Port, End Port: (Applicable to TCP, UDP only) Specify a range of listening ports serving as the destination for outgoing traffic. When opening a single port, ensure the same number is used in both fields.
ICMP Type, ICMP Code: (Applicable to ICMP only) Define the type of message and error code transmitted within the ICMP protocol.

Once the VM is running and network setup is completed , you can access it using the provided IP address. Use SSH or any other preferred method to connect to your VM.
Congratulations! You have successfully created a Virtual Machine using the default network in Apache CloudStack.
Take a look of next article : Steps to Create Ubuntu Template.