For the time being, the AI-related issues in the open-source space have been largely attributed to the flood of AI-slop-generated code contributions, which human project maintainers were unable to process because the effort required to validate each contribution far exceeded the quality
]]>
For the time being, the AI-related issues in the open-source space have been largely attributed to the flood of AI-slop-generated code contributions, which human project maintainers were unable to process because the effort required to validate each contribution far exceeded the quality of those contributions.
Now Cloudflare, by slop-forking Next.js, has just validated that it's okay to take an open-source project, shove it into an LLM, and have it vibe-code a completely new product based on the source code the engine was fed.
The question arises: if AI regenerates the source code of an open-source project entirely, does the original open-source license still apply?
We're approaching the Slop Ages, where protecting your IP from AI heists becomes virtually impossible. We've seen it in the music industry, and the time has come for the software industry.
I am a software developer myself, and Evilginx has been open-sourced for over 8 years. That's why this news story rubs me the wrong way on a personal level.
Evilginx is an offensive security tool - a phishing framework focused on bypassing MFA. Due to its dual-use nature, it can be used either by the good guys to demonstrate the weaknesses of the company's MFA implementation or by the bad guys for malicious purposes, mainly to harm others.
I had countless second thoughts since the release of the open-source version, whether it was a good idea to put it out there, and later update it with new features, knowing that on one hand it will popularise the problems around weak MFA, and on the other hand give the bad guys a jump-start to expand their criminal enterprise.
It was no surprise to me to learn later that APT groups like Scattered Spider or Void Blizzard reportedly created their own phishing toolkits, based on publicly exposed Evilginx source code.
The main reason I launched Evilginx Pro as a closed-source, paid product last year was a combination of wanting to aid the good guys while gatekeeping the tool from the bad guys (and, of course, building a business out of it).
It has always been important to me to make the community version of the tool accessible to everyone. Still, I was not a fan of the collateral; this decision also carried.
Getting back to my original point.
We now live in a world where a threat actor can feed the GitHub source code of any offensive security tool into an AI and prompt it to create something completely different from scratch, with more features and easier to use. Security issues arising from vibe-coding become a secondary concern in this scenario and can be largely disregarded.
Over the last 2 years, I've been making significant improvements to the Evilginx proxy engine. The majority of these changes have now been implemented in Evilginx Pro. One of the upcoming major updates is the introduction of the new Phishlets 2.0 format.
The plan is to release Phishlets 2.0, together with the proxy engine improvements, as part of the major update to the Evilginx community edition and make it accessible to everyone. As you may've guessed by now, my main concern is whether to release it as open-source or closed-source.
Going the open-source route, I risk threat actors spending a few hundred bucks on a Claude subscription to create their own derivatives of Evilginx, which they can later rebrand and sell on the dark web.
The closed-source route allows me to still release the tool to the public, with proper guardrails to prevent misuse, while keeping it accessible to people who want to use Evilginx to learn hands-on how MFA is bypassed in phishing engagements.
I don't feel that open source is the proper delivery method for offensive security tooling anymore.
The AI has completely reshaped the open-source ecosystem. Writing code is no longer dark magic; it is more accessible than ever, but it has also introduced the cancer we will have to learn to live with.
I use AI to generate small helper libraries, while the rest of the Evilginx code is written by hand. Not because I reject the new AI-oriented reality we live in, but because I really enjoy programming. My love of programming brought me to this point in life.
I also enjoy the concept of ownership. By releasing your work into the world, you let everyone know that you made it, that you personally vouch for its quality, and that you own any mistakes you make. This is what builds trust and reputation.
With AI-generated software, there is neither.
- Kuba
P.S. I refrained from using an LLM to correct this post to avoid adding to the irony of the matter.
References:
 Steve Faulkner

I'm proud to announce that another major update to Evilginx Pro has just been released!
This update includes multiple bug fixes and introduces new features that were heavily requested. I strongly hope you will make great use of them!
This time, I've finished documenting the new features beforehand, and the guides are already available in the online documentation.
Let's dive in!
New Features
Here are the highlights of this update:
Event Notifications
This feature has been requested for a long time. The 4.3 update introduces real-time notifications, which can trigger for the following events in Evilginx:
- Lure URL was clicked.
- The visitor passed Botguard validation and arrived at the phishing page.
- Credential was captured.
- Session tokens were captured.
Notifications can be sent via Slack messages, Pushover push notifications, or the most versatile option: webhook requests in JSON format.
Webhook event notifications allow you to use the data captured by Evilginx to build your own custom tooling. It will enable you to receive captured data in real time.
Use the retrieved data to generate phishing engagement reports or for lateral movement using the captured credentials and session tokens.
All that is required is an HTTP/HTTPS server written in Python, Go, or any other language you are comfortable with. The event data will be sent from the Evilginx server in JSON format as an HTTP request to the URL of your choosing.
You can find the complete documentation with usage examples in the official documentation:
Tunnelling Proxies
The proxy feature has been left abandoned for quite some time, and it badly needed an update.
A few months ago, I realised the JA4 signature spoofing would stop working when routing Evilginx connections through a proxy. Since I had to fix how the proxies are implemented in Evilginx Pro, I decided to give the feature a complete overhaul.
The tunnelling proxy overhaul now allows you to manage multiple proxy servers on a single server and assign them to route connections server-wide, only for specific phishlets, or only to particular lures.
These options should provide enough flexibility to evade geolocation-based access controls and prevent CAPTCHA prompts when connections are routed through particular countries during your phishing engagements.
You can find the complete documentation with usage examples in the official documentation:
Improved CSS canary token evasion
Thanks to Rad Kawar (check out his new tool Deceptiq!), I was informed that CSS canary tokens made by Thinkst Canary added a bit of obfuscation to the url(...) block, through escaping random characters with hex values, like:
body {
    background: url('abcdefg.\63loudfr\6fnt\2enet/012345/cGhpc2guZG9tYWluLmNvbQ%3D%3D/img.gif') !important;
}Here is the function, which handles the generation of escaped canary token URLs:

The randomly escaped string would pretty effectively fool string rewriting implemented in phishlets, which looked for a string .cloudfront.net to replace it with something else to prevent the canary token from calling home:
sub_filters:
- {triggers_on: 'aadcdn.msftauthimages.net', orig_sub: 'aadcdn', domain: 'msftauthimages.net', search: '\.cloudfront\.net', replace: '.nowhere.local', mimes: ['text/css']} # disable canary tokens loaded from .cloudfront.net domainThe Pro version in the 4.3 update will now detect all URLs in proxied CSS files, including the "obfuscated" (escaped) ones, which may carry canary tokens, and it will unescape them, so that you can freely replace them with sub_filters.
Other improvements
There are multiple quality-of-life improvements included with this update, including:
- Ability to uninstall servers with
servers uninstallcommand. - Lure ID is now visible in the list of captured sessions, so you know which session originated from which lure.
- Phishlets now support a
portparameter inproxy_hostsentries, allowing you to target websites hosted on ports other than the standard TCP443. - Fixed server deployment for the latest versions of Debian and Ubuntu. The deployments will now work correctly for systems running the new
sysctlversion, which reads configuration files from the/etc/sysctl.d/directory. - The Gophish click event no longer triggers on URL clicks. Instead, it triggers once Botguard validates the connection and after the redirector redirects to the phishing page.
Check out the complete changelog below:
Closing thoughts
I strongly hope you enjoy this update, and the new event notifications feature allows you to create epic custom tooling integrated with your Evilginx phishing campaigns.
The next thing I'll be working on is the new Phishlets V2 format, which is long overdue. The work has already started, and I have big plans to overhaul Evilginx to become an extremely versatile reverse proxy tool.
Another project I've started looking into is how Evilginx phishing links can be hosted on a CDN. Stay tuned for that, as I may release a quick blog post about it once I figure out a working setup.
If you haven't already, make sure to apply and join our BREAKDEV RED community for red teamers. Our secure Discord server is a great place to discuss everything related to cybersecurity, and I'd love to see you there!
If you're already using Evilginx Pro and would like something improved or added, feel free to let me know via email, Twitter @mrgretzky, or LinkedIn.
Happy phishing! 🪝🐟
]]>It's been about five months, already, since the release of Evilginx Pro, and I'm proud to release the second major update. This release was hugely influenced by the feedback I received from multiple Evilginx Pro users I met at the x33fcon conference, which took place in Gdynia in June 2025. Being able to communicate with you directly to exchange ideas and learn how you use the tool gives me confidence that I'm moving in the right direction with the implementation of new features.
At x33fcon this year, I also had the opportunity to give a talk about the various anti-phishing techniques I've come across in recent years and how an attacker would approach to evade them. The video of the talk can be found below:
I've recently released the 4.2 update for Evilginx Pro and thought it would be a good idea to share what's new and how to use the latest features.
Without further ado, let's jump into the changes, starting with the most significant ones.
Proxy engine rewrite
The first and most significant change is the complete rewrite of the proxy engine. Back when I released Evilginx 2.0, I had only just started learning programming in the Go language. The code quality I produced then was... mediocre at best 😅. The proxy code residing in http_proxy.go eventually took the form of spaghetti and quickly spiralled out of control. The code worked, but at times caused Evilginx to behave erratically.
The eight-year-old legacy code made it impossible to add any new features, because even the most minor additions risked causing the whole proxy logic to crumble like a Jenga tower. Since this part of the code became the core of Evilginx, I was pretty reluctant to touch it, in order not to break the tool's main functionality. With the release of Evilginx Pro, it became clear that the time had come for a complete rewrite.
The proxy engine rewrite was introduced with Evilginx Pro version 4.1. All of the proxy components now work together much more reliably, and most importantly, the proxy code is now ready to give more power to the users who'd like to have complete control over the live modification of HTTP packets in transit. Full use of these changes will be made when Phishlets 4.0 format is released in future updates.
Phishlets 4.0 (not yet available) will allow you to:
- Capture data from the request & response HTTP headers.
- Capture data from the request & response HTTP content body.
- Inject custom headers into HTTP requests & responses.
- Modify the values of the request & response HTTP headers.
- Modify the content body in HTTP requests & responses.
Additionally, here are the most notable tweaks introduced with the proxy engine rewrite:
Improved HTML injection
Evilginx, from the beginning, has utilised string pattern recognition to identify suitable locations for injecting its meta tags or JavaScript code blocks into proxied HTML content. This approach was very error-prone, as regular expressions would sometimes miss the pattern detection, resulting in crucial injections being omitted.
After the changes, Evilginx will now correctly parse the whole structure of the HTML document, looking for the specific object types. When performing the injection, rather than inserting a string into the HTML code, it will generate a new HTML object, which will later get properly formatted when the HTML content is rendered to a string.
This change now allows you to select the location where you'd like to inject your JavaScript js_inject injects.
js_inject:
  - trigger_domains: ["login.microsoftonline.com"]
    trigger_paths: [".*"]
    location: "<location_string>"
Where the <location_string> can be one of the following:
| Location | Description |
|---|---|
head |
Inject at the end of the <head> tag. |
body_top |
Inject at the beginning of the <body> tag. |
body_bottom |
Inject at the end of the <body> tag. |
Phishlet collision fixes
One of the fixes, which needs mentioning, is the fix when handling multiple active phishlets which target the same destination hostnames.
Let's say you have two phishlets phishlet1 and phishlet2. Both of them have the same hostname defined in proxy_hosts. Evilginx now allows you to enable both phishlets as it will now recognise the target hostname based on the defined phishlet's hostname, rather than the target hostname.
Redirector fixes
If you had a redirector set up for your lure and you generated the lure URL with embedded custom parameters, Evilginx would lose the custom parameters and fail to forward them when the redirector redirected to the phishing page. The forwarding of custom parameters is now fixed, allowing you to use redirectors to their full potential.
Anti-phishing evasion
One of the most prominent features, released in update 4.1, was the option in phishlets to rewrite URL paths. Rewriting URL paths, while reverse proxying website content, allows you to protect your phishing pages from URL path pattern detection implemented by Google Chrome Safe Browsing protection.
Keep in mind that the following information is entirely speculative and the conclusion is based on my trial & error testing, rather than on reverse engineering the code of the detection engine.
If you reverse proxy the Google sign-in page and Safe Browsing kicks in, it will try to match the URL path and URL query to one of its known patterns. As an example, Safe Browsing will see the following phishing URL:
https://accounts.phishing.com/v3/signin/identifier?followup=https%3A%2F%2Faccounts.google.com%2F&ifkv=ABCD01234&passive=0123456789&flowName=GlifWebSignIn&flowEntry=ServiceLogin&dsh=XYZXYZ1234It will first detect the URL path, which it marks as the known URL path for the Google sign-in page: /v3/signin/identifier
Then it will try to match the keys and values of the URL query to look for known patterns. The keys it may match are as follows: followup, ifkv, passive, flowName, flowEntry or dsh.
Once it determines that the page, based on the URL path & query, must be the Google sign-in page, it will check the website's domain. That's when it will see phishing.com, instead of google.com and detection will be triggered.
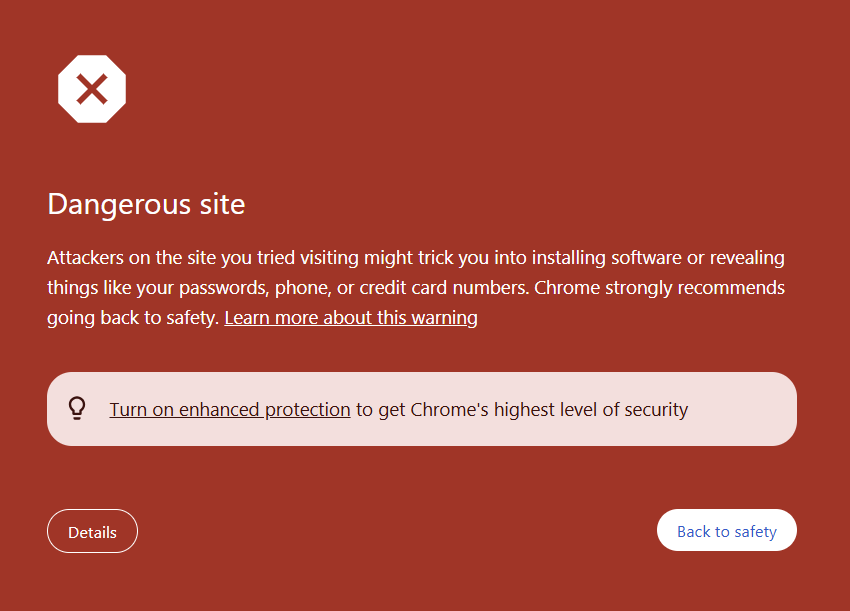
What I managed to figure out is that when the reverse proxy rewrites the URL path and modifies the URL query of the requests, Safe Browsing will have trouble detecting the phishing page, even with Enhanced protection turned on (it allegedly uses AI, so you know it must be good 😉).
That's where the new rewrite_urls feature comes in, exclusive to Evilginx Pro. We will now analyse the rewrite URL rules in the phishlet created to proxy the Microsoft 365 sign-in page:
rewrite_urls:
  - trigger:
        domains: ['login.microsoftonline.com']
        paths: ['/common/oauth2/v2.0/authorize']
    rewrite:
        path: '/signin'
        query:
          - key: 'boop'
            value: '{id}'
        exclude_keys: ['client_id']
The MS365 sign-in page for our following example has the following URL:
https://login.microsoftonline.com/common/oauth2/v2.0/authorize?client_id=4765445b-32c6-49b0-83e6-1d93765276ca&response_type=code%20id_token&scope=openid%20profile%20https%3A%2F%2Fwww.office.com%2Fv2%2FOfficeHome.All&response_mode=form_post&nonce=XXXYYYZZZ&client-request-id=f4978b5c-2855-46a9-9d58-18c850118fc5&state=ABCDEF0123Once the phishing link is opened in the browser, Evilginx Pro will attempt to proxy the URL above to display its contents to the user, and the phishlet's rewrite URL rules will trigger.
The proxy engine will detect a forwarded request to the URL with the hostname login.microsoftonline.com and URL path /common/oauth2/v2.0/authorize. Evilginx will then generate a new, rewritten URL and return it in the Location header of an HTTP 302 redirection response to redirect the user's browser:
https://login.phishing.com/signin?client_id=4765445b-32c6-49b0-83e6-1d93765276ca&boop=123456789The proxy engine will also map the generated URL to the original URL that served as a trigger for the URL rewrite. Once the user's web browser switches to the rewritten URL, the new HTTP request will be sent to the rewritten URL.
When Evilginx receives the request, it sees that the provided URL is mapped to the previously cached URL, which triggered the rewrite URL rule and the URL the proxy forwards the request to is replaced with it. That way, Evilginx can seamlessly forward the spoofed URL, converting it to the legitimate one in real-time.
The rewrite:path value dictates the URL path that the proxy will redirect to. The rewrite:query includes the query keys with values, which will be added to the URL. At least one of the injected query parameters must contain the placeholder {id} within its rewrite:query:value field. It does not have to match exactly a string {id}, but it can also be combined with another string, e.g. something-{id}-token.
The rewrite:exclude_keys array contains the names of keys that Evilginx will preserve, preventing them from being rewritten. You can see in the example above that the generated rewritten URL preserved the key client_id with its original value. Some websites use JavaScript to access GET query parameters from the URL address bar. Removing these parameters may break the website's functionality. You need to verify yourself if the website starts acting up when GET parameters are removed. Of course, preventing too many GET parameters from being rewritten may result in pattern matching triggering detections, so use this with caution.
DNS providers
Update 4.2 expands on the number of DNS providers supported by Evilginx Pro. The tool now allows for automatic management of DNS records for the following providers:
- Route53 (AWS)
- Cloudflare
- Gandi.net
For demonstration purposes, let's go through the process of setting up the Route53 DNS provider from AWS.
How to configure the Route53 DNS provider with Evilginx Pro?
At this point, I assume you already have an AWS account with access to the admin dashboard. The first step is to create a new user for managing DNS records on Route53 via Identity and Access Management (IAM).

Once you pick the user name, you will be asked to specify the permissions for the created user. Since we want the user to have full access to Route53 domain management, select Attach policies directly and look for AmazonRoute53FullAccess policy name.
To keep things clean, you can create a group with the mentioned policy and add the user to this group instead.

AmazonRoute53FullAccess permission policy for the created user.Once the user is created, we will need to create an access key that will be used to configure Evilginx Pro for automatic DNS record management on Route53.
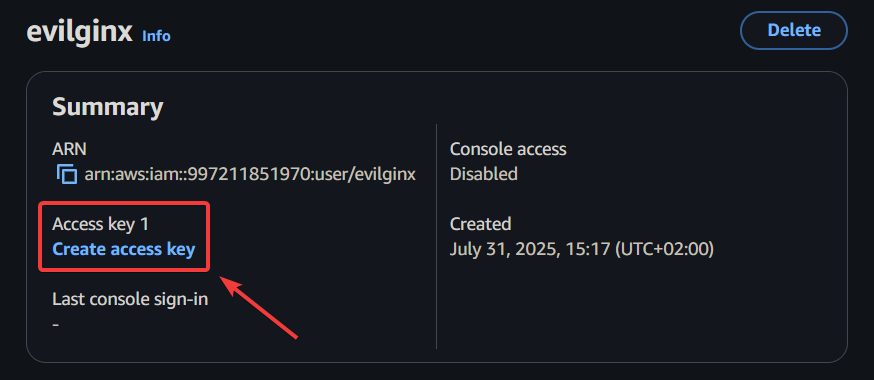
When asked to provide the use case, pick Other.
With the access key created, you will need to copy the Access key and Secret access key and store them in a safe place, preferably in a password manager. These keys will need to be entered to configure the Route53 DNS provider in Evilginx Pro.

Now that you have created the access keys for Route 53 domain management, go to your Route 53 dashboard, open the Hosted Zones management panel and create a new hosted zone.

Enter the name of your registered domain and click the Hosted zone details dropdown to see the nameservers you need to point your domain registrar to.

You will now need to go to your domain registrar, where you purchased the domain, and set up custom nameservers for your domain by entering all of the nameserver hostnames from the list you obtained at Route 53. Keep in mind that DNS propagation worldwide usually takes up to an hour, but may also take up to 72 hours.
With everything set up, we can use the obtained access keys to configure the DNS providers in Evilginx Pro.
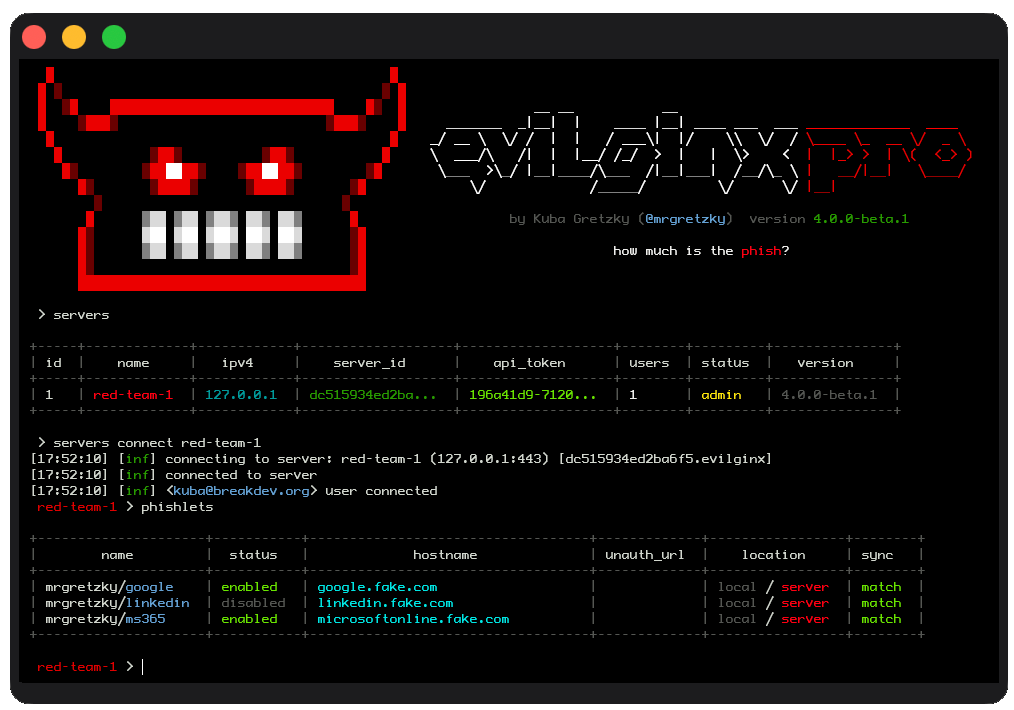
In the Evilginx Pro client, connect to the server you want to use the domain we set up with Route 53 and add the domain:
domains add phishing.comConfigure the domain to be managed by the Route 53 DNS provider with the generated access keys:
domains config phishing.com route53 access_key_id=<access_key> secret_access_key=<secret_access_key>Once this is done, you can test if everything worked by typing:
domains list phishing.comYou should see the list of all of your DNS records obtained through the DNS provider. If there is an error, please investigate the error message and use it for troubleshooting. The most likely issue would be that you're using the access key for an account with insufficient permissions.

If you prefer to use Cloudflare as the DNS provider for your domain, follow the same steps:
- Onboard your domain on Cloudflare
- Obtain the Cloudflare name servers and set them for your domain in your domain registrar admin panel.
You will need to create the Cloudflare API token to use with Evilginx Pro. Set it up later in the client with the command:
domains config <domain> cloudflare api_token=<api_token>Lures
Custom hostnames for Lure URLs are back
In version 4.1, I have removed the ability to configure custom hostnames for lure URLs. I made this decision due to issues with Evilginx proxy session management, through cookies stored for specific phishlet hostnames. The problems became apparent when the lure URL hostname had an entirely different hostname suffix than the hostname configured for the particular phishlet.
Suddenly, Evilginx had to manage TLS certificates for an entirely different hostname (since wildcard certificates work only for a subdomain one level up), and cookies to manage Evilginx proxy sessions had to be set for multiple domains, to recognise the same visitor across redirects. Since web browsers do not allow web servers to set cookies for a different domain than the domain of the server responding to the request, additional effort would have to be made to redirect between hostnames with one-shot tokens sent through GET query parameters. I did not want to overcomplicate this process.
As for version 4.2, the customisable hostnames for lure URLs are back, although in a more simplified form. What Evilginx allows you to do now is only customise the first subdomain of the lure hostname.
For example, if you had your Google phishlet hostname set to notgoogle.phishing.com, the lure URL hostname would become accounts.notgoogle.phishing.com, since the primary sign-in subdomain for that phishlet is hardcoded to be accounts. Now you can change the subdomain prefix to be anything you want:
lures set <id> hostname www.notgoogle.phishing.comThis will change the lure hostname to www.notgoogle.phishing.com. You can pick any hostname you want as long as you only change the top subdomain of the phishlet's hostname. The hostname needs to end with notgoogle.phishing.com in this example.
I also added a feature in version 4.2, which was not available in previous versions of Evilginx. You can now specify an empty subdomain for your lure URL hostname. This is extremely helpful if you want your phishing URL hostname to consist entirely of your domain name.
First, you need to set your phishlet's hostname to your top-level domain name:
phishlets set <phishlet_name> hostname phishing.comYour Google phishlet's lure URL hostname would become accounts.phishing.com, so we need to remove the subdomain with:
lures set <id> hostname phishing.comNow your lure URL hostname will become your top-level domain name and will look similar to this:
https://phishing.com/whatever/path/you/want.pdfCustom URL queries are now allowed
Another addition in 4.2 is the ability to set up custom URL query parameters for your lure URLs. This was not possible before, as Evilginx would strip the URL queries from the customised lure URL path.
You can now add your own URL query parameters (like archType=x64) to make your lures better fit your social engineering pretext, thus making them more believable:
lures set <id> path /client/6.5.9.11873/ZoomInstallerFull.exe?archType=x64Custom parameters can now be encrypted
Evilginx allows passing custom parameters through lure URLs. These parameters are encoded with base64 and embedded as a GET query parameter within the generated lure URLs. The following command allows for embedding custom parameters email and from_name in your lure URL:
lures get-url <id> [email protected] from_name=KubaThis will generate the following URL:
https://phishing.com/documents/Annual_Bonus_Report_2025.pdf?yui=dK-1zTbo6N5Bg9RYqI1QxahXeyIsHVPvKk87oDmFLKIm8hTWbMABxPynIVBaY1imev4mAkf4aRV-Yh4E4MwOKgThe custom parameters can be used to customise the HTML content of your Redirectors, or they can be used in your js_inject JavaScript injects. Custom parameters are also used internally by the custom Gophish integration for Evilginx.
Until now, the value dK-1zTbo6N5Bg9RYqI1QxahXeyIsHVPvKk87oDmFLKIm8hTWbMABxPynIVBaY1imev4mAkf4aRV-Yh4E4MwOKg could have been decoded by anyone who knew how, as Evilginx has never used encryption to protect the contents of the passed custom parameters. The source code for encoding custom parameters is publicly available, and I'm pretty sure that defenders have already discovered how to utilise custom parameter decoding for phishing URL detection. If you enumerate all GET parameter values of the URL and find one that can be successfully decoded, you can be 100% sure the link was generated with Evilginx.
Changes in Evilginx Pro version 4.2 now include an option to use AES-256 encryption, protecting your custom parameters embedded within generated lure URLs.
The only thing you need to do is configure the encryption key on your Evilginx Pro server with:
config enc_key your-custom-encryption-passphraseLeaving the enc_key config option empty will use the previous method of encoding, which anyone can decode.
This change significantly impacts the Gophish integration for Evilginx, which also had to be updated, as covered in the next section.
Gophish integration
[x] Gophish: Added an option to submit captured credentials to the Gophish server. Configure with command: `config gophish submit_credentials <true/false>`
[x] Gophish: Added an option to send the SHA256 hash of the captured password to the Gophish server instead of the clear text version. Configure with command: `config gophish hash_passwords <true/false>`
The Gophish integration for Evilginx was updated to version 0.12.2 from version 0.12.1. This update introduces the encryption key support for custom parameters. If you configured enc_key on your Evilginx Pro server, you MUST enter the passphrase in the Lure Encryption Key field when creating a new Gophish campaign.

You can also now use Lure URLs in Gophish with predefined GET query parameters or with your own custom parameters you want to pass to your Redirectors or JavaScript injects. Gophish will properly repackage the Lure URL with added Gophish-specific parameters for campaign tracking.
Send captured credentials to Gophish
The long-requested feature has finally arrived in 4.2. Evilginx Pro can now send the captured credentials to the Gophish instance. This feature is turned off by default due to security reasons. You can enable it on your server with the command:
config gophish submit_credentials trueIf you prefer not to send the captured passwords in clear-text, you can opt for a more secure option to send an SHA-256 hash of the passwords instead. You can enable this feature with the command (submit_credentials needs to be set to true):
config gophish hash_passwords truePhishlets
[x] Phishlet's enabled status can now be determined by looking at the list of `lures` with disabled phishlets being grayed out and enabled ones in color.
[x] Phishlet's hostname is now visible when listing the configured `lures`.
You can now see if the phishlet the lure refers to is disabled or enabled when listing your lures. The lures with a coloured phishlet name are enabled, while the greyed-out ones are not.

You can now also see the phishlet's configured hostname directly in the lures list table.
A minor tweak was added to warn you if the phishlet the lure refers to is disabled when you generate the lure URL:

Too many times have I opened the lure URL of a disabled phishlet, trying to figure out what happened when the phishing page would not load.
Javascript obfuscation
[x] Improved the speed of multi-threaded Javascript obfuscation by increasing the number of concurrent socket connections to the Evilpuppet instance.
[x] Javascript obfuscation level can now be changed with command: `config obfuscation javascript <off/low/medium/high/ultra>`
The performance of dynamic JavaScript obfuscation was improved by increasing the number of concurrent socket connections to the Evilpuppet instance.
You can now also control the intensity of JavaScript obfuscation of proxied web content with the command:
config obfuscation javascript <off/low/medium/high/ultra>The following table explains what each setting does:
| Level | Description |
|---|---|
off |
Obfuscation completely disabled (not recommended). |
low |
Evilginx built-in injected scripts and scripts injected via js_inject through phishlets are obfuscated. |
medium |
Everything above and all scripts inlined within HTML pages are obfuscated. (recommended) |
high |
Everything above and all scripts requested through <script src='...'></script> tags are obfuscated. |
ultra |
Everything above and all scripts dynamically generated for HTML obfuscation are obfuscated (may significantly slow down page loads). |
It is recommended to use the medium option for JavaScript obfuscation as it provides the best balance between speed and the risk of detection.
Fixes
I've finally managed to resolve the infinite redirects issue when triggering lure URLs on conflicting URL paths.
Let's say you had your phishing lure URL path defined as /login, and the target's website sign-in page was also hosted at /login URL path. Once the lure URL was clicked on /login URL path and all BotGuard checks have completed, Evilginx would redirect the visitor to path /login on the same hostname, which is the URL path of the target website's sign-in page. When the redirect hit, Evilginx would detect /login URL path as the trigger for the phishing lure URL, and it would repeat the cycle. The redirects would continue until the web browser got tired of them, but more importantly, they would prevent the redirection to the sign-in page.
The temporary fix I released with version 4.1.1 would make every phishing lure URL trigger ONLY ONCE to prevent any lure retriggers in the same proxy session. The drawback was that if the same user clicked the same phishing lure URL again, it would not redirect to the sign-in page at all, since technically the lure URL would work only once. This was not ideal, and I had to come up with a better solution.
I took advantage of the fact that most of the redirects happen internally through HTTP 301/302 responses. This gave me an opportunity to detect them and add unique GET query markers to the Location header URLs to make them ignored by lure URL triggers.
Other changes
[x] Added an option to enable debug output in the server logs for troubleshooting purposes. Configure with command: `config debug <true/false>`
[x] Added support to deploy servers running on Ubuntu 24.10.
The other minor changes that were added made it possible to enable debug output on the Evilginx Pro server easily. Just type the command:
config debug trueThen, after you SSH to your Evilginx Pro server, type:
sudo journalctl -a -u evilginxThis will allow you to browse the full server log for troubleshooting, which is sometimes very useful when debugging issues with phishlets during the engagements.
Oh, and you can now use automated deployment with servers deploy command to deploy Evilginx Pro servers to servers running on Ubuntu 24.10 due to popular demand.
Closing thoughts
Evilginx Pro is currently in the state I envisioned it to be for release. Given the significant time spent on development (and hacking cons) over the past months, sacrifices had to be made. One of the essential sacrifices was the documentation. I wanted to let you know that I am aware the documentation is currently lacking in content (as of August 2025), and it is the next thing on the list I will be addressing. There is obviously no point in releasing new features without letting everyone know about them and how to use them. This blog post is just the first step.
I have several ideas and modules lined up that I want to work on. Some of them are:
- Evilginx 4.0 CE - Release the new open-source version with the proxy engine rewrite and the SQLite support to the public.
- Phishlets 4.0 - Redo the phishlets format with a cleaned-up structure and syntax. Make it easier to create new phishlets and add support for embedding static web page content into the phishlets.
- Evilpuppet for MFA flow automation - New way to perform phishing attacks, focusing just on reverse proxying the MFA flow. This will probably be a talk I give next year!
I want to thank all of you for your continued support. ❤️
I'm incredibly lucky to be able to do this full time, and it wouldn't be possible without you giving me the benefit of the doubt.
If you haven't already, make sure to apply and join our BREAKDEV RED community for red teamers. Our secure Discord server is a great place to discuss everything related to cybersecurity, and I'd love to see you there!
If you're already using Evilginx Pro and you'd like something improved or added, feel free to let me know via email, on Twitter @mrgretzky or on LinkedIn.
Happy phishing! 🪝🐟
P.S. Nothing in this blog post was generated with LLMs. Let's keep the internet created by humans for humans.
]]>This is it! After over two years of development, countless delays, and hundreds of manual company verifications, concluded with multiple hurdles related to export regulations, Evilginx Pro is finally live!
To celebrate, the Evilginx Mastery course is having a 30% OFF sale. Use this coupon to redeem a discount: EVILGINXPRO.
The idea to release a professional version of the Evilginx phishing framework originated several years ago when I developed the first version of Evilpuppet to use a background browser to bypass the latest anti-phishing protections implemented by Google. I strongly wanted to share what I've implemented, but I knew releasing this to the public would probably do more harm than good.
Since then, I've met a large number of red teamers. Once I've learned what issues they've been facing at work, it became clear how hard red teaming has become when relying only on open-source tools, which do not always work as reliably as one would wish. Marc Smeets from Outflank gave a great talk about this subject at x33fcon last year.
It has become my top priority to reinvent Evilginx and create a phishing framework which is reliable, easy to use and fast to deploy while solving most of the issues red teams struggled with worldwide.
At its core, I also wanted the Pro version to drive innovation in anti-phishing defense development by inventing and implementing the most advanced anti-phishing evasions I could to bypass the majority of commonly used protections.
Evilginx Pro I'm releasing today is the fruit of a passion I've had for a long time in developing offensive security tools for cybersecurity enthusiasts. The journey has just begun, and now that the product is officially released, I can focus on making it even better by implementing all the ideas I've planned for it.
How to buy Evilginx Pro?
Since Evilginx Pro can cause harm when used with malicious intent, my priority has always been to make it only available to vetted red teamers or penetration testers who can prove they work in cybersecurity companies which perform offensive operations with legitimate intent.
That is why in 2023, I launched the BREAKDEV RED community for red teamers. The community hangs out on a Discord server where every single member is vetted by hand. Every member of the community gains access to the shop where you can purchase Evilginx Pro.

We currently have over 1500 members from over 260 companies around the world! Joining the community is and will always be completely free!
If you haven't joined yet, please do so by clicking the button below and filling out the application form:
After sending your application, please allow some time for us to process your request. Since 2023, I've significantly improved the speed of the approval process, but it is still being improved to keep up with the demand.
Once you get approved and gain access to the community, before you can purchase Evilginx Pro, several requirements will need to be met to comply with the export regulations of dual-use goods.
I've outlined them in the next paragraph.
Reason for Delayed Launch
The official release date was supposed to be February 25th 2025, but as you may've witnessed two weeks ago, I had to pull an emergency break after I've been informed by my legal team that the worldwide release of a tool, being a phishing framework, may be not as straight-forward as I expected.
As some of you may've guessed, the primary issue was the export regulations. I was under the impression that if my tool did not "install itself on the external device without the user's consent", it could not be considered dual-use and fall under export regulations under the Wassenaar Arrangement. Since I have already been doing the extra verification of all potential buyers with the screening process to join the BREAKDEV RED community, I thought it was enough. I was wrong, and I take full responsibility for the delay.
Now, the good news is that, after two weeks of hard work, the top-notch legal team handling the matter has figured out a solution. I now have all the guidelines on how to properly release Evilginx Pro while being compliant with all the necessary export regulations for exporting the dual-use goods from Poland.
The downside is that there will be a bit more paperwork involved regarding additional company verification, but on the positive note, you can now be 100% sure that the tool you are purchasing is doing absolutely everything possible to stay on the 100% legal side.
Company Verification Changes
Update 2025-04-01: I've updated this section with details on the improved verification process, which reduced the number of requested documents and decreased the verification time.
Until now, the verification consisted of two steps:
- Verification that you are working in a cybersecurity company as a red teamer or pentester with a fairly decent public profile.
- Verification of company details, such as the name, website, address, and tax identification number.
Here are the additional steps required to green-light your BREAKDEV RED account and make it eligible to make a purchase:
Signed End-user Statement
An official company representative will need to fill out and sign an end-user statement with a handwritten signature and send it back to us. The contents of the statement state the nature of the product and the importer's commitments.
You can find the PDF with the end-user statement available for download on the company page in your BREAKDEV RED account panel.
Both the signed statement and the current extract from the commercial register are instrumental in obtaining the export license from the Ministry of Economic Development and Technology.
Export License Processing Time
Once all required documents are received, the verification process takes up to 24 hours.
Once the export license is granted, all members of the company eligible to make purchases will receive the notification email. From that moment, the ability to order Evilginx Pro licenses will be unlocked in the BREAKDEV RED account panel.
What is new in Evilginx Pro?
Since you're here, you may be asking how the Pro version differs from the already available open-source community version of Evilginx. Here is the list of changes and improvements. The latest version of this list can be found in the official online documentation.
Client-Server Architecture
Evilginx has always worked as both the client and the server. You would deploy the application to an external server and control the server from the terminal while using SSH to connect to the remote server.
Evilginx Pro allows you to deploy dedicated Evilginx servers, which work as background daemons and start automatically on every server reboot. You can control and deploy multiple Evilginx servers straight from a single Evilginx client instance, running in the terminal on your local PC, no matter if you're on Windows, Linux or Mac.
Evilginx API
One of the most requested features of Evilginx was the ability to extract captured data from the server remotely. With the client-server architecture of Evilginx Pro, anyone can now write their own tool instrumentation using the exposed API on every Evilginx server instance.
The API is exposed via HTTPS, listening on the same TCP 443 as the main Evilginx HTTPS server. Evilginx Pro implements a stealth channel, which cannot be interacted with without knowing the internal secret hostname of the API request handler. The connection is additionally protected with a client certificate, allowing only legitimate and whitelisted Evilginx Pro users to connect to the Evilginx API server.
Wildcard TLS Certificates
The biggest issue most red teams struggled with was the fact that once Evilginx obtained the TLS certificate, the phishing hostname would immediately get listed in the public TLS transparency report database. This resulted in dozens of security products immediately performing scans of the Evilginx server, looking for malicious activity. This often resulted in the phishing server getting blacklisted before it could've been used for the engagement.
Evilginx Pro will now obtain wildcard TLS certificates by default, which prevents the hostname of the phishing server from being fully exposed. Security products will be unable to scan the phishing server by looking at the registered TLS certificate since the subdomain in the wildcard TLS certificate is an asterisk. The full hostname of phishing pages is not disclosed in clear text.
Botguard
Additionally, Evilginx Pro implements Botguard, which prevents security products from accessing the phishing website even if the hostname and full phishing URL are known to them.
Botguard uses multiple techniques, combining JA4 signature fingerprinting and telemetry analysis retrieved from the client browser using JavaScript. These methods are used to determine if the phishing server was accessed by bots through automated means.
If bot-like behaviour is detected, Evilginx Pro will display a spoofed website reverse proxied from an external URL predefined by the red team operator. You can learn more about how it works in the x33fcon keynote I gave in 2024.
Community Phishlets Database
Evilginx has always been considered to be a phishing framework, which can be extended with "phishlets" to target specific websites. The open-source version of the framework was made available without the ready-to-use phishlets. This decision was made due to ethical reasons to not make it too easy to use out of the box to wreak havoc by malicious actors. Since Evilginx Pro is now made available only to vetted red team professionals, the risk of phishing framework misuse is much lower.
Evilginx Pro now lets you access the community-curated database of ready-to-use phishlets to use for your next phishing engagement. Keep in mind, though, that there is no guarantee that the phishlets will be constantly updated to work with the most recent version of the target websites.
Evilpuppet (background browser)
With the increasing number of defenses against phishing implemented by industry leaders, Evilginx had to innovate to keep up with the changing ecosystem. Websites will often gather telemetry metadata from the user's web browser to determine if the user is not in the middle of getting phished by a malicious actor.
Evilpuppet implements a web browser, running on the Evilginx server in the background, to generate legitimate web browser telemetry, which can be extracted and injected into Evilginx Pro phishing sessions in real time during the phishing attack.
External DNS Management
By default, apart from acting as an HTTP server, Evilginx also acted as a nameserver, listening on port UDP 53 for DNS requests. This allowed Evilginx to be flexible in managing an unlimited number of phishing hostnames required by various phishlets. This, however, made Evilginx fairly easy to detect, since if anyone investigated the nameservers set up in the phishing domain's registrar, they would notice that the phishing server is hosted on the same IP as the nameservers, tied to the domain.
Red teams were able to mitigate that issue by using external DNS providers, but in doing so, they lost flexibility since all DNS records had to be managed manually and not through Evilginx automation.
Evilginx Pro now retains that flexibility even when using external DNS providers. Evilginx can now be configured to manage DNS records externally through the API of supported third-party DNS providers, making it more stealthy and easier to use.
Multi-domain Support
Evilginx Pro, unlike its community version counterpart, can now be configured to use more than one domain to run phishing campaigns. You can now set different base domains for each phishlet you want to use without the need to change your DNS settings.
Each domain can be set up with a different third-party DNS provider, be it internal or external, like Cloudflare or Digital Ocean.
Javascript Obfuscation
Evilginx will often inject its own JavaScript code into the reverse-proxied websites to manage redirects, gather botguard telemetry or provide additional interaction with the viewed website through JavaScript injected from phishlets. The injected code could have been easily fingerprinted through static signatures, potentially resulting in reverse-proxied websites being flagged as phishing.
Evilginx Pro will now automatically perform code obfuscation of all injected JavaScript code, using the obfuscator.io engine running locally. This results in JavaScript code taking different shapes with every page load, making the code impossible to fingerprint with pattern detection logic.
Automated Server Deployment
The days of deploying Evilginx servers by hand are over. Evilginx Pro provides a straightforward way of deploying a new phishing server by issuing a single command. You only need to provide the server's IP address and root credentials (password or authorized private key) to access the server. Evilginx client will do the rest.
Website Spoofing
When the Evilginx Pro server detects either a client requesting a URL which is not a valid phishing lure URL or determines the connection is made by automation software, it will not redirect the visitor to an external website anymore but render another website's content in the context of the current one.
This provides better phishing anti-detection capabilities and gives the impression that a legitimate website is hosted under the phishing URL.
SQLite Database
Data storage for Evilginx data has been completely revamped. Evilginx Pro no longer uses BuntDB text-file storage, and it now uses a SQLite database for speed and ease of access.
Conclusion
I have high hopes for Evilginx Pro, and I'm very excited to see what it's going to become.
If you have any questions about Evilginx Pro, you can contact us at [email protected]. Don't forget to check out the online documentation and the official Evilginx Pro website.
You can find me on the following platforms:
LinkedIn: Kuba Gretzky
Bsky: @mrgretzky.breakdev.org
Twitter: @mrgretzky
I wish you all the best, and hopefully, I will see you at the BREAKDEV RED Discord server!
]]>Long time no hear in terms of Evilginx updates. While I'm still working on the release of Evilginx Pro, I've decided to fix a few issues and add new features to the public version of Evilginx, in the meantime.
First of all, I wanted to thank everyone for the great feedback and insightful discussions in the BREAKDEV RED community Discord. All of the reported issues and suggestions led to the improvement of Evilginx and this update is the fruit of such great community feedback.
Additionally, I wanted to use this opportunity to thank everyone for sending their applications to access BREAKDEV RED. We've gathered an incredible number of security professionals (almost 850 at the time of writing) and every day I'm learning something new from you guys, which I'm super grateful for. Hell, I've even finally fully understood how to properly configure the SPF/DKIM/DMARC combo thanks to all the discussion on the subject.
Vetting the applications takes a lot of time and before I open the registrations again, to the public, I'd like to automate the verification process a bit. Once I do this, requesting access to the community should be more accessible to everyone.
Allowing access only to red teamers with a clean conscience is still of utmost importance to me and it is the base for creating a friendly atmosphere, which fuels guilt-free information sharing.
This time I have something special for you. Never before have I had a request so popular that it was mentioned in 90% of all BREAKDEV RED application forms. Let it be known that your pleas have been heard.
Evilginx has an official integration with GoPhish by Jordan Wright from now on!
That's right - you will finally be able to create phishing campaigns for sending emails with valid Evilginx lure URLs and enjoy all the benefits of GoPhish's lovely UI, seeing which emails were opened, which lure URLs were clicked and which clicks resulted in successful session capture.
Here is the full list of changes coming in Evilginx 3.3 together with a full guide on how to use all the new features.
GoPhish Support
I've forked GoPhish and added the integration with Evilginx in the cleanest way possible. If you were using your custom version of GoPhish, merging Evilginx integration with your own fork should be relatively easy.
I have made the integration in such a way that Evilginx will be notifying GoPhish of the following events, which occur:
- A hidden image tracker is triggered when the email is opened. The tracker image is just a lure URL with specific parameters to let Evilginx know it should be used as a tracker.
- A phishing link is clicked within the email message. The phishing link within the email message sent through GoPhish is just the lure URL with embedded parameters.
- The session is successfully captured with Evilginx. Once Evilginx gathers the credentials and logs the cookies, it will notify GoPhish that the data has been submitted.
I've exposed additional API endpoints in GoPhish to make it possible to change the results status for every sent email.
Now, when you create a new campaign in GoPhish, you do not have a "Landing Page" to select. Instead, you will generate a lure URL in Evilginx and paste it into the "Evilginx Lure URL" text box.
What's more, GoPhish will automatically generate the encrypted custom parameters with personalized content, retrievable by Evilginx, for each embedded link. The personalized values embedded with every phishing link embedded within the generated email message are the following:
- First Name (
fname) - Last Name (
lname) - Email (
email)
This is super useful as you can use the custom parameters further to customize the content on your phishing pages within your js_inject scripts.
Let's say you wanted to pre-fill the email in the sign-in text box on the phishing page. Now you can just use the {email} placeholder within your injected script and you can be sure that GoPhish will deliver the right value for you. The same goes for {fname} and {lname}.
GoPhish will also embed the rid (Result ID) in the phishing link's parameters, so that Evilginx will know for which result it should update the status.
You can monitor the status of your mailing campaigns and check email deliverability, straight from GoPhish, but Evilginx will be the only side storing the credentials and authentication cookies.
How to set up GoPhish with Evilginx?
First of all, you need to get GoPhish from my forked GoPhish repository. You can either grab clone the source code and build it yourself or you can grab the binaries from releases.
Deploy GoPhish on the external server. It doesn't have to be the same server Evilginx is running on, but it will have to be reachable by your Evilginx instances. You can find out how to install GoPhish in its official documentation.
Once you have GoPhish running on a remote server and you also have Evilginx deployed and ready for action, you will need to tell Evilginx how it can communicate with your GoPhish server.
Configuring Evilginx
For this, you will need the Admin URL of your GoPhish instance and the API key. You can find the API key within the Account Settings in your GoPhish admin panel. To figure out the IP and port of your GoPhish instance, refer to the official documentation.

For example, if your GoPhish admin server is running on an IP 1.2.3.4 listening on port 3333, with TLS enabled, you can set it up as follows:
config gophish admin_url https://1.2.3.4:3333
config gophish api_key c60e5bce24856c2c473c4560772
If you do not use a valid TLS certificate for the exposed GoPhish instance, you may need to allow insecure TLS connections as well (such connections can be man-in-the-middled, so tread carefully):
config gophish insecure trueOnce all this is configured, your Evilginx instance is ready to go. You can test if the communication with GoPhish works properly by issuing the command:
config gophish testConfiguring GoPhish
Here I am assuming you are familiar with how to use GoPhish. If not, feel free to check out the documentation on how to get started.
Make sure GoPhish is running either in a tmux session or you set it up to run as a daemon. You can find more information on how to do it in this GitHub issue.
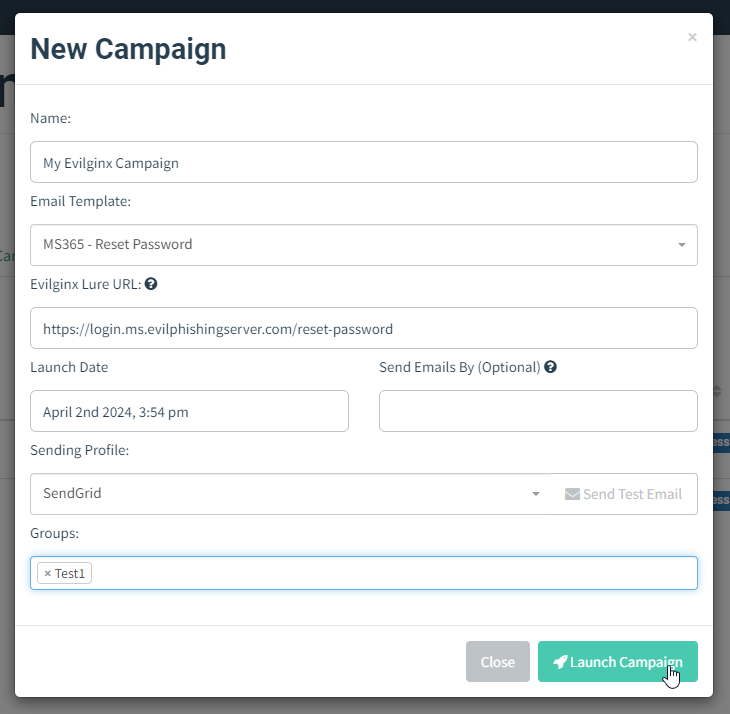
Once you have everything properly set up, it is time to set up your Campaign. Create the new campaign and then select the Email Template, Sending Profile and the group of recipients. You may notice that instead of being asked for the Landing Page profile you need to provide the Evilginx Lure URL.
Open your Evilginx instance, create the lure and grab the lure URL you want to send out in your phishing campaign, using the command:
lures get-url <id>Copy this URL and paste it into the Evilginx Lure URL text field of the campaign creation panel.
That's it! You can now send out the campaign emails while enjoying the full overview of your campaign progress within the GoPhish UI.
Custom TLS Certificates
Since the release of Evilginx 3.0, the tool has been using certmagic library for TLS certificate management with automated LetsEncrypt TLS certificate registration. Having to use only LetsEncrypt certificates is often not ideal as it may mark your phishing server, on an engagement, as suspicious.
Many people have requested support to use their own TLS certificates with Evilginx, including the wildcard certificates. This feature has finally been implemented.
To add your own TLS certificates, first, create a new directory under ~/.evilginx/crt/sites/ with the name of your website or hostname. The name does not matter and it can be anything you choose.
Evilginx will scan these directories looking for the public X509 certificate and the private key used to sign the certificate. The X509 certificate should have either the .pem or .crt extension, while the private key should have the .key extension.
For convenience, Evilginx will also recognize the keypair generated by CertBot, where the public certificate is named fullchain.pem and the private key is privkey.pem. You can copy both files into the same directory to add such a TLS certificate generated by CertBot.
Once you put your custom TLS certificates in the right place, don't forget to disable automated LetsEncrypt certificate retrieval with:
config autocert offIMPORTANT! Make sure the private key files are not password-protected or otherwise Evilginx may fail to load them.
Example 1:
~/.evilginx/crt/sites/wildcard.domain.com/fullchain.pem
~/.evilginx/crt/sites/wildcard.domain.com/privkey.pem
Example 2:
~/.evilginx/crt/sites/my_certificate/public.crt
~/.evilginx/crt/sites/my_certificate/private.key
CertMagic library will automatically add the TLS certificates to the managed pool and it will automatically respond with a valid TLS certificate.
HTTP Proxy IP Detection
I know some of you use Caddy, Apache or Nginx as an additional proxy layer, sitting in front of the Evilginx instance. This created an issue for Evilginx to properly detect the origin IP address of incoming requests. Since all requests were proxied through a local web server, the origin IP would default to 127.0.0.1, completely ignoring the additional HTTP headers added by the proxies, with the correct origin IP addresses as values.
Since this update, Evilginx will properly recognize the origin IP address of all proxied HTTP requests. The list of monitored HTTP headers is as follows:
X-Forwarded-For
X-Real-IP
X-Client-IP
Connecting-IP
True-Client-IP
Client-IP
JSON support in force_post
Thanks to @yudasm_ contribution, you can now enjoy injecting your custom POST parameters within body contents transmitted in JSON format.
Check out Yehuda's recent blog post on how he used this feature to evade FIDO2 authentication when phishing MS365 accounts.
Fixed a bug used to detect Evilginx
Keanu Nys reported an issue, in the BREAKDEV RED channel, where he found that one of the online URL scanners he used was able to open the phishing page by visiting the URL with just a hostname, without a valid lure URL path.
There was a bug in Evilginx, which would only enforce valid lure URLs for phishing hostnames, which were defined with session: true in the proxy_hosts section of the phishlet file.
Upon closer inspection, I've decided that the session parameter never made sense and it is now obsolete. Every proxy_hosts entry is treated as if session was set to true.
BUGFIX 🐛: Fixed a pretty serious flaw in Evilginx, which allowed scanners to detect phishing pages, bypassing the unauthorized requests protection and blacklist rules.
— Kuba Gretzky (@mrgretzky) February 28, 2024
Pull from master and enjoy! 🥳
Big thanks to Keanu Nys for finding this. 💗https://t.co/v7eQdK4Ugw
Keanu wrote a great post-mortem post about the bug he found, so if you're interested in learning more about it, you can find it here.
Fixed the infinite redirection loop
Evilginx, since forever, had a very annoying bug, which would trigger the infinite redirection loop, whenever the lure URL path was set to be the same as the login path of the targeted website.
This has now been fixed and Evilginx will also make an additional check to compare if the lure URL contains the valid phishing domain used by the landing phishing page.
Added support for more TLDs
Over the years, there have been multiple new TLDs launched for registering domains. Evilginx will try hard to detect all URLs in proxied packets and convert them either from phishing domains to original domains or from original domains to phishing domains.
To be more efficient, it relies on the detection of URLs ending with known TLDs. Some of the newer TLDs have not been supported and this update changes that.
Here is the new list of all supported TLDs:
aero
arpa
art
biz
bot
cat
click
cloud
club
com
coop
edu
game
gov
inc
info
ink
int
jobs
live
lol
mil
mobi
museum
name
net
online
org
pro
root
shop
site
tech
tel
today
travel
vip
wiki
xyz
[all known 2 character TLDs]
Changelog
Here is the whole Evilginx 3.3 changelog with some additional changes and fixes I did not mention in this post:
3.3.0
- Feature: Official GoPhish integration, using the fork: https://github.com/kgretzky/gophish
- Feature: Added support to load custom TLS certificates from a public certificate file and a private key file stored in
~/.evilginx/crt/sites/<hostname>/. Will loadfullchain.pemandprivkey.pempair or a combination of a.pem/.crt(public certificate) and a.key(private key) file. Make sure to run without-developerflag and disable autocert retrieval withconfig autocert off. - Feature: Added ability to inject
force_postPOST parameters into JSON content body (by @yudasm_). - Feature: Added ability to disable automated TLS certificate retrieval from LetsEncrypt with
config autocert <on/off>. - Feature: Evilginx will now properly recognize origin IP for requests coming from behind a reverse proxy (nginx/apache2/cloudflare/azure).
- Fixed: Infinite redirection loop if the lure URL path was the same as the login path defined in the phishlet.
- Fixed: Added support for exported cookies with names prefixed with
__Host-and__Secure-. - Fixed: Global
unauth_urlcan now be set to an empty string to have the server return403on unauthorized requests. - Fixed: Unauthorized redirects and blacklisting would be ignored for
proxy_hostswithsession: false(default) making it easy to detect evilginx by external scanners. - Fixed: IP address
127.0.0.1is now ignored from being added to the IP blacklist. - Fixed: Added support for more TLDs to use with phishing domains (e.g.
xyz,art,tech,wiki,lol& more) - Fixed: Credentials will now be captured also from intercepted requests.
Conclusion
I'm happy to have finally been able to include the most requested features, together with some quality-of-life improvements, before the Evilginx Pro release this year.
Please let me know your feedback about the update, either on Twitter @mrgretzky or in BREAKDEV RED Discord.
Looking forward to your opinion!
If you're reading this before 3rd April 2024, you can still get a 30% discount for the Evilginx Mastery course, which I am constantly updating and you get access for a lifetime. Expect to see the GoPhish integration guide added sometime in the future.
Happy phishing!
-- Kuba Gretzky
]]>Evilginx Pro will be a paid professional version of Evilginx, with extra features and added advanced reverse proxy anti-detection techniques, available only
]]>I've teased the idea of Evilginx Pro long enough and I think it is finally time to make a proper reveal of what it exactly is.
Evilginx Pro will be a paid professional version of Evilginx, with extra features and added advanced reverse proxy anti-detection techniques, available only to BREAKDEV RED community members.
If you've not yet applied to the community or you did not receive the approval e-mail from the first round, you can apply again as Round #2 of registration is currently ongoing.
The Pro version is catered to professional red teamers and penetration testers, who want to see better results during phishing engagements and who want to make the job easier for themselves and have more time to focus on other aspects of the tasks at hand.
Without further ado, let's jump into the product presentation.
Features
The list of exclusive features available in the Pro version is not final. First of all, I wanted to outline the features I've already implemented, which are guaranteed to be included on day one:
Evilpuppet
Evilpuppet is an additional module running alongside Evilginx, responsible for managing a Chromium browser in the background, for various purposes.
I wanted to make a quick note here that, since there are already multiple ways to detect headless browsers, the Evilpuppet background browser does not launch in headless mode, to prevent unnecessary detections, while still running with a hidden interface.
The main reason why Evilpuppet was created, was due to new reverse proxy phishing detections, introduced on popular websites.
The module serves two purposes:
Secret Token Extraction
More websites begin to implement extensive JavaScript obfuscation with the generation of what I call - "secret tokens". The secret token, in general, is an encrypted buffer holding telemetry data gathered from the client's web browser. The telemetry data often holds the URL of the visited website, which in the case of the phishing website, would hold the name of the attacker's phishing domain.
The secret token value is often transmitted as a hidden POST parameter. Once retrieved by the server, the token is decrypted and its content is analyzed, in search for anomalies, which could indicate that sign-in originated from a reverse proxy server, hosted on a different domain than the legitimate website.
If you're interested in learning how secret tokens are generated and how they are used to protect users from reverse proxy phishing, you can watch my x33fcon talk where I explained how to properly implement such protections.
The students of my Evilginx Mastery course can also learn how to evade secret token protection within the private Training Lab.
Sometimes reverse engineering the JavaScript responsible for gathering telemetry and generating the secret token's value, then hotpatching it, is simply not possible.
This is where Evilpuppet comes in.
Evilpuppet runs as a Node.js application, which controls a Chromium browser, automated through Puppeteer. The process of bypassing the secret token protection can be described as follows:
- When a phished user begins the login process, in which a secret token is generated, Evilpuppet will spawn a browser in the background and open the legitimate website's sign-in page.
- In the background session, Evilpuppet will enter the credentials supplied by the phished user and initiate the sign-in process.
- Once the secret token is generated and embedded within the transmitted HTTP packet, Evilpuppet will extract its value and send it back to Evilginx.
- The secret token generated within the reverse proxy phishing session is then replaced with the secret token extracted from the Evilpuppet background session.
You may be thinking how is this possible? Why isn't the secret token tied to the specific sign-in session to prevent the attacker from re-using secret tokens generated in different sessions?
Unfortunately, what makes it possible is the fact that HTTP communication is stateless by design. You can emulate the state by including specific session tokens as cookies or authorization headers, but this can all be emulated by the attacker. If we could tie a sign-in session to a TLS handshake, for example, this would be a different story. There was once a lot of buzz about the concept of Token Binding, but I believe the idea did not take off.
If you've recently tried using Evilginx to phish LinkedIn, you may have noticed the phished account is locked out immediately when a reverse proxy phishing attack succeeds. This happens, because Microsoft implemented reverse proxy phishing session detection, through the generation of a secret token.
You can see the secret token, transmitted with the POST login request as a hidden apfc parameter.

Evilginx Pro with Evilpuppet will capture the value of apfc parameter in the background browser session and inject it into a reverse proxy session, effectively circumventing the protection and making the LinkedIn server think the sign-in happened on a legitimate website.
Here is a short video of Evilginx Pro successfully phishing a LinkedIn user, while extracting a secret token with the background browser. As a bonus enjoy some extra Cyberpunk music I made!
NOTE: The background Chromium browser will be running in the background, on the Evilginx server and will not be visible. It is only visible in the video for demonstration purposes.
🎬Phishing LinkedIn and bypassing MFA demo created for the upcoming Evilginx Pro post 🔥
— Kuba Gretzky (@mrgretzky) September 26, 2023
💡Evilginx uses a background browser to capture the secret token from legitimate website and inject it back into the reverse proxy phishing session.
P.S. Enjoy that Cyberpunk tune I made 🎵 pic.twitter.com/rkbOmVSdeb
To learn more about how Evilpuppet can be automated with Evilginx Pro, you can look into the LinkedIn phishlet, which was used in the demo video:
min_ver: '3.0.0'
proxy_hosts:
  - {phish_sub: 'www', orig_sub: 'www', domain: 'linkedin.com', session: true, is_landing: true, auto_filter: true}
sub_filters:
  - {triggers_on: 'www.linkedin.com', orig_sub: '', domain: 'www.linkedin.com', search: '<\/head>', replace: '<style>#artdeco-global-alert-container {display: none !important;} .alternate-signin-container {display: none !important;}</style></head>', mimes: ['text/html']}
auth_tokens:
  - domain: '.www.linkedin.com'
    keys: ['li_at']
credentials:
  username:
    key: 'session_key'
    search: '(.*)'
    type: 'post'
  password:
    key: 'session_password'
    search: '(.*)'
    type: 'post'
login:
  domain: 'www.linkedin.com'
  path: '/login'
js_inject:
  - trigger_domains: ["www.linkedin.com"]
    trigger_paths: ["/login"]
    trigger_params: ["email"]
    script: |
      function lp(){
        var email = document.querySelector("#username");
        var password = document.querySelector("#password");
        if (email != null && password != null) {
          email.value = "{email}";
          password.focus();
          return;
        }
        setTimeout(function(){lp();}, 100);
      }
      setTimeout(function(){lp();}, 100);
evilpuppet:
  triggers:
    - domains: ['www.linkedin.com']
      paths: ['/checkpoint/lg/login-submit']
      token: 'apfc'
      open_url: 'https://www.linkedin.com/login'
      actions:
        - selector: '#username'
          value: '{username}'
          enter: false
          click: false
          post_wait: 500
        - selector: '#password'
          value: '{password}'
          enter: false
          click: false
          post_wait: 500
        - selector: 'button[type=submit]'
          click: true
          post_wait: 1000
  interceptors:
    - token: 'apfc'
      url_re: '/checkpoint/lg/login-submit'
      post_re: 'apfc=([^&]*)'
      abort: true
Evilpuppet support is already included in the official documentation, so please check that out if you want to learn how the evilpuppet section of a phishlet works.
For comparison, you can use the same phishlet with the public version of Evilginx and observe how the account will be locked when phished successfully when there is no Evilpuppet to help with injecting the legitimate apfc secret token.
Post-Phishing Automation
This feature is not yet completed, but the end goal is to allow Evilpuppet to use the captured session tokens and log into the phished service on behalf of the phished user.
Once logged in, it could be instrumented to perform specific actions on the phished user's account to change account settings or exfiltrate data.
The idea is to create a full-blown post-phishing automation framework similar to what Necrobrowser does in the Muraena project.
Wildcard TLS Certificates
Evilginx Pro is officially supporting the automatic retrieval and renewal of wildcard TLS certificates from LetsEncrypt.
One of the most annoying aspects of using Evilginx with LetsEncrypt was that whenever Evilginx requested the TLS certificates for all of the phishing subdomains, the TLS certificate for a given phishing domain would immediately be published within the Certificate Transparency Log.
Once the certificate lands in the log, dozens of automated scanners will begin scanning the domains attached to generated TLS certificates, looking for malicious intent. You could observe this happening in the Evilginx terminal with multiple unauthorized requests popping up to your phishing domain, right after the TLS certificate, through LetsEncrypt was issued.
Wildcard certificates do not carry the same problem. Even though wildcard certificates will land in the same Certificate Transparency Log, the automated scanners will have no idea what domains to scan, because the Common Name attached to the wildcard TLS certificate would look like *.baddomain.com and any subdomain could be used.
Using Evilginx Pro with wildcard certificates will prevent your phishing domains from being scanned when TLS certificates from LetsEncrypt are issued, allowing your phishing campaigns to remain undetected much longer.
JA3 Fingerprinting Evasion
Methods to detect reverse proxy phishing have been similar to methods to detect web scraping bots. Very often scraper bots would be written in a specific programming language like Java, Go or Python. Each of these languages implements an HTTP library, which holds specific fingerprintable characteristics.
One such fingerprinting method is called JA3 and it is more often implemented by major companies.
The idea is to detect the specific combination of TLS ciphers supported by the HTTP client willing to connect to the server. The list of TLS ciphers is exchanged during the TLS handshake. As an example, Google Chrome will have a different list of supported TLS ciphers than the HTTP library used in Go or Python.
Evilginx Pro will make sure to always imitate a list of TLS ciphers of popular web browsers, to evade any form of JA3 fingerprinting and make its connections look as close to casual web browser traffic as possible.
Daemonization and Multi-User Collaboration
Currently, Evilginx is both a client and a server, in one application. This makes Evilginx fairly easy to use, but it also introduces a set of problems, making it harder to deploy and manage at scale.
The only way to run Evilginx in the background, right now, is to execute it within a tmux or screen session. This complicates the process of launching Evilginx on boot, as the launch script needs to manage tmux sessions as well. It also means that every instance of Evilginx needs to be controlled over an SSH connection, which is often not ideal.
My plan with Evilginx Pro is to make the server fully daemonized and allow it to be controlled through exposed admin API by Evilginx Pro client applications. Both the Evilginx server and Evilpuppet Node.js application would be running as daemons, awaiting connections from Evilginx clients.
Evilginx Pro server would expose a full API, accessible over a standard HTTPS connection on the default 443 port. API access would be protected with an authorization token to identify the Evilginx admin user.
This new client-server architecture would allow a multi-user collaboration across multiple Evilginx Pro instances. Every user with a valid Evilginx Pro license would be able to interact with any Evilginx Pro server instance, set up with the same license.
Evilginx Pro clients will look and feel the same way as the current Evilginx terminal UI. The only difference with Evilginx Pro will be that you'd be using one terminal to control multiple remote server instances. The introduction of a full-blown API to control Evilginx instances will also allow automating Evilginx server setup and, one day, it may even be possible to develop a web UI for Evilginx.
Licensing System
Important to note here is the fact that it will be required to have a valid BREAKDEV RED community account, in order to be eligible to obtain an Evilginx Pro license. This means that only people qualified to join the community will be allowed to purchase Evilginx Pro licenses. This is to limit the misuse of Evilginx Pro's extra offensive capabilities and make sure that only vetted personnel are using the Pro version.
Due to the separation of a server and a client in Evilginx Pro, communication with the BREAKDEV licensing server will only take place on the side of Evilginx client applications. Since Evilginx server instances are critical in terms of operational security during red team engagements or phishing simulations, they will not make any unnecessary outgoing connections to licensing servers. The only established connections will be the ones required for reverse proxy sessions to work properly.
Multiple Base Domains Support
At the moment, Evilginx allows the use of only a single base domain, configured globally, which is used by every activated phishlet. If your configured base domain is fake.com, every lure URL you generate, even for different phishlets, will use a hostname ending with fake.com.
Evilginx Pro allows more flexibility with the configuration of multiple base domains. These can later be assigned to individual phishlets or individual lures.
Phishlets will be assigned the last used domain from the list, which will be then automatically used for the generation of new lures, but you can also override the selected domain and pick a different one from the list of supported domains for each lure separately.
No Detectable Artifacts
I made sure to deprive Evilginx Pro of any identifiable artifacts and I do not only mean the removal of the infamous X-Evilginx header.
Evilginx Pro is much harder to identify by automated scanners and HTTP servers it connects to.
Server Stealth Overhaul
You will now have an option for how to handle unauthorized requests. At the moment, unauthorized requests would redirect the visitor to a different URL, through the injection of Location header in the HTTP response or throw a 403 Forbidden HTTP error.
Evilginx Pro allows you to either use the default method or:
- Display the contents of another website under the same domain, using a reverse proxy functionality similar to
proxy_passin Nginx. - Respond with custom HTML content stored in the local directory.
HTML and JavaScript Obfuscation
Evilginx Pro implements much smarter techniques for evading phishing page detection.
All of the JavaScript or HTML content, injected through js_inject or hosted through lure redirectors will be now delivered dynamically obfuscated, making it much harder for signature detections to determine the hosted content as malicious.
Some of you have had a lot of success hosting your phishing pages behind additional obfuscation layers like Cloudflare. Some research has also been published describing how effective content obfuscation is, to protect phishing pages.
It makes sense that HTML and JavaScript obfuscation should be natively supported by Evilginx, without having to use external services to overcomplicate your infrastructure setup.
Auto-Deploy Scripts
Evilginx Pro comes with easy-to-use bash scripts to easily deploy Evilginx to external servers.
You can deploy Evilginx to the remote server as easily as by running a single command:
SSH_KEY_FILE=~/keys/ssh.key SSH_USER=admin ./deploy.sh 1.2.3.4You can learn more about the automatic deployment script here. The usage may slightly change in the final product, but it will always remain as easy as using a single command.
Closed Source
I wanted to make note here that Evilginx Pro will not be released as open-source. This decision comes from the fact that I want to lower the risk of possible source code leaks, which could lead to unauthorized use of the tool.
I expect to make exceptions for companies, which need to perform due diligence, before using the tool, to have guarantees that the tool securely stores and manages critical operational data, to protect their own customers.
Final Thoughts
I expect Evilginx Pro to be released in Q4 2023 or Q1 2024, with the license price tag of 1200-1400 EUR per seat, billed annually. The price is not final and will depend heavily on product demand. The higher the demand, the lower the price will be.
There will be no limits to how many Evilginx Pro servers you deploy. The license will be required only by the Evilginx Pro client application, assigned to a specific user, from which it will be possible to communicate with all deployed servers. In short, every red teamer will require one named license to use Evilginx Pro to be able to connect to an unlimited number of Evilginx Pro server instances, created for the same license.
Everyone who has been accepted into the BREAKDEV RED community will soon receive a link to the form with several questions, through which I'll be gathering feedback on Evilginx Pro.
Thank you in advance if you spend the time to fill it out! Your answers will be used to make Evilginx Pro a better product.
If you haven't yet applied to become a member of the BREAKDEV RED community, round 2 of registrations is up! Please apply here.
Wish you all the best and as always expect updates to show up on my Twitter @mrgretzky.
]]>Today I want to announce my plan for creating a closed community for professional red teamers, working in red team companies, who perform phishing engagements as part of their job.
Read more about it below, but if you're already ready to sign up, here is the button, which will take you to the registration form:
Red Teams United
My idea is to create a vetted Discord community, oriented around using Evilginx and ethical phishing, where everyone can safely share their phishing tips and tricks without having to worry about such information being misused by malicious parties.
I plan to launch a community repository for Evilginx phishlets, which will be maintained by me and other red teamers from the same trusted BREAKDEV RED community. Every community member will be granted free access to the repository and everyone will be able to contribute their own phishlets.
Additionally, all community members will be granted the ability to purchase licenses for Evilginx Pro as soon as it lands. The reveal of all the upcoming features will happen in the upcoming weeks. I expect Evilginx Pro to become a game-changer in professional phishing, solving a lot of issues around detection and adding the ability to bypass the latest reverse proxy phishing mitigations.
One of my main concerns is for Evilginx Pro to not fall into the hands of wrong-doers, which is the number one reason why I want to establish the trusted community in the first place.
Benefits for BREAKDEV RED members:
- FREE access to the private Evilginx phishlets repository on GitHub, maintained by me and other Evilginx power users.
- FREE access to the private BREAKDEV RED community on Discord, where you can interact with fellow red teamers, who went through the same vetting process as you did.
- (OPTIONAL) Ability to purchase licenses for Evilginx Pro when it comes out sometime later this year or early 2024.
I have already confirmed that Discord communities can be highly beneficial for brainstorming and for Evilginx development. One of the great examples was when @JackButton_ shared how he implemented his own idea of signature base evasion and automated scan preventions using CloudFlare, on Evilginx Mastery Discord.
How do I sign up?
First of all, here is a list of requirements you need to fulfill, in order to be granted membership:
Registration requirements:
- You're an employee or an owner of a cybersecurity company offering legal penetration testing services, with a focus on phishing simulations.
- The provided contact e-mail should be hosted on the company domain. Sorry, no free domains (Gmail, Protonmail etc.), since those carry the risks of impersonation.
- Your company should have a public website with outlined services provided in the area of cybersecurity. Once your status is approved, I will send you an email to the address you provided, with a final confirmation request.
If by any chance you do not use company emails hosted on the company domain, please explain in the "Comments" section of the form and we will work something out.
If you're ready to sign up, clicking this button will lead you to the registration form:
FAQ
What is Evilginx Pro?
It is a privately maintained version of Evilginx which employs:
- Evasion of widely employed phishing detection mechanisms.
- Extra features like extraction of secret tokens, using an entirely new Evilpuppet module, responsible for interfacing Evilginx with a background browser.
- Reverse proxy support for most popular services (including Google, LinkedIn and more).
I will release a blog post soon, going into detail on what exactly the Pro version is about.
Update: The blog post is out.
What is the registration form about?
Since I do not want any of the community benefits to be abused or misused, I want to offer them EXCLUSIVELY to legitimate cybersecurity companies, offering red teaming and/or penetration testing services.
Your answers allow me to learn more about your company and let me make a decision whether to put it on the list of trusted companies, interested in becoming Evilginx power users.
]]>Welcome back!
I've recently managed to find some free time to work on reverse proxy support for the latest Google updates and in the process I've made several additions to the Evilginx code base, which I think some of you will find useful.
To start, I wanted to give a big shoutout to Daniel (@dunderhay) for publishing a great post on how he used Evilginx to phish the Microsoft 365 ADFS environment and how he even made his modifications to succeed!
Evilginx is getting more love this year than in the last couple of years and I'm very happy about it. I have big plans for Evilginx, which I will announce soon, but first I wanted to give you a rundown of what the latest 3.2 update consists of.
I will start with the most significant changes.
Dynamic Redirection on Session Capture
One of the behaviours, that annoyed me when using Evilginx, was the fact that sometimes it was not possible to immediately redirect the phished user to the configured redirect_url, once all session tokens were captured. Evilginx could only redirect the browser once the targeted website attempted to navigate to a different page, on its own.
It made redirects not work on single-page applications. I learned it first-hand during the development of the Training Lab for my Evilginx Mastery course. The main page of the lab changes its contents dynamically and never navigates to a different URL. This means that once session tokens are captured by Evilginx, the tool is unable to redirect the user to redirect_url address.
In the 3.2 update, I've managed to solve the problem with injected JavaScript sending out HTTP long polling requests on every proxied page, to retrieve session capture status directly from the Evilginx proxy server in real-time. Evilginx will inject its own JavaScript code on every HTML page load, which will be responsible for querying https://<phish_domain>/s/<phish_session_id> infinitely. Evilginx proxy server will respond with a JSON structure, containing the redirect_url value only when the session is successfully captured. Otherwise, the connection will time out after 30 seconds and will be retried afterwards. Long polling allows Evilginx to let the injected script know that the session was captured immediately when it happens.
The script will then change the window.location URL to the retrieved redirect_url value, redirecting the user to a preconfigured page address. Redirection should now work great within Evilginx Mastery Training Lab.
Instead of HTTP long polling, I could've used WebSockets, but I wanted to keep it simple without the need to rely on external libraries, which would need to be injected as well.
Temporary Lure Pausing
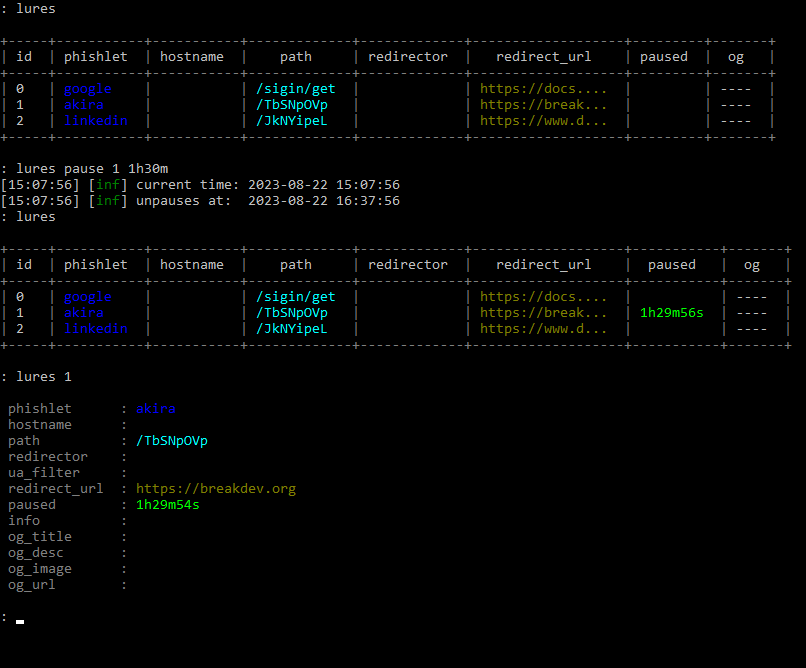
Imagine a situation - you're on a phishing engagement and finally get to send out your phishing lures. Once the emails start arriving at the target inbox, the mailbox server opens them one by one and scans the HTML content of every phishing URL. The mail server then determines emails as phishing and they are sent to quarantine.
There are many ways to prevent automated scanners from seeing the content of your phishing pages, but the most straightforward method would be to simply hide your phishing pages for a brief moment, right before you send out the emails. Enough to hide their content from automated scanners, but not from the targeted user.
Now you can easily hide your lures from prying eyes by pausing them for a specific time duration with:
lures pause <id> <time_duration>The best part is that you don't have to worry about unpausing a lure manually. Once the pause period expires, the lure with become active again and you will get a notification about it in the terminal. The pause state also persists between Evilginx restarts.
Interception of HTTP Requests
I found out that sometimes it would be useful to be able to block some of the proxied requests or have them return custom responses, without the proxied requests ever reaching the destination server.
Now you can detect specific requests within the new intercept section in your phishlets, which will match specific URL paths on domains within your proxy_hosts list. Once the request matches your filters, you will be able to detour the request and return your response with a custom HTTP status code.
intercept:
  - {domain: 'www.linkedin.com', path: '^\/report_error$', http_status: 200, body: '{"error":0}'', mime: "application/json"}
  - {domain: 'app.linkedin.com', path: '^\/api\/v1\/log\/.*', http_status: 404}
In the example above, any request to https://www.linkedin.com/report_error will be intercepted and will return HTTP status 200 with response body {"error":0} and MIME type application/json.
The second entry will make sure that all requests to https://app.linkedin.com/api/v1/log/<whatever> will return 404 Not Found HTTP response.
Redirect URL Added to Phishlets
Sometimes for the phishlet to work properly and to not interrupt the phished user's experience, it needs to redirect the user's browser right after session tokens are successfully captured. For now, the redirect would happen only if redirect_url was specified for the lure, used with the phishing engagement.
At times, it is important to have a default redirect_url specified, especially if we want the user to be redirected to the home page of the phished website, by design. Sometimes the redirection to the home page will happen automatically, but sometimes it needs to be enforced.
From this Evilginx version, you can set a default redirect_url in the phishlet you are creating to make sure the phished user is redirected, once session tokens are captured, even if redirect_url has not been set up for the given lure.
Unauthorized Request Redirects Per Phishlet
First of all, I've changed the name redirect_url from global config to unauth_url, to better illustrate its purpose and so it doesn't get confused with redirect_url set up in phishlets or lures.
IMPORTANT! Keep note that the URL you set for unauthorized request redirects may reset itself after the update, due to the name change.
Unauthorized URL or unauth_url holds the URL address where visitors will be redirected if they open any URL on the phishing domain, which doesn't correspond to any valid URL or if the lure is currently paused.
So far, it was possible to set up unauth_url globally, which would provide the same URL to redirect to for all active phishlets. With 3.2 you can now override the global unauth_url by specifying a value for each phishlet with:
phishlets unauth_url <phishlet> <url>This feature was suggested by @0x_aalex who was also kind enough to submit a PR with his implementation. Thank you for that!
Tweaks and Fixes
Additionally to several new features, Evilginx has also received some QoL tweaks and fixes, which should improve the overall phishing performance.
Disabled caching of proxied content by web browsers
Sometimes it was especially frustrating to test the sub_filters of your phishlets because your web browser cached the content of your previous modification. Every time you made small changes and had to retest, it was required to clear the browser cache.
Starting from the 3.2 update, Evilginx will prevent web browsers from caching HTML, JavaScript and JSON content by injecting Cache-Control: no-cache, no-store HTTP header in proxied responses.
This should also make working with js_inject much more convenient.
JavaScript injected through external references
Normally when your phishlets inject JavaScript, through js_inject functionality, Evilginx would drop the whole script into the content of the HTML page within <script>...</script> tags. This approach was kind of messy, so I figured out a way to inject multiple scripts as external references, like this:
<script type="application/javascript" src="/s/48d378a85f0867ef16bf0fd28deda0d4b30139c54805033803e7fdcbc31f293c/2628b4fe94aa35effbe26d64ed6decd00c9d26fb53aa0dfb57836055a27e38cf.js"></script>
<script type="application/javascript" src="/s/48d378a85f0867ef16bf0fd28deda0d4b30139c54805033803e7fdcbc31f293c.js"></script>
Requests to download external JavaScript resources will be intercepted by Evilginx proxy and the response will be delivered from Evilginx directly, without ever being forwarded to the destination website.
This approach should make it possible to introduce dynamic JS obfuscation, in the future. (Stay tuned!)
Changelog
Here is the full changelog for Evilginx 3.2:
- Feature: URL redirects on successful token capture now work dynamically on every phishing page. Pages do not need to reload or redirect first for the redirects to happen.
- Feature: Lures can now be paused for a fixed time duration with
lures pause <id>. Useful when you want to briefly redirect your lure URL when you know sandboxes will try to scan them. - Feature: Added phishlet ability to intercept HTTP requests and return custom responses via a new
interceptsection. - Feature: Added a new optional
redirect_urlvalue for phishlet config, which can hold a default redirect URL, to redirect to, once tokens are successfully captured.redirect_urlset for the specific lure will override this value. - Feature: You can now override globally set unauthorized redirect URL per phishlet with
phishlet unauth_url <phishlet> <url>. - Fixed: Disabled caching for HTML and Javascript content to make on-the-fly proxied content replacements and injections more reliable.
- Fixed: Blocked requests will now redirect using javascript, instead of HTTP location header.
- Fixed: Improved JS injection by adding
<script src"...">references into HTML pages, instead of dumping the whole script there. - Fixed: Changed
redirect_urltounauth_urlin global config to avoid confusion. - Fixed: Fixed HTTP status code response for Javascript redirects.
- Fixed: Javascript redirects now happen on
text/htmlpages with valid HTML content. - Fixed: Removed
ua_filtercolumn from the lures list view. It is still viewable in lure detailed view.
Closing Thoughts
Hope you enjoy this update and there is more to come for Evilginx!
If you are interested in mastering the Evilginx phishing framework, consider checking out my Evilginx Mastery course:
In the upcoming weeks, I want to show off a sneak peek of Evilginx Pro and outline all of its extra features. Evilginx Pro will be a paid product I want to distribute only to vetted red teaming companies around the world.
I will post more details when I'm ready!
If you are interested in how to protect against reverse proxy phishing, do check out the talk I gave in May at x33fcon cybersecurity conference from this year:
For now, stay tuned and you can always follow me on Twitter @mrgretzky.
]]>Today I'm publishing the research I started to work on last year, but I was too busy with the Evilginx Mastery course, to publish it, at the time.
If you want a quick TL;DR rundown of what this blog post is about, check out the demo video I prepared:
Background
In recent years, I've noticed that more and more web applications begin to offer a new way to sign in - through QR code scanning. This method is especially convenient if you have a mobile app, on your phone, corresponding to the web application you are trying to sign into, in your web browser.
Here are the most popular websites, you can sign into, in any web browser, by scanning a QR code within the mobile application.


To sign in, you open the mobile application, navigate to "Scan QR code", usually residing somewhere within your profile settings, in the mobile application, and scan the QR with your phone camera.
The QR code, displayed on every sign-in page, is nothing more than a dynamically generated session token, which you can authorize with your mobile application, to pair it with your account.
Try to scan any of these QR codes with your phone's camera and you'll see the code translates into a unique string, usually presented in URL format. Here are several examples:
Discord:
https://discord.com/ra/GLt61XsN_fuakToqeSMV25pd3G-uwSbdScI1Zc9iwT8Whatsapp:
2@o7Ugs+XwUVXgG2f8stGluhiItwCxbZJNLkpkeKEhz65GmPh6+/N1lp3fXpaSjxeARrE2JGXi3ikIFA==,it98cjNOA3qvp4i/TidKTeWZTrGkFUTnqsOzPPxFEzI=,AMV+jQ0gSnoFFKbuYzKdrDSPT7BVZ4R5iFxIGEbCqQI=,nVAlyqnDJiYfW/S1LzZoaVNsDm+pNaB1mGm8pGC0+/E=,1Steam:
https://s.team/q/1/1711614348354244891TikTok:
https://www.tiktok.com/t/ZGJXCraU8/Binance:
https://www.binance.com/en/qr/93bd2ead7e504488bda81bf50deab7e8Now let's imagine if there is any potential way, attackers could convince users to scan the QR code with the session token they control.
Meet Evil QR Phishing aka QRLJacking
One day you receive an email, telling you that you've been granted exclusive access to a private Discord server, where highly valuable information will be shared, among the participants. All you need to do is open the attached link and scan the QR code with your Discord application.
You click the link and the following website shows up in your web browser:
Since you are pretty excited to join, you open your Discord application and scan the QR code, showing up on the screen of your PC. Discord asks you to confirm if you want to sign in, using the scanned QR code. You think that it makes sense that you need to be signed in to join the Discord server, so you agree without hesitation.
Once you approve the login attempt, the website redirects you to the Discord server page. You lose interest and go back to your other activities. All this without realizing, you've just given the attacker full access to your account.
What happened?
Here is the step-by-step process of what the attacker did to pull off this phishing attack, using the Evil QR toolkit.
- The attacker opens the official Discord login page within their web browser to generate the sign-in QR code.
- Using the Evil QR browser extension, the attacker is able to extract the sign-in QR code from the login page and upload it to the Evil QR server, where the phishing page is hosted.
- The phishing page, hosted by the attacker, dynamically displays the most recent sign-in QR code controlled by the attacker.
Once the target successfully scans the QR code, the attacker takes over the phished account.
The concept of phishing users with sign-in QR codes is not new and it has been broadly documented by Mohamed Abdelbasset Elnouby (@SymbianSyMoh) from Seekurity in 2016! I highly recommend you read this post as it covers a lot of information about the potential attack vectors, which could be used to pull off such attacks.
The technique was later officially recognized as QRLJacking and @SymbianSyMoh also released a QRLJacker tool in 2020 to demonstrate how such attacks can be executed. Evil QR idea is just a spin-off of the same idea.
Evil QR Toolkit
To demonstrate this interesting phishing technique, I've developed a set of proof-of-concept tools for demonstration purposes.
You can find the open-sourced Evil QR toolkit on my GitHub if you're interested in trying it out yourself.
As you can see below, the Evil QR attack can be customized using personalized phishing pre-text, with dynamic updates, for every website separately. Evil QR browser extension can detect and extract QR codes, within websites, no matter how they are rendered.
The extension supports extracting QR codes rendered as CANVAS, IMG, SVG or even DIV (by taking a screenshot with html2canvas library).

Evil QR Server
The server is developed in GO and its main purpose is to expose REST API for the browser extension and run an HTTP server to host the phishing page.
It awaits authenticated communication from the browser extension including QR code image with metadata in JSON format on /qrcode/[qr_uuid] endpoint:
{
    "id": "11111111-1111-1111-1111-111111111111",
    "source": "data:image/png;base64,iVBORw0K...",
    "host": "discord.com"
}
The retrieved QR code is then stored and is available for retrieval by the JavaScript, running on the phishing page. The phishing page is using HTTP Long Polling to be able to retrieve QR code updates with minimal delays, without having to use Websockets.
The phishing page automatically detects which hostname the QR code was retrieved from and can dynamically adjust its CSS and text content to change the phishing pre-text, for social engineering purposes.
Evil QR Browser Extension

The extension is used solely by the attacker and it needs to be enabled on the sign-in page of the web application, the target is phished for. It will automatically find the QR code image and detect if it changes. Once it changes, it will upload the updated image to the Evil QR server.
One of the most important characteristics of session tokens represented by sign-in QR codes, is that the tokens are short-lived by design. Every token is made to expire approximately after 30 seconds, which drastically shortens the time frame of the token's validity. Once the token expires, the website regenerates it and updates the displayed QR code, on the sign-in page.
If the sign-in session tokens did not expire, the attackers would hypothetically be able to print out the QR codes on a physical piece of paper and send them as phishing leaflets to potential victims, since the tokens would never expire.
Some websites will stop updating QR codes, after a certain period of inactivity, to save bandwidth. When this happens, they will usually display a "Retry" button of some sort, which the extension can automatically detect and click on, to not interrupt the process of updating QR codes.
The extension can also detect the presence of a specific DOM object, which will show up only when the attacker is signed in after the phishing attempt is successful. It will then send an update to the Evil QR server with authorized: "true" parameter, allowing the phishing page to decide on how to proceed.
How serious is this?
In my personal opinion - not that serious. For the QRLJacking phishing attack to be successful, it requires a lot of prerequisites to be met prior to the attack taking place. Nevertheless, it was a very fun project to work on.
The classic phishing attacks, focused on capturing credentials and session tokens to bypass multi-factor authentication, are still much more dangerous than this one and they can be executed on a much larger scale using a tool like Evilginx for example.
I think the most realistic scenario of how QRLJacking phishing could be pulled off, would be to set up a phishing page with a QR code on display using an external device, deployed in public, like a tablet or TV screen. Once one person successfully signs in, by scanning a QR code, the attacker's Evil QR setup would save the captured session for later and reload the new sign-in page to generate a new QR code to phish another user.
That could in theory make it possible to phish a larger number of users, one at a time. I don't think QRLJacking phishing is a viable technique when sending phishing links via e-mail or other mediums. These days most people read incoming messages on their mobile phones and once the phishing page with a QR code shows up on their phone's screen, it is impossible to use the same phone's camera to scan it.
To summarize, here is a list of all pros and cons of executing this phishing attack technique, I could think of:
Pros:
- No need for the target to enter their username and password.
- Could be potentially pulled off in public areas, having an external device displaying a phishing QR code, on display.
Cons:
- Target needs to have the mobile app pre-installed for the given service.
- Attacks are hard to pull off, on a wider scale, since there has to be a separate QR code generated for every target.
- Usually pretty hard to find the setting to scan QR codes within mobile applications, involving multiple clicks, with every click lowering the chance of a successful social engineering attempt.
- If a phishing page is opened on a mobile phone, there is no way for the target to scan the QR code with the same mobile phone.
Closing thoughts
I decided not to implement this attack vector into Evilginx phishing framework, since Evilginx is already powerful on its own.
While sign-in QR codes displayed on phishing pages, reverse proxied by Evilginx, will not let you sign in by scanning them, due to hostname mismatch, it is still possible to patch the JavaScript code, which generates them, to make them work on phishing pages.
If you're interested in learning more about reverse proxy phishing to bypass MFA, check out my Evilginx Mastery video course, which will teach you everything you need to know to perform successful red team phishing engagements.
Till next time!
]]>This post has been long coming and I'm glad to finally be able to make it happen!
Today I'm finally releasing Evilginx 3.0, together with Evilginx Mastery online course, into which I've poured everything I know about Evilginx and how to use it in the most effective manner.
Evilginx hasn't seen any updates for nearly two and a half years. That's why it was a great surprise to me to hear, that even though I haven't released any updates, a lot of red teamers still use this tool for phishing simulations with many successes. I've been amazed to come across some great posts about Evilginx, like the ones by Jan Bakker, Jeffrey Appel or Pepe Berba.
Talking to people in the industry motivated me to give Evilginx a quality of life refresher, in order to build stronger foundations for future updates. It's been nearly 6 years, since I've released the first version of Evilginx, which was nothing more than a LUA script for custom version of nginx. Back then I couldn't have foreseen such great reception, the tool would receive, over the years.
It's a fact, that a lot of people have been struggling to figure out how to properly use Evilginx or create their own phishlets. Lack of official documentation to guides didn't help and you could only get so far, analyzing public phishlets and trying to figure out how they work through trial & error.
Additionally, to my surprise, during recent years, not many websites have attempted to develop their own detections for reverse proxy phishing. I need to actually hand it to Google and Microsoft as they seem to have been one of the few companies doing anything to protect their users against reverse proxy phishing.
All this will hopefully change today. Here is, in detail, what I've been working on, for the past year, and what I'm today releasing to the public:
Evilginx Mastery Course
Public version of Evilginx will always remain open-source and free to use. You can use the tool as you see fit. To fund further development, I decided to publish a paid online course, with which I could demonstrate my whole knowledge about Evilginx and share hands-on step by step video footage showing how I personally use Evilginx, myself.
Big thanks to SEKTOR7 and Rasta Mouse for encouragement to make an attempt in creating an Evilginx course.
The course is also prepared with defenders in mind. Seeing how little websites do to protect from reverse proxy phishing, nowadays, I've included tips on what defenders can do to make reverse proxy phishing attacks extremely hard or nearly impossible to pull off.
If you decide to purchase the course, thank you in advance and keep in mind that it helps me greatly to continue working on Evilginx and will definitely be a great contribution to my levels of motivation.
If you plan to purchase access to the course for multiple employees in your company, please contact me directly at [email protected] and we can work out a discount.
You can buy the course online and watch the lessons, at your own pace, whenever you want: Evilginx Mastery - Reverse Proxy MFA Phishing Guide For Red Teams
To know more about the course, take a look at my attempt to make a promotional video for the course. And yes I know how to blink :D
Evilginx 3.0
This version is not delivering flashy big features, but rather it serves as a quality-of-life update. I've fixed numerous issues, which have been lingering in Evilginx for a long time and updated some mechanics to make the tool work better than before.
GitHub: https://github.com/kgretzky/evilginx2
Here are some highlights of what has changed:
Improved TLS certificate management
I've ditched the old GO library for managing LetsEncrypt certificates and switched to well-maintained certmagic library. This change now allows to perform automated retrieval of TLS certificates, from LetsEncrypt, more efficiently and most importantly, Evilginx will now automatically renew expiring certificates, so you won't have to ever worry about your phishing campaigns expiring without warning.
Session tokens can now be extracted from response body or HTTP Headers
Ever since Evilginx was released, I've only considered a single scenario where session tokens are to be transmitted as HTTP cookies. Over the years, I've learned this approach was wrong, as now it is becoming more and more common for session tokens to be retrieved in JSON packets and later stored as LocalStorage values. This is now especially common practice with web applications relying heavily on JavaScript functionality like messenger applications.
It is now possible to look for session tokens in HTTP response packets body or in contents of HTTP headers like the Authorization header.
I've covered how to handle such scenario in one of the training labs from Evilginx Mastery course.
Example phishlets no longer available in main repository
My main goal has always been to deliver a reverse proxy phishing framework for red teamers. The provided example phishlets were always meant to serve as a learning material to learn how to make your own phishlets. Keeping them updated, was honestly an impossible feat. This is why I've made a decision to cease support for example phishlets in the main Evilginx repository.
Phishlets get outdated and stop working relatively fast and I always wanted to focus on developing the framework, rather then keeping the example phishlets constantly up-to-date. I encourage everyone to set up their own repositories with phishlets they want to share with the community. My priority now is to put effort into teaching people how to create their own phishlets.
Once I find several contributors, who may want to work on several phishlets for fun, I may set up a new repository just for aggregating several working and tested phishlets, made by others, and later have it integrated somehow with Evilginx installations.
Phishing pages can now be embedded within iframes
Few months ago, the legendary mr.d0x, released amazing research on BITB (browser-in-the-browser) phishing, where you could create a fake popup window, with JavaScript, showing a spoofed URL in fake address bar. I liked the idea so much that I really wanted to see it working with Evilginx.
Displaying phishing pages in iframes turned out to not be supported, by default. Now you can fully enjoy displaying your phishing page within iframes. Just make sure to fully rewrite the default BITB templates as they have been heavily flagged by Google as malicious content.
Also make sure to check out mr.d0x courses on Malware Development!
Configuration format changed to JSON
Evilginx configuration file was stored originally in YAML format. JSON, overall, is a much better option, with its syntax being easier to use than YAML, but maybe a bit harder to read. Nevertheless, with config file in JSON format, it will be easier to write custom deployment scripts, handling dynamic generation of configuration files.
Phishlets will remain in YAML format.
Phishing sessions are now created always when valid lure URL is opened
Evilginx would whitelist IP addresses of every target, making requests to valid lure URLs. This is required to later allow the proxying of requests, which cannot contain Evilginx session cookies, due to web browsers not allowing some requests to transmit cookies.
The bug in Evilginx would prevent creation of new reverse proxy sessions for valid lure URLs coming from IP addresses, which have already been whitelisted.
In 3.0 update, every time a target opens a valid lure URL, they will be assigned a new reverse proxy session. This fix will also make it possible to properly track the clicks to your lure URLs.
Child phishlets derived from phishlet templates
One of the problematic issues Evilginx users have encountered was targeting websites, which were hosted under customized hostnames.
Say you wanted to target a specific company's Okta portal, hosted on evilcorp.okta.com domain. To target custom domains, you'd have to manually edit the phishlet file and put the hardcoded evilcorp.okta.com into it.
With the phishlet templates feature, instead of having to modify a phishlet file manually, every time you'd need to target a different hostname, now you can create a phishlet template for Okta, setting up a placeholder for custom variables in your phishlet file e.g. {subdomain}.okta.com.
Having such template, whenever you'd need to target a specific hostname, you could just create a child phishlet as a derivative from your phishlet template and specify subdomain=evilcorp, as an example. Such created child phishlet can be then used as a normal phishlet with its own personalized setup.
You can learn how to create and use phishlet templates in my Evilginx Mastery course, as well.
URL redirection with JavaScript
Originally when all session tokens have been successfully captured, Evilginx would redirect the user to preconfigured redirect_url URL through HTTP Location header. I found this solution to not be ideal, since this approach exposed the phishing URL to destination website, through Referer header, when redirection took place.
Since 3.0, the redirection will happen via JavaScript injected into text/html content of the next web page, loaded after all session tokens have been captured. This approach will avoid populating the Referer header with your phishing URL. There is still one issue with redirecting the user if the website does not load any new pages after successful sign-in. This I will try to tackle in future updates.
License changed from GPL to BSD-3
In short - GPL requires to redistribute the tool with full source code. BSD-3 is more permissive, allowing to redistribute the tool without it.
Changelog
The full changelog for Evilginx 3.0 is as follows:
- Feature: TLS certificates from LetsEncrypt will now get automatically renewed.
- Feature: Automated retrieval and renewal of LetsEncrypt TLS certificates is now managed by
certmagiclibrary. - Feature: Authentication tokens can now be captured not only from cookies, but also from response body and HTTP headers.
- Feature: Phishing pages can now be embedded inside of iframes.
- Feature: Changed redirection after successful session capture from
Locationheader redirection to injected Javascript redirection. - Feature: Changed config file from
config.yamltoconfig.json, permanently changing the configuration format to JSON. - Feature: Changed open-source license from GPL to BSD-3.
- Feature: Added
alwaysmodifier for capturing authentication cookies, forcing to capture a cookie even if it has no expiration time. - Feature: Added
phishlet <phishlet>command to show details of a specific phishlet. - Feature: Added phishlet templates, allowing to create child phishlets with custom parameters like pre-configured subdomain or domain. Parameters can be defined anywhere in the phishlet file as
{param_name}and every occurence will be replaced with pre-configured parameter values of the created child phishlet. - Feature: Added
phishlet createcommand to create child phishlets from template phishlets. - Feature: Renamed lure
templatesto lureredirectorsdue to name conflict with phishlet templates. - Feature: Added
{orig_hostname}and{orig_domain}support forsub_filtersphishlet setting. - Feature: Added
{basedomain}and{basedomain_regexp}support forsub_filtersphishlet setting. - Fixed: One target can now have multiple phishing sessions active for several different phishlets.
- Fixed: Cookie capture from HTTP packet response will not stop mid-term, ignoring missing
optcookies, when all authentication cookies are already captured. - Fixed:
trigger_pathsregexp will now match a full string instead of triggering true when just part of it is detected in URL path. - Fixed: Phishlet table rows are now sorted alphabetically.
- Fixed: Improved phishing session management to always create a new session when lure URL is hit if session cookie is not present, even when IP whitelist is set.
- Fixed: WebSocket connections are now properly proxied.
Evilginx Online Documentation
As Evilginx kept growing it become harder and harder to keep up with all the features. GitHub Wiki kind of worked to, at least, provide documentation for the latest phishlet format, but I've never been fully satisfied with it.
I've always wanted the documentation to be easily accessible, well structured, easy to navigate and to have a quality look & feel. I can happily say, I may've found the perfect solution with Docusaurus.
Evilginx most up-to-date documentation, since today, will always be accessible through one official URL: https://help.evilginx.com
Check it out!
I honestly think, now with Evilginx having proper documentation, it will become much easier for everyone to use. I strongly hope you make good use of it! I'm often using it myself when I forget how the tool I made is supposed to work :P
Closing thoughts
The last 6 years have been a wild ride and I can't thank everyone enough for giving Evilginx a shot. I've never expected a tool, based on a simple idea, would eventually become a tool people use at work, to simulate phishing attacks. Mention of Evilginx even made it to TechCrunch, at one point.
I really hope Evilginx will continue to serve its purpose in aiding you during your phishing engagements. Thank you, again, and if you decide to give Evilginx Mastery course a try, accept my eternal gratitude!
To end with a cliffhanger, I will say that Evilginx story is not over and there may be Evilginx Pro in the works, with some special features I decided to keep private for now. The pro version will most likely be licensed only to cybersecurity companies. Some of you may find mentions about private features in the official online documentation.
For updates follow me on Twitter @mrgretzky and Mastodon @[email protected].
If you have any inquires about company discounts or if you require any custom functionality in Evilginx, you can always contact me directly at: [email protected].
As always - enjoy and stay tuned!
In October 2022, I've come across a tweet from 5th July, from @wdormann, who reported a discovery of a new method for bypassing MOTW, using a flaw in how Windows handles file extraction from ZIP files.
So if it were a ZIP instead of ISO, would MotW be fine?
— Will Dormann (@wdormann) July 5, 2022
Not really. Even though Windows tries to apply MotW to extracted ZIP contents, it's really quite bad at it.
Without trying too hard, here I've got a ZIP file where the contents retain NO protection from Mark of the Web. pic.twitter.com/1SOuzfca5q
This sounded to me like a nice challenge to freshen up my rusty RE skills. The bug was also a 0-day, at the time. It has already been reported to Microsoft, without a fix deployed for more than 90 days.
What I always find the most interesting about vulnerability research write-ups is the process on how one found the bug, what tools were used and what approach was taken. I wanted this post to be like this.
Now that the vulnerability has been fixed, I can freely publish the details.
Background
What I found out, based on public information about the bug and demo videos, was that Windows, somehow, does not append MOTW to files extracted from ZIP files.
Mark-of-the-web is really another file attached as an Alternate Data Stream (ADS), named Zone.Identifier, and it is only available on NTFS filesystems. The ADS file always contains the same content:
[ZoneTransfer]
ZoneId=3
For example, when you download a ZIP file file.zip, from the Internet, the browser will automatically add file.zip:Zone.Identifier ADS to it, with the above contents, to indicate that the file has been downloaded from the Internet and that Windows needs to warn the user of any risks involving this file's execution.
This is what happens when you try to execute an executable like a JScript file, through double-clicking, stored in a ZIP file, with MOTW attached.

Clearly the user would think twice before opening it when such popup shows up. This is not the case, though, for specially crafted ZIP files bypassing that feature.
Let's find the cause of the bug.
Identifying the culprit
What I knew already from my observation is that the bug was triggered when explorer.exe process handles the extraction of ZIP files. I figured the process must be using some internal Windows library for handling ZIP files unpacking and I was not mistaken.
ProcessHacker revealed zipfldr.dll module loaded within Explorer process and it looked like a good starting point. I booted up IDA with conveniently provided symbols from Microsoft, to look around.
ExtractFromZipToFile function immediately caught my attention. I created a sample ZIP file with a packaged JScript file, for testing, which had a single instruction:
WScript.Echo("YOU GOT HACKED!!1");
I then added a MOTW ADS file with Notepad and filled it with MOTW contents, mentioned above:
notepad file.zip:Zone.IdentifierI loaded up x64dbg debugger, attached it to explorer.exe and set up a breakpoint on ExtractFromZipToFile. When I double-clicked the JS file, the breakpoint triggered and I could confirm I'm on the right path.
CheckUnZippedFile
One of the function calls I noticed nearby, revealed an interesting pattern in IDA. Right after the file is extracted and specific conditions are meet, CheckUnZippedFile function is called, followed by a call to _OpenExplorerTempFile, which opens the extracted file.
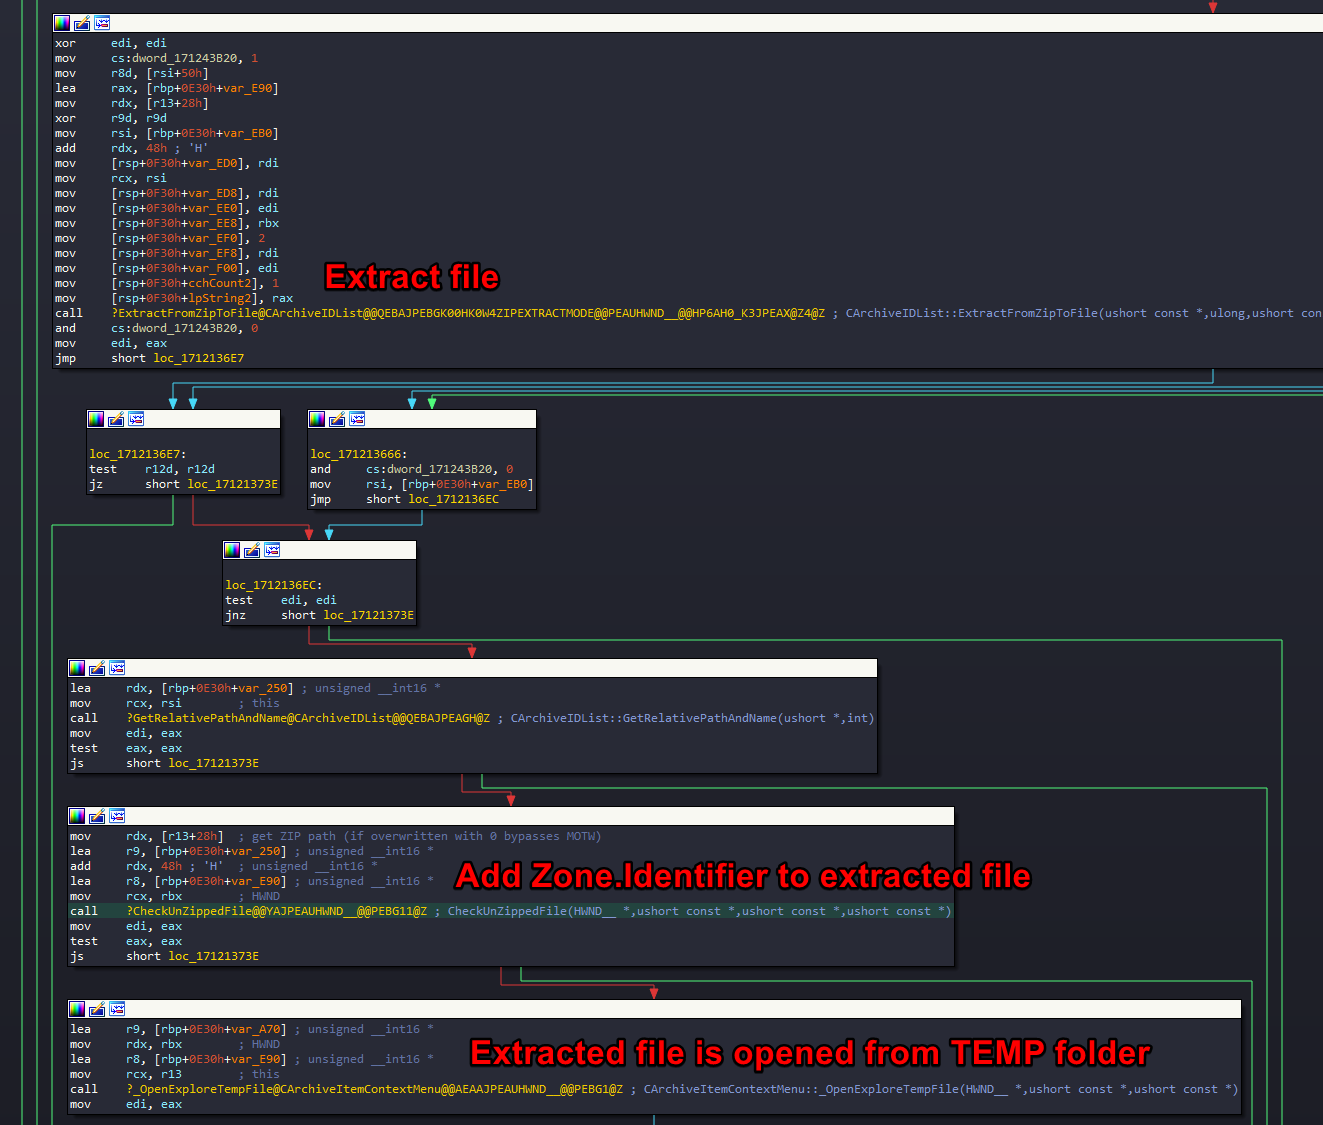
Having a hunch that CheckUnZippedFile is the function responsible for adding MOTW to extracted file, I nopped its call and found that I stopped getting the MOTW warning popup, when I tried executing a JScript file from within the ZIP.
It was clear to me that if I managed to manipulate the execution flow in such a way that the branch, executing this function is skipped, I will be able to achieve the desired effect of bypassing the creation of MOTW on extracted files. I looked into the function to investigate further.
I noticed that CheckUnZippedFile tries to combine the TEMP folder path with the zipped file filename, extracted from the ZIP file, and when this function fails, the function quits, skipping the creation of MOTW file.
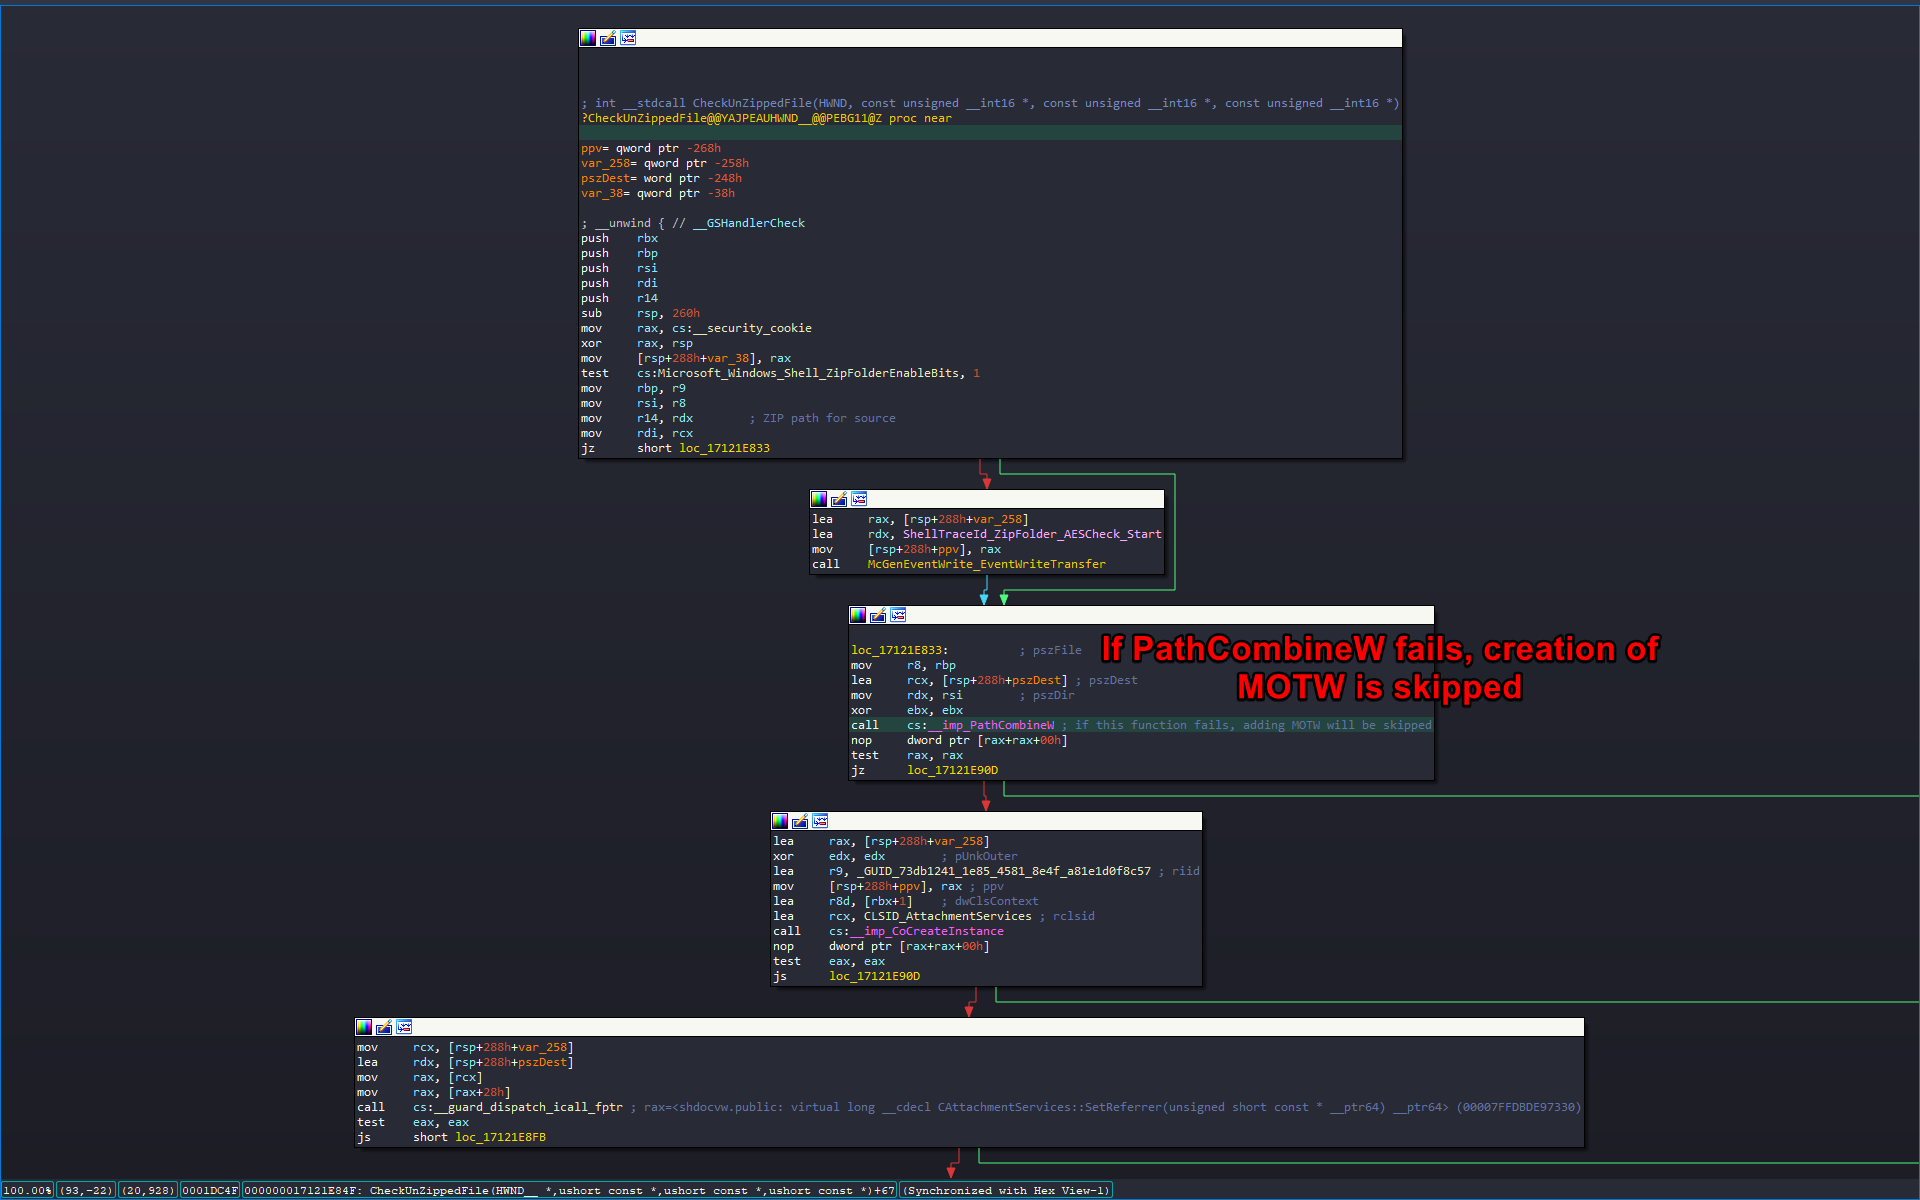
Considering that I controlled the filename of the extracted ZIP file, I could possibly manipulate its content to trigger PathCombineW to fail and as a result achieve my goal.
PathCombineW turned out to be a wrapper around PathCchCombineExW function with output buffer size limit set to fixed value of 260 bytes. I thought that if I managed to create a really long filename or use some special characters, which would be ignored by the function handling the file extraction, but would trigger the length check in CheckUnZippedFile to fail, it could work.
I opened 010 Editor, which I highly recommend for any kind of hex editing work, and opened my sample ZIP file with a built-in ZIP template.

I spent few hours testing with different filename lengths, with different special characters, just to see if the extraction function would behave in erratic way. Unfortunately I found out that there was another path length check, called prior to the one I've been investigating. It triggered much earlier and prevented me from exploiting this one specific check. I had to start over and consider this path a dead end.
I looked if there are any controllable branching conditions, that would result in not triggering the call to CheckUnZippedFile at all, but none of them seemed to be dependent on any of the internal ZIP file parameters. I considered looking deeper into CheckUnZippedFile function and found out that when PathCombineW call succeeds, it creates a CAttachmentServices COM objects, which has its three methods called:
CAttachmentServices::SetReferrer(unsigned short const * __ptr64)
CAttachmentServices::SetSource(unsigned short const * __ptr64)
CAttachmentServices::SaveWithUI(struct HWND__ * __ptr64)
I realized I am about to go deep down a rabbit hole and I may spend there much longer than a hobby project like that should require. I had to get a public exploit sample to speed things up.
Huge thanks you @bohops & @bufalloveflow for all the help in getting the sample!
Detonating the live sample
I managed to copy over all relevant ZIP file parameters from the obtained exploit sample into my test sample and I confirmed that MOTW was gone, when I extracted the sample JScript file.
I decided to dig deeper into SaveWithUI COM method to find the exact place where creation of Zone.Identifier ADS fails. Navigating through shdocvw.dll, I ended up in urlmon.dll with a failing call to WritePrivateProfileStringW.
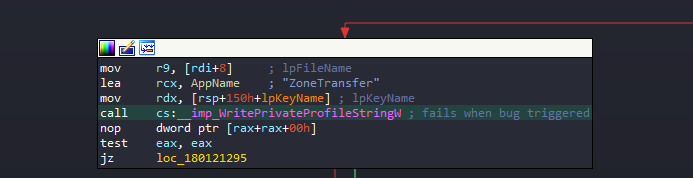
This is the Windows API function for handling the creation of INI configuration files. Considering that Zone.Identifier ADS file is an INI file containing section ZoneTransfer, it was definitely relevant. I dug deeper.
The search led me to the final call of NtCreateFile, trying to create the Zone.Identifier ADS file, which failed with ACCESS_DENIED error, when using the exploit sample and succeeded when using the original, untampered test sample.
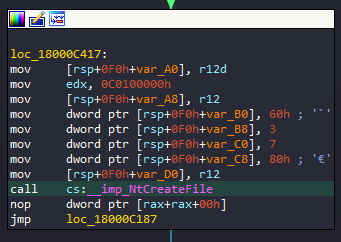
It looked like the majority of parameters were constant, as you can see on the screenshot above. The only place where I'd expect anything dynamic was in the structure of ObjectAttributes parameter. After closer inspection and half an hour of closely comparing the contents of the parameter structures from two calls, I concluded that both failing and succeeding calls use exactly the same parameters.
This led me to realize that something had to be happening prior to the creation of the ADS file, which I did not account for. There was no better way to figure that out than to use Process Monitor, which honestly I should've used long before I even opened IDA 😛.
Backtracking
I set up my filters to only list file operations related to files extracted to TEMP directory, starting with Temp prefix.
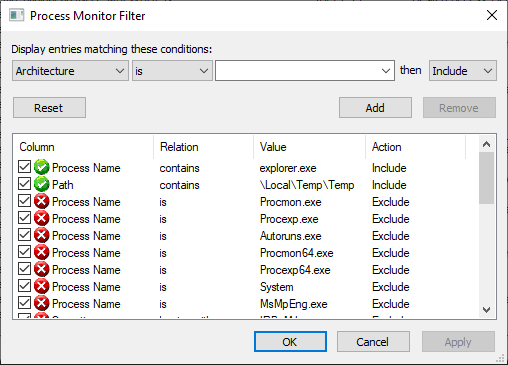
The test sample clearly succeeded in creating the Zone.Identifier ADS file:
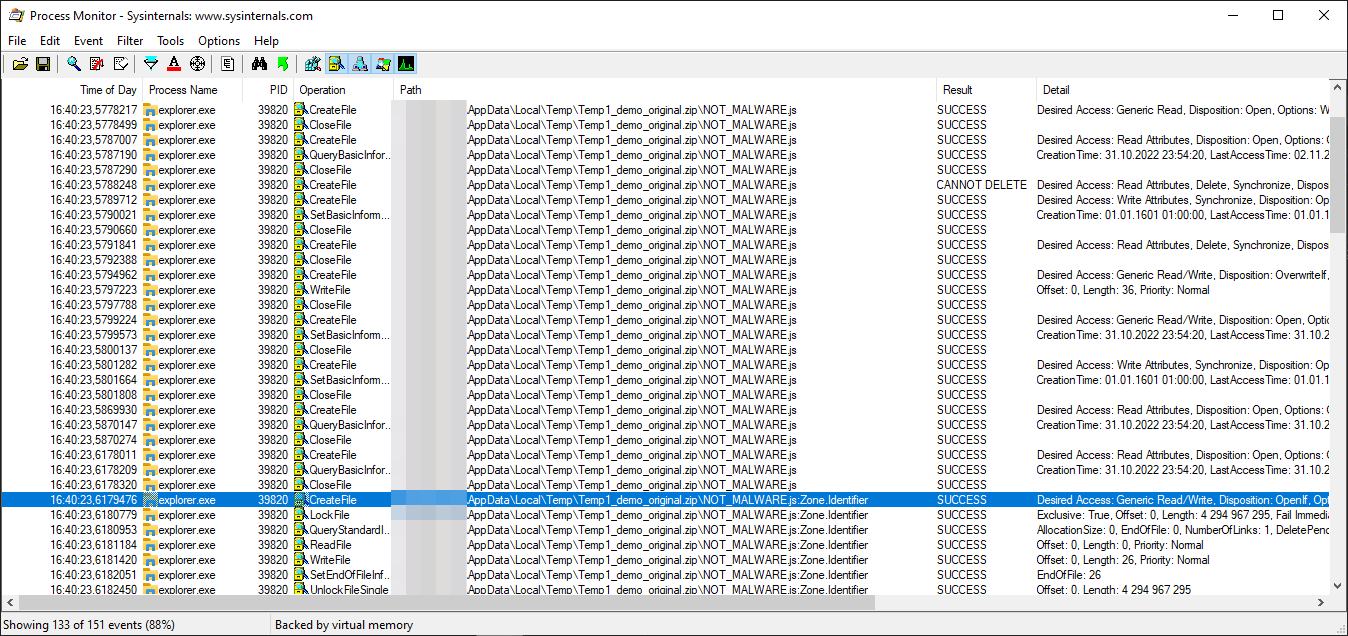
While the exploit sample failed:

Through comparison of these two listings, I could not clearly see any drastic differences. I exported the results as text files and compared them in a text editor. That's when I could finally spot it.
Prior to creating Zone.Identifier ADS file, the call to SetBasicInformationFile was made with FileAttributes set to RN.
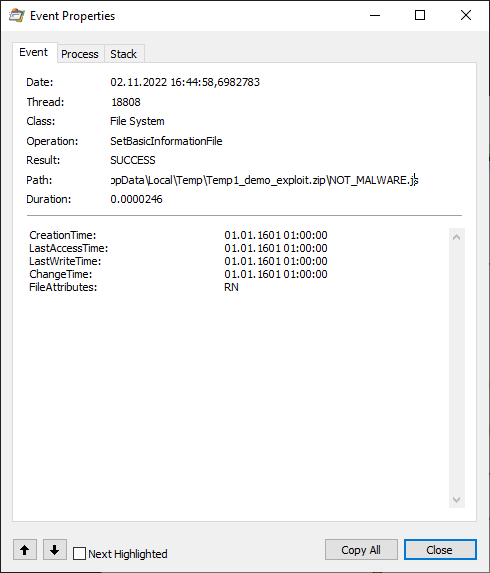
I looked up what was that R attribute, which apparently is not set for the file when extracting from the original test sample and then...

The R file attribute stands for read-only. The file stored in a ZIP file has the read-only attribute set, which is set also on the file extracted from the ZIP. Obviously when Windows tries to attach the Zone.Identifier ADS, to it, it fails, because the file has a read-only attribute and any write operation on it will fail with ACCESS_DENIED error.
It doesn't even seem to be a bug, since everything is working as expected 😛. The file attributes in a ZIP file are set in ExternalAttributes parameter of the ZIPDIRENTRY structure and its value corresponds to the ones, which carried over from MS-DOS times, as stated in ZIP file format documentation I found online.
   4.4.15 external file attributes: (4 bytes)

       The mapping of the external attributes is
       host-system dependent (see 'version made by').  For
       MS-DOS, the low order byte is the MS-DOS directory
       attribute byte.  If input came from standard input, this
       field is set to zero.

   4.4.2 version made by (2 bytes)

        4.4.2.1 The upper byte indicates the compatibility of the file
        attribute information.  If the external file attributes
        are compatible with MS-DOS and can be read by PKZIP for
        DOS version 2.04g then this value will be zero.  If these
        attributes are not compatible, then this value will
        identify the host system on which the attributes are
        compatible.  Software can use this information to determine
        the line record format for text files etc.

        4.4.2.2 The current mappings are:

         0 - MS-DOS and OS/2 (FAT / VFAT / FAT32 file systems)
         1 - Amiga                     2 - OpenVMS
         3 - UNIX                      4 - VM/CMS
         5 - Atari ST                  6 - OS/2 H.P.F.S.
         7 - Macintosh                 8 - Z-System
         9 - CP/M                     10 - Windows NTFS
        11 - MVS (OS/390 - Z/OS)      12 - VSE
        13 - Acorn Risc               14 - VFAT
        15 - alternate MVS            16 - BeOS
        17 - Tandem                   18 - OS/400
        19 - OS X (Darwin)            20 thru 255 - unused

        4.4.2.3 The lower byte indicates the ZIP specification version
        (the version of this document) supported by the software
        used to encode the file.  The value/10 indicates the major
        version number, and the value mod 10 is the minor version
        number.
Changing the value of external attributes to anything with the lowest bit set e.g. 0x21 or 0x01, would effectively make the file read-only with Windows being unable to create MOTW for it, after extraction.
Conclusion
I honestly expected the bug to be much more complicated and I definitely shot myself in the foot, getting too excited to start up IDA, instead of running Process Monitor first. I started with IDA first as I didn't have an exploit sample in the beginning and I was hoping to find the bug, through code analysis. Bottom line, I managed to learn something new about Windows internals and how extraction of ZIP files is handled.
As a bonus, Mitja Kolsek from 0patch asked me to confirm if their patch worked and I was happy to confirm that it did!
Nice work. Care to verify that our micropatches fix this? (A free 0patch account suffices.) https://t.co/us8FVWczXk
— Mitja Kolsek (@mkolsek) November 1, 2022
The patch was clean and reliable as seen in the screenshot from a debugger:

I've been also able to have a nice chat with Will Dormann, who initially discovered this bug, and his story on how he found it is hilarious:
I merely wanted to demonstrate how an exploit in a ZIP was safer (by way of prompting the user) than that *same* exploit in an ISO. So how did I make the ZIP? I:
1) Dragged the files out of the mounted ISO
2) Zipped them. That's it. The ZIP contents behaved the same as the ISO.
Every mounted ISO image is listing all files in read-only mode. Drag & dropping files from read-only partition, to a different one, preserves the read-only attribute set for created files. This is how Will managed to unknowingly trigger the bug.
Will also made me realize that 7zip extractor, even though having announced they began to add MOTW to every file extracted from MOTW marked archive, does not add MOTW by default and this feature has to be enabled manually.
I mentioned it as it may explain why MOTW is not always considered a valid security boundary. Vulnerabilities related to it may be given low priority and be even ignored by Microsoft for 90 days.
When 7zip announced support for MOTW in June, I honestly took for granted that it would be enabled by default, but apparently the developer doesn't know exactly what he is doing.
I haven't yet analyzed how the patch made by Microsoft works, but do let me know if you did and I will gladly update this post with additional information.
Hope you enjoyed the write-up!
]]>For the past couple of months, I've been hearing about increasing numbers of account takeover attacks in the Discord community. Discord has somehow become a de facto official messenger application among the cryptocurrency community, with new channels oriented around NFTs, popping up like mushrooms.
Hacking Discord accounts has suddenly become a very lucrative business for cybercriminals, who are going in for the kill, to make some easy money. They take over admin accounts in cryptocurrency-oriented communities to spread malware and launch further social engineering attacks. My focus is going to be purely on Discord account security, which should be of concern to everyone using Discord.
In recent weeks I thought the attackers are using some new reverse-proxy phishing techniques to hijack WebSocket sessions with similar tools to Evilginx, but in reality the hacks, I discovered, are much easier to execute than I anticipated.
In this post I will be explaining how the attacks work, what everyone can do to protect themselves and more importantly what Discord can do to mitigate such attacks.
Please bear in mind that this post covers my personal point of view on how I feel the mitigations should be implemented and I am well aware that some of you may have much better ideas. I encourage you to contact me @mrgretzky or at [email protected] if you feel I missed anything or was mistaken.
Criticism is welcomed!
The Master Key
When you log in to your Discord account, either by entering your account credentials on the login screen, or by scanning a QR code with your Discord mobile app, Discord will send you your account token, in form of a string of data.
This token is the only key required to access your Discord account.
From now on I will refer to that token as the master token, since it works like a master key for your Discord account. That single line of text, consisting of around 70 characters, is what the attackers are after. When they manage to extract the master token from your account, it is game over and third parties can now freely access your account, bypassing both the login screen and any multi-factor authentication you may've set up.
Now that we know what the attackers are after, let's analyze the attack flow.
Deception Tactics
Attacker's main goal is to convince you in any way possible to reveal your account token, with the most likely approach being social engineering. First, attackers will create a story to set themselves up as a people you can trust, who will resolve your pressing issue, like unban your account on a Discord channel or elevate your community status.
There is a hack/scam(bypasses 2fa) that scammers are using to compromise discord accounts. If you are a project founder/admin, this is IMPORTANT.
— Little Lemon Friends (@LittlelemonsNFT) January 3, 2022
Our server just got attacked.
Here's how, a🧵
In this thread you can read how attackers managed to convince the target to do a screen share from their computer with Chrome DevTools opened, on the side. DevTools allowed them to extract the master token, through revealing the contents of Discord's LocalStorage.
Discord now purposefully renames the window.localStorage object, when it loads, to make it inaccessible to injected JavaScript. It also hides the token variable, containing the master token's value, from the storage. This was done to prevent attackers from stealing master tokens, by convincing the targets to open LocalStorage through screen share.
Discord also shows a pretty warning, informing users about the risks of pasting unknown code into the DevTools console.

The renaming of localStorage object and concealment of token variable did not fix the issue. Attackers figured out they can force Discord window to reload and then retrieve the data before implemented mitigations are executed.
This is exactly how the most recent bookmarklet attack works. Attackers convince their victim to bookmark JavaScript code in their bookmarks tab and trick them later to click the saved bookmark, with Discord app in focus, to execute attacker's malicious code.
Attacker's code retrieves the victim's Discord master token and sends it to the attacker.
The malicious JavaScript to access the master token looks like this:
javascript:(function(){location.reload();var i = document.createElement('iframe');document.body.appendChild(i);alert(i.contentWindow.localStorage.token)})()To try it out, open Discord website, go to the console tab in Chrome DevTools (Control+Shift+I) and paste this code into it, which is something you should never do when asked 😉. After you press Enter, you should see the popup box with your master token value in it.
Attackers will exfiltrate the token through Discord WebHooks. This is done to bypass current Content Security Policy rules as obviously discord.com domain is allowed to be connected to from Discord client.
Most users have no idea that saved bookmarks can run malicious JavaScript in context of the website they are currently viewing. This is why this type of attack may be successful among even the security savvy users.
Another much harder approach, the attackers can take, is deploying malware onto target computer. Once you install malware on your PC the consequences can be far greater than just losing your Discord account. Just wanted to make note here that browser's LocalStorage will store the tokens in unencrypted form.
LocalStorage database files for Chrome reside in:
%LOCALAPPDATA%\Google\Chrome\User Data\<PROFILE>\Local Storage\leveldb\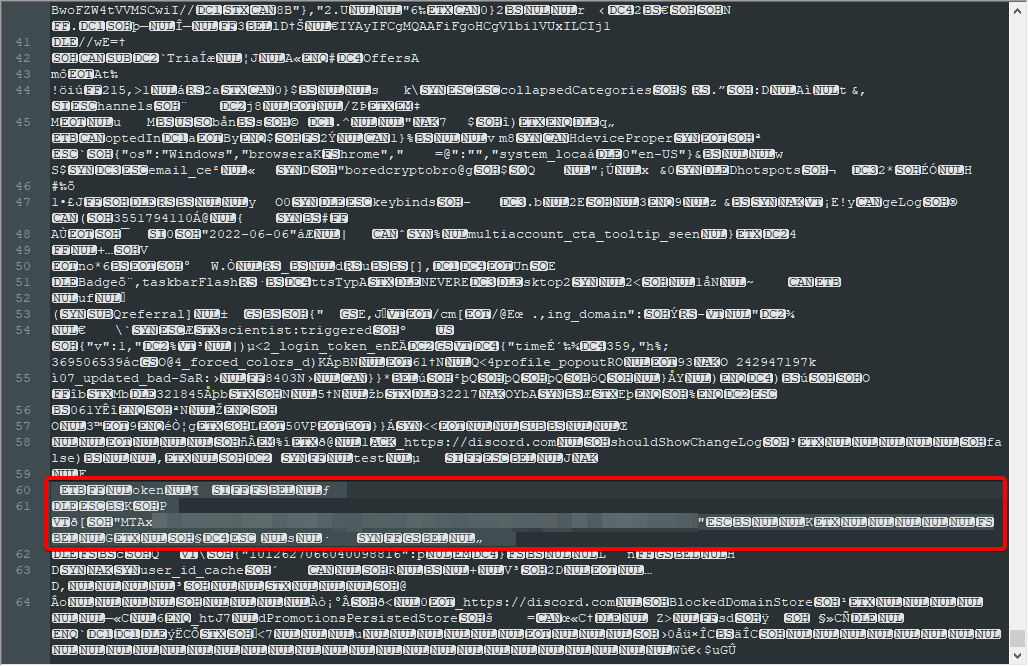
Once the attacker retrieves your Discord master token, they can inject it into their browser's LocalStorage, with token as a variable name. It can easily be done using LocalStorage Manager extension for Chrome.
Discord on reload will detect the valid token in its LocalStorage and allow full control over the hijacked account. All this is possible even with multi-factor authentication enabled on hijacked account.
Proposed Mitigations
The fact that a single token, accessible through JavaScript, lets you impersonate and fully control another user's account is what makes the bookmarklet attack possible.
The attacker needs to execute their malicious JavaScript in context of the user's Discord session. This can happen either through exploitation of an XSS vulnerability or by tricking a user into bookmarking and clicking the JavaScript bookmarklet.
There is unfortunately no definitive fix to this problem, but there are definitely ways to increase the costs for attackers and make the attacks much harder to execute.
Store Token as an HttpOnly Cookie
Modern web services rely heavily on communication with REST APIs and Discord is no different. REST APIs, to conform with the standard, must implement a stateless architecture, meaning that each request from the client to the server must contain all of the information necessary to understand and complete the request.
The session token, included with requests to REST API, is usually embedded within the Authorization HTTP header. We can see that Discord app does it the same way:

Authorization HTTP headerFor the web application to be able to include the session token within the Authorization header or request body, the token value itself must be accessible through JavaScript. Token accessible through JavaScript will be always vulnerable to XSS bugs or other JavaScript injection attacks (like bookmarklets).
Some people may not agree with me, but I think that critical authorization tokens should be handled through cookie storage, inaccessible to JavaScript. Support for Authorization header server-side can also be allowed, but it should be optional. For reasons unknown to me, majority of REST API developers ignore token authorization via cookies altogether.
Server should be sending the authorization session token value as a cookie with HttpOnly flag, in Set-Cookie HTTP header.
Storing the session token with HttpOnly flag, in the browser, will make sure that the cookie can never be retrieved from JavaScript code. The session token will be automatically sent with every HTTP request to domains, the cookie was set up for.
The request, which sends authentication token as a cookie, could look like this:

Authorization headerI've noticed that Discord's functionality does not rely solely on interaction with its API, but the major part of its functionality is handled through WebSocket connections.
The WebSocket connection is established with gateway.discord.gg endpoint, instead of the main discord.com domain.
If the session token cookie was delivered as a response to request delivered to domain discord.com, it would not be possible to set a cookie for domain discord.gg due to security boundaries.
To counter that, Discord would either need to implement some smart routing allowing Discord clients to use WebSocket connections through discord.com domain or it would have to implement authorization using one-time token with discord.gg endpoint, once the user successfully logs in, to have discord.gg return a valid session token as a cookie, for its own domain.
Right now Discord permits establishing WebSocket connection through gateway.discord.gg to anyone and the authorization token validation happens during internal WebSocket messages exchange.
This means that the session token is also required during WebSocket communication, increasing its reliance on being accessible through JavaScript. This brings me to another mitigation that can be implemented.
Ephemeral Session Tokens
Making a strict requirement for tokens to be delivered as HttpOnly cookies, will never work. There needs to be some way to have authorization tokens accessible to JavaScript and not give the attacker all the keys to the castle once that token gets compromised.
That's why I'd make authentication reliant on two types of tokens:
- Authentication token stored only as a cookie with
HttpOnlyflag, which will be used to authenticate with REST API and to initiate a WebSocket connection. - Session token generated dynamically with short expiration time (few hours), accompanied by a refresh token used for creating new session tokens. Session tokens will be used only in internal WebSocket communication. WebSocket connections will allow to be established only after presenting a valid authentication token as a cookie.
If you wish to learn more about ephemeral session tokens and refresh tokens, I recommend this post.
But, wait! Attacker controls the session anyway!
Before you yell at me about all of these mitigations being futile, because the attacker, with his injected JavaScript, is already able to fully impersonate and control the hacked user session, hear me out.
Me and @buherator exchanged opinions about possible mitigations and he made a good point:
I don't see how this would make a difference. The app needs to maintain long term sessions, thus the attacker in control of the app can have them too (if she can't achive her goal in millis). Having to request new tokens periodically is an implementation nuance.
— buherator (@buherator) August 27, 2022
In short - the attacker is able to inject their own JavaScript, which will work in context of the Discord app. Running malicious code in context of Discord allows the attacker to make any request to Discord API, with all required security tokens attached. This also includes cookies stored with HttpOnly flag, since attacker's requests can have them included automatically with withCredentials set to true:
var req = new XmlHttpRequest();
req.open("GET", “http://discord.com/api/v9/do_something”, true);
req.withCredentials = true;
req.send(null);
No matter how well the tokens are protected, Discord client needs access to all of them, which means attacker executing code, in context of the app, will be able to forge valid client requests, potentially being able to change user's settings or sending spam messages to subscribed channels.
I've been thinking about it for few days and reached a conclusion that implementing the mitigations I mentioned would still be worth it. At the moment the attack is extremely easy to pull off, which is what makes it so dangerous. Ability to forge packets, impersonating a target user is not as bad as being able to completely recreate victim's session within a Discord client remotely.
With token cookie protected with HttpOnly flag, the attacker will only be able to use the token to perform actions, impersonating the hacked user, but they will never be able to exfiltrate the token's value, in order to inject it into their own browser.
In my opinion this will still vastly lower the severity of the attack and will force the attackers to increase the complexity of the attack in technical terms, requiring knowledge of Discord API, in order to perform the attacker's tasks, once the user's session is hijacked.
Another thing to note here is that the attacker will remain in charge of the user's hijacked session only until the Discord app is closed or reloaded. They will not be able to spawn their own session to freely impersonate the hacked user at any time they want. Currently the stolen master token gives the attacker lifetime access to victim's account. Token is invalidated and recreated only when user changes their password.
Takeaways
It is important to note that the attackers are only able to exfiltrate the master token value, using XMLHttpRequest and Discord's Webhooks, by sending it to Discord channels they control. Using WebHooks allows them to comply with Discord's Content Security Policy.
If it weren't for WebHooks, attackers would have to figure out another way to exfiltrate the stolen tokens. At the time of writing the article, the connect-src CSP rules for discord.com, which tell the browser the domains it should only allow Discord app to connect to, are as follows:
connect-src 'self' https://discordapp.com https://discord.com https://connect.facebook.net https://api.greenhouse.io https://api.github.com https://sentry.io https://www.google-analytics.com https://hackerone-api.discord.workers.dev https://*.hcaptcha.com https://hcaptcha.com https://geolocation.onetrust.com/cookieconsentpub/v1/geo/location ws://127.0.0.1:* http://127.0.0.1:*;There seem to be other services allowed, which could be used to exfiltrate the tokens through them, like GitHub API, Sentry or Google Analytics.
Not sure if Discord client needs access to WebHooks through XMLHttpRequest, but if it doesn't, it may've been a better choice for Discord to host WebHook handlers on a different domain than discord.com and control access to them with additional CSP rules.
There is also one question, which remains unanswered:
Should web browsers still support bookmarklets?
As asked by @zh4ck in his tweet, which triggered my initial curiosity about the attacks.
Bookmarklets were useful in the days when it was convenient to click them to spawn an HTML popup for quickly sharing the URL on social media. These days I'm not sure if anyone still needs them.
I have no idea if letting bookmarks start with javascript: is needed anymore, but it can easily become one of those legacy features that will keep coming back to haunt us.
Wrap-up
I hope you liked the post and hopefully it managed to teach you something.
I am constantly looking for interesting projects to work on. If you think my skills may be of help to you, do reach out, through the contact page.
Until next time!
References
- Chrome Inspector hack https://twitter.com/LittlelemonsNFT/status/1477923368053706755
- Bookmarklet Discord hack https://twitter.com/Serpent/status/1485002655953211392
- Bookmarklet Discussion https://twitter.com/zh4ck/status/1562734600941891589
- LocalStorage Manager: https://chrome.google.com/webstore/detail/localstorage-manager/fkhoimdhngkiicbjobkinobjkoefhkap
Welcome back everyone! I can expect everyone being quite hungry for Evilginx updates! I am happy to announce that the tool is still kicking.
It's been a while since I've released the last update. This blog tells me that version 2.3 was released on January 18th 2019. One and a half year is enough to collect some dust.
I'll make sure the wait was worth it.
First of all, I wanted to thank all you for invaluable support over these past years. I've learned about many of you using Evilginx on assessments and how it is providing you with results. Such feedback always warms my heart and pushes me to expand the project. It was an amazing experience to learn how you are using the tool and what direction you would like the tool to expand in. There were some great ideas introduced in your feedback and partially this update was released to address them.
I'd like to give out some honorable mentions to people who provided some quality contributions and who made this update happen:
>> GET EVILGINX HERE <<
Special Thanks!
Julio @juliocesarfort - For constantly proving to me and himself that the tool works (sometimes even too well)!
OJ Reeves @TheColonial - For constant great source of Australian positive energy and feedback and also for being always humble and a wholesome and awesome guy! Check out OJ's live hacking streams on Twitch.tv and pray you're not matched against him in Rocket League!
pry @pry0cc - For pouring me many cups of great ideas, which resulted in great solutions! Also check out his great tool axiom!
Jason Lang @curiousjack - For being able to bend Evilginx to his will and in turn gave me ideas on what features are missing and needed.
@an0nud4y - For sending that PR with amazingly well done phishlets, which inspired me to get back to Evilginx development.
Pepe Berba - For his incredible research and development of custom version of LastPass harvester! I still need to implement this incredible idea in future updates.
Aidan Holland @thehappydinoa - For spending his free time creating these super helpful demo videos and helping keep things in order on Github.
Luke Turvey @TurvSec - For featuring Evilginx and for creating high quality tutorial hacking videos on his Youtube channel
So, again - thank you very much and I hope this tool will stay relevant to your work for the years to come and may it bring you lots of pwnage! Just remember to let me know on Twitter via DM that you are using it and about any ideas you're having on how to expand it further!
Here is the list of upcoming changes:
2.4.0
- Feature: Create and set up pre-phish HTML templates for your campaigns. Create your HTML file and place
{lure_url_html}or{lure_url_js}in code to manage redirection to the phishing page with any form of user interaction. Command:lures edit <id> template <template> - Feature: Create customized hostnames for every phishing lure. Command:
lures edit <id> hostname <hostname>. - Feature: Support for routing connection via SOCKS5 and HTTP(S) proxies. Command:
proxy. - Feature: IP blacklist with automated IP address blacklisting and blocking on all or unauthorized requests. Command:
blacklist - Feature: Custom parameters can now be embedded encrypted in the phishing url. Command:
lures get-url <id> param1=value1 param2="value2 with spaces". - Feature: Requests to phishing urls can now be rejected if User-Agent of the visitor doesn't match the whitelist regular expression filter for given lure. Command:
lures edit <id> ua_filter <regexp> - List of custom parameters can now be imported directly from file (text, csv, json). Command:
lures get-url <id> import <params_file>. - Generated phishing urls can now be exported to file (text, csv, json). Command:
lures get-url <id> import <params_file> export <export_file> <text|csv|json>. - Fixed: Requesting LetsEncrypt certificates multiple times without restarting. Subsequent requests would result in "No embedded JWK in JWS header" error.
- Removed setting custom parameters in lures options. Parameters will now only be sent encoded with the phishing url.
- Added
with_paramsoption tosub_filterallowing to enable the sub_filter only when specific parameter was set with the phishing url. - Made command help screen easier to read.
- Improved autofill for
lures editcommands and switched positions of<id>and the variable name. - Increased the duration of whitelisting authorized connections for whole IP address from 15 seconds to 10 minutes.
I'll explain the most prominent new features coming in this update, starting with the most important feature of them all.
Pre-phish HTML Templates
First of all let's focus on what happens when Evilginx phishing link is clicked. It verifies that the URL path corresponds to a valid existing lure and immediately shows you proxied login page of the targeted website.
If that link is sent out into the internet, every web scanner can start analyzing it right away and eventually, if they do their job, they will identify and flag the phishing page.
Pre-phish HTML templates add another step in, before the redirection to phishing page takes place. You can create your own HTML page, which will show up before anything else. On this page, you can decide how the visitor will be redirected to the phishing page.
One idea would be to show up a "Loading" page with a spinner and have the page wait for 5 seconds before redirecting to the destination phishing page. Another one would be to combine it with some social engineering narration, showing the visitor a modal dialog of a file shared with them and the redirection would happen after visitor clicks the "Download" button.
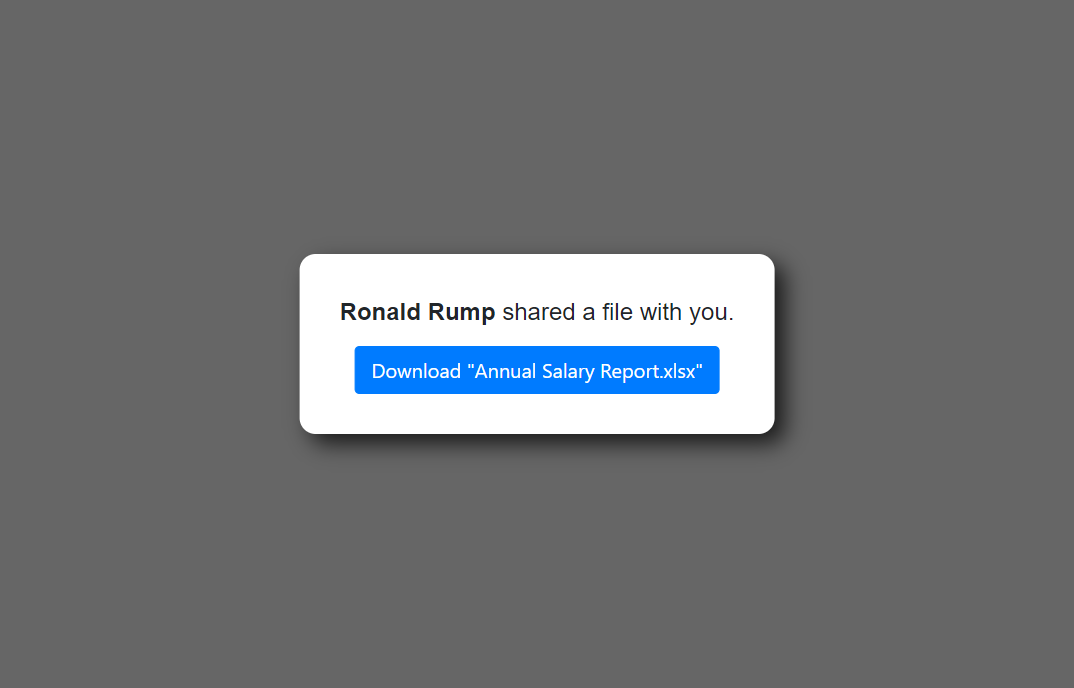
Every HTML template supports customizable variables, which values can be delivered embedded with the phishing link (more info on that below).
There are also two variables which Evilginx will fill out on its own. These are:
{lure_url}: This will be substituted with an unquoted URL of the phishing page. This one is to be used inside your HTML code. Example output: https://your.phish.domain/path/to/phish
{lure_url_js}: This will be substituted with obfuscated quoted URL of the phishing page. Obfuscation is randomized with every page load. This one is to be used inside of your Javascript code. Example output:
'h' + 't' + 'tp' + 's:/' + '/' + 'c' + 'hec' + 'k.' + 't' + 'his' + '.ou' + 't' + '.fa' + 'k' + 'e' + '.' + 'co' + 'm' + '/se' + 'cur' + 'it' + 'y/' + 'c' + 'hec' + 'k?' + 'C' + '=g' + '3' + 'Ct' + 'p' + 'sA'The first variable can be used with <a href=...> HTML tags like so:
<a href="{lure_url}">Click here</a>While the second one should be used with your Javascript code:
window.location.assign({lure_url_js});If you want to use values coming from custom parameters, which will be delivered embedded with the phishing URL, put placeholders in your template with the parameter name surrounded by curly brackets: {parameter_name}
You can check out one of the sample HTML templates I released, here: download_example.html
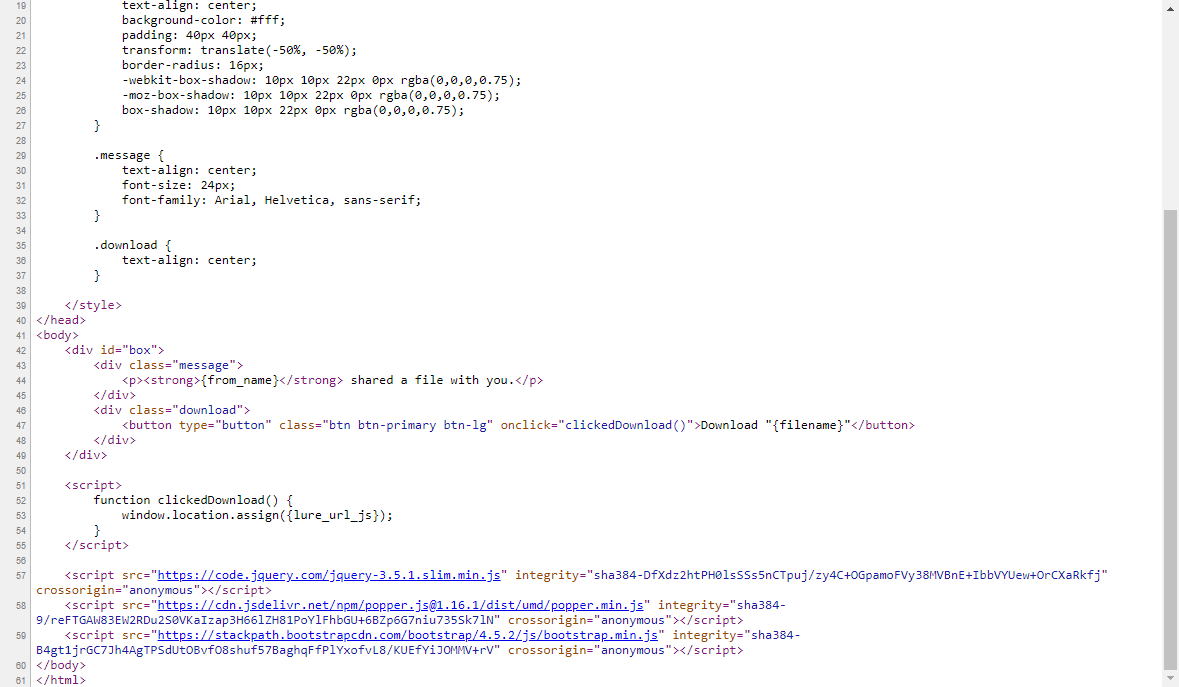
Once you create your HTML template, you need to set it for any lure of your choosing. Remember to put your template file in /templates directory in the root Evilginx directory or somewhere else and run Evilginx by specifying the templates directory location with -t <templates_path> command line argument.
Set up templates for your lures using this command in Evilginx:
lures edit <id> templates <template_name>Custom Parameters in Phishing Links
In previous versions of Evilginx, you could set up custom parameters for every created lure. This didn't work well at all as you could only provide custom parameters hardcoded for one specific lure, since the parameter values were stored in database assigned to lure ID and were not dynamically delivered.
This is changing with this version. Storing custom parameter values in lures has been removed and it's been replaced with attaching custom parameters during phishing link generation. This allows for dynamic customization of parameters depending on who will receive the generated phishing link.
In the example template, mentioned above, there are two custom parameter placeholders used. You can specify {from_name} and {filename} to display a message who shared a file and the name of the file itself, which will be visible on the download button.
To generate a phishing link using these custom parameters, you'd do the following:
lures get-url 0 from_name="Ronald Rump" filename="Annual Salary Report.xlsx"Remember - quoting values is only required if you want to include spaces in parameter values. You can also escape quotes with \ e.g. variable1=with\"quote.
This will generate a link, which may look like this:
https://onedrive.live.fake.com/download/912381236/Annual_Salary_Report.xlsx?vLT=hvQzgP8bXoSOWvfYKkd5aMsvRgsLEXqL6_4SX3VYI95Jji1JPUnPDNmQUnsdSW9hPbpESDausLz2ckLb6MBTAs you can see both custom parameter values were embedded into a single GET parameter. The parameter name is randomly generated and its value consists of a random RC4 encryption key, checksum and a base64 encoded encrypted value of all embedded custom parameter. This ensures that the generated link is different every time, making it hard to write static detection signatures for. There is also a simple checksum mechanism implemented, which invalidates the delivered custom parameters if the link ever gets corrupted in transit.
Don't forget that custom parameters specified during phishing link generation will also apply to variable placeholders in your js_inject injected Javascript scripts in your phishlets.
It is important to note that you can change the name of the GET parameter, which holds the encrypted custom parameters. You can also add your own GET parameters to make the URL look how you want it. Evilginx is smart enough to go through all GET parameters and find the one which it can decrypt and load custom parameters from.
For example if you wanted to modify the URL generated above, it could look like this:
https://onedrive.live.fake.com/download/912381236/Annual_Salary_Report.xlsx?token=hvQzgP8bXoSOWvfYKkd5aMsvRgsLEXqL6_4SX3VYI95Jji1JPUnPDNmQUnsdSW9hPbpESDausLz2ckLb6MBT®ion=en-US&date=20200907&something=totally_irrelevant_get_parameterGenerating phishing links one by one is all fun until you need 200 of them, with each requiring different sets of custom parameters. Thankfully this update also got you covered.
You can now import custom parameters from file in text, CSV and JSON format and also export the generated links to text, CSV or JSON. You can also just print them on the screen if you want.
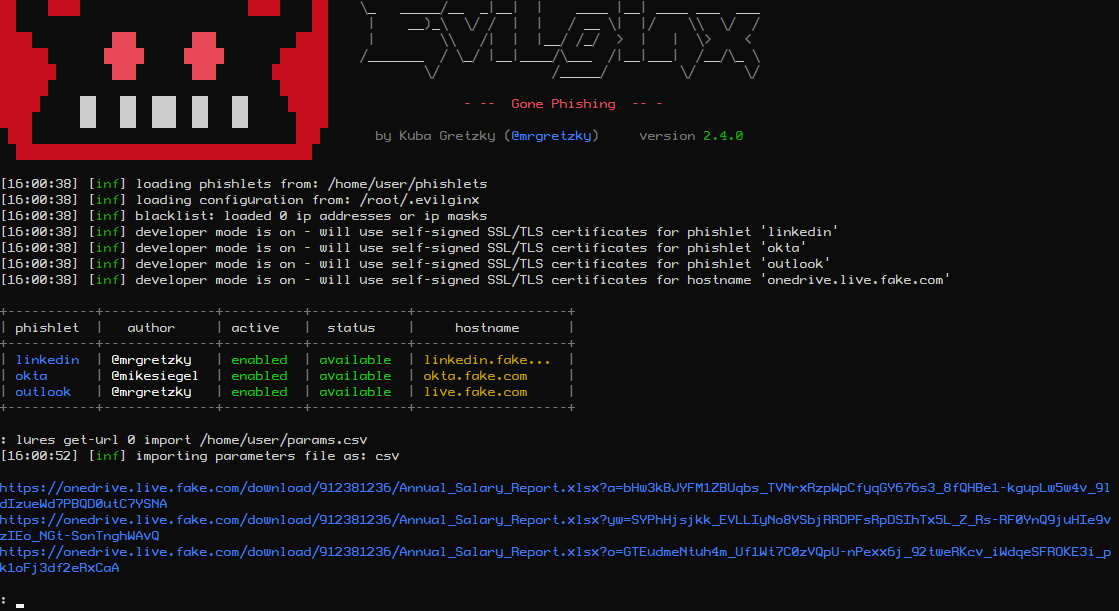
Custom parameters to be imported in text format would look the same way as you would type in the parameters after lures get-url command in Evilginx interface:
[email protected] name="Katelyn Wells"
[email protected] name="George Doh" delay=5000
[email protected] name="John Cena"
If you wanted to use CSV format:
email,name,delay
[email protected],"Katelyn Wells",
[email protected],"George Doh",5000
[email protected],"John Cena",
And lastly JSON:
[
	{
		"email":"[email protected]",
		"name":"Katelyn Wells"
	},
	{
		"email":"[email protected]",
		"name":"George Doh",
		"delay":"5000"
	},
	{
		"email":"[email protected]",
		"name":"John Cena"
	}
]
For import files, make sure to suffix a filename with file extension according to the data format you've decided to use, so .txt for text format, .csv for CSV format and .json for JSON.
Generating phishing links by importing custom parameters from file can be done as easily as:
lures get-url <id> import <import_file>Now if you also want to export the generated phishing links, you can do it with export parameter:
lures get-url <id> import <import_file> export <export_file> <text|csv|json>Last command parameter selects the output file format.
Custom Hostnames for Phishing Links
Normally if you generated a phishing URL from a given lure, it would use a hostname which would be a combination of your phishlet hostname and a primary subdomain assigned to your phishlet. During assessments, most of the time hostname doesn't matter much, but sometimes you may want to give it a more personalized feel to it.
That's why I wanted to do something about it and make the phishing hostname, for any lure, fully customizable. Since Evilginx is running its own DNS, it can successfully respond to any DNS A request coming its way.
So now instead of being forced to use a phishing hostname of e.g. www.linkedin.phishing.com, you can change it to whatever you want like this.is.totally.not.phishing.com. Of course this is a bad example, but it shows that you can go totally wild with the hostname customization and you're no longer constrained by pre-defined phishlet hostnames. Just remember that every custom hostname must end with the domain you set in the config.
You can change lure's hostname with a following command:
lures edit <id> hostname <your_hostname>After the change, you will notice that links generated with get-url will use the new hostname.
User-Agent Filtering
This is a feature some of you requested. It allows you to filter requests to your phishing link based on the originating User-Agent header. Just set an ua_filter option for any of your lures, as a whitelist regular expression, and only requests with matching User-Agent header will be authorized.
As an example, if you'd like only requests from iPhone or Android to go through, you'd set a filter like so:
lures edit <id> ua_filter ".*(Android|iPhone).*"HTTP & SOCKS5 Proxy Support
You can finally route the connection between Evilginx and targeted website through an external proxy.
This may be useful if you want the connections to specific website originate from a specific IP range or specific geographical region. It may also prove useful if you want to debug your Evilginx connection and inspect packets using Burp proxy.
You can check all available commands on how to set up your proxy by typing in:
help proxyMake sure to always restart Evilginx after you enable proxy mode, since it is the only surefire way to reset all already established connections.
IP Blacklist
If you don't want your Evilginx instance to be accessed from unwanted sources on the internet, you may want to add specific IPs or IP ranges to blacklist. You can always find the current blacklist file in:
~/.evilginx/blacklist.txtBy default automatic blacklist creation is disabled, but you can easily enable it using one of the following options:
blacklist unauthThis will automatically blacklist IPs of unauthorized requests. This includes all requests, which did not point to a valid URL specified by any of the created lures.
blacklist onThis will blacklist IP of EVERY incoming request, despite it being authorized or not, so use caution. This will effectively block access to any of your phishing links. You can use this option if you want to send out your phishing link and want to see if any online scanners pick it up.
If you want to add IP ranges manually to your blacklist file, you can do so by editing blacklist.txt file in any text editor and add the netmask to the IP:
134.123.0.0/16You can also freely add comments prepending them with semicolon:
; this is a comment
18.123.445.0/24 ;another comment
New with_params Option for Phishlets
You can now make any of your phishlet's sub_filter entries optional and have them kick in only if a specific custom parameter is delivered with the phishing link.
You may for example want to remove or replace some HTML content only if a custom parameter target_name is supplied with the phishing link. This may allow you to add some unique behavior to proxied websites. All sub_filters with that option will be ignored if specified custom parameter is not found.
You can add it like this:
sub_filters:
- {triggers_on: 'auth.website.com', orig_sub: 'auth', domain: 'website.com', search: '<body\s', replace: '<body style="visibility: hidden;" ', mimes: ['text/html'], with_params: ['target_name']}
This will hide the page's body only if target_name is specified. Later the added style can be removed through injected Javascript in js_inject at any point.
Quality of Life Updates
I've also included some minor updates. There are some improvements to Evilginx UI making it a bit more visually appealing. Fixed some bugs I found on the way and did some refactoring. All the changes are listed in the CHANGELOG above.
Epilogue
I'm glad Evilginx has become a go-to offensive software for red teamers to simulate phishing attacks. It shows that it is not being just a proof-of-concept toy, but a full-fledged tool, which brings reliability and results during pentests.
I hope some of you will start using the new templates feature. I welcome all quality HTML templates contributions to Evilginx repository!
If you have any ideas/feedback regarding Evilginx or you just want to say "Hi" and tell me what you think about it, do not hesitate to send me a DM on Twitter.
Also please don't ask me about phishlets targeting XYZ website as I will not provide you with any or help you create them. Evilginx is a framework and I leave the creation of phishlets to you. There are already plenty of examples available, which you can use to learn how to create your own.
Happy phishing!
>> GET EVILGINX HERE <<
Find me on Twitter: @mrgretzky
Email: [email protected]
]]>I have to admit, I took my sweet time to write this post and release this tool, but the time has finally come. I am finally ready to publish pwndrop, which has been in development for the last two years. Rewritten from scratch once (Angular.js was not a right choice) and stalled for multiple months due to busy times at work.
The timing for the release isn't ideal, but at least I hope using pwndrop can help you get through these tough weeks/months.
Also stay at home, don't eat bats and do not burn any 5G antennas.
If you want to jump straight in and grab the tool, follow this link to Github:
What is pwndrop?
Pwndrop is a self-deployable file hosting service for red teamers, allowing to easily upload and share payloads over HTTP and WebDAV.

If you've ever wasted a whole evening setting up a web server just to host a few files and get that .htaccess file redirection working, fear no more. Your future evenings are safe from being wasted again!
With pwndrop you can set up your own on-premise file server. The features are specifically tailored for red teamers, willing to host their payloads, but the tool can also be used as a normal file sharing service. All uploaded files are accessible via HTTP, HTTPS and WebDAV.
Before jumping into describing what features are present on release, I wanted to give away some information on the tool's development process.
Under the hood
For a long time I wanted a self-hosted Dropbox, which would allow me to easily upload and share files with custom URL paths. There is of course Python's SimpleHTTPServer, which has a decent fanbase, but I badly wanted something that would have a web UI with drag & drop interface and deployable with a single command. The idea was born. I knew I'd make a backend in GO, but I had no experience in using any of the modern frontend libraries. It was 2018 back then and I decided it will be a good opportunity to learn something new.
First came in an idea of using Angular.js, since it is a very robust and well supported framework. In the end, it turned out to be too bloated for my needs and the amount of things I had to learn to just to make a simple UI (I'm looking at you TypeScript) was staggering. I managed to get a proof of concept version working and then scratched the whole project to start anew, almost a year later.

Then in 2019, a really smart and creative red teamer Jared Haight @jaredhaight released his C2 framework FactionC2 at TROOPERS19. I immediately fell in love with the web UI he did and after chatting a bit with him, I learned he used Vue.js. Vue seemed to be lightweight, relatively new and already pretty popular, which made it a perfect choice. Thanks Jared for inspiration!
I bought Vue.js course at Udemy and in few weeks I was ready to go. If you want to make a tool with a web interface, do check out Vue as it may fit your needs as well.
For my own and your convenience I got rid of all of the npm + webpack clutter to slim down the project as much as possible. When I found out that a small project like pwndrop requires 1000MB of preinstalled packages through npm init, the decision to put the project on a diet was made. I wanted to simplify working with the project as much as possible and cut out the unnecessary middleware. Even using webpack requires learning a ton on how to configure it and I definitely didn't want to spend any extra time on that. Now the project doesn't take more than 70MB of precious hard drive space.
All in all, I've detached the frontend entirely from the build process, allowing the UI files to reside in their own folder, making them easily accessible for modifications and updates. The backend, on the other hand, is a single executable file, which installs itself and runs as a daemon in a background.
My main goal was to dumb down the installation process to the greatest extent and I'm pretty proud of the outcome. The whole project has ZERO dependencies and can be installed as easily as copying the precompiled files to your server and entering a single command to install and launch the server.
Let's now jump into the most important part - the features!
Features
Here is the list of features, which you can use from the get-go in the release version.
Drag & drop uploading of files
Easily drag & drop your files onto pwndrop admin panel to upload them.

Works on mobile
Since the UI is made with Bootstrap, I made sure it is responsive and looks good on every device.
Fun way to use pwndrop on your phone is to take photos with phone camera through the admin panel and they will be automatically uploaded to your server.
Share files over HTTP, HTTPS and even WebDAV
Best part of pwndrop is that it is not just an ordinary web server. My main focus was to support serving files also over WebDAV, which is used for pulling 2nd stage payloads through variety of different methods.
You can even use it with your l33t "UNC Path 0-days" ;)
In the future I plan to also add support for serving files over SMB. This will also allow to steal Net-NTLMv2 hashes from the machines making the request.
Click any of the "copy link" buttons to get a shareable link in your clipboard.
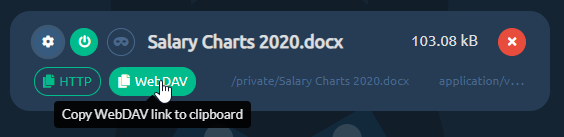
Enable and disable your file downloads
You can enable or disable file's ability to be downloaded, with a single click. Disabled files will return 404 or follow the pre-configured redirection when requested.
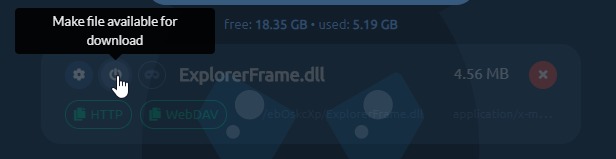
Set up facade files to return a different file from the same URL
Each uploaded file can be set up with a facade file, which will be served when a facade is enabled.
For example, you may want to share a link to a Word document with your custom macro payload, but you don't want your macro to be analyzed by online scanners as soon as you paste the link. To protect your payload, you can upload a facade clean document file under your payload file.
When facade mode is enabled all online scanners requesting the file, will receive your clean facade file. This can give you a brief window of evading detection. To have your link return the payload file, you need to manually disable facade mode.
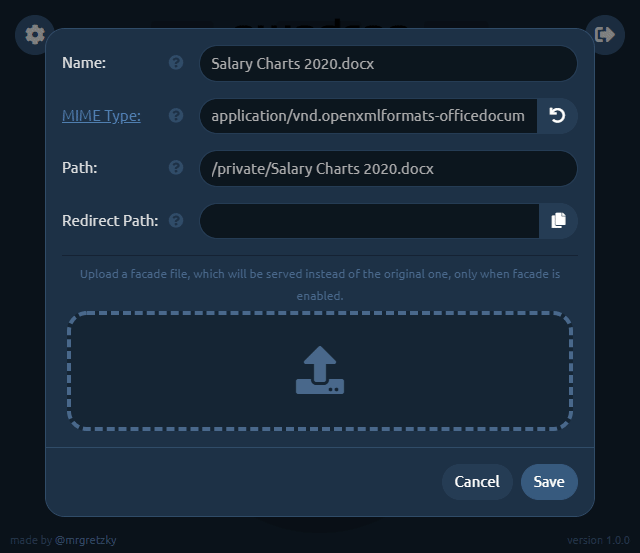
Create custom URL paths without creating directories
You can set whatever URL path you want for your payloads and pwndrop will always return a file when that URL is reached. There is no need to put files into physical directories.
By default, the tool will put every uploaded file under a randomly generated subdirectory. You can easily change it uploaded file's settings.

URL redirects to spoof file extension
Let's say you want to have a shared link, pointing to /download/Salary Charts 2020.docx, but after the user clicks it it should download an HTA payload Salary Charts 2020.docx.hta instead.
Normally you'd have to write some custom .htaccess files to use with Apache's mod_rewrite or fight with nginx configuration files.
With pwndrop you just need to specify the URL path, the file should automatically redirect to.

I will describe the whole setup process in the Quickstart section below.
Change MIME types
In most web servers, web server decides what should be the MIME type of the downloaded file. This gives the web browser information what to do with a file once it is downloaded.
For example a file with text/plain MIME type will be treated as a simple text file and will be displayed in the browser window. The same text file with application/octet-stream MIME type will be treated as a binary file and the browser will save it to a file on disk.

This allows for some interesting manipulation, especially with MIME type confusion exploits.
You can find the list of common MIME types here.

Automatic retrieval of TLS certificates from LetsEncrypt
Once you install pwndrop and point your domain's DNS A records to it, the first attempted HTTPS connection to pwndrop will initiate an automatic retrieval of a TLS certificate from LetsEncrypt.
Secure connections should work out of the box, but do check the readme on Github to learn more about setting it up, especially if you want to use the tool locally or without a domain.
Password protected and hidden admin panel
I wanted to make sure that the admin panel of pwndrop is never visible to people who are not meant to see it. Being able to control the web server fully, I was able to completely lock down access to it. If the viewer's web browser does not have the proper authorization cookie, pwndrop will either redirect to predefined URL or return a 404.
In order to authorize your browser, you need to open a secret URL path on your pwndrop domain. The default path is /pwndrop and should be changed in the settings as soon as the tool is deployed to your server.
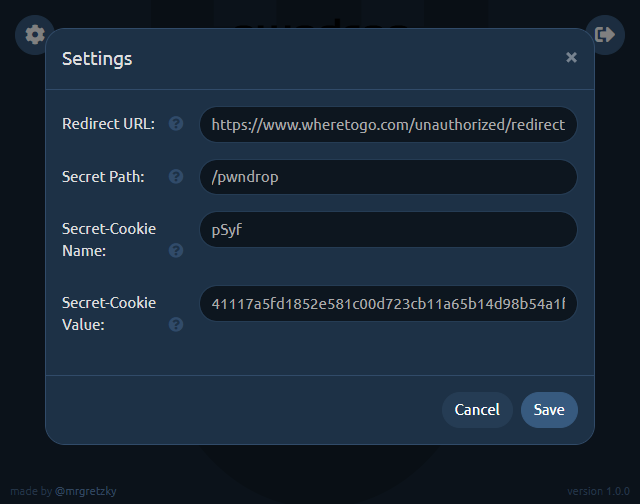
If you want to relock access to the admin panel, just change the Secret-Cookie name or value and you will need to visit the Secret-Path again, in order to regain access.
Quickstart
Now that I hope I've managed to highlight all of the features. I wanted to give you a rundown of how to set up your first uploaded file with a facade and redirection.
Goal: Host our payload.exe payload and disguise it as https://www.evilserver.com/uploads/MyResume.pdf shared link. The payload file will be delivered through redirection as MyResume.pdf.exe. The MyResume.pdf file will be set up as a facade file and it will be served as a legitimate PDF file if facade mode is enabled, in order to temporarily hide its true form from online scanners.
Here we go.
0. Deployment
If you don't yet have the server to deploy pwndrop to I highly recommend Digital Ocean. The cheapest $5/mo Debian 9 server with 25GB of storage space will work wonders for you. You can use my referral link to get an extra $100 to spend on your servers in 60 days for free.
I won't be covering the deployment process of pwndrop here on the blog as it may get outdated at some point. Instead check out the always up-to-date README with all the deployment instructions on Github.
If you are in a hurry, though, you can install pwndrop on Linux with a single command:
curl https://raw.githubusercontent.com/kgretzky/pwndrop/master/install_linux.sh | sudo bash1. Upload your payload executable file
Make sure you authorize your browser first, by opening: https://<yourdomain.com>/pwndrop
Then open https://<yourdomain.com> and follow the instructions on the screen to create your admin account.
IMPORTANT! Do not forget to change the Secret-Path from /pwndrop to something of your choice in the settings.
Use the Upload button or drag & drop payload.exe onto pwndrop to upload your payload file.
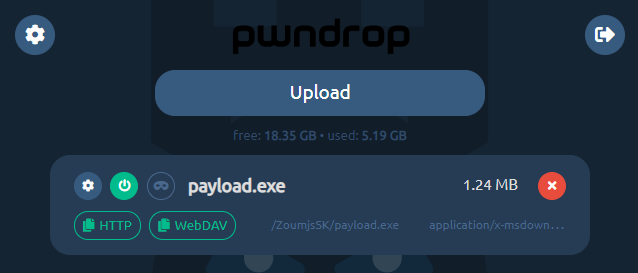
2. Upload your PDF facade file
Click the top-left cog icon on your newly uploaded file and the settings dialog will pop out.
Click the facade file upload area or directly drop MyResume.pdf file onto it.
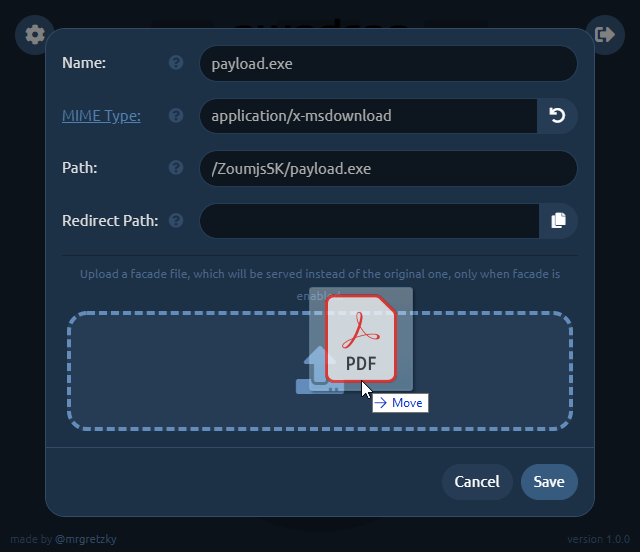
3. Set up redirection
Now you need to change the Path to what it should look like in your shared link. We want it to point to MyResume.pdf so change it to, say: /uploads/MyResume.pdf (you can choose whatever path you want).
Then click the Copy button at the right side of Redirect Path editbox and it will copy the contents of Path editbox to the editbox below.
Just add .exe to the copied path making it /uploads/MyResume.pdf.exe. This will be the path pwndrop redirects to, to serve the payload executable after the user clicks the shared link.
Keep in mind that the redirection will only happen when facade mode is disabled. When facade mode is enabled, pwndrop will serve the facade PDF file instead, not triggering any red flags.
We will also change the MIME type of the facade file, which will show you the power of this feature. While application/x-msdownload MIME type for PDF facade file is valid, the Chrome browser will initiate a download when the shared link is clicked. When you change the MIME type to application/pdf , though, Chrome will open the preview of the PDF file as it will know it is dealing with a PDF file.
Depending on what effect you want to achieve, either having the user download the PDF or have it previewed in the web browser, you can play with different options.
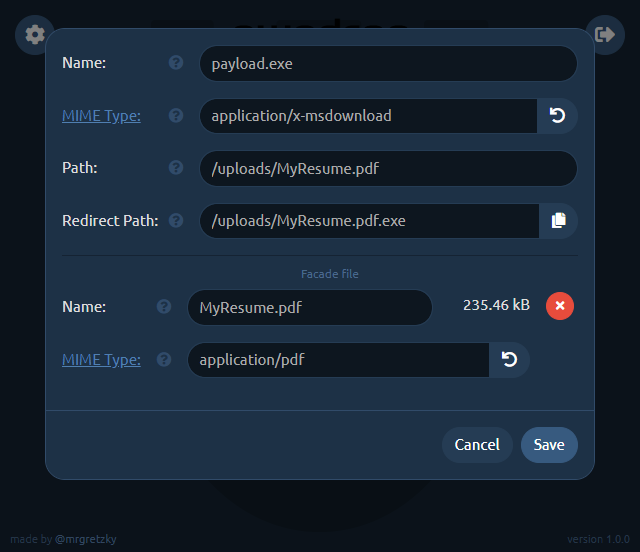
Don't forget to click Save once you're finished with setting up the file.
4. Sharing your file
Now you're done. You can get the HTTP shared link, by clicking the HTTP button. http:// or https:// prefix will be picked based on how you're currently browsing the admin panel. Similarly, if you click the WebDAV button, you will get the WebDAV link copied to your clipboard.
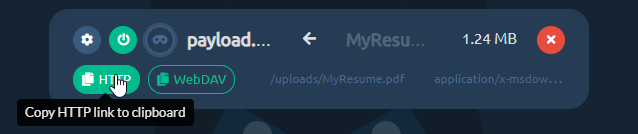
If you ever decide, you want to temporarily disable sharing for this file, just click the power button and it will effectively make the file hidden and links to it will stop working.
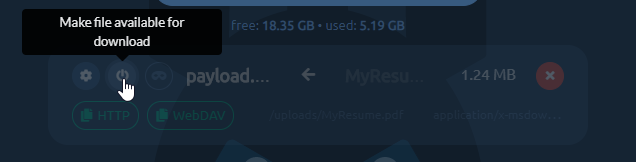
Next important thing is enabling the facade. Just click the third button from the left to flip the on/off switch to enable/disable facade mode. When the facade mode is enabled, pwndrop will serve the facade file, which you've uploaded for the given payload, instead of the original payload file. In our example it will deliver the PDF file instead of the payload executable.
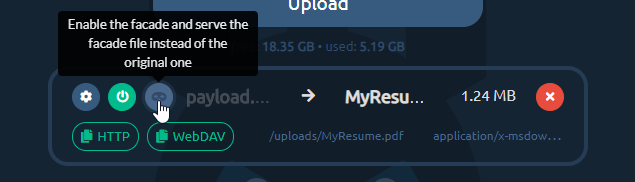
Aaand that's it. Enjoy your first shared payload! Hope I've managed to not make the process too complex and that it was pretty easy to follow.
Future Development
I have a lot of ideas I want implemented into pwndrop, but instead of never releasing the tool and keep adding features, because "it is always not yet perfect", I've decided to release the tool as it is now. I will iteratively expand on it by adding new features from time to time.
So before you send me your feedback, check out what I plan to implement in near and far future. I really want to hear what features you'd like to see and how you'd want to use the tool.
Download Counter
This one should be implemented quite fast. It would add a download counter for each file, specifying the number of times the file is allowed to be downloaded. When the limit is reached, pwndrop will either serve a facade file or return file not found.
Download Tracker
This feature is a much needed one, but requires a bit of work. I want to add a separate view panel, which will display in real-time all download requests for every payload file. The log should contain the visitor's User-Agent, IP address and some additional metadata that can be gathered from the particular request.
File dropping with Javascript
There is a method to initiate a file download directly through Javascript executed on an HTML page. It is an effective method for bypassing request scanners of several EDRs.
The idea is that the whole payload file gets embedded into an HTML page as an encrypted blob, which is then decrypted in real-time and served as a download to the web browser. That way there is never a direct request made to a file resource with specific URL, meaning there is nothing to download and scan. EDRs would have to implement Javascript emulation engines in order to execute a dropper script in a sandbox and analyze the decrypted payload.
Conditional facades
At the moment, facade mode can only be enabled/disabled manually, but eventually I'd like this process to be somewhat automated. Pwndrop could check if the request is made with specific cookie, User-Agent or from targeted IP range and then decide whether to serve a payload file or a facade file instead.
Password protected downloads
Sometimes it is good to share a file, which downloads only after entering a valid password. This is the feature I'd also like to have in pwndrop. I'm not yet sure if it should be done with basic HTTP authentication or something custom. Let me know if you have any ideas.
The End (for now!)
This is only the end of this post, but definitely not the end of pwndrop's development. I'd really like to see how you, the red teamers, plan to use this tool and how it can aid you in managing your payloads.
I also hope that you can use this tool not only for work. I hope it helps you share any files you want with the people you want, without having to worry about privacy and/or security issues. Self-hosting is always the best way to go.
Expect future updates on this blog and if you have any feedback you want to share, do contact and follow me on Twitter @mrgretzky.
Get the latest version of pwndrop here:
Enjoy and I'm waiting for your feedback!
]]>Welcome to 2019!
As was noted, this will be the year of phishing automation. We've already seen a release of new reverse-proxy tool Modlishka and it is only January.
This release would not have happened without the inspiration I received from Michele Orru (@antisnatchor), Giuseppe Trotta (@Giutro) and
]]>
Welcome to 2019!
As was noted, this will be the year of phishing automation. We've already seen a release of new reverse-proxy tool Modlishka and it is only January.
This release would not have happened without the inspiration I received from Michele Orru (@antisnatchor), Giuseppe Trotta (@Giutro) and Piotr Duszyński (@drk1wi). Thank you!
This is by far the most significant update since the release of Evilginx. The 2.3 update makes it unnecessary to manually create your own sub_filters. I talked to many professional red teamers (hello @_RastaMouse) who have struggled with creating their own phishlets, because of the unfair, steep learning curve of figuring out what strings to replace and where, in the proxied HTTP content. I can proudly say that these days are over and it should now be much easier to create phishlets from scratch.
If you arrived here by accident and you have no idea what I'm talking about, check out the first post on Evilginx. It is a phishing framework acting as a reverse proxy, allowing to bypass 2FA authentication.
Let's jump straight into the changes.
Changelog - version 2.3
Here is a full list of changes in this version:
- Proxy can now create most of required
sub_filterson its own, making it much easier to create new phishlets. - Added lures, with which you can prepare custom phishing URLs, each having its own set of unique options (
help luresfor more info). - Added OpenGraph settings for lures, allowing to create enticing content for link previews.
- Added ability to inject custom Javascript into proxied pages.
- Injected Javascript can be customized with attacker-defined data, specified in lure options.
- Deprecated
landing_pathand replaced it with aloginsection, which contains the domain and path for website's login page.
Diving into more detail now.
Automatic handling of
sub_filters
In order for Evilginx to properly proxy a website, it must not stray off its path and it should make sure that all proxied links and redirections are converted from original URLs to the phishing URLs. If the browser navigates to the original URL, the user will no longer be proxied through Evilginx and the phishing will simply fail.
I am aware it was super hard to manually figure out what strings to replace and it took considerable amounts of time to analyze HTML content of every page to manage substitutions, using trial and error method.
Initially I thought that doing the automatic URL substitution, in page body, will just not work well. The guys I mentioned at the top of this post, proved me wrong and I was amazed how well it can work when properly executed. When I saw this method successfully implemented and demonstrated in Modlishka, I was blown away. I knew I had to try and do the same for Evilginx.
It took me a whole weekend to implement the required changes and I'm very happy with the outcome. You can now start creating your phishlet without any sub_filters at all. Just define the proxy_hosts for the domains and subdomains that you want to proxy through and it should work out-of-the-box. You may need to create your own sub_filters only if there is some unusual substitution required to bypass security checks or you just want to modify some HTML to make the phishing scenario look better.
Best thing with automated sub_filters generation is the fact that the whole website's functionality may fully work, through the proxy, even after the user is authenticated (e.g. Gmail's inbox).
Phishing with lures
The tokenized phishing link with redirection URL, encoded in base64 format, was pretty ugly and definitely not perfect for carefully planned phishing attacks. As an improvement, I thought of creating custom URLs with attacker-defined path. Each assigned with a different redirection URL, which would be navigated to on successful authentication through the phishing proxy. This idea eventually surfaced in form of lures.
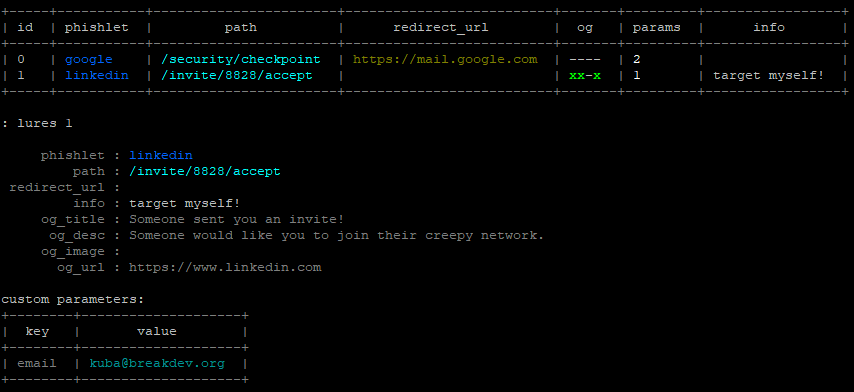
You can now create as many lures as you want for specific phishlets and you are able to give each of them following options:
- Custom path to make your phishing URLs look more inviting to be clicked.
- Redirection URL to navigate the user to, after they successfully authenticate.
- OpenGraph features, which will inject
<og:...>meta tags into proxied website to make the phishing links generate enticing previews when sent in messengers or posted to social media. - Customized script content, which will be embedded into your injected Javascript code (e.g. for pre-filling the user's email address).
- Description for your own eyes to not forget what the lure was for.
Here is how OpenGraph lure configuration can be used to generate an enticing preview for WhatsApp:

On clicking the link, the user will be taken to the attacker-controlled proxied Google login page and on successful authentication, he can be redirected to any document hosted on Google Drive.
The command for generating tokenized phishing links through phishlets get-url still works, although I'd consider it obsolete now. You should now generate phishing URLs with pre-created lures instead: lures get-url 0
To get more information on how to use lures, type in help lures and you will get a list of all sub-commands you can use.
Javascript injection
Now you can inject any javascript code into the proxied HTML content, based on URL path or domain. This gives incredible capabilities for customizing your phishing attack. You could for example make the website pre-fill the email of your target in the authentication form and display their profile photo.
Here is the example of injected javascript that pre-fills the target's email on LinkedIn login page:
js_inject:
  - trigger_domains: ["www.linkedin.com"]
    trigger_paths: ["/uas/login"]
    trigger_params: ["email"]
    script: |
      function lp(){
        var email = document.querySelector("#username");
        var password = document.querySelector("#password");
        if (email != null && password != null) {
          email.value = "{email}";
          password.focus();
          return;
        }
        setTimeout(function(){lp();}, 100);
      }
      setTimeout(function(){lp();}, 100);
You can notice that the email value is set to {email}, which lets Evilginx know that this will be replaced with the value set in the created lure. Setting the email value would be done the following way.
: lures edit params 0 [email protected]
See that the trigger_params variable contains the email value, which means that this javascript will ONLY be injected if the email parameter is configured in the lure used in the phishing attack.
Here is a demo of what a creative attacker could do with Javascript injection on Google, pre-filling his target's details for him:
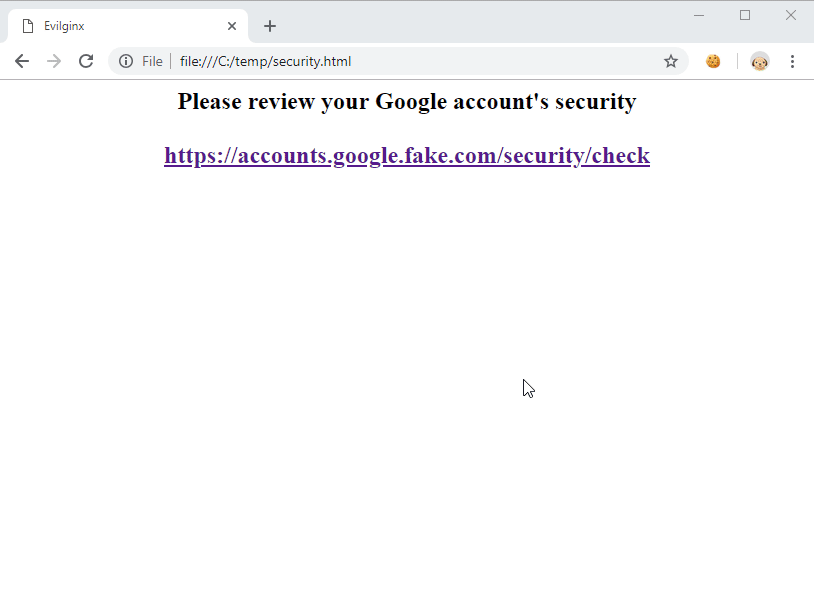
Removal of
landing_urlsection
To upgrade your phishlets to version 2.3, you have to remove landing_url section and replace it with a login section.
I figured you may want to use a different domain for your phishing URL than the one, which is used to display the login page. For example Google's login page is always at domain accounts.google.com, but you may want the phishing link to point to a different sub-domain like docs.phished-google.com. That way you can add docs.google.com to proxy_hosts and set the option to is_landing: true.
The login section should contain:
login:
  domain: 'accounts.google.com'
  path: '/signin/v2/identifier'
IMPORTANT! The login section always defines where the login page resides on the targeted website.
That way the user will be automatically redirected to the login page domain even when the phishing link originated on a different domain.
Refer to the official phishlets 2.3.0 documentation for more information.
Have fun!
I can proudly say that now the phishlet format is close to being perfect and, since the difficulty of creating one from scratch significantly dropped, I will be starting a series of blog posts teaching how to create a phishlet from scratch, including how to configure everything.
The series will start very soon and posts will be written in hands-on step by step format, showing the whole process of phishlet creation from start to finish, for the website that I pick.
Make sure to follow me on Twitter if you want up-to-date information on Evilginx development.