The post CRUD Operations Web App using PHP & MySQL | Part 2 appeared first on Coding Infinite.
]]>If you missed previous parts, then you can find here => Getting Started with Web Application using PHP & MySQL | Tutorials
I’m assuming that you have followed the previous part of this Tutorial & created API for CRUD Operations using PHP & MySQL.
In this part, we’ll use AdminLTE Template to create UI for our CRUD API we have created in the previous part of this article.
We have also set up our Template & created the database in the First part of this Tutorial.
After following the previous article, your project structure will look like this.
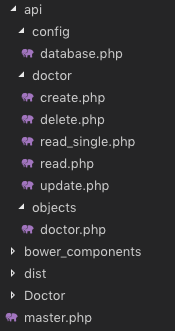
We know that we have created the master.php in the First part, which is our Layout page.
We also have “Doctor” Folder at the root directory of our Project. We’ll create all pages related to Doctor in this Folder.
Let’s start by creating a page to display all doctors data into a Table.
We have created “index.php” file inside “Doctor” Folder. Update this file with the Code below.
<?php
  $content = '<div class="row">
                <div class="col-xs-12">
                <div class="box">
                  <div class="box-header">
                    <h3 class="box-title">Dostors List</h3>
                  </div>
                  <!-- /.box-header -->
                  <div class="box-body">
                    <table id="doctors" class="table table-bordered table-hover">
                      <thead>
                      <tr>
                        <th>Name</th>
                        <th>Email</th>
                        <th>Phone</th>
                        <th>Gender</th>
                        <th>Specialist</th>
                        <th>Action</th>
                      </tr>
                      </thead>
                      <tbody>
                      </tbody>
                      <tfoot>
                      <tr>
                        <th>Name</th>
                        <th>Email</th>
                        <th>Phone</th>
                        <th>Gender</th>
                        <th>Specialist</th>
                        <th>Action</th>
                      </tr>
                      </tfoot>
                    </table>
                  </div>
                  <!-- /.box-body -->
                </div>
                <!-- /.box -->
              </div>
            </div>';
  include('../master.php');
?>
<!-- page script -->
<script>
  $(document).ready(function(){
    $.ajax({
        type: "GET",
        url: "../api/doctor/read.php",
        dataType: 'json',
        success: function(data) {
            var response="";
            for(var user in data){
                response += "<tr>"+
                "<td>"+data[user].name+"</td>"+
                "<td>"+data[user].email+"</td>"+
                "<td>"+data[user].phone+"</td>"+
                "<td>"+((data[user].gender == 0)? "Male": "Female")+"</td>"+
                "<td>"+data[user].specialist+"</td>"+
                "<td><a href='update.php?id="+data[user].id+"'>Edit</a> | <a href='#' onClick=Remove('"+data[user].id+"')>Remove</a></td>"+
                "</tr>";
            }
            $(response).appendTo($("#doctors"));
        }
    });
  });
  function Remove(id){
    var result = confirm("Are you sure you want to Delete the Doctor Record?");
    if (result == true) {
        $.ajax(
        {
            type: "POST",
            url: '../api/doctor/delete.php',
            dataType: 'json',
            data: {
                id: id
            },
            error: function (result) {
                alert(result.responseText);
            },
            success: function (result) {
                if (result['status'] == true) {
                    alert("Successfully Removed Doctor!");
                    window.location.href = '/medibed/doctor';
                }
                else {
                    alert(result['message']);
                }
            }
        });
    }
  }
</script>
Code Explanation
First of all, we have the content of this page in a PHP variable & then we simply included our master.php because it has the code for Layout page.
On document load, we’re using ajax to consume our read API to get all doctors.
We also have a function to remove a Doctor.
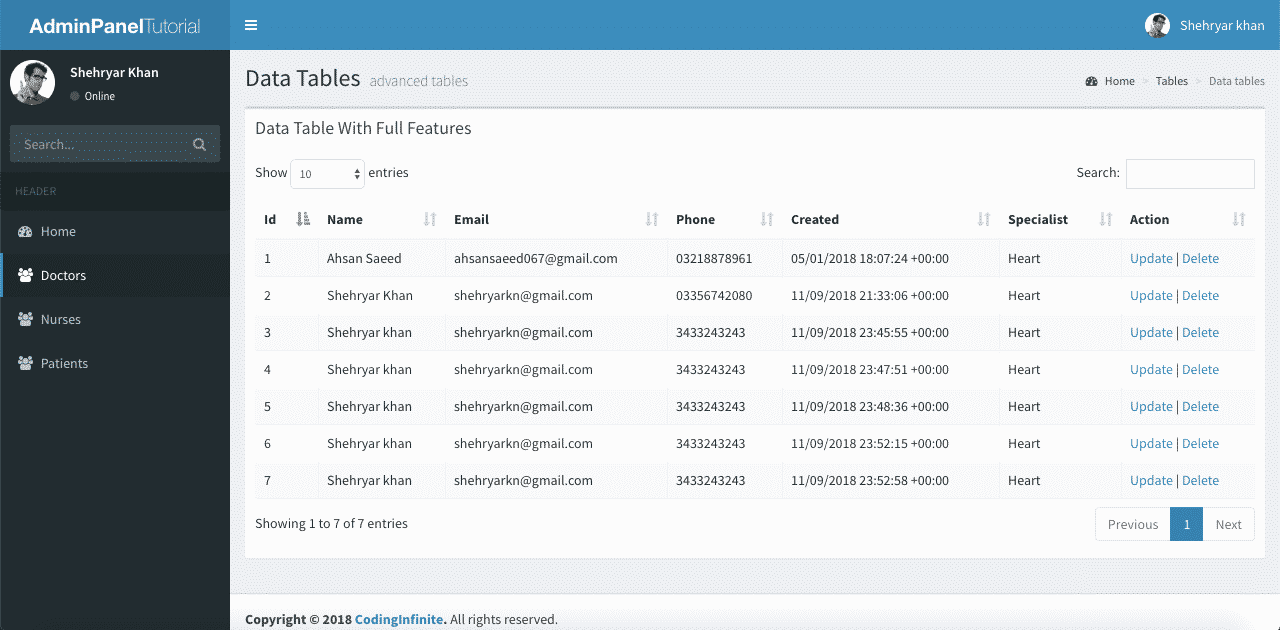
Now go to this Url => http://localhost/medibed/doctor/
you’ll see this page

Doctor remove will also work fine because of remove function ready in our code.
Now we need to create pages to Create & Update a Doctor.
Create a new file inside “Doctor” Folder with the name “create.php” & add this Code.
<?php
  $content = '<div class="row">
                <!-- left column -->
                <div class="col-md-12">
                  <!-- general form elements -->
                  <div class="box box-primary">
                    <div class="box-header with-border">
                      <h3 class="box-title">Add Doctor</h3>
                    </div>
                    <!-- /.box-header -->
                    <!-- form start -->
                    <form role="form">
                      <div class="box-body">
                        <div class="form-group">
                          <label for="exampleInputName1">Name</label>
                          <input type="text" class="form-control" id="name" placeholder="Enter Name">
                        </div>
                        <div class="form-group">
                          <label for="exampleInputEmail1">Email address</label>
                          <input type="email" class="form-control" id="email" placeholder="Enter email">
                        </div>
                        <div class="form-group">
                          <label for="exampleInputPassword1">Password</label>
                          <input type="password" class="form-control" id="password" placeholder="Password">
                        </div>
                        <div class="form-group">
                          <label for="exampleInputName1">Phone</label>
                          <input type="text" class="form-control" id="phone" placeholder="Enter Phone">
                        </div>
                        <div class="form-group">
                            <label for="exampleInputName1">Gender</label>
                            <div class="radio">
                                <label>
                                <input type="radio" name="gender" id="optionsRadios1" value="0" checked="">
                                Male
                                </label>
                            </div>
                            <div class="radio">
                                <label>
                                <input type="radio" name="gender" id="optionsRadios2" value="1">
                                Female
                                </label>
                            </div>
                        </div>
                        <div class="form-group">
                          <label for="exampleInputName1">Specialist</label>
                          <input type="text" class="form-control" id="specialist" placeholder="Enter Specialization">
                        </div>
                      </div>
                      <!-- /.box-body -->
                      <div class="box-footer">
                        <input type="button" class="btn btn-primary" onClick="AddDoctor()" value="Submit"></input>
                      </div>
                    </form>
                  </div>
                  <!-- /.box -->
                </div>
              </div>';
  include('../master.php');
?>
<script>
  function AddDoctor(){

        $.ajax(
        {
            type: "POST",
            url: '../api/doctor/create.php',
            dataType: 'json',
            data: {
                name: $("#name").val(),
                email: $("#email").val(),
                password: $("#password").val(),
                phone: $("#phone").val(),
                gender: $("input[name='gender']:checked").val(),
                specialist: $("#specialist").val()
            },
            error: function (result) {
                alert(result.responseText);
            },
            success: function (result) {
                if (result['status'] == true) {
                    alert("Successfully Added New Doctor!");
                    window.location.href = '/medibed/doctor';
                }
                else {
                    alert(result['message']);
                }
            }
        });
    }
</script>
Now click on Create Doctor inside Doctors SideBar Menu or go to this Url => http://localhost/medibed/doctor/create.php
You’ll see this page

Try to Create a new Doctor.
I hope everything is working as expected.
Let’s complete our Update Doctor functionality by creating a new file inside “Doctor” Folder as “update.php”
Add the below code inside this newly created file.
<?php
  $content = '<div class="row">
                <!-- left column -->
                <div class="col-md-12">
                  <!-- general form elements -->
                  <div class="box box-primary">
                    <div class="box-header with-border">
                      <h3 class="box-title">Update Doctor</h3>
                    </div>
                    <!-- /.box-header -->
                    <!-- form start -->
                    <form role="form">
                      <div class="box-body">
                        <div class="form-group">
                          <label for="exampleInputName1">Name</label>
                          <input type="text" class="form-control" id="name" placeholder="Enter Name">
                        </div>
                        <div class="form-group">
                          <label for="exampleInputEmail1">Email address</label>
                          <input type="email" class="form-control" id="email" placeholder="Enter email">
                        </div>
                        <div class="form-group">
                          <label for="exampleInputPassword1">Password</label>
                          <input type="password" class="form-control" id="password" placeholder="Password">
                        </div>
                        <div class="form-group">
                          <label for="exampleInputName1">Phone</label>
                          <input type="text" class="form-control" id="phone" placeholder="Enter Phone">
                        </div>
                        <div class="form-group">
                            <label for="exampleInputName1">Gender</label>
                            <div class="radio">
                                <label>
                                <input type="radio" name="gender" id="gender0" value="0" checked="">
                                Male
                                </label>
                            </div>
                            <div class="radio">
                                <label>
                                <input type="radio" name="gender" id="gender1" value="1">
                                Female
                                </label>
                            </div>
                        </div>
                        <div class="form-group">
                          <label for="exampleInputName1">Specialist</label>
                          <input type="text" class="form-control" id="specialist" placeholder="Enter Specialization">
                        </div>
                      </div>
                      <!-- /.box-body -->
                      <div class="box-footer">
                        <input type="button" class="btn btn-primary" onClick="UpdateDoctor()" value="Update"></input>
                      </div>
                    </form>
                  </div>
                  <!-- /.box -->
                </div>
              </div>';

  include('../master.php');
?>
<script>
    $(document).ready(function(){
        $.ajax({
            type: "GET",
            url: "../api/doctor/read_single.php?id=<?php echo $_GET['id']; ?>",
            dataType: 'json',
            success: function(data) {
                $('#name').val(data['name']);
                $('#email').val(data['email']);
                $('#password').val(data['password']);
                $('#phone').val(data['phone']);
                $('#gender'+data['gender']).prop("checked", true);
                $('#specialist').val(data['specialist']);
            },
            error: function (result) {
                console.log(result);
            },
        });
    });
    function UpdateDoctor(){
        $.ajax(
        {
            type: "POST",
            url: '../api/doctor/update.php',
            dataType: 'json',
            data: {
                id: <?php echo $_GET['id']; ?>,
                name: $("#name").val(),
                email: $("#email").val(),
                password: $("#password").val(),
                phone: $("#phone").val(),
                gender: $("input[name='gender']:checked").val(),
                specialist: $("#specialist").val()
            },
            error: function (result) {
                alert(result.responseText);
            },
            success: function (result) {
                if (result['status'] == true) {
                    alert("Successfully Updated Doctor!");
                    window.location.href = '/medibed/doctor';
                }
                else {
                    alert(result['message']);
                }
            }
        });
    }
</script>
Now you can also update any doctor record.
We have successfully created our CRUD(Create, Read, Update, Delete) Operations using Beautiful & Free UI Template.
You can also download the complete source code from GitHub.
Please Comment If you found any problem.
You might be interested in:
- Signup Login page in PHP with Database MySQL Source Code
- Restful Web Services in PHP Example – PHP + MySQL with Source Code
The post CRUD Operations Web App using PHP & MySQL | Part 2 appeared first on Coding Infinite.
]]>The post CRUD Operations using PHP & MySQL | Tutorials with Source Code appeared first on Coding Infinite.
]]>For creating beautiful & responsive UI, I’m using AdminLTE Template. So, In case if you missed the first part of this Tutorial, then you can find here => Getting Started with Web Application using PHP & MySQL | Tutorials
Assuming that you have followed the above tutorial & setup your project, let’s start our CRUD Operations Tutorial using PHP & MySQL.
I’m performing my CRUD Operation on this Database Table. You can use your own Table.

Creating Folders
- First of all, create a new folder at the root of your project directory as “api”.
- Inside “api” folder create three folders as “config”, “objects” & “doctors”.
we’ll keep all Doctor API inside “doctors” folder.
This directory structure will help us to keep our project easy to manage.
Database Connectivity
In your “config” folder inside “api” folder, create a new file there as “database.php” and paste this code there
<?php
class Database{

    // specify your own database credentials
    private $host = "localhost";
    private $db_name = "hospital_db";
    private $username = "root";
    private $password = "";
    public $conn;

    // get the database connection
    public function getConnection(){

        $this->conn = null;

        try{
            $this->conn = new PDO("mysql:host=" . $this->host . ";dbname=" . $this->db_name, $this->username, $this->password);
            $this->conn->exec("set names utf8");
        }catch(PDOException $exception){
            echo "Connection error: " . $exception->getMessage();
        }

        return $this->conn;
    }
}
?>
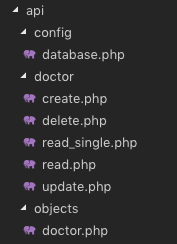
Now, your project structure should look like this.

Let’s start from creating API for CRUD operations.
I’m going to use Object Oriented Approach in this tutorial.
First of all, create a Model of your Doctor.
So, create a new file as “doctor.php” inside “objects” folder & add this Code:
<?php
class Doctor{

    // database connection and table name
    private $conn;
    private $table_name = "doctors";

    // object properties
    public $id;
    public $name;
    public $email;
    public $password;
    public $phone;
    public $gender;
    public $specialist;
    public $created;

    // constructor with $db as database connection
    public function __construct($db){
        $this->conn = $db;
    }

    // read all doctors
    function read(){

        // select all query
        $query = "SELECT
                    `id`, `name`, `email`, `password`, `phone`, `gender`, `specialist`, `created`
                FROM
                    " . $this->table_name . "
                ORDER BY
                    id DESC";

        // prepare query statement
        $stmt = $this->conn->prepare($query);

        // execute query
        $stmt->execute();

        return $stmt;
    }

    // get single doctor data
    function read_single(){

        // select all query
        $query = "SELECT
                    `id`, `name`, `email`, `password`, `phone`, `gender`, `specialist`, `created`
                FROM
                    " . $this->table_name . "
                WHERE
                    id= '".$this->id."'";

        // prepare query statement
        $stmt = $this->conn->prepare($query);

        // execute query
        $stmt->execute();
        return $stmt;
    }

    // create doctor
    function create(){

        if($this->isAlreadyExist()){
            return false;
        }

        // query to insert record
        $query = "INSERT INTO  ". $this->table_name ."
                        (`name`, `email`, `password`, `phone`, `gender`, `specialist`, `created`)
                  VALUES
                        ('".$this->name."', '".$this->email."', '".$this->password."', '".$this->phone."', '".$this->gender."', '".$this->specialist."', '".$this->created."')";

        // prepare query
        $stmt = $this->conn->prepare($query);

        // execute query
        if($stmt->execute()){
            $this->id = $this->conn->lastInsertId();
            return true;
        }

        return false;
    }

    // update doctor
    function update(){

        // query to insert record
        $query = "UPDATE
                    " . $this->table_name . "
                SET
                    name='".$this->name."', email='".$this->email."', password='".$this->password."', phone='".$this->phone."', gender='".$this->gender."', specialist='".$this->specialist."'
                WHERE
                    id='".$this->id."'";

        // prepare query
        $stmt = $this->conn->prepare($query);
        // execute query
        if($stmt->execute()){
            return true;
        }
        return false;
    }

    // delete doctor
    function delete(){

        // query to insert record
        $query = "DELETE FROM
                    " . $this->table_name . "
                WHERE
                    id= '".$this->id."'";

        // prepare query
        $stmt = $this->conn->prepare($query);

        // execute query
        if($stmt->execute()){
            return true;
        }
        return false;
    }

    function isAlreadyExist(){
        $query = "SELECT *
            FROM
                " . $this->table_name . "
            WHERE
                email='".$this->email."'";

        // prepare query statement
        $stmt = $this->conn->prepare($query);

        // execute query
        $stmt->execute();

        if($stmt->rowCount() > 0){
            return true;
        }
        else{
            return false;
        }
    }
}
you can see that we have all CRUD Operations including read_single function for reading a single Doctor record from MySQL database table.
Now, we’ll create a separate file for each operation inside “doctor” folder & we’ll call functions from “doctor.php” inside “objects” folder.
Let’s create a file inside “doctor” folder as “create.php” for creating a new doctor & add the below code inside this file.
<?php

// include database and object files
include_once '../config/database.php';
include_once '../objects/doctor.php';

// get database connection
$database = new Database();
$db = $database->getConnection();

// prepare doctor object
$doctor = new Doctor($db);

// set doctor property values
$doctor->name = $_POST['name'];
$doctor->email = $_POST['email'];
$doctor->password = base64_encode($_POST['password']);
$doctor->phone = $_POST['phone'];
$doctor->gender = $_POST['gender'];
$doctor->specialist = $_POST['specialist'];
$doctor->created = date('Y-m-d H:i:s');

// create the doctor
if($doctor->create()){
    $doctor_arr=array(
        "status" => true,
        "message" => "Successfully Signup!",
        "id" => $doctor->id,
        "name" => $doctor->name,
        "email" => $doctor->email,
        "phone" => $doctor->phone,
        "gender" => $doctor->gender,
        "specialist" => $doctor->specialist
    );
}
else{
    $doctor_arr=array(
        "status" => false,
        "message" => "Email already exists!"
    );
}
print_r(json_encode($doctor_arr));
?>
For reading all records from Doctors table create a file as “read.php” & add this code
<?php
// include database and object files
include_once '../config/database.php';
include_once '../objects/doctor.php';

// get database connection
$database = new Database();
$db = $database->getConnection();

// prepare doctor object
$doctor = new Doctor($db);

// query doctor
$stmt = $doctor->read();
$num = $stmt->rowCount();
// check if more than 0 record found
if($num>0){

    // doctors array
    $doctors_arr=array();
    $doctors_arr["doctors"]=array();

    while ($row = $stmt->fetch(PDO::FETCH_ASSOC)){
        extract($row);
        $doctor_item=array(
            "id" => $id,
            "name" => $name,
            "email" => $email,
            "password" => $password,
            "phone" => $phone,
            "gender" => $gender,
            "specialist" => $specialist,
            "created" => $created
        );
        array_push($doctors_arr["doctors"], $doctor_item);
    }

    echo json_encode($doctors_arr["doctors"]);
}
else{
    echo json_encode(array());
}
?>
to Update a record, create a file as “update.php” & add the code below
<?php

// include database and object files
include_once '../config/database.php';
include_once '../objects/doctor.php';

// get database connection
$database = new Database();
$db = $database->getConnection();

// prepare doctor object
$doctor = new Doctor($db);

// set doctor property values
$doctor->id = $_POST['id'];
$doctor->name = $_POST['name'];
$doctor->email = $_POST['email'];
$doctor->password = base64_encode($_POST['password']);
$doctor->phone = $_POST['phone'];
$doctor->gender = $_POST['gender'];
$doctor->specialist = $_POST['specialist'];

// create the doctor
if($doctor->update()){
    $doctor_arr=array(
        "status" => true,
        "message" => "Successfully Updated!"
    );
}
else{
    $doctor_arr=array(
        "status" => false,
        "message" => "Email already exists!"
    );
}
print_r(json_encode($doctor_arr));
?>
& for the last letter of CRUD, which is D.
create another file as “delete.php” & add this code
<?php

// include database and object files
include_once '../config/database.php';
include_once '../objects/doctor.php';

// get database connection
$database = new Database();
$db = $database->getConnection();

// prepare doctor object
$doctor = new Doctor($db);

// set doctor property values
$doctor->id = $_POST['id'];

// remove the doctor
if($doctor->delete()){
    $doctor_arr=array(
        "status" => true,
        "message" => "Successfully Removed!"
    );
}
else{
    $doctor_arr=array(
        "status" => false,
        "message" => "Doctor Cannot be deleted. may be he's assigned to a patient!"
    );
}
print_r(json_encode($doctor_arr));
?>
in the end, we need another method which is to get a single doctor record.
So, create a new file as “read_single.php” & add the below code
<?php
// include database and object files
include_once '../config/database.php';
include_once '../objects/doctor.php';

// get database connection
$database = new Database();
$db = $database->getConnection();

// prepare doctor object
$doctor = new Doctor($db);

// set ID property of doctor to be edited
$doctor->id = isset($_GET['id']) ? $_GET['id'] : die();

// read the details of doctor to be edited
$stmt = $doctor->read_single();

if($stmt->rowCount() > 0){
    // get retrieved row
    $row = $stmt->fetch(PDO::FETCH_ASSOC);
    // create array
    $doctor_arr=array(
        "id" => $row['id'],
        "name" => $row['name'],
        "email" => $row['email'],
        "password" => $row['password'],
        "phone" => $row['phone'],
        "gender" => $row['gender'],
        "specialist" => $row['specialist'],
        "created" => $row['created']
    );
}
// make it json format
print_r(json_encode($doctor_arr));
?>
After this our “api” directory will look like this
Our API for CRUD Operation is ready using PHP & MySQL. Now, we need to create UI using the template we set up in the previous article & then connect our UI with the API we created in this article.
We’ll create UI for our CRUD Operations in the next part of this Article.
Comment If you find any difficulty, I’m available to solve your problems.
The post CRUD Operations using PHP & MySQL | Tutorials with Source Code appeared first on Coding Infinite.
]]>The post Error Logging in Asp.Net Core Application | NLog | Log4Net | Tutorials appeared first on Coding Infinite.
]]>There are many open-source libraries available for Error Logging. For .Net, most trusted & commonly used frameworks are NLog & Log4Net. Both frameworks make it simpler to send our application logs in different places like databases, files, log management systems & many other places. We can also Email our Critical logs. The awesome thing is that we can send the logs to a different place just by changing the config file.
By using Error Logging in an Application, we can categorize our logs at different levels. Here’s the list.
Levels
- Info – Info Message, enabled in production mode
- Warning – Warning Messages, temporary & recoverable problems.
- Error – Error Messages, programming exceptions.
- Trace – Very detailed Logs, usually enabled during the development phase.
- Debug – Debugging information, less information than Traces.
- Fatal – Serious Errors, failures that need immediate attention.
As I have discussed above, Error Logging Frameworks also facilitates us to send our application’s log to different destinations, we called them targets.
Targets
- Files- We can log our messages into a file.
- Databases – Important Logs can also be stored in a database. Usually, we store only those logs to a database which we need to display in our application.
- Console – In Console Applications, best available target to display logs is console itself.
- Email – In case of fatal errors which need attention we need to aware the team with the failure. so it’s always a good idea to email those logs.
Let’s have a quick look at available Logging frameworks for .Net Core. After deciding the better one, we’ll implement the winner logging framework in our Application. So in case, you missed the Admin Panel tutorials,
here you can follow => Creating Admin Panel in Asp.net Core MVC – Step by Step Tutorial
Choosing a Framework
Here’s the result of a speed comparison of 5 most popular error logging framework for .Net & .Net Core
Logging Frameworks Comparison Result by Loggly and SolarWinds
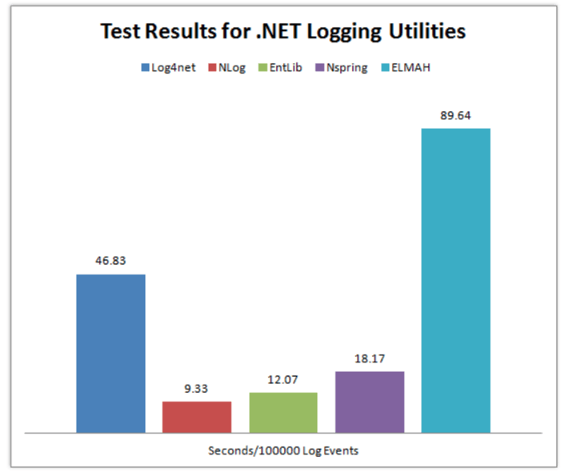
So clearly, NLog is the winner here because it’s taking the minimum time to Log.
Without wasting our time let’s see how we can install, configure and use NLog in our Application.
Creating a Project
I’m going to use VS Code to create an empty web project.
Create an empty Web Application using this command
dotnet new web
after this add the Code below to your “Startup.cs” File to ready your Application.
using Microsoft.AspNetCore.Builder;
using Microsoft.AspNetCore.Hosting;
using Microsoft.Extensions.DependencyInjection;

public class Startup
{
    public void ConfigureServices(IServiceCollection services)
    {
        services.AddMvc();
    }

    public void Configure(IApplicationBuilder app, IHostingEnvironment env)
    {
        if (env.IsDevelopment())
        {
            app.UseDeveloperExceptionPage();
        }

        app.UseMvc(routes =>
        {
            routes.MapRoute(
                name: "default",
                template: "{controller=Home}/{action=Index}/{id?}");
        });
    }
}
Now create a new Folder as “Controllers” at the root level of your Project & inside this folder create a controller class as “HomeController.cs”
Installing NLog
After creating the project, we need to add NLog Library.
NLog is available at Nuget. You can install it in the way you like it. I’m going to use the .Net CLI. So, here’s the command to install NLog
dotnet add package NLog
Configuration
Now Add a configuration file at the root of your project with the name as “NLog.config” & paste this Code
<?xml version="1.0" encoding="utf-8" ?>
<nlog xmlns="http://www.nlog-project.org/schemas/NLog.xsd"
      xmlns:xsi="http://www.w3.org/2001/XMLSchema-instance">

    <targets>
        <target name="logfile" xsi:type="File" fileName="Logs.txt" />
        <target name="logconsole" xsi:type="Console" />
    </targets>

    <rules>
        <logger name="*" minlevel="Info" writeTo="logconsole" />
        <logger name="*" minlevel="Debug" writeTo="logfile" />
    </rules>
</nlog>
There’s another way to configure NLog but I’ll recommend using XML configuration. In this case, you’ll be able to edit you Logging configuration even after publishing your application.
If you still don’t like configuring NLog using above way then you can do the same by programmatically.
Here’s the alternate way.
var config = new NLog.Config.LoggingConfiguration();

var logfile = new NLog.Targets.FileTarget("logfile") { FileName = "Logs.txt" };
var logconsole = new NLog.Targets.ConsoleTarget("logconsole");

config.AddRule(LogLevel.Info, LogLevel.Fatal, logconsole);
config.AddRule(LogLevel.Debug, LogLevel.Fatal, logfile);

NLog.LogManager.Configuration = config;
you can add this code to your “Program.cs” or “Startup.cs”.
Writing Logs
Now Add the code below in your “HomeController.cs” inside your Controllers Folder.
Microsoft.AspNetCore.Mvc;
using NLog;

public class HomeController : Controller
{
    private static Logger logger = LogManager.GetCurrentClassLogger();

    public void Index()
    {
        logger.Debug("Hello from Home Controller...");
    }
}
Run your application & go to the Home Controller URL. e.g. http://localhost:*/Home
Now you’ll find your “Logs.txt” here => bin -> Debug -> netcoreapp
Here’s what I got in my “Logs.txt” File
2019-02-21 13:17:49.4574|DEBUG|NLogTutorials.HomeController|Hello from Home Controller...
Comment If you find any problem or have any Question.
Here are more Articles you might be Interested
– Creating Admin Panel in Asp.net Core MVC – Step by Step Tutorial
– Top 10 .Net Core Features You need to know
– Dynamic Role-Based Authorization Asp.net Core
The post Error Logging in Asp.Net Core Application | NLog | Log4Net | Tutorials appeared first on Coding Infinite.
]]>The post Creating Interactive Dashboards in Asp.net Core MVC appeared first on Coding Infinite.
]]>
Here’s my Tutorial, If you’re interested in Dynamic User-defined Dashboards using Asp.Net Core
This is the 7th Part of Admin Panel Tutorial Series.
- Choosing Template for Admin Panel
- Creating a Database
- Setup AdminLTE Template in Asp.net Core MVC project
- Creating Models
- Login Page for Admin Panel
- CRUD(Create, Read, Update, Delete) Operations
- Creating Interactive Dashboards
- Audit Trail / Activity Logging
- Role-Based Authorization
- Error Logging
Creating Dashboards breaks down into two portions:
- Dashboard Design
- Populating it with required data.
For the first portion, you’ll have to do CSS and HTML work. And for it, you can search for already created HTML templates.
Chats, Graphs, Tables & Tiles make the Dashboards more Interactive & help to better understand your business. So, Let’s start from here.
I’ll recommend you to always use a Template to create Dashboards because in a Template you’ll get everything already included for you. You’ll just need to download, Setup & start development.
I’ll use AdminLTE for Designing our Dashboards. If you don’t know how to setup AdminLTE Template with Asp.net Core MVC Project,
here’s the simple setup Tutorial for you => Setting up Admin Template in Asp.net Core MVC
I hope that following above article you have setup Template with your Asp.net Core project.
Add this Line at the start of your “_Layout.cshtml” page right after BootStrap css
<!-- Morris chart -->
<link rel="stylesheet" href="proxy.php?url=bower_components/morris.js/morris.css">
Like this

Now Open your “Index.cshtml” inside your Views -> Home Folder & paste this code:
@model AdminPanelTutorial.Models.DashboardViewModel

<section class="content-header">
    <h1>
    Dashboard
    <small>Control panel</small>
    </h1>
    <ol class="breadcrumb">
    <li><a href="proxy.php?url=#"><i class="fa fa-dashboard"></i> Home</a></li>
    <li class="active">Dashboard</li>
    </ol>
</section>
<!-- Main content -->
<section class="content">
    <!-- Small boxes (Stat box) -->
    <div class="row">
    <div class="col-lg-3 col-xs-6">
        <!-- small box -->
        <div class="small-box bg-aqua">
        <div class="inner">
            <h3>@Model.doctors_count</h3>
            <p>Doctors</p>
        </div>
        <div class="icon">
            <i class="fa fa-users"></i>
        </div>
        <a href="proxy.php?url=#" class="small-box-footer">More info <i class="fa fa-arrow-circle-right"></i></a>
        </div>
    </div>
    <!-- ./col -->
    <div class="col-lg-3 col-xs-6">
        <!-- small box -->
        <div class="small-box bg-green">
        <div class="inner">
            <h3>@Model.nurses_count<sup style="font-size: 20px"></sup></h3>
            <p>Nurses</p>
        </div>
        <div class="icon">
            <i class="fa fa-users"></i>
        </div>
        <a href="proxy.php?url=#" class="small-box-footer">More info <i class="fa fa-arrow-circle-right"></i></a>
        </div>
    </div>
    <!-- ./col -->
    <div class="col-lg-3 col-xs-6">
        <!-- small box -->
        <div class="small-box bg-yellow">
        <div class="inner">
            <h3>@Model.patients_count</h3>
            <p>Patients</p>
        </div>
        <div class="icon">
            <i class="ion ion-person"></i>
        </div>
        <a href="proxy.php?url=#" class="small-box-footer">More info <i class="fa fa-arrow-circle-right"></i></a>
        </div>
    </div>
    <!-- ./col -->
    <div class="col-lg-3 col-xs-6">
        <!-- small box -->
        <div class="small-box bg-red">
        <div class="inner">
            <h3>65</h3>
            <p>This Month</p>
        </div>
        <div class="icon">
            <i class="ion ion-pie-graph"></i>
        </div>
        <a href="proxy.php?url=#" class="small-box-footer">More info <i class="fa fa-arrow-circle-right"></i></a>
        </div>
    </div>
    <!-- ./col -->
    </div>
    <!-- /.row -->
    <!-- Main row -->
    <div class="row">
    <!-- Left col -->
    <section class="col-lg-7 connectedSortable">
        <!-- Custom tabs (Charts with tabs)-->
        <!-- DONUT CHART -->
        <div class="box box-danger">
            <div class="box-header with-border">
            <h3 class="box-title">Donut Chart</h3>
            <div class="box-tools pull-right">
                <button type="button" class="btn btn-box-tool" data-widget="collapse"><i class="fa fa-minus"></i>
                </button>
                <button type="button" class="btn btn-box-tool" data-widget="remove"><i class="fa fa-times"></i></button>
            </div>
            </div>
            <div class="box-body chart-responsive">
            <div class="chart" id="sales-chart" style="height: 300px; position: relative;"></div>
            </div>
            <!-- /.box-body -->
        </div>
        <!-- /.nav-tabs-custom -->
    </section>
    <!-- /.Left col -->
    <!-- right col (We are only adding the ID to make the widgets sortable)-->
    <section class="col-lg-5 connectedSortable">
        <!-- TO DO List -->
        <div class="box box-primary">
        <div class="box-header">
            <i class="ion ion-clipboard"></i>
            <h3 class="box-title">To Do List</h3>
            <div class="box-tools pull-right">
            <ul class="pagination pagination-sm inline">
                <li><a href="proxy.php?url=#">«</a></li>
                <li><a href="proxy.php?url=#">1</a></li>
                <li><a href="proxy.php?url=#">2</a></li>
                <li><a href="proxy.php?url=#">3</a></li>
                <li><a href="proxy.php?url=#">»</a></li>
            </ul>
            </div>
        </div>
        <!-- /.box-header -->
        <div class="box-body">
            <!-- See dist/js/pages/dashboard.js to activate the todoList plugin -->
            <ul class="todo-list">
            <li>
                <!-- drag handle -->
                <span class="handle">
                    <i class="fa fa-ellipsis-v"></i>
                    <i class="fa fa-ellipsis-v"></i>
                    </span>
                <!-- checkbox -->
                <input type="checkbox" value="">
                <!-- todo text -->
                <span class="text">Patient 1 Check up Time</span>
                <!-- Emphasis label -->
                <small class="label label-danger"><i class="fa fa-clock-o"></i> 2 mins</small>
                <!-- General tools such as edit or delete-->
                <div class="tools">
                <i class="fa fa-edit"></i>
                <i class="fa fa-trash-o"></i>
                </div>
            </li>
            <li>
                    <span class="handle">
                    <i class="fa fa-ellipsis-v"></i>
                    <i class="fa fa-ellipsis-v"></i>
                    </span>
                <input type="checkbox" value="">
                <span class="text">Medicine for X Patient</span>
                <small class="label label-info"><i class="fa fa-clock-o"></i> 4 hours</small>
                <div class="tools">
                <i class="fa fa-edit"></i>
                <i class="fa fa-trash-o"></i>
                </div>
            </li>
            <li>
                    <span class="handle">
                    <i class="fa fa-ellipsis-v"></i>
                    <i class="fa fa-ellipsis-v"></i>
                    </span>
                <input type="checkbox" value="">
                <span class="text">New Patient Operation</span>
                <small class="label label-warning"><i class="fa fa-clock-o"></i> 1 day</small>
                <div class="tools">
                <i class="fa fa-edit"></i>
                <i class="fa fa-trash-o"></i>
                </div>
            </li>
            <li>
                    <span class="handle">
                    <i class="fa fa-ellipsis-v"></i>
                    <i class="fa fa-ellipsis-v"></i>
                    </span>
                <input type="checkbox" value="">
                <span class="text">Ward Visit</span>
                <small class="label label-success"><i class="fa fa-clock-o"></i> 3 days</small>
                <div class="tools">
                <i class="fa fa-edit"></i>
                <i class="fa fa-trash-o"></i>
                </div>
            </li>
            <li>
                    <span class="handle">
                    <i class="fa fa-ellipsis-v"></i>
                    <i class="fa fa-ellipsis-v"></i>
                    </span>
                <input type="checkbox" value="">
                <span class="text">Any other Activity</span>
                <small class="label label-primary"><i class="fa fa-clock-o"></i> 1 week</small>
                <div class="tools">
                <i class="fa fa-edit"></i>
                <i class="fa fa-trash-o"></i>
                </div>
            </li>
            <li>
                    <span class="handle">
                    <i class="fa fa-ellipsis-v"></i>
                    <i class="fa fa-ellipsis-v"></i>
                    </span>
                <input type="checkbox" value="">
                <span class="text">Any other Activity</span>
                <small class="label label-default"><i class="fa fa-clock-o"></i> 1 month</small>
                <div class="tools">
                <i class="fa fa-edit"></i>
                <i class="fa fa-trash-o"></i>
                </div>
            </li>
            </ul>
        </div>
        <!-- /.box-body -->
        <div class="box-footer clearfix no-border">
            <button type="button" class="btn btn-default pull-right"><i class="fa fa-plus"></i> Add item</button>
        </div>
        </div>
        <!-- /.box -->
    </section>
    <!-- right col -->
    </div>
    <!-- /.row (main row) -->
</section>

<!-- Morris.js charts -->
<script src="proxy.php?url=bower_components/raphael/raphael.min.js"></script>
<script src="proxy.php?url=bower_components/morris.js/morris.min.js"></script>
<script>
  $(function () {
    "use strict";
    //DONUT CHART
    var donut = new Morris.Donut({
      element: 'sales-chart',
      resize: true,
      colors: ["#3c8dbc", "#f56954", "#00a65a"],
      data: [
        {label: "Registered Doctors", value: @Model.doctors_count},
        {label: "Registered Nurses", value: @Model.nurses_count},
        {label: "Registered Patients", value: @Model.patients_count}
      ],
      hideHover: 'auto'
    });
  });
</script>
</body>
</html>
For populating above Page with real Data from DB you need to pass Data from Controller to View.
As a Best Practise, we’ll use ViewModel.
Create a new Folder as “ViewModels” & inside this Folder create a new file with the name “DashboardViewModel.cs”
& Add this Code:
namespace AdminPanelTutorial.Models
{
    public class DashboardViewModel
    {
        public int doctors_count { get; set; }
        public int nurses_count { get; set; }
        public int patients_count { get; set; }

    }
}
* Don’t forget to Update namespace here & in “Index.cshtml” File’s First Line According to your project’s namespace.
Now finally add this code to your “HomeController.cs”:
using System.Linq;
using AdminPanelTutorial.Models;
using Microsoft.AspNetCore;
using Microsoft.AspNetCore.Hosting;
using Microsoft.AspNetCore.Mvc;

namespace AdminPanelTutorial
{
    public class HomeController : Controller
    {
        private MyDbContext db = new MyDbContext();
        public IActionResult Index()
        {
            DashboardViewModel dashboard = new DashboardViewModel();

            dashboard.doctors_count = db.Doctors.Count();
            dashboard.nurses_count = db.Nurses.Count();
            dashboard.patients_count = db.Patients.Count();

            return View(dashboard);
        }
    }
}
Run your Application & you’ll see this page.
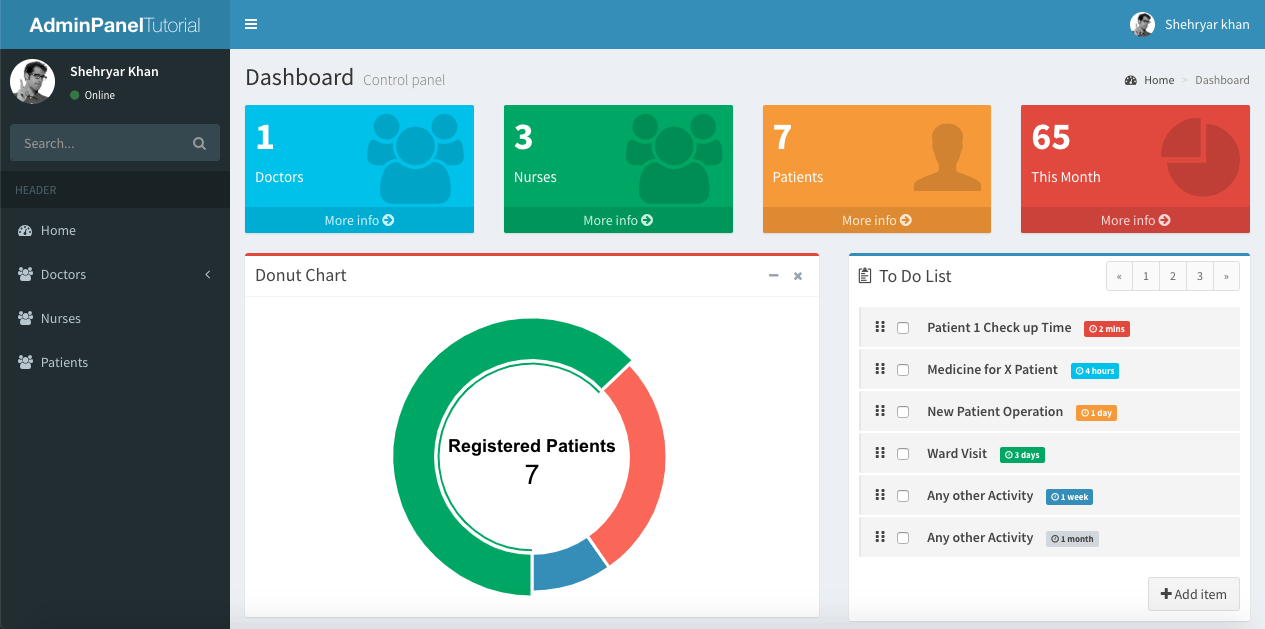
I’m just getting Doctors, Nurses & Patients count & displaying in my Dashboard as an example, you can Create ViewModel according to your Dashboard Design.
Running your project, you’ll see your Dashboard with real Doctors, Nurses & Patients count.
* Explore the AdminLTE Template to design your more Interactive Dashboards. Your Application can have more than one Dashboard.
Comment below If you find any difficulty or If you find this tutorial helpful.
The post Creating Interactive Dashboards in Asp.net Core MVC appeared first on Coding Infinite.
]]>The post Dynamic Role Based Authorization Asp.net Core | Assign Role from DB appeared first on Coding Infinite.
]]>In Applications like Admin Panel where your Application is being managed by multiple users, you must manage your users according to their roles.
Typically in an ASP.NET MVC project, this can be achieved by using an authorize attribute, Something like this:
[Authorize(Roles = "Manager, SecondUser")]
public ActionResult HelloWorld()
Now Only “Manager” & “SecondUser” can access the HelloWorld Action.
But what’s the problem here?
Actually, the above code ties the “Manager” & “SecondUser” with your Controller & Action. So If you want to change User Role in Future, you have to update your code and publish a new version of your Application.
So In this Tutorial, we’ll see the better way to implement Role based Authorization & dynamically Create & Assign Roles to Users.
If you missed Admin Panel Tutorial, Find here => Creating Admin Panel in Asp.net Core MVC – Step by Step Tutorial
Difference Between Authentication & Authorization
Before Start Implementing Dynamic Role-based Authorization we must know the difference between Authorization & Authentication.
Authentication is actually the process of validating Users Identity by verifying Credentials e.g. Username & Password. Whereas Authorization is the process to validate If a user has rights to access a specific action.
Authorization always comes after the Authentication process.
Now Let’s see how you can Implement Dynamic Role-based Authorization using Asp.net.
Dynamic Role-based Authorization
Database Structure is Important
The database structure is really Important for this. First of all, we should have an Admins Table where we’ll add your users & a Roles Table for adding Roles for Users.
Menus Table is for defining all actions or menus & link_roles_menus is for assigning access to roles.
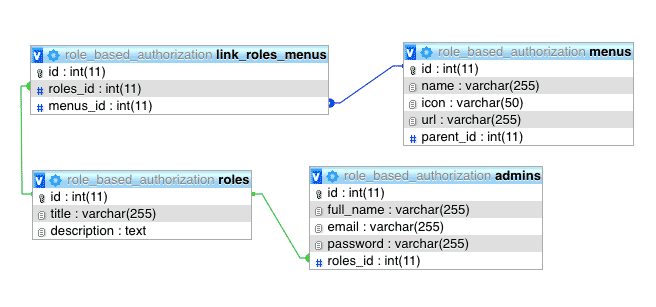
Here’s the Code Database Script. I have also shared the database script inside the GitHub repository.
-- phpMyAdmin SQL Dump
-- version 4.7.7
-- https://www.phpmyadmin.net/
--
-- Host: localhost
-- Generation Time: Nov 28, 2018 at 09:46 PM
-- Server version: 10.1.30-MariaDB
-- PHP Version: 7.2.1

SET SQL_MODE = "NO_AUTO_VALUE_ON_ZERO";
SET AUTOCOMMIT = 0;
START TRANSACTION;
SET time_zone = "+00:00";


/*!40101 SET @OLD_CHARACTER_SET_CLIENT=@@CHARACTER_SET_CLIENT */;
/*!40101 SET @OLD_CHARACTER_SET_RESULTS=@@CHARACTER_SET_RESULTS */;
/*!40101 SET @OLD_COLLATION_CONNECTION=@@COLLATION_CONNECTION */;
/*!40101 SET NAMES utf8mb4 */;

--
-- Database: `role_based_authorization`
--

-- --------------------------------------------------------

--
-- Table structure for table `admins`
--

CREATE TABLE `admins` (
  `id` int(11) NOT NULL,
  `full_name` varchar(255) DEFAULT NULL,
  `email` varchar(255) DEFAULT NULL,
  `password` varchar(255) DEFAULT NULL,
  `roles_id` int(11) DEFAULT NULL
) ENGINE=InnoDB DEFAULT CHARSET=latin1;

--
-- Dumping data for table `admins`
--

INSERT INTO `admins` (`id`, `full_name`, `email`, `password`, `roles_id`) VALUES
(1, 'Shehryar Khan', '[email protected]', '12345', 1),
(2, 'Ahsan Saeed', '[email protected]', '12345', 2),
(3, 'Shayan tahir', '[email protected]', '12345', 6);

-- --------------------------------------------------------

--
-- Table structure for table `link_roles_menus`
--

CREATE TABLE `link_roles_menus` (
  `id` int(11) NOT NULL,
  `roles_id` int(11) NOT NULL,
  `menus_id` int(11) NOT NULL
) ENGINE=InnoDB DEFAULT CHARSET=latin1;

--
-- Dumping data for table `link_roles_menus`
--

INSERT INTO `link_roles_menus` (`id`, `roles_id`, `menus_id`) VALUES
(47, 2, 1),
(48, 2, 2),
(49, 2, 4),
(50, 2, 5),
(51, 2, 6),
(52, 2, 7),
(65, 1, 1),
(66, 1, 2),
(67, 1, 3),
(68, 1, 4),
(69, 1, 5),
(70, 1, 6),
(71, 1, 7),
(76, 6, 1),
(77, 6, 2),
(78, 6, 4);

-- --------------------------------------------------------

--
-- Table structure for table `menus`
--

CREATE TABLE `menus` (
  `id` int(11) NOT NULL,
  `name` varchar(255) NOT NULL,
  `icon` varchar(50) NOT NULL,
  `url` varchar(255) DEFAULT NULL,
  `parent_id` int(11) NOT NULL
) ENGINE=InnoDB DEFAULT CHARSET=latin1;

--
-- Dumping data for table `menus`
--

INSERT INTO `menus` (`id`, `name`, `icon`, `url`, `parent_id`) VALUES
(1, 'Dashboard', 'fa fa-dashboard', '/', 0),
(2, 'Admins', 'fa fa-users', '#', 0),
(3, 'Create Admin', 'fa fa-plus', '/Admins/Create', 2),
(4, 'Manage Admins', 'fa fa-users', '/Admins/Index', 2),
(5, 'Roles', 'fa fa-lock', '#', 0),
(6, 'Create Role', 'fa fa-lock', '/Roles/Create', 5),
(7, 'Manage Roles', 'fa fa-lock', '/Roles/Index', 5);

-- --------------------------------------------------------

--
-- Table structure for table `roles`
--

CREATE TABLE `roles` (
  `id` int(11) NOT NULL,
  `title` varchar(255) NOT NULL,
  `description` text NOT NULL
) ENGINE=InnoDB DEFAULT CHARSET=latin1;

--
-- Dumping data for table `roles`
--

INSERT INTO `roles` (`id`, `title`, `description`) VALUES
(1, 'Manager', 'Super Admin with all rights...'),
(2, 'Supervisor', 'Can View Dashboard, Admins & Roles'),
(6, 'Developer', 'Can View Dashboard &  Admins List');

--
-- Indexes for dumped tables
--

--
-- Indexes for table `admins`
--
ALTER TABLE `admins`
  ADD PRIMARY KEY (`id`),
  ADD KEY `admins_ibfk_1` (`roles_id`);

--
-- Indexes for table `link_roles_menus`
--
ALTER TABLE `link_roles_menus`
  ADD PRIMARY KEY (`id`),
  ADD KEY `menus_id` (`menus_id`),
  ADD KEY `roles_id` (`roles_id`);

--
-- Indexes for table `menus`
--
ALTER TABLE `menus`
  ADD PRIMARY KEY (`id`);

--
-- Indexes for table `roles`
--
ALTER TABLE `roles`
  ADD PRIMARY KEY (`id`);

--
-- AUTO_INCREMENT for dumped tables
--

--
-- AUTO_INCREMENT for table `admins`
--
ALTER TABLE `admins`
  MODIFY `id` int(11) NOT NULL AUTO_INCREMENT, AUTO_INCREMENT=6;

--
-- AUTO_INCREMENT for table `link_roles_menus`
--
ALTER TABLE `link_roles_menus`
  MODIFY `id` int(11) NOT NULL AUTO_INCREMENT, AUTO_INCREMENT=79;

--
-- AUTO_INCREMENT for table `menus`
--
ALTER TABLE `menus`
  MODIFY `id` int(11) NOT NULL AUTO_INCREMENT, AUTO_INCREMENT=8;

--
-- AUTO_INCREMENT for table `roles`
--
ALTER TABLE `roles`
  MODIFY `id` int(11) NOT NULL AUTO_INCREMENT, AUTO_INCREMENT=7;

--
-- Constraints for dumped tables
--

--
-- Constraints for table `admins`
--
ALTER TABLE `admins`
  ADD CONSTRAINT `admins_ibfk_1` FOREIGN KEY (`roles_id`) REFERENCES `roles` (`id`);

--
-- Constraints for table `link_roles_menus`
--
ALTER TABLE `link_roles_menus`
  ADD CONSTRAINT `link_roles_menus_ibfk_1` FOREIGN KEY (`menus_id`) REFERENCES `menus` (`id`),
  ADD CONSTRAINT `link_roles_menus_ibfk_2` FOREIGN KEY (`roles_id`) REFERENCES `roles` (`id`);
COMMIT;

/*!40101 SET CHARACTER_SET_CLIENT=@OLD_CHARACTER_SET_CLIENT */;
/*!40101 SET CHARACTER_SET_RESULTS=@OLD_CHARACTER_SET_RESULTS */;
/*!40101 SET COLLATION_CONNECTION=@OLD_COLLATION_CONNECTION */;
How to Implement
As I have already said, the most important thing here is your Database Tables Linking. Above database is perfect for the easy to implement role-based authorization system.
After Creating a database, simply Add pages for “admins”, “roles”, “menus” Tables with CRUD Operations.
Here’s the Simple CRUD Operations Tutorial with Admin Template => CRUD Operations in Asp.net Core MVC
How to Create Menu from Database
As you can see in “menus” Table that It has a column with the name “parent_id” so It means that menus will be in a Tree format with the Parent-Child relations in the same Table. So I’ll recommend you to Follow This Tutorial to load Data from Database to TreeView for Assigning Menus Access to a Role.
Here’s the Code for Creating Menu from Database.
public class AccountController : Controller
{
    MyDbContext db = new MyDbContext();

    public IActionResult Login()
    {
        return View();
    }

    public ActionResult Validate(Admins admin)
    {
        var _admin = db.Admins.Where(s => s.Email == admin.Email).FirstOrDefault();
        if (_admin != null)
        {
            if (_admin.Password == admin.Password)
            {
                HttpContext.Session.SetString("email", _admin.Email);
                HttpContext.Session.SetInt32("id", _admin.Id);
                HttpContext.Session.SetInt32("role_id", (int)_admin.RolesId);
                HttpContext.Session.SetString("name", _admin.FullName);

                int roleId = (int)HttpContext.Session.GetInt32("role_id");
                List<Menus> menus = db.LinkRolesMenus.Where(s => s.RolesId == roleId).Select(s => s.Menus).ToList();

                DataSet ds = new DataSet();
                ds = ToDataSet(menus);
                DataTable table = ds.Tables[0];
                DataRow[] parentMenus = table.Select("ParentId = 0");

                var sb = new StringBuilder();
                string menuString = GenerateUL(parentMenus, table, sb);
                HttpContext.Session.SetString("menuString", menuString);
                HttpContext.Session.SetString("menus", JsonConvert.SerializeObject(menus));

                return Json(new { status = true, message = "Login Successfull!" });
            }
            else
            {
                return Json(new { status = true, message = "Invalid Password!" });
            }
        }
        else
        {
            return Json(new { status = false, message = "Invalid Email!" });
        }
    }

    private string GenerateUL(DataRow[] menu, DataTable table, StringBuilder sb)
    {
        if (menu.Length > 0)
        {
            foreach (DataRow dr in menu)
            {
                string url = dr["Url"].ToString();
                string menuText = dr["Name"].ToString();
                string icon = dr["Icon"].ToString();

                if (url != "#")
                {
                    string line = String.Format(@"<li><a href="proxy.php?url="{0}""><i class=""{2}""></i> <span>{1}</span></a></li>", url, menuText, icon);
                    sb.Append(line);
                }

                string pid = dr["Id"].ToString();
                string parentId = dr["ParentId"].ToString();

                DataRow[] subMenu = table.Select(String.Format("ParentId = '{0}'", pid));
                if (subMenu.Length > 0 && !pid.Equals(parentId))
                {
                    string line = String.Format(@"<li class=""treeview""><a href="proxy.php?url="#""><i class=""{0}""></i> <span>{1}</span><span class=""pull-right-container""><i class=""fa fa-angle-left pull-right""></i></span></a><ul class=""treeview-menu"">", icon, menuText);
                    var subMenuBuilder = new StringBuilder();
                    sb.AppendLine(line);
                    sb.Append(GenerateUL(subMenu, table, subMenuBuilder));
                    sb.Append("</ul></li>");
                }
            }
        }
        return sb.ToString();
    }

    public DataSet ToDataSet<T>(List<T> items)
    {
        DataTable dataTable = new DataTable(typeof(T).Name);
        //Get all the properties
        PropertyInfo[] Props = typeof(T).GetProperties(BindingFlags.Public | BindingFlags.Instance);
        foreach (PropertyInfo prop in Props)
        {
            //Setting column names as Property names
            dataTable.Columns.Add(prop.Name);
        }
        foreach (T item in items)
        {
            var values = new object[Props.Length];
            for (int i = 0; i < Props.Length; i++)
            {
                values[i] = Props[i].GetValue(item, null);
            }
            dataTable.Rows.Add(values);
        }
        DataSet ds = new DataSet();
        ds.Tables.Add(dataTable);
        return ds;
    }

    public ActionResult Logout()
    {
        HttpContext.Session.Clear();
        return RedirectToAction("Login", "Account");
    }
}
Validate Method is called when we click on the Login button on the Login Page. It Generates the Menu HTML based string keep in the Session.
How It will work
On Successful Login, First of all, get the Role ID of the Admin, from Role ID get all menus list from Database which is allowed to the User & display in your Application Menu. Also, store in your Sessions memory.
Use ActionFilterAttribute to check before every Action that either this Action is Valid for the Logged in User or Not.
Here’s the Code for ActionFilterAttribute
public class AuthorizedAction: ActionFilterAttribute
{
    public override void OnResultExecuting(ResultExecutingContext filterContext)
    {

    }

    public override void OnActionExecuting(ActionExecutingContext filterContext)
    {
        base.OnActionExecuting(filterContext);

        if (filterContext.HttpContext.Session.GetString("email") == null)
        {
            filterContext.Result = new RedirectToRouteResult(
                new RouteValueDictionary { { "controller", "Account" }, { "action", "Login" } });
            return;
        }

        var menus = JsonConvert.DeserializeObject<List<Menus>>(filterContext.HttpContext.Session.GetString("menus"));
        var controllerName = filterContext.RouteData.Values["controller"];
        var actionName = filterContext.RouteData.Values["action"];
        string url = "/" + controllerName + "/" + actionName;

        if (!menus.Where(s => s.Url == url).Any())

        {
            filterContext.Result = new RedirectToRouteResult(
                new RouteValueDictionary { { "controller", "Account" }, { "action", "Login" } });
            return;
        }
    }
}
I would recommend using routing to not reload your whole page on every option-click.
Here’s the Angular UI-Router Tutorial with Asp.net Core.
I’ll recommend to Download Complete Code from GitHub & run it. In my opinion, If you are able to understand the Database, you can easily Implement the solution in your own way.
If you want any support from me please comment below. I’m always available to help you.
FAQ.
Q: How to Authorize Links other than Menu?
Ans: Add another column in the “Menus” Table as “is_menu” & when getting menus list on Successful login, filter the records only have “is_menu” = 1. Rest of the work will be as explained above.
Now you can Add all links(other than menu items), you want to authorize in “Menus” Table.
You might be interested in:
The post Dynamic Role Based Authorization Asp.net Core | Assign Role from DB appeared first on Coding Infinite.
]]>The post User’s Activity Logging in Asp.net Core MVC Application | C# appeared first on Coding Infinite.
]]>
Why Activity Logging
Before start Implementation, you must have a clear idea for what kind of applications Activity Logging is necessary.
Let say you have an Admin Panel for managing your App or Website backend & you have more than one Administrator to manage your Admin Panel. If an Admin Create, Delete or Update records then you must be aware of his the activities in your Application.
Here’s the Admin Panel Tutorial you might be interested => Creating Admin Panel in Asp.net Core MVC – Step by Step Tutorial
Example Activities to Log
- Login, Logout
- Create, Delete or Update a Record
- Create or remove a User
- Update Profile Info
- Change Password
- etc
Now, I’ll explain the several ways to Log the Users Activities.
Nuget Libraries with Action filters
There are many Libraries available to Log Users Activities as well as Error. Some Libraries also facilitates us to generate Log files automatically. Here are some of the most commonly used libraries Log4Net, Elmah. Usually, these libraries used with Action Filters to Log each action of User. Sometimes the purpose of this type of Logging is to judge users experience. For Logging Users Activity I always prefer custom Logging where Its necessary to Log.
Custom Implementation
When the first time I looked at some of the most common logging libraries, and they seemed like more work to set up than to write on my own. So I decided to write my own code to log the Users Activities in my Application.
What to Save as Log
- User Email/Username/Id
- Full Name
- Ip Address of Client System
- Current Time
- JavaScript Navigator userAgent Property
- Log Type(e.g Login, Logout, Edit Profile Info, Change Password)
* Never save User Password in Logs
Implementation
At the time of successful login store User Id, Email, Full name, IP Address & the JavaScript Navigator userAgent Property using Session or any other temporary Data store Technique.
How To Get JavaScript Navigator userAgent Property
This is a very simple way to get the Client Information using JavaScript in a Web Applications.
With a single Statement, like this navigator.userAgent
We’ll get something like this
User-agent header sent: Mozilla/5.0 (Macintosh; Intel Mac OS X 10_14_0) AppleWebKit/537.36 (KHTML, like Gecko) Chrome/70.0.3538.102 Safari/537.36
How to Get Client IP Address using C#
Here’s the Code to Get Client’s IP Address
public static string GetLocalIPAddress()
{
    var host = Dns.GetHostEntry(Dns.GetHostName());
    foreach (var ip in host.AddressList)
    {
        if (ip.AddressFamily == AddressFamily.InterNetwork)
        {
            return ip.ToString();
        }
    }
    throw new Exception("No network adapters with an IPv4 address in the system!");
}
You may also Get & store the Mac Address of the user.
& Don’t forget to store Current Time with each Log Record.
Conclusion
Applications like Admin Panel must log each Activity of the user because we usually have more than one admin for our application. I’ll recommend saving these activities in Database but for Error Logging I’ll recommend Error Files because sometimes If your application is not properly handling exceptions It can generate logs in a huge number that may affect your Database performance. For the Critical Actions, e.g. an admin is deleting another user, you must send an Email to the super admin Immediately.
Thank you for reading, share with the community If you find this helpful or comment below If you have any Question.
Creating Interactive Dashboards
The post User’s Activity Logging in Asp.net Core MVC Application | C# appeared first on Coding Infinite.
]]>The post CRUD Operations in Asp.net Core MVC appeared first on Coding Infinite.
]]>For creating beautiful & responsive UI, I’m using AdminLTE Template. So, In case if you missed Setting up AdminLTE in Asp.net Core, then you can find here => Setting up Admin Template in Asp.net Core MVC
Assuming that you have followed the above tutorial & setup your project, let’s start our Asp.net Core CRUD Operations Tutorial.
This is the 6th Part of Admin Panel Tutorial Series.
- Choosing Template for Admin Panel
- Creating a Database
- Setup AdminLTE Template in Asp.net Core MVC project
- Creating Models
- Login Page for Admin Panel
- CRUD(Create, Read, Update, Delete) Operations
- Creating Interactive Dashboards
- Audit Trail / Activity Logging
- Role-Based Authorization
- Error Logging
If you want to create Models from MySQL Database then you can follow this Article => Entity Framework Core Database First – Asp.Net Core Scaffold MySql DB
I’m performing my CRUD Operation on this Database Table. You can use your own Table.
First of all, create a Controller as “DoctorsController.cs” & Add this Code.
using System.Linq;
using AdminPanelTutorial.Models;
using Microsoft.AspNetCore;
using Microsoft.AspNetCore.Hosting;
using Microsoft.AspNetCore.Mvc;

namespace AdminPanelTutorial
{
    public class DoctorsController : Controller
    {
        MyDbContext db = new MyDbContext();
        public ActionResult Index()
        {
            return View(db.Doctors.ToList());
        }

        public ActionResult Create()
        {
            return View();
        }

        [HttpPost]
        public ActionResult CreateDoctor(Doctors doctor){
            db.Doctors.Add(doctor);
            db.SaveChanges();
            return RedirectToAction("Index", "Doctors");
        }

        [HttpPost]
        public bool Delete(int id){
            try
            {
                Doctors doctor = db.Doctors.Where(s => s.Id == id).First();
                db.Doctors.Remove(doctor);
                db.SaveChanges();
                return true;
            }
            catch (System.Exception)
            {
                return false;
            }

        }

        public ActionResult Update(int id){
            return View(db.Doctors.Where(s => s.Id == id).First());
        }

        [HttpPost]
        public ActionResult UpdateDoctor(Doctors doctor){
            Doctors d = db.Doctors.Where(s => s.Id == doctor.Id).First();
            d.Name = doctor.Name;
            d.Phone = doctor.Phone;
            d.Specialist = doctor.Specialist;
            db.SaveChanges();
            return RedirectToAction("Index", "Doctors");
        }
    }
}
* Update your Solution name
Code Explanation:
We have an Index Method to list all records from Doctors Table to our DataTable.
We have Create Method to open Create Doctor Form & when we Submit this Form our CreateDoctor will be used to Add Doctor into the Database.
You must Encrypt your Password before storing it into Database. You may follow this Tutorial for Password Hashing Code => C# Hashing algorithm class
We have only one Method to Delete Doctor because we’ll use Ajax to delete our Doctor.
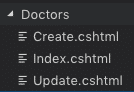
Now Create a new Folder as “Doctors” inside your “Views” Folder & Create these 3 Files inside “Doctors” Folders => “Index.cshtml”, “Create.cshtml”, “Update.cshtml”
Add this Code into your “Index.cshtml”
@model IEnumerable<AdminPanelTutorial.Models.Doctors>

<section class="content-header">
    <h1>
    Doctors
    </h1>
    <ol class="breadcrumb">
    <li><a href="proxy.php?url=#"><i class="fa fa-dashboard"></i> Home</a></li>
    <li class="active">Doctors</li>
    </ol>
</section>
<!-- Main content -->
<section class="content">
    <div class="row">
    <div class="col-xs-12">
        <div class="box">
        <div class="box-header">
            <h3 class="box-title">Manage Doctors</h3>
        </div>
        <!-- /.box-header -->
        <div class="box-body">
            <table id="example1" class="table table-bordered table-striped">
            <thead>
            <tr>
                <th>Id</th>
                <th>Name</th>
                <th>Email</th>
                <th>Phone</th>
                <th>Created</th>
                <th>Specialist</th>
                <th>Action</th>
            </tr>
            </thead>
            <tbody>
                @foreach (var item in Model)
                {
                    <tr>
                    <td>@Html.DisplayFor(modelItem => item.Id)</td>
                    <td>@Html.DisplayFor(modelItem => item.Name)</td>
                    <td>@Html.DisplayFor(modelItem => item.Email)</td>
                    <td>@Html.DisplayFor(modelItem => item.Phone)</td>
                    <td>@Html.DisplayFor(modelItem => item.Created)</td>
                    <td>@Html.DisplayFor(modelItem => item.Specialist)</td>
                    <td><a href="proxy.php?url=Doctors/Update/@item.Id">Update</a> | <a href="proxy.php?url=" onclick="Delete('@item.Id')">Delete</a></td>
                    </tr>
                }
            </table>
        </div>
        <!-- /.box-body -->
        </div>
        <!-- /.box -->
    </div>
    <!-- /.col -->
    </div>
    <!-- /.row -->
</section>

<!-- DataTables -->
<script src="proxy.php?url=~/bower_components/datatables.net/js/jquery.dataTables.min.js"></script>
<script src="proxy.php?url=~/bower_components/datatables.net-bs/js/dataTables.bootstrap.min.js"></script>

<!-- page script -->
<script>
    $(function () {
        $('#example1').DataTable();
    });
    function Delete(id){
        var txt;
        var r = confirm("Are you sure you want to Delete?");
        if (r == true) {

            $.ajax(
            {
                type: "POST",
                url: '@Url.Action("Delete", "Doctors")',
                data: {
                    id: id
                },
                error: function (result) {
                    alert("error");
                },
                success: function (result) {
                    if (result == true) {
                        var baseUrl="/Doctors";
                        window.location.reload();
                    }
                    else {
                        alert("There is a problem, Try Later!");
                    }
                }
            });
        }
    }
</script>
* Don’t forget to replace your Solution name with “AdminPanelTutorial” at the very First line of this Code
Add “DataTables” css file into your “_Layout.cshtml” (Created in the First Part of this Tutorial) after BootStrap css added at the start of the File
<!-- DataTables -->
<link rel="stylesheet" href="proxy.php?url=~/bower_components/datatables.net-bs/css/dataTables.bootstrap.min.css">
your “_Layout.cshtml” will look like this

You can see that I have already Added Ajax at the End of the Code above to Delete the Doctor Record from the Database.
Now run your Project & go to http://localhost:port/Doctors (replace your port)
you’ll see All Doctors from your Database Table.
You can Also Test Your Delete Operation, It should work fine.
Let’s move Further & Add Code below into your “Create.cshtml”
<!-- Content Header (Page header) -->
<section class="content-header">
    <h1>
    Doctors
    </h1>
</section>
<!-- Main content -->
<section class="content container-fluid">
    <!-- Horizontal Form -->
    <div class="box box-info">
    <div class="box-header with-border">
        <h3 class="box-title">Add Doctor</h3>
    </div>
    <!-- /.box-header -->
    <!-- form start -->
    <form class="form-horizontal" method="post" action="proxy.php?url=CreateDoctor">
        <div class="box-body">
        <div class="form-group">
            <label for="inputEmail3" class="col-sm-2 control-label">Name</label>
            <div class="col-sm-10">
            <input type="text" class="form-control" name="Name" placeholder="Name">
            </div>
        </div>
        <div class="form-group">
            <label for="inputEmail3" class="col-sm-2 control-label">Email</label>
            <div class="col-sm-10">
            <input type="email" class="form-control" name="Email" placeholder="Email">
            </div>
        </div>
        <div class="form-group">
            <label for="inputPassword3" class="col-sm-2 control-label">Password</label>
            <div class="col-sm-10">
            <input type="password" class="form-control" name="Password" placeholder="Password">
            </div>
        </div>
        <div class="form-group">
            <label for="inputEmail3" class="col-sm-2 control-label">Phone</label>
            <div class="col-sm-10">
            <input type="text" class="form-control" name="Phone" placeholder="Phone">
            </div>
        </div>
        <div class="form-group">
            <label for="inputEmail3" class="col-sm-2 control-label">Specialist</label>
            <div class="col-sm-10">
            <input type="text" class="form-control" name="Specialist" placeholder="Specialist">
            </div>
        </div>
        </div>
        <!-- /.box-body -->
        <div class="box-footer">
        <button type="submit" class="btn btn-default">Cancel</button>
        <button type="submit" class="btn btn-info pull-right">Create</button>
        </div>
        <!-- /.box-footer -->
    </form>
    </div>
    <!-- /.box -->
</section>
Run your project & go to https://localhost:port/Doctors/Create
You’ll see this Page
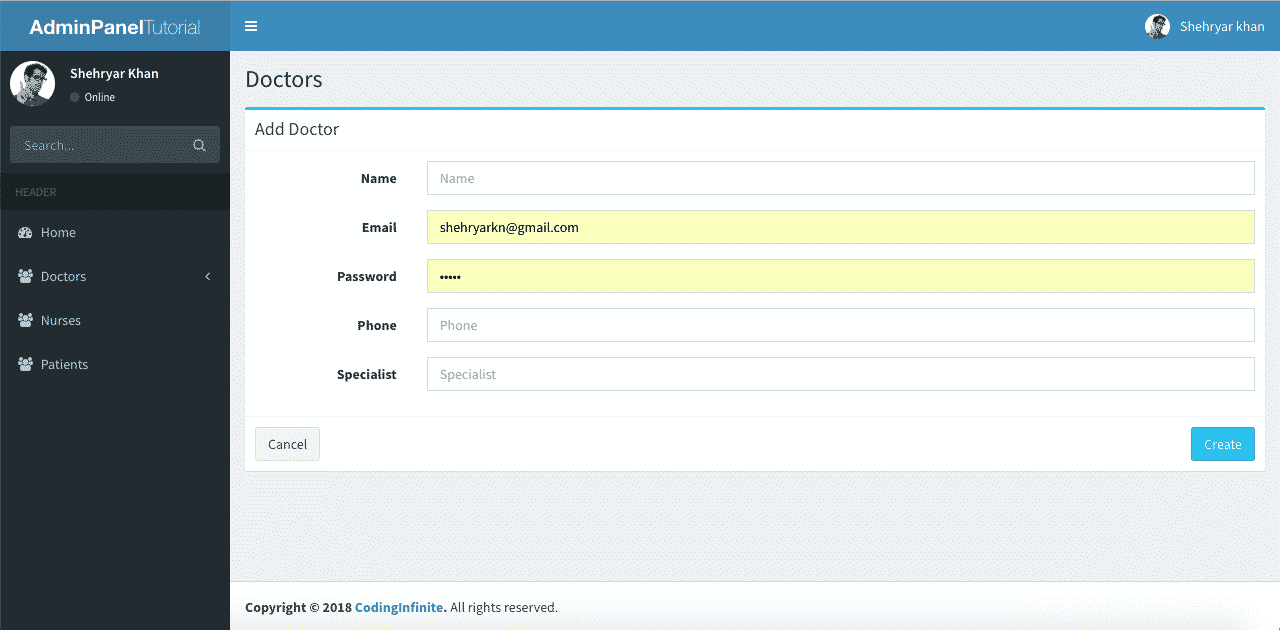
Try to create a new Doctor, It will Add new Doctor & redirect you to Index Page.
Now the last thing is our Update Operation.
Open your “Update.cshtml” file Add this Code
@model AdminPanelTutorial.Models.Doctors

<section class="content-header">
    <h1>
    Doctors
    </h1>
</section>
<!-- Main content -->
<section class="content container-fluid">
    <!-- Horizontal Form -->
    <div class="box box-info">
    <div class="box-header with-border">
        <h3 class="box-title">Update Doctor</h3>
    </div>
    <!-- /.box-header -->
    <!-- form start -->
    <form class="form-horizontal" method="post" action="proxy.php?url=/Doctors/UpdateDoctor">
        <div class="box-body">
        <div class="form-group">
            <label for="inputEmail3" class="col-sm-2 control-label">Email</label>
            <div class="col-sm-10">
            <input type="Email" class="form-control" name="Email" value="@Model.Email">
            </div>
        </div>
        <div class="form-group">
            <label for="inputEmail3" class="col-sm-2 control-label">Name</label>
            <div class="col-sm-10">
            <input type="text" class="form-control" name="Name" placeholder="Name" value="@Model.Name">
            </div>
        </div>
        <div class="form-group">
            <label for="inputEmail3" class="col-sm-2 control-label">Phone</label>
            <div class="col-sm-10">
            <input type="text" class="form-control" name="Phone" placeholder="Phone" value="@Model.Phone">
            </div>
        </div>
        <div class="form-group">
            <label for="inputEmail3" class="col-sm-2 control-label">Specialist</label>
            <div class="col-sm-10">
            <input type="text" class="form-control" name="Specialist" placeholder="Specialist" value="@Model.Specialist">
            </div>
        </div>
        <input type="hidden" name="Id" value="@Model.Id"/>
        </div>
        <!-- /.box-body -->
        <div class="box-footer">
        <button type="submit" class="btn btn-default">Cancel</button>
        <button type="submit" class="btn btn-info pull-right">Update</button>
        </div>
        <!-- /.box-footer -->
    </form>
    </div>
    <!-- /.box -->
</section>
* Don’t forget to replace your Solution name with “AdminPanelTutorial” at the very First line of this Code
Now run your Project & Update a Doctor Record.
I hope that everything is working fine & your CRUD operations are working perfectly. You can use your UI Template & Database Table for Performing your CRUD Operations. I used This AdminLTE Template just to Beautify our UI you can use your own.
You can also download the complete project from GitHub.
Comment If you find any Difficulty, I’m here to help you. I’ll reply you with Solution as soon as possible.
Creating Login Page Asp.net Core
Creating Interactive Dashboards
The post CRUD Operations in Asp.net Core MVC appeared first on Coding Infinite.
]]>The post Login page in Asp.net Core MVC with Database appeared first on Coding Infinite.
]]>This is the 5th Part of Admin Panel Tutorial Series.
- Choosing Template for Admin Panel
- Creating a Database
- Setup AdminLTE Template in Asp.net Core MVC project
- Creating Models
- Login Page for Admin Panel
- CRUD(Create, Read, Update, Delete) Operations
- Creating Interactive Dashboards
- Audit Trail / Activity Logging
- Role-Based Authorization
- Error Logging
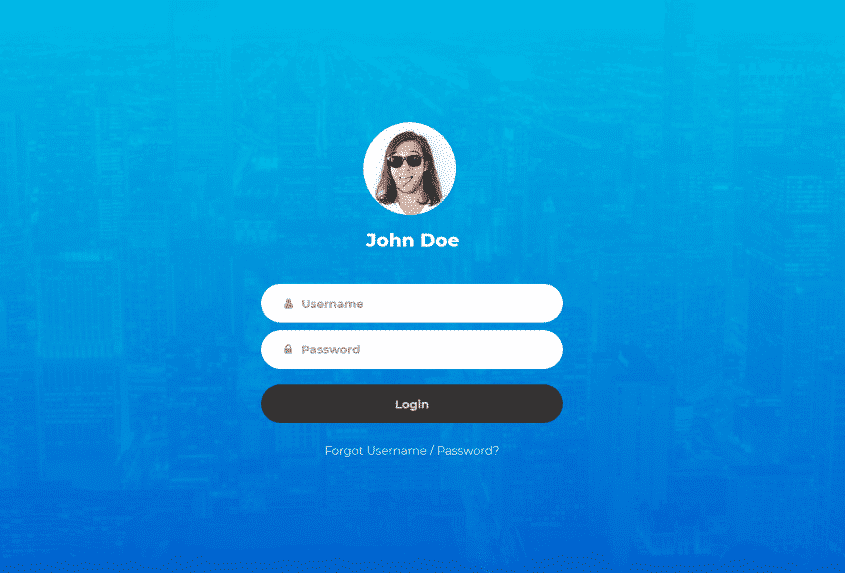
There are many Login pages designs are available, you can use of your choice. For this tutorial, I’m going to use This Beautiful Login page by colorlib.
So, If you have not even created your Asp.net Core project then your first step is to create an Empty project using this command
dotnet new Web
& don’t forget to create these Four folders “Controllers”, “Models”, “Views” & “wwwroot”. Add this code to your “Startup.cs” to ready your project for using MVC
using System;
using System.Collections.Generic;
using System.Linq;
using System.Threading.Tasks;
using Microsoft.AspNetCore.Builder;
using Microsoft.AspNetCore.Hosting;
using Microsoft.AspNetCore.Http;
using Microsoft.Extensions.DependencyInjection;

namespace AdminPanelTutorial
{
    public class Startup
    {
        public void ConfigureServices(IServiceCollection services)
        {
            services.AddMvc();
        }

        // This method gets called by the runtime. Use this method to configure the HTTP request pipeline.
        public void Configure(IApplicationBuilder app, IHostingEnvironment env)
        {
            if (env.IsDevelopment())
            {
                app.UseDeveloperExceptionPage();
            }

            app.UseStaticFiles();

            app.UseMvc(routes =>
            {
                routes.MapRoute(
                    name: "default",
                    template: "{controller=Home}/{action=Index}/{id?}");
            });
        }
    }
}
Downloading Login Page Template
Now, you need to download Login page Code from Colorlib. So download from here => Login Form 12 by Colorlib
unzip the folder and you’ll find these folders & file

Copy all folders from here and paste in the “wwwroot” folder of your Asp.net Core MVC project.
Now, create a Controller as “AccountController.cs” inside your Controllers Folder & Add this code.
using Microsoft.AspNetCore;
using Microsoft.AspNetCore.Hosting;
using Microsoft.AspNetCore.Mvc;

namespace AdminPanelTutorial
{
    public class AccountController : Controller
    {
        public IActionResult Login()
        {
            return View();
        }
    }
}
Create a new Folder into Views as “Account” & inside this Folder create a file as “Login.cshtml” and put this code
@{
   Layout=null;
}

<!DOCTYPE html>
<html lang="en">
<head>
  <title>Login V12</title>
  <meta charset="UTF-8">
  <meta name="viewport" content="width=device-width, initial-scale=1">
<!--===============================================================================================-->
  <link rel="icon" type="image/png" href="proxy.php?url=~/images/icons/favicon.ico"/>
<!--===============================================================================================-->
  <link rel="stylesheet" type="text/css" href="proxy.php?url=~/vendor/bootstrap/css/bootstrap.min.css">
<!--===============================================================================================-->
  <link rel="stylesheet" type="text/css" href="proxy.php?url=~/fonts/font-awesome-4.7.0/css/font-awesome.min.css">
<!--===============================================================================================-->
  <link rel="stylesheet" type="text/css" href="proxy.php?url=~/fonts/Linearicons-Free-v1.0.0/icon-font.min.css">
<!--===============================================================================================-->
  <link rel="stylesheet" type="text/css" href="proxy.php?url=~/vendor/animate/animate.css">
<!--===============================================================================================-->
  <link rel="stylesheet" type="text/css" href="proxy.php?url=~/vendor/css-hamburgers/hamburgers.min.css">
<!--===============================================================================================-->
  <link rel="stylesheet" type="text/css" href="proxy.php?url=~/vendor/select2/select2.min.css">
<!--===============================================================================================-->
  <link rel="stylesheet" type="text/css" href="proxy.php?url=~/css/util.css">
  <link rel="stylesheet" type="text/css" href="proxy.php?url=~/css/main.css">
<!--===============================================================================================-->
</head>
<body>

  <div class="limiter">
    <div class="container-login100" style="background-image: url('../images/img-01.jpg');">
      <div class="wrap-login100 p-t-50 p-b-0">
        <form class="login100-form validate-form">
          <div class="login100-form-avatar">
            <img src="proxy.php?url=~/images/avatar-01.jpg" alt="AVATAR">
          </div>

          <span class="login100-form-title p-t-20 p-b-45">
            John Doe
          </span>

          <div class="wrap-input100 validate-input m-b-10" data-validate = "Email is required">
            <input class="input100" type="text" name="email" id="email" placeholder="Email">
            <span class="focus-input100"></span>
            <span class="symbol-input100">
              <i class="fa fa-user"></i>
            </span>
          </div>

          <div class="wrap-input100 validate-input m-b-10" data-validate = "Password is required">
            <input class="input100" type="password" name="password" id="password" placeholder="Password">
            <span class="focus-input100"></span>
            <span class="symbol-input100">
              <i class="fa fa-lock"></i>
            </span>
          </div>

          <div class="container-login100-form-btn p-t-10">
            <input type="button" value="Login" class="login100-form-btn" onclick="Validate()">
          </div>

          <div class="text-center w-full p-t-25 p-b-80">
            <a href="proxy.php?url=#" class="txt1">
              Forgot Username / Password?
            </a>
          </div>

        </form>
      </div>
    </div>
  </div>

<!--===============================================================================================-->
  <script src="proxy.php?url=~/vendor/jquery/jquery-3.2.1.min.js"></script>
<!--===============================================================================================-->
  <script src="proxy.php?url=~/vendor/bootstrap/js/popper.js"></script>
  <script src="proxy.php?url=~/vendor/bootstrap/js/bootstrap.min.js"></script>
<!--===============================================================================================-->
  <script src="proxy.php?url=~/vendor/select2/select2.min.js"></script>
<!--===============================================================================================-->
  <script src="proxy.php?url=~/js/main.js"></script>

</body>
</html>
Run your project & go to http://localhost:8080/Account/Login (your port can be different)
Creating Models
Now you need to create models for your Database table.
Here’s my table for users to login
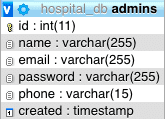
I’m using Database First approach to create Models from my existing Database, so If you have also created your Database & want to create models then I’ll recommend you this Article to Scaffold your Database or follow this:
Scaffolding Database
My default .Net Core version is 2.2. So, I have created my project in 2.2.
Add Pomelo Nuget Package, your project compatible version.
dotnet add package Pomelo.EntityFrameworkCore.MySql
For EntityFramework Core Commands, add the line below to your project configuration file DotNetCoreMySQL.csproj
<ItemGroup>
    <DotNetCliToolReference Include="Microsoft.EntityFrameworkCore.Tools.DotNet" Version="2.0.3" />
    <PackageReference Include="Microsoft.EntityFrameworkCore.Design" Version="2.2.6" />
</ItemGroup>
run this command
dotnet restore
Now run the scaffold command to create Models from Database
dotnet ef dbcontext scaffold "Server=localhost;User Id=root;Password=1234;Database=hospital_db" "Pomelo.EntityFrameworkCore.MySql" -c MyDbContext -o Models
Your Models will be created. I recommend you first to create Models Folder and scaffold your Database there.
Validate User
Now you need a method to validate user from Database.
Update your “AccountController.cs” with this Code:
using Microsoft.AspNetCore;
using Microsoft.AspNetCore.Hosting;
using Microsoft.AspNetCore.Mvc;
using AdminPanelTutorial.Models;

namespace AdminPanelTutorial
{
    public class AccountController : Controller
    {
        MyDbContext db = new MyDbContext();
        public IActionResult Login()
        {
            return View();
        }

        public ActionResult Validate(Admins admin)
        {
            var _admin = db.Admins.Where(s => s.Email == admin.Email);
            if(_admin.Any()){
                if(_admin.Where(s => s.Password == admin.Password).Any()){

                    return Json(new { status = true, message = "Login Successfull!"});
                }
                else
                {
                    return Json(new { status = false, message = "Invalid Password!"});
                }
            }
            else
            {
                return Json(new { status = false, message = "Invalid Email!"});
            }
        }
    }
}
We’ll use ajax to validate our user from the Login Page.
So the last thing is our ajax call. Put this Code at the End of your Login.cshtml, before </Body> Tag
<script>

  function Validate() {

    $.ajax(
    {
      type: "POST",
      url: '@Url.Action("Validate", "Account")',
      data: {
        email: $('#email').val(),
        password: $('#password').val()
      },
      error: function (result) {
        alert("There is a Problem, Try Again!");
      },
      success: function (result) {
        console.log(result);
        if (result.status == true) {
          window.location.href = '@Url.Action("Index", "Home")';
        }
        else {
          alert(result.message);
        }
      }

    });
  }

</script>
Now run your project & Login with the email & password you have in your Admins Table.
I have saved Password without any Hashing just for keeping it simple. But keep in mind that this is a really bad practice. You should never save the password in your Database without hashing.
If you want to Hash password then follow this article => C# Hashing algorithm class
Or If you find any problem in this Tutorial, please do comment below & stay connected for the next part of this Tutorial.
The post Login page in Asp.net Core MVC with Database appeared first on Coding Infinite.
]]>The post Setting up Admin Template in Asp.net Core MVC appeared first on Coding Infinite.
]]>This is the 3rd Part of Admin Panel Tutorial Series.
- Choosing Template for Admin Panel
- Creating a Database
- Setup AdminLTE Template in Asp.net Core MVC project
- Creating Models
- Login Page for Admin Panel
- CRUD(Create, Read, Update, Delete) Operations
- Creating Interactive Dashboards
- Audit Trail / Activity Logging
- Role-Based Authorization
- Error Logging
Before starting this tutorial, I’m considering that you have downloaded the AdminLTE Template or have followed my previous Tutorial
I’m using VS Code, you can use Editor or IDE of your choice. Here’s my article on best .Net Core IDE.
Create a new Folder as AdminPanelTutorial
Open the folder in your VS Code & Create an Empty .Net Core MVC Project.
I’m using dotnet cli for creating a new Project. you can use the IDE for your choice.
So, run this command
dotnet new Web
A new project will be according with the default version of your installed SDK. Mine is .Net Core 2.2
If you want to create a project using a specific .Net Core Version, you can follow this article:
After that add this code to your “Startup.cs” File to ready your project for using MVC.
using System;
using System.Collections.Generic;
using System.Linq;
using System.Threading.Tasks;
using Microsoft.AspNetCore.Builder;
using Microsoft.AspNetCore.Hosting;
using Microsoft.AspNetCore.Http;
using Microsoft.Extensions.DependencyInjection;

namespace AdminPanelTutorial
{
    public class Startup
    {
        public void ConfigureServices(IServiceCollection services)
        {
            services.AddMvc();
        }

        // This method gets called by the runtime. Use this method to configure the HTTP request pipeline.
        public void Configure(IApplicationBuilder app, IHostingEnvironment env)
        {
            if (env.IsDevelopment())
            {
                app.UseDeveloperExceptionPage();
            }

            app.UseStaticFiles();

            app.UseMvc(routes =>
            {
                routes.MapRoute(
                    name: "default",
                    template: "{controller=Home}/{action=Index}/{id?}");
            });
        }
    }
}
Now create Four folders “Controllers”, “Models”, “Views” & “wwwroot”.
After that, your project structure will look like this
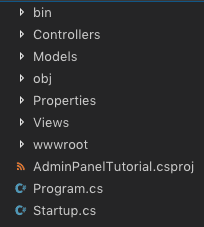
Now unzip the AdminLTE zip file, you’ll see these files & folders inside.

For keeping our project clean you need to copy & paste only these Folders “bower_components” & “dist” from here to the “wwwroot” folder of your project.
Now create a Controller as “HomeController.cs” inside your Controllers Folder & Add this code.
using Microsoft.AspNetCore;
using Microsoft.AspNetCore.Hosting;
using Microsoft.AspNetCore.Mvc;

namespace AdminPanelTutorial
{
    public class HomeController : Controller
    {
        public IActionResult Index()
        {
            return View();
        }
    }
}
Don’t forget to change the namespace according to your project name.
Creating a Layout Page
Creating a Layout page is always considered as a good coding practice. It will help to reuse the common Code of our Application, which will be required in every Page of our Application.
So, Create a new File as “_ViewStart.cshtml” Inside your “Views” Folder & Add this Code:
@{
    Layout = "~/Views/Shared/_Layout.cshtml";
}
Now Create a Folder “Shared” inside “Views” Folder & Inside “Shared” Folder Create two new Files as “_Layout.cshtml” & “_MainMenu.cshtml”
Put this Code Inside “Layout.cshtml”
<!DOCTYPE html>
<html>
<head>
  <meta charset="utf-8">
  <meta http-equiv="X-UA-Compatible" content="IE=edge">
  <title>Admin Panel</title>
  <!-- Tell the browser to be responsive to screen width -->
  <meta content="width=device-width, initial-scale=1, maximum-scale=1, user-scalable=no" name="viewport">
  <link rel="stylesheet" href="proxy.php?url=~/bower_components/bootstrap/dist/css/bootstrap.min.css">
  <!-- Font Awesome -->
  <link rel="stylesheet" href="proxy.php?url=~/bower_components/font-awesome/css/font-awesome.min.css">
  <!-- Ionicons -->
  <link rel="stylesheet" href="proxy.php?url=~/bower_components/Ionicons/css/ionicons.min.css">
  <!-- Theme style -->
  <link rel="stylesheet" href="proxy.php?url=~/dist/css/AdminLTE.min.css">
  <link rel="stylesheet" href="proxy.php?url=~/dist/css/skins/skin-blue.min.css">
<!-- jQuery 3 -->
<script src="proxy.php?url=~/bower_components/jquery/dist/jquery.min.js"></script>
  <!-- Google Font -->
  <link rel="stylesheet"
        href="proxy.php?url=https://fonts.googleapis.com/css?family=Source+Sans+Pro:300,400,600,700,300italic,400italic,600italic">
</head>
<body class="hold-transition skin-blue sidebar-mini">
<div class="wrapper">
  <!-- Main Header -->
  <header class="main-header">
    <!-- Logo -->
    <a href="proxy.php?url=index2.html" class="logo">
      <!-- mini logo for sidebar mini 50x50 pixels -->
      <span class="logo-mini"><b>AP</b>T</span>
      <!-- logo for regular state and mobile devices -->
      <span class="logo-lg"><b>AdminPanel</b>Tutorial</span>
    </a>
    <!-- Header Navbar -->
    <nav class="navbar navbar-static-top" role="navigation">
      <!-- Sidebar toggle button-->
      <a href="proxy.php?url=#" class="sidebar-toggle" data-toggle="push-menu" role="button">
        <span class="sr-only">Toggle navigation</span>
      </a>
      <!-- Navbar Right Menu -->
      <div class="navbar-custom-menu">
        <ul class="nav navbar-nav">
          <!-- User Account Menu -->
          <li class="dropdown user user-menu">
            <!-- Menu Toggle Button -->
            <a href="proxy.php?url=#" class="dropdown-toggle" data-toggle="dropdown">
              <!-- The user image in the navbar-->
              <img src="proxy.php?url=~/dist/img/user2-160x160.jpg" class="user-image" alt="User Image">
              <!-- hidden-xs hides the username on small devices so only the image appears. -->
              <span class="hidden-xs">Shehryar khan</span>
            </a>
            <ul class="dropdown-menu">
              <!-- The user image in the menu -->
              <li class="user-header">
                <img src="proxy.php?url=~/dist/img/user2-160x160.jpg" class="img-circle" alt="User Image">
                <p>
                  Shehryar khan - Coding Infinite
                  <small>Member since Nov. 2012</small>
                </p>
              </li>
              <!-- Menu Body -->
              <li class="user-body">
                <div class="row">
                  <div class="col-xs-4 text-center">
                    <a href="proxy.php?url=#">Account</a>
                  </div>
                </div>
                <!-- /.row -->
              </li>
              <!-- Menu Footer-->
              <li class="user-footer">
                <div class="pull-left">
                  <a href="proxy.php?url=#" class="btn btn-default btn-flat">Profile</a>
                </div>
                <div class="pull-right">
                  <a href="proxy.php?url=#" class="btn btn-default btn-flat">Sign out</a>
                </div>
              </li>
            </ul>
          </li>
        </ul>
      </div>
    </nav>
  </header>
  <!-- Left side column. contains the logo and sidebar -->
  <aside class="main-sidebar">
    <!-- sidebar: style can be found in sidebar.less -->
    <section class="sidebar">
      <!-- Sidebar user panel (optional) -->
      <div class="user-panel">
        <div class="pull-left image">
          <img src="proxy.php?url=~/dist/img/user2-160x160.jpg" class="img-circle" alt="User Image">
        </div>
        <div class="pull-left info">
          <p>Shehryar Khan</p>
          <!-- Status -->
          <a href="proxy.php?url=#"><i class="fa fa-circle text-success"></i> Online</a>
        </div>
      </div>
      <!-- search form (Optional) -->
      <form action="proxy.php?url=#" method="get" class="sidebar-form">
        <div class="input-group">
          <input type="text" name="q" class="form-control" placeholder="Search...">
          <span class="input-group-btn">
              <button type="submit" name="search" id="search-btn" class="btn btn-flat"><i class="fa fa-search"></i>
              </button>
            </span>
        </div>
      </form>
      <!-- /.search form -->
      <!-- Sidebar Menu -->
      @Html.Partial("_MainMenu")
      <!-- /.sidebar-menu -->
    </section>
    <!-- /.sidebar -->
  </aside>
  <!-- Content Wrapper. Contains page content -->
  <div class="content-wrapper">
    <!-- Content Header (Page header) -->
    @RenderBody()
    <!-- /.content -->
  </div>
  <!-- /.content-wrapper -->
  <!-- Main Footer -->
  <footer class="main-footer">
    <!-- Default to the left -->
    <strong>Copyright © 2018 <a href="proxy.php?url=https://codinginfinite.com">CodingInfinite</a>.</strong> All rights reserved.
  </footer>
</div>
<!-- ./wrapper -->
<!-- REQUIRED JS SCRIPTS -->
<!-- Bootstrap 3.3.7 -->
<script src="proxy.php?url=~/bower_components/bootstrap/dist/js/bootstrap.min.js"></script>
<!-- AdminLTE App -->
<script src="proxy.php?url=~/dist/js/adminlte.min.js"></script>
</body>
</html>
& Copy the code below inside your “_MainMenu.cshtml”
<ul class="sidebar-menu" data-widget="tree">
<li class="header">HEADER</li>
<!-- Optionally, you can add icons to the links -->
<li class="active"><a href="proxy.php?url=#"><i class="fa fa-link"></i> <span>Link</span></a></li>
<li><a href="proxy.php?url=#"><i class="fa fa-link"></i> <span>Another Link</span></a></li>
<li class="treeview">
    <a href="proxy.php?url=#"><i class="fa fa-link"></i> <span>Multilevel</span>
    <span class="pull-right-container">
        <i class="fa fa-angle-left pull-right"></i>
        </span>
    </a>
    <ul class="treeview-menu">
    <li><a href="proxy.php?url=#">Link in level 2</a></li>
    <li><a href="proxy.php?url=#">Link in level 2</a></li>
    </ul>
</li>
</ul>
Now create a new Folder to Views as “Home” & inside this Folder create a file as “Index.cshtml”
Now your “Views” directory structure will be looking something like this
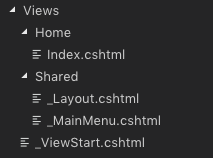
Now add this code to your “Index.cshtml” file
<section class="content-header">
    <h1>
    Home
    <small>Optional description</small>
    </h1>
</section>
<!-- Main content -->
<section class="content container-fluid">
    <!--------------------------
    | Your Page Content Here |
    -------------------------->
</section>
Run your project. You’ll see this page
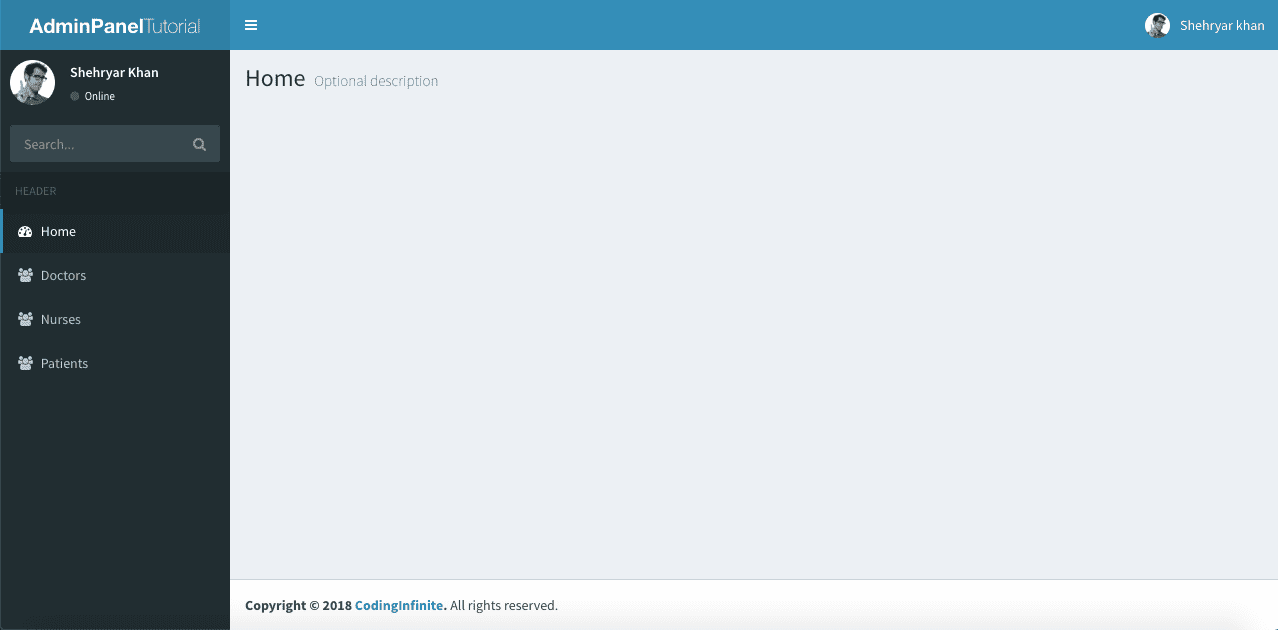
Now your Starter Page is ready. You can also download the Complete Source Code from Github.
If you find any problem, please share in the comment section below.
In the next part of this tutorial, we’ll create a login page for our Admin Panel. Although AdminLTE provides a sample login page but we’ll use the more beautiful design for our login page.
Admin Panel Tutorial in Asp.net Core
The post Setting up Admin Template in Asp.net Core MVC appeared first on Coding Infinite.
]]>