The post CRUD Operations Web App using PHP & MySQL | Part 2 appeared first on Coding Infinite.
]]>If you missed previous parts, then you can find here => Getting Started with Web Application using PHP & MySQL | Tutorials
I’m assuming that you have followed the previous part of this Tutorial & created API for CRUD Operations using PHP & MySQL.
In this part, we’ll use AdminLTE Template to create UI for our CRUD API we have created in the previous part of this article.
We have also set up our Template & created the database in the First part of this Tutorial.
After following the previous article, your project structure will look like this.
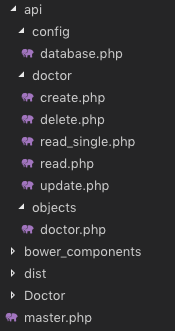
We know that we have created the master.php in the First part, which is our Layout page.
We also have “Doctor” Folder at the root directory of our Project. We’ll create all pages related to Doctor in this Folder.
Let’s start by creating a page to display all doctors data into a Table.
We have created “index.php” file inside “Doctor” Folder. Update this file with the Code below.
<?php
  $content = '<div class="row">
                <div class="col-xs-12">
                <div class="box">
                  <div class="box-header">
                    <h3 class="box-title">Dostors List</h3>
                  </div>
                  <!-- /.box-header -->
                  <div class="box-body">
                    <table id="doctors" class="table table-bordered table-hover">
                      <thead>
                      <tr>
                        <th>Name</th>
                        <th>Email</th>
                        <th>Phone</th>
                        <th>Gender</th>
                        <th>Specialist</th>
                        <th>Action</th>
                      </tr>
                      </thead>
                      <tbody>
                      </tbody>
                      <tfoot>
                      <tr>
                        <th>Name</th>
                        <th>Email</th>
                        <th>Phone</th>
                        <th>Gender</th>
                        <th>Specialist</th>
                        <th>Action</th>
                      </tr>
                      </tfoot>
                    </table>
                  </div>
                  <!-- /.box-body -->
                </div>
                <!-- /.box -->
              </div>
            </div>';
  include('../master.php');
?>
<!-- page script -->
<script>
  $(document).ready(function(){
    $.ajax({
        type: "GET",
        url: "../api/doctor/read.php",
        dataType: 'json',
        success: function(data) {
            var response="";
            for(var user in data){
                response += "<tr>"+
                "<td>"+data[user].name+"</td>"+
                "<td>"+data[user].email+"</td>"+
                "<td>"+data[user].phone+"</td>"+
                "<td>"+((data[user].gender == 0)? "Male": "Female")+"</td>"+
                "<td>"+data[user].specialist+"</td>"+
                "<td><a href='update.php?id="+data[user].id+"'>Edit</a> | <a href='#' onClick=Remove('"+data[user].id+"')>Remove</a></td>"+
                "</tr>";
            }
            $(response).appendTo($("#doctors"));
        }
    });
  });
  function Remove(id){
    var result = confirm("Are you sure you want to Delete the Doctor Record?");
    if (result == true) {
        $.ajax(
        {
            type: "POST",
            url: '../api/doctor/delete.php',
            dataType: 'json',
            data: {
                id: id
            },
            error: function (result) {
                alert(result.responseText);
            },
            success: function (result) {
                if (result['status'] == true) {
                    alert("Successfully Removed Doctor!");
                    window.location.href = '/medibed/doctor';
                }
                else {
                    alert(result['message']);
                }
            }
        });
    }
  }
</script>
Code Explanation
First of all, we have the content of this page in a PHP variable & then we simply included our master.php because it has the code for Layout page.
On document load, we’re using ajax to consume our read API to get all doctors.
We also have a function to remove a Doctor.
Now go to this Url => http://localhost/medibed/doctor/
you’ll see this page

Doctor remove will also work fine because of remove function ready in our code.
Now we need to create pages to Create & Update a Doctor.
Create a new file inside “Doctor” Folder with the name “create.php” & add this Code.
<?php
  $content = '<div class="row">
                <!-- left column -->
                <div class="col-md-12">
                  <!-- general form elements -->
                  <div class="box box-primary">
                    <div class="box-header with-border">
                      <h3 class="box-title">Add Doctor</h3>
                    </div>
                    <!-- /.box-header -->
                    <!-- form start -->
                    <form role="form">
                      <div class="box-body">
                        <div class="form-group">
                          <label for="exampleInputName1">Name</label>
                          <input type="text" class="form-control" id="name" placeholder="Enter Name">
                        </div>
                        <div class="form-group">
                          <label for="exampleInputEmail1">Email address</label>
                          <input type="email" class="form-control" id="email" placeholder="Enter email">
                        </div>
                        <div class="form-group">
                          <label for="exampleInputPassword1">Password</label>
                          <input type="password" class="form-control" id="password" placeholder="Password">
                        </div>
                        <div class="form-group">
                          <label for="exampleInputName1">Phone</label>
                          <input type="text" class="form-control" id="phone" placeholder="Enter Phone">
                        </div>
                        <div class="form-group">
                            <label for="exampleInputName1">Gender</label>
                            <div class="radio">
                                <label>
                                <input type="radio" name="gender" id="optionsRadios1" value="0" checked="">
                                Male
                                </label>
                            </div>
                            <div class="radio">
                                <label>
                                <input type="radio" name="gender" id="optionsRadios2" value="1">
                                Female
                                </label>
                            </div>
                        </div>
                        <div class="form-group">
                          <label for="exampleInputName1">Specialist</label>
                          <input type="text" class="form-control" id="specialist" placeholder="Enter Specialization">
                        </div>
                      </div>
                      <!-- /.box-body -->
                      <div class="box-footer">
                        <input type="button" class="btn btn-primary" onClick="AddDoctor()" value="Submit"></input>
                      </div>
                    </form>
                  </div>
                  <!-- /.box -->
                </div>
              </div>';
  include('../master.php');
?>
<script>
  function AddDoctor(){

        $.ajax(
        {
            type: "POST",
            url: '../api/doctor/create.php',
            dataType: 'json',
            data: {
                name: $("#name").val(),
                email: $("#email").val(),
                password: $("#password").val(),
                phone: $("#phone").val(),
                gender: $("input[name='gender']:checked").val(),
                specialist: $("#specialist").val()
            },
            error: function (result) {
                alert(result.responseText);
            },
            success: function (result) {
                if (result['status'] == true) {
                    alert("Successfully Added New Doctor!");
                    window.location.href = '/medibed/doctor';
                }
                else {
                    alert(result['message']);
                }
            }
        });
    }
</script>
Now click on Create Doctor inside Doctors SideBar Menu or go to this Url => http://localhost/medibed/doctor/create.php
You’ll see this page

Try to Create a new Doctor.
I hope everything is working as expected.
Let’s complete our Update Doctor functionality by creating a new file inside “Doctor” Folder as “update.php”
Add the below code inside this newly created file.
<?php
  $content = '<div class="row">
                <!-- left column -->
                <div class="col-md-12">
                  <!-- general form elements -->
                  <div class="box box-primary">
                    <div class="box-header with-border">
                      <h3 class="box-title">Update Doctor</h3>
                    </div>
                    <!-- /.box-header -->
                    <!-- form start -->
                    <form role="form">
                      <div class="box-body">
                        <div class="form-group">
                          <label for="exampleInputName1">Name</label>
                          <input type="text" class="form-control" id="name" placeholder="Enter Name">
                        </div>
                        <div class="form-group">
                          <label for="exampleInputEmail1">Email address</label>
                          <input type="email" class="form-control" id="email" placeholder="Enter email">
                        </div>
                        <div class="form-group">
                          <label for="exampleInputPassword1">Password</label>
                          <input type="password" class="form-control" id="password" placeholder="Password">
                        </div>
                        <div class="form-group">
                          <label for="exampleInputName1">Phone</label>
                          <input type="text" class="form-control" id="phone" placeholder="Enter Phone">
                        </div>
                        <div class="form-group">
                            <label for="exampleInputName1">Gender</label>
                            <div class="radio">
                                <label>
                                <input type="radio" name="gender" id="gender0" value="0" checked="">
                                Male
                                </label>
                            </div>
                            <div class="radio">
                                <label>
                                <input type="radio" name="gender" id="gender1" value="1">
                                Female
                                </label>
                            </div>
                        </div>
                        <div class="form-group">
                          <label for="exampleInputName1">Specialist</label>
                          <input type="text" class="form-control" id="specialist" placeholder="Enter Specialization">
                        </div>
                      </div>
                      <!-- /.box-body -->
                      <div class="box-footer">
                        <input type="button" class="btn btn-primary" onClick="UpdateDoctor()" value="Update"></input>
                      </div>
                    </form>
                  </div>
                  <!-- /.box -->
                </div>
              </div>';

  include('../master.php');
?>
<script>
    $(document).ready(function(){
        $.ajax({
            type: "GET",
            url: "../api/doctor/read_single.php?id=<?php echo $_GET['id']; ?>",
            dataType: 'json',
            success: function(data) {
                $('#name').val(data['name']);
                $('#email').val(data['email']);
                $('#password').val(data['password']);
                $('#phone').val(data['phone']);
                $('#gender'+data['gender']).prop("checked", true);
                $('#specialist').val(data['specialist']);
            },
            error: function (result) {
                console.log(result);
            },
        });
    });
    function UpdateDoctor(){
        $.ajax(
        {
            type: "POST",
            url: '../api/doctor/update.php',
            dataType: 'json',
            data: {
                id: <?php echo $_GET['id']; ?>,
                name: $("#name").val(),
                email: $("#email").val(),
                password: $("#password").val(),
                phone: $("#phone").val(),
                gender: $("input[name='gender']:checked").val(),
                specialist: $("#specialist").val()
            },
            error: function (result) {
                alert(result.responseText);
            },
            success: function (result) {
                if (result['status'] == true) {
                    alert("Successfully Updated Doctor!");
                    window.location.href = '/medibed/doctor';
                }
                else {
                    alert(result['message']);
                }
            }
        });
    }
</script>
Now you can also update any doctor record.
We have successfully created our CRUD(Create, Read, Update, Delete) Operations using Beautiful & Free UI Template.
You can also download the complete source code from GitHub.
Please Comment If you found any problem.
You might be interested in:
- Signup Login page in PHP with Database MySQL Source Code
- Restful Web Services in PHP Example – PHP + MySQL with Source Code
The post CRUD Operations Web App using PHP & MySQL | Part 2 appeared first on Coding Infinite.
]]>The post CRUD Operations using PHP & MySQL | Tutorials with Source Code appeared first on Coding Infinite.
]]>For creating beautiful & responsive UI, I’m using AdminLTE Template. So, In case if you missed the first part of this Tutorial, then you can find here => Getting Started with Web Application using PHP & MySQL | Tutorials
Assuming that you have followed the above tutorial & setup your project, let’s start our CRUD Operations Tutorial using PHP & MySQL.
I’m performing my CRUD Operation on this Database Table. You can use your own Table.

Creating Folders
- First of all, create a new folder at the root of your project directory as “api”.
- Inside “api” folder create three folders as “config”, “objects” & “doctors”.
we’ll keep all Doctor API inside “doctors” folder.
This directory structure will help us to keep our project easy to manage.
Database Connectivity
In your “config” folder inside “api” folder, create a new file there as “database.php” and paste this code there
<?php
class Database{

    // specify your own database credentials
    private $host = "localhost";
    private $db_name = "hospital_db";
    private $username = "root";
    private $password = "";
    public $conn;

    // get the database connection
    public function getConnection(){

        $this->conn = null;

        try{
            $this->conn = new PDO("mysql:host=" . $this->host . ";dbname=" . $this->db_name, $this->username, $this->password);
            $this->conn->exec("set names utf8");
        }catch(PDOException $exception){
            echo "Connection error: " . $exception->getMessage();
        }

        return $this->conn;
    }
}
?>
Now, your project structure should look like this.

Let’s start from creating API for CRUD operations.
I’m going to use Object Oriented Approach in this tutorial.
First of all, create a Model of your Doctor.
So, create a new file as “doctor.php” inside “objects” folder & add this Code:
<?php
class Doctor{

    // database connection and table name
    private $conn;
    private $table_name = "doctors";

    // object properties
    public $id;
    public $name;
    public $email;
    public $password;
    public $phone;
    public $gender;
    public $specialist;
    public $created;

    // constructor with $db as database connection
    public function __construct($db){
        $this->conn = $db;
    }

    // read all doctors
    function read(){

        // select all query
        $query = "SELECT
                    `id`, `name`, `email`, `password`, `phone`, `gender`, `specialist`, `created`
                FROM
                    " . $this->table_name . "
                ORDER BY
                    id DESC";

        // prepare query statement
        $stmt = $this->conn->prepare($query);

        // execute query
        $stmt->execute();

        return $stmt;
    }

    // get single doctor data
    function read_single(){

        // select all query
        $query = "SELECT
                    `id`, `name`, `email`, `password`, `phone`, `gender`, `specialist`, `created`
                FROM
                    " . $this->table_name . "
                WHERE
                    id= '".$this->id."'";

        // prepare query statement
        $stmt = $this->conn->prepare($query);

        // execute query
        $stmt->execute();
        return $stmt;
    }

    // create doctor
    function create(){

        if($this->isAlreadyExist()){
            return false;
        }

        // query to insert record
        $query = "INSERT INTO  ". $this->table_name ."
                        (`name`, `email`, `password`, `phone`, `gender`, `specialist`, `created`)
                  VALUES
                        ('".$this->name."', '".$this->email."', '".$this->password."', '".$this->phone."', '".$this->gender."', '".$this->specialist."', '".$this->created."')";

        // prepare query
        $stmt = $this->conn->prepare($query);

        // execute query
        if($stmt->execute()){
            $this->id = $this->conn->lastInsertId();
            return true;
        }

        return false;
    }

    // update doctor
    function update(){

        // query to insert record
        $query = "UPDATE
                    " . $this->table_name . "
                SET
                    name='".$this->name."', email='".$this->email."', password='".$this->password."', phone='".$this->phone."', gender='".$this->gender."', specialist='".$this->specialist."'
                WHERE
                    id='".$this->id."'";

        // prepare query
        $stmt = $this->conn->prepare($query);
        // execute query
        if($stmt->execute()){
            return true;
        }
        return false;
    }

    // delete doctor
    function delete(){

        // query to insert record
        $query = "DELETE FROM
                    " . $this->table_name . "
                WHERE
                    id= '".$this->id."'";

        // prepare query
        $stmt = $this->conn->prepare($query);

        // execute query
        if($stmt->execute()){
            return true;
        }
        return false;
    }

    function isAlreadyExist(){
        $query = "SELECT *
            FROM
                " . $this->table_name . "
            WHERE
                email='".$this->email."'";

        // prepare query statement
        $stmt = $this->conn->prepare($query);

        // execute query
        $stmt->execute();

        if($stmt->rowCount() > 0){
            return true;
        }
        else{
            return false;
        }
    }
}
you can see that we have all CRUD Operations including read_single function for reading a single Doctor record from MySQL database table.
Now, we’ll create a separate file for each operation inside “doctor” folder & we’ll call functions from “doctor.php” inside “objects” folder.
Let’s create a file inside “doctor” folder as “create.php” for creating a new doctor & add the below code inside this file.
<?php

// include database and object files
include_once '../config/database.php';
include_once '../objects/doctor.php';

// get database connection
$database = new Database();
$db = $database->getConnection();

// prepare doctor object
$doctor = new Doctor($db);

// set doctor property values
$doctor->name = $_POST['name'];
$doctor->email = $_POST['email'];
$doctor->password = base64_encode($_POST['password']);
$doctor->phone = $_POST['phone'];
$doctor->gender = $_POST['gender'];
$doctor->specialist = $_POST['specialist'];
$doctor->created = date('Y-m-d H:i:s');

// create the doctor
if($doctor->create()){
    $doctor_arr=array(
        "status" => true,
        "message" => "Successfully Signup!",
        "id" => $doctor->id,
        "name" => $doctor->name,
        "email" => $doctor->email,
        "phone" => $doctor->phone,
        "gender" => $doctor->gender,
        "specialist" => $doctor->specialist
    );
}
else{
    $doctor_arr=array(
        "status" => false,
        "message" => "Email already exists!"
    );
}
print_r(json_encode($doctor_arr));
?>
For reading all records from Doctors table create a file as “read.php” & add this code
<?php
// include database and object files
include_once '../config/database.php';
include_once '../objects/doctor.php';

// get database connection
$database = new Database();
$db = $database->getConnection();

// prepare doctor object
$doctor = new Doctor($db);

// query doctor
$stmt = $doctor->read();
$num = $stmt->rowCount();
// check if more than 0 record found
if($num>0){

    // doctors array
    $doctors_arr=array();
    $doctors_arr["doctors"]=array();

    while ($row = $stmt->fetch(PDO::FETCH_ASSOC)){
        extract($row);
        $doctor_item=array(
            "id" => $id,
            "name" => $name,
            "email" => $email,
            "password" => $password,
            "phone" => $phone,
            "gender" => $gender,
            "specialist" => $specialist,
            "created" => $created
        );
        array_push($doctors_arr["doctors"], $doctor_item);
    }

    echo json_encode($doctors_arr["doctors"]);
}
else{
    echo json_encode(array());
}
?>
to Update a record, create a file as “update.php” & add the code below
<?php

// include database and object files
include_once '../config/database.php';
include_once '../objects/doctor.php';

// get database connection
$database = new Database();
$db = $database->getConnection();

// prepare doctor object
$doctor = new Doctor($db);

// set doctor property values
$doctor->id = $_POST['id'];
$doctor->name = $_POST['name'];
$doctor->email = $_POST['email'];
$doctor->password = base64_encode($_POST['password']);
$doctor->phone = $_POST['phone'];
$doctor->gender = $_POST['gender'];
$doctor->specialist = $_POST['specialist'];

// create the doctor
if($doctor->update()){
    $doctor_arr=array(
        "status" => true,
        "message" => "Successfully Updated!"
    );
}
else{
    $doctor_arr=array(
        "status" => false,
        "message" => "Email already exists!"
    );
}
print_r(json_encode($doctor_arr));
?>
& for the last letter of CRUD, which is D.
create another file as “delete.php” & add this code
<?php

// include database and object files
include_once '../config/database.php';
include_once '../objects/doctor.php';

// get database connection
$database = new Database();
$db = $database->getConnection();

// prepare doctor object
$doctor = new Doctor($db);

// set doctor property values
$doctor->id = $_POST['id'];

// remove the doctor
if($doctor->delete()){
    $doctor_arr=array(
        "status" => true,
        "message" => "Successfully Removed!"
    );
}
else{
    $doctor_arr=array(
        "status" => false,
        "message" => "Doctor Cannot be deleted. may be he's assigned to a patient!"
    );
}
print_r(json_encode($doctor_arr));
?>
in the end, we need another method which is to get a single doctor record.
So, create a new file as “read_single.php” & add the below code
<?php
// include database and object files
include_once '../config/database.php';
include_once '../objects/doctor.php';

// get database connection
$database = new Database();
$db = $database->getConnection();

// prepare doctor object
$doctor = new Doctor($db);

// set ID property of doctor to be edited
$doctor->id = isset($_GET['id']) ? $_GET['id'] : die();

// read the details of doctor to be edited
$stmt = $doctor->read_single();

if($stmt->rowCount() > 0){
    // get retrieved row
    $row = $stmt->fetch(PDO::FETCH_ASSOC);
    // create array
    $doctor_arr=array(
        "id" => $row['id'],
        "name" => $row['name'],
        "email" => $row['email'],
        "password" => $row['password'],
        "phone" => $row['phone'],
        "gender" => $row['gender'],
        "specialist" => $row['specialist'],
        "created" => $row['created']
    );
}
// make it json format
print_r(json_encode($doctor_arr));
?>
After this our “api” directory will look like this
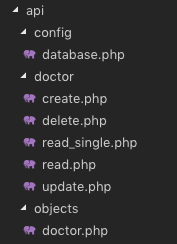
Our API for CRUD Operation is ready using PHP & MySQL. Now, we need to create UI using the template we set up in the previous article & then connect our UI with the API we created in this article.
We’ll create UI for our CRUD Operations in the next part of this Article.
Comment If you find any difficulty, I’m available to solve your problems.
The post CRUD Operations using PHP & MySQL | Tutorials with Source Code appeared first on Coding Infinite.
]]>The post Allow Remote Access Of Specific MySQL Database Tables | Views appeared first on Coding Infinite.
]]>Recently, we have completed our project successfully and installed in one of our client’s system. But before installation, we have met this problem where we need to give mysql database access to our client. So, we don’t want to give the whole database access instead to give access only some specific tables of a database. Because the client only needs to know about smart meters data, not about the whole application data.
In this blog post, I’ll focus on how to grant some specific tables remote access when working with mysql database on Linux or Unix-like operating system. Before you begin, you must consider the following prerequisites:
- Install mysql server on the database server.
- Start the mysql service via
sudo systemctl start mysql.service. - Open mysql and create a database instance which table access you want to grant.
- Allow the remote access to the mysql database server by editing the .cnf. You can see this link for enabling the remote connection in the mysql database server.
Below is the example of my complete mysql database. You can create your own database or use your existing database.

Create a new mysql user for remote database access
Now in order to grant some specific database tables access, we need to create a new user (with no grant options) from which our client can access only the exposed tables. First, let’s create a new mysql user with the following query at mysql> prompt.

Please note the % sign in the above command refers to any host. It means our testUser client can connect to mysql database server via any Ip address.
After the creation of testUser let’s see all mysql user’s hosts and username with the following query.

Grant some specific mysql database tables access to testUser
Before granting remote database tables access lets see the current grants for testUser with the below query.

You see currently there are no database table grants for the testUser.
If you guys have seen the above mdc_collector database then you know there are a total of ten tables and we only need to give remote access to some specific tables. Now let’s say we want to give access to testUser only billing_data, monthly_billing_data, and load_profile_data tables instead of the complete database. To exposed database tables enter the following commands at mysql> prompt.

After giving remote access to mysql database tables let’s see the selected grants for testUser with the following query.

You see the testUser only has remote access to three tables instead of the complete mdc_collector database. And finally, you may also need to run flush privileges on mysql> prompt.
flush privileges;
Verify remote database table access on a client system
Note: I already told you that in the prerequisites section that the remote connection of mysql DB only works if you’ve enabled the incoming connections in the mysql server machine. You can see this link for reference.
Now if you guys go to your personal machine or any client machine and try to connect the mysql server via any mysql client like the workbench you’ll see the mdc_collector database with only three tables in it. The following shows the connection with workbench.

The connection has been successfully made with the mysql database server. Now test the database tables.

You can also test the remote database access to mysql server via cmd. If and only if you’ve installed the mysql package inside the client machine.

The above picture is my client machine where I successfully login into mysql server database via remote access.
- -u testUser: The
testUseris our mysql user which we have created inside the server machine. - -h 192.168.1.192: Ip-address or hostname where the mysql database server is hosted.
- -p: Asks for the
testUserpassword.
Now let’s verify that our client user has only three tables remote access instead of complete mysql database.

Alright, guys, this was all from this blog. Anything I miss, feel free to let me know using the comments section.
Thank you for being here and keep reading…
The post Allow Remote Access Of Specific MySQL Database Tables | Views appeared first on Coding Infinite.
]]>The post Getting Started with Web Application using PHP & MySQL | Tutorials appeared first on Coding Infinite.
]]>This Tutorial is for beginners. So, for keeping the things simple we’ll not use any PHP Framework. We’ll use Object-Oriented PHP for creating our Web Application.
We’re going to create an Application to manage Doctors, Nurses etc & I’m going to give our application a name “Medibed”.

If you’re interested in creating Web Services using PHP. Here’s my article on Web Services in PHP
Restful Web Services in PHP Example – PHP + MySQL with Source Code
This Tutorial is designed using Object Oriented PHP. So, you must have a basic knowledge of Object Oriented Concepts in PHP before following this series. Here’s a quick overview of all those OOP Concepts.
Now, Let’s start our Tutorial.
Pre-requisites
Before starting this Tutorial, you must have a basic knowledge of PHP, MySQL, HTML, CSS, & JQuery to customize your application. We’ll use MySQL for creating Database for our Application & an Admin Template for creating interactive User Interfaces.
There are many Free Templates Available, for this Tutorial, I’m going to use This Beautiful Admin Template by almasaeed.
Setting up Server
To work on your local system you need to have PHP & MySQL installed on your system. So, the first step is to have a server to run our application. I’m going to install XAMPP because It installs both PHP & MySQL for us.

Run your server, go to your “htdocs” Folder inside “XAMPP” Forder & create a new folder there as “medibed”
Creating Database
It’s time to create a database for our Web Application.
I’m going to use very simple Hospital Database with 4 Tables, “doctors”, “nurses”, “patients” & “admins”.
You can use the database of your Web or Mobile App for which you are developing your Application.
Here’s the Database I’m going to use with the name “hospital_db”

& here’s the SQL script for this database
Database Script
SET SQL_MODE = "NO_AUTO_VALUE_ON_ZERO";
SET AUTOCOMMIT = 0;
START TRANSACTION;
SET time_zone = "+00:00";

-- Database: `hospital_db`
--
-- --------------------------------------------------------
--
-- Table structure for table `admins`
--
CREATE TABLE `admins` (
  `id` int(11) NOT NULL,
  `name` varchar(255) NOT NULL,
  `email` varchar(255) NOT NULL,
  `password` varchar(255) NOT NULL,
  `phone` varchar(15) NOT NULL,
  `created` timestamp NOT NULL DEFAULT CURRENT_TIMESTAMP
) ENGINE=InnoDB DEFAULT CHARSET=latin1;
-- --------------------------------------------------------
--
-- Table structure for table `doctors`
--
CREATE TABLE `doctors` (
  `id` int(11) NOT NULL,
  `name` varchar(255) NOT NULL,
  `email` varchar(255) NOT NULL,
  `password` varchar(255) NOT NULL,
  `phone` varchar(15) NOT NULL,
  `gender` int(11) NOT NULL,
  `specialist` varchar(255) NOT NULL,
  `created` timestamp NOT NULL DEFAULT CURRENT_TIMESTAMP
) ENGINE=InnoDB DEFAULT CHARSET=latin1;
--
-- Dumping data for table `doctors`
--
INSERT INTO `doctors` (`id`, `name`, `email`, `password`, `phone`, `gender`, `specialist`, `created`) VALUES
(1, 'Ahsan Saeed', '[email protected]', 'Vm0xMFlWbFdWWGhVYmxKWFltdHdVRlpzV21GWFJscHlWV3RLVUZWVU1Eaz0=', '03218878961', 0, 'Heart', '2018-05-01 13:07:24');
-- --------------------------------------------------------
--
-- Table structure for table `nurses`
--
CREATE TABLE `nurses` (
  `id` int(11) NOT NULL,
  `name` varchar(255) NOT NULL,
  `email` varchar(255) NOT NULL,
  `password` varchar(255) NOT NULL,
  `phone` varchar(15) NOT NULL,
  `created` timestamp NOT NULL DEFAULT CURRENT_TIMESTAMP
) ENGINE=InnoDB DEFAULT CHARSET=latin1;
--
-- Dumping data for table `nurses`
--
INSERT INTO `nurses` (`id`, `name`, `email`, `password`, `phone`, `created`) VALUES
(1, 'Ahsan', '[email protected]', 'MTIzNDU=', '03218878961', '2018-06-27 13:39:31'),
(2, '2', 'ABC', 'WFla', '123456789', '2018-07-06 13:50:24'),
(3, 'Shehryar khan', '[email protected]', 'YXBwcnl4', '3433243243', '2018-07-06 18:12:35');
-- --------------------------------------------------------
--
-- Table structure for table `patients`
--
CREATE TABLE `patients` (
  `id` int(11) NOT NULL,
  `name` varchar(255) NOT NULL,
  `phone` varchar(15) NOT NULL,
  `gender` int(11) NOT NULL,
  `health_condition` varchar(255) NOT NULL,
  `doctor_id` int(11) NOT NULL,
  `nurse_id` int(11) NOT NULL,
  `created` timestamp NOT NULL DEFAULT CURRENT_TIMESTAMP
) ENGINE=InnoDB DEFAULT CHARSET=latin1;
--
-- Dumping data for table `patients`
--
INSERT INTO `patients` (`id`, `name`, `phone`, `gender`, `health_condition`, `doctor_id`, `nurse_id`, `created`) VALUES
(6, 'hjj', '9988596666', 1, 'vbjbb', 1, 1, '2018-06-26 13:12:18'),
(9, '2', '123456789', 1, 'OK', 1, 1, '2018-07-06 13:59:25'),
(10, '2', '123456789', 1, 'OK', 1, 1, '2018-07-06 14:13:13'),
(11, 'shehryar', '123456789', 1, 'OK', 1, 1, '2018-07-06 17:36:08'),
(14, 'Coding Infinite', '3433243243', 0, 'asd', 1, 1, '2018-07-06 18:39:42'),
(15, 'Coding Infinite', '3433243243', 0, 'asd', 1, 1, '2018-07-06 18:40:07'),
(16, 'Coding Infinite', '3433243243', 0, 'asd', 1, 1, '2018-07-06 18:40:59');
--
-- Indexes for dumped tables
--
--
-- Indexes for table `admins`
--
ALTER TABLE `admins`
  ADD PRIMARY KEY (`id`);
--
-- Indexes for table `doctors`
--
ALTER TABLE `doctors`
  ADD PRIMARY KEY (`id`);
--
-- Indexes for table `nurses`
--
ALTER TABLE `nurses`
  ADD PRIMARY KEY (`id`);
--
-- Indexes for table `patients`
--
ALTER TABLE `patients`
  ADD PRIMARY KEY (`id`),
  ADD KEY `doctor_id` (`doctor_id`),
  ADD KEY `nurse_id` (`nurse_id`);
--
-- AUTO_INCREMENT for dumped tables
--
--
-- AUTO_INCREMENT for table `admins`
--
ALTER TABLE `admins`
  MODIFY `id` int(11) NOT NULL AUTO_INCREMENT;
--
-- AUTO_INCREMENT for table `doctors`
--
ALTER TABLE `doctors`
  MODIFY `id` int(11) NOT NULL AUTO_INCREMENT, AUTO_INCREMENT=2;
--
-- AUTO_INCREMENT for table `nurses`
--
ALTER TABLE `nurses`
  MODIFY `id` int(11) NOT NULL AUTO_INCREMENT, AUTO_INCREMENT=4;
--
-- AUTO_INCREMENT for table `patients`
--
ALTER TABLE `patients`
  MODIFY `id` int(11) NOT NULL AUTO_INCREMENT, AUTO_INCREMENT=17;
--
-- Constraints for dumped tables
--
--
-- Constraints for table `patients`
--
ALTER TABLE `patients`
  ADD CONSTRAINT `patients_ibfk_1` FOREIGN KEY (`doctor_id`) REFERENCES `doctors` (`id`),
  ADD CONSTRAINT `patients_ibfk_2` FOREIGN KEY (`nurse_id`) REFERENCES `nurses` (`id`);
COMMIT;
Save the Above SQL Script in a file as “hospital_db.sql”.
Go to http://localhost/phpmyadmin, create a database as “hospital_db” & import the SQL File in your Database.
Now our database is ready & the next step is to set up our Server & AdminLTE Template for our Application.
Setting Up Template
First, you need to download AdminLTE Template. So download or clone AdminLTE & Unzip AdminLTE folder.
You’ll see these files & folders.

For keeping our project clean you need to copy & paste only Two Folders “bower_components” & “dist” from here to the folder we have created earlier with the name “medibed”.
Let start by creating a Layout Page for our Application.
Now create a new file as “master.php” at the root folder of your Folder & paste this code.
<!DOCTYPE html>
<html>
<head>
  <meta charset="utf-8">
  <meta http-equiv="X-UA-Compatible" content="IE=edge">
  <title>MediBed</title>
  <!-- Tell the browser to be responsive to screen width -->
  <meta content="width=device-width, initial-scale=1, maximum-scale=1, user-scalable=no" name="viewport">
  <link rel="stylesheet" href="proxy.php?url=../bower_components/bootstrap/dist/css/bootstrap.min.css">
  <!-- Font Awesome -->
  <link rel="stylesheet" href="proxy.php?url=../bower_components/font-awesome/css/font-awesome.min.css">
  <!-- Ionicons -->
  <link rel="stylesheet" href="proxy.php?url=../bower_components/Ionicons/css/ionicons.min.css">
  <!-- Theme style -->
  <link rel="stylesheet" href="proxy.php?url=../dist/css/AdminLTE.min.css">
  <link rel="stylesheet" href="proxy.php?url=../dist/css/skins/skin-blue.min.css">

  <!-- Google Font -->
  <link rel="stylesheet"
        href="proxy.php?url=https://fonts.googleapis.com/css?family=Source+Sans+Pro:300,400,600,700,300italic,400italic,600italic">
</head>
<body class="hold-transition skin-blue sidebar-mini">
<div class="wrapper">

  <!-- Main Header -->
  <header class="main-header">

    <!-- Logo -->
    <a href="proxy.php?url=index.php" class="logo">
      <!-- mini logo for sidebar mini 50x50 pixels -->
      <span class="logo-mini"><b>M</b>BD</span>
      <!-- logo for regular state and mobile devices -->
      <span class="logo-lg"><b>Medi</b>BED</span>
    </a>

    <!-- Header Navbar -->
    <nav class="navbar navbar-static-top" role="navigation">
      <!-- Sidebar toggle button-->
      <a href="proxy.php?url=#" class="sidebar-toggle" data-toggle="push-menu" role="button">
        <span class="sr-only">Toggle navigation</span>
      </a>
      <!-- Navbar Right Menu -->
      <div class="navbar-custom-menu">
        <ul class="nav navbar-nav">


          <!-- User Account Menu -->
          <li class="dropdown user user-menu">
            <!-- Menu Toggle Button -->
            <a href="proxy.php?url=" class="dropdown-toggle" data-toggle="dropdown">
              <!-- The user image in the navbar-->
              <img src="proxy.php?url=../dist/img/avatar5.png" class="user-image" alt="User Image">
              <!-- hidden-xs hides the username on small devices so only the image appears. -->
              <span class="hidden-xs">Ahmed Khalid</span>
            </a>
            <ul class="dropdown-menu">
              <!-- The user image in the menu -->
              <li class="user-header">
                <img src="proxy.php?url=../dist/img/avatar5.png" class="img-circle" alt="User Image">

                <p>
                  Ahmed Khalid - Developer
                  <small>Member since May. 2018</small>
                </p>
              </li>

              <!-- Menu Footer-->
              <li class="user-footer">
                <div class="pull-left">
                  <a href="proxy.php?url=#" class="btn btn-default btn-flat">Profile</a>
                </div>
                <div class="pull-right">
                  <a href="proxy.php?url=#" class="btn btn-default btn-flat">Sign out</a>
                </div>
              </li>
            </ul>
          </li>
          <!-- Control Sidebar Toggle Button -->

        </ul>
      </div>
    </nav>
  </header>
  <!-- Left side column. contains the logo and sidebar -->
  <aside class="main-sidebar">

    <!-- sidebar: style can be found in sidebar.less -->
    <section class="sidebar">

      <!-- Sidebar user panel (optional) -->
      <div class="user-panel">
        <div class="pull-left image">
          <img src="proxy.php?url=../dist/img/avatar5.png" class="img-circle" alt="User Image">
        </div>
        <div class="pull-left info">
          <p>Ahmed Khalid</p>
          <!-- Status -->
          <a href="proxy.php?url="><i class="fa fa-circle text-success"></i> Online</a>
        </div>
      </div>

      <!-- search form (Optional) -->
      <form action="proxy.php?url=#" method="get" class="sidebar-form">
        <div class="input-group">
          <input type="text" name="q" class="form-control" placeholder="Search...">
          <span class="input-group-btn">
              <button type="submit" name="search" id="search-btn" class="btn btn-flat"><i class="fa fa-search"></i>
              </button>
            </span>
        </div>
      </form>
      <!-- /.search form -->

      <!-- Sidebar Menu -->
      <ul class="sidebar-menu" data-widget="tree">
        <li class="header">Menu</li>
        <!-- Optionally, you can add icons to the links -->
        <li class="treeview">
          <a href="proxy.php?url=#"><i class="fa fa-medkit"></i> <span>Doctors</span>
            <span class="pull-right-container">
                <i class="fa fa-angle-left pull-right"></i>
              </span>
          </a>
          <ul class="treeview-menu">
            <li><a href="proxy.php?url=/medibed/doctor/create.php">Create Doctor</a></li>
            <li><a href="proxy.php?url=/medibed/doctor">All Doctors</a></li>
          </ul>
        </li>
      </ul>

      <!-- /.sidebar-menu -->
    </section>
    <!-- /.sidebar -->
  </aside>

  <!-- Content Wrapper. Contains page content -->
  <div class="content-wrapper">
    <!-- Content Header (Page header) -->
    <section class="content-header">
      <h1>
        Dashboard
        <small>Welcome to Admin Dashboard</small>
      </h1>
      <ol class="breadcrumb">
        <li><a href="proxy.php?url=#"><i class="fa fa-dashboard"></i> MediBed</a></li>
        <li class="active">Dashboard</li>
      </ol>
    </section>

    <!-- Main content -->
    <section class="content container-fluid">

      <?php echo $content; ?>

    </section>
    <!-- /.content -->
  </div>
  <!-- /.content-wrapper -->

  <!-- Main Footer -->
  <footer class="main-footer">
    <!-- Default to the left -->
    <strong>Copyright © 2018 <a href="proxy.php?url=https://codinginfinite.com">Coding Infinite</a>.</strong> All rights reserved.
  </footer>

  <!-- Add the sidebar's background. This div must be placed
  immediately after the control sidebar -->
  <div class="control-sidebar-bg"></div>
</div>
<!-- ./wrapper -->

<!-- REQUIRED JS SCRIPTS -->

<!-- jQuery 3 -->
<script src="proxy.php?url=../bower_components/jquery/dist/jquery.min.js"></script>
<!-- Bootstrap 3.3.7 -->
<script src="proxy.php?url=../bower_components/bootstrap/dist/js/bootstrap.min.js"></script>
<!-- DataTables -->
<script src="proxy.php?url=../bower_components/datatables.net/js/jquery.dataTables.min.js"></script>
<script src="proxy.php?url=../bower_components/datatables.net-bs/js/dataTables.bootstrap.min.js"></script>
<!-- AdminLTE App -->
<script src="proxy.php?url=../dist/js/adminlte.min.js"></script>

</body>
</html>
This is our master/layout page. We’ll load the content of all other pages inside this master page.
Let’s test our master page.
Create a new Folder as “Doctor” at the root of our project & inside this folder create a new file with the name “index.php”
Now, your “medibed” folder should look like this.

Add the Code below Inside your “index.php”
<?php
  $content = '<h2>Your Main Content Here</h2>';
  include('../master.php');
?>
Now, open your browser & go to this URL => http://localhost/medibed/doctor
you’ll see this

Congrats, you have successfully completed the first step toward creating your Web Application.
In the Next part of this Tutorial, we’ll perform CRUD operations using this beautiful Template.
Comment If you have any question or find any difficulty. I’m here to solve your problem.
You might be interested in:
- Signup Login page in PHP with Database MySQL Source Code
- Restful Web Services in PHP Example – PHP + MySQL with Source Code
The post Getting Started with Web Application using PHP & MySQL | Tutorials appeared first on Coding Infinite.
]]>The post CRUD Operations in Asp.net Core MVC appeared first on Coding Infinite.
]]>For creating beautiful & responsive UI, I’m using AdminLTE Template. So, In case if you missed Setting up AdminLTE in Asp.net Core, then you can find here => Setting up Admin Template in Asp.net Core MVC
Assuming that you have followed the above tutorial & setup your project, let’s start our Asp.net Core CRUD Operations Tutorial.
This is the 6th Part of Admin Panel Tutorial Series.
- Choosing Template for Admin Panel
- Creating a Database
- Setup AdminLTE Template in Asp.net Core MVC project
- Creating Models
- Login Page for Admin Panel
- CRUD(Create, Read, Update, Delete) Operations
- Creating Interactive Dashboards
- Audit Trail / Activity Logging
- Role-Based Authorization
- Error Logging
If you want to create Models from MySQL Database then you can follow this Article => Entity Framework Core Database First – Asp.Net Core Scaffold MySql DB
I’m performing my CRUD Operation on this Database Table. You can use your own Table.
First of all, create a Controller as “DoctorsController.cs” & Add this Code.
using System.Linq;
using AdminPanelTutorial.Models;
using Microsoft.AspNetCore;
using Microsoft.AspNetCore.Hosting;
using Microsoft.AspNetCore.Mvc;

namespace AdminPanelTutorial
{
    public class DoctorsController : Controller
    {
        MyDbContext db = new MyDbContext();
        public ActionResult Index()
        {
            return View(db.Doctors.ToList());
        }

        public ActionResult Create()
        {
            return View();
        }

        [HttpPost]
        public ActionResult CreateDoctor(Doctors doctor){
            db.Doctors.Add(doctor);
            db.SaveChanges();
            return RedirectToAction("Index", "Doctors");
        }

        [HttpPost]
        public bool Delete(int id){
            try
            {
                Doctors doctor = db.Doctors.Where(s => s.Id == id).First();
                db.Doctors.Remove(doctor);
                db.SaveChanges();
                return true;
            }
            catch (System.Exception)
            {
                return false;
            }

        }

        public ActionResult Update(int id){
            return View(db.Doctors.Where(s => s.Id == id).First());
        }

        [HttpPost]
        public ActionResult UpdateDoctor(Doctors doctor){
            Doctors d = db.Doctors.Where(s => s.Id == doctor.Id).First();
            d.Name = doctor.Name;
            d.Phone = doctor.Phone;
            d.Specialist = doctor.Specialist;
            db.SaveChanges();
            return RedirectToAction("Index", "Doctors");
        }
    }
}
* Update your Solution name
Code Explanation:
We have an Index Method to list all records from Doctors Table to our DataTable.
We have Create Method to open Create Doctor Form & when we Submit this Form our CreateDoctor will be used to Add Doctor into the Database.
You must Encrypt your Password before storing it into Database. You may follow this Tutorial for Password Hashing Code => C# Hashing algorithm class
We have only one Method to Delete Doctor because we’ll use Ajax to delete our Doctor.
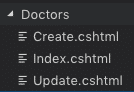
Now Create a new Folder as “Doctors” inside your “Views” Folder & Create these 3 Files inside “Doctors” Folders => “Index.cshtml”, “Create.cshtml”, “Update.cshtml”
Add this Code into your “Index.cshtml”
@model IEnumerable<AdminPanelTutorial.Models.Doctors>

<section class="content-header">
    <h1>
    Doctors
    </h1>
    <ol class="breadcrumb">
    <li><a href="proxy.php?url=#"><i class="fa fa-dashboard"></i> Home</a></li>
    <li class="active">Doctors</li>
    </ol>
</section>
<!-- Main content -->
<section class="content">
    <div class="row">
    <div class="col-xs-12">
        <div class="box">
        <div class="box-header">
            <h3 class="box-title">Manage Doctors</h3>
        </div>
        <!-- /.box-header -->
        <div class="box-body">
            <table id="example1" class="table table-bordered table-striped">
            <thead>
            <tr>
                <th>Id</th>
                <th>Name</th>
                <th>Email</th>
                <th>Phone</th>
                <th>Created</th>
                <th>Specialist</th>
                <th>Action</th>
            </tr>
            </thead>
            <tbody>
                @foreach (var item in Model)
                {
                    <tr>
                    <td>@Html.DisplayFor(modelItem => item.Id)</td>
                    <td>@Html.DisplayFor(modelItem => item.Name)</td>
                    <td>@Html.DisplayFor(modelItem => item.Email)</td>
                    <td>@Html.DisplayFor(modelItem => item.Phone)</td>
                    <td>@Html.DisplayFor(modelItem => item.Created)</td>
                    <td>@Html.DisplayFor(modelItem => item.Specialist)</td>
                    <td><a href="proxy.php?url=Doctors/Update/@item.Id">Update</a> | <a href="proxy.php?url=" onclick="Delete('@item.Id')">Delete</a></td>
                    </tr>
                }
            </table>
        </div>
        <!-- /.box-body -->
        </div>
        <!-- /.box -->
    </div>
    <!-- /.col -->
    </div>
    <!-- /.row -->
</section>

<!-- DataTables -->
<script src="proxy.php?url=~/bower_components/datatables.net/js/jquery.dataTables.min.js"></script>
<script src="proxy.php?url=~/bower_components/datatables.net-bs/js/dataTables.bootstrap.min.js"></script>

<!-- page script -->
<script>
    $(function () {
        $('#example1').DataTable();
    });
    function Delete(id){
        var txt;
        var r = confirm("Are you sure you want to Delete?");
        if (r == true) {

            $.ajax(
            {
                type: "POST",
                url: '@Url.Action("Delete", "Doctors")',
                data: {
                    id: id
                },
                error: function (result) {
                    alert("error");
                },
                success: function (result) {
                    if (result == true) {
                        var baseUrl="/Doctors";
                        window.location.reload();
                    }
                    else {
                        alert("There is a problem, Try Later!");
                    }
                }
            });
        }
    }
</script>
* Don’t forget to replace your Solution name with “AdminPanelTutorial” at the very First line of this Code
Add “DataTables” css file into your “_Layout.cshtml” (Created in the First Part of this Tutorial) after BootStrap css added at the start of the File
<!-- DataTables -->
<link rel="stylesheet" href="proxy.php?url=~/bower_components/datatables.net-bs/css/dataTables.bootstrap.min.css">
your “_Layout.cshtml” will look like this

You can see that I have already Added Ajax at the End of the Code above to Delete the Doctor Record from the Database.
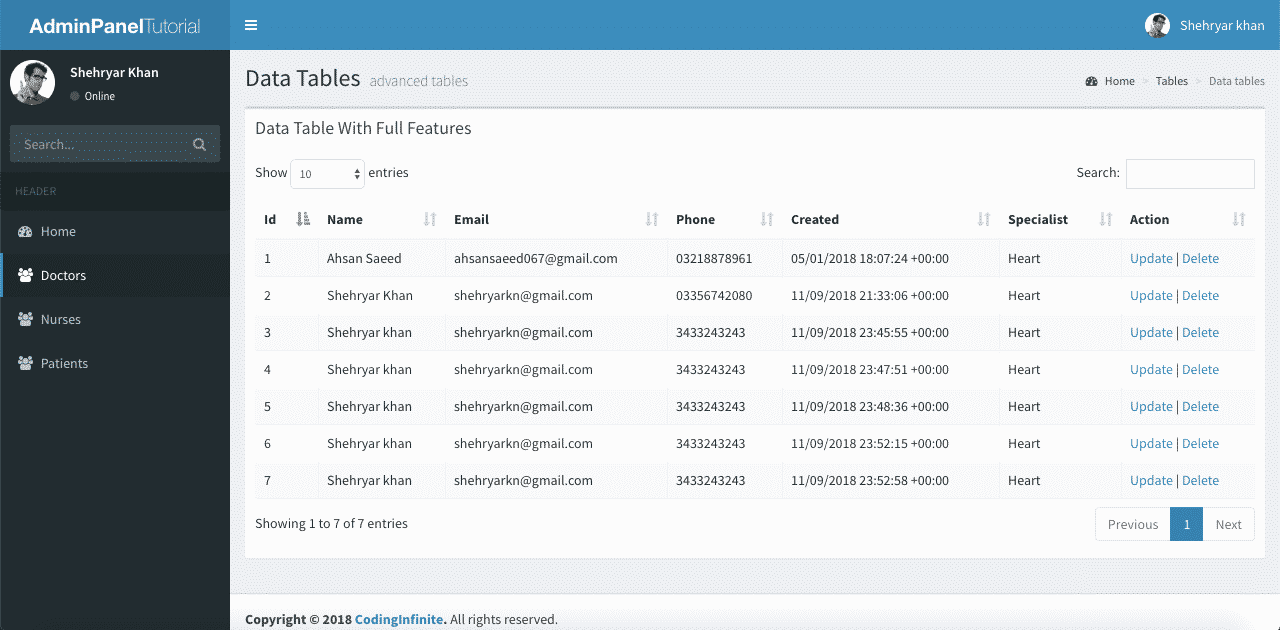
Now run your Project & go to http://localhost:port/Doctors (replace your port)
you’ll see All Doctors from your Database Table.
You can Also Test Your Delete Operation, It should work fine.
Let’s move Further & Add Code below into your “Create.cshtml”
<!-- Content Header (Page header) -->
<section class="content-header">
    <h1>
    Doctors
    </h1>
</section>
<!-- Main content -->
<section class="content container-fluid">
    <!-- Horizontal Form -->
    <div class="box box-info">
    <div class="box-header with-border">
        <h3 class="box-title">Add Doctor</h3>
    </div>
    <!-- /.box-header -->
    <!-- form start -->
    <form class="form-horizontal" method="post" action="proxy.php?url=CreateDoctor">
        <div class="box-body">
        <div class="form-group">
            <label for="inputEmail3" class="col-sm-2 control-label">Name</label>
            <div class="col-sm-10">
            <input type="text" class="form-control" name="Name" placeholder="Name">
            </div>
        </div>
        <div class="form-group">
            <label for="inputEmail3" class="col-sm-2 control-label">Email</label>
            <div class="col-sm-10">
            <input type="email" class="form-control" name="Email" placeholder="Email">
            </div>
        </div>
        <div class="form-group">
            <label for="inputPassword3" class="col-sm-2 control-label">Password</label>
            <div class="col-sm-10">
            <input type="password" class="form-control" name="Password" placeholder="Password">
            </div>
        </div>
        <div class="form-group">
            <label for="inputEmail3" class="col-sm-2 control-label">Phone</label>
            <div class="col-sm-10">
            <input type="text" class="form-control" name="Phone" placeholder="Phone">
            </div>
        </div>
        <div class="form-group">
            <label for="inputEmail3" class="col-sm-2 control-label">Specialist</label>
            <div class="col-sm-10">
            <input type="text" class="form-control" name="Specialist" placeholder="Specialist">
            </div>
        </div>
        </div>
        <!-- /.box-body -->
        <div class="box-footer">
        <button type="submit" class="btn btn-default">Cancel</button>
        <button type="submit" class="btn btn-info pull-right">Create</button>
        </div>
        <!-- /.box-footer -->
    </form>
    </div>
    <!-- /.box -->
</section>
Run your project & go to https://localhost:port/Doctors/Create
You’ll see this Page
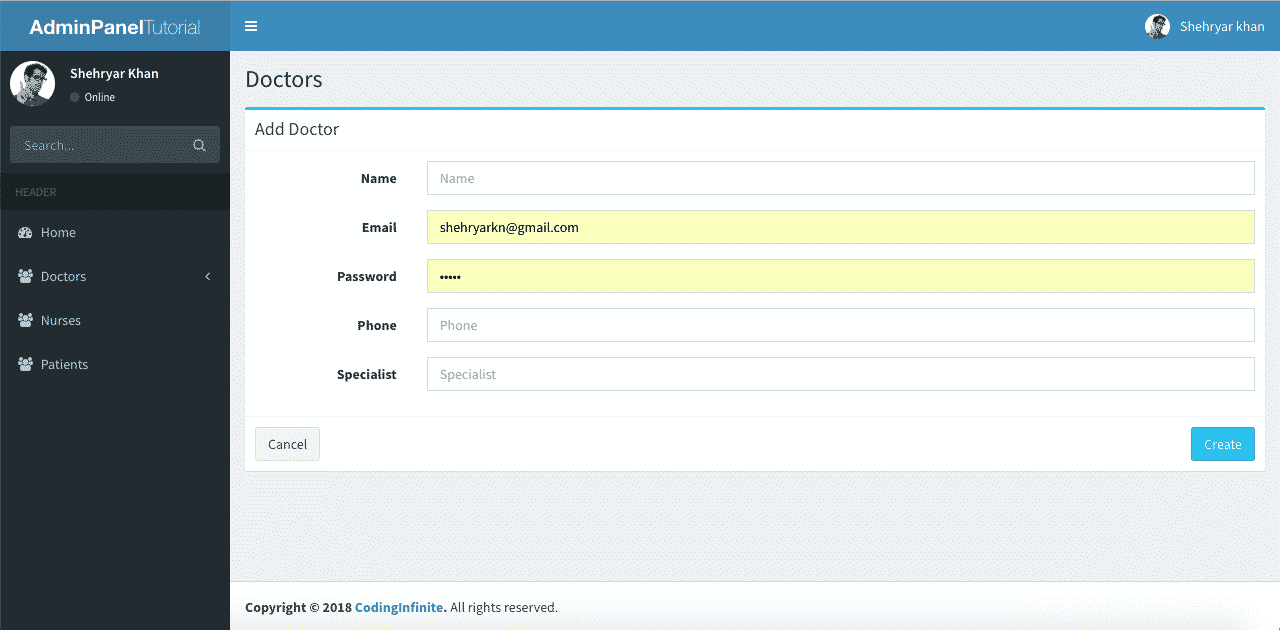
Try to create a new Doctor, It will Add new Doctor & redirect you to Index Page.
Now the last thing is our Update Operation.
Open your “Update.cshtml” file Add this Code
@model AdminPanelTutorial.Models.Doctors

<section class="content-header">
    <h1>
    Doctors
    </h1>
</section>
<!-- Main content -->
<section class="content container-fluid">
    <!-- Horizontal Form -->
    <div class="box box-info">
    <div class="box-header with-border">
        <h3 class="box-title">Update Doctor</h3>
    </div>
    <!-- /.box-header -->
    <!-- form start -->
    <form class="form-horizontal" method="post" action="proxy.php?url=/Doctors/UpdateDoctor">
        <div class="box-body">
        <div class="form-group">
            <label for="inputEmail3" class="col-sm-2 control-label">Email</label>
            <div class="col-sm-10">
            <input type="Email" class="form-control" name="Email" value="@Model.Email">
            </div>
        </div>
        <div class="form-group">
            <label for="inputEmail3" class="col-sm-2 control-label">Name</label>
            <div class="col-sm-10">
            <input type="text" class="form-control" name="Name" placeholder="Name" value="@Model.Name">
            </div>
        </div>
        <div class="form-group">
            <label for="inputEmail3" class="col-sm-2 control-label">Phone</label>
            <div class="col-sm-10">
            <input type="text" class="form-control" name="Phone" placeholder="Phone" value="@Model.Phone">
            </div>
        </div>
        <div class="form-group">
            <label for="inputEmail3" class="col-sm-2 control-label">Specialist</label>
            <div class="col-sm-10">
            <input type="text" class="form-control" name="Specialist" placeholder="Specialist" value="@Model.Specialist">
            </div>
        </div>
        <input type="hidden" name="Id" value="@Model.Id"/>
        </div>
        <!-- /.box-body -->
        <div class="box-footer">
        <button type="submit" class="btn btn-default">Cancel</button>
        <button type="submit" class="btn btn-info pull-right">Update</button>
        </div>
        <!-- /.box-footer -->
    </form>
    </div>
    <!-- /.box -->
</section>
* Don’t forget to replace your Solution name with “AdminPanelTutorial” at the very First line of this Code
Now run your Project & Update a Doctor Record.
I hope that everything is working fine & your CRUD operations are working perfectly. You can use your UI Template & Database Table for Performing your CRUD Operations. I used This AdminLTE Template just to Beautify our UI you can use your own.
You can also download the complete project from GitHub.
Comment If you find any Difficulty, I’m here to help you. I’ll reply you with Solution as soon as possible.
Creating Login Page Asp.net Core
Creating Interactive Dashboards
The post CRUD Operations in Asp.net Core MVC appeared first on Coding Infinite.
]]>The post Signup Login page in PHP with Database MySQL Source Code appeared first on Coding Infinite.
]]>What we’ll cover in Signup Login page in PHP with Database
- File Structure
- Creating HTML page
- Connecting HTML page with Webservices
File Structure
We’ll use this folders & files structure inside our “app” folder for our Login & Signup page.
index.html
|
assets
├─── css
├────── style.css
api
├─── config/
├────── database.php – file used for connecting to the database.
├─── objects/
├────── user.php – contains properties and methods for “user” database queries.
├─── User/
├────── signup.php – file that will accept user data to be saved to the DB.
├────── login.php – file that will accept username & password and validate
as you can see that we have added pages and assets folders, pages folder will contain all HTML pages and assets folder is for CSS, JS, images etc.
Creating HTML page
as I stated that you can create your own design or you can use any other design, for this tutorial I’m using This template and I just modified it according to my Webservices.
inside your “app” folder, create a new file as “index.html” and paste this code there
<!DOCTYPE html>
<html lang="en" >

<head>
  <meta charset="UTF-8">
  <title>PHP Learning</title>


  <link rel='stylesheet prefetch' href='https://fonts.googleapis.com/css?family=Open+Sans:600'>

      <link rel="stylesheet" href="proxy.php?url=./assets/css/style.css">


</head>

<body>

  <div class="login-wrap">
  <div class="login-html">
    <input id="tab-1" type="radio" name="tab" class="sign-in" checked><label for="tab-1" class="tab">Sign In</label>
    <input id="tab-2" type="radio" name="tab" class="sign-up"><label for="tab-2" class="tab">Sign Up</label>
    <div class="login-form">
      <form class="sign-in-htm" action="proxy.php?url=./api/user/login.php" method="GET">
        <div class="group">
          <label for="user" class="label">Username</label>
          <input id="username" name="username" type="text" class="input">
        </div>
        <div class="group">
          <label for="pass" class="label">Password</label>
          <input id="password" name="password" type="password" class="input" data-type="password">
        </div>
        <div class="group">
          <input id="check" type="checkbox" class="check" checked>
          <label for="check"><span class="icon"></span> Keep me Signed in</label>
        </div>
        <div class="group">
          <input type="submit" class="button" value="Sign In">
        </div>
        <div class="hr"></div>
        <div class="foot-lnk">
          <a href="proxy.php?url=#forgot">Forgot Password?</a>
        </div>
      </form>
      <form class="sign-up-htm" action="proxy.php?url=./api/user/signup.php" method="POST">
        <div class="group">
          <label for="user" class="label">Username</label>
          <input id="username" name="username" type="text" class="input">
        </div>
        <div class="group">
          <label for="pass" class="label">Password</label>
          <input id="password" name="password" type="password" class="input" data-type="password">
        </div>
        <div class="group">
          <label for="pass" class="label">Confirm Password</label>
          <input id="pass" type="password" class="input" data-type="password">
        </div>
        <div class="group">
          <input type="submit" class="button" value="Sign Up">
        </div>
        <div class="hr"></div>
        <div class="foot-lnk">
          <label for="tab-1">Already Member?</a>
        </div>
      </form>
    </div>
  </div>
</div>


</body>

</html>
Now go to the “assets” folder and create a new folder as “css” and create a new file there as “style.css” and paste this code there
body{
  margin:0;
  color:#6a6f8c;
  background:#c8c8c8;
  font:600 16px/18px 'Open Sans',sans-serif;
}
*,:after,:before{box-sizing:border-box}
.clearfix:after,.clearfix:before{content:'';display:table}
.clearfix:after{clear:both;display:block}
a{color:inherit;text-decoration:none}

.login-wrap{
  width:100%;
  margin:auto;
  margin-top: 30px;
  max-width:525px;
  min-height:570px;
  position:relative;
  background:url(http://codinginfinite.com/demo/images/bg.jpg) no-repeat center;
  box-shadow:0 12px 15px 0 rgba(0,0,0,.24),0 17px 50px 0 rgba(0,0,0,.19);
}
.login-html{
  width:100%;
  height:100%;
  position:absolute;
  padding:90px 70px 50px 70px;
  background:rgba(40,57,101,.9);
}
.login-html .sign-in-htm,
.login-html .sign-up-htm{
  top:0;
  left:0;
  right:0;
  bottom:0;
  position:absolute;
  -webkit-transform:rotateY(180deg);
          transform:rotateY(180deg);
  -webkit-backface-visibility:hidden;
          backface-visibility:hidden;
  transition:all .4s linear;
}
.login-html .sign-in,
.login-html .sign-up,
.login-form .group .check{
  display:none;
}
.login-html .tab,
.login-form .group .label,
.login-form .group .button{
  text-transform:uppercase;
}
.login-html .tab{
  font-size:22px;
  margin-right:15px;
  padding-bottom:5px;
  margin:0 15px 10px 0;
  display:inline-block;
  border-bottom:2px solid transparent;
}
.login-html .sign-in:checked + .tab,
.login-html .sign-up:checked + .tab{
  color:#fff;
  border-color:#1161ee;
}
.login-form{
  min-height:345px;
  position:relative;
  -webkit-perspective:1000px;
          perspective:1000px;
  -webkit-transform-style:preserve-3d;
          transform-style:preserve-3d;
}
.login-form .group{
  margin-bottom:15px;
}
.login-form .group .label,
.login-form .group .input,
.login-form .group .button{
  width:100%;
  color:#fff;
  display:block;
}
.login-form .group .input,
.login-form .group .button{
  border:none;
  padding:15px 20px;
  border-radius:25px;
  background:rgba(255,255,255,.1);
}
.login-form .group input[data-type="password"]{
  text-security:circle;
  -webkit-text-security:circle;
}
.login-form .group .label{
  color:#aaa;
  font-size:12px;
}
.login-form .group .button{
  background:#1161ee;
}
.login-form .group label .icon{
  width:15px;
  height:15px;
  border-radius:2px;
  position:relative;
  display:inline-block;
  background:rgba(255,255,255,.1);
}
.login-form .group label .icon:before,
.login-form .group label .icon:after{
  content:'';
  width:10px;
  height:2px;
  background:#fff;
  position:absolute;
  transition:all .2s ease-in-out 0s;
}
.login-form .group label .icon:before{
  left:3px;
  width:5px;
  bottom:6px;
  -webkit-transform:scale(0) rotate(0);
          transform:scale(0) rotate(0);
}
.login-form .group label .icon:after{
  top:6px;
  right:0;
  -webkit-transform:scale(0) rotate(0);
          transform:scale(0) rotate(0);
}
.login-form .group .check:checked + label{
  color:#fff;
}
.login-form .group .check:checked + label .icon{
  background:#1161ee;
}
.login-form .group .check:checked + label .icon:before{
  -webkit-transform:scale(1) rotate(45deg);
          transform:scale(1) rotate(45deg);
}
.login-form .group .check:checked + label .icon:after{
  -webkit-transform:scale(1) rotate(-45deg);
          transform:scale(1) rotate(-45deg);
}
.login-html .sign-in:checked + .tab + .sign-up + .tab + .login-form .sign-in-htm{
  -webkit-transform:rotate(0);
          transform:rotate(0);
}
.login-html .sign-up:checked + .tab + .login-form .sign-up-htm{
  -webkit-transform:rotate(0);
          transform:rotate(0);
}

.hr{
  height:2px;
  margin:60px 0 50px 0;
  background:rgba(255,255,255,.2);
}
.foot-lnk{
  text-align:center;
}
Now you’ll see the page same as this

Connecting HTML page with Webservices
Download Login & Signup API from Github you can also create these API following my previous post, Restful Web Services in PHP Example – PHP + MySQL Best Practice
setup Database and paste “api” folder inside “app” folder.
all done, Now you can run your index.html through localhost.
You might be Interested in:
Here are some more Tutorial for creating Web Application & CRUD Operations using PHP & MySQL.
- Getting Started with Web Application using PHP & MySQL | Tutorials
- CRUD Operations using PHP & MySQL | Tutorials with Source Code
- Learn Object Oriented Programming In PHP
The post Signup Login page in PHP with Database MySQL Source Code appeared first on Coding Infinite.
]]>The post Entity Framework Core Database First – Asp.Net Core Scaffold MySql DB appeared first on Coding Infinite.
]]>History
.Net Core is a lightweight and cross-platform version of the DotNet framework and the awesome thing is Developers required the same expertise to work with Asp.Net Core as .Net Framework.
After .Net Core Launch, Mac, and Linux users can also develop using Microsoft Technologies.
Most of the users use SQL Server as a Database of their Application when working with .Net Technologies. But difficulties occur while developing with macOS or Linux, Although SQL Server can be used using Docker which is very popular these days, Docker required some expertise that’s why most of the developers love to use other Databases.
When .Net Core was released the framework supported only the following databases:
- SQL Server
- Postgres
- SQLite
- SQL Server Compact
But with a redesigned completely, EntityFramework Core became lighter than the old version. Now in its 2nd version, EntityFramework Core supports more databases and in this article, I will show you how to use it with a MySQL database.
Environment
I’m using the environment below for this post:
- MacOS High Sierra
- PhpMyAdmin for MySQL
- Visual Studio Code
Solution
I’m using Visual Studio Code
First, create a DotNet Core Console Application using DotNet CLI Command
dotnet new console -o DotNetCoreMySQL
My default .Net Core version is 2.2. So, my project will be created in 2.2.
Now Add Pomelo Nuget Package, your project compatible version.dotnet add package Pomelo.EntityFrameworkCore.MySql
For EntityFramework Core Commands, add the line below to your project configuration file DotNetCoreMySQL.csproj
<ItemGroup>
    <DotNetCliToolReference Include="Microsoft.EntityFrameworkCore.Tools.DotNet" Version="2.0.3" />
    <PackageReference Include="Microsoft.EntityFrameworkCore.Design" Version="2.2.6" />
</ItemGroup>
run this command
dotnet restore
Now run the scaffold command to create Models from Database
dotnet ef dbcontext scaffold "Server=localhost;User Id=root;Password=1234;Database=MyTestDB" "Pomelo.EntityFrameworkCore.MySql" -c MyDbContext
Your Models will be created. I recommend you first to create Models Folder and scaffold your Database there.
use these commands to that:
mkdir Models
Now run this scaffold command to scaffold inside Models folder.
dotnet ef dbcontext scaffold "Server=localhost;User Id=root;Password=1234;Database=MyTestDB" "Pomelo.EntityFrameworkCore.MySql" -c MyDbContext -o Models
Update Models
You can use Scaffold-DbContext command with -f flag. This way you can force scaffolding to overwrite existing model files.
dotnet ef dbcontext scaffold "Server=localhost;User Id=root;Password=1234;Database=MyTestDB" "Pomelo.EntityFrameworkCore.MySql" -c MyDbContext -f
Most of the developers face problem in scaffolding due to versions conflict. Keep in mind, if you’re using .Net 2 then use the Pomelo of the same version or if you are working with .Net Core 2.1 then use the Latest version of Pomelo.
If you still face any problem please comment below.
Here are more Articles you might be Interested
– Creating Admin Panel in Asp.net Core MVC – Step by Step Tutorial
– Top 10 .Net Core Features You need to know
– Dynamic Role-Based Authorization Asp.net Core
– Upload File to SFTP Server using C#
The post Entity Framework Core Database First – Asp.Net Core Scaffold MySql DB appeared first on Coding Infinite.
]]>