For those of you not familiar with the concept, a Landing Zone is an Infrastructure-as-Code (“IaC”) deployment of subscriptions, Management Groups, policies, RBAC, and networking components that account for a customer’s unique scale, security, governance, networking, and identity requirements.
Check out the video below to see how we help guide our customers to make the best foundational choices to “stick” their Landing Zone!
]]>After a quick screen share, everything seemed to be in order on the nodes themselves from a high level. Different subnets as required on AWS, proper configuration, and none of the common mistakes I see with AGs.
Knowing there’s a special requirement in Azure to handle the floating VIPs with an internal load balancer, I then set out to check Google to see what was missed.
Most of the documentation I found on Amazon’s site seemed to just reference the quickstart template, and really didn’t give any more detailed requirements or configuration detail. After a few more minutes, I came across a “Windows Wednesday” article from 2013 entitled “Windows Wednesday – AWS Implementation Guide for Microsoft SQL Server 2012 AlwaysOn Availability Groups” that seemed pretty relevant. While the linked PDF by David Pae and Ulf Schoo was geared toward building an SQL Server 2012 AG, the general process hasn’t changed all that much, so I gave it a read.
It, too, covered using a quickstart template, but it appeared to be an older version, as there were less parameters mentioned, and the guide showed a bit more manual configuration.
And then there it was, on page 11. The missing link.
On an AWS implementation, VIPs must be added as “secondary private addresses” to each node, in the AWS console itself, and not just through the operating system

by David Pae, Ulf Schoo

This image is from page 11 of the PDF “Implementing Microsoft Windows Server Failover Clustering (WSFC) and SQL Server 2012 AlwaysOn Availability Groups in the AWS Cloud”
by David Pae, Ulf Schoo
The key is to add the IPs for both the WSFC management point, and the AG listener IP, to the correct node, based on subnet.
For example, we did something like this:
Node 1 (10.0.1.0 subnet)
10.0.1.10 – Node IP – Primary IP, already there
10.0.1.100 – WFSC IP – Added as secondary IP
10.0.1.150 – AG listener – Added as secondary IP
Node 2 (10.0.2.0 subnet)
10.0.2.10 – Node IP – Primary IP, already there
10.0.2.100 – WSFC IP – Added as secondary IP
10.0.2.150 – AG listener – Added as secondary IP
After a bit of discussion, we added all the secondary IPs to the nodes through the AWS console, and then rebooted each node for good measure. Once they came back up, everything was working correctly, and the issue was resolved. Total call time was a shade under 20 minutes to get to this point.
To quote Gavin Rossdale from the band Bush “It’s the little things that kill”
]]>However, they also wanted it integrated with Active Directory for authentication & autorization, and wanted to use Kerberos for password-less login.
This was a bit more complicated, and doesn’t seem super-well documented in any one single location.
MongoDB’s documentation will get you started, but has some gaps around bringing together the Windows side, service names, and the host keytab.
This blog post will not be a comprehensive guide to installation and configuration of MongoDB; This will be covered in a future blog post. The assumption here is that we’ve already got a working cluster, and that we want to add AD & Kerberos support.
My goal here is to walk though a practical example of how I got this to work in my home lab environment (and thus my customers).
We’ll actually use many of the things we learned in my previous post on Setting up Windows Authentication on SQL Server 2017 Linux
Our environment:
- 4x Hyper-V VMs, running CentOS 7.5, build 1804; “Infrastructure Server” install. Latest updates applied.
- 3x Data nodes (mongodb[01-03].ufp.cloud)
- 1x Operations Manager node (opsmgr.ufp.cloud)
- Installation is fully-managed by Operations Manager (automation agent)
- Fully functional Active Directory domain, named UFP.CLOUD
Here’s how MongoDB is currently configured:
- MongoDB 4.0.0 Enterprise (Required for Kerberos)
- 3 Shards, replicated across the 3 nodes
- 3 mongos routers (one per node)
- Config database replicated across all 3 nodes
- Data directory set to /data
- mongod user recursively set to owner of /data
- Using defaults of all naming
- *NOT BUILT TO BEST PRACTICES*
Here’s what it all looks like in Operations Manager:

The basic outline we’re going to follow:
- Machine Prep
- Creating the SPN’s
- Creating the Keytab file
- Add the keytab to the MongoDB configuration
- Enabling Windows Authentication and Authorization
- Creating Roles in MongoDB
- Testing
Alright; let’s get started
Machine Prep:
Our first step is to get the Linux servers prepared for Windows Authentication.
As we learned in my previous article on Setting up Windows Authentication on SQL Server 2017 Linux, this involves installing a few packages, and making sure that our /etc/hosts file is configured correctly.
Since I have already covered the majority of this in the previous post, I will just cover the highlights here.
The prerequisite packages we need to support Windows Authentication on Linux are :
sudo yum install realmd krb5-workstation oddjob oddjob-mkhomedir sssd samba-common-tools
These need to be installed on all 3 nodes. Once we’ve installed the packages, we need to join the domain. Use the command below, substituting a user that has privileges to add computers to the domain. You’ll be prompted for password twice. If you see an error about something DNS related, leave the domain, ensure the .etc/hosts file has the machine’s FQDN and shortname, along with IP, and try again.
sudo realm join ufp.cloud -U '[email protected]' -v
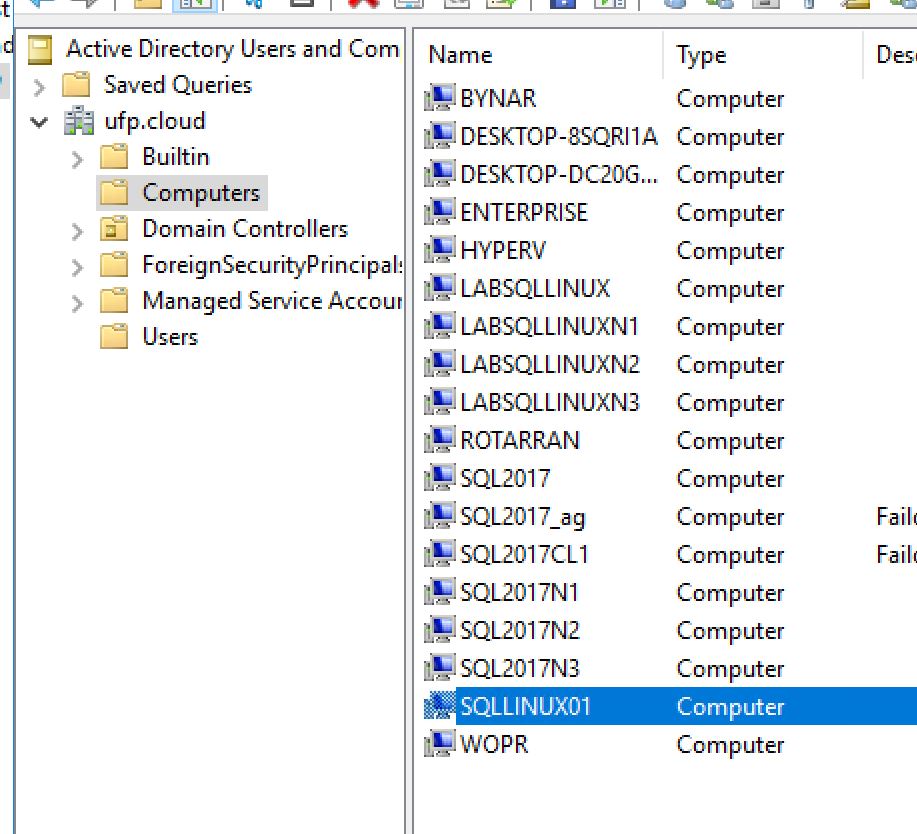
Once you’ve added all of the nodes to the domain, you should be able to see them in Active Directory Users and Computers:

Now we’re ready to move on to the next step
Creating the SPN’s
This is one of the most critical steps to get right, but also probably the easiest part of the entire process. What we need is an SPN that reflects the service name, FQDN, and the service account we’re going to use for MongoDB. In my case, I want to use a service account called svc_mongodb.
MongoDB is highly configurable, and will allow you to define any service name you want – but to keep things simple, we’ll just use the default of mongodb. You create the SPNs from a Windows machine, using an elevated command prompt, using an authorized account (generally domain admin).
Here’s what I used:
setspn -S mongodb/mongodb01.ufp.cloud svc_mongodb
setspn -S mongodb/mongodb02.ufp.cloud svc_mongodb
setspn -S mongodb/mongodb03.ufp.cloud svc_mongodb
Creating the Keytab file
The steps to create the keytab file follows the same pattern we used before for SQL Server on Linux, using the ktutil command. Here’s the steps (this must be done on each machine individually
- Use kinit to log in as the service account we want to use, and then validate that the SPN works. Make sure to grab the kvno number, since we’ll need it for the next step. It’s generally always 2. Replace the SPN name to match the particular host you’re running the command from.
[dbadave@mongodb01 ~]$ kinit [email protected]
Password for [email protected]:
[dbadave@mongodb01 ~]$ kvno mongodb/mongodb01.ufp.cloud
mongodb/[email protected]: kvno = 2
- Use ktutil to create the keytab, and save it as /data/mongodb.keytab, then adjust permissions on it to make it readable only by the Linux mongod user. Make note to change the addent line to match the host name that you’re on, and be very sure you choose the same wkt path on each host. This makes the next part much simpler.
[dbadave@mongodb01 ~]$ sudo ktutil
[sudo] password for dbadave:
ktutil: addent -password -p mongodb/[email protected] -k 2 -e rc4-hmac
Password for mongodb/[email protected]:
ktutil: wkt /data/mongodb.keytab
ktutil: quit
[dbadave@mongodb01 ~]$ sudo chown mongod:mongod /data/mongodb.keytab
[dbadave@mongodb01 ~]$ sudo chmod 400 /data/mongodb.keytab
Please note the last two commands – this sets the security on theKeyTab file. This has to be very restrictive, as above, otherwise you’ll get errors on trying to start the mongod service.
Add the keytab to the MongoDB configuration
Since our cluster was created and is managed by Operations Manager (which I highly recommend), we don’t want to modify the MongoDB configuration outside of it. Luckily, Operations Manager makes adding cluster-wide settings, such as Kerberos keytab location, super easy.
- Log in to Operations Manager, and select your cluster:

- Go to the Deployments tab, and click on “Modify” for the cluster you want to enable AD & Kerberos Authentication on:

- Choose “Advanced Configuration Options”, and click on “Add Option”

- Select the “kerberosKeytab” option from the rather large list. Previous versions of Operations manager made this process easier, as items were categorized. Not so, any more. You have to wade through the whole list of options to find it

- Enter the path that you used to save the keytab on all the nodes (/data/mongodb.keytab), and then deploy your changes

- Deploy the changes, and wait for successful restart. If you get errors on restart, make sure you’ve set the permissions as above, as MongoDB will not start on a particular node if the permissions on the KeyTab are NOT restrictive enough
Ince we’re back up, let’s move on to the next steps
Enabling Windows Authentication and Authorization
Now that we’ve got the keytab installed on all of the nodes, and set MongoDB to use it, we’re ready to enable Windows & Kerberos Authentication on our cluster.
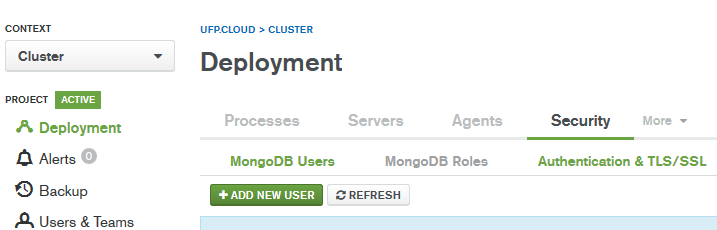
We start by going to Deployments, then Security, and then “Authentication & TLS/SSL”
On this next page, we set up our connection to Active Directory. These settings work for my home lab, but you may need to adjust some of them to work with your domain – particularly the “Transport Security” and the “Bind Method”
We’ll need to enter our domain controllers (kirk.ufp.cloud, picard.ufp.cloud), and an account that’s authorized to query the directory.
In this example, we’re just using the service account we created earlier.

Now that we’ve got that information in there, let’s click next.

On this page, we select the authentication mechanisms we want to use. In our case, we’re wanting “Username/Password”, “Kerberos (GSSAPI)”, and “LDAP: Native Authentication”, so we’ll go ahead and click those boxes, then hit next.

Here’s where the AD magic happens. It’s important to configure this part correctly – As a consultant, the KeyTab and the mappings are the two most common items I see that are misconfigured.
Here’s what we’re doing here:
- Authorization Query Template: This is the LDAP query that will be used to identify which groups a user belongs to, and will be checked against the roles we’ll configure later to validate the user is authorized
- User to Distinguished Name Mapping: This is the query that will be used to discover the full Distinguished Name (DN) of a user, from the User Principal Name (UPN). This allows you to log in to MongoDB using your UPN (generally your email address), and have MongoDB query AD to discover your full DN, and then validate that you’re in a group that is allowed access to MongoDB.
In our example, I’ll log in as [email protected] (note the uppercase – this is important), which maps to the following DN: CN=dbadave,CN=Users,DC=ufp,DC=cloud. This user is then in a group that’s given admin rights to MongoDB
I’ll use a quick PowerShell command to illustrate:
PS C:\Users\dbadave> Get-ADUser -Identity dbadave

DistinguishedName : CN=dbadave,CN=Users,DC=ufp,DC=cloud
Enabled           : True
GivenName         : dbadave
Name              : dbadave
ObjectClass       : user
ObjectGUID        : 6dafb433-5874-447b-a81f-6bd394e6a2af
SamAccountName    : dbadave
SID               : S-1-5-21-3488226428-2329485013-3257030103-1123
Surname           :
UserPrincipalName : [email protected]
In our case, the example queries on the official documentation works by replacing the placeholder text with our domain name and tld, but in more complex environments we’ll have to make more modifications. Generally, most of my enterprise customers use custom OUs to for their users and groups, so we need to specify those custom OUs in the queries to make sure they’re looking in the right place. I also have to modify the timeout setting we saw before a lot of times. But generally between validating the SPN, the KerberosKeyTab, and the two queries, I’ve been able to get AD/Kerberos working in most every environment.
Once we’re happy with these queries, let’s click Next

We’re not using use TLS/SSL in this example, so let’s just click next

This is setting up authentication for the Operations Manager accounts to connect to MongoDB. We can configure this to use and AD account, but in our case we’ll just Operations Manager create and manage the users
Let’s click on Save, and then deploy the changes, and wait for successful restart. Once we’re back up, let’s create the roles we need
Creating Roles in MongoDB
This is the final step in getting everything to work, and also one of the more misunderstood parts. Instead of defining a user that has rights, MongoDB wants up to specify a role, that has the exact DN of an AD group, to control authentication/authorization.
In my example, I have created an AD group called “MongoAdmins”, and added my userid to it. The first step is to get the full Distinguished Name of the group. We can get this with some real simple PowerShell:
PS C:\Users\dbadave> Get-ADGroup -Identity MongoAdmins


DistinguishedName : CN=MongoAdmins,CN=Users,DC=ufp,DC=cloud
GroupCategory : Security
GroupScope : Global
Name : MongoAdmins
ObjectClass : group
ObjectGUID : 1b82dd47-84fb-4b7b-be01-9135422ee1e3
SamAccountName : MongoAdmins
SID : S-1-5-21-3488226428-2329485013-3257030103-1138
What we need here is the DistinguishedName, which in our case is CN=MongoAdmins,CN=Users,DC=ufp,DC=cloud
With this information, let’s go to Deployment, Security, and then “MongoDB Roles”

Let’s add a new role

Here’s where we create the role. Since we’re creating an admin user, and we want them to have access to all databases, we’ll do this:
Identifier:
This is where we specify the database and group for the new role we’re creating
- Database – is the MongoDB database we’re adding the role to. In our case, we’ll enter “admin”
- Name – this is where you’ll enter the full DN for the group that we got earlier from the PowerShell query. We’ll enter CN=MongoAdmins,CN=Users,DC=ufp,DC=cloud
Inherits From:
These are pre-defined roles in MongoDB that grant permissions without having to define a custom set. In our case, since this is an admin user, we’ll assign some admin roles
The rest we’ll leave at defaults, and click on Add Role

Next we deploy our changes

We then validate that we’re just adding a new role, with a few admin level permissions. Click on “Confirm & Deploy”

After deployment, we can see that our role has been successfully added.
Testing
We should now be able to log in to MongoDB, as an admin, via Kerberos, using a member of the “MongoAdmins” AD group, from Windows.
Let’s test that. We’ll need to make sure that we’re using the enterprise version of the mongo client, as this is the only version of the client that supports Kerberos. We’ll also need to make sure we’re constructing our connection string correctly. Let’s see how to do that.
The command we’re going to us is:
mongo.exe admin --username [email protected] --authenticationMechanism GSSAPI --host mongodb01.ufp.cloud --authenticationDatabase $external
Let’s break that down a bit.
- username – The AD User Principal Name if the authorized account. To get passthrough authentication to work, this should be logged in as this account on your Windows machine. The runas command works, too
- authenticationMechanism – This setting tells the client we want to use Kerberos (GSSAPI)
- host – The FQDN (and port, if NOT 27017) of the host to connect to
- authenticationDatabase – This tells MongoDB that this is an external user, and not a local one. This causes MongoDB to query AD to find the user. If you don’t pass this option, you’ll be prompted for a password
Alright – let’s run it and see what we get
C:\Program Files\MongoDB\Server\4.0\bin>mongo.exe admin --username [email protected] --authenticationMechanism GSSAPI --host mongodb01.ufp.cloud --authenticationDatabase $external
MongoDB shell version v4.0.0
connecting to: mongodb://mongodb01.ufp.cloud:27017/admin
MongoDB server version: 4.0.0
MongoDB Enterprise mongos>
And it looks like we’re in!
Let’s make sure we have admin rights, by getting a status of the sharding we set up. Formatting is flattened to make it easier to read.
MongoDB Enterprise mongos> sh.status()
--- Sharding Status ---
sharding version: {
"_id" : 1,
"minCompatibleVersion" : 5,
"currentVersion" : 6,
"clusterId" : ObjectId("5b4d6d86d72b308dee1f0ee3")
}
shards:
{ "_id" : "myShard_0", "host" : "myShard_0/mongodb01.ufp.cloud:27010,mongodb02.ufp.cloud:27010,mongodb03.ufp.cloud:27010", "state" : 1 }
{ "_id" : "myShard_1", "host" : "myShard_1/mongodb01.ufp.cloud:27011,mongodb02.ufp.cloud:27011,mongodb03.ufp.cloud:27011", "state" : 1 }
{ "_id" : "myShard_2", "host" : "myShard_2/mongodb01.ufp.cloud:27012,mongodb02.ufp.cloud:27012,mongodb03.ufp.cloud:27012", "state" : 1 }
active mongoses:
"4.0.0" : 3
autosplit:
Currently enabled: yes
balancer:
Currently enabled: yes
Currently running: no
Failed balancer rounds in last 5 attempts: 2
Last reported error: interrupted at shutdown
Time of Reported error: Tue Jul 17 2018 00:21:20 GMT-0500 (Central Standard Time)
Migration Results for the last 24 hours:
No recent migrations
databases:
{ "_id" : "config", "primary" : "config", "partitioned" : true }
config.system.sessions
shard key: { "_id" : 1 }
unique: false
balancing: true
chunks:
myShard_0 1
{ "_id" : { "$minKey" : 1 } } -->> { "_id" : { "$maxKey" : 1 } } on : myShard_0 Timestamp(1, 0)

MongoDB Enterprise mongos>
…And we’ve got admin rights!
Here’s what it looks like if we run this command as a non-admin, with the most relevant part in bold:
C:\Program Files\MongoDB\Server\4.0\bin>mongo.exe admin --username [email protected] --authenticationMechanism GSSAPI --host mongodb01.ufp.cloud --authenticationDatabase $external
MongoDB shell version v4.0.0
connecting to: mongodb://mongodb01.ufp.cloud:27017/admin
MongoDB server version: 4.0.0
MongoDB Enterprise mongos> sh.status()
2018-08-08T09:41:07.758-0500 E QUERY [js] Error: error: {
"ok" : 0,
"errmsg" : "not authorized on config to execute command { find: \"version\", filter: {}, limit: 1.0, singleBatch: true, $clusterTime: { clusterTime: Timestamp(1533739254, 4), signature: { hash: BinData(0, 01F45FA247313A866FF5CE95EFD66F629A53257B), keyId: 6579035057246175236 } }, $db: \"config\" }",
"code" : 13,
"codeName" : "Unauthorized",
"operationTime" : Timestamp(1533739254, 5),
"$clusterTime" : {
"clusterTime" : Timestamp(1533739254, 5),
"signature" : {
"hash" : BinData(0,"AfRfokcxOoZv9c6V79ZvYppTJXs="),
"keyId" : NumberLong("6579035057246175236")
}
}
} :
MongoDB Enterprise mongos>
And there we have it. We’ve now got AD Authentication/Authorization & Kerberos configured and working with MongoDB and Operations Manager
Summary
I know this was a long post, but as I mentioned before, I really didn’t find a great resource that brought all of the elements together in a step-by-step manner. The MongoDB official documentation is pretty close, but doesn’t walk through the KeyTab part, or the identification of the DNs for users/groups – nor does it cover doing this in Operations Manager.
I mainly put this together as a way to help me document the process, but I hope someone else finds it useful
-Dave
]]>I see this as being one of the more common use-cases for customers looking to integrate SQL Server on Linux, and is actually fairly straight forward. The process we’ll follow here is a bit more long-winded than just copy and pasting from the Microsoft documentation, but I feel it’s important to take your time and understand what you’re doing the first few times.
In part II of this post, due out soon, we’ll take this node and add it to an Availability Group, so stay tuned…
Here’s our environment setup:
- Server OS: CentOS-7-x86_64-Everything-1708, with Infrastructure Server software selection chosen. Get it here
- Virtualization: Hyper-V 2016 host
- Server name: sqllinux01
- Server IP: 192.168.80.10
- Domain Name: ufp.cloud (AD domain name)
- DNS Servers: 192.168.5.1, 192.168.5.2 (AD domain controllers)
- Local User: dbadave (We’ll log in as this user, and use it to run commands)
- Domain Admin User Name: [email protected] (Used to join machine to AD domain)
- SQL Service Account: [email protected] (we’ll use this for the SPN creation)
Assumptions:
- Working, reasonably healthy Active Directory Infrastructure
- VM built; OS installed and sitting on a login screen
- Network Time enabled during installation
- All IP, DNS, Hostname, and Search domain configuration done during installation ( screen shot below)
- Network interface enabled on boot (not enabled by default… Hmm…)
- Non-root user dbadave created during installation, and made administrator (checkbox on installation)
- All traffic allowed between subnets on the Hyper-V 2016 host
- Using Documentation from Microsoft; Available here
- Using PuTTY as our terminal. Get it here
For reference, here’s a screenshot showing my network config during installation:

One very important note:
We’re using CentOS here, due to Red Hat Enterprise Linux (RHEL) requirements for having a support subscription to access certain packages that I need to build out Availability Groups during SQL Saturdays and other sessions. However, CentOS is almost identical to RHEL, just without the branding and support requirements. Certainly close enough to follow the same documentation. Unfortunately, it’s not on the list of fully supported operating systems for SQL Server 2017 on Linux – probably due to lack of paid support.
While CentOS works great for doing demos, please make sure you use supported OS’s in production.
Alright; let’s get started!
First thing we’ll do is use PuTTY to ssh in to the freshly built server, and log in as the User created during setup (dbadave)
[dbadave@sqllinux01 ~]$
OK; looks pretty empty; not much going on here. Let’s change that!
First thing I like to do is update, so let’s do that now.
[dbadave@sqllinux01 ~]$ sudo yum update && sudo yum upgrade -y
Being a Linux box, it’s going to ask you for your password. This distribution also likes to quote Spider-Man at you. Or was uncle Ben a Unix geek? The world may never know.
[dbadave@sqllinux01 ~]$ sudo yum update && sudo yum upgrade

We trust you have received the usual lecture from the local System
Administrator. It usually boils down to these three things:

    #1) Respect the privacy of others.
    #2) Think before you type.
    #3) With great power comes great responsibility.

[sudo] password for dbadave:
Given the large amount of updates I had to apply (223, in this case) I opted to reboot. Unless it prompts you, its generally optional tho.
Now that updates are out of the way, let’s start installing the required packages to get AD Auth working.
Per documentation for RHEL, we should just need the following packages:
realmd and krb5-workstation
Easy enough, let’s install them:
sudo yum install realmd krb5-workstation
And we get presented with the following:
===================================================================================
 Package                  Arch           Version                Repository    Size
===================================================================================
Installing:
 krb5-workstation         x86_64         1.15.1-8.el7           base         811 k
 realmd                   x86_64         0.16.1-9.el7           base         208 k
Installing for dependencies:
 libkadm5                 x86_64         1.15.1-8.el7           base         174 k
 oddjob                   x86_64         0.31.5-4.el7           base          69 k
 oddjob-mkhomedir         x86_64         0.31.5-4.el7           base          38 k
 psmisc                   x86_64         22.20-15.el7           base         141 k

Transaction Summary
===================================================================================
Install  2 Packages (+4 Dependent packages)

Total download size: 1.4 M
Installed size: 4.0 M
Is this ok [y/d/N]:
What this is telling us is that the package manager found some dependencies that need to be squared away before thoe two packages can be installed. Pretty smart! let’s just answer ‘Y’ here to allow this to happen. We could have just run the yum command with the the -y flag to bypass the permission part, but I think it’s a good idea to understand what’s going on. After you’ve done this a few times, you’ll be set to just skip the extra messages.
After input, the package manager immediately goes to work, and finishes rather quickly:
Downloading packages:
(1/6): krb5-workstation-1.15.1-8.el7.x86_64.rpm             | 811 kB  00:00:00
(2/6): libkadm5-1.15.1-8.el7.x86_64.rpm                     | 174 kB  00:00:00
(3/6): oddjob-0.31.5-4.el7.x86_64.rpm                       |  69 kB  00:00:00
(4/6): oddjob-mkhomedir-0.31.5-4.el7.x86_64.rpm             |  38 kB  00:00:00
(5/6): realmd-0.16.1-9.el7.x86_64.rpm                       | 208 kB  00:00:00
(6/6): psmisc-22.20-15.el7.x86_64.rpm                       | 141 kB  00:00:09
-----------------------------------------------------------------------------------
Total                                                 135 kB/s | 1.4 MB  00:10
Running transaction check
Running transaction test
Transaction test succeeded
Running transaction
  Installing : psmisc-22.20-15.el7.x86_64                                      1/6
  Installing : oddjob-0.31.5-4.el7.x86_64                                      2/6
  Installing : oddjob-mkhomedir-0.31.5-4.el7.x86_64                            3/6
  Installing : libkadm5-1.15.1-8.el7.x86_64                                    4/6
  Installing : krb5-workstation-1.15.1-8.el7.x86_64                            5/6
  Installing : realmd-0.16.1-9.el7.x86_64                                      6/6
  Verifying  : realmd-0.16.1-9.el7.x86_64                                      1/6
  Verifying  : oddjob-0.31.5-4.el7.x86_64                                      2/6
  Verifying  : krb5-workstation-1.15.1-8.el7.x86_64                            3/6
  Verifying  : oddjob-mkhomedir-0.31.5-4.el7.x86_64                            4/6
  Verifying  : psmisc-22.20-15.el7.x86_64                                      5/6
  Verifying  : libkadm5-1.15.1-8.el7.x86_64                                    6/6

Installed:
  krb5-workstation.x86_64 0:1.15.1-8.el7        realmd.x86_64 0:0.16.1-9.el7

Dependency Installed:
  libkadm5.x86_64 0:1.15.1-8.el7                oddjob.x86_64 0:0.31.5-4.el7
  oddjob-mkhomedir.x86_64 0:0.31.5-4.el7        psmisc.x86_64 0:22.20-15.el7

Complete!
[dbadave@sqllinux01 ~]$
Everything looks good here, so on to the next step. We’ve already addressed the network configuration step listed next in the Microsoft documentation during installation, so let’s skip that step.
Step 4: Join the domain
This is where we’ll use the Realmd package we downloaded earlier
This command tells our server to discover how to connect to our domain through DNS, and join the domain
sudo realm join ufp.cloud -U '[email protected]' -v
And here’s what we get back:
 * Resolving: _ldap._tcp.ufp.cloud
 * Performing LDAP DSE lookup on: 192.168.5.2
 * Performing LDAP DSE lookup on: 192.168.5.1
 * Successfully discovered: ufp.cloud
Password for [email protected]:
So far so good – Realm discovered our domain just fine. Now it’s asking us to enter in our domain user password to complete the process, so let’s do that. Here’s what we get back:
Password for [email protected]:
 * Couldn't find file: /usr/sbin/sssd
 * Required files: /usr/sbin/oddjobd, /usr/libexec/oddjob/mkhomedir, /usr/sbin/sssd, /usr/bin/net
 * Resolving required packages
 ! PackageKit not available: The name org.freedesktop.PackageKit was not provided by any .service files
 ! Necessary packages are not installed: oddjob, oddjob-mkhomedir, sssd, samba-common-tools
realm: Couldn't join realm: Necessary packages are not installed: oddjob, oddjob-mkhomedir, sssd, samba-common-tools
Woah! our first error!
None of the dependencies were listed in previous steps, however there is a note that seems to fit our situation:
“If you see an error, “Necessary packages are not installed,” then you should install those packages using your Linux distribution’s package manager before running the realm join command again.”
OK, no problem. Let’s install the packages it is asking us to install:
sudo yum install oddjob oddjob-mkhomedir sssd samba-common-tools
And here’s what we get back:
===================================================================================
 Package                 Arch        Version                    Repository    Size
===================================================================================
Installing:
 samba-common-tools      x86_64      4.6.2-12.el7_4             updates      456 k
 sssd                    x86_64      1.15.2-50.el7_4.11         updates      121 k
Installing for dependencies:
 avahi-libs              x86_64      0.6.31-17.el7              base          61 k
 c-ares                  x86_64      1.10.0-3.el7               base          78 k
 cups-libs               x86_64      1:1.6.3-29.el7             base         356 k
 cyrus-sasl-gssapi       x86_64      2.1.26-21.el7              base          41 k
 http-parser             x86_64      2.7.1-5.el7_4              updates       28 k
 libbasicobjects         x86_64      0.1.1-27.el7               base          25 k
 libcollection           x86_64      0.6.2-27.el7               base          41 k
 libdhash                x86_64      0.4.3-27.el7               base          28 k
 libini_config           x86_64      1.3.0-27.el7               base          63 k
 libipa_hbac             x86_64      1.15.2-50.el7_4.11         updates      129 k
 libldb                  x86_64      1.1.29-1.el7               base         128 k
 libnfsidmap             x86_64      0.25-17.el7                base          49 k
 libpath_utils           x86_64      0.2.1-27.el7               base          27 k
 libref_array            x86_64      0.1.5-27.el7               base          26 k
 libsmbclient            x86_64      4.6.2-12.el7_4             updates      130 k
 libsss_autofs           x86_64      1.15.2-50.el7_4.11         updates      131 k
 libsss_certmap          x86_64      1.15.2-50.el7_4.11         updates      151 k
 libsss_sudo             x86_64      1.15.2-50.el7_4.11         updates      129 k
 libtalloc               x86_64      2.1.9-1.el7                base          33 k
 libtdb                  x86_64      1.3.12-2.el7               base          47 k
 libtevent               x86_64      0.9.31-2.el7_4             updates       36 k
 libwbclient             x86_64      4.6.2-12.el7_4             updates      104 k
 pytalloc                x86_64      2.1.9-1.el7                base          16 k
 python-sssdconfig       noarch      1.15.2-50.el7_4.11         updates      155 k
 samba-client-libs       x86_64      4.6.2-12.el7_4             updates      4.7 M
 samba-common            noarch      4.6.2-12.el7_4             updates      197 k
 samba-common-libs       x86_64      4.6.2-12.el7_4             updates      164 k
 samba-libs              x86_64      4.6.2-12.el7_4             updates      265 k
 sssd-ad                 x86_64      1.15.2-50.el7_4.11         updates      226 k
 sssd-common             x86_64      1.15.2-50.el7_4.11         updates      1.3 M
 sssd-common-pac         x86_64      1.15.2-50.el7_4.11         updates      183 k
 sssd-ipa                x86_64      1.15.2-50.el7_4.11         updates      318 k
 sssd-krb5               x86_64      1.15.2-50.el7_4.11         updates      159 k
 sssd-krb5-common        x86_64      1.15.2-50.el7_4.11         updates      194 k
 sssd-ldap               x86_64      1.15.2-50.el7_4.11         updates      227 k
 sssd-proxy              x86_64      1.15.2-50.el7_4.11         updates      155 k

Transaction Summary
===================================================================================
Install  2 Packages (+36 Dependent packages)

Total download size: 11 M
Installed size: 29 M
Is this ok [y/d/N]:
Wow, that’s a lot of additional packages… This is pretty common with Linux, as dependencies can have dependencies.
Well, we obviously need them, so let’s go ahead and respond with ‘Y’. We’ll see lots of text scroll by as before, but we’ll eventually see this screen:
Dependency Installed:
  avahi-libs.x86_64 0:0.6.31-17.el7               c-ares.x86_64 0:1.10.0-3.el7
  cups-libs.x86_64 1:1.6.3-29.el7                 cyrus-sasl-gssapi.x86_64 0:2.1.26-21.el7
  http-parser.x86_64 0:2.7.1-5.el7_4              libbasicobjects.x86_64 0:0.1.1-27.el7
  libcollection.x86_64 0:0.6.2-27.el7             libdhash.x86_64 0:0.4.3-27.el7
  libini_config.x86_64 0:1.3.0-27.el7             libipa_hbac.x86_64 0:1.15.2-50.el7_4.11
  libldb.x86_64 0:1.1.29-1.el7                    libnfsidmap.x86_64 0:0.25-17.el7
  libpath_utils.x86_64 0:0.2.1-27.el7             libref_array.x86_64 0:0.1.5-27.el7
  libsmbclient.x86_64 0:4.6.2-12.el7_4            libsss_autofs.x86_64 0:1.15.2-50.el7_4.11
  libsss_certmap.x86_64 0:1.15.2-50.el7_4.11      libsss_sudo.x86_64 0:1.15.2-50.el7_4.11
  libtalloc.x86_64 0:2.1.9-1.el7                  libtdb.x86_64 0:1.3.12-2.el7
  libtevent.x86_64 0:0.9.31-2.el7_4               libwbclient.x86_64 0:4.6.2-12.el7_4
  pytalloc.x86_64 0:2.1.9-1.el7                   python-sssdconfig.noarch 0:1.15.2-50.el7_4.11
  samba-client-libs.x86_64 0:4.6.2-12.el7_4       samba-common.noarch 0:4.6.2-12.el7_4
  samba-common-libs.x86_64 0:4.6.2-12.el7_4       samba-libs.x86_64 0:4.6.2-12.el7_4
  sssd-ad.x86_64 0:1.15.2-50.el7_4.11             sssd-common.x86_64 0:1.15.2-50.el7_4.11
  sssd-common-pac.x86_64 0:1.15.2-50.el7_4.11     sssd-ipa.x86_64 0:1.15.2-50.el7_4.11
  sssd-krb5.x86_64 0:1.15.2-50.el7_4.11           sssd-krb5-common.x86_64 0:1.15.2-50.el7_4.11
  sssd-ldap.x86_64 0:1.15.2-50.el7_4.11           sssd-proxy.x86_64 0:1.15.2-50.el7_4.11

Complete!
[dbadave@sqllinux01 ~]$
OK, everything looks good; Let’s try our realm command again:
sudo realm join ufp.cloud -U '[email protected]' -v
Same as before, our domain is found, and we’re prompted to enter our domain user password.
However, this time we don’t get an error:
Resolving: _ldap._tcp.ufp.cloud
 * Performing LDAP DSE lookup on: 192.168.5.1
 * Successfully discovered: ufp.cloud
Password for [email protected]:
 * Required files: /usr/sbin/oddjobd, /usr/libexec/oddjob/mkhomedir, /usr/sbin/sssd, /usr/bin/net
 * LANG=C LOGNAME=root /usr/bin/net -s /var/cache/realmd/realmd-smb-conf.348ZHZ -U [email protected] ads join ufp.cloud
Enter [email protected]'s password:
Using short domain name -- UFP
Joined 'SQLLINUX01' to dns domain 'ufp.cloud'
 * LANG=C LOGNAME=root /usr/bin/net -s /var/cache/realmd/realmd-smb-conf.348ZHZ -U [email protected] ads keytab create
Enter [email protected]'s password:
 * /usr/bin/systemctl enable sssd.service
Created symlink from /etc/systemd/system/multi-user.target.wants/sssd.service to /usr/lib/systemd/system/sssd.service.
 * /usr/bin/systemctl restart sssd.service
 * /usr/bin/sh -c /usr/sbin/authconfig --update --enablesssd --enablesssdauth --enablemkhomedir --nostart &&
/usr/bin/systemctl enable oddjobd.service && /usr/bin/systemctl start oddjobd.service
 * Successfully enrolled machine in realm
[dbadave@sqllinux01 ~]$
Notice the message above “Successfully enrolled machine in realm”? That’s the realm equivalent of “Welcome to the ufp.cloud domain!” you get on Windows machines, just with less popups and fanfare. Our Linux machine is now on the Active Directory domain.
Just for grins, let’s check Active Directory Users and Computers, and see if we can see the computer object:
…And sure enough its there, just as we’d expect with a Windows host
Ok, now let’s validate connectivity with the domain, and make sure we’re able to get our all-important Kerberos ticket. We’re going to run 3 commands at once here, since they’re all related:
- id returns user id and group information about our user
- kinit obtains and caches our ticket. *Note the UPPERCASE domain name*
- klist returns information about the kerberos ticket we grabbed from kinit
So, let’s see what we get:
[dbadave@sqllinux01 ~]$ id [email protected]
uid=63601123([email protected]) gid=63600513(domain [email protected]) groups=63600513(domain [email protected]),
63600512(domain [email protected]),63600572(denied rodc password replication [email protected])
[dbadave@sqllinux01 ~]$ kinit [email protected]
Password for [email protected]:
[dbadave@sqllinux01 ~]$ klist
Ticket cache: KEYRING:persistent:1000:1000
Default principal: [email protected]

Valid starting       Expires              Service principal
04/17/2018 12:52:35  04/17/2018 22:52:35  krbtgt/[email protected]
        renew until 04/24/2018 12:52:31
[dbadave@sqllinux01 ~]$
Alright – looks like we can authenticate on the domain, and get a kerberos ticket. Good deal. Everything is looking great. Now let’s go ahead and get SQL Server 2017 installed. We could have done it earlier, but I wanted to get the domain joining out of the way
This is a very easy process. Our first step is to install the Microsoft Repository on the server. This tells the server how to find the SQL Server packages to install. To do that, we download the .repo file, and put it in the right directory. Here’s the command:
sudo curl -o /etc/yum.repos.d/mssql-server.repo https://packages.microsoft.com/config/rhel/7/mssql-server-2017.repo
After we run it, we see this. This is the closest that we get to a confirmation.
  % Total    % Received % Xferd  Average Speed   Time    Time     Time  Current
                                 Dload  Upload   Total   Spent    Left  Speed
100   232  100   232    0     0    494      0 --:--:-- --:--:-- --:--:--   495
[dbadave@sqllinux01 ~]$
Alright, now let’s install SQL Server 2017 on Linux:
sudo yum install mssql-server
After a bit of text scrolls by, we’ll see this.
====================================================================================================
 Package          Arch       Version             Repository                                    Size
====================================================================================================
Installing:
 mssql-server     x86_64     14.0.3023.8-5       packages-microsoft-com-mssql-server-2017     167 M

Transaction Summary
====================================================================================================
Install  1 Package

Total download size: 167 M
Installed size: 167 M
Is this ok [y/d/N]:
One interesting thing here is that the entire SQL Server 2017 installation is only 167 Megabytes. Granted, this is just for the database engine, but still impressively small. Anyway, as before, let’s just respond with ‘Y’.
After the package downloads, you may see this prompt. This is asking you if it’s OK to install the Microsoft key. Answer ‘Y’ here, too.
Downloading packages:
warning: /var/cache/yum/x86_64/7/packages-microsoft-com-mssql-server-2017/packages/mssql-server-14.0.3023.8-5.x86_64.rpm:
Header V4 RSA/SHA256 Signature, key ID be1229cf: NOKEY
Public key for mssql-server-14.0.3023.8-5.x86_64.rpm is not installed
mssql-server-14.0.3023.8-5.x86_64.rpm                                        | 167 MB  00:00:15
Retrieving key from https://packages.microsoft.com/keys/microsoft.asc
Importing GPG key 0xBE1229CF:
 Userid     : "Microsoft (Release signing) <[email protected]>"
 Fingerprint: bc52 8686 b50d 79e3 39d3 721c eb3e 94ad be12 29cf
 From       : https://packages.microsoft.com/keys/microsoft.asc
Is this ok [y/N]:
After a few moments, you should see this, which lets you know installation was successful, but there’s still more to do
Running transaction check
Running transaction test
Transaction test succeeded
Running transaction
  Installing : mssql-server-14.0.3023.8-5.x86_64                                                1/1

+--------------------------------------------------------------+
Please run 'sudo /opt/mssql/bin/mssql-conf setup'
to complete the setup of Microsoft SQL Server
+--------------------------------------------------------------+

SQL Server needs to be restarted in order to apply this setting. Please run
'systemctl restart mssql-server.service'.
  Verifying  : mssql-server-14.0.3023.8-5.x86_64                                                1/1

Installed:
  mssql-server.x86_64 0:14.0.3023.8-5

Complete!
[dbadave@sqllinux01 ~]$
Well, might as go as we’re told. Let’s run the setup command and finish configuration. To do that, we run:
sudo /opt/mssql/bin/mssql-conf setup
We’re now asked to choose our edition of SQL Server 2017. Since this instance will be part of my Availability Group demo, I’m just going to choose ‘Evaluation”. I may be lazy, but even I can get a demo out in 180 days. let’s just enter ‘1’ here. It will then ask us to accept the EULA, then choose and confirm your sa password . So, lets do that, too. After a few moments, it will finish up and tell you SQL Server is installed:
Enter your edition(1-8): 1
The license terms for this product can be found in
/usr/share/doc/mssql-server or downloaded from:
https://go.microsoft.com/fwlink/?LinkId=855864&clcid=0x409

The privacy statement can be viewed at:
https://go.microsoft.com/fwlink/?LinkId=853010&clcid=0x409

Do you accept the license terms? [Yes/No]:Yes

Enter the SQL Server system administrator password:
Confirm the SQL Server system administrator password:
Configuring SQL Server...

The licensing PID was successfully processed. The new edition is [Enterprise Evaluation Edition].
Created symlink from /etc/systemd/system/multi-user.target.wants/mssql-server.service to /usr/lib/systemd/system/
mssql-server.service.
Setup has completed successfully. SQL Server is now starting.
[dbadave@sqllinux01 ~]$
We now have a fully functional SQL Server installation, and a Linux server that can communicate on the domain.
Now it’s time to combine the two and get something more useful.
Our next step is to create a Service Principal Name (SPN) for the instance. We do this on the Windows side, in an elevated command prompt, using the setspn command. We need to provide the FQDN for the Linux Server, as well as the domain account we want to use for SQL Server.
For our particular situation, our SPN command will look like this:
setspn -A MSSQLSvc/sqllinux01.ufp.cloud:1433 sqlservice
Running the command gives us this:
C:\WINDOWS\system32>setspn -A MSSQLSvc/sqllinux01.ufp.cloud:1433 sqlservice
Checking domain DC=ufp,DC=cloud

Registering ServicePrincipalNames for CN=SQLService,CN=Users,DC=ufp,DC=cloud
        MSSQLSvc/sqllinux01.ufp.cloud:1433
Updated object

C:\WINDOWS\system32>
All right, command worked. So far so good. I;m a trust, but verify guy though. So let’s make sure we see the right SPN by using the setspn -l command, passing in the domain account – and see what we get:
C:\WINDOWS\system32>setspn -l sqlservice
Registered ServicePrincipalNames for CN=SQLService,CN=Users,DC=ufp,DC=cloud:
        MSSQLSvc/sqllinux01.ufp.cloud:1433

C:\WINDOWS\system32>
Ok – we’ve validated that the SPN is in place as we’d expect. We’re at the home stretch – just a bit more configuration to do. First, we need to validate the key version number, or knvo, for the service account. To do that, we run the two commands below.
as we learned earlier, kinit obtains and caches the kerberos ticket – although this time we’re running it for a different account, so be sure to have the password for this account handy. knvo will return the key version number needed to complete the rest of the setup. The knvo is generally 2, but we have to validate
kinit [email protected]
kvno MSSQLSvc/sqllinux01.ufp.cloud:1433
Running the command and entering the password needed gives us this:
[dbadave@sqllinux01 ~]$ kinit [email protected]
Password for [email protected]:
[dbadave@sqllinux01 ~]$ kvno MSSQLSvc/sqllinux01.ufp.cloud:1433
MSSQLSvc/sqllinux01.ufp.cloud:[email protected]: kvno = 2
[dbadave@sqllinux01 ~]$
Alright. Now that we’ve got that out of the way, lets create the keytab file that will tell the SQL Server service how to use the SPN we created earlier. To do that, we use the ktutil command. Let’s use these commands to get us going. You have to run these commands interactively, as opposed to just copying and pasting the whole block. Also be careful about entering in the passwords when prompted, as ktutil does not check if the password is actually valid
[dbadave@sqllinux01 ~]$ sudo ktutil
[sudo] password for dbadave:
ktutil: addent -password -p MSSQLSvc/sqllinux01.ufp.cloud:[email protected] -k 2 -e aes256-cts-hmac-sha1-96
Password for MSSQLSvc/sqllinux01.ufp.cloud:[email protected]:
ktutil: addent -password -pnds MSSQLSvc/sqllinux01.ufp.cloud:[email protected] -k 2 -e rc4-hmac
Password for MSSQLSvc/sqllinux01.ufp.cloud:[email protected]:
ktutil: wkt /var/opt/mssql/secrets/mssql.keytab
ktutil: quit
Once that’s all done, we need to allow the mssql:mssql user/group that gets created on the linux host after you install SQL Server 2017 to have permissions to read the file. By default, it’s only readable by the root user. That’s fairly straight forward to do, just run the commands.
sudo chown mssql:mssql /var/opt/mssql/secrets/mssql.keytab
sudo chmod 400 /var/opt/mssql/secrets/mssql.keytab
Alright – Now the final thing we need to do to get this thing working. We need to tell SQL Server that we want it start up with kerberos support, and tell it how to find the keytab file we created earlier, and then to restart.
sudo /opt/mssql/bin/mssql-conf set network.kerberoskeytabfile /var/opt/mssql/secrets/mssql.keytab
sudo systemctl restart mssql-server
And we’re done! That’s the end of the configuration needed on the host.
Now let’s test things. First, let’s connect to the instance using the SQL Server instance using sa account, and the password we created earlier. After we connect, let’s try and create a windows user, and then try to connect using my domain account.
When we connect to this server from now on, we need to make sure we need to that we use the fully qualified domain name, otherwise we’ll have errors when trying to connect with windows authorization. In our case it’s sqllinux01.ufp.cloud.
So, let’s see if this works
First, let’s connect to the instance using the sa account, using sqlcmd from my windows 10 machine
C:\WINDOWS\system32>sqlcmd -S sqllinux01.ufp.cloud -Usa -p -Q "select @@version"
Password:
--------------------------------------------------------------------------------
        Mar  2 2018 18:24:44
        Copyright (C) 2017 Microsoft Corporation
        Enterprise Evaluation Edition (64-bit) on Linux (CentOS Linux 7 (Core))

(1 rows affected)

C:\WINDOWS\system32>
OK; that worked as expected. We can log in as the SA account. Now let’s create a new user from Windows. Just to make things a bit more interesting, let’s use a different user than any of the others we’ve tested with. This time, let’s use [UFP\dave], and make them (me?) a sysadmin:
C:\WINDOWS\system32>sqlcmd -S sqllinux01.ufp.cloud -Usa -p
Password:
1> USE [master]
2> GO
Changed database context to 'master'.

1> CREATE LOGIN [UFP\dave] FROM WINDOWS WITH DEFAULT_DATABASE=[master]
2> GO

1> ALTER SERVER ROLE [sysadmin] ADD MEMBER [UFP\dave]
2> GO
All right! Everything looks like it worked. Now let’s test the login using Windows authentication:
C:\WINDOWS\system32>sqlcmd -S sqllinux01.ufp.cloud -E -Q "select suser_sname()"

--------------------------------------------------------------------------------
UFP\dave
(1 rows affected)

C:\WINDOWS\system32>
Wow, looks like we have Windows authentication! Before we get too excited, let’s try with SSMS:


…And we’re in!
We now have a fresh install of Linux and SQL Server 2017, with Windows authentication working! Time for a drink, heh
My next post will show how to add this node, and two others like it, to a 3-node availability group. I’ll also show a few quicker ways for us to do what we did today with setting up Windows authentication. Just this first time we discussed it I wanted to do it the longer way just so we could cover all the steps.
Anyway, thanks for reading – I know it’s a long one.
If you have any questions, or have suggestions for things you’d like to see covered, please reach out!
]]>In almost every instance, I have been asked about what SQL Server features are supported while running on Linux, which is certainly important to understand before you go down the path of implementation. While this is generally well documented here, I always like to show the table below and talk a bit about the limitations, and discuss how they may affect adoption for each specific use case. A lot of the limitations are understandable, especially given the v1 nature of the product, and the complete overhaul that was needed to make it work. I think another factor might be an overall lack of support of features needed to support some of the functionality in the open-source implementations of the Windows equivalent services, or an overall lack of a standard way to do certain things that are well defined in Windows.
However, there’s some interesting things in here that really need to be there in the very near future.
This table below is accurate as of 4/15/2018, and can change at any time.
This is just a compilation from the link above to Microsoft.com

Database Engine:
A lot of this is understandable, but I was really surprised at the lack of transactional replication support. This has been a core feature of the product for over 20 years. Depending on the exact need, there could be plenty of ways to accomplish the task without it, but there’s a lot of mission-critical mouse-traps out there that depend on this feature. Merge Replication is quite a bit newer, but I have come across its use at many customers it with various levels of success. Personally, if the environment requires transactional or merge replication, I’m not seeing the value in re-tooling an entire solution just to migrate. There’s got to be some other pressing reason. Like stability and scalability.
Also surprising is Polybase and Stretch DB. While I have not run across a lot of either, I do have customers using them. Also, given that they’re newer features, and were fairly large part of the marketing message behind SQL Server 2016, the exclusion does seem a bit strange. Also strange considering there’s a good chance that shops looking to use SQL Server on Linux may already have an investment in other Big Data tech they’d want to integrate with – exactly what Polybase is for. Seems slightly backwards, IMO.
I am not surprised by the lack of Filetable support. Given the feature that it provides, I would image there’s a lot of dependencies on Windows SMB functionality that would probably have to be ported as well. I would expect to see this feature supported at some point in the future, but probably after there’s some specific support added to SAMBA or another specific SMB/CIFS package, or Microsoft rolls their own, and the *NIX world that has to support Windows protocols will rejoice much. And then we’d finally get Data Domain CIFS support working like a first-class citizen. You know what? Microsoft – PLEASE do that, and then open-source it.
You’d make the world a better place.
Lack of UNSAFE and EXTERNAL_ACCESS CLR assemblies will immediately prevent many vendors from supporting SQL Server on Linux.
SQL Server Agent:
Most surprising here to me is Alerts. I consider Agent Alerts on certain very specific severity messages (16-25, and 823-825) to be absolutely critical to monitoring a production server. I typically will not release an instance to production without these Agent Alerts in place. There’s other ways to implement this, using monitoring tools, custom scripts, etc – but this is a very critical feature that needs to be added ASAP. If I had to guess, this is possibly due to guaranteeing there’s a predictable, standard, and reliable way to send mail directly from the Linux host in place. However, that’s mostly just as easy as requiring their preferred SMTP transport as an dependency, or rolling their own in to the product.
Lack of CDC support makes sense, given the lack of a Log Reader Agent, but I see it as a significant hole. We do get System-Versioned Temporal Tables, so it’s possible some of the gap can be covered by that, depending on the specific implementation.
Managed Backups is something that will probably affect a smaller subset of my potential customers, as I’m not seeing it much out in the wild.
High Availability:
To me, the lack of mirroring is really no big loss. Microsoft has been threatening us with the big “D” on that feature for a while now, and frankly I am happy to see it gone, now that we’ve got Basic Availability Groups included with Standard (which would be a lot more awesome if we could actually run DBCC CheckDB on the replica…). I totally understand that some vendors out there still will not support Availability Groups for whatever reason, but this gap is closing every day.
Security:
OK – Lack of 3rd party AD tools is a pretty big hole here. In my career, I have done quite a bit with Identity and Access Management (IAM) in mixed environments. Probably the best tool out there for this is Centrify, which is probably why it’s specifically called out, but there’s several others. A lot of my customers are looking for ways to integrate their identities, and even MFA/2FA across their multi-vendor, multi-OS landscape, and not playing nice with the tools that do this is not the way you make friends.
This alone may prevent adoption in some large *NIX shops. Missing AD Auth for Linked Servers is also a pretty large deal for a lot of my customers. The good news is that we DO get TDE, Always Encrypted, Dynamic Data Masking, and Row-Level Security. So there’s that.
Services:
Lots of interesting exclusions here.
SQL Server Browser is an interesting one, as its very useful in multi-instance environments. At least ones that don’t require ports on connection strings.
StreamInsight is not something I really see out there, and those customers that have talked about it have found a better fit with cloud technologies. So, I would not think it would affect my customers. Analysis Services, on the other hand, may be a big for a lot of shops that want a single server implementation, however I am personally seeing a trend of migration from AS to other technologies, including cloud-based ones. Plus, there’s nothing stopping you from housing AS on a windows host, and still using the Linux SQL Server as a data source.
I go back and forth on Reporting Services. A lot of my customers use it, but almost all are looking to migrate to Power BI or some other similar offering. The largest gap I see is with packaged applications. Also, as before – nothing stopping someone from having the RS tier in a Windows VM, and use the Linux SQL Server as a data source Well, except licensing – so consider that as you’re planning your solution. I actually feel exactly the same about Master Data Services and Data Quality Services.
Essentially, for any of the excluded services, those that need it can still implement those tiers on Windows without too much hassle.
]]>
My topic for this weekend was “Linux fundamentals for the SQL Server DBA”. In this session, I aimed to arm SQL Server DBA’s with the tools and resources they may need in order to support SQL Server running on the Linux operating system. This includes a brief history of Linux (for context), common Linux commands with a comparison chart to traditional DOS/Power Shell commands they might be using now, installation of Red Hat Enterprise Linux, installation and setup of SQL Server 2017 on Linux, and some basic tuning of the OS and SQL Server for better performance. I also provided a few pages of references, including direct links to Microsoft documentation, for finding more information on their own. An hour long session can provide a TON of information, but we have to cover information so quickly sometimes that it leads to information overload. I always try to provide the extra references so that people know how and where to find more information on whatever we cover, should they so-choose. Before and after my presentation, I spent time at the SQL Clinic to help provide technical help to anyone who needed it.
I am currently working on a longer version of this course, that also includes more on Docker Containers. I truly believe at some point OS’s on the data center/cloud side of things will essentially become irrelevant, and container technology will be the enabler of this revolution.
]]>