今回はClaude CodeなどのAIエージェントを拡張して、その振る舞いなどを定義できる「Agent Skills」機能をご紹介します。
はじめに
AIコーディングツールは日々驚くべき進化を続けています。コード補完からコード生成へ、そして「AIエージェント」の登場によって、開発フロー自体の自動化が現実のものとなってきました。
その最前線で開発が進められているAnthropic社の「Claude Code」に、2025年10月、新機能「Agent Skills」が追加されました。Agent Skillsとは、一言で言えば「AIエージェントに決まった処理をさせるための機能」です。
今回の記事では、Agent Skillsについて、その概要から特長、導入方法、そして実際にスキルを作成して使用するまでの手順を詳しく紹介します。
Agent Skillsとは
Agent Skillsは、2025年10月に発表されたClaude Codeの新機能です。これは、AIエージェントが専門知識や定型処理を使えるようにする仕組みで、Claude Codeだけでなく、他のAIツールでも使用できるオープンな標準仕様として公開されています。

Agent Skillsは、AIエージェントに特定の処理を自動実行させるために、「スキル」という単位で処理を定義する機能です。プログラミング言語におけるライブラリのイメージに近いかもしれません。SKILL.mdというファイルに処理内容を記述しておくことで、AIエージェントはその「スキル」を呼び出して処理を実行することができるのです。
AIエージェントに依頼を出すと、その都度AIが推論を行って、アクションを決定します。
その結果、これまでは以下のような問題がありました。
- 同じ指示でも回答が毎回変わってしまう
- 似たような処理で何度もトークンを消費してしまう
- 同じプロンプトを繰り返し入力するのが面倒
しかし、Agent Skillsを使うことで、よく使う処理をあらかじめ定義しておき、必要な時にAIエージェントに実行させることができます。これにより、AIエージェントは定義された手順に従って、迷いなく正確にタスクをこなせるようになります。
Agent Skillsは、Anthropicが開発した機能ですが、「Agent Skills Open Standard」として公開されており、Cursor、GitHub Copilotなど他のAIツールへの展開も進んでいます。
そんな注目の機能であるAgent SkillsをClaude Codeで利用する方法を解説します。
Claude Codeの詳細や導入方法については、以下の記事をご参照ください。
Agent Skillsの特長
Agent Skillsには、以下のような特長があります。
再現性の高さ
最大の特長は、処理の再現性の高さです。これまでのAIエージェントは、同じ指示を出しても、毎回回答が変わってしまうことがありました。しかし、Agent Skillsでは、スキル内で手順や実行コマンドを明示できるため、通常のチャット指示よりも結果のブレを抑えやすくなります。
チーム共有可能
スキルはプロジェクト内の.claude/skills/ディレクトリにファイルとして保存されます。これをGitなどで管理することで、チームメンバー間でスキルを共有できます。熟練のエンジニアが作成したデプロイ手順やテスト手順をスキル化しておけば、チーム全体で高品質な作業フローを統一することができます。
段階的読み込み
Agent Skillsは、必要になったときにスキルを読み込み、手順に従って必要な分だけ処理を実行します。そのため処理に必要なすべての情報をプロンプト(コンテキスト)に含める必要がなく、トークン消費を抑えることができるのも特長です。
CLAUDE.mdやカスタムコマンドとの違い
Claude Codeには、プロジェクトの設定を行う「CLAUDE.md」や、定型文を登録する「カスタムコマンド」という機能もあります。それぞれの違いは以下の通りです。
- CLAUDE.md:プロジェクト全体のコンテキスト(背景、ルール、方針)
プロジェクトの概要、コーディング規約、アーキテクチャの指針などを記述するファイルです。AIエージェントにプロジェクト全体のコンテキスト(背景知識)を理解させるために使用します。 - カスタムコマンド:単発の指示(毎回同じ文章を入力する手間を省く)
よく使う指示を登録しておくことで、毎回同じ文章を入力する手間を省くことができる機能です。例えば、testと入力するだけでnpm run testを実行させるなど、単発のコマンド入力の手間を省くために使用します。 - Agent Skills:複雑な手順を自動実行(スクリプトや外部ツールも使える)
複数の手順を組み合わせたり、外部スクリプト(Pythonなど)を実行したりする、より複雑な処理を定義するための機能です。AIエージェントに自律的にツールを使わせる場合に適しています。
有効な利用シーン
Agent Skillsは、安定した結果が求められる処理や複雑な手順の自動実行が得意です。ChangelogやPR、仕様書などのドキュメントの自動生成や、テスト、デプロイ、リファクタリングなどの定型作業の自動化に活用できます。また、将来的にはCI/CDパイプライン全体の構築や、コードレビューからデプロイまでの一連のワークフローの自動化なども期待されています。
自作orパッケージ?便利なスキル集の紹介
Agent Skillsは自作もできますが、世界中の開発者が作成したスキルが集まる「スキル集」が多数公開されており、活発なエコシステムが形成されつつあります。
ここでは主要なスキル集を紹介します。
主要なスキル集
- Vercel公式/skills.sh
- 最大規模のスキル集。2026年2月時点で数万件のスキルが登録されており、最も活発なスキル集です。
- VoltAgent/awesome-agent-skills
- 主要企業の公式スキルを網羅的に集約。2026年2月時点で500以上のスキルが登録されており、Anthropic、Vercel、Google、Microsoftなどの主要企業の公式スキルを網羅的に集約しています。
- https://github.com/anthropics/skills
- Anthropic公式スキル。2026年2月時点で100以上のスキルが登録されており、Anthropic公式が提供するスキル集です。
- コミュニティキュレーション:
- ComposioHQ/awesome-claude-skills
コミュニティによって厳選されたスキル集。Claude Code向けに最適化されたスキルが多数登録されています。 - travisvn/awesome-claude-skills
個人開発者がキュレーションしているスキル集。ユニークなスキルが見つかることも。
- ComposioHQ/awesome-claude-skills
これらはGitHubのスキルリポジトリからコードをダウンロードし、.claude/skills/ディレクトリに配置することで、スキルを利用できます。また、skills.shでは、npx skills add <owner/repo>でスキルを追加できます
スキル集を利用するメリット
自作しなくても、すぐに使える実用的なスキルが豊富に揃っています。スキル集からスキルを導入し、必要に応じてカスタマイズすることで、「使える」機能をチームや社内で共有し、開発効率を向上させることができます。
一方で、公開されているスキル集には悪意のあるスキルが混ざっている可能性もあります。信用できる提供元が公開しているスキル集を利用するようにしましょう。
スキルを自作するメリット
細かな要件に合わせたスキルを作成できるのは、自作の大きなメリットです。日々の細かな業務や、チームの独自ルールに合わせたスキルを開発することで、生産性を劇的に向上させることができます。
Agent Skillsは、Skill Creatorという機能も用意しており、Skillの自作をサポートしてくれます。
Agent Skillsを使ってみよう
事前準備
必須の準備
- Claude Codeの導入
Claude CodeでAgent Skillsを利用するには、まずClaude Codeを導入する必要があります。詳しくはこちらの記事を参考に導入してください。
推奨の準備
- Git環境
スキル集を利用するために、Git環境も用意しておくと便利です。アカウントを作成し、スキル集を取得する準備をしましょう。 - Python環境
Agent Skillsでは、外部ファイルを実行することができます。今回はPythonのスクリプトを実行する例を紹介しますので、必要に応じてPython環境を整えてください。
スキルの作成
では早速、Agent Skillsの機能でスキルを作成してみましょう。スキルを作成するには、いくつかの決まりがあります。
ディレクトリ構造
スキルは以下のディレクトリ構造を遵守する必要があります。グローバルで利用するスキルは、Claude Codeのルートディレクトリに、.claude/skills/という構造で配置する必要があります。
プロジェクトで利用するスキルは、プロジェクトのルートディレクトリに、同じ階層構造で配置します。
  .
  ├── .claude
  │   └── skills
  │       └── <skill_name>
  │           ├── SKILL.md
  │           └── <script_name>
SKILL.mdの書き方
SKILL.mdは、YAMLフロントマターとMarkdown本文で構成されています。
YAMLフロントマター(メタ情報)
メタ情報として、最低限、name属性、description属性を以下の形式で指定します。他にも設定できる情報は、version属性、author属性などがあります。
- name:スキル名
- description:スキルの説明
例)name: Hello World description: A simple hello world skill version: 1.0.0 author: Claude
Markdown本文(指示)
Markdown本文には、実際の処理を記述します。
例)# Hello World This is a simple hello world skill.
サポートファイル
Agent Skillsでは、SKILL.mdだけでなく、実際の処理を行うスクリプトファイルを一緒に配置できます。これを「サポートファイル」と呼びます。
例えば、以下のようなファイルをサポートファイルとして利用できます。
- Pythonスクリプト(.py)
- Shellスクリプト(.sh)
- JavaScriptファイル(.js)
- その他の実行可能ファイル
SKILL.mdの本文で、これらのファイルを実行するコマンドを記述することで、AIエージェントが自動的にスクリプトを実行してくれます。
今回の例では、SKILL.mdと同階層に配置したhello.pyを呼び出すように記述します。
実践例:簡単な挨拶スキルを作る
それでは、例として簡単な挨拶スキルを作ってみましょう。「挨拶して」と指示すると、名前と時刻を提示し挨拶してくれるスキルを自作していきます。
ステップ1:フォルダ作成
プロジェクトのルートディレクトリ下に、.claude/skills/hello-skillフォルダを作成します。
以下のような構成になります。
project_root/
└── .claude
    └── skills
        └── hello-skill
            ├── hello.py
            └── SKILL.md
ステップ2:SKILL.md作成
.claude/skills/hello-skill/SKILL.mdを作成します。
YAMLフロントマターの記述
---
name: hello
description: A simple skill to greet the user with the current time using a Python script.
---
【日本語訳】Pythonスクリプトで、現在時刻とともにユーザーに挨拶するためのシンプルなスキル。
Markdown本文(指示)の記述例
## Instructions
When the user asks for a greeting or asks about the time, you MUST run the provided Python script `hello.py` to get the accurate time and greeting.
Do not guess the time. Execute the script.

## Usage
Run the script using: `python3 hello-skill/hello.py`
【日本語訳】
指示:ユーザーが挨拶を求めたり、時刻について尋ねたりした場合は、必ず提供されているPythonスクリプト「hello.py」を実行して、正確な時刻と挨拶を取得してください。時刻を推測してはいけません。スクリプトを実行してください。
使用方法:スクリプトを実行するには、以下のコマンドを入力してください:python3 hello-skill/hello.py
ステップ3:スクリプト作成
現在時刻を取得するhello.pyを作成します。
import datetime
import os

def get_greeting():
    now = datetime.datetime.now()
    user = os.getenv('USER', 'User')
    return f"Hello {user}! The current time is {now.strftime('%Y-%m-%d %H:%M:%S')}."

if __name__ == "__main__":
    print(get_greeting())
ステップ4:動作確認
ステップ2と3で作成したファイルをステップ1で作成したディレクトリに配置します。

claudeコマンドで、Claude Codeを起動します

「挨拶してください」と指示をすると、スキルを使用するか確認されるので、Yesを選択します。

次に、pythonスクリプトを実行するか確認されます。
ここで「Yes, and don’t ask again for python3 commands in <スキル名>」(このスキル内でのpython実行を許可する)を選択すると、次回から実行確認が省略されます。

自動的にスクリプトが実行され、現在時刻と共に挨拶が表示されます。

ここまで所要時間は5分程度です。シンプルなスキルであれば、このように手軽に自作できます。ただし、より複雑な処理を実装する場合には、SKILL.mdの記述にも工夫が必要になってきます。
そんなときに便利なのが、AnthropicのSkill Creatorです。この機能を使えば、AIがスキルの作成をサポートしてくれます。次回の記事では、Skill Creatorを使った高度なスキル作成について詳しく解説する予定ですので、ぜひご期待ください。
注意点とトラブルシューティング
実際に動作させてみて、いくつか注意すべきポイントがありましたので紹介します。
- SKILL.mdの記述
ファイル先頭のYAMLフロントマター(---で囲まれた部分)にnameとdescriptionが正しく記述されているか確認してください。 - 指示の具体性
descriptionやInstructionsが曖昧だと、AIがスキルを使うべきか判断できない場合があります。具体的なキーワードを含めるようにしましょう。 - 再起動
新しいスキルを追加した直後は、Claude Codeの再起動が必要な場合があります。
さいごに
Agent Skillsを活用することで、Claude Codeは単なるコード生成ツールを超え、「開発フロー全体を支えるパートナー」へと進化します。
これまで、AIエージェントは便利だけれど「何をするか分からない不安定さ」がありました。しかしAgent Skillsによって、「AIに任せる部分」と「確実に実行させたい処理」をコントロールできるようになりつつあります。
定型作業の自動化や、チーム固有のワークフローの共有など、活用の幅はアイデア次第で大きく広がります。ぜひ、Agent Skillsを活用して、AIエージェントを使いこなしてみてください。
メシウスではさまざまなWebアプリケーションフレームワークと一緒に使えるJavaScriptライブラリを提供しています。

無償のトライアル版や、ブラウザ上で手軽に試せるデモアプリケーションも公開しているので、こちらも是非ご覧ください。
]]>今回は以下で公開しているコメントコンポーネントとPythonのWebフレームワーク「FastAPI」を使用したアプリケーションをベースに、簡易的なログイン機能とリアルタイムな双方向通信機能を追加して、簡単なチャットアプリケーションを作成してみたいと思います。
開発環境
今回は開発環境として以下を使用します。
- InputManJS V5.1J
- Python 3.13.0
- FastAPI 0.115.5
- Visual Studio Code
- Live Server(Visual Studio Code拡張機能)
簡易的なログイン機能を追加する
まずはチャットアプリに必要なログイン機能を追加していきます。今回はパスワード不要でユーザーIDのみでログインする非常に簡易的なものを実装します。
フロント部分の「index.html」を以下のように修正します。今回は同じHTMLファイル内にログインフォームとコメントコンポーネントを配置し、ログイン/ログアウト処理が行われたらそれぞれ表示を切り替えます。
・・・(中略)・・・
<body>
    <div id="login-area">
        <input type="text" id="userid-input" placeholder="ユーザーID" />
        <button id="login-btn">ログイン</button>
    </div>
    <div id="gcComment" style="display:none;"></div>
</body>
・・・(中略)・・・「scripts/app.js」を以下のように修正し、ログインの処理とコメントコンポーネントの初期化処理などを定義します。「users」APIからユーザー情報を取得し、コメントコンポーネントに設定します。また、headerFooterItemsオプションを使用して、ログインしているユーザー名の表示や、ログアウトボタンをヘッダーに追加しています。
document.addEventListener('DOMContentLoaded', () => {

    const baseURL = `http://localhost:8000/`;
    const commentURL = `${baseURL}comments`;
    const userURL = `${baseURL}users`;
    const reactionURL = `${baseURL}reactions`;

    // ログイン状態管理
    let currentUser = null;
    // コメントコンポーネント
    let gcComment = null;

    // ページロード時にlocalStorageから自動ログイン
    let savedUser = localStorage.getItem('gcCommentUser');
    if (savedUser) {
        try {
            const userInfo = JSON.parse(savedUser);
            currentUser = userInfo;
            document.getElementById('login-area').style.display = 'none';
            document.getElementById('gcComment').style.display = '';
            initGcComment(currentUser);
        } catch (e) {
            localStorage.removeItem('gcCommentUser');
        }
    }

    // ログインボタン処理
    document.getElementById('login-btn').addEventListener('click', async () => {
        const userId = document.getElementById('userid-input').value.trim();
        if (!userId) {
            alert('ユーザーIDを入力してください');
            return;
        }
        // バックエンドからユーザー情報取得
        try {
            const res = await fetch(`http://localhost:8000/users?id=${encodeURIComponent(userId)}`);
            if (!res.ok) throw new Error('ユーザー取得失敗');
            const user = await res.json();
            if (user.length === 0) {
                alert('ユーザーが見つかりません');
                return;
            }
            currentUser = {
                id: String(user[0].id),
                username: user[0].username,
                avatar: user[0].avatar,
                avatarType: 'square',
            };
            // localStorageに保存
            localStorage.setItem('gcCommentUser', JSON.stringify(currentUser));
            document.getElementById('login-area').style.display = 'none';
            document.getElementById('gcComment').style.display = '';
            initGcComment(currentUser);
            window.location.hash = '#chat';
        } catch (e) {
            alert('ユーザー情報の取得に失敗しました');
        }
    });

    // コメントコンポーネント初期化関数
    function initGcComment(userInfo) {
        gcComment = new GC.InputMan.GcComment(document.getElementById('gcComment'), {
            dataSource: {
                enabled: true,
                remote: {
                    comments: {
                        read: { url: commentURL },
                        create: { url: commentURL },
                        update: { url: commentURL },
                        delete: { url: commentURL }
                    },
                    users: {
                        read: {
                            url: userURL,
                            schema: {
                                dataSchema: {
                                    name: 'username'
                                }
                            }
                        }
                    },
                    reactions: {
                        read: { url: reactionURL },
                        create: { url: reactionURL },
                        delete: { url: reactionURL }
                    },
                }
            },
            editorConfig: { height: 150 },
            commentMode: GC.InputMan.GcCommentMode.ThreadMode,
            userInfo: userInfo,
            header: [
                'userinfo'
            ],
            headerFooterItems: {
                userinfo: (gcComment) => {
                    let container = document.createElement('div'); // 新しいコンテナ要素を作成
                    let label = document.createElement('span'); // テキスト用のspan要素を作成
                    label.innerText = 'ユーザー名:' + gcComment.userInfo.username; // ラベルのテキストを設定
                    label.style.marginRight = '10px'; // ボタンとの間に少し余白を追加

                    let btn = document.createElement('button');
                    btn.innerText = 'ログアウト';
                    btn.classList.add('btn');
                    btn.addEventListener('click', () => {
                        if (window.confirm('ログアウトしますか?')) {
                            localStorage.removeItem('gcCommentUser');
                            gcComment.destroy();
                            savedUser = null;
                            currentUser = null;
                            document.getElementById('login-area').style.display = '';
                            document.getElementById('gcComment').style.display = 'none';
                            window.location.hash = '';
                        }

                    });

                    container.appendChild(label); // ラベルをコンテナに追加
                    container.appendChild(btn); // ボタンをコンテナに追加

                    return {
                        getElement: () => container,
                    };
                },
            },
        });
    }
});
動作確認
ファイルを修正したら、以下のコマンドでバックエンドのAPIを起動します。
uvicorn app.main:app --reloadVisual Studio Code上で「index.html」を右クリックして、「Open with Live Server」を実行します。

実行後、ブラウザ上にログインページが表示されます。

あらかじめ前回登録しておいたユーザーのID(1~6)を入力しログインします。
ログイン後はコメントの投稿や、ログアウトから別ユーザーへの切り替えも可能です。
双方向通信機能を追加する
次はこのアプリケーションにリアルタイム双方向通信機能を追加し、新しくコメントが投稿された場合に、別の接続しているユーザーの画面のコメントコンポーネントに対して、画面を再読み込みすることなく即座に変更(別の画面で投稿されたコメント)を反映できるようにします。
バックエンド側
バックエンドのFastAPIのアプリケーションにpython-socketioを組み込み、コメントの登録、更新、削除、リアクションの登録、削除が行われた場合にクライアントに変更箇所を通知します。また、変更箇所の通知用に、リアクション情報取得とコメントを辞書形式に変換するヘルパー関数もそれぞれ追加しています。
import socketio
from typing import Any
from fastapi import Depends, FastAPI, Form, HTTPException, status, Query
from fastapi.exceptions import RequestValidationError
from fastapi.responses import JSONResponse
from sqlalchemy.orm import Session
from sqlalchemy import func
from starlette.middleware.cors import CORSMiddleware
from starlette.requests import Request
from datetime import datetime
from typing import Union
from .database import engine, get_db
from . import models, schemas

models.Base.metadata.create_all(bind=engine)

# コメント情報取得のヘルパー関数
def get_comment(id: int, db_session: Session):
    return db_session.query(models.Comment).filter(models.Comment.id == id).first()

# ピン留めされたコメント情報取得のヘルパー関数
def get_sticked_comment(db_session: Session):
    return db_session.query(models.Comment).filter(models.Comment.sticked == True).first()

# ユーザー情報取得のヘルパー関数
def get_user(id: int, db_session: Session):
    return db_session.query(models.User).filter(models.User.id == id).first()

# リアクション情報取得のヘルパー関数(どのユーザーがどのリアクションをしたか)
def get_reaction(commentId: int, db_session: Session):
    return db_session.query(models.Reaction.reactionChar, models.Reaction.userId).filter(models.Reaction.commentId == commentId).all()

# コメントを辞書形式に変換するヘルパー関数、ユーザー情報が必要な場合は、user引数を渡します
def comment_to_dict(comment: models.Comment, user: Union[models.User, None] = None):

    comment_dict = {
        "id": comment.id,
        "parentCommentId": comment.parentCommentId,
        "content": comment.content,
        "sticked": comment.sticked,
        "postTime": comment.postTime.strftime("%Y/%m/%d %H:%M:%S"),
        "updateTime": comment.updateTime.strftime("%Y/%m/%d %H:%M:%S"),
        "userId": comment.userId,
        "mentionInfo": comment.mentionInfo,
    }

    # ユーザー情報が提供されている場合、辞書に追加
    if user:
        comment_dict["userInfo"] = {
            "id": user.id,
            "name": user.username,
            "avatar": user.avatar,
        }

    return comment_dict

app = FastAPI()

# Socket.IO サーバーのセットアップ
sio: Any = socketio.AsyncServer(async_mode="asgi", cors_allowed_origins="*")

# CORS対応
app.add_middleware(
    CORSMiddleware,
    allow_origins=["*"],
    allow_credentials=True,
    allow_methods=["*"],
    allow_headers=["*"]
)

socket_app = socketio.ASGIApp(sio, app)

# Commentを全件取得
@app.get("/comments")
def read_comments(db: Session = Depends(get_db), type : str = Query("NONE")):
    # type=stickの場合はピン留めするコメントの情報を返却
    if type == "sticked":
        sticked_comment = get_sticked_comment(db)
        if sticked_comment is not None:
            return {
                        "id": sticked_comment.id,
                        "parentCommentId": sticked_comment.parentCommentId,
                        "content": sticked_comment.content,
                        "sticked": sticked_comment.sticked,
                        "postTime": sticked_comment.postTime.strftime("%Y/%m/%d %H:%M:%S"),
                        "updateTime": sticked_comment.updateTime.strftime("%Y/%m/%d %H:%M:%S"),
                        "userId": sticked_comment.userId,
                        "mentionInfo": sticked_comment.mentionInfo,
            }
        else:
            return {"hasMore": False, "comments": []}
    else:
        comments = db.query(models.Comment).all()
        return {
            "hasMore": False,
            "comments": [
                {
                    "id": comment.id,
                    "parentCommentId": comment.parentCommentId,
                    "content": comment.content,
                    "sticked": comment.sticked,
                    "postTime": comment.postTime.strftime("%Y/%m/%d %H:%M:%S"),
                    "updateTime": comment.updateTime.strftime("%Y/%m/%d %H:%M:%S"),
                    "userId": comment.userId,
                    "mentionInfo": comment.mentionInfo,
                }
                for comment in comments
            ],
        }

# Commentを登録
@app.post("/comments")
async def create_comment(
    userId: int = Form(...),
    parentId: Union[int, str, None] = Form(None),
    sticked: bool = Form(False),
    content: str = Form(...),
    mentionInfo: Union[str, None] = Form(None),
    socketId: str = Form(None),
    db: Session = Depends(get_db)
):
    formdata = schemas.CommentIn(
        userId=userId,
        parentId=parentId,
        sticked=sticked,
        content=content,
        mentionInfo=mentionInfo,
    )

    comment = models.Comment(
        userId=formdata.userId,
        parentCommentId = None if formdata.parentId == 'undefined' else formdata.parentId,
        sticked=formdata.sticked,
        content=formdata.content,
        mentionInfo=formdata.mentionInfo,
        postTime=datetime.now(),
        updateTime=datetime.now()
    )

    db.add(comment)
    db.commit()
    db.refresh(comment)

    user = get_user(comment.userId, db)
    commentdict = comment_to_dict(comment, user)
    await sio.emit("commentupdated", {"type": "add", "comment": commentdict}, skip_sid=socketId )  # socketIdを指定してemit

    return comment

# Commentを更新
@app.put("/comments")
async def update_comment(
    id: int = Form(...),
    userId: int = Form(...),
    parentCommentId: Union[int, str, None] = Form(None),
    stick: bool = Form(False),
    content: Union[str, None] = Form(None),
    newContent: Union[str, None] = Form(None),
    mentionInfo: Union[str, None] = Form(None),
    socketId: str = Form(None),
    db: Session = Depends(get_db)
):
    formdata = schemas.CommentIn(
        userId=userId,
        parentId=parentCommentId,
        sticked=True if stick is True else False, # ピン留めの状態を更新
        content=newContent if newContent is not None else content,
        mentionInfo=mentionInfo,
    )

    comment = models.Comment(
        userId=formdata.userId,
        parentCommentId=formdata.parentId,
        sticked=formdata.sticked,
        content=formdata.content,
        mentionInfo=formdata.mentionInfo,
        updateTime=datetime.now()
    )
    try:
        sticked_comment = get_sticked_comment(db)
        if sticked_comment is not None and sticked_comment.id != id and comment.sticked:
            # 既にピン留めされているコメントがある場合は、ピン留めを解除
            sticked_comment.sticked = False

        db_comment = get_comment(id,db)
        if db_comment is None:
            raise HTTPException(status_code=404, detail="Comment not found")
        else:
            db_comment.userId = comment.userId
            db_comment.parentCommentId = None if comment.parentCommentId == 'undefined' else comment.parentCommentId
            db_comment.sticked = comment.sticked
            db_comment.content = comment.content
            db_comment.mentionInfo = comment.mentionInfo
            db_comment.updateTime = comment.updateTime

            db.commit()
            db.refresh(db_comment)

            commentdict = comment_to_dict(comment)
            await sio.emit("commentupdated", {"type": "update", "comment": commentdict}, skip_sid=socketId)
            return db_comment
    except Exception as e:
        db.rollback()  # エラーが発生したらすべての変更をロールバック
        raise HTTPException(status_code=500, detail=f"An error occurred: {e}")

# Commentを削除
@app.delete("/comments")
async def delete_comment(commentId: int, socketId: str, db: Session = Depends(get_db)):
    db_comment = get_comment(commentId,db)
    if db_comment is None:
        raise HTTPException(status_code=404, detail="Comment not found")
    else:
        db_comment = db.query(models.Comment).filter(models.Comment.id == commentId).delete()
        db.commit()
        await sio.emit("commentupdated", {"type": "delete", "id": commentId}, skip_sid=socketId)
        return True

# Userを取得
@app.get("/users")
def read_user(id: int, db: Session = Depends(get_db)):
    user = get_user(id, db)
    if user is None:
        return []
    return [user]

# Reactionを取得
@app.get("/reactions")
def read_reaction(commentId: int, userId: int, db: Session = Depends(get_db)):
    reactions = db.query(models.Reaction.reactionChar, func.count(models.Reaction.reactionChar).label("count")
        ).filter(models.Reaction.commentId == commentId).group_by(models.Reaction.reactionChar).all()

    user_reactions = db.query(models.Reaction.reactionChar).filter(models.Reaction.commentId == commentId, models.Reaction.userId == userId).all()
    user_reacted_chars = {reaction[0] for reaction in user_reactions}

    reaction_info = [
        {
            "reactionChar": reaction[0],
            "count": reaction[1],
            "currentUserReacted": reaction[0] in user_reacted_chars
        }
        for reaction in reactions
    ]

    return reaction_info

# Reactionsを登録
@app.post("/reactions")
async def create_reaction(
    reactChar: str = Form(...),
    commentId: int = Form(...),
    userId: int = Form(...),
    socketId: str = Form(None),
    db: Session = Depends(get_db)
):
    formdata = schemas.ReactionIn(
        reactionChar=reactChar,
        commentId=commentId,
        userId=userId,
    )

    reaction = models.Reaction(
        reactionChar=formdata.reactionChar,
        commentId=formdata.commentId,
        userId=formdata.userId,
    )

    db.add(reaction)
    db.commit()
    db.refresh(reaction)

    reactions = get_reaction(reaction.commentId, db)

    reaction_info_list = [
        {
            "reactionChar": r[0],
            "userId": r[1],
        }
        for r in reactions
    ]

    await sio.emit("reactionupdated", {"type": "add", "commentId": reaction.commentId, "reactionInfo": reaction_info_list}, skip_sid=socketId)
    return True

# Reactionを削除
@app.delete("/reactions")
async def delete_reaction(commentId: int, userId: int, reactChar: str,socketId: str = Form(None), db: Session = Depends(get_db)):
    db_reaction = db.query(models.Reaction).filter(models.Reaction.userId == userId, models.Reaction.commentId == commentId, models.Reaction.reactionChar == reactChar).delete()
    if db_reaction == 0:
        raise HTTPException(status_code=404, detail="Reaction not found")
    else:
        db.commit()

        reactions = get_reaction(commentId, db)

        reaction_info_list = [
            {
                "reactionChar": r[0],
                "count": r[1],
            }
            for r in reactions
        ]

        await sio.emit("reactionupdated", {"type": "delete", "commentId": commentId, "reactionChar": reactChar, "reactionInfo": reaction_info_list}, skip_sid=socketId)

        return True

# リクエストエラー時のハンドリング
@app.exception_handler(RequestValidationError)
async def handler(request:Request, exc:RequestValidationError):
    print(exc)
    return JSONResponse(content={}, status_code=status.HTTP_422_UNPROCESSABLE_ENTITY)

# WebSocket 接続時の処理
@sio.event
def connect(sid, environ):
    print(f"Client {sid} connected")

@sio.event
def disconnect(sid):
    print(f"Client {sid} disconnected")

# FastAPIにASGIアプリをマウント
app.mount("/socket.io", socket_app)コメントやリアクションの登録や更新、削除処理が完了したタイミングでemitメソッドを実行して接続しているクライアントにイベントを送信します。その際、skip_sidのオプションで現在のユーザー(コメントの登録、更新、削除を実施したユーザー)のsocketIdを指定し、イベントを送信する対象から除外します。
・・・(中略)・・・
await sio.emit("commentupdated", {"type": "add", "comment": commentdict}, skip_sid=socketId )  # socketIdを指定してemit
・・・(中略)・・・
フロントエンド側
次にフロント側の「index.html」にCDNのsocket.ioの参照を追加します。
・・・(中略)・・・
    <script src="scripts/gc.inputman.comment.ja.js"></script>
    <script src="https://cdnjs.cloudflare.com/ajax/libs/socket.io/4.8.1/socket.io.js"></script>
・・・(中略)・・・次に「script/app.js」を以下のように修正します。コメントやリアクション登録時に設定するパラメーターにsocketidを追加し、接続しているクライアントをサーバー側で識別できるようにします。
document.addEventListener('DOMContentLoaded', () => {

    const baseURL = `http://localhost:8000/`;
    const commentURL = `${baseURL}comments`;
    const userURL = `${baseURL}users`;
    const reactionURL = `${baseURL}reactions`;

    // ログイン状態管理
    let currentUser = null;
    // コメントコンポーネント
    let gcComment = null;

    let socket = io(baseURL, { transports: ["websocket", "polling"] });

    // ページロード時にlocalStorageから自動ログイン
    let savedUser = localStorage.getItem('gcCommentUser');
    if (savedUser) {
        try {
            const userInfo = JSON.parse(savedUser);
            currentUser = userInfo;
            document.getElementById('login-area').style.display = 'none';
            document.getElementById('gcComment').style.display = '';
            if (socket.connected === false) {
                socket.connect();
            }
            socket.on('connect', () => {
                initGcComment(currentUser);
            });
        } catch (e) {
            localStorage.removeItem('gcCommentUser');
        }
    }

    // ログインボタン処理
    document.getElementById('login-btn').addEventListener('click', async () => {
        const userId = document.getElementById('userid-input').value.trim();
        if (!userId) {
            alert('ユーザーIDを入力してください');
            return;
        }
        // バックエンドからユーザー情報取得
        try {
            const res = await fetch(`http://localhost:8000/users?id=${encodeURIComponent(userId)}`);
            if (!res.ok) throw new Error('ユーザー取得失敗');
            const user = await res.json();
            if (user.length === 0) {
                alert('ユーザーが見つかりません');
                return;
            }
            currentUser = {
                id: String(user[0].id),
                username: user[0].username,
                avatar: user[0].avatar,
                avatarType: 'square',
            };
            // localStorageに保存
            localStorage.setItem('gcCommentUser', JSON.stringify(currentUser));
            document.getElementById('login-area').style.display = 'none';
            document.getElementById('gcComment').style.display = '';

            socket.connect();
            socket.on('connect', () => {
                if (Object.keys(gcComment).length === 0) {
                    initGcComment(currentUser);
                }
            });
            window.location.hash = '#chat';
        } catch (e) {
            console.log('Error fetching user information:', e);
            alert('ユーザー情報の取得に失敗しました');
        }
    });

    // コメントコンポーネント初期化関数
    function initGcComment(userInfo) {
        gcComment = new GC.InputMan.GcComment(document.getElementById('gcComment'), {
            dataSource: {
                enabled: true,
                remote: {
                    comments: {
                        read: { url: commentURL },
                        create: { url: commentURL, requestData: { socketId: socket.id } },
                        update: { url: commentURL, requestData: { socketId: socket.id } },
                        delete: { url: commentURL, requestData: { socketId: socket.id } }
                    },
                    users: {
                        read: {
                            url: userURL,
                            schema: {
                                dataSchema: {
                                    name: 'username'
                                }
                            }
                        }
                    },
                    reactions: {
                        read: { url: reactionURL },
                        create: { url: reactionURL, requestData: { socketId: socket.id } },
                        delete: { url: reactionURL, requestData: { socketId: socket.id } }
                    },
                }
            },
            editorConfig: { height: 150 },
            commentMode: GC.InputMan.GcCommentMode.ThreadMode,
            userInfo: userInfo,
            header: [
                'userinfo'
            ],
            headerFooterItems: {
                userinfo: (gcComment) => {
                    let container = document.createElement('div'); // 新しいコンテナ要素を作成
                    let label = document.createElement('span'); // テキスト用のspan要素を作成
                    label.innerText = 'ユーザー名:' + gcComment.userInfo.username; // ラベルのテキストを設定
                    label.style.marginRight = '10px'; // ボタンとの間に少し余白を追加

                    let btn = document.createElement('button');
                    btn.innerText = 'ログアウト';
                    btn.classList.add('btn');
                    btn.addEventListener('click', () => {
                        if (window.confirm('ログアウトしますか?')) {
                            localStorage.removeItem('gcCommentUser');
                            gcComment.destroy();
                            savedUser = null;
                            currentUser = null;
                            socket.disconnect();
                            document.getElementById('login-area').style.display = '';
                            document.getElementById('gcComment').style.display = 'none';
                            window.location.hash = '';
                        }

                    });

                    container.appendChild(label); // ラベルをコンテナに追加
                    container.appendChild(btn); // ボタンをコンテナに追加

                    return {
                        getElement: () => container,
                    };
                },
            },
        });
    }

    // サーバー側で定義されているcommentupdatedイベントの発火を検知します。
    socket.on('commentupdated', (msg) => {
        handleCommentsChange(msg);
    });

    //  サーバー側で定義されているreactionupdatedイベントの発火を検知します。
    socket.on('reactionupdated', (msg) => {
        handleReactionChange(msg);
    });

    function handleCommentsChange(msg) {
        switch (msg.type) {
            case 'add':
                gcComment.execCommand(GC.InputMan.GcCommentCommand.AddCommentElement, {
                    comment: {
                        ...msg.comment,
                        parentCommentId: String(msg.comment.parentCommentId) || null,
                        postTime: new Date(msg.comment.postTime),
                        updateTime: new Date(msg.comment.updateTime),
                    },
                    scrollIntoView: true
                });
                break;

            case 'delete':
                gcComment.execCommand(GC.InputMan.GcCommentCommand.DeleteCommentElement, {
                    commentId: String(msg.id)
                });
                break;

            case 'update':
                const comment = getComment(gcComment.comments, msg.comment.id);
                if (!comment) {
                    console.warn('更新対象のコメントが見つかりません:', msg.comment.id);
                    return;
                }
                if (comment) {
                    gcComment.execCommand(GC.InputMan.GcCommentCommand.UpdateCommentElement, {
                        comment: {
                            ...comment,
                            content: msg.comment.content,
                            updateTime: new Date(msg.comment.updateTime)
                        }
                    });
                }
                break;
            default:
                return;
        }
    }

    function handleReactionChange(msg) {
        const comment = getComment(gcComment.comments, msg.commentId);
        const reaction = getReactionInfo(msg.commentId, currentUser.id, msg.reactionInfo);
        if (comment) {
            gcComment.execCommand(GC.InputMan.GcCommentCommand.UpdateCommentElement, {
                comment: {
                    ...comment,
                    reactions: reaction
                },
            });
        }
    }

    function getComment(comments, commentId) {
        for (const comment of comments) {
            if (comment.id == commentId) {
                return comment;
            }
            if (Array.isArray(comment.replies)) {
                const res = getComment(comment.replies, commentId);
                if (res) return res;
            }
        }
        return null;
    }

    function getReactionInfo(commentId, currentUserId, reactions) {
        const reactionMap = new Map();

        reactions.forEach((reaction) => {

            if (!reactionMap.has(reaction.reactionChar)) {
                reactionMap.set(reaction.reactionChar, {
                    reactionChar: reaction.reactionChar,
                    count: 0,
                    currentUserReacted: false,
                });
            }
            const reactionInfo = reactionMap.get(reaction.reactionChar);
            reactionInfo.count++;
            if (reaction.userId == currentUserId) {
                reactionInfo.currentUserReacted = true;
            }
        });
        return Array.from(reactionMap.values());
    }
});socket.onでサーバー側で発火したイベントを検知しています。
・・・(中略)・・・
    // サーバー側で定義されているcommentupdatedイベントの発火を検知します。
    socket.on('commentupdated', (msg) => {
        handleCommentsChange(msg);
    });

    //  サーバー側で定義されているreactionupdatedイベントの発火を検知します。
    socket.on('reactionupdated', (msg) => {
        handleReactionChange(msg);
    });
・・・(中略)・・・イベント検知後、コメントコンポーネントのexecCommandメソッドを使用して、変更内容を別画面に反映します。これにより、画面やコンポーネントをリロードすることなく、変更をその他の接続している画面に反映します。
・・・(中略)・・・
    function handleCommentsChange(msg) {
        switch (msg.type) {
            case 'add':
                gcComment.execCommand(GC.InputMan.GcCommentCommand.AddCommentElement, {
                    comment: {
                        ...msg.comment,
                        parentCommentId: String(msg.comment.parentCommentId) || null,
                        postTime: new Date(msg.comment.postTime),
                        updateTime: new Date(msg.comment.updateTime),
                    },
                    scrollIntoView: true
                });
                break;
・・・(中略)・・・
動作確認
更新が完了したらAPIを再起動し、ブラウザを2つ立ち上げ、コメントコンポーネントを組み込んだ画面にアクセスします。それぞれの画面でコメントを投稿すると、もう一方の画面に即座に変更が反映されます。
今回作成したサンプルは以下よりダウンロード可能です。
さいごに
今回はWebアプリケーションにコメント機能を組み込むことができるInputManJSの「コメントコンポーネント(GcComment)」でリアルタイム双方向通信を行うチャットアプリを作成する方法をご紹介しました。
なお、今回ご紹介したコメントコンポーネントの機能はほんの一部です。製品サイトでは、InputManJSのコメントコンポーネントの機能を手軽に体験できるデモアプリケーションやトライアル版も公開しておりますので、こちらもご確認ください。
また、ご導入前の製品に関するご相談、ご導入後の各種サービスに関するご質問など、お気軽にお問合せください。
]]>
今回は以下の記事作成したコメントコンポーネントとPythonのWebフレームワーク「FastAPI」を使用したアプリケーションをベースに、ピン留め機能を追加する方法をご紹介します。
※ 本記事の最後で今回作成するサンプルをダウンロード可能です。
開発環境
今回は開発環境として以下を使用します。
- InputManJS V5.1J
- Python 3.13.0
- FastAPI 0.115.5
- Visual Studio Code
- Live Server(Visual Studio Code拡張機能)
バックエンド(Web API)をピン留め機能に対応する
Web APIと連携したコメントコンポーネントでピン留めを実行すると、リクエストに含まれるstickというフィールドの値に「true」が設定されて送信されます。
さらに、ピン留め機能が追加されたV5.1J以降のコメントコンポーネントでWeb APIから取得したコメント情報を画面に表示する場合、通常のコメント取得のリクエストのほか、ピン留めするべきコメントの情報を取得するために以下のようなクエリパラメータ(type=sticked)を持つリクエストを別途実行するようになりました。
(APIのURL)/comments?type=stickedコメントコンポーネントはこのリクエストのレスポンスのコメントをピン留めして表示します。こちらを実現するには、バックエンドのWeb API側に以下のような機能を追加します。
- ピン留めされた(
stick=true)コメントに対して、ピン留めされたコメントであることを示すフラグを設定する - その際、ピン留めされたコメントが既に存在する場合は、そのコメントに設定されているフラグを解除する(ピン留めされているコメントが2つ以上存在しないようにする)
type=stickedのクエリパラメータが設定されたGETリクエストに対して、ピン留めされたコメントの情報を返却する
Web API(FastAPI)の修正
まずはSQLAlchemyのモデル定義を記載している「models.py」を以下のように追記し、ピン留めされたコメントであることを示すフラグのフィールドを追加します。今回はstickedという名前で追加しました。
from sqlalchemy import Column, Integer, String, Text, DateTime, ForeignKey
from .database import Base

class Comment(Base):
    __tablename__ = "comments"
    id = Column('id', Integer, primary_key=True)
    parentCommentId = Column('parentCommentId', Integer, ForeignKey("comments.id", ondelete="CASCADE"), nullable=True)
    content = Column('content', Text)
    userId = Column('userId', Integer)
    mentionInfo = Column('mentionInfo', Text, nullable=True)
    postTime = Column('postTime', DateTime)
    updateTime = Column('updateTime', DateTime)
    sticked = Column('sticked', Boolean, default=False)
・・・(中略)・・・次に「schemas.py」に設定したPydanticのスキーマ定義にもstickedを追加します。
from pydantic import BaseModel
from typing import Union

class CommentIn(BaseModel):
    userId: int
    parentId: Union[int, str, None] = None
    content: str
    mentionInfo: Union[str, None] = None
    sticked: Union[bool, None] = False
・・・(中略)・・・
次にCRUD処理を行うアプリケーション本体の「main.py」を修正します。
まずはピン留めされたコメント情報を取得するためのヘルパー関数を作成します。
・・・(中略)・・・
# ピン留めされたコメント情報取得のヘルパー関数
def get_sticked_comment(db_session: Session):
    return db_session.query(models.Comment).filter(models.Comment.sticked == True).first()
・・・(中略)・・・さらに/comments エンドポイントに対するGETリクエストの処理を以下のように書き換え、クエリパラメータ(type)の値に応じて、返却するコメント情報の内容を分岐します。
from fastapi import Depends, FastAPI, Form, HTTPException, status, Query
・・・(中略)・・・
# Commentを全件取得
@app.get("/comments")
def read_comments(db: Session = Depends(get_db), type : str = Query("NONE")):
    # type=stickの場合はピン留めするコメントの情報を返却
    if type == "sticked":
        sticked_comment = get_sticked_comment(db)
        if sticked_comment is not None:
            return {
                        "id": sticked_comment.id,
                        "parentCommentId": sticked_comment.parentCommentId,
                        "content": sticked_comment.content,
                        "sticked": sticked_comment.sticked,
                        "postTime": sticked_comment.postTime.strftime("%Y/%m/%d %H:%M:%S"),
                        "updateTime": sticked_comment.updateTime.strftime("%Y/%m/%d %H:%M:%S"),
                        "userId": sticked_comment.userId,
                        "mentionInfo": sticked_comment.mentionInfo,
            }
        else:
            return {"hasMore": False, "comments": []}
    else:
        comments = db.query(models.Comment).all()
        return {
            "hasMore": False,
            "comments": [
                {
                    "id": comment.id,
                    "parentCommentId": comment.parentCommentId,
                    "content": comment.content,
                    "sticked": comment.sticked,
                    "postTime": comment.postTime.strftime("%Y/%m/%d %H:%M:%S"),
                    "updateTime": comment.updateTime.strftime("%Y/%m/%d %H:%M:%S"),
                    "userId": comment.userId,
                    "mentionInfo": comment.mentionInfo,
                }
                for comment in comments
            ],
        }
・・・(中略)・・・同じく/comments エンドポイントのPOSTリクエストの処理を以下のように追加し、ピン留めされたコメントであることを示すフラグのstickedを登録する項目に追加します。
・・・(中略)・・・
# Commentを登録
@app.post("/comments")
async def create_comment(
    userId: int = Form(...),
    parentId: Union[int, str, None] = Form(None),
    sticked: bool = Form(False),
    content: str = Form(...),
    mentionInfo: Union[str, None] = Form(None),
    db: Session = Depends(get_db)
):
    formdata = schemas.CommentIn(
        userId=userId,
        parentId=parentId,
        sticked=sticked,
        content=content,
        mentionInfo=mentionInfo,
    )

    comment = models.Comment(
        userId=formdata.userId,
        parentCommentId = None if formdata.parentId == 'undefined' else formdata.parentId,
        sticked=formdata.sticked,
        content=formdata.content,
        mentionInfo=formdata.mentionInfo,
        postTime=datetime.now(),
        updateTime=datetime.now()
    )

    db.add(comment)
    db.commit()
    db.refresh(comment)
    return comment
・・・(中略)・・・最後に/comments エンドポイントのPUTリクエストの処理を以下のように書き換え、通常のコメント情報の更新処理に加え、ピン留めの更新リクエスト(stick=true)が送信された際のピン留め状態の更新の処理を追加します。その際、すでにピン留めしているコメントがある場合はそのコメントのstickedの値を「False」に更新します。
・・・(中略)・・・
# Commentを更新
@app.put("/comments")
async def update_comment(
    id: int = Form(...),
    userId: int = Form(...),
    parentCommentId: Union[int, str, None] = Form(None),
    stick: bool = Form(False),
    content: Union[str, None] = Form(None),
    newContent: Union[str, None] = Form(None),
    mentionInfo: Union[str, None] = Form(None),
    db: Session = Depends(get_db)
):
    formdata = schemas.CommentIn(
        userId=userId,
        parentId=parentCommentId,
        sticked=True if stick is True else False, # ピン留めの状態を更新
        content=newContent if newContent is not None else content,
        mentionInfo=mentionInfo,
    )

    comment = models.Comment(
        userId=formdata.userId,
        parentCommentId=formdata.parentId,
        sticked=formdata.sticked,
        content=formdata.content,
        mentionInfo=formdata.mentionInfo,
        updateTime=datetime.now()
    )
    try:
        sticked_comment = get_sticked_comment(db)
        if sticked_comment is not None and sticked_comment.id != id and comment.sticked:
            # 既にピン留めされているコメントがある場合は、ピン留めを解除
            sticked_comment.sticked = False

        db_comment = get_comment(id,db)
        if db_comment is None:
            raise HTTPException(status_code=404, detail="Comment not found")
        else:
            db_comment.userId = comment.userId
            db_comment.parentCommentId = None if comment.parentCommentId == 'undefined' else comment.parentCommentId
            db_comment.sticked = comment.sticked
            db_comment.content = comment.content
            db_comment.mentionInfo = comment.mentionInfo
            db_comment.updateTime = comment.updateTime

            db.commit()
            db.refresh(db_comment)
            return db_comment
    except Exception as e:
        db.rollback()  # エラーが発生したらすべての変更をロールバック
        raise HTTPException(status_code=500, detail=f"An error occurred: {e}")
    finally:
        db.close()
・・・(中略)・・・
ピン留めの動作確認
更新が完了したら「fastapi-comment-api」フォルダの直下で以下のコマンドを実行してAPIを起動します。
uvicorn app.main:app --reloadAPIを起動したら、「inputmanjs-comment-db」の「index.html」をVisual Studio Code上で右クリックして、「Open with Live Server」を実行します。

実行後、ブラウザ上にコメントコンポーネントが組み込まれたWebページが表示されます。

いくつかコメントを登録し、ピン留めしたいコメントにカーソルをあわせると、横にアイコンが表示されるので、それをクリックするとコメントをピン留めできます。また、ピン留めしたコメントをクリックすると、そのコメントに移動できます。
すでにピン留めされているコメントがある状態で別のコメントをピン留めすると、ピン留めするコメントを入れ替えることができます。
また、ピン留めされたコメントのピン留めを解除することもできます。
今回作成したサンプルは以下よりダウンロード可能です。
さいごに
今回はWebアプリケーションにコメント機能を組み込むことができるInputManJSの「コメントコンポーネント(GcComment)」でコメントをピン留めする機能を実装する方法をご紹介しました。
なお、今回ご紹介したコメントコンポーネントの機能はほんの一部です。製品サイトでは、InputManJSのコメントコンポーネントの機能を手軽に体験できるデモアプリケーションやトライアル版も公開しておりますので、こちらもご確認ください。
また、ご導入前の製品に関するご相談、ご導入後の各種サービスに関するご質問など、お気軽にお問合せください。
]]>今回はこのFastAPIを使用してSQLiteのデータベースと連携するWeb APIを作成し、さらにVue.jsとJavaScript開発ライブラリ「Wijmo(ウィジモ)」で作成したフロントエンドアプリケーションと連携して、データの生成(Create)、読込(Read)、更新(Update)、削除(Delete)を行う方法をご紹介します。

バックエンド
Web APIの作成
今回はPythonの標準データベースであるSQLiteを使用して、GET(参照)、POST(登録)、PUT(更新)、DELETE(削除)といったCRUD処理を行うWeb APIを作成します。
まずはvenvを使って新しく「fastapi-backend」という仮想環境を作成します。
python -m venv fastapi-backend「fastapi-backend」フォルダに移動し、仮想環境を有効化します。
cd fastapi-backend
Scripts\activate
次にFastAPIとASGI Webサーバの「Uvicorn」、Pythonで使えるORMの「SQLAlchemy」をpip経由でインストールします。
pip install fastapi uvicorn sqlalchemyインストールが完了したらプロジェクトのルートに「app」フォルダを作成し、「__init__.py」ファイルを作成します(中身は空でOKです)。

続けて同フォルダに「database.py」ファイルを作成し、データベース接続の設定を記載します。
from sqlalchemy import create_engine
from sqlalchemy.ext.declarative import declarative_base
from sqlalchemy.orm import sessionmaker

DATABASE_URL = "sqlite:///./test.db"

engine = create_engine(DATABASE_URL, connect_args={"check_same_thread": False})
SessionLocal = sessionmaker(autocommit=False, autoflush=False, bind=engine)
Base = declarative_base()

def get_db():
    db = SessionLocal()
    try:
        yield db
    finally:
        db.close()
次に「models.py」を作成し、SQLAlchemyのモデル定義を記載します。
from sqlalchemy import Column, Integer, String
from .database import Base

class Order(Base):
    __tablename__ = "orders"
    id = Column('id', Integer, primary_key=True)
    productName = Column('productName', String)
    orderDate = Column('orderDate', String)
    amount = Column('amount', Integer)
次に「schemas.py」を作成し、バリデーションなどを担うPydanticのスキーマ定義を記載します。
from datetime import datetime
from pydantic import BaseModel

class Order(BaseModel):
    productName: str
    orderDate: datetime
    amount: int
次に「crud.py」を作成し、CRUD処理を行うヘルパー関数の定義を記載します。
from sqlalchemy.orm import Session
from . import models, schemas

def get_order(id: int, db_session: Session):
    return db_session.query(models.Order).filter(models.Order.id == id).first()

def create_order(order: schemas.Order, db: Session):
    db_order = models.Order(productName=order.productName, orderDate=order.orderDate, amount=order.amount)
    db.add(db_order)
    db.commit()
    db.refresh(db_order)
    return db_order

def update_order(id: int, order: schemas.Order, db: Session):
    db_order = get_order(id,db)
    db_order.productName = order.productName
    db_order.orderDate = order.orderDate
    db_order.amount = order.amount
    db.commit()
    db.refresh(db_order)
    return db_order

def delete_order(id: int, db: Session):
    db_order = get_order(id,db)
    if db_order is None:
        return None
    db.delete(db_order)
    db.commit()
    return db_order
最後にアプリケーション本体の「main.py」を作成します。CORSの設定も行い、これから作成するVueアプリのオリジンを設定します。
from fastapi import Depends, FastAPI, HTTPException
from sqlalchemy.orm import Session
from . import crud, models, schemas
from .database import engine, get_db
from starlette.middleware.cors import CORSMiddleware

models.Base.metadata.create_all(bind=engine)

app = FastAPI()

# CORS対応
app.add_middleware(
    CORSMiddleware,
    allow_origins=["http://localhost:5173"],
    allow_credentials=True,
    allow_methods=["*"],
    allow_headers=["*"]
)

# 受注情報を全件取得
@app.get("/orders/")
def read_orders(db: Session = Depends(get_db)):
    orders = db.query(models.Order).all()
    return orders

# 受注情報を1件取得
@app.get("/orders/{order_id}")
def read_order(order_id: int, db: Session = Depends(get_db)):
    order = crud.get_order(order_id, db)
    return order

# 受注情報の登録
@app.post("/orders/")
def create_order(order: schemas.Order, db: Session = Depends(get_db)):
    return crud.create_order(order=order, db=db)

# 受注情報の更新
@app.put("/orders/{order_id}")
def update_order(order_id: int, order: schemas.Order, db: Session = Depends(get_db)):
    db_order = crud.update_order(id=order_id, order=order, db=db)
    if db_order is None:
        raise HTTPException(status_code=404, detail="Order not found")
    return db_order

# 受注情報の削除
@app.delete("/orders/{order_id}")
def delete_order(order_id: int, db: Session = Depends(get_db)):
    db_order = crud.delete_order(id=order_id, db=db)
    if db_order is None:
        raise HTTPException(status_code=404, detail="Order not found")
    return db_order
Web APIの実行
以上でWeb APIの作成が完了したので実行してみます。以下のコマンドでAPIを起動します。
uvicorn app.main:app --reload起動後、「http://127.0.0.1:8000/docs」にアクセスすると、自動生成されたOpenAPIのAPIドキュメントが表示されます。

APIドキュメント上で各種APIの動作を確認できます。まずはPOSTのAPIを実行し受注情報を登録します。
次にGETのAPI(「http://127.0.0.1:8000/orders/1」)を実行し、今登録した受注情報を取得します。
以下のように「http://127.0.0.1:8000/orders」でGETを実行すれば受注情報の全件取得もできます。
※ あらかじめ何件かデータを登録しています。
次にPUTのAPI(「http://127.0.0.1:8000/orders/1」)を実行し、受注情報を更新します。
さらにDELETEのAPI(「http://127.0.0.1:8000/orders/1」)を実行し、受注情報を削除します。
再度「http://127.0.0.1:8000/orders」のGETリクエストを実行し、正しく受注情報が削除されていることを確認します。
フロントエンド
FastAPIを使用したバックエンドのWeb APIが作成できましたので、そのAPIと連携するフロントエンドのアプリをVue.jsとWijmoで作成していきます。npmを使用しますので、あらかじめNode.jsのインストールが必要です。
Vueアプリケーションの作成
まずはcreate-vueを利用して、Vueアプリケーションを作成します。
npm create vue@latestcreate-vueがインストールされていない場合は、上記のコマンド実行時に以下のようなメッセージが表示されインストールを促されます。Yキーを押下してインストールを行います。
Need to install the following packages:
  [email protected]
Ok to proceed? (y)
今回プロジェクト名には「wijmo-frontend」を設定しました。
? Project name: » wijmo-frontend上記のほか、create-vueによって様々なオプションの選択を求められますが、今回は「Add TypeScript?」のみYesを選択してTypeScriptを追加し、その他のオプションはすべてデフォルトの「NO」を選択してシンプルなアプリケーションを作成します。
√ Project name: ... wijmo-frontend
√ Add TypeScript? ... No / Yes
√ Add JSX Support? ... No / Yes
√ Add Vue Router for Single Page Application development? ... No / Yes
√ Add Pinia for state management? ... No / Yes
√ Add Vitest for Unit Testing? ... No / Yes
√ Add an End-to-End Testing Solution? » No
√ Add ESLint for code quality? » No
プロジェクトを作成したら、動作確認のために実行してみます。以下のコマンドを実行してプロジェクトフォルダ「wijmo-frontend」に移動します。
cd wijmo-frontend次に以下のコマンドを実行してアプリケーションを起動します。
npm install
npm run dev
ブラウザで「http://localhost:5173/」を開くと以下のようにVueアプリケーションの実行を確認できます。

動作を確認したらCtrl+Cキーを押下して終了しておきます。
Wijmoのインストールとアプリへの組み込み
「npm install」コマンドを実行して、WijmoのVue.js用パッケージをアプリケーションにインストールします。
npm install @mescius/wijmo.vue2.all「src/App.vue」ファイルを編集し、WijmoのFlexGridをアプリに組み込んでいきます。まずはWijmoの各種コンポーネントのインポートやCRUD処理の実装を行います。シンタックスシュガー(糖衣構文)の<script setup>を使用して記述しています。
urlには先ほど作成したFastAPIのURLを設定し、WijmoのhttpRequestメソッドを使用してWeb APIからデータを取得します。また、FlexGrid上で行われた変更箇所はCollectionViewを使って追跡します。
[更新]押下時に実行される「update」関数では登録、更新、削除の処理を行っており、FlexGrid上で行われた変更内容が格納される「customer.itemsEdited」「customer.itemsAdded」「customer.itemsRemoved」の3つの配列を参照してリクエストをそれぞれ送信します。また、reviver関数の中では日付項目が格納されたstring型の項目に対し、Date型に変換する処理を行っています。
※ ライセンスキーを設定しない場合トライアル版を示すメッセージが表示されます。ライセンスキーの入手や設定方法についてはこちらをご覧ください。
<script setup>
import { onMounted } from "vue";
//Wijmoのコンポーネントをインポートします。
import * as wjCore from "@mescius/wijmo";
import { WjFlexGrid, WjFlexGridColumn } from '@mescius/wijmo.vue2.grid';
//日本語化カルチャをインポートします。
import '@mescius/wijmo.cultures/wijmo.culture.ja';

//wjCore.setLicenseKey('ここにライセンスキーの文字列を設定します');
const url = "http://127.0.0.1:8000/orders";

const order = new wjCore.CollectionView([], { trackChanges: true });

// データ取得 (GET)
onMounted(() => {
  wjCore.httpRequest(url, {
    success: (xhr) => {
      const data = JSON.parse(xhr.response, reviver);
      order.sourceCollection = data;
    },
  });
});

// 更新処理 (PATCH, POST, DELETE)
const update = () => {
  // データ更新(PATCH)
  order.itemsEdited.forEach((item) => {
    wjCore.httpRequest(`${url}/${item.id}`, {
      method: "PUT",
      data: item,
    });
  });

  // データ登録(POST)
  order.itemsAdded.forEach((item) => {
    wjCore.httpRequest(url, {
      method: "POST",
      data: item,
    });
  });

  // データ削除(DELETE)
  order.itemsRemoved.forEach((item) => {
    wjCore.httpRequest(`${url}/${item.id}`, {
      method: "DELETE",
    });
  });
};

const reviver = (key, val) => {
  // 先頭から"yyyy-mm-dd"の文字列を日付データと判断
  if (typeof (val) == "string" &&
    val.match(/^\d{4}-\d{2}-\d{2}.*/)) {
    return new Date(Date.parse(val)); // Date型に変換
  } return val;
};
</script>さらに<template>で更新処理を実行するボタンやFlexGridの表示部分の定義を行います。WjFlexGridColumnコンポーネントでは各カラムのプロパティの値を設定しています。
<template>
  <button @click="update" class="button">更新</button>
  <wj-flex-grid :autoGenerateColumns=false :itemsSource="order" :allowAddNew="true" :allowDelete="true">
    <wj-flex-grid-column header="ID" binding="id" :width="60"></wj-flex-grid-column>
    <wj-flex-grid-column header="商品名" binding="productName" :width="200"></wj-flex-grid-column>
    <wj-flex-grid-column header="受注日" binding="orderDate" :width="120" format='yyyy/M/d'></wj-flex-grid-column>
    <wj-flex-grid-column header="金額" binding="amount" :width="100" format="c"></wj-flex-grid-column>
  </wj-flex-grid>
</template>続けて<style>でWijmoのCSSファイルのインポートや各種スタイルの定義を行います。
<style>
/* Wijmoのスタイルファイルをインポートします */
@import '@mescius/wijmo.styles/wijmo.css';

body {
  margin: 10px 0px 0px 10px;
}

.button {
  font-size: 12px;
  margin-bottom: 10px;
}

.wj-flexgrid {
    width: 530px;
}
</style>
「src/App.vue」ファイル全体の内容は以下のようになります。
<script setup>
import { onMounted } from "vue";
//WjFlexGridコンポーネントをインポートします。
import * as wjCore from "@mescius/wijmo";
import { WjFlexGrid, WjFlexGridColumn } from '@mescius/wijmo.vue2.grid';
//日本語化カルチャをインポートします。
import '@mescius/wijmo.cultures/wijmo.culture.ja';

//wjCore.setLicenseKey('ここにライセンスキーの文字列を設定します');
const url = "http://127.0.0.1:8000/orders";

const order = new wjCore.CollectionView([], { trackChanges: true });

// データ取得 (GET)
onMounted(() => {
  wjCore.httpRequest(url, {
    success: (xhr) => {
      const data = JSON.parse(xhr.response, reviver);
      order.sourceCollection = data;
    },
  });
});

// 更新処理 (PATCH, POST, DELETE)
const update = () => {
  // データ更新(PATCH)
  order.itemsEdited.forEach((item) => {
    wjCore.httpRequest(`${url}/${item.id}`, {
      method: "PUT",
      data: item,
    });
  });

  // データ登録(POST)
  order.itemsAdded.forEach((item) => {
    wjCore.httpRequest(url, {
      method: "POST",
      data: item,
    });
  });

  // データ削除(DELETE)
  order.itemsRemoved.forEach((item) => {
    wjCore.httpRequest(`${url}/${item.id}`, {
      method: "DELETE",
    });
  });
};

const reviver = (key, val) => {
  // 先頭から"yyyy-mm-dd"の文字列を日付データと判断
  if (typeof (val) == "string" &&
    val.match(/^\d{4}-\d{2}-\d{2}.*/)) {
    return new Date(Date.parse(val)); // Date型に変換
  } return val;
};
</script>

<template>
  <button @click="update" class="button">更新</button><br/>
  <wj-flex-grid :autoGenerateColumns=false :itemsSource="order" :allowAddNew="true" :allowDelete="true">
    <wj-flex-grid-column header="ID" binding="id" :width="60"></wj-flex-grid-column>
    <wj-flex-grid-column header="商品名" binding="productName" :width="200"></wj-flex-grid-column>
    <wj-flex-grid-column header="受注日" binding="orderDate" :width="120" format='yyyy/M/d'></wj-flex-grid-column>
    <wj-flex-grid-column header="金額" binding="amount" :width="100" format="c"></wj-flex-grid-column>
  </wj-flex-grid>
</template>


<style>
/* Wijmoのスタイルファイルをインポートします */
@import '@mescius/wijmo.styles/wijmo.css';

body {
  margin: 10px 0px 0px 10px;
}

.button {
  font-size: 12px;
  margin-bottom: 10px;
}

.wj-flexgrid {
    width: 530px;
}
</style>
最後に「src/assets/main.css」に記載されている既存のスタイルを削除します。
@import './base.css';データの取得(READ)
以上の手順で、Wijmoの組み込みは完了です。再び「npm run dev」コマンドを実行して「http://localhost:5173/」にアクセスすると、FlexGrid上にAPIから取得したデータが表示されていることを確認できます。
※ 事前に冒頭で作成したFastAPIのWeb APIを起動しておいてください。

データの登録(CREATE)
FlexGridの一番下の行にデータを入力することで新規データの登録が可能です。データ入力後[更新]ボタンを押下するとAPIに登録のリクエストを送信できます。
データの更新(UPDATE)
FlexGrid上で任意のデータを更新し、[更新]ボタンを押下するとAPIに更新のリクエストを送信できます。一度に複数のレコードを更新することも可能です。
データの削除(DELETE)
FlexGrid上で削除したい行を選択しDeleteキーを押下すると対象の行を削除できます。その後、[更新]ボタンを押下するとAPIに削除のリクエストを送信できます。
さいごに
以上がFastAPIを使用してWeb APIを作成し、Vue.jsとWijmoを使ったフロントエンドアプリと連携する方法でした。
WebサイトではWijmoの機能を手軽に体験できるデモアプリケーションやトライアル版も公開しておりますので、こちらもご確認ください。
また、ご導入前の製品に関するご相談、ご導入後の各種サービスに関するご質問など、お気軽にお問合せください。
]]>
今回はコメントコンポーネントとPythonのWebフレームワーク「FastAPI」を使用して、バックエンドのSQLiteのデータベースと連携する、コメント機能付きのアプリケーションを作成してみたいと思います。
開発環境
今回は開発環境として以下を使用します。
- Python 3.13.0
- FastAPI 0.115.5
- Visual Studio Code
- Live Server(Visual Studio Code拡張機能)
バックエンド(Web API)の作成
コメントコンポーネントはサーバー(データベース)側との連携のためのインターフェースを用意しています。APIを介してコメントコンポーネントとデータベースとの双方向のデータバインディングを実現します。

今回は連携するサーバー側のWeb APIをPythonのWebフレームワーク「FastAPI」で作成していきます。FastAPIの概要や導入方法は以下の記事もご参考ください。
Web APIの仕様
コメントコンポーネントではコメント情報、ユーザー情報、リアクション情報の計3つのテーブルを使用します。以下に簡単に今回作成するWeb APIの仕様をまとめます。今回は最小限の機能を実装していきますので、使用するコメントコンポーネントの機能によっては追加実装が必要になる場合がある点をご注意ください。
コメント情報取得(GET)
コメントの情報を取得します
リクエストURL
- http://localhost:8000/comments
リクエストパラメータ
- なし
正常時のレスポンス(Content-Type:application/json)
| フィールド名 | 説明 |
|---|---|
| hasMore | 動的読み込み機能を使用する際に使用。今回は未使用なので固定で「False」を返却。 |
| comments | コメント情報を含む配列データを返却 |
commentsの配列には以下のようなデータを返却します。
| フィールド名 | 説明 |
|---|---|
| id | コメントごとに付与されるID |
| parentCommentId | 返信コメントを登録した場合に設定される、親となるコメントのID |
| content | コメントの本文 |
| userId | コメントしたユーザーのID |
| mentionInfo | メンション機能で使用するメンションしたユーザーの情報。今回は未使用。 |
| postTime | コメントの登録日時 |
| updateTime | コメントの更新日時 |
コメント情報登録(POST)
コメントの情報を登録します
リクエストURL
- http://localhost:8000/comments
リクエストパラメータ(Content-Type:multipart/form-data)
| フィールド名 | 説明 |
|---|---|
| parentCommentId | 返信コメントを登録した場合に設定される、親となるコメントのID |
| content | コメントの本文 |
| userId | コメントしたユーザーのID |
| mentionInfo | メンション機能で使用するメンションしたユーザーの情報。今回は未使用。 |
正常時のレスポンス(Content-Type:application/json)
| フィールド名 | 説明 |
|---|---|
| id | 登録したコメントのID |
| parentCommentId | 返信コメントを登録した場合に設定される、親となるコメントのID |
| content | コメントの本文 |
| userId | コメントしたユーザーのID |
| mentionInfo | メンション機能で使用するメンションしたユーザーの情報。今回は未使用。 |
| postTime | コメントの登録日時 |
| updateTime | コメントの更新日時 |
コメント情報更新(PUT)
コメントの情報を更新します
リクエストURL
- http://localhost:8000/comments
リクエストパラメータ(Content-Type:multipart/form-data)
| フィールド名 | 説明 |
|---|---|
| id | 更新するコメントのID |
| parentCommentId | 返信コメントを登録した場合に設定される、親となるコメントのID |
| newContent | 更新後のコメントの本文 |
| userId | コメントしたユーザーのID |
| mentionInfo | メンション機能で使用するメンションしたユーザーの情報。今回は未使用。 |
正常時のレスポンス(Content-Type:application/json)
| フィールド名 | 説明 |
|---|---|
| id | 更新したコメントのID |
| parentCommentId | 返信コメントを登録した場合に設定される、親となるコメントのID |
| content | 更新したコメントの本文 |
| userId | コメントしたユーザーのID |
| mentionInfo | メンション機能で使用するメンションしたユーザーの情報。今回は未使用。 |
| postTime | コメントの登録日時 |
| updateTime | コメントの更新日時 |
コメント情報削除(DELETE)
コメントの情報を削除します
リクエストURL
- http://localhost:8000/comments
クエリパラメータ
| フィールド名 | 説明 |
|---|---|
| commentId | 削除するコメントのID |
正常時のレスポンス(Content-Type:application/json)
「true」を返却します
ユーザー情報取得(GET)
ユーザーの情報を取得します
リクエストURL
- http://localhost:8000/users
クエリパラメータ
| フィールド名 | 説明 |
|---|---|
| id | 参照するユーザーのID |
正常時のレスポンス(Content-Type:application/json)
| フィールド名 | 説明 |
|---|---|
| id | ユーザーのID |
| username | ユーザーの名前 |
| avatar | ユーザーのアイコン画像のパス(URL) |
リアクション情報取得(GET)
リアクションの情報を取得します
リクエストURL
- http://localhost:8000/reactions
クエリパラメータ
| フィールド名 | 説明 |
|---|---|
| commentId | リアクションしたコメントのID |
| userId | リアクションしたユーザーのID |
正常時のレスポンス(Content-Type:application/json)
| フィールド名 | 説明 |
|---|---|
| reactionChar | リアクションの絵文字 |
| count | リアクションの件数 |
| currentUserReacted | 現在のユーザーのリアクションかどうかのフラグ |
リアクション情報登録(POST)
リアクションの情報を登録します
リクエストURL
- http://localhost:8000/reactions
リクエストパラメータ(Content-Type:multipart/form-data)
| フィールド名 | 説明 |
|---|---|
| reactChar | リアクションの絵文字 |
| commentId | リアクションしたコメントのID |
| userId | リアクションしたユーザーのID |
正常時のレスポンス(Content-Type:application/json)
「true」を返却します
リアクション情報削除(DELETE)
リアクションの情報を削除します
リクエストURL
- http://localhost:8000/reactions
クエリパラメータ
| フィールド名 | 説明 |
|---|---|
| commentId | 削除するリアクションのコメントのID |
| userId | 削除するリアクションを行ったユーザーのID |
| reactChar | 削除するリアクションの絵文字 |
正常時のレスポンス(Content-Type:application/json)
「true」を返却します
FastAPIでWeb APIの作成
それでは早速Web APIを作成していきます。まずはvenvを使って新しく「fastapi-comment-api」という仮想環境を作成します。
※ Python環境の構築方法はこちらの記事をご覧ください。
python -m venv fastapi-comment-api「fastapi-comment-api」フォルダに移動し、仮想環境を有効化します。
cd fastapi-comment-api
Scripts\activate
FastAPIとASGI Webサーバの「Uvicorn」、Pythonで使えるORMの「SQLAlchemy」、さらにPythonでフォームデータを扱うために「Python-Multipart」をpip経由でインストールします。
pip install fastapi uvicorn sqlalchemy python-multipartインストールが完了したらプロジェクトのルートに「app」フォルダを作成し、「__init__.py」ファイルを作成します(中身は空でOKです)。

続けて同フォルダに「database.py」ファイルを作成し、データベース接続の設定を記載します。SQLAlchemyでSQLiteを使用する場合、外部キー制約がデフォルトでは有効にならないのでPragmaステートメントで使用して明示的に有効化します。
from sqlalchemy import create_engine, event
from sqlalchemy.ext.declarative import declarative_base
from sqlalchemy.orm import sessionmaker
from sqlalchemy.engine import Engine

DATABASE_URL = "sqlite:///./test.db"

engine = create_engine(DATABASE_URL, connect_args={"check_same_thread": False})
SessionLocal = sessionmaker(autocommit=False, autoflush=False, bind=engine)
Base = declarative_base()

@event.listens_for(Engine, "connect")
def set_sqlite_pragma(dbapi_connection, connection_record):
    cursor = dbapi_connection.cursor()
    cursor.execute("PRAGMA foreign_keys=ON")
    cursor.close()

def get_db():
    db = SessionLocal()
    try:
        yield db
    finally:
db.close()次に「models.py」を作成し、SQLAlchemyのモデル定義を記載します。commentsテーブルのparentCommentIdと、reactionsテーブルのcommentIdに対して外部キーの設定を行い、コメントが削除された場合に、関連する子コメント情報やリアクション情報が連動して削除されるように設定します。
from sqlalchemy import Column, Integer, String, Text, DateTime, ForeignKey
from .database import Base

class Comment(Base):
    __tablename__ = "comments"
    id = Column('id', Integer, primary_key=True)
    parentCommentId = Column('parentCommentId', Integer, ForeignKey("comments.id", ondelete="CASCADE"), nullable=True)
    content = Column('content', Text)
    userId = Column('userId', Integer)
    mentionInfo = Column('mentionInfo', Text, nullable=True)
    postTime = Column('postTime', DateTime)
    updateTime = Column('updateTime', DateTime)

class User(Base):
    __tablename__ = "users"
    id =  Column('id', Integer, primary_key=True)
    username = Column('username', String)
    avatar = Column('avatar', String)

class Reaction(Base):
    __tablename__ = "reactions"
    id = Column('id', Integer, primary_key=True)
    commentId = Column('commentId', Integer, ForeignKey("comments.id", ondelete="CASCADE"))
    userId = Column('userId', Integer)
    reactionChar = Column('reactionChar', Text)
次に「schemas.py」を作成し、バリデーションなどを担うPydanticのスキーマ定義を記載します。
from pydantic import BaseModel
from typing import Union

class CommentIn(BaseModel):
    userId: int
    parentId: Union[int, str, None] = None
    content: str
    mentionInfo: Union[str, None] = None

class ReactionIn(BaseModel):
    reactionChar: str
    commentId: int
    userId: int
最後にCRUD処理を行うアプリケーション本体の「main.py」を作成します。
from fastapi import Depends, FastAPI, Form, HTTPException, status
from fastapi.exceptions import RequestValidationError
from fastapi.responses import JSONResponse
from sqlalchemy.orm import Session
from sqlalchemy import func
from starlette.middleware.cors import CORSMiddleware
from starlette.requests import Request
from datetime import datetime
from typing import Union
from .database import engine, get_db
from . import models, schemas


models.Base.metadata.create_all(bind=engine)

# コメント情報取得のヘルパー関数
def get_comment(id: int, db_session: Session):
    return db_session.query(models.Comment).filter(models.Comment.id == id).first()

# ユーザー情報取得のヘルパー関数
def get_user(id: int, db_session: Session):
    return db_session.query(models.User).filter(models.User.id == id).first()

app = FastAPI()

# CORS対応
app.add_middleware(
    CORSMiddleware,
    allow_origins=["*"],
    allow_credentials=True,
    allow_methods=["*"],
    allow_headers=["*"]
)

# Commentを全件取得
@app.get("/comments")
def read_comments(db: Session = Depends(get_db)):
    comments = db.query(models.Comment).all()
    return {
        "hasMore": False,
        "comments": [
            {
                "id": comment.id,
                "parentCommentId": comment.parentCommentId,
                "content": comment.content,
                "postTime": comment.postTime.strftime("%Y/%m/%d %H:%M:%S"),
                "updateTime": comment.updateTime.strftime("%Y/%m/%d %H:%M:%S"),
                "userId": comment.userId,
                "mentionInfo": comment.mentionInfo,
            }
            for comment in comments
        ],
    }

# Commentを登録
@app.post("/comments")
async def create_comment(
    userId: int = Form(...),
    parentId: Union[int, str, None] = Form(None),
    content: str = Form(...),
    mentionInfo: Union[str, None] = Form(None),
    db: Session = Depends(get_db)
):
    formdata = schemas.CommentIn(
        userId=userId,
        parentId=parentId,
        content=content,
        mentionInfo=mentionInfo,
    )

    comment = models.Comment(
        userId=formdata.userId,
        parentCommentId = None if formdata.parentId == 'undefined' else formdata.parentId,
        content=formdata.content,
        mentionInfo=formdata.mentionInfo,
        postTime=datetime.now(),
        updateTime=datetime.now()
    )

    db.add(comment)
    db.commit()
    db.refresh(comment)
    return comment

# Commentを更新
@app.put("/comments")
async def update_comment(
    id: int = Form(...),
    userId: int = Form(...),
    parentCommentId: Union[int, str, None] = Form(None),
    newContent: str = Form(...),
    mentionInfo: Union[str, None] = Form(None),
    db: Session = Depends(get_db)
):
    formdata = schemas.CommentIn(
        userId=userId,
        parentId=parentCommentId,
        content=newContent,
        mentionInfo=mentionInfo,
    )

    comment = models.Comment(
        userId=formdata.userId,
        parentCommentId=formdata.parentId,
        content=formdata.content,
        mentionInfo=formdata.mentionInfo,
        updateTime=datetime.now()
    )

    db_comment = get_comment(id,db)
    if db_comment is None:
        raise HTTPException(status_code=404, detail="Comment not found")
    else:
        db_comment.userId = comment.userId
        db_comment.parentCommentId = None if comment.parentCommentId == 'undefined' else comment.parentCommentId
        db_comment.content = comment.content
        db_comment.mentionInfo = comment.mentionInfo
        db_comment.updateTime = comment.updateTime

        db.commit()
        db.refresh(db_comment)
        return db_comment

# Commentを削除
@app.delete("/comments")
def delete_comment(commentId: int, db: Session = Depends(get_db)):
    db_comment = get_comment(commentId,db)
    if db_comment is None:
        raise HTTPException(status_code=404, detail="Comment not found")
    else:
        db_comment = db.query(models.Comment).filter(models.Comment.id == commentId).delete()
        db.commit()
        return True

# Userを取得
@app.get("/users")
def read_user(id: int, db: Session = Depends(get_db)):
    user = get_user(id, db)
    return user

# Reactionを取得
@app.get("/reactions")
def read_reaction(commentId: int, userId: int, db: Session = Depends(get_db)):
    reactions = db.query(models.Reaction.reactionChar, func.count(models.Reaction.reactionChar).label("count")
        ).filter(models.Reaction.commentId == commentId).group_by(models.Reaction.reactionChar).all()

    user_reactions = db.query(models.Reaction.reactionChar).filter(models.Reaction.commentId == commentId, models.Reaction.userId == userId).all()
    user_reacted_chars = {reaction[0] for reaction in user_reactions}

    reaction_info = [
        {
            "reactionChar": reaction[0],
            "count": reaction[1],
            "currentUserReacted": reaction[0] in user_reacted_chars
        }
        for reaction in reactions
    ]

    return reaction_info

# Reactionsを登録
@app.post("/reactions")
async def create_reaction(
    reactChar: str = Form(...),
    commentId: int = Form(...),
    userId: int = Form(...),
    db: Session = Depends(get_db)
):
    formdata = schemas.ReactionIn(
        reactionChar=reactChar,
        commentId=commentId,
        userId=userId,
    )

    reaction = models.Reaction(
        reactionChar=formdata.reactionChar,
        commentId=formdata.commentId,
        userId=formdata.userId,
    )

    db.add(reaction)
    db.commit()
    db.refresh(reaction)
    return True

# Reactionを削除
@app.delete("/reactions")
def delete_reaction(commentId: int, userId: int, reactChar: str, db: Session = Depends(get_db)):
    db_reaction = db.query(models.Reaction).filter(models.Reaction.userId == userId, models.Reaction.commentId == commentId, models.Reaction.reactionChar == reactChar).delete()
    if db_reaction == 0:
        raise HTTPException(status_code=404, detail="Reaction not found")
    else:
        db.commit()
        return True

# リクエストエラー時のハンドリング
@app.exception_handler(RequestValidationError)
async def handler(request:Request, exc:RequestValidationError):
    print(exc)
    return JSONResponse(content={}, status_code=status.HTTP_422_UNPROCESSABLE_ENTITY)
動作確認
完成したら以下のコマンドでAPIを起動します。
uvicorn app.main:app --reload起動後、「http://127.0.0.1:8000/docs」にアクセスすると、自動生成されたOpenAPIのAPIドキュメントが表示されます。

また、プロジェクトフォルダのルート直下に自動でSQLiteのデータベースファイル「test.db」が作成されるので、「DB Browser for SQLite」などで開くと、comments、users、reactionsの3つのテーブルが作成されていることが確認できます。

あらかじめDB Browser for SQLite上で以下のSQLを実行し、ユーザー情報を登録しておきます。
INSERT INTO USERS (id, username, avatar) VALUES (1, "森上 偉久馬", "./img/avatar1.png");
INSERT INTO USERS (id, username, avatar) VALUES (2, "葛城 孝史", "./img/avatar2.png");
INSERT INTO USERS (id, username, avatar) VALUES (3, "加藤 泰江", "./img/avatar3.png");
INSERT INTO USERS (id, username, avatar) VALUES (4, "川村 匡", "./img/avatar4.png");
INSERT INTO USERS (id, username, avatar) VALUES (5, "松沢 誠一", "./img/avatar5.png");
INSERT INTO USERS (id, username, avatar) VALUES (6, "成宮 真紀", "./img/avatar6.png");
フロントエンドの作成
次に先ほど作成したAPIと連携するフロントエンド側のアプリケーションを作成していきます。
事前準備
InputManJSの使用にはInputManJSのモジュールを環境にインストールする必要があります。CDNを参照したり、npmなどから入手したりする方法もありますが、今回は環境に直接InputManJSのモジュールを配置していきます。あらかじめInputManJSの製品版かトライアル版をご用意ください。トライアル版は以下より無償で入手可能です。
製品版、またはトライアル版をダウンロードしたら、ZIPファイルを解凍し、以下のファイルを環境にコピーします。
- comment/scripts/gc.inputman.comment.ja.js
- comment/css/gc.inputman.comment.css
また、「img」フォルダを作成し、コメントを入力するユーザーのアイコン画像を配置します。今回の記事で使用するアイコン画像はこちらからダウンロード可能です。
コピーしたファイルはそれぞれ以下のように配置します。

コメントコンポーネントの参照
まずはコメントコンポーネントを使うのに必要なライブラリの参照設定をHTMLファイルに追加します。コメントコンポーネントのモジュールのほか、初期化やAPIとの接続設定などの各種処理を記載する「app.js」への参照も追加します。
※ CDNから参照する場合はコメントアウトされている部分とライブラリの参照先を入れ替えてください。
<!DOCTYPE html>
<html>

<head>
    <meta charset="UTF-8">
    <title>コメントコンポーネントサンプル</title>

    <!-- ローカルのライブラリを参照する場合 -->
    <link rel="stylesheet" href="css/gc.inputman.comment.css" />
    <script src="scripts/gc.inputman.comment.ja.js"></script>

    <!-- CDNからライブラリを参照する場合 -->
    <!--
    <link rel="stylesheet" href="https://cdn.mescius.com/inputmanjs/hosted/comment/css/gc.inputman.comment.css
" />
    <script src="https://cdn.mescius.com/inputmanjs/hosted/comment/scripts/gc.inputman.comment.ja.js"></script>
    -->

    <script src="scripts/app.js"></script>
</head>

<body>
</body>

</html>
コメントコンポーネントの組み込み
次にコメントコンポーネントをWebページに組み込んでいきます。「index.html」の中で、タグボックスコントロールを表示する領域を<div>タグで定義します。
・・・(中略)・・・
<body>
    <div id="gcComment"></div>
</body>

</html>続いて「scripts/app.js」にコメントコンポーネントの初期化処理を記載します。dataSourceオプションのenableオプションをtrueに設定し、バックエンドとのAPI連携を有効化します。また、remoteオプションで、各APIのエンドポイントを設定します。
※ ライセンスキーを設定しない場合トライアル版を示すメッセージが表示されます。ライセンスキーの入手や設定方法についてはこちらをご覧ください。
GC.InputMan.LicenseKey = 'ここにInputManJSのライセンスキーを設定します';

document.addEventListener('DOMContentLoaded', () => {

        const gcComment = new GC.InputMan.GcComment(document.getElementById('gcComment'), {
        dataSource: {
            enabled: true,
            remote: {
                comments: {
                    read: {
                        url: `http://localhost:8000/comments`,
                    },
                    create: {
                        url: `http://localhost:8000/comments`,
                    },
                    update: {
                        url: `http://localhost:8000/comments`,
                    },
                    delete: {
                        url: `http://localhost:8000/comments`,
                    }
                },
                users: {
                    read: {
                        url: `http://localhost:8000/users`,
                        schema: {
                            dataSchema: {
                                name: 'username'
                            }
                        }
                    }
                },
                reactions: {
                    read: {
                        url: `http://localhost:8000/reactions`,
                    },
                    create: {
                        url: `http://localhost:8000/reactions`,
                    },
                    delete: {
                        url: `http://localhost:8000/reactions`,
                    }
                },
            }
        },
        editorConfig: {
            height: 150,
        },
        commentMode: GC.InputMan.GcCommentMode.ThreadMode,
        userInfo: {
            id: "1",
            username: "森上 偉久馬",
            avatar: 'img/avatar1.png',
            avatarType: 'square',
        }
    });
});
なお、今回は以下のようにユーザー情報を固定にしているので、1人のユーザーしかコメントが登録できませんが、先ほど作成したusersのAPIからユーザー情報を取得するなどして、ログインするユーザーに応じて動的にuserInfoを設定することで、アプリ上で複数人がコミュニケーションをすることが可能になります。
・・・(中略)・・・
        userInfo: {
            id: "1",
            username: "森上 偉久馬",
            avatar: 'img/avatar1.png',
            avatarType: 'square',
        }
    });
});
以上でコメントコンポーネントを使用する準備は完了です。Visual Studio Code上で「index.html」を右クリックして、「Open with Live Server」を実行します。

実行後、ブラウザ上にコメントコンポーネントが組み込まれたWebページが表示されます。
※ あらかじめ先ほど作成したWeb APIを起動しておいて下さい。

動作確認
エディタからコメントやリアクションを登録すると、バックエンドのAPIと連携してデータベースにコメント情報等が登録され、画面をリロードしても登録したコメント情報がきちんと表示されます。
コメントの修正や、リアクションの削除等の変更もきちんと反映されます。
親コメントを削除すると、それに紐づく子コメントも削除されます。
コメントコンポーネントのデータベース連携については以下のデモアプリケーションもご参考ください。
さいごに
今回はWebアプリケーションにコメント機能を組み込むことができるInputManJSの「コメントコンポーネント(GcComment)」で、PythonのWebフレームワーク「FastAPI」で作成したWeb APIと連携してコメント機能付きのアプリケーションの作成方法を解説しました。次回は双方向のリアルタイム通信機能を追加し、複数人がリアルタイムで会話ができるチャットアプリケーションの作成方法を解説します。
なお、今回ご紹介したコメントコンポーネントの機能はほんの一部です。製品サイトでは、InputManJSのコメントコンポーネントの機能を手軽に体験できるデモアプリケーションやトライアル版も公開しておりますので、こちらもご確認ください。
また、ご導入前の製品に関するご相談、ご導入後の各種サービスに関するご質問など、お気軽にお問合せください。
]]>今回はPythonで効率的かつ高速にWeb APIを構築するためのWebフレームワーク「FastAPI」の特長と簡単なAPI構築のステップをご紹介します。
はじめに
FastAPIはその名前の通り高速かつ直感的なAPI開発を可能にするモダンなフレームワークです。この記事では、FastAPIの特長と簡単なCRUD処理を行うWeb API構築のステップをご紹介します。
FastAPIとは
FastAPIは、Pythonで構築されたモダンで高性能なWebフレームワークです。
主にWeb APIの開発に特化しており、その使いやすさとパフォーマンスの高さから、シンプルなアプリケーションから大規模なプロジェクトまで幅広く利用されています。
FastAPIはデータモデルのバリデーションとシリアライゼーションを行う「Pydantic」と、ルーティング、ミドルウェア、WebSocketなどの機能を提供するASGI※フレームワーク「Starlette」を採用しており、これらによりNode.jsやGo並みの高いパフォーマンスを実現しています。
※ ASGI(Asynchronous Server Gateway Interface):非同期対応のPythonのWebサーバー、フレームワーク、アプリケーション間の通信の標準インターフェース
FastAPIの特長
高速なパフォーマンス
FastAPIはASGI(Asynchronous Server Gateway Interface)をベースにしており、非同期処理をネイティブサポートしています。データベースアクセスや外部APIの呼び出し中に他のリクエストを並行処理することが可能なので、従来の同期的なフレームワークに比べて、スケーラブルで応答性の高いアプリケーションを構築できます。
型アノテーションの活用
FastAPIはPythonの型アノテーション(Type Hints)を使用して、リクエストやレスポンスのデータバリデーションを自動化します。開発者は型を定義するだけで、データ整合性の検証が容易に行えるので、開発者体験も向上します。
自動ドキュメント生成
OpenAPI(旧Swagger)とReDocによるインタラクティブなAPIドキュメントが自動生成されるのでドキュメント作成の手間を削減できます。また、エンドポイントのテストやデバッグもドキュメント上で容易に実行できます。
開発効率の向上
FastAPIはデコレータを使ったルーティングや非同期I/Oサポートにより、少ないコード量で複雑な機能を実装できます。また、PydanticやStarletteなどのライブラリと統合されており、ユーザー認証やWebSocketサポートなども簡単に導入可能です。さらにエラー発生時に詳細なスタックトレースを出力してくれるので、デバッグも容易です。
FastAPIのユースケース
RESTful APIの構築
FastAPIは軽量で高性能なRESTful APIを構築するのに最適です。非同期処理をネイティブでサポートし、大量のリクエストを効率よく処理できるので、eコマースやソーシャルメディアアプリのバックエンドや、分散システムの各サービス間でのデータ交換を行うマイクロサービスなどで活用できます。
機械学習APIの公開
FastAPIは機械学習モデルをエンドユーザーに提供するためのAPIの開発にも適しています。リクエストが並列で処理されるため、リアルタイムでの機械学習予測や大量のAPIリクエストを効率よく処理できます。また、前述のPythonの型アノテーションとPydanticを組み合わせることでモデルに送られるデータのバリデーションチェックを簡単に実現できます。
リアルタイムアプリケーションの構築
FastAPIはWebSocketをサポートしているので、リアルタイムでのメッセージの送受信を行うチャットアプリや、動的に更新されるダッシュボードなどのリアルタイムアプリケーションを構築するのにも最適です。
使ってみよう!FastAPIクイックスタート
FastAPIの使い方を知るために、実際に簡単なWeb APIを作成して動かしてみましょう。
なお、FastAPIの実行にはPythonが必要なため、公式サイトからダウンロードしてインストールしておきましょう。
ダウンロードのリンクからインストーラーがダウンロードできますので、実行してインストールしましょう。

FastAPIで最小限のWeb APIの作成
まずは最小限の構成のWeb APIを作成していきます。まずはvenvを使って「fastapi-sample」という仮想環境を作成します。
python -m venv fastapi-sample「fastapi-sample」フォルダに移動し、仮想環境を有効化します。
cd fastapi-sample
Scripts\activate
Pythonの実行環境が整ったら、FastAPIとASGI Webサーバの「Uvicorn」をpip経由でインストールします。
pip install fastapi uvicornプロジェクトのルートディレクトリに「main.py」のファイルを作り、下記のコードを記述します。
from fastapi import FastAPI

app = FastAPI()

@app.get("/")
def read_root():
    return {"message": "Hello, FastAPI!"}
ファイル作成後、下記のコマンドを実行しWeb APIを起動します。
uvicorn main:app --reload 
ブラウザで「http://127.0.0.1:8000/」にアクセスすると、「main.py」に定義したレスポンスが表示されます。

また、「http://127.0.0.1:8000/docs」にアクセスすると、自動生成されたOpenAPIのAPIドキュメントが使用できます。

同様に「http://127.0.0.1:8000/redoc」にアクセスすると、自動生成されたReDocのAPIドキュメントが使用できます。

FastAPIでSQLiteと連携してCRUD処理を行うWeb APIの作成
次にPythonの標準データベースであるSQLiteと連携して、GET(参照)、POST(登録)、PUT(更新)、DELETE(削除)といったCRUD処理を行うWeb APIを作成してみます。まずはvenvを使って新しく「fastapi-user」という仮想環境を作成します。
python -m venv fastapi-user「fastapi-user」フォルダに移動し、仮想環境を有効化します。
cd fastapi-user
Scripts\activate先ほどと同様のFastAPIとUvicornに加え、Pythonで使えるORMの「SQLAlchemy」も一緒にインストールします。これにより、SQLを直接書くことなくデータベースを操作できます。
pip install fastapi uvicorn sqlalchemyインストールが完了したらプロジェクトのルートに「app」フォルダを作成し、「__init__.py」ファイルを作成します(中身は空でOKです)。

続けて同フォルダに「database.py」ファイルを作成し、データベース接続の設定を記載します。
from sqlalchemy import create_engine
from sqlalchemy.ext.declarative import declarative_base
from sqlalchemy.orm import sessionmaker

DATABASE_URL = "sqlite:///./test.db"

engine = create_engine(DATABASE_URL, connect_args={"check_same_thread": False})
SessionLocal = sessionmaker(autocommit=False, autoflush=False, bind=engine)
Base = declarative_base()

def get_db():
    db = SessionLocal()
    try:
        yield db
    finally:
        db.close()
次に「models.py」を作成し、SQLAlchemyのモデル定義を記載します。
from sqlalchemy import Column, Integer, String
from .database import Base

class User(Base):
    __tablename__ = "users"
    id = Column(Integer, primary_key=True)
    name = Column(String)
    email = Column(String)
次に「schemas.py」を作成し、バリデーションなどを担うPydanticのスキーマ定義を記載します。
from pydantic import BaseModel

class User(BaseModel):
    name: str
    email: str
次に「crud.py」を作成し、CRUD処理を行うヘルパー関数の定義を記載します。
from sqlalchemy.orm import Session
from . import models, schemas

def get_user(id: int, db_session: Session):
    return db_session.query(models.User).filter(models.User.id == id).first()

def create_user(user: schemas.User, db: Session):
    db_user = models.User(name=user.name, email=user.email)
    db.add(db_user)
    db.commit()
    db.refresh(db_user)
    return db_user

def update_user(id: int, user: schemas.User, db: Session):
    db_user = get_user(id,db)
    db_user.name = user.name
    db_user.email = user.email
    db.commit()
    db.refresh(db_user)
    return db_user

def delete_user(id: int, db: Session):
    db_user = get_user(id,db)
    if db_user is None:
        return None
    db.delete(db_user)
    db.commit()
    return db_user
最後にアプリケーション本体の「main.py」を作成します。
from fastapi import Depends, FastAPI, HTTPException
from sqlalchemy.orm import Session
from . import crud, models, schemas
from .database import engine, get_db

models.Base.metadata.create_all(bind=engine)

app = FastAPI()

# ユーザーを全件取得
@app.get("/users/")
def read_users(db: Session = Depends(get_db)):
    users = db.query(models.User).all()
    return users

# ユーザーを1件取得
@app.get("/users/{user_id}")
def read_user(user_id: int, db: Session = Depends(get_db)):
    user = crud.get_user(user_id, db)
    return user

# ユーザーの登録
@app.post("/users/")
def create_user(user: schemas.User, db: Session = Depends(get_db)):
    return crud.create_user(user=user, db=db)

# ユーザーの更新
@app.put("/users/{user_id}")
def update_user(user_id: int, user: schemas.User, db: Session = Depends(get_db)):
    db_user = crud.update_user(id=user_id, user=user, db=db)
    if db_user is None:
        raise HTTPException(status_code=404, detail="User not found")
    return db_user

# ユーザーの削除
@app.delete("/users/{user_id}")
def delete_user(user_id: int, db: Session = Depends(get_db)):
    db_user = crud.delete_user(id=user_id, db=db)
    if db_user is None:
        raise HTTPException(status_code=404, detail="User not found")
    return db_user
動作確認
完成したら以下のコマンドでAPIを起動します。
uvicorn app.main:app --reload起動後、「http://127.0.0.1:8000/docs」にアクセスすると、自動生成されたOpenAPIのAPIドキュメントが表示されます。

APIドキュメント上で各種APIの動作を確認できます。まずはPOSTのAPIを実行しユーザーを登録します。
次にGETのAPI(「http://127.0.0.1:8000/users/1」)を実行し、今登録したユーザの情報を取得します。
以下のように「http://127.0.0.1:8000/users」でGETを実行すればユーザー情報の全件取得もできます。
※ あらかじめ何件かユーザー情報を登録しています。
次にPUTのAPI(「http://127.0.0.1:8000/users/1」)を実行し、ユーザの情報を更新します。
さらにDELETEのAPI(「http://127.0.0.1:8000/users/1」)を実行し、ユーザの情報を削除します。
再度「http://127.0.0.1:8000/users」のGETリクエストを実行し、正しくユーザー情報が削除されていることを確認します。
さいごに
本記事では、FastAPIの特長と導入方法、そして簡単なCRUD処理を行うWeb APIの作り方を解説しました。
FastAPIはPythonで手軽に高パフォーマンスなWeb APIを構築可能で、プロジェクトの規模を問わず、幅広い用途で使えるフレームワークですので、是非お試しいただければ幸いです。
メシウスではFastAPIで作成したWeb APIとも連携可能な、業務アプリのフロントエンド開発に使える高機能なJavaScriptライブラリを提供しています。

無償のトライアル版や、ブラウザ上で手軽に試せるデモアプリケーションも公開しているので、こちらも是非ご覧ください。
]]>今回はhtmxやASGIといった技術スタックを使ったPythonのWebアプリケーションフレームワーク「FastHTML」をご紹介します。
はじめに
Webアプリケーション開発に掛かる負担を少しでも減らすために、これまで様々なWebフレームワークが生み出されてきました。開発に便利な機能を備える反面、複雑な構成や開発上の制約、学習コストの高さなどの問題を抱えていましたが、開発者の知見や経験をもとに段々とその仕組みも洗練されてきました。
今回ご紹介するFastHTMLは、Pythonの簡単なコードだけでWebアプリケーションを素早く作り上げることができるシンプルなWebフレームワークです。本記事では、他のWebフレームワークにはないFastHTMLの特長やその使い方を解説していきます。
FastHTMLとは
FastHTMLは、Python環境で動作するWebアプリケーション作成のためのフレームワークです。
似たようなPythonのフレームワークで「FastAPI」がありますが、FastHTMLはFastAPIからインスピレーションを得て開発されたフレームワークで、FastAPIのユーザーにも使いやすいように作られています。
FastAPI is one of the inspirations for FastHTML. We are fans of its developer experience and tried to make FastHTML extremely familiar for FastAPI users.
FastHTML – Modern web applications in pure Python
フロントエンドのUI構築には「htmx」を使用できるので、JavaScriptのコードを書かなくても、インタラクティブな処理をHTML要素の中に簡単に組み込めます。また、必要に応じてJavaScriptライブラリを組み込んで機能を強化することもできます。htmxについては以下の記事もご覧ください。
WebページのHTML/CSS/JavaScriptをPythonのAPIを通じて出力できるため、Pythonに慣れ親しんだ開発者は簡単にWebサイトを作成できます。特に、細かいデザインを必要としない管理画面や社内アプリ、プロトタイプなどのWebアプリを素早く作るのに適しています。
また、FastHTMLはコードやファイル構成がシンプルでわかりやすいのが特長です。動的で複雑なUIでもコンポーネントごとに簡潔なコードで記述でき、プロジェクト内には余計なファイルを必要としません。
例えばPythonで下記のコードを記述することで、特定のURLへのアクセスに対してHTMLを出力するWebアプリケーションを実行できます。
from fasthtml.common import *

app,rt = fast_app()

@rt('/')
def get(): return Div(P('Hello World!'), hx_get="/change")

serve()
実行してブラウザからアクセスすると、下記のようなbody要素を持つHTMLが表示されます。
<body>
  <div hx-get="/change">
    <p>Hello World!</p>
  </div>
</body>このHTMLでは、div要素をクリックすると、ページ遷移することなくbody要素の内容が/changeのコンテンツに置き換えられます。
このように、FastHTMLでは簡単なPythonコードだけで、URLルーティングを持つWebサーバー機能を実行でき、JavaScriptの記述を必要としない動的処理を持つWebアプリケーションを作成できます。
FastHTMLの特長
フルスタックのWebフレームワーク
FastHTMLは、ルーティングやセッション、データベース連携などWebアプリケーション開発に必要な機能が揃ったフルスタックのWebフレームワークです。
それらの機能を実現するために、htmxやASGIなどの技術スタックが使われています。htmxは、JavaScriptによる動的な処理を含むHTMLを、簡素化されたよりスマートな記述により出力する仕組みです。このhtmxを含め、HTMLやCSSで構成されるコンポーネントをPythonのAPIを通じて定義できるため簡単なUIであればPythonコードだけでWebアプリケーションを完結できます。また、ASGIはPythonからHTTPのリクエストとレスポンスを制御する仕組みで、Webサーバー機能に利用されています。
拡張ライブラリで素早く開発
FastHTMLは動作が軽量で、素早くWebアプリケーションを配置できるところが特徴的です。Webアプリケーションの開発に必要な最低限の機能は備えていますが、必要に応じてBootstrapやDaisyUIなどの拡張機能をライブラリを通じて導入できます。
また、RailwayやHuggingFaceなどのホスティングサービスであれば簡単なコマンドだけでデプロイできるため、開発からリリースまでの期間を短縮可能です。特に運用環境に制約のないプロトタイプや社内アプリなど低コストで素早くデプロイしたい用途に適しています。
Python開発者は習得しやすい
FastHTMLはPython環境で動作するため、既存のPythonライブラリを組み合わせたWebアプリケーション開発に便利です。Pythonでは特に、機械学習やデータ分析、画像処理、グラフ作図など機能の実装に便利なライブラリが多く存在しており、これらをFastHTMLと共にWebアプリケーションに組み込むのに役立ちます。
また、FastHTMLには組み込みのコンポーネントが備わっており、HTMLやCSSを記述することなくAPIレベルでの配置が可能です。Web開発に慣れていなくても、Pythonの扱いに慣れた開発者であれば簡単に作成できるところは大きなメリットです。
使ってみよう!FastHTMLクイックスタート
FastHTMLの使い方を知るために、実際にWebアプリケーションを作成して動かしてみましょう。
なお、FastHTMLの実行にはPythonが必要なため、公式サイトからダウンロードしてインストールしておきましょう。
ダウンロードのリンクからインストーラーがダウンロードできますので、実行してインストールしましょう。

Pythonの実行環境が整ったら、FastHTMLをpip経由でインストールしましょう。
pip install python-fasthtml続けて、Webアプリケーション用のディレクトリを作成します。
mkdir fasthtml-tutorial
cd fasthtml-tutorial作成したディレクトリに「main.py」のファイルを作り、下記のコードを記述しましょう。今回は公式のサンプルからチャートを表示するアプリを実行してみます。
import json
from fasthtml.common import *

app, rt = fast_app(hdrs=(Script(src="https://cdn.plot.ly/plotly-2.32.0.min.js"),))

data = json.dumps({
    "data": [{"x": [1, 2, 3, 4],"type": "scatter"},
            {"x": [1, 2, 3, 4],"y": [16, 5, 11, 9],"type": "scatter"}],
    "title": "Plotly chart in FastHTML ",
    "description": "This is a demo dashboard",
    "type": "scatter"
})

@rt("/")
def get():
  return Titled("Chart Demo", Div(id="myDiv"),
    Script(f"var data = {data}; Plotly.newPlot('myDiv', data);"))

serve()
最後に、下記のコマンドを実行してみましょう。Webサーバーと共にアプリケーションが起動します。
python main.py
ブラウザで「http://localhost:5001/」にアクセスすると、折れ線グラフが描かれたページが表示されます。

さいごに
本記事では、FastHTMLの特長と簡単なアプリケーションの作り方を解説しました。
FastHTMLは、PythonのAPIを通じてインタラクティブなWebアプリケーションを素早く開発できるフルスタックのWebフレームワークです。また、既製のUIコンポーネントやCSSフレームワーク、JavaScriptライブラリを活用することでより簡単に作成可能です。
メシウスでは業務アプリ開発に最適なJavaScriptライブラリを提供しています。

無償のトライアル版や、ブラウザ上で手軽に試せるデモアプリケーションも公開しているので、こちらも是非ご覧ください。
]]>今回は弊社が提供するJavaScript開発ライブラリ「Wijmo(ウィジモ)」のデータグリッドコントロール「FlexGrid」をFlaskに組み込んで、CRUD処理を行うアプリケーションを作成してみたいと思います。
開発環境
- Python 3.11.0
- Flask 2.2.2
アプリケーションの作成
まずはFlaskでアプリケーションを作成していきます。今回は前回作成したWeb APIの部分とは別にアプリケーションを作成して連携させてみたいと思います。flask-wijmo-appという名前で環境を作成します。
python -m venv flask-wijmo-app「flask-wijmo-app」フォルダに移動し、仮想環境を有効化します。
cd flask-wijmo-app
Scripts\activate
さらに仮想環境が有効化されている状態で、以下のコマンドを実行してFlaskをインストールします。
pip install FlaskWijmoの静的ファイルの配置
Flaskには「Jinja2」というテンプレートエンジンが用意されており、HTMLを動的に生成することができます。名前の由来は「template(テンプレート)」⇒「temple(お寺)」⇒「神社」から来ています。
「jinja2」は先ほどインストールしたFlaskと一緒にインストールされます。以下のコマンドで現在インストールされているパッケージの一覧を表示できます。
pip list
「Jinja2」では「templates」フォルダにHTMLなどのテンプレートファイルを配置し、「static」フォルダにJavaScriptやCSSなどの静的ファイルを配置します。
まずはアプリケーションのルート直下に「static」フォルダを作成し、さらにその配下に「js」フォルダと「css」フォルダも追加し、Wijmoのjsファイルとcssファイルを以下のように配置します。
- static/css/wijmo.min.css
- static/js/wijmo.min.js
- static/js/wijmo.input.min.js
- static/js/wijmo.grid.min.js
- static/js/wijmo.grid.filter.min.js
- static/js/cultures/wijmo.culture.ja.min.js
テンプレートファイルの作成
次に同じくアプリケーションのルート直下に「templates」フォルダを作成し「index.html」ファイルを追加し、Wijmoのライブラリの参照設定や、FlexGridの初期化処理、CRUD処理を行うための各種APIの呼び出し処理を記述します。
<!DOCTYPE html>
<html>
<head>
    <title></title>
    <meta charset="utf-8" />
    <!-- styles -->
    <!-- Wijmoのスタイル(必須) -->
    <link href="/static/css/wijmo.min.css" rel="stylesheet" />

    <!-- Wijmoのコアモジュール(必須) -->
    <script src="/static/js/wijmo.min.js"></script>
    <!-- Wijmoコントロール(オプション。必要なコントロールを設定する) -->
    <script src="/static/js/wijmo.grid.min.js"></script>
    <script src="/static/js/wijmo.grid.filter.min.js"></script>
    <script src="/static/js/wijmo.input.min.js"></script>
    <!-- Wijmoカスタムカルチャー(オプション。任意のカルチャーを設定する) -->
    <script src="/static/js/wijmo.culture.ja.min.js"></script>

    <style>
        .grid {
            height: 250px;
        }
    </style>
</head>

<body>
    <div id="flexGrid"></div>
    <button id="btn">データを更新する</button>

    <script>
        const url = 'http://127.0.0.1:5001/order';

        var cv = new wijmo.collections.CollectionView(null, {
            trackChanges: true
        });

        var flexGrid = new wijmo.grid.FlexGrid('#flexGrid', {
            itemsSource: cv,
            allowAddNew: true,
            allowDelete: true,
            autoGenerateColumns: false,
            columns: [
                { binding: 'product', header: '商品名', width: 200 },
                { binding: 'date', header: '受注日', format: 'yyyy-mm-dd', },
                { binding: 'amount', header: '受注数', width: 80 },
            ]
        });

        // read
        wijmo.httpRequest(url, {
            success: function (xhr) {
                cv.sourceCollection = JSON.parse(xhr.responseText)
            },
            error: function (xhr) {
                window.alert('データを読み込めませんでした')
            }
        });

        document.getElementById('btn').addEventListener('click', function () {
            //update
            for (var i = 0; i < cv.itemsEdited.length; i++) {
                wijmo.httpRequest(url + '/' + cv.itemsEdited[i].id, {
                    method: 'PUT',
                    //requestHeaders: requestHeaders,
                    data: cv.itemsEdited[i],

                    error: function (xhr) {
                        console.log(xhr)
                    }
                });
            }

            //create
            for (var i = 0; i < cv.itemsAdded.length; i++) {

                wijmo.httpRequest(url, {
                    method: 'POST',
                    data: cv.itemsAdded[i],
                    error: function (xhr) {
                        console.log(xhr)
                    }
                });
            }

            //delete
            for (var i = 0; i < cv.itemsRemoved.length; i++) {
                wijmo.httpRequest(url + '/' + cv.itemsRemoved[i].id, {
                    method: 'DELETE',
                    error: function (xhr) {
                        console.log(xhr)
                    }
                });
            }
        })
    </script>
</body>
</html>
起動ファイルの作成
最後にメインの起動ファイルを作成します。アプリケーションのルート直下に「app.py」を作成し、以下の内容を記述します。今回はブラウザから「http://127.0.0.1:5000/」にアクセスしたときに「index.html」のテンプレートを実行するように設定しています。
from flask import Flask
from flask import render_template

app = Flask(__name__)

@app.route("/")
def index():
   return render_template('index.html')
最終的なフォルダ構成は以下の様になります。

アプリケーションの実行
この時点で一度アプリケーションを起動してみます。以下のコマンドを実行してアプリケーションを起動します。
flask run「http://127.0.0.1:5000/」にアクセスすると、以下のようにブラウザ上に空の状態のFlexGridが表示できます。

CRUD処理の実行
Web APIのCORSの設定
次にWeb APIと連携し、WijmoのFlexGrid上からCRUD処理を実行していきます。Web APIは前回作成したものを使用します。
今回はFlexGridを表示するアプリとAPIは別アプリになるので、異なるポートからAPIが呼び出せるようにCORSの設定を追加します。FlaskでのCORSの設定には「Flask-CORS」を使用します。
以下のコマンドを実行してFlask-CORSをインストールします。
pip install flask-corsインストールが完了したら前回作成した「flask-api-app」の「__init__.py」を以下のように追記します。
from flask import Flask
from flask_sqlalchemy import SQLAlchemy
from flask_marshmallow import Marshmallow
from flask_cors import CORS

app = Flask(__name__)
app.config['SECRET_KEY'] = 'secret key'
app.config['SQLALCHEMY_DATABASE_URI'] = 'sqlite:///order.sqlite3'
app.config["SQLALCHEMY_TRACK_MODIFICATIONS"] = False
app.config['JSON_AS_ASCII'] = False #日本語を利用

#SQLAlchemyでデータベース定義
db = SQLAlchemy(app)
ma = Marshmallow(app)
cors = CORS(app)

import src.db
最後に以下のコマンドを実行してAPIを起動します。この時、Wijmoを組み込んだアプリ側とポートが被らないように別のポート(5001)を指定して起動します。
flask run -p 5001データの読み込み(READ)
APIを起動したら「flask-wijmo-app」も再度起動し、「http://127.0.0.1:5000/」にアクセスすると、ブラウザ上のFlexGridにデータが表示されます。

データの登録(CREATE)
グリッドの一番下の行にデータを入力し、[更新]ボタンをクリックすると、データの登録ができます。
データの更新(UPDATE)
程追加したデータの一部を編集し、[更新]ボタンをクリックすると、データの更新ができます。
データの削除(DELETE)
先程追加したデータの行を選択後、Deleteキーで削除し、[更新]ボタンをクリックすると、データの削除ができます。
さいごに
以上がFlaskに「Wijmo」のデータグリッドコントロール「FlexGrid」を組み込んで、CRUD処理を実装する方法でした。WijmoにはFlexGrid以外にも高機能なUIコントロールが含まれていますので、気になった方はぜひ製品サイトもご覧ください。
製品サイトでは、Wijmoの機能を手軽に体験できるデモアプリケーションやトライアル版も公開しておりますので、こちらもご確認ください。
また、ご導入前の製品に関するご相談、ご導入後の各種サービスに関するご質問など、お気軽にお問合せください。
]]>今回はPythonのWebアプリケーションフレームワーク「Flask」でWeb APIを作成する方法ついてお届けします。
Flaskは、Python言語で稼働するWebアプリケーションのフレームワークです。シンプルで軽量な作りであることから簡単にWebアプリケーションを作成できる特徴があります。
今回の記事では、「Flask」を使ってREST APIを作成する方法をご紹介します。
PythonとFlaskのインストール
まずはPythonとFlaskをインストールします。Flaskの導入方法は以下の記事で解説しておりますので、参考にしながらFlaskの実行環境を構築してください。
今回はflask-api-appという名前で環境を作成しAPIを作成していきます。
python -m venv flask-api-app「flask-api-app」フォルダに移動し、仮想環境を有効化します。
cd flask-api-app
Scripts\activate
Flask-SQLAlchemyのインストール
今回作成するREST APIでは、データベースを使ってGET(参照)、POST(登録)、PUT(更新)、DELET(削除)の処理が行えるようにします。
Flaskにてデータベースとのやり取りを行う方法として「Flask-SQLAlchemy」と呼ばれるライブラリを使います。「Flask-SQLAlchemy」はORM(Object Relational Mapping)としてオブジェクトの関連付けを行ってくれるため、SQL文を作成せずデータベース操作が可能となります。
さらにPythonオブジェクトとJSONデータの変換のために「flask-marshmallow 」と「marshmallow-sqlalchemy」を使用します。
以下のコマンドを入力することでインストールが行えます。
※ 今回の記事では、「C:\Work\Python\Flask」にPythonの実行環境が作成されている前提で進めます。
pip install flask-sqlalchemy flask-marshmallow marshmallow-sqlalchemy
データベースとGUI管理ツール
今回はPythonに標準で組み込まれている「SQLite3」を使用します。
SQLiteのGUI管理ツールとして「DB Browser for SQLite」が便利です。以下のURLからダウンロードします。

サイト内の最新バージョン(今回では「Version 3.12.2 released」)をクリックし、Downloadsの「DB.Browser.for.SQLite-3.12.2-win64.zip – .zip (no installer) for Win64」から入手します。任意の場所に解凍し、「DB Browser for SQLite.exe」を実行することで起動できます。
REST APIの作成
ここまでの準備が完了したら、FlaskでREST APIを作成していきましょう。「flask-api-app」フォルダ配下に「app.py」ファイルを作成し、さらに「src」フォルダを追加してその配下に「__init__.py」ファイルと「db.py」ファイルを作成します。

| __init__.py | Python実行時の初期設定をまとめたファイルです。今回では、データベースへの接続設定を主に記述します。 |
|---|---|
| app.py | Pythonを実行する起動ファイルです。 |
| db.py | データベースに対してCRUD処理を行うファイルです。 |
initファイルの作成
「__init__.py」ファイルの中身を以下のように記述します。
from flask import Flask
from flask_sqlalchemy import SQLAlchemy
from flask_marshmallow import Marshmallow

app = Flask(__name__)
app.config['SECRET_KEY'] = 'secret key'
app.config['SQLALCHEMY_DATABASE_URI'] = 'sqlite:///order.sqlite3'
app.config["SQLALCHEMY_TRACK_MODIFICATIONS"] = False
app.config['JSON_AS_ASCII'] = False #日本語を利用

#SQLAlchemyでデータベース定義
db = SQLAlchemy(app)
ma = Marshmallow(app)

import src.dbapp.config['SECRET_KEY']とapp.config['SQLALCHEMY_DATABASE_URI']では、データベースの設定とセッション情報を暗号化するためのキーを設定します。今回はSQLiteのデータベースファイル名としてorder.sqlite3を指定しています。
app.config["SQLALCHEMY_TRACK_MODIFICATIONS"]をtrueに設定すると、Flask-SQLAlchemyがオブジェクトの変更を追跡し、警告を出力するようになります。今回はFlask-SQLAlchemyイベントシステムを使用しないためFalseを設定します。
また、FlaskでJSON形式のレスポンスを行うために「flask.jsonify」を使用しますが、デフォルトの文字コードとして「ASCII」が設定されるため日本語を返そうとすると不都合が起きます。
app.config["JSON_AS_ASCII"]をFalseにすることで文字コードの設定をUTF-8に変更できるため、日本語等のその他の文字を正しく表示できます。
起動ファイルの作成
「app.py」ファイルの中身を以下のように記述します。
import sys
sys.dont_write_bytecode = True

from src import app

if __name__ == '__main__':
app.run(debug=True)このファイルが直接実行されたときに実行される処理を記述します。debug=Trueを指定することデバッグモードでアプリケーションを起動し、実行時にコンソール上に情報を表示します。
dbファイルの作成
「db.py」ファイルの中身を以下のように記述し、データベースモデルの定義を行います。
from src import app
from src import db
from src import ma
from flask import Flask, render_template, request, redirect, jsonify
from flask_sqlalchemy import SQLAlchemy
from sqlalchemy import Column, Integer, String, desc

# DBの作成
class Order(db.Model):
    __tablename__ = 'Order'
    id = db.Column(Integer, primary_key=True) #連番(主キー)
    product = db.Column(String(32)) #受注した製品名
    date = db.Column(String(8)) #受注日
    amount = db.Column(Integer) #受注した数量
今回は以下の項目を管理するテーブルを作成します。
| 項目名 | フィールド型 | 説明 |
|---|---|---|
| id | 数値型 | 連番(キー項目) |
| product | 文字列型 | 受注した製品名 |
| date | 文字列型(日付) ※SQLiteでは日付型はないため文字列型で管理する | 受注日 |
| amount | 数値型 | 受注した数量 |
次に、データベースを作成するための関数を作成します。before_first_requestを使用して、APIに初めてリクエストが送信されたときにだけデータベースの作成を行います。
・・・(中略)・・・
@app.before_first_request
def init():
    db.create_all()
次にJSON出力用のスキーマを定義し、データを全件取得して返却するGETの処理を記述します。
@app.route()はURLと関数の関連付けを行います。ここでは「http:// 127.0.0.1:5000/order」にアクセスするとgetAll()関数が呼び出されます。また、methodsでは、HTTPメソッドを指定しています。
・・・(中略)・・・
class OrderSchema(ma.SQLAlchemyAutoSchema):
    class Meta:
        model = Order
order_schema = OrderSchema(many=True)

#GET(全件参照)
@app.route('/order', methods=["GET"])
def getAll():
    data = Order.query.all()
    return jsonify(order_schema.dump(data))
ここで一度Web APIを実行してみます。以下のコマンドを実行し、APIを起動します。
flask runAPIを起動したら、Postmanなどのツールを使用してリクエストを送信し、テストを兼ねてデータベースの作成を行います。
「http://127.0.0.1:5000/order」に対してGETリクエストを実行すると空のデータが返却されます。
「var\src-instance」フォルダ配下に「order.sqlite3」ファイルが自動で作成されます。

作成されたデータベースファイルを「DB.Browser.for.SQLite」で確認すると、定義されたモデルで作成されていることが確認できます。

続いて同ファイルに以下を追加し、GET(1件参照)、POST(登録)、PUT(更新)、DELETE(削除)の処理も追加していきます。
・・・(中略)・・・
#GET(1件参照)
@app.route('/order/<int:id>', methods=["GET"])
def get(id):

    data = Order.query.filter_by(id=id).all()
    return jsonify(order_schema.dump(data))

#POST(登録)
@app.route('/order', methods=["POST"])
def post():
    entry = Order()
    # jsonリクエストから値取得
    json = request.get_json()
    if type(json) == list:
        data = json[0]
    else:
        data = json
    entry.product = data["product"]
    entry.date = data["date"]
    entry.amount = data["amount"]
    db.session.add(entry)
    db.session.commit()
    db.session.close()

    latestdata= Order.query.order_by(desc(Order.id)).first()
    return redirect('/order/' + str(latestdata.id))

#PUT(更新)
@app.route('/order/<int:id>', methods=["PUT"])
def put(id):
    entry = Order.query.get(id)
    # jsonリクエストから値取得
    json = request.get_json()
    if type(json) == list:
        data = json[0]
    else:
        data = json
    entry.product = data["product"]
    entry.date = data["date"]
    entry.amount = data["amount"]
    db.session.merge(entry)
    db.session.commit()
    db.session.close()

    return redirect('/order/' + str(id))

#DELETE(削除)
@app.route('/order/<int:id>', methods=["DELETE"])
def delete(id):
    entry = Order.query.get(id)
    db.session.delete(entry)
    db.session.commit()
    db.session.close()

    return '', 204
動作確認
以上でAPIの作成は完了です。それぞれリクエストを送信して動作確認してみます。
POST(登録)
「http://127.0.0.1:5000/order」に対してPOSTリクエストを実行します。以下のJSONをBodyに追加して実行します。
[
    {
        "amount": 200,
        "date": "2022-10-01",
        "product": "コーヒービター"
    }
]
データベースファイルを確認すると、リクエストで送信した値が登録されています。

PUT(更新)
「http://127.0.0.1:5000/order/1」に対してPUTリクエストを実行します。以下のJSONをBodyに追加して実行します。
[
    {
        "amount": 300,
        "date": "2022-10-15",
        "product": "コーヒーマイルド"
    }
]
データベースファイルを確認すると、リクエストで送信した値でデータが更新されています。

DELETE(削除)
「http://127.0.0.1:5000/order/1」に対してDELETEリクエストを実行します。
データベースファイルを確認すると、id=1のデータが削除されています。

GET(全件参照)
すでにGETリクエストが動作確認済みですが、POSTで何件かデータを登録し、全件取得の処理を確認してみます。データを登録後に「http://127.0.0.1:5000/order」に対してGETリクエストを実行します。
GET(1件参照)
「http://127.0.0.1:5000/order/3」のように、URLにidを追加することで、1件だけのデータを取得することもできます。
さいごに
以上がFlaskでWeb APIを実装する方法でした。次回はこのAPIと弊社のJavaScriptライブラリの連携方法についてご紹介したいと思います。
Flaskで業務アプリのUIを開発するには?
グレープシティでは、Flaskとも連携可能な、業務システム開発で使えるJavaScriptライブラリを提供しています。

Webサイトでは、各製品の機能を手軽に体験できるデモアプリケーションやトライアル版も公開しておりますので、こちらもご確認ください。
また、ご導入前の製品に関するご相談、ご導入後の各種サービスに関するご質問など、お気軽にお問合せください。
]]>今回はPythonのWebアプリケーションフレームワーク「Flask」をご紹介します。
はじめに
Pythonは現在、人気が急上昇しているプログラミング言語です。Pythonはプログラムを1行ずつ実行して結果を確認できるインタープリタ型の言語ですが、その特性ゆえ初心者にもわかりやすい言語と言われています。
近年はデータ分析やAI開発にも使用されており、2022年現在ではGoogle社の社内標準言語の一つになっています。検索エンジンを基にしたプログラミング言語ランキング「TIOBE Index」においても、Pythonは2021年度に1位を獲得し、その後も継続して1位を獲得し続けています。
Pythonには開発をサポートするフレームワークが数多くありますが、今回はWebアプリケーション開発やWeb API開発で使用されるフレームワーク「Flask(フラスク)」をご紹介します。
Flaskとは
FlaskはPythonで作成されたWebアプリケーションを作成するためのフレームワークです。
同様のPythonで作成されたWebアプリケーションフレームワークで代表的なものにはDjango、Bottleなどがあります。今回は、その正反対の特徴から比較されることも多いDjangoと比べながら、Flaskの特徴について解説します。
Flaskの特徴
Flaskには大きく2つの特徴があります。
シンプルかつ軽量であり、初期の学習コストが低い
Flaskは中核のプログラムが非常にシンプルでありながら、様々な拡張が可能なように保たれています。デフォルトで用意されている機能は必要最小限であり、そこから自分に必要な機能を追加していくことができます。その軽量さからマイクロフレームワークとも呼ばれており、作成方法もシンプルで初期の学習コストが低いです。
一方、Djangoはフルスタックフレームワークと呼ばれており、データベースを始めとした様々な機能が最初から搭載されています。それゆえにフレームワーク自体のサイズが大きく、初期の学習コストが高いのが特徴です。
拡張機能で、様々な機能を追加できる
Flaskは、デフォルトでPython用テンプレートエンジン「Jinja2」、WSGIライブラリ「Werkzeug」といったライブラリが組み込まれています。他にも、ログイン機能やデータベース機能などの周辺プラグインで拡張することによって、開発に必要な様々な機能を追加していくことができます。
Flaskは小規模〜中規模程度のWebアプリケーションやWeb APIでの採用が多いです。理由としては、Flaskの拡張性はメリットではありますが、大規模になると自分で1つずつライブラリを選定することがデメリットになるからです。
大規模なアプリケーションを作成する場合は、最初から多くの機能が搭載されているDjangoなどの採用も検討するようにしてください。Flaskと比べてDjangoは日本語情報が多いという特徴もありますので、自身のやりたい内容を考えて、採用を検討すると良いでしょう。
使ってみよう!Flaskクイックスタート
それでは、早速Flaskをセットアップしてみましょう。
Flaskは、Python環境で利用できるpip(パッケージ管理ツール)を使いインストールを行います。まずはPythonのインストールからはじめましょう。
Pythonのインストール
Python Japanの公式サイトにアクセスします。
「Pythonのインストール」の項から、自身が利用しているOSを選択してインストール作業を行ってください。
Pythonのバージョンには3系と2系がありますが、FlaskはPython3.6以降をサポート対象としていますので、今回は3系を使用するようにしてください。基本的にはその時点の最新バージョンをインストールして頂ければ問題ありません。
インストール後、コマンドを実行できるアプリを起動し、pythonおよびpipが使用できるようになっていることを確認します。
- Windowsの場合は「PowerShell」または「コマンドプロンプト」
- macOSの場合は、「ターミナル」アプリ
以下のコマンドを実行し、結果を確認します。「-V」のVは大文字であることに注意してください。
※ 記事中で使用している「python」コマンドは、環境によってはパスを設定しないと使用できない場合があります。その場合は「python3」コマンドで実行してください。
python -V
pip -V
実行結果に自分のインストールしたバージョンが表示されれば、使用する準備ができてきます。コマンドが実行できない場合はOSを再起動して再度試すようにしてください。

Python実行環境の準備
Pythonは「venv」という仕組みを使用することで、1つのPCの中に複数のPython実行環境を構築することができます。
作業ディレクトリに移動し、以下のコマンドを実行してFlask用のPython実行環境を作成し、有効化します。
- Windowsの場合
python -m venv venv
.\venv\Scripts\activate- macOSの場合
python -m venv venv
. venv/bin/activate
先頭に(venv)がついていると、Python実行環境が有効化されています。なお、有効化は「deactivate」コマンドを実行することで解除できます。Flaskを実行する場合は、Python実行環境が有効化されていることを必ず確認するようにしてください。
Python実行環境を作成すると、作業ディレクトリ内に「venv」フォルダが作成されます。「venv」フォルダ内には、Python実行に必要なファイルが格納されています。
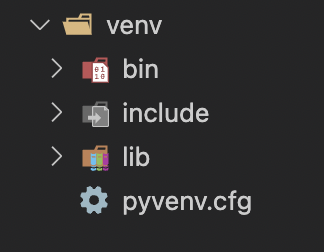
Flaskのインストール
それでは、Flaskを準備していきます。
Python実行環境が有効化されている状態で、以下のコマンドを実行してください。
pip install Flask
Successfullyのログが出力されれば、インストールが成功しています。Flask本体の他にも、開発に便利なライブラリも一緒にインストールされます。
FlaskでWebアプリケーションを作成してみよう
準備が整いましましたので、早速Webアプリケーションを作成しましょう。
作業ディレクトリ内に「hello.py」というファイルを作成してください。

次に、「hello.py」に、以下の内容を記述してください。今回はWebサーバーにアクセスした際に「Hello, Flask!」という文字を表示するWebアプリケーションを作成します。
from flask import Flask

app = Flask(__name__)

@app.route("/")
def hello():
  return "<p>Hello, Flask!</p>"
Pythonはインデント(字下げ)でまとまりを表現しますので、returnの前のインデントも忘れずに行うようにしてください。
ファイルの入力が完了したら、OSの環境変数にFlaskを起動する設定を追加します。今回は「hello.py」というファイルを起動するため、環境変数に「hello」を設定します。自身が使用しているOSや入力するアプリに対応したコマンドを実行してください。
- WindowsのPowerShellの場合
$env:FLASK_APP = "hello"- Windowsのコマンドプロンプトの場合
set FLASK_APP=hello- macOSの場合
export FLASK_APP=helloWebサーバーを起動する準備が整いましたので、以下のコマンドで起動します。
flask run実行後にターミナルの表示が切り替わり、開発用サーバが立ち上がります。赤字で表示された警告メッセージは、サーバーが開発用に起動していることを示しています。

表示されているURL『http://127.0.0.1:5000』にブラウザでアクセスしてみましょう。作成したFlaskのWebアプリケーションが表示されれば成功です。
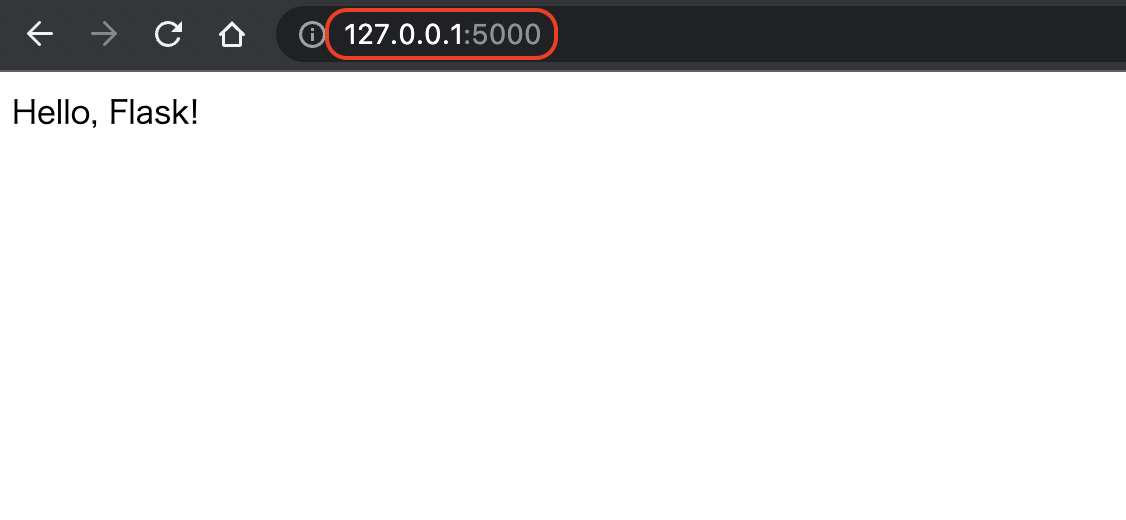
さいごに
今回の記事では、Flaskの概要や、環境構築方法についてご紹介しました。
グレープシティでは様々なWebアプリケーションフレームワークと一緒に使えるJavaScriptライブラリを提供しています。無償のトライアル版や、ブラウザ上で手軽に試せるデモアプリケーションも公開しているので、こちらも是非ご覧ください。
]]>