Login
On this page you will be able to enter/change the name for
]]>In the account settings page of the Stages app, you will find all of the options to change your log in information, billing, the people on your team, making changes to your Stages, and the Integrations.
Login
On this page you will be able to enter/change the name for your account as well as your email address, and make changes to your password.

Billing
Here you can view your plan name, when your trial ends, your billing information and when your next charge will occur.
From here you will also be able to change the plan you are on, whether you're on basic, professional, or business.


Team Members
Here is where any changes that need to be made to your team happen. You can enter each team members name and their email. You can add and remove members and make changes at any time.
The amount of members on your team will depend on your Stages subscription which you can view under the billing section in the account settings, and you can see all available subscription plans at the Plans & Pricing Page at https://getstages.com/pricing

Stages
Here is where you can create new Stages, and make changes to existing Stages. New Stages can be made by clicking create stage at the top of the dashboard. You can name each stage to suit your needs, and choose a color to make it stand out to you and your team. If needed you can also delete old Stages if your needs have changed.

Integrations
On this page you will be able to see the name of your Shopify store, and the shop URL.
Learn how to change your billing plan
Billing
In the Stages app, there are three billing plans for you to chose from:
- Basic: this plan will charge you 29$/month and will allow you to have one user on the
How to change your billing plan in the Stages App
Learn how to change your billing plan
Billing
In the Stages app, there are three billing plans for you to chose from:
- Basic: this plan will charge you 29$/month and will allow you to have one user on the plan.
- Professional: this plan will charge you 59$/month and will allow you to have up to five users on the plan.
- Business: this plan will charge you 119$/month and will allow you to have up to 15 users on the plan.

If at any time you wish to change your plan to either a higher or lower one, you can find this under billing and select a new plan and click save changes.
All of the information regarding billing and when your next charge will occur can also be found on this page. And if for any reason you wish to cancel you can click on the cancel subscription button at the top of the dashboard.

This documentation outlines the process of contacting support for the Stages app via email. If you encounter any issues, have questions, or require assistance with the app's functionality, our support team is here to help. This guide will show you how to initiate contact and provide the information needed to receive prompt assistance.
Accessing Contact Information
Begin by locating the contact information for the Stages app support team, via the Help and Support section.
Preparing for Email Support
Before composing your support email, gather all relevant information regarding the issue or question you need assistance with. This may include screenshots, error messages, order details, or any other data that can help the support team understand your situation.
Writing a Support Email
Compose a clear and concise email that outlines your issue or question. Be sure to include the following details:
- A brief but descriptive subject line.
- A detailed description of the problem or inquiry.
- Any steps you've already taken to address the issue.
- Contact information, including your name and email address.
- Be sure to include your account ID number and your Shopify shop domain, e.g.
shopname.myshopify.com
Attaching Relevant Information
If you have screenshots, log files, or other attachments that can provide additional context, attach them to the support email. This can be particularly helpful in diagnosing technical issues.
Sending the Support Email
Once you've completed the email, review it for accuracy and click the "Send" button to submit your request for support.
Following Up
If you don't receive a response within a certain time frame or need further clarification, don't hesitate to follow up with the support team by replying to the existing email thread. Provide any additional information or details requested by the support team promptly.
Conclusion
Contacting support via email for the Stages app is a straightforward process. By following the steps outlined in this documentation, you can ensure that your inquiries or issues are addressed promptly and effectively. Our support team is committed to assisting you and ensuring your experience with the Stages app is as smooth as possible.
]]>This documentation will guide you through the process of exporting orders from the Stages App to a CSV (Comma-Separated Values) format. CSV is a versatile format commonly used for data interchange and analysis. Exporting orders in CSV format allows you to easily share and manipulate your order data with spreadsheet programs such as Microsoft Excel or Apple Numbers.
Accessing the Export Feature
To start exporting orders to CSV, you'll need to access the export feature within the Stages App, located at the top of the screen. Clicking export will then prompt you to export your orders from Stages.
Selecting Orders to Export
You can now select which orders you want to export, order that are:
- Open
- Closed, or
- Open and closed
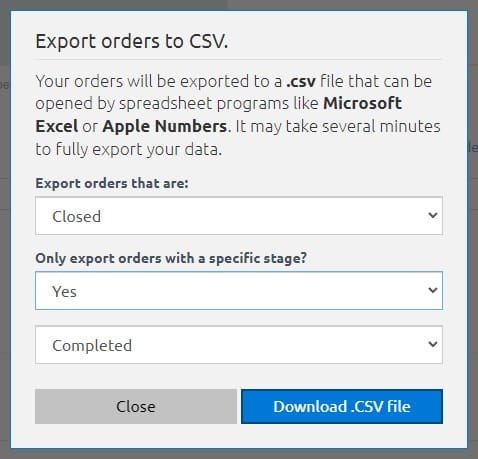
At this point you can also chose to export orders with a specific stage or all Stages.
Initiating the CSV Export
Once you have slected which orders you would like to export, you can now initiate the .CSV export process. Simply click on the Download .CSV file button to begin. It may take several minutes to fully export all of your data.
Conclusion
Exporting orders to CSV with the Stages App is a valuable feature that enables you to efficiently work with your order data. This format allows you to analyze, share, and integrate your order information with other systems. By following the steps outlined in this documentation, you can perform CSV exports confidently and enhance your order management workflow.
]]>Accessing the Filtering Feature
- Navigate to
The ability to filter orders in the Stages app allows users to view specific subsets of orders based on defined criteria. This feature is essential for users who need to focus on particular order types, statuses, or details without the distraction of unrelated data.
Accessing the Filtering Feature
- Navigate to the Orders Section: After signing into the Stages app, click on the “Open Orders” tab in the main navigation bar to access your orders overview.
- Open the Filter Panel: Locate and select the "Filter" button, usually found near the search bar or at the top of the orders list. This will reveal the filtering options panel.
Filter Criteria
You can filter your orders to any stage from this point, whatever that stage may be.
EX:
- Open orders
- Closed orders
- Ready to Ship
- Shipped


Applying Filters
Selecting the approprite stage and clicking filter will then bring you to all orders of that particular stage.
Clearing Filters
To return to the complete list of orders:
- Open the Filter Panel: If not already open, click the "Filter" button to access the filters.
- Clear Selections: Use the "Clear Filter" option to remove all active filters
Accessing the Import Feature
To start importing orders, locate the import feature in the Stages app. This can be found at the top of the
]]>This documentation provides a step-by-step guide on how to import orders into the Stages app, making it easy for you to efficiently manage your orders.
Accessing the Import Feature
To start importing orders, locate the import feature in the Stages app. This can be found at the top of the screen. Clicking import will then prompt you to import your orders from Shopify that are either:
-
Open
-
Closed
-
Cancelled
You can then set them to import to any stage of your choosing such as
-
Open
-
Completed
-
Or ready to ship.

Completing the Import
After selecting which Stages you want to import from, and to you can now click on the import button to begin the process. After the upload you will see all of the imported order and can then begin using the Stages app to keep track of every process of your orders!
Conclusion
In this guide, you've learned how to streamline your order management by importing Shopify orders into the Stages App. By following the steps outlined in this documentation, you can easily import orders, set their Stages, and efficiently keep track of every aspect of your order process.
The Stages App empowers you to stay organized and make your order management more efficient. Whether you're handling open, closed, or canceled orders, you now have the tools to keep your workflow smooth and your orders up-to-date.
]]>
If needed you can also change the
]]>Clicking on the Order ID number can give you a better look at the status and goings on of each indivdual order. You will be able to see every time the Stage has been changed, and whenever an Automation Rule has been triggered.
If needed you can also change the stage for the order, and even mark the order as closed.
Scrolling further down the Order ID page will bring you to the notes section. Any customer notes the customer has left can be viewed here as long as any notes your team may have left for the order. If the customer of the order you are viewing has any other orders, they can be viewed in this section as well.

can help streamline your order management.
Accessing the search bar
To start searching, you can locate the search bar on
]]>Stages has a built in search feature to help you quickly find your orders. Whether you're looking for one specific order, or multiple orders, the Stages search bar
can help streamline your order management.
Accessing the search bar
To start searching, you can locate the search bar on the orders page and click on it to begin using the search feature.
Searching for orders
There are two ways that you can search for your orders.
-
Using a barcode scanner If you have a barcode scanner, you can scan the barcode on the order to enter the number.
-
Using an order ID number. Alternatively, you can manually enter the order ID number. As you type the order ID number, you can press the Enter key to add more numbers.
This will display a list of all orders with matching ID numbers.
This list includes orders regardless of their stage, due date, or open/closed status.
When typing in the order ID number, you can press the enter key and continue to add in more numbers, and this will bring up a list of all of the searched ID numbers.

Modifying Order Stages
After searching for your orders, you can also at this point change the stage of any of these orders. Here's how:
-
Individually: You can click each orders stage individually and change it from the menu. Alternatively, you can also:
-
Bulk: You can select multiple orders at once and change the stage.
For example: After searching for 3 different ID numbers, you have the option to change one of those orders to open and the other two orders to ready to ship
Or, if all of the orders are on the same stage, you could select all and change them to
completed or shipped all at once.
Conclusion
The Stages search feature is designed to be easy to use and help keep your orders in line and up to date.
]]>When working directly from your Shopify store page and viewing/managing your oders from there, you can quickly open up a specific order directly to Stages to modify its stage. This can be done by clicking on the orders you wish to change from your Shopify order list, and clicking on the more actions button. From here simply click on the " View and set this orders stage " button. You will then be prompted to log in to your Stages account and from there can continue modifying the order.

Accessing the Sorting Feature
- Navigate to the Orders
The Stages app provides a sorting system that allows users to organize their orders based on various criteria such as date, status, priority, and custom tags. This feature is designed to help users streamline their workflows and manage their orders more efficiently.
Accessing the Sorting Feature
- Navigate to the Orders Section: Upon logging into the Stages app, click on the “Orders” tab on the left-hand navigation menu to access your list of orders.
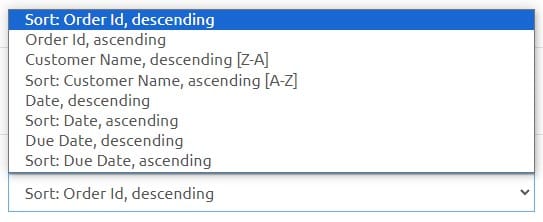
- Open the Sorting Menu: At the top of the orders list, locate and click on the "Sort" button. This will open a dropdown menu displaying the available sorting options.
Date/Due Date
- You can select to sort by date ascending
- And alternatively date descending
- Due date ascending
- And due date descending
Name
- You can select to sort by name ascending A-Z
- And by descending Z-A
Order ID
- You can select to sort by order ID ascending
- And order ID descending
Conclusion
Effectively managing and sorting orders is crucial to maintaining a productive workflow within the Stages app. By utilizing the various sorting options and configurations, you can customize your view to align with your personal or organizational needs. Whether prioritizing by date, due date, name, or order ID, these tools are designed to enhance your efficiency and control over order management.
]]>When inviting members to your Stages app team, it's important to make note and rember what your billing plan is. The basic plan only allows for there to be one user, professional can have up to five, and the buisness plan can have up to 15
]]>
When inviting members to your Stages app team, it's important to make note and rember what your billing plan is. The basic plan only allows for there to be one user, professional can have up to five, and the buisness plan can have up to 15 users. To start inviting users to your team, simply click on the send invite button at the top of your dashboard.
From here you can enter the new users name and their email adress and get them their invite.

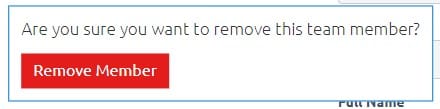
On the team dashboard, you can also manage the members of your team. You can see each members full name and their email. If for any reason you need to remove a member, you can click on the red trash can icon and you will be promted to continuing the removal process.
Using a team with the Stages app is a great way to help your orders stay organized and keep your work flow moving smoothly.
]]>Team Notes are a great way to communicate with the rest of your team in the Stages app. Any information you need to relay to another team member regarding the status of an order, changes that need to be made to an order, or even just that an order has been completed and shipped can be left in the Team Notes section.

To create a note, you can locate the notes section on the Open Orders dashboard. Clicking on (No team notes.) will bring up the window and you can begin typing in the relavent information regarding that particular order.
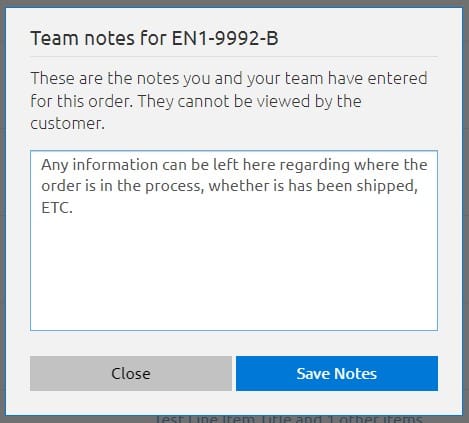
Using the team notes feature in the Stages App helps in maintaining effective communication within your team and keeping your orders streamlined and oraganized.
]]>Don't keep your customers guessing about where there order is. With the Stages Tracking Widget, you
]]>Stages is an order management platform that not only helps you and your employees track hundreds of orders across your manufacturing and fulfillment processes — it helps your customers track them too.
Don't keep your customers guessing about where there order is. With the Stages Tracking Widget, you can make sure your customers always know exactly how much work has been done on their order, and how much work is left before it's in their hands.
All you have to do is send them to https://stages-test-shop-2.myshopify.com/apps/stages-tracking-widget where they can easily keep track of their order as you and your team put it together.
Tip: You can send your users straight to their tracked order (instead of searching for it first) by creating a link in your automated emails that points to {{stages.trackinglink}}.

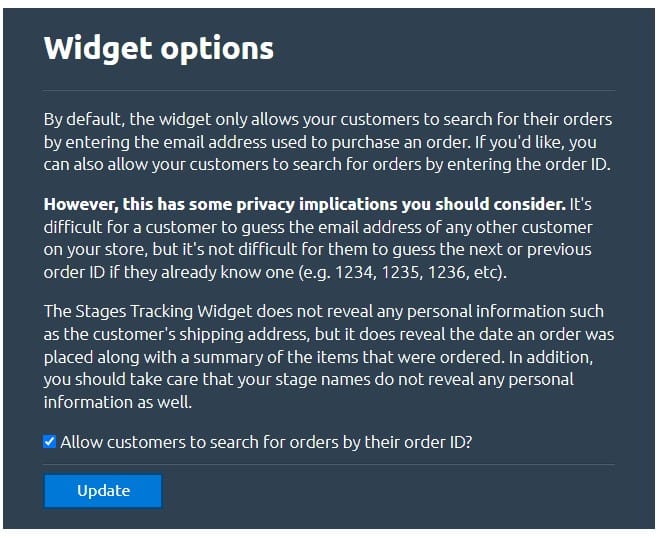
Widget options
By default, the widget only allows your customers to search for their orders by entering the email address used to purchase an order. If you'd like, you can also allow your customers to search for orders by entering the order ID.
However, this has some privacy implications you should consider. It's difficult for a customer to guess the email address of any other customer on your store, but it's not difficult for them to guess the next or previous order ID if they already know one (e.g. 1234, 1235, 1236, etc).
The Stages Tracking Widget does not reveal any personal information such as the customer's shipping address, but it does reveal the date an order was placed along with a summary of the items that were ordered. In addition, you should take care that your stage names do not reveal any personal information as well.
In the automation rules section of the Stages App, you can create new rules that will trigger an email whenever the stage has been changed. After selecting a trigger for the new rule, and you've given it a name, you can then start setting up the automated email. After selecting the rule from the list, you'll be able to choose from triggers and actions. Selecting triggers will allow you to choose from any Stage that you have set up to trigger the action. Selecting actions will give you the option to Add another action.
From here you will want to select send an automated email.

Now you can begin to fill out the email form. You will want to be sure to fill out who the emails are going to, and each custom email should have a comma to separate. You can also add who the email is from and add in a reply to email address as well, and any replies the email receives will be sent here.
It is important to note that all automated emails will be sent from the Stages email: [email protected] and will not be sent from any personal or work-related email addresses you might have.
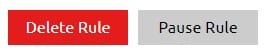
If at any point you need to pause automated emails, this can be done by clicking Pause Rule in the top right of the app dashboard. Any rules can also be removed by clicking the Delete Rule in the same way.
One last thing to note and remember is that automated emails will only be sent once per action.
]]>
Stages uses Handlebars for customizing the content in your automated emails. Handlebars gives you more control and flexibility, including support for iterating over a collection of items such as an order's line items or fulfillments.
Handlebars basics
A handlebars expression looks like {{some.content}} surrounded by a pair of double curly braces. All you have to do to use a handlebars expression is write it in your automation email template. When your automation rule is triggered, our server will find all handlebars expressions and replace them with the order's data.
For example, let's say you want to send a simple, automated email message to your team whenever an order's stage changes from 'Ready to Ship' to 'Shipped'. You would write something like this in your template:
Hello team,

Order #{{order.id}} has just switched from {{stage.from.name}} to {{stage.to.name}}. The customer's name is {{customer.first_name}} {{customer.last_name}}.
When that email is sent, it will be transformed into the following email message:
Hello team,

Order #12345 has just switched from Ready to Ship to Shipped. The customer's name is John Doe.
Of course, there are a lot more handlebars that you can use to customize your email messages, and you can see the full list of handlebars below. But first, let's talk about looping or iterating over an order's line items and fulfillments.
Injecting line items and fulfillments with handlebars
Handlebars is easy enough to use when you're referring to a single property such as an order ID or the customer's name, but looping over an order's collection of line items and fulfillments is slightly more involved.
To start a loop over a collection, you would write {{each order.lineitems}}. After starting a loop you can refer to the current item in the loop by prepending it with loop_var followed by the property you want to access, e.g. {{loop_var.productname}}.
(You can see the full list of line-item- and fulfillment-specific handlebars below.)
Finally, you must close the loop with {{end}}. If you don't close the loop, it won't work and your email message will break.
For example, let's say you want to send an email message to your team that contains a list of the line items in an order. Your template would look a something like this:
Hello team,

Order #{{order.id}} has the following line items:

{{each order.lineitems}}

* {{loop_var.productname}} purchased for ${{loop_var.price}}.

{{end}}
When sent, the email message will be transformed into the following:
Hello team,

Order #12345 has the following line items:

* Warsong T-shirt - Red purchased for $12.00.
* Darkspear Hoodie - Black purchased for $19.00.
For a more in-depth and technical look at everything you can do with Handlebars, please refer to the technical docs on substitutions by our email service provder, SparkPost.
All valid handlebars
The following is a list of all valid handlebars that can be used in your automated emails. Please note that handlebars are case-sensitive, and we will automatically convert them to lower-case when you create or update an automation rule.
Insert a link to the Stages order tracking widget that's embedded on your store:
{{stages.trackinglink}}.
Handlebars referring to the customer:
{{customer.firstname}}.{{customer.lastname}}.{{customer.email}}- The customer's email address.
Handlebars referring to the order:
{{order.id}}: The order's ID as it appears in your Shopify store.{{order.created}}: The date and time the order was created, in aJan 25, 2015 09:30 AMformat.{{order.CustomerNote}}: The note that the purchasing customer left on the order.{{order.TeamNote}}: The note that you or your team have added to the order while using Stages.{{order.payment.currency}}: The currency that the customer paid with.{{order.payment.total}}: The total amount that the customer paid.{{order.payment.totalusd}}: The total amount that the customer paid, in United States Dollars.{{order.payment.tax}}: The total amount of tax that the customer paid.{{order.payment.cardnumber}}: The customer's credit card number, masked in the•••• •••• •••• 1234format.{{order.payment.cardtype}}: The type of the customer's credit card, such as VISA or MasterCard.{{order.lineitems}}: A collection of the order's line items, which must be looped over using the{{each order.lineitems}}handlebar and must be closed with the{{end}}handlebar. The following handlebars are available in the loop and refer to the current line item:{{loop_var.price}}: The line item's price at the time of purchase.{{loop_var.sku}}: The line item's SKU.{{loop_var.producttitle}}: The line item's title. Ex: 'Warsong T-shirt'.{{loop_var.productvarianttitle}}: The line item's variant title. Ex: 'Red'.{{loop_var.productname}}: The line item's name, which is the title and variant title combined. Ex: 'Warsong T-shirt - Red'.{{loop_var.productvendor}}: The line item's vendor.
Handlebars referring to the order's billing address:
{{billing.address.firstname}}.{{billing.address.lastname}}.{{billing.address.street1}}.{{billing.address.street2}}.{{billing.address.city}}.{{billing.address.state}}- The full name of a state or province.{{billing.address.postalcode}}- The ZIP or postal code.{{billing.address.country}}- The full name of a country.{{billing.address.countrycode}}- The abbreviated name of a country. Ex: USA.{{billing.address.statecode}}- The abbrevated name of a state or province. Ex: IA or CA.
Handlebars referring to the order's shipping address:
{{shipping.address.firstname}}.{{shipping.address.lastname}}.{{shipping.address.street1}}.{{shipping.address.street2}}.{{shipping.address.city}}.{{shipping.address.state}}- The full name of a state or province.{{shipping.address.postalcode}}- The ZIP or postal code.{{shipping.address.country}}- The full name of a country.{{shipping.address.countrycode}}- The abbreviated name of a country. Ex: USA.{{shipping.address.statecode}}- The abbrevated name of a state or province. Ex: IA or CA.
Handlebars referring to the order's fulfillments:
{{fulfillments}}- A collection of the order's fulfillments, which must be looped over using the{{each fulfillments}}handlebar and must be closed with the{{end}}handlebar. The following handlebars are available in the loop and refer to the current fulfillment:{{loop_var.status}}- The fulfillment's current status.{{loop_var.shippingcompany}}- The shipping company being used for this fulfillment, such as UPS or Amazon.{{loop_var.trackingnumber}}- A tracking number to be used with the shipping company.{{loop_var.trackingurl}}- A URl that the recipient can use to track this fulfillment.{{loop_var.lineitems}}- The line items in the fulfillment, which must be looped over using the{{each loop_var.lineitems}}handlebar and must be closed with the{{end}}handlebar. The handlebars available in this loop are the same handlebars that are available in the above{{order.lineitems}}loop.
Handlebars referring to the order's previous and new stage in the Stages app:
{{stage.from.name}}- The name of the previous stage.{{stage.from.color}}- The color of the previous stage. Ex: Red, Blue, Green, etc.{{stage.to.name}}- The name of the new stage.{{stage.to.color}}- The color of the new stage. Ex: Red, Blue, Green, etc.
Finally, you can use {{stages.trackinglink}} to send your customers a direct link to the Stages order tracking widget that's automatically embedded on your Shopify store. Your customers can use that link to easily track exactly where their order is in your manufacturing and fulfillment process.