The post How to Upload Media Files to Options Pages via a Front-end Form appeared first on FormBuilder.
]]>Create an Options Page
You can use the already prepared JetEngine’s Options Page or create a new one. In this case, we add the Media field to the already existing Options Page. For that, proceed to WordPress Dashboard > JetEngine > Options Pages and click the “Edit” button next to the needed Options Pages.
In the Fields tab, click the “New Field” button. Set the Label and the “Media” Field Type. It is essential to select the “Media ID” Value format.

Click the “Update Page” button once you are ready.
Set up a Form
Now, let’s proceed to creating a form. To build a WordPress form, we navigate to WordPress Dashboard > JetFormBuilder > Add New Form.
Enter the form’s title — in this case, it is “Upload Media to Options Pages”.
The Welcome block appears by default. From here, you can select a form pattern or generate a form with OpenAI. Also, you can hit the “Start from scratch” button and use the three fields added by default; otherwise, you can delete them to begin anew.
In this case, we delete the Hidden Field and keep the Text Field to update the Text field of the Options Page, but we will not focus on this in the article.
Add the Media Field to the form. In the right-side column, proceed to the Field tab and enable the Insert attachment toggle. In the FIELD VALUE dropdown, select the “Attachment ID” option. Also, select who can upload images in the USER ACCESS field.

Now, proceed to the JetForm settings section and open the Post Submit Actions tab. Here, press the “+ New Action” button. In the opened pop-up, find and click the “Update Options” action to add it.
In the newly opened pop-up, select the needed option in the OPTIONS PAGE. Set up the OPTIONS MAP to establish compliance between form fields and Options Page fields.

Click the “Update” button in the action settings.
Once you are ready, click the “Publish” button.
Add the Form to the Page
Following the How to Display a Form on the Front End guide, we add the newly created form to the parent template page.

Click the “Publish” button once you are ready with the settings.
Check the Result
Proceed to the front end and submit the form.

If we check the Form Records, we can see the successful submission.

In the Options Page, we also get the uploaded image.

That’s it. Now you know how to create a form for uploading media files to Options Pages using the WordPress JetFormBuilder plugin.
The post How to Upload Media Files to Options Pages via a Front-end Form appeared first on FormBuilder.
]]>The post Calculation Formulas Guide appeared first on FormBuilder.
]]>Table of Contents:
- Arithmetic Operators
- Advanced Calculations
- Conditional Statements
- Comparison Operators
- JetBooking Calculations
Arithmetic Operators
The Calculation Field supports basic formulas for addition, subtraction, multiplication, and division.
Addition
You need at least two Number Fields to sum. Inside your Calculated Field, the following formula:
%FIELD::number_meta_field_1%+%FIELD::number_meta_field_2%Here, “number_meta_field_1” is a form Number Field #1 name, and “number_meta_field_2” is a form Number Field #2 name.

Save the changes, and on the front end, whatever numbers we add to the Number Fields are correctly summed in the Calculation Field below.

Subtraction
Ensure you have two Number Fields in the form. Add the following formula to the Calculated Field:
%FIELD::number_meta_field_1%-%FIELD::number_meta_field_2%Instead of the “number_meta_field_1”, use the form Number Field #1 name, and type the form Number Field #2 name instead of the “number_meta_field_2”.

Publish the settings and proceed to the front end. Here, the subtraction is completed correctly.

Multiplication
To multiply two Number Fields, add the following formula to the Calculated Field:
%FIELD::number_meta_field_1%*%FIELD::number_meta_field_2%Use the name of the form Number Field #1 instead of the “number_meta_field_1”, as well as use the name of the form Number Field #2 instead of the “number_meta_field_2”.

Save the form and check the frontend page. Here, the numbers we add are multiplied correctly.

Division
To divide two numbers, add two Number Fields and paste the following formula into the Calculated Field:
%FIELD::number_meta_field_1%/%FIELD::number_meta_field_2%Here, “number_meta_field_1” is a form Number Field #1 name, and “number_meta_field_2” is a form Number Field #2 name.

Save the changes and open the frontend page. Here, the calculation result is correct.

Advanced Calculations
The Calculated Field in JetFormBuilder is not limited to basic mathematical operations. It supports all the math object methods, which help perform advanced calculations with numeric values returned by form fields.
Refer to our Advanced Math Calculations tutorial for the detailed guide. In this article, we will summarize the most important information.
Rounding
To round the number to the nearest integer, ensure that you have a Number Field added to the form, and add the following formula to the Calculated Field:
Math.round(%number_field%)Instead of the “number_field”, use the form Number Field name.

Save the settings and check the front page. The numbers are being rounded correctly.

Rounding up
If you need to return the smallest integer greater than or equal to the specified number, ensure you have the Number Field in the form and paste the following formula to the Calculated Field:
Math.ceil(%number_field%)Use the form Number Field name instead of “number_field”.

Save the changes, and on the front, the Calculated Field will round up any floating-point value pulled from a separate form field.

Rounding down
To return the largest integer less than or equal to the specified number, add the Number Field to your form and add the following formula to the Calculation Field:
Math.floor(%number_field%)Type in the form Number Field name instead of “number_field”.

Save the changes and proceed to the front end. The Calculation Field operates correctly.

Finding the largest and the smallest numbers
To define the largest or the smallest number, you need at least two Number Fields, and use one of the following formulas inside the Calculation Field:
To find the largest number:
(Math.max(%number_one%, %number_two%, %number_three%))To find the smallest number:
(Math.min(%number_one%, %number_two%, %number_three%))In both cases, remember to change “number_one”, “number_two”, etc., to the names of your form Number Fields.

After saving the settings, we can verify that the Calculation Field correctly defines the maximum number on the front end.

Similarly, we can change the formula to get the smallest number and save the settings.

Then, the Calculation Field will return the smallest of the offered numbers.

Exponentiation
When you need to exponentiate the numbers (raise the first specified number to the power of the second number), ensure you add two Number Fields and add the following formula to the Calculated Field:
(Math.pow(%number_one%, %number_two%))Here, “number_one” is a form Number Field #1 name, and “number_two” is a form Number Field #2 name.

Save the changes and check it on the front. Here, the numbers are exponentiated correctly.

Conditional Statements
To learn about setting up the conditional formulas, refer to our How to Use Conditional Formulas in the Calculated Field guide.
In this article, we will investigate a particular use case in detail in which conditional formulas can be a useful and effective solution.
To set different prices for users of different ages, first create a custom number field for users to store their age.

In the form, add the Number Field. In the field’s Value tab, click the “Dynamic Tag” button next to the DEFAULT VALUE field. In the newly opened pop-up, select the “User” SOURCE. Choose the “Current user” option for the GET USER ID FROM and select the “User Meta” for the USER FIELD. Insert the meta field name in the input field. Click the “Update” button.

In the Calculation Field, add the following formula:
(%user_age% >= 18) ? 100 : 50Here, the “user_age” is the name of the Number Field in the form. “18” is the age at which you want to limit the content/price. “100” and “50” are the prices you want to apply to users aged 18 or older and those aged 18 or younger, respectively.

Save the changes and check the frontend page. When the user is 18 or older, the price is “100”.

For users under 18, the half-price option will be shown.

Comparison Operators
JetFormBuilder supports ternary operators in Calculated Fields. They allow you to return different calculation results depending on whether a condition is met.
The basic syntax looks like this:
condition ? value_if_true : value_if_falseFor example, if the value of number_field equals 5, the calculated result will be 5 × 100. If the value is not 5, the calculated field will return 0. In order to implement this, add the following formula to the Calculated Field:
%number_field% == 5 ? %number_field% * 100 : 0“number_field” is the name of a Number Field in the form. Instead of a fixed number (5), you can also compare the value against another Number Field or a dynamic value.

Save the changes and check the front end. When the Number Field has the “5” value, the Calculation Field returns the correct value.

When the value in the Number Field is different, the Calculated Field returns “0”.

JetBooking Calculations
The JetBooking pricing system usually requires various calculations. In this guide, we will investigate the most common JetBooking calculation cases.
Total price
The main formula for total price calculation is suitable for even basic cases. Paste the following formula into the Calculated Field:
(%FIELD::quantity%+2)*%META::price%Here, the “quantity” is a Number Field, “2” is a fixed value, which you can change, and the “price” is the current post JetBooking’s price field (when the form field for price is added).

Total price with additional services
When the total amount needs to be counted based on the selected dates, additional services, or the number of guests, the following form should be used:
%FIELD::_dates%*%META::_apartment_price%+%FIELD::additional_services_a%*%FIELD::guest%*%FIELD::_dates%+%FIELD::additional_services_b%*%FIELD::_dates%+%FIELD::additional_services_c%Here, “_dates”, “additional_services_a”, and “guest” are the form fields used inside the form, while %META::_apartment_price% is the macro that returns the price per 1 day/night.

Total price per hour
When you use a Timepicker field and need to count the price for the hours the customer used the service, the following formula should be used inside the Calculated Field:
( ( %ADVANCED_PRICE::_dates% / 10 ) * 24 ) + ( ( %BOOKING_TIME::check-out-time% - %BOOKING_TIME::check-in-time% ) / 3600 )Here, “ADVANCED_PRICE” is a macro for getting the flexible booking price, “BOOKING_TIME” is the macro to get the price per hour, “_dates” is a date field name, and “check-in-time” and “check-out-time” are the required keywords to retrieve the start and end time (you should not use your form fields’ name instead).
Total price of the WooCommerce order
When you use the WooCommerce-based mode for your booking system, the general simple form for the total price can be used:
(%FIELD::quantity%+2)*%META::price%If you use additional services or need to base the total price on the number of guests or selected days, use the following formula:
%FIELD::_dates%*%META::_apartment_price%+%FIELD::additional_services_a%*%FIELD::guest%*%FIELD::_dates%+%FIELD::additional_services_b%*%FIELD::_dates%+%FIELD::additional_services_c%In the same booking form built with the JetFormBuilder plugin, we can use a Calculated Field to set the price used in the WooCommerce checkout and order. To do so, open the Post Submit Actions tab and add the “Apartment Booking” action.
In addition to mapping the APARTMENT ID FIELD and CHECK-IN/CHECK-OUT DATE FIELD, we should select the Calculated Field, which contains the advanced price formula as a WOOCOMMERCE PRICE FIELD.
If you leave the WOOCOMMERCE PRICE FIELD empty, WooCommerce will use the value of the Price per 1 day/night meta field of the “Room” Custom Post Type.

Click the “Update” button.
Total price multiplied by the coefficient
In case you need to multiply the total price by the coefficient, you need to save the needed coefficient in the Hidden Field.
Add the following formula to the Calculated Field:
%FIELD::number%*%FIELD::room_price%+%FIELD::number%*%FIELD::room_price%*%FIELD::hidden_coefficient_percent%Here, “number” and “room_price” are Number form fields, and “hidden_coefficient_percent” is a Hidden Field.
This formula multiplies the number of visitors by the price, then adds 10% of that product as a tax.

Flexible pricing management
When you use flexible pricing, such as seasonal prices, rates, and weekend prices, the following macros should be applied to the formulas:
%ADVANCED_PRICE::_check_in_out%This macro returns the advance rate times the number of days booked and works with the Check-in/Check-out fields.
The %META::_apartment_price% and %META::price% return prices associated with the Custom Post Type.
Tax calculation
Conditions are the main logic in the tax calculation. The settings and the case are described in detail in our Customizing Tax Rates via Calculated Field guide.
The approach for the tax calculation would be similar to the coefficient calculation. We would need to add the Hidden Field with the static tax applied.
%FIELD::number%*%FIELD::room_price%+%FIELD::number%*%FIELD::room_price%*%FIELD::hidden_tax_percent%Here, “number” and “room_price” are Number form fields, and “hidden_tax_percent” is a Hidden Field.
Calculation of the Repeater field values
To get the most detailed information on combining the Calculated Field with the Repeater Field, refer to our How to Combine Hidden Field and Repeater with Calculated Field guide. In this guide, we will summarize the most important formulas.
Calculated field outside a Repeater
When you put the Calculated Field outside the Repeater Field, for example, you want a total based on how many repeater rows are added, use the following formula:
%FIELD::quantity%*%META::price%Here, the %FIELD::quantity% is a macro for the form field value. %META::price% is a macro that returns the current post meta value.
Calculated field inside a Repeater
When you want to calculate values per repeater item before tallying, for instance, each row shows how many adults and kids, and you want the total guests per row, use the following formula in the Calculated Field:
%FIELD::adults% + %FIELD::kids%“adults” and “kids” are the names for the inner Repeater Field. The results can be summed in another Calculated Field outside the repeater.
Combined approach (inside and outside Repeater)
For complex pricing, you can use Calculated Fields within the repeater to compute per-row totals (e.g., the total number of people in that row). Then, use another Calculated Field outside the repeater to aggregate results and produce a final total price.
For example, we have a Repeater Field with Number Fields for adults and kids. In the Repeater Field, there is also a Calculated Field that counts all family members, so we need to sum the adults and kids.
Outside the Repeater Field, we have another Calculated Field to retrieve the total number of guests: we need to sum all family members across all repeaters.
Additionally, the form includes a pricing field (e.g., room price) and a Hidden tax field.
So the final price formula looks like this:
%FIELD::family_members% * %FIELD::choose_a_room% * (1 + %FIELD::tourist_tax%)This multiplies the total number of guests across all repeaters by the selected room price, including tax.
That’s it. Now, you know JetFormBuilder calculated formulas and how to use them for dynamic forms in WordPress. In this guide, we explored simple arithmetic, advanced, conditional, and JetBooking calculation formulas.
The post Calculation Formulas Guide appeared first on FormBuilder.
]]>The post Send Email appeared first on FormBuilder.
]]>The “Send Email” Post Submit Action allows sending emails to one or some users, sending attachments, selecting options dynamically, using CC/BCC, deactivating auto-formatting, and more.
The “Send Email” Post Submit Action can be used separately or as part of another Post Submit Action (i.e., it allows sending a link for verification of a user, sending a confirmation email with booking details, or sending a PDF file after submission of a form, etc.).
More details about managing the Post Submit Actions can be found in the Post Submit Action Controls Overview.
- Adding the “Send Email” Post Submit Action
- Editing the “Send Email” Post Submit Action Settings
- Setting Conditions
- Deleting and Turning Off
- Setting Verification
- Dynamic Emailing for Guest Posts
Adding the “Send Email” Post Submit Action
To set the “Send Email” Post Submit Action, open the JetForm settings tab, scroll down to the Post Submit Action section, and press the “+ New Action” button.

Then, pick the “Send Email” option in the newly-appeared Add new action pop-up.

Once the “Send Email” Post Submit Action is picked, the Edit Send Email pop-up will appear.
Editing the “Send Email” Post Submit Action Settings
The Edit Send Email pop-up appears if you select the corresponding Post Submit Action while creating it or when you press the pencil-shaped “Edit Action” button on the “Send Email” Post Submit Action panel.
In this tutorial, we first created a new form and then added the “Send Email” Post Submit Action.

The Edit Send Email pop-up has the following settings:
- MAIL TO 一 a required field to select who will receive the message. It includes the following options:
- Admin email 一 an option that, if selected, allows sending email to the admin email address configured in General Settings of your site;
- Email from submitted form field 一 an option that, if selected, enables the FROM FIELD drop-down list 一 a menu that allows selecting a form’s field for taking the email from.
- Custom email 一 an option that, if selected, activates the EMAIL ADDRESS text field where the email address(es) can be entered to which the message will be sent.

- Use CC/BCC 一 a toggle that enables the CC ADDRESS FROM and BCC ADDRESS FROM drop-down lists, which allows sending the secondary and hidden recipients of the email, respectively. These drop-down lists have the “Admin email,” “Email from submitted form field,” and “Custom email” options that provide the same functionality as the corresponding MAIL TO list options.

- REPLY TO 一 a drop-down list that allows setting the email that you would like to use for receiving answers. These drop-down lists have the “Admin email,” “Email from submitted form field,” and “Custom email” options that provide the same functionality as the corresponding MAIL TO list options.
- SUBJECT 一 a text field that is intended to enter the subject of the letter that the user will receive. It can be simple text, and you also have the option to insert values from the fields of the submitted form. To do this, click the “wrench” icon and choose the desired macros.

- FROM NAME and FROM EMAIL ADDRESS 一 text fields for inserting the name that will appear as the email’s sender and the email address that will be added as the address of the letter sender, respectively. Both these fields allow text to be entered or data to be inserted from the form’s fields by pressing the “wrench” icon and picking the needed field from the enlisted ones.
- CONTENT TYPE 一 a drop-down list allowing choosing if the message will be Plain Text or an HTML code:
- Plain Text 一 an option that specifies that the email content text will have no images and/or other multimedia;
- HTML 一 an option that allows using rich text, images, and other multimedia elements in the email content. When this option is selected, the Disable Auto-Formatting toggle is activated, which disallows the default to separate the email content text into paragraphs and turn links into clickable hyperlinks;
- CONTENT 一 a textarea field intended for adding the body of the email. It allows adding texts, HTML code, or data from form fields. To add macros to insert the form field data, click the “wrench” icon to the right of the current option name.

- ATTACHMENT 一 a drop-down list for selecting the field from which the attachment will be taken.

Finally, to save the changes, press the “Update” button in the left bottom corner of the pop-up.
Setting Conditions
To set the conditions when the “Send Email” Post Submit Action should be performed, press the “criss crossed arrow” icon on the “Send Email” Post Submit Action panel. If no conditions are set, the action will be performed by default after submission.
For an in-depth understanding of how to set one or some conditions, customize their options, and meet requirements, read the Conditions overview.
Deleting and Turning Off
For temporary deactivation of this action, click the “Turn off/Turn on” button (the “closed eye” icon) on the “Send Email” Post Submit Action panel. To delete this action, press the “Delete Action” button (the “recycle bin” icon) on the “Send Email” Post Submit Action panel.

Setting Verification
To allow user verification via email, press the “+ Verification” button on the “Send Email” Post Submit Action panel.

Then, the “Verification” Post Submit Action panel will be added above the “Send Email” Post Submit Action panel. Press the “Edit Action” button on the “Verification” Post Submit Action panel. The Setting Up Email Verification tutorial explains in detail how to customize the verification settings, define specific events, and send a confirmation email with a verification link.

In turn, the “Runs on verification” warning text and the “Run always” link will be added to the “Send Email” Post Submit Action panel. Press the “Run always” link to separate these actions. Then, the “DEFAULT. PROCESS X” text will be added under the “Send Email” text.
Dynamic Emailing for Guest Posts
In scenarios like guest posting, you may need to notify the original author when an Admin publishes or updates their post. Since the “Current User” at that moment is the Admin, you should pull the author’s email dynamically.
Generate the Current Post Author shortcode
To target the post author rather than the current editor, proceed to WordPress Dashboard > JetEngine > JetEngine > Shortcode Generator feature and set such options:

- “JetEngine Data” for the Shortcode dropdown;
- “Post/Term/User/Object Data” for the Source dropdown;
- “E-mail” of the User section for the Object Field dropdown;

- “Current Post Author” for the Context dropdown.
Copy the generated shortcode (e.g., [email protected]).
Configure the Hidden Field
Add a Hidden Field to your form to act as a “data bridge” and adjust such settings:

- Keep the FIELD VALUE unselected;
- Set FORM FIELD NAME, for example, “author_email”;
- Into the DEFAULT VALUE, enter the generated shortcode.
Set the Send Email action
After that, ensure to customize the “Send Email” Post Submit Action settings:

- Select the “Custom email” for the MAIL TO dropdown;
- Enter the Hidden Field name (“author_email” in our case) into the EMAIL ADDRESS field.
After customizing the form settings, save it.
That’s all. Now you know more about the “Send Email” Post Submit Action settings of the JetFormBuilder WordPress plugin.
The post Send Email appeared first on FormBuilder.
]]>The post How to Insert/Update WooCommerce Product with Attributes appeared first on FormBuilder.
]]>Table of Contents:
- Inserting a WooCommerce Product with Attributes via Form
- Updating the WooCommerce Product with Attributes via Form
Inserting a WooCommerce Product with Attributes via Form
Proceed to setting up a form. For that, we navigate to WordPress Dashboard > JetFormBuilder > Add New Form.
Enter the form’s title — in this case, it is “Create New Product”.
Form fields settings
The Welcome block appears by default. From here, you can select a form pattern or generate a form with OpenAI. Otherwise, you can hit the “Start from scratch” button and use the three fields added by default; otherwise, you can delete them to begin anew.
In this case, we build our form from scratch. We keep the Text Field for the post’s title. Additionally, we add a Number Field to store the product’s price.

We also add the Media Field to set the product’s thumbnail. It is essential to enable the Insert Attachment toggle and select which users can upload images in the USER ACCESS field.

We add the Textarea Field for the excerpt.
For the product categories, we add a Select Field with the “Terms” source and select the required taxonomy in the TAXONOMY input.
When attributes are stored as categories, we create a Checkbox Field with the “Terms” source and select the required attributes in the TAXONOMY input.

We also added a Text Field for the SKU, a Select Field for the stock status with manual input options, and a Number Field for the stock quantity.

You can add more or fewer fields — it depends on your needs.
Additionally, we changed the Action Button’s text to “Add Product”.

Set up the form Action
Then, open the Post Submit Actions tab and add the Insert/Update Post action. Open the action settings and select the “Products” for the POST TYPE and the required POST STATUS.
Now, we need to set up the FIELDS MAP:
- Text Field for the product’s title is for the “Post Title”;
- Number Field for the price is for the “Product Regular Price”;
- Media Field for the image is for the “Post Thumbnail”;
- Textarea Field is for the “Post Excerpt”;
- Select Field with the categories is for the “Post Terms,” in the newly appeared field, select the product categories you need;
- Checkout Field for the attributes is for the “Post Terms,” in the newly appeared field, select the product attributes you need;
- Text Field for SKu is for the “Product SKU”;
- Select Field for the stock status is for the “Product Stock Status”;
- Number Field for the stock quantity is for the “Product Stock Quantity”.

Click the “Update” button once you are ready. Then click the “Save” button to save the form’s settings.
Add the form to a page
Proceed to the static page where you need to add the form and insert it, following the How to Display a Form on the Front End guide.

Click the “Publish” button once you are ready.
Add the product from the frontend
Proceed to the frontend and fill in the form.

In the form records, we see that the form was successfully submitted and a new product was created.

Updating the WooCommerce Product with Attributes via Form
Proceed to setting up a form. For that, we navigate to WordPress Dashboard > JetFormBuilder > Add New Form.
Enter the form’s title — in this case, it is “Create New Product”.
Form fields settings
The Welcome block appears by default. From here, you can select a form pattern or generate a form with OpenAI. Otherwise, you can hit the “Start from scratch” button and use the three fields added by default; otherwise, you can delete them to begin anew.
In this case, we build our form from scratch. We keep the Hidden Field with the “Current Post ID” option selected for the FIELD VALUE. Additionally, we keep the Text Field for the post’s title and add a Number Field to store the product’s price.

Then, we add the Media Field to set the product’s thumbnail. Enable the Insert Attachment toggle and select which users can upload images in the USER ACCESS field.

For the excerpt, we add the Textarea Field.
To update the product categories, we add a Select Field with the “Terms” source and select the required taxonomy in the TAXONOMY input.
To edit the attributes, we create a Checkbox Field, as they are stored as categories. Set the “Terms” source, then select the required attributes in the TAXONOMY input.

Additionally, we added a Text Field for the SKU, a Select Field for the stock status with manual input options, and a Number Field for the stock quantity.

We also changed the Action Button’s text to “Update Product”.
Set up the form Action
Proceed to the Post Submit Actions tab and add the Insert/Update Post action. Open the action settings and select the “Products” for the POST TYPE and the required POST STATUS.
Now, we need to set up the FIELDS MAP:
- Hidden Field with the current product ID is for the “Post ID”;
- Text Field for the product’s title is for the “Post Title”;
- Number Field for the price is for the “Product Regular Price”;
- Media Field for the image is for the “Post Thumbnail”;
- Textarea Field is for the “Post Excerpt”;
- Select Field with the categories is for the “Post Terms,” in the newly appeared field, select the product categories you need;
- Checkout Field for the attributes is for the “Post Terms,” in the newly appeared field, select the product attributes you need;
- Text Field for SKu is for the “Product SKU”;
- Select Field for the stock status is for the “Product Stock Status”;
- Number Field for the stock quantity is for the “Product Stock Quantity”.

Click the “Update” button once you are ready.
Preset settings
Open the Preset Setting tab and, following the Preset Settings guide, connect the form fields with the products’ fields.

Click the “Save” button once you are ready.
Add the form to a page
Proceed to the single product page template and insert the update form, following the How to Display a Form on the Front End guide.

Click the “Publish” button.
Update the product from the frontend
Now open any product page. The form has all fields pre-set, and if I update the title, attribute, and stock quantity, it will be submitted successfully.

In the form record, we can ensure that the product data is updated.

That’s it. Now you know how to build forms for creating and updating WooCommerce products with the WordPress JetFormBuilder plugin.
The post How to Insert/Update WooCommerce Product with Attributes appeared first on FormBuilder.
]]>The post How to Configure a Custom Recurring Subscription Form appeared first on FormBuilder.
]]>In this tutorial, we focus on configuring a custom recurring subscription plan in the PayPal “Sandbox” mode and choosing it via the Select (Checkbox or Radio) Fields of the previously created form.
It allows the price range to depend on the number of ordered items (so-called tiered pricing); therefore, the chosen data will be transferred to the PayPal checkout page, and PayPal will provide tier-based payment.
Here, we assume that the PayPal Recurring Payments add-on for JetFormBuilder is installed and activated, and that the subscription plan and the form have been created. In addition, we primarily focus on configuring specific fields and settings. More details on configuring the required subscription plans, adjusting the Post Submit Actions, and managing the subscriptions via PayPal and JetFormBuilder Dashboard can be found in the How to Configure Payment Gateways and How to Set Recurring PayPal Payments in WordPress Form tutorials.
Table of Contents:
Create a Tier-Based Subscription Plan
Initially, log in to your PayPal Developer account. By default, you will be redirected to the Sandbox test accounts page of your main PayPal account. Here, go to the Apps & Credentials tab and select the required credential from the unlisted options.

Then scroll down this page to view the Sandbox account info section to the Email and Password data.

Then, enter the Sandbox PayPal account using the provided Email and Password. Here, the “John Doe” username is set by default; you can enter your desired one.

Here, unfold the Business Tools tab and press the “Recurring payments dashboard” link.

After that, you will be redirected to the Manage subscriptions page.

Here, click the “Create subscription product” link, fill in the required fields, and proceed to the next page.

Once the product’s general data is complete, you will be redirected to the Create plan page to configure the subscription. On this page, select the “Tiered pricing” option and move to the next page.

Then, adjust the pricing on the Define pricing for this subscription plan page by filling out the Currency, Pricing, and other fields.

Also, scroll the page down and configure the Tier based planning section that is intended to specify the pricing range.

Once configured, press the “Next” button in the bottom-right corner of the page.

In the last step, after being redirected to the Review and save your new plan page, browse the options set, update them (if needed), scroll down the page, and press the “Turn Plan On” button in the bottom-right corner to make the plan live.

Finally, on the Set up your PayPal checkout experience for subscriptions page (if needed), set the layout options, scroll down the page, click the “Copy Code” button, then click the “Go to plans” link to be redirected to the Subscription plans page. Otherwise, press the “Do this later” link to be redirected to the Subscription plans page.

Your subscription plan is now displayed on the Sandbox PayPal Dashboard > Sales > Subscriptions > Subscription plans page. Further, the Plan ID (here, “P-647****”) will be entered into the form’s Radio Field.

Configure the JetForm Settings
Then, return to your PayPal Developer account.
Here, go to the Apps & Credentials tab and select the required credential from the listed options. After that, copy the Client ID and Secret key 1 data.
Then, return to your site. Before building the form, ensure that the PayPal gateways are activated for your website. Open the WordPress Dashboard > JetFormBuilder > Settings page and check the Payments Gateways settings.
Toggle the Enable Gateways switcher. Optionally, activate the Enable Test Mode switcher if you test work with your PayPal account in the “Sandbox” mode and disable it if you work in the Live PayPal mode.
Then, in the WordPress Dashboard > JetFormBuilder > Settings > Payments Gateways subtab, complete the Client ID and Secret Key fields and the corresponding data, and hit the “Save” button.

Build the Form
Go to WordPress Dashboard > JetFormBuilder > Add New to create a new form. Use an embedded pattern or build it from scratch. Here, we create a custom “Subscription Form” with the Text Fields, Image Field, Radio Field, and Action Button. Also, the Select or Checkbox Fields can be used instead of the Radio Field.

This form creation tutorial explains how to build forms from scratch.
Next, move to the Gateways Settings section. Enable the PayPal Checkout option, then press the “Edit” button below to access the settings.
Here, in the newly opened Edit PayPal Checkout Settings window, enable the Use Global Settings toggle to inherit the Client ID and Secret Key you entered earlier in the JetFormBuilder settings.
Choose the “Create a subscription” GATEWAY ACTION from the drop-down menu.
Push the “Sync Access Token” button to synchronize the data, and after successful synchronization, select the needed plan in the SUBSCRIPTION PLAN FIELD (here, we set the “test plan” subscription plan we built earlier). As for the QUANTITY FIELD, we leave it with the default “Manual Input” value.

As for the other fields, read the How to Build WordPress Registration Form With Payment tutorial to learn how to manage macros in settings that can be applied here.
Click on the “Update” button to save the adjusted settings.
In the next step, return to the form builder and insert the multiple-choice field. For instance, we added the Radio Field with the “Manual Input” option. Press the “Manage Items” button, then enter the required price range in the LABEL fields. Then, move to the “Sandbox” PayPal account: Sandbox PayPal Dashboard > Sales > Subscriptions > Subscription plans page, copy the required Plan ID (here, “P-647****”) and enter it into the VALUE fields.

Scroll the pop-up down and save the settings.
In the last step, insert the required Post Submit Actions: we keep the “Save Form Record” Post Submit Action and add the “Register User” Post Submit Action since the form is intended to manage subscribers. Once completed, press the “Update” button.
Read the Register Form tutorial to learn how to build register forms and manage their settings.

In the final stage, press the “Condition” button to open the Edit Action Conditions & Events pop-up window. Here, select the Events Match tab and choose the needed subscription event(s) from the Add Event drop-down menu: DEFAULT.PROCESS ー the event that is performed simultaneously with the specified action. This event runs before the redirect to check whether PayPal functionality is enabled.

That’s it for the form; now, you can hit the “Publish” button.
Test the Flow
Open an editor you prefer and find the JetForm widget/block/element. In this tutorial, we use Elementor. Read the Displaying a JetFormBuilder Form in Any Page Builder tutorial to learn how to add the JetForm widget/block/element in Elementor, Block Editor, and the Bricks theme.
Move to the front end, complete the form with the required information, and submit it by pressing the “SIGN UP” button.

After submission of the form, you will be redirected to the PayPal payment page. After logging in, if needed, select the appropriate options and press the “Continue” button. Finally, review the provided information and click the “Agree & Subscribe” button.

After payment, you will be redirected back to the form.
Finally, the submission will be displayed in the PayPal and JetFormBuilder Dashboard. That’s all about configuring the tiered pricing PayPal subscription plan and building the JetForm form to set a price range based on the items ordered using the PayPal Recurring Payment add-on for WordPress websites.
The post How to Configure a Custom Recurring Subscription Form appeared first on FormBuilder.
]]>The post How to Update Related Items’ Meta appeared first on FormBuilder.
]]>Table of Contents:
Create a Relation
Proceed to WordPress Dashboard > JetEngine > Relations and either click the “Add New” button or edit the existing relation. In this case, we use the relation between the Custom Post Type and users.

Scroll down and enable the Register get items/item REST API Endpoint and Register update REST API Endpoint toggles.

Additionally, in the Meta Fields tab, click the “New Field” button and add the needed fields. In this case, we add the “Text” Field type.

Click the “Add Relation” button once you are ready with the settings.
Get a Shortcode
Follow to WordPress Dashboard > JetEngine > JetEngine > Shortcode Generator. Keep the “JetEngine Data” option for the Shortcode field. Select the “Relation Meta Data” Source and select the Meta Field you created for your relation.

Scroll down and copy the shortcode you get. It will be needed later during the form building.

Build the Form
Now, let’s proceed to creating a form. To build a WordPress form, we navigate to WordPress Dashboard > JetFormBuilder > Add New Form.
Enter the form’s title – in this case, it is “Update Related Item Meta”.
Form fields settings
The Welcome block appears by default. From here, you can select a form pattern or generate a form with OpenAI. Also, you can hit the “Start from scratch” button and use the three fields added by default; otherwise, you can delete them to begin anew.
In this case, we keep only the Hidden Field with the “Current Post ID” option selected in the FIELD VALUE input.
We add one more Hidden Field, but with the “Current User ID” option.

Now, add the Text Field, which will update the text field from the relation (if you have a different field type in the relation, use the same field type in the form).
In the right-side tab, insert the shortcode you created earlier into the DEFAULT VALUE field.

Add as many fields as you need to update the meta for the related item.
Set up the form Actions
Now, proceed to the JetForm settings section and open the Post Submit Actions tab. Here, press the “+ New Action” button. In the opened pop-up, find and click the “REST API Request” action to add it.

In the newly opened pop-up, you need to fill in two fields: REST API URL and CUSTOM BODY. You can get both of them from the Relation settings page.

Copy the Endpoint URL and paste it into the REST API URL field. For the CUSTOM BODY field, use the following code as a reference:
{
	"parent_id": "%post_id%",
	"child_id": "%user_id%",
	"context": "child",
	"store_items_type": "update",
	"meta":
 { "relation_meta_text": "%text_field_to_update%"
}
}
Note that instead of the “post_id”, you add the name of the form’s field attached to the parent relation item (in this case, CPT is the parent item, so we are getting the current post ID). Instead of “user_id”, use the form field name attached to the child relation item (the current user ID, in this case). Instead of the “relation_meta_text”, use the name of the relation field. Instead of the “text_field_to_update”, type the form field name that is associated with the relation meta field.

Then, enable the Authorization toggle and select the “Application Password” option for the AUTHORIZATION TYPE.

It should be concatenated from your admin username and your Application Password, which can be set in WordPress Dashboard > Users > Profile > Application Passwords.

Click the “Update” button in the action settings.
Once you are ready, click the “Publish” button.
Add the Form to the Page
Following the How to Display a Form on the Front End guide, we add the newly created form to the parent template page.

Click the “Publish” button once you are ready with the settings.
Check the Result
Now, let’s proceed to the front parent post page. Here, we have the “Employer” value in the Text Field.

We change it to the “Manager” and click the “Submit” button.

Additionally, we can check the form record to see that the relation item’s meta field was successfully updated.

That’s it. Now you know how to build a form to edit and update related items’ meta fields using the JetFormBuilder WordPress plugin.
The post How to Update Related Items’ Meta appeared first on FormBuilder.
]]>The post How to Create a Subscription Registration Form appeared first on FormBuilder.
]]>Let’s assume we have a book-selling website that allows users to select their role in the form. We added three custom user roles using the User Role Editor plugin: “Basic Plan,” “Silver Plan,” and “Gold Plan.” In this tutorial, we will show how to build a subscription registration form.
- Create a Form with the “Register User” Conditions
- Create a Form with the “Call Hook Action” Condition
Create a Form with the “Register User” Conditions
Go to WordPress Dashboard > JetFormBuilder > Add New Form to build a new form.
Build a form
We complete the name of the form and add the Text Field with the “Login” FIELD LABEL.

Then, we add one more Text Field with the “Email” FIELD LABEL.
Also, we set the FIELD TYPE to “Email” to ensure only emails can be entered in the field.

Next, we add two more Text Fields, one for the “First Name” and the second for the “Last Name.”

The following field is also a Text Field, but this time indicating the “Password”, with the “Password” FIELD TYPE set accordingly.
We also activate the Show eye icon toggle.

We also add a “Confirm Password” Text Field with the “Password” FIELD TYPE set.
To fully adjust it, we go to the Validation section and select the “Advanced” VALIDATION TYPE.
Click the area below to adjust the validation type in the pop-up.

In the pop-up, pick the “Equals” RULE TYPE, select the “Password” field in the CHOOSE FIELD dropdown, and set the ERROR MESSAGE. For example, “Passwords don’t match.”
Click the “Update” button to save the changes.
Now, the “Confirm Password” field checks if the completed value matches the “Password” field. If the values don’t match, the form won’t be submitted.

Next, we add a Radio Field to let users select a subscription plan. We set the “Select Subscription Plan” FIELD LABEL and press the “Manage items” button to define the radio options.

We add three values with the “Basic Plan,” “Silver Plan,” and “Gold Plan” LABELS and corresponding VALUES: “basic-plan”, “silver-plan”, and “gold-plan”.
To save the options, press the “Update” button.

To finalize the form, add the Action Button block. We don’t alter the settings and leave the default “Submit” FIELD LABEL.

Set up post submit actions
It’s time to adjust the post submit actions. The corresponding section is located in the JetForm tab.
Click the “New Action” button to add the first action.

In the pop-up, select the “Register User” option and click it to open the action settings.
Initially, we activate the Allow creating new users by existing users toggle and specify the “Administrator” role in the WHO CAN ADD NEW USER? dropdown. This is not mandatory, but it allows an administrator to check whether the user will be registered using this form.

Scrolling down to the FIELDS MAP, we should map our form fields to the standard user’s fields.

After mapping, select the USER ROLE to be assigned to the new user registered via the form. In our case, we select the “Basic Plan” first.
You can also work on other fields in the pop-up if needed, and whenever ready, press the “Update” button.

Hover over the added “Register User” action and press the “crossed arrows” icon to edit the conditions under which the action will be performed.

Another pop-up with the settings opens. Here, add a new condition and adjust it: pick the “Equal” OPERATOR, select the field with the subscription plans in the FIELD dropdown field, and set the needed value in the VALUE TO COMPARE field. In our case, we complete it with the “basic-plan” value as this is the option’s VALUE we specified in the “Select Subscription Plan” Radio Field’s settings.
When the condition is set, press the “Update” button to save it.

Add two more “Register User” Post Submit Actions. In one of them, select the “Silver Plan” USER ROLE, and in another, the “Gold Plan” USER ROLE.

Also, set the corresponding conditions for each post submit action.

When the form is ready, press the “Publish/Save” button.
Add the form to the page
Now, let’s add the form to the page. It can be any desired page; in our case, we built a new page in the WordPress Dashboard > Pages directory.
Find and add a JetForm widget/block/element to the page. Select the needed form in the corresponding field.

When the page is ready, save it.
Check the result
Open the edited page on the front end. The form is now available for completion.
Let’s complete and submit the form to check if it works.
For example, we select the “Silver Plan” option to assign it as a user role.

Once the message about the form succession is shown, we can proceed to the WordPress Dashboard > Users page and check the new user.
We can now see that the new user is created and their user role is set to “Silver Plan.”

Create a Form with the “Call Hook Action” Condition
Let’s discover another way of creating a subscription registration form.
Build a form
We duplicate the form we’ve built before in the Build a form chapter to make changes to post submit actions.
Set up post submit actions
Right away, we proceed to the Post Submit Actions tab and leave only one “Register User” action by deleting the other two.
Click the “pencil” icon next to the “Register User” action to open the action editing pop-up.
This time, we deactivate the Allow creating new users by existing users toggle so only non-logged-in users can register.

We adjust the action as we did in the previous form (Set up post submit actions chapter) and also activate the Add User ID to form data toggle so that the registered user ID will be added to the form data.
Press the “Update” button when done.

Now, let’s add another post submit action. This time, “Call Hook.”
In the editing pop-up, complete the HOOK NAME field with the preferred name. In our case, it’s the “update-user-role” value.
Click the “Update” button to save the action.

If the form is ready, press the “Save/Publish” button.
Add a hook
Now, let’s add a hook that will be called after the form is submitted. We will add it with the Code Snippets plugin. So, we proceed to the WordPress Dashboard > Snippets dashboard and add a new snippet.
We name it “Set user role” and paste the following code into the corresponding area:

add_action( 'jet-form-builder/custom-action/update-user-role', function( $request, $action_handler ) {

	$user_id = $request['user_id'];

	if ( ! $user_id ) {
		return;
	}

	$user = new WP_User( $user_id );

	$role = isset( $request['plan'] ) ? $request['plan'] : false;

	switch ( $role ) {

		case 'basic-plan':
			$user->set_role( 'basic_plan' );
			break;

		case 'silver-plan':
			$user->set_role( 'silver_plan' );
			break;

		case 'gold-plan':
			$user->set_role( 'gold_plan' );
			break;
	}

}, 10, 2 );
Where:
- “Update-user-role” is a HOOK NAME we set in the “Call Hook” post submit action;
- “plan” is the FORM FIELD NAME of the Radio Field that contains options that should be connected to user subscription plans;
- “basic-plan”, “silver-plan”, and “gold-plan” are the Radio Field option’s VALUES;
- “basic_plan”, “silver_plan”, and “gold_plan” are the Role names set in the User Role Editor plugin during role creation.
Save and activate the snippet when ready.
Add the form to the page
Now, add the form to the page. We will add the form to the page in the WordPress Dashboard > Pages directory.
Add the JetForm widget/block/element to the page and pick the just-built form in the Choose Form selector.

Adjust other settings if needed and publish the page.
Check the result
Now, check the form from the perspective of a non-logged-in user. This form cannot be used by an already existing logged-in user.
Complete the form to register the new user. For instance, this time we chose the “Gold Plan” subscription.

Check the WordPress Dashboard > Users > All Users page. Here, you will observe that the new user is added, with the “Gold Plan” Role assigned.

That’s all about creating a subscription registration form with the JetFormBuilder plugin on your WordPress website.
The post How to Create a Subscription Registration Form appeared first on FormBuilder.
]]>The post How to Use Macros in Email Formatting appeared first on FormBuilder.
]]>This guide explains how to use these macros when setting up the “Send Email” post-submit action.
Also, check the Macros Guide to learn about all macros available for JetFormBuilder.
Contents
- General Macros
- Macros for Media Fields
- Macros for Post Fields
- Macros for Term Fields
- Macro for Checkbox Fields
- How to Insert a Link to a Newly Created Post
- How to Format Date Fields
- How to Display Repeater In Email
- How to Display Fields Labels Instead of Values
General Macros
- %field-name% — use this macro in the content of the “Send Email” post-submit action to retrieve the form field value. Remember to replace the ‘field-name’ part with the actual name of the form field (e.g., if there is a Text Field with the name ‘text’, the macro will look like this: %text%). The macro also supports multiple optional fields, including Radio, Select, and Checkbox Fields.
- ifEmpty — if the field or macro is empty, returns the value specified in brackets and apostrophes (”).
For example, we created a form and added a Text Field for user name input and a Calculated Field with the inserted macro:
%user_input|ifEmpty('visitor')%Where ‘user_input’ is the Text Field name. Also, the VALUE TYPE should be set to “as String,” and the Hidden toggle can be enabled to hide the field in the form on the front end.

Then, we proceed to the JetForm > Post Submit Actions tab and add the “Send Email” action. In the CONTENT textarea, enter the Calculated Field name wrapped in percent signs, for example:
%test_output%You can also combine it with other macros and plain text.

Then we open the form on the front end, submit it with the Text Field empty, and receive an email with the placeholder value.

Macros for Media Fields
- %media-field|img_url_by_id% — retrieves the image URL from the Media Field. Mind using the Media Field name instead of the ‘media-field’ part. If you need to render the actual image in the content of the email, use HTML markup and the <img> tag, for example: <img src=”%media-field|img_url_by_id%”>.
For example, we create a simple form with the Media Field with the “image_” FORM FIELD NAME. In its settings, we set the “Attachment ID” as the FIELD VALUE.

Then, we proceed to the JetForm > Post Submit Actions tab and add the “Send Email” action. In its settings, we select “HTML” as CONTENT TYPE and enter these macros into the CONTENT textarea to display the image and its URL:
<img src="proxy.php?url=%image_|img_url_by_id%">%image_|img_url_by_id%The “image_” is the name of the Media Field.

We submitted the form on the front end. The uploaded image and its URL are displayed in the email.

- %media-field|file_url_by_id% — retrieves the attachment URL from the Media Field. The “Attachment ID” should be chosen as the FIELD VALUE.
Macros for Post Fields
- %post-field|post_title_by_id% — gets the post/page title from its ID stored, for example, in a Radio or Select Field with the “Post” source. The ‘post-field’ part should be replaced with the form field name.
- %post-field|post_titles_by_ids% — gets the names of multiple posts from their ID stored, for example, in a Checkbox Field with the “Post” source.
For instance, we add a Checkbox Field with the “post_checkbox” FORM FIELD NAME. In the FILL OPTIONS FROM selector, we set “Posts” and keep the “Posts” POST TYPE.

Then, we proceed to the JetForm > Post Submit Actions > “Send Email” action and enter the macro into the CONTENT textarea:
%post_checkbox|post_titles_by_ids%where the “post_checkbox” is the Checkbox Field name.
On the front end, we select two posts and submit the form.

In the email, two selected posts are displayed and separated by a comma.

- %post-field|post_link_by_id% — retrieves the linked title of the post by its ID.
- %post_field|post_url_by_id% — retrieves the URL of the post by its ID.
Macros for Term Fields
- %term-field|term_title_by_id% — displays the term’s name by its ID stored, for example, in a Radio, Select, and Checkbox Field with the “Terms” source. The ‘term-field’ part should be replaced with the form field name.
- %term-field|term_titles_by_ids% — displays the term names by their IDs.
Macro for Checkbox Fields
- %checkbox-field|render_acf_checkbox% — displays values selected in the Checkbox Field created with the ACF plugin. The ‘checkbox-field’ part should be replaced with the form field name.
How to Insert a Link to a Newly Created Post
Craft a form for creating new posts. More information can be found in the How to Create a Post via the Form? chapter of the Insert/Update Post overview or in the Front-End Post Submission Form tutorial.
Additionally, in the WordPress Dashboard > JetFormBuilder > Add New Form tab, you can select the “Insert Post” pattern in the Welcome block to insert several form fields and the “Insert/Update Post” action.

In the “Insert/Update Post” action settings, we change the POST STATUS to “Published”. If the status isn’t specified, all posts will be added as “Draft”.
Then, add the “Send Email” action. In its settings, scroll down to the CONTENT textarea and add such a macro:
%inserted_post_id|post_url_by_id%Or use %inserted_post_id|post_link_by_id% to display the post tile with a link.

Save the form settings and submit it on the front end.

How to Format Date Fields
- %date-field|format_date% or %date-field|format_date(F j, Y)% — use those macros to change the date/time output of the Date, Time, and Datetime Fields. The ‘date-field’ value corresponds to the name of the Date/Time/Datetime Field, and F j, Y is the date format, which can be changed according to the Customizing date and time format article. Additionally, the macro can appear as follows: %date-field|format_date(d)% or %time-field|format_date(h)%.
For example, we create a Datetime Field with the “date_and_time” FORM FIELD NAME. In the JetForm > Post Submit Actions > “Send Email” action, we enter the macro into the CONTENT textarea:
%date_and_time|format_date(F j, Y g:i a)%where the “date_and_time” is the Datetime Field name and “(F j, Y g:i a)” is the date and time format (example output: “November 6, 2010 12:50 am”).

We submit the form on the front end and get the email with the date and time in the adjusted format.

- |T (%date_field|T%, %datetime_field|T%, %time_field|T%) — converts date/time to timestamp.
- |toDate, |toDateTime, |toTime — converts timestamp back to date and time format (e.g., 2025-10-21).
- |addDay(N), |addMonth(N), |addYear(N) — adds N days/months/years to a date or timestamp. If N is not specified, it adds 1 day, month, or year. For example, use the %date_field|addDay(1)% macro in the Calculated Field to add 1 day to the date set in the form field, so if you set “10-09-2025”, the Calculated Field will display “10-10-2025”. The “date_field” part should be replaced with the form field name.
- |subDay(N), |subMonth(N), |subYear(N) — subtract N days/months/years from a date or timestamp. If N is not specified, it subtracts 1 day, month, or year.
- |addMin(N), |addHour(N), |subMin(N), |subHour(N) – manipulate hours and minutes, e.g., %time_start|subHour(3)%.
- |setDay(N), |setMonth(N), |setYear(N) — sets a specific month/day/year for a date or timestamp.
For the showcase, we create the Datetime and Calculated Fields. Into the Calculated Field, we enter the macro:
‘%start_date|T|addDay(5)|toDateTime%’which takes the selected date, turns it into a timestamp, adds 5 days, and outputs the new date. The “start_date” is the name of the Datetime Field.

In the JetForm > Post Submit Actions > “Send Email” action, we enter the Datetime and Calculated Field names, wrapped in percent signs, into the CONTENT textarea. Click the “wrench” icon to input the macros in a simple way:
Your date: %start_date|format_date(F j, Y g:i a)%
Your final date: %final_date|format_date(F j, Y g:i a)%
We also add a macro to format the date, as without it, the result will appear as follows: 2025-11-11T12:20.

On the front end, we set the date and time and submit the form. The Calculated Field shows five days after the selected start date.

The email displays the start and final dates in the adjusted format.

Also, check the Date and Time Macros chapter of the Macros Guide to learn more.
How to Display Repeater in Email
The process is described in the How to Customize the Output Repeater in the Send Email Action tutorial.
How to Display Fields Labels Instead of Values
If you try to display the options selected in the Select, Radio, and Checkbox Fields in emails, the values will be displayed instead of labels (e.g., “first_option” instead of “First Option”). Labels can be displayed using the JetEngine plugin.
First, proceed to WordPress Dashboard > JetEngine > Glossaries and press the “+ New Glossary” button to set the list of options.
Type the Name and select the Data Source (you can adjust options manually or upload a list from a file). We set three simple options.
When you finish, push the “Save” button.

Second, add a piece of code either via a custom code snippets plugin (like Code Snippets) or directly in your theme’s functions.php file (preferably in a child theme to prevent changes from being overwritten on updates).
For example, we install and activate the Code Snippets plugin, then open the WordPress Dashboard > Snippets > Add New tab.
We type the name into the title bar (e.g., “Glossary labels in Send Email action”) and enter such code into the PHP textarea:
add_filter( 'jet-form-builder/content-filters', function( $filters ) {

	class Get_Labels_By_Glossary extends \Jet_Form_Builder\Classes\Filters\Base_Filter {

		public function get_id(): string {
			return 'get_label_by_glossary';
		}

		public function callback_args(): array {
			return array( ', ' );
		}

		public function apply_macros( $value, ...$args ): string {

			list( $glossary ) = $args;

			if ( ! function_exists( 'jet_engine' ) || ! $glossary ) {
				return $value;
			}

			return jet_engine_label_by_glossary( $value, $glossary );
		}
	}

	array_unshift( $filters, ( new Get_Labels_By_Glossary() ) );

	return $filters;
} );
Then, we click the “Save and Activate” button.
Third, open the JetFormBuilder form and set the required field using the Glossary.
For instance, we add a Checkbox Field with the “checkbox_field” FORM FIELD NAME. In the FILL OPTIONS FROM dropdown, we pick the “Glossary” option and select the created glossary.

In the JetForm > Post Submit Actions > “Send Email” action settings, enter such a macro into the CONTENT textarea:
%field_name|get_label_by_glossary(N)%where “field_name” is the name of your form field and “N” is the ID of your Glossary.

Finally, submit the form on the front end, and selected options will be displayed in the email.

That’s it; now you know how to use JetFormBuilder functionality to display specific form data using available macros in emails sent from your WordPress website. Additionally, you can combine them with the JetEngine macros. For more details, check this guide.
The post How to Use Macros in Email Formatting appeared first on FormBuilder.
]]>The post How to Create a Logout Form appeared first on FormBuilder.
]]>Table of Contents:
Create a Form
First, we navigate to WordPress Dashboard > JetFormBuilder > Add New Form.
Enter the form’s title — in this case, it is “Logout Form”.
The Welcome block appears by default. From here, you can select a form pattern or generate a form with OpenAI. Otherwise, you can hit the “Start from scratch” button and use the three fields added by default; otherwise, you can delete them to begin anew.
In this case, we start from scratch and delete all fields, keeping only the Action Button.
Proceed to the JetForm tab and scroll down to the Post Submit Actions section. Click the “+ New Action” and select the “Call Hook” action. Enter the desired HOOK NAME.

Click the “Update” button.
Then, add the “Redirect to Page” action. In the REDIRECT TO dropdown, select the “Custom URL” option. Then, in the REDIRECT URL field, enter the link from your site where you would like to redirect users after they log out (we put the home page link).

To ensure that the logout element disappears from the page after the user is logged out, click the “eye” icon to set the block’s Visibility Conditions. Click the Enable toggle and select the “Show element if condition met” option for the VISIBILITY CONDITION TYPE. Click the “Add new item” button and choose the “User logged in” condition.

Click the “Update” button once you are ready. Save the form changes.
Adjust the Code
Add the following code to the functions.php of your child theme, or in the Code Snippets plugin, or a similar one:
add_action( 'jet-form-builder/custom-action/jetformbuilderlogout', function( $action_handler ) {
wp_logout();
} );
Click the “Save and Activate” button.
Add the Form to a Page
Proceed to the page where you need to add the form and insert it, following the How to Display a Form on the Front End guide. In this case, we add the widget to the header.

Click the “Publish” button once you are ready.
Check the Result
Proceed to the front-end page, and the “Log Out” button is presented in the header.

When we click the button, we are logged out and are redirected to the home page.

That’s it. Now you know how to build a logout form using the WordPress JetFormBuilder plugin.
The post How to Create a Logout Form appeared first on FormBuilder.
]]>The post How to Activate JetFormBuilder PRO Addons appeared first on FormBuilder.
]]>Table of Contents:
Install the Addon
Proceed to your JetFormBuilder account and click the “Download” button next to the needed addon.

A zip file will be downloaded to your device.
Move to WordPress Dashboard > Plugins > Add New Plugin. Click the “Upload Plugin” and “Choose file” buttons to find the addon you already downloaded.
Once the needed file is selected, click the “Install Now” button.

You can also activate the addon right away.

Activate the License
Now, proceed to the WordPress Dashboard > JetFormBuilder > Addons directory and click the “Activate License” button.

The license key can be found in your account or in the email you received after registering on the JetFormBuilder website. Copy and paste the license key into the field in the Activate License pop-up.

Click the “Activate” button.
That’s it. Now you know how to download and activate JetFormBuilder PRO Addons on your WordPress site.
The post How to Activate JetFormBuilder PRO Addons appeared first on FormBuilder.
]]>The post How to Populate a Form Field with a List of Users appeared first on FormBuilder.
]]>We demonstrate how to enlist the concatenated user’s First and Last Names via a Checkbox Field. Here, logged-in users can select the required option from the list and submit the data via forms on the front end.
Since users can have anonymous names, it is necessary to establish a backend connection between the users’ data (such as their First Name and Last Name, which should be concatenated) and the selected option. To do this, we use a query and Post Submit Actions to connect user data with the Custom Post Types via forms.
In addition, we assume that JetEngine and JetFormBuilder plugins are installed and activated, and WordPress users are created and logged in.
Create a Query
Move to the WordPress Dashboard > JetEngine > Query Builder tab and create a user query. Here, we do not configure any other settings; instead, we copy the query’s ID (“78”, in this case).

Since the generator takes the parameters obtained via the query, they can be viewed while editing the query.

Build and Configure a Form
Next, create a form and add the needed fields. Since we focus only on the usage of the query as a “Generate Dynamically” option, we do not configure other settings. In this case, you can create a login form or combine registration and login in one form.
In the developed form, we add two Columns and insert the Checkbox Field into the left one. Then, we configure the following settings: set the “Generate Dynamically” FILL OPTIONS FROM, “Get values list from JetEngine Query” GENERATOR FUNCTION, and type the following text in the FIELD NAME field:
78|ID|user_login
Where “78” 一 the ID of the custom query;
“ID” 一 an option that provides values, in this case, the user ID;
“user_login” 一 an option that provides the user login.

Once completed, adjust the Post Submit Action settings.
Here, we set the “Insert/Update Post” Post Submit Action to capture students’ full names who want to take a specific course and save the corresponding data in the CPT posts.

Additionally, the “Update User” Post Submit Action can be added to the form to populate the selected data into the User Profile.
Finally, save the form.
Test the Flow
Insert the form into a page using the JetForm widget/block/element. Here, we use Elementor and the JetForm widget, respectively.

Then, save the page and navigate to the front end to view the list of available students and courses. Here, the logged-in users can select their name and appropriate courses.

To check the form, tick the user’s full name and the corresponding course to be saved.

Next, navigate to the User Profile and check if the data was added correctly.

That’s it. Now you know how to configure a “User Query” query to establish a backend connection between the users’ data (such as their First Name and Last Name, which should be concatenated) and the selected option, using the JetEngine and JetFormBuilder plugins for WordPress.
The post How to Populate a Form Field with a List of Users appeared first on FormBuilder.
]]>The post How to Create a Password Change Form for a User Account appeared first on FormBuilder.
]]>In this tutorial, you will learn how to configure the JetFormBuilder form to update the user’s password on the WordPress site, ensuring that the new password differs from the old one.
Table of Contents:
Adjust the Form
First, we navigate to WordPress Dashboard > JetFormBuilder > Add New Form.
Enter the form’s title — in this case, it is “Password Change Form”.
The Welcome block appears by default. From here, you can select a form pattern or generate a form with OpenAI. Otherwise, you can hit the “Start from scratch” button and use the three fields added by default; otherwise, you can delete them to begin anew.
In this case, we select the “Register Form” pattern as an orientation. You can use a simpler or more complicated form instead. In this case, we consider the most straightforward approach.

In this tutorial, we remove the Column with the Image and add a Hidden Field. We select the “Current User ID” option in the FIELD VALUE input.

For the “Name” and “Email” Text Fields, we set the DEFAULT VALUES to retrieve the current user’s info.
For that, select “User” as a SOURCE. For GET USER ID FROM, choose the “Current user” option and select the required USER FIELD (“First Name” and “E-mail” in this case). These settings are optional.

Additionally, we add another Text Field for the current password.
Now, proceed to the “New Password” field and open the Validation tab. Select the Advanced section and click the “Add new” button.
Select the “Server-Side callback” for the RULE TYPE, and in the CHOOSE CALLBACK dropdown select the “Compare with Current User Password”. Enter the desired ERROR MESSAGE.

Click the “Update” button once you are ready. Add the same advanced validation rule to the “Confirm Password” field if you use it.
Once you are ready with the form fields’ settings, proceed to the Preset setup. For that, open the JetForm tab and scroll down to the Preset Settings section. Select the “User” option for the SOURCE. For GET USER ID FROM, choose the “Current user” option. Then, connect the form fields to the corresponding user’s fields.

Move to the Post Submit Actions tab and add the “Update User” action.
Set up the FIELDS MAP. For the “New Password” field, select the “Compare with Current Password”.

When all the fields are connected, click the “Update” button.
Once you are ready, save the form.
Add the Form to the Page
Proceed to the page where you need to add the form and insert it, following the How to Display a Form on the Front End guide.

Click the “Publish” button once you are ready.
Check the Result
Open the front-end page and try to enter the same password — then we get the error message.

However, when we enter a new password, the form is submitted correctly, and the password is changed.

That’s it. Now, you know how to create a form for changing the password for the User Account with the WordPress JetFormBuilder plugin.
The post How to Create a Password Change Form for a User Account appeared first on FormBuilder.
]]>The post How to Update the Post via the Pop-Up appeared first on FormBuilder.
]]>In this tutorial, you will learn how to configure the JetFormBuilder form to update the post via the JetPopup pop-up inside the JetEngine listing on the WordPress site.
Table of Contents:
Adjust a Form
First, we will build the “Edit post” form. For a detailed guide, refer to the Insert/Update Post article. In this tutorial, we will take an overall look at the form settings.
Proceed to setting up a form. For that, we navigate to WordPress Dashboard > JetFormBuilder > Add New Form.
Enter the form’s title — in this case, it is “Update Post”.
The Welcome block appears by default. From here, you can select a form pattern or generate a form with OpenAI. Otherwise, you can hit the “Start from scratch” button and use the three fields added by default; otherwise, you can delete them to begin anew.
In this case, we build our form from scratch. We keep the Hidden Field for the current post ID and the Text Field for the post’s title. Additionally, we used the Number Field to update the price. You can add as many fields as needed.

Go to the Preset Settings tab on the right side. Turn on the Enable toggle. Select the “Post” SOURCE, and the “Current post” option for the GET POST ID FROM. For the Hidden “Post ID” field, choose the “Post ID” option.
Choose the corresponding fields for each of the form fields you added.

Then, open the Post Submit Actions tab and add the Insert/Update Post action. Open the action settings and select the needed POST TYPE and POST STATUS.
In the FIELDS MAP section, set up the fields. It is necessary to select the “Post ID (will update the post)” option for the post_id field.

Click the “Update” button once you are ready.
Publish the form once everything is set up.
Set Up a Pop-Up
Move to WordPress Dashboard > JetPopup > Create New Popup.
Fill in the fields in the Create a Popup window that appears. In this case, we selected the “Elementor” Content Type, typed the “Update Post Form PopUp” text in the Name(optional) field, and ticked the “Classic” option in the Choose Preset(optional) field. Finally, click the “Create” button.

Refer to the How to Create a New Popup Template in Elementor tutorial to learn about pop-up settings.
In the pop-up settings, open the page builder, then add the JetForm widget. Select the form in the Choose Form input.

Then, click the “gear” icon in the top panel and open the Settings section. Enable the Loading content with Ajax toggle.

Click the “Publish” button once you are ready.
Add the Pop-Up to the Listing
Proceed to the listing template you created. Add the Button Elementor widget to the needed space. Open the Advanced tab and proceed to the JetPopup section.
Select the pop-up you created in the Attached Popup field. Keep the “Click on Widget” Trigger Type. Enable the JetEngine Listing popup toggle.

Click the “Publish” button once you are ready.
Check the Result
Proceed to the front-end page and click the “Edit Post” button on any post from the listing.

We can change the post title and price and update the post. New data is displayed straightaway after the form is submitted.

That’s it. Now, you know how to update the post via the JetPopup pop-up using the JetFormBuilder form on the WordPress site.
The post How to Update the Post via the Pop-Up appeared first on FormBuilder.
]]>The post Macros Guide appeared first on FormBuilder.
]]>Contents
- Basic Field Macros
- Date and Time Macros
- Milliseconds Conversion Macros
- String Macro
- Post and Term Macros (When a Field Stores IDs)
- Media Field Macros
- Macros for Emails Only
Basic Field Macros
- %field-name% — returns the value of any form field. Works everywhere inside the form. The ‘field-name’ part should be replaced with the actual name of the form field (e.g., if there is a Text Field with the name ‘text’, the macro will look like this: %text%). The macro also supports multiple optional fields, including Radio, Select, and Checkbox Fields.
- %checkbox-field|render_acf_checkbox% — displays values selected in the Checkbox Field created with the ACF plugin. The ‘checkbox-field’ part should be replaced with the form field name.
Date and Time Macros
These are commonly used in Date, Time, or Datetime Field in conjunction with the Calculated Field to generate final dates or time intervals.
- %date_field|format_date(F j, Y g:i a) – formats date or datetime into a specific pattern.
- |T% – converts date/time into a timestamp.
To showcase how this macro works, we create a Datetime Field with the “start_date” name and a Calculated Field, where we enter the “%start_date|T%” macro.

On the front end, after setting the date and time in the Datetime Field, the Calculated Field converts it into a timestamp.

- |toDate, |toDateTime, |toTime — converts timestamp back to date and time format (e.g., 2025-10-21).
- |addDay(N), |addMonth(N), |addYear(N) — adds N days/months/years to a date or timestamp. If N is not specified, it adds 1 day, month, or year. For example, use the %date_field|addDay(1)% macro in the Calculated Field to add 1 day to the date set in the form field, so if you set “10-09-2025”, the Calculated Field will display “10-10-2025”. The “date_field” part should be replaced with the form field name.
For the showcase, we use the previous Datetime and Calculated Fields. Into the Calculated Field, we enter the macro:
‘%start_date|T|addDay(5)|toDateTime%’which takes the selected date, turns it into a timestamp, adds 5 days, and outputs the new date.
On the front end, we set the date and time. The Calculated Field shows five days after the selected Start Date.
- |subDay(N), |subMonth(N), |subYear(N) — subtract N days/months/years from a date or timestamp. If N is not specified, it subtracts 1 day, month, or year.
- |addMin(N), |addHour(N), |subMin(N), |subHour(N) – manipulate hours and minutes.
For example, we set the Time Field and enter the macro (“time_start” should be replaced with the Time Field name) into the Calculated Field:
%time_start|addMin(15)%
On the front end, we set the time in the Time Field, and the Calculated Field shows the time with 15 minutes added.
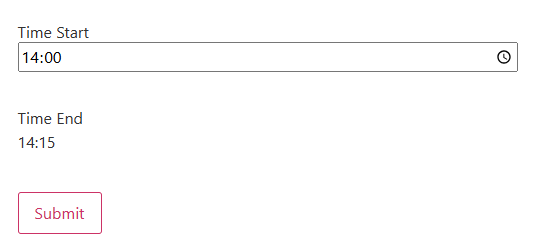
If you want to add both date and time, use the macro with a formula like this:
'%datetime_start|T|addMin(15)|addDay(5)|toDateTime%'And set the VALUE TYPE to “as String” in the Calculated Field block settings.

On the front end, we set the date and time in the Datetime Field, and the Calculated Field shows the datetime with 5 days and 15 minutes added.

- |setDay, |setMonth, |setYear — sets a specific month/day/year for a date or timestamp.
For example, we use the Datetime Field and enter such a macro into the Calculated Field:
%datetime_start|setYear(2077)%We also set the VALUE TYPE to “as Date” in the Calculated Field block settings and set the required DATE FORMAT (e.g., “YYYY-MM-DD HH:mm” for the Datetime Field).

On the front end, we set the date and time in the Datetime Field (20/11/2025 13:43), and the Calculated Field shows the datetime with the year set with a macro (20/11/2077 13:43).

Milliseconds Conversion Macros
- |toMinuteInMs, |toHourInMs, |toDayInMs, |toWeekInMs, |toMonthInMs, |toYearInMs — converts a regular number (e.g., from a Number Field) into the number of milliseconds equal to these minutes/seconds/days, etc. They can be used to perform math operations, e.g., to calculate the future date or to compare two dates by converting durations into milliseconds.
For example, we add a Number Field with the “duration_in_minutes” name and a Calculated Field with such a macro:
%duration_in_minutes|toMinuteInMs%and the “as Number” VALUE TYPE selected.

On the front end, we enter “4” minutes in the Number Field, and a calculated result is displayed below as “240000” ms (milliseconds).

String Macro
- length — returns the length of a string (number of characters) or the number of elements in an array.
For instance, we add a Text Field with the “Password” FIELD TYPE and a Calculated Field with such a macro:
%user_pass|length%where the “user_pass” is the Text Field name. We also set the “as Number” VALUE TYPE.

On the front end, the Calculated Field counts the number of symbols entered in the password field.

Post and Term Macros (When a Field Stores IDs)
These macros can be used in emails, calculated fields, or displayed dynamically on confirmation pages:
- %post_field|post_title_by_id%
- %post_field|post_titles_by_ids%
- %term_field|term_title_by_id%
- %term_field|term_titles_by_ids%
Media Field Macros
These can be used in emails, Dynamic Values, hidden fields, or custom messages.
- %media_field|img_url_by_id% – get the image URL.
- %media_field|file_url_by_id% – get the file URL.
Macros for Emails Only
A few are specifically tied to the “Send Email” action context:
- %inserted_post_id|post_url_by_id%
- %inserted_post_id|post_link_by_id%
These rely on the form, creating a post with the “Insert/Update Post” action, so they don’t work in real-time form fields.
For more details, refer to the How to Insert a Link to a Newly Created Post chapter in the How to Use Macros in Email Formatting tutorial.
That’s all. Now you know about the JetFormBuilder macros and how to use them for dynamic forms in WordPress. Additionally, you can combine them with the JetEngine macros. For more details, check this guide.
The post Macros Guide appeared first on FormBuilder.
]]>The post How to Create a Conversational Form? appeared first on FormBuilder.
]]>Table of Contents:
- Create a Custom Content Type
- Set Up the Form
- Add the Form to the Page
- Add the Feedback List to the Page
- Check the Result
A conversational form is an interactive type of online form designed to mimic a natural conversation between the user and the website. Instead of displaying all questions at once, it presents them one or a couple at a time — often with smooth transitions, friendly wording, and visual cues that simulate a chat-like experience.
In this article, we will focus on creating a multistep conversation for collecting users’ feedback. We will obtain feedback in the Custom Content Types (CCT) and display a list of responses.
Create a Custom Content Type
As we mentioned in this article, we will keep the feedback responses in the CCT.
First, go to the WordPress > JetEngine > JetEngine > Modules tab, and enable the Custom Content Types toggle. This will provide access to the CCT creation.

Then, proceed to WordPress > JetEngine > Custom Content Types and click the “Add New” button.

Enter the Name and Slug of the CCT.

Scroll down to the Fields tab and add as many meta fields as needed.

Click the “Add Content Type” button once you are ready.
Refer to the How to Create Custom Content Type guide to learn the settings details.
Set Up the Form
Proceed to setting up a form. For that, we navigate to WordPress Dashboard > JetFormBuilder > Add New Form.
Enter the form’s title — in this case, it is “Conversational Feedback Form”.
The Welcome block appears by default. From here, you can select a form pattern or generate a form with OpenAI. Otherwise, you can hit the “Start from scratch” button and use the three fields added by default; otherwise, you can delete them to begin anew.
In this case, we build our form from scratch. As we mentioned earlier, the conversational form is supposed to have multiple steps. You can refer to our WordPress Multi-Step Form with Step Indicator and Conditional Blocks guide to learn more about setting up this feature.
Fields set-up
First, add the Form Page Start block, which indicates the start of the first form page. Everything above this block is regarded as a header.
We add the Heading Field with the “We’d love to hear your thoughts! This quick form takes about 2 minutes” text for a better user experience.
Then, we use the Select Field for users to answer the “What are you giving feedback on?” question. Here, we used the “Manual Input” for the source and added four options: “Website”, “Product”, “Service”, and “Other”. Click the “Update” button once options are set up.

As we have the “Other” option, we need to add the input that will be available only when the user chooses the “Other” option. To do this, add the Conditional Block to the form and place the Text Field inside it. Add the desired LABEL to the Text Field (“Please, clarify what you are giving feedback on” in this case).
Proceed to the Conditional Block settings and click the “arrows” icon to set up the conditions for the Text Field to be shown.
Select the “Show if…” option for the WHICH FUNCTION NEED EXECUTE? dropdown. For the FIELD input, choose the field according to which the current field should be shown (Select Field in our case). Choose the “Equal” OPERATOR and set the VALUE (“other” for this tutorial). Click the “Update” button.

To identify the end of the first page, add the Form Page Break Field.
On the second page, we add the rating scale for users’ overall experience. For that, we can use the Range Field.
In the FIELD LABEL, enter the question. In the Field tab, set the MIN and MAX VALUES (in this case, we set them to “0” and “10”). Enter the STEP value (we use “1”).
Additionally, we add the FIELD DESCRIPTION (“0 – Not satisfied at all, 10 – Extremely satisfied”) to make the field easier to use.

Now, let’s add two more Conditional Blocks with Text Fields inside: one to show when the user puts “0-3” rate with the “Sorry to hear that. What could we improve?” question, and another one to be shown when the rating is “4-10” with the “That’s great! What did you like most?” question.
So, for the first Text Field, we add the condition with the “Less then or equal” OPERATOR and “3” VALUE TO COMPARE. Click the “Update” button.

For the second Text Field, the condition is almost the same, only the OPERATOR should be changed to the “Greater than” option.

Now, add one more Form Page Break Field. On the following page, we add two more Textarea Fields for users to answer “What did you like or dislike about your experience?” and “Was anything confusing or difficult to use?” questions.

Additionally, we add a Radio Field with options to answer the “How did you first hear about us?” question. We used the “Manual Input” for the FILL OPTIONS FROM input.

As we have the “Other” option, we also add a Conditional Block with a Text Field to display when the “Other” option is selected.

Add the Form Page Break Field again. On this page, we add the Likert Scale with options that allow users to evaluate it.
Since there is no ready solution for the scale, we will need to add the following code to the site. Proceed to the WordPress Dashboard > Appearance > Customize > Additional CSS and paste the CSS code:
.checkradio-wrap {
    display: flex !important;
    flex-direction: row !important;
    justify-content: space-around !important;
    flex-wrap: nowrap !important;
    gap: 1rem;
}


.checkradio-wrap .jet-form-builder__field-wrap {
    flex-grow: 1 !important;
    width: auto !important;
    text-align: center;
}


.wp-block-columns:nth-of-type(odd) {
    background-color: #FFFACD !important;
}


.wp-block-columns:nth-of-type(even) {
    background-color: #FFD700 !important;
}


.wp-block-columns {
    border-left: 1px solid #cccccc;
    border-right: 1px solid #cccccc;
    border-bottom: 1px solid #cccccc;
    padding: 10px;
}


.wp-block-columns:first-of-type {
    border-top: 1px solid #cccccc;
}
Click the “Publish” button when the code is added.
Move back to the form editing page. In the Heading, we add the question (“Please rate the following aspects:”).
Then we need to add three parameters and five options to select (“Poor”, “Could be better”, “Neutral”, “Good”, “Excellent”). For that, we add six Columns. Starting from the second column, we put the options’ names in the Paragraphs.
Below, we add four more columns for two sections, and in the first section, we add the parameters that are expected to be evaluated.

Now, we need to add the Radio Field. Leave the LABEL empty and manually enter five options, adding numbers in the VALUE field.

We need as many options in the field as we have added options to select (“Poor”, “Could be better”, “Neutral”, “Good”, “Excellent”). Once you have added all the options, click the “Update” button.
Now we need to add three more of the same Radio Fields (or we can simply duplicate them). When duplicating, ensure that the fields have unique names.

To add a new page, we add a new Form Page Break Field. Here, we add a Checkbox Field with the “Would you like us to follow up with you?” question. Among the options, we add “yes” and “no” answers.
If the user selects the “yes” option, another Text Field for their email address should appear. For that, we put the Text Field inside the Conditional Block. The “In the list” option should be used for the OPERATOR when the Checkbox Field options are used in the VALUE input.

Click the “Update” button once you are ready.
Add one more Form Page Break Field. This page will be the last one, so we will add the Textarea Field with the “Any final comments or suggestions?” question here.

Then, add the Action Button and the last Form Page Break Field.
Adjust the Post Submit Action
Now, proceed to the JetForm tab and scroll to the Post Submit Actions. In this case, we add the Insert/Update Custom Content Type Item, Send Email, and keep the Save Form Record actions.
To add a new CCT Item, set up the CONTENT TYPE, ITEM STATUS, and adjust the FIELDS MAP in the Edit Insert/Update Custom Content Type Item pop-up. Click the “Update” button once you are ready.

The follow-up email should only be sent when the user agrees, selecting the “yes” option in the Checkbox Field. In the Edit Send Email pop-up, we select the “Email from submitted form field” in the MAIL TO field. In the FORM FIELD dropdown, the needed email field is selected. The CONTENT should also be set. Click the “Update” button.

Then, proceed to the Post-Submit Actions Conditions settings for the Send Email action. In the Fields comparison tab, click the “Add New Condition” button. In the OPERATOR field, select the “In the list” option and the needed field in the FIELD input. The TYPE TRANSFORM COMPARING VALUE we leave empty. For the VALUE TO COMPARE, we put the “yes” option. Click the “Update” button.

Change the messages
Additionally, we modify the messages displayed after the form is submitted. For that, proceed to the General Messages Settings section and type the desired text into the FORM SUCCESSFULLY SUBMITTED and SUBMIT FAILED fields (in this tutorial, we used the “Thanks for your feedback! We truly appreciate your time.” and “Oh no, something went wrong… Try again” messages).

Once you are ready with the settings, click the “Publish” button.
Add the Form to the Page
Following the How to Display a Form on the Front End guide, we add the created form to the necessary page.

Click the “Publish” button once you are ready with the settings.
Add the Feedback List to the Page
If you need to display all the feedback you receive, you can create a listing template for the CCT.

Publish it, then proceed to the necessary page and add it using the Listing Grid widget.

Click the “Publish” button once you are ready with the setup.
Check the Result
Let’s proceed to the front end and check if the form works correctly.
On the front page, the feedback form and the feedback list are displayed.

It is also clear that when the “Website” option is selected in the What are you giving feedback on? field, no other fields are displayed. But if we select the “Other” option, the Text Field appears.

On the next page, when the Range Field has a value selected less than “3”, the “Sorry to hear that. What could we improve?” field is displayed.

When we change the value to “8”, for example, the “That’s great! What did you like most?” becomes visible.

On the next page, we can fill in the Textarea Fields and choose an option from the Radio Field.

The Likert scale is presented on the following page.

Then, the user can select whether they want to receive follow-up emails. If the “yes” option is checked, the extra field for the email is opened.

And finally, users can enter comments in the Textarea Field and submit the form.

When the form is submitted, the custom message is displayed, and the feedback response is added to the list.

That’s it. Now, you know how to create a conversational form for collecting feedback using the WordPress JetFormBuilder plugin.
The post How to Create a Conversational Form? appeared first on FormBuilder.
]]>The post How to Enable Klarna, SEPA, Sofort, and Other Extra Payment Methods in Stripe appeared first on FormBuilder.
]]>In this article, we focus on adding the Klarna payment method as an example. Klarna is one of the most popular Buy Now, Pay Later (BNPL) options available in Europe. You can also enable other popular payment methods supported by Stripe, such as Afterpay/Clearpay, Affirm, and Giropay, depending on your country and Stripe account settings.
For instance, users in the USA can enable Affirm, Afterpay, or Cash App Pay; those in Germany can add Klarna, Giropay, Sofort, SEPA, or PayPal; while in the UK, popular choices include Klarna, Afterpay/Clearpay, and Pay by Bank. You can add any payment method available in Stripe that is accepted in your country.
Table of Contents:
- Connect Stripe Payments
- Add the Code
- Connect the Method
- Set Up the Form
- Add the Form to the Page
- Check the Result
Connect Stripe Payments
First, install and activate the Stripe Payments & Subscriptions add-on. Refer to the Stripe Payments & Subscriptions guide to learn how to set up integration between Stripe and JetFormBuilder correctly.
Navigate to the WordPress Dashboard > JetFormBuilder > Settings > Payments Gateways tab and turn the Enable Gateways toggle on.
Unfold the Stripe Gateway API tab. Here, you can enter the Public Key and Secret Key copied from the Stripe website and “Save” them to use in the JetFormBuilder forms further.

Add the Code
To enable additional payment methods, the custom code should be added to the functions.php file of the child theme or the Code Snippets plugin. Use the following code on the site:
<?php
add_filter(
    'jet-form-builder/stripe/payment-methods',
    function( $methods ) {
        return array('klarna');
    },
    10
);
Instead of “klarna,” use any needed payment method.

Click the “Save and Activate” button once you are ready.
Connect the Method
Ensure that the required payment methods are listed in the Create a Payment Method guide. Methods mentioned only on the Stripe site can be integrated with JetFormBuilder forms.
Then, in your Stripe account, navigate to Settings > Payments > Payment methods and ensure that the required payment method is enabled.

Set Up the Form
Proceed to setting up a form. For that, we navigate to WordPress Dashboard > JetFormBuilder > Add New Form.
Enter the form’s title — in this case, it is “Extra Methods in Stripe”.
The Welcome block appears by default. From here, you can select a form pattern or generate a form with OpenAI. Otherwise, you can hit the “Start from scratch” button and use the three fields added by default; otherwise, you can delete them to begin anew.
In this case, we built our form following the Stripe Payment Form with JetFormBuilder PRO Addon guide.

Proceed to the JetForm settings tab and open the Gateways Settings. Enable the “Stripe Checkout” option.

Click the “Edit” button. In the newly opened Edit Stripe Checkout Settings pop-up, enable the Use Global Settings toggle.

So the PUBLIC KEY and SECRET KEY are added automatically. Enter the needed CURRENCY CODE and ensure that it is supported by the payment method you use. Choose the needed field for the PRICE/AMOUNT FIELD.
You can change the PAYMENT SUCCESS or PAYMENT FAILED MESSAGES if needed. Then, click the “Update” button.
Once you are ready, hit the “Publish” button.
Add the Form to the Page
Following the How to Display a Form on the Front End guide, we add the created form to the necessary page.

Click the “Publish” button once you are ready with the settings.
Check the Result
Let’s proceed to the front end and fill in the form.

Once we click the “Proceed with Payment” button, we are redirected to the Stripe Checkout page, where we can choose whether to pay with Stripe or Klarna.

That’s it. Now you know how to add extra payment methods to your JetFormBuilder form on the WordPress site.
The post How to Enable Klarna, SEPA, Sofort, and Other Extra Payment Methods in Stripe appeared first on FormBuilder.
]]>The post How to Customize the Output Repeater in the Send Email Action appeared first on FormBuilder.
]]>Table of Contents:
- Display Repeater Field Items with Custom Output Format
- Display Post Titles from a Select Field Inside a Repeater in the “Send Email” Action
Display Repeater Field Items with Custom Output Format
You can customize how Repeater Field items are displayed in the “Send Email” action by applying a custom output format. This approach enables looping through repeater items and incorporating specific subfield values into the email content.
Add the code
First of all, proceed to the functions.php of your active child theme or Code Snippets (or similar plugin) and add the code from the following link: https://gist.github.com/Crocoblock/e79e8e13ce52aa0191839b9318a0a6e2

After adding the code, click the “Save and Activate” button.
Set up the form
Let’s proceed to creating a form. To build a WordPress form, we navigate to WordPress Dashboard > JetFormBuilder > Add New Form.
Enter the form’s title – in this case, it is “Get Repeater in Email”.
The Welcome block appears by default. From here, you can select a form pattern or generate a form with OpenAI. Otherwise, you can hit the “Start from scratch” button and use the three fields added by default, or you can delete them to begin anew.
In this case, we used the “Contact” pattern and added a Repeater Field with a Text Field inside.

Proceed to the “Send Email” Post Submit Action and click the pencil-shaped edit button. In the CONTENT field, enter the following input:
%repeater_content(repeater_field|br)%
{item_count}: %text_field%
%repeater_content%
Here, the “repeater_field” is the name of the main Repeater Field, and the “text_field” is the name of the inner Repeater’s fields.

Click the “Update” button when ready, then publish the form.
Check the result
Following the How to Display a Form on the Front End guide, we add the created form to the necessary page. Then, proceed to the front-end page and submit the form.

As soon as the form is submitted, we receive an email containing the text entered in the Repeater Field.

The list of inputs from the Repeater Field is presented in the received email.
Display Post Titles from a Select Field Inside a Repeater in the “Send Email” Action
Here, we will focus on a bit different case: instead of the Text Field, the Select Field will be used in the Repeater Field. The aim is to display the selected options from the Select Field in the email sent by the form.
Set the code
Proceed to the functions.php of your site theme or Code Snippets (or similar plugin) and add the code from the following link: https://gist.github.com/Crocoblock/e79e8e13ce52aa0191839b9318a0a6e2

Click the “Save and Activate” button once you are ready.
Adjust the form
Proceed to the needed form and add the Select Field inside the Repeater Field. In this case, we selected the “Posts” source for the Select Field.

Proceed to the “Send Email” Post Submit Action and scroll down to the CONTENT field. Add the following input:
%repeater_content(repeater_field|,nl)%
%select_field|post_titles_by_ids%
%repeater_content%
Here, the “repeater_field” is the name of the Repeater Field, and the “select_field” is the name of the Select Field. Ensure that you are using the names of your fields.

Click the “Update” button and publish the form.
Result
Submit the form on the front-end page.

The result is that the email will contain the post titles you selected in the form.

That’s it. Now you know how to customize the Repeater Field’s output in email using the WordPress JetFormBuilder plugin.
The post How to Customize the Output Repeater in the Send Email Action appeared first on FormBuilder.
]]>