The post Swap Is Back: High RAM Prices Are Bringing Back an Old Technology appeared first on LowEndBox.
]]> When I started using Unix back before some LEB readers were born, configuring swap was crucial.
For those who might not know, swap is the use of a disk drive for RAM substitution. If you have a VPS with 1024MB of RAM and you have no swap, when you try allocate the 1025th MB of RAM, it’s going to fail. If you have some swap space, then the kernel will look for some RAM that isn’t in use. You may have some background processes (or even running processes) that have allocated RAM but aren’t using it at the moment or haven’t touched it in a while. The kernel will take those RAM pages and write their contents to disk, freeing the RAM. Then later if the process needs to access those pages, they’re read from disk and brought back into RAM.
I’m simplifying slightly, because there are actually a couple different flavors. “Paging” is the modern method of moving individual pages of RAM to disk, while “swapping” is an older technology that moved entire processes. But it’s the same idea.
All of this happens transparently, nut not without cost. Disk is at least an order of magnitude slower than RAM, so using swap is much slower than RAM. Additionally, it can introduce janky latencies in applications because at random times a memory fetch has to go to slower disk.
Swap was Dead
Back when a big server had 256MB of RAM, swap was crucial. Configuring it, sizing it, and monitoring it was part of sysadmin life. We all had monitors that alerted when swapping was happening.
But once RAM got into the multi-gigabyte range, swap became a lot less important. When a server is small, the core parts of the OS – kernel, background processes, etc. – take up a large part of the overall RAM. Let’s say they take 125MB. That’s half of RAM if your server has 256MB. But when your server has 8GB of RAM, it’s less than 2%.
In recent years, a lot of people just haven’t bothered. I’ve provisioned VMs that don’t have minimal swap and it rarely seems to be used.
But that was before the RAM price apocalypse.
Swap is Back
Now that memory prices are spiking, VPS plans may increasingly ship with stingier RAM, or the price of the plans may go up. This means we all may need to learn to live with swap again.
The good news is that instead of putting swap on old spinning hard drives, you’re putting it on NVMe, which is much faster. But it’s still not nearly as fast as RAM.
And the swapping technology itself is better. Modern Linux kernels use zswap, which compresses pages before writing them to disk. Sure, you need to uncompress them to use them, but most systems have extra CPU power to burn.
Long story short…you probably are going to need to shake the dust off your swap management skills.
Swap File vs Swap Partition
Historically Linux used swap partitions, but today swap files are usually better. Swap partitions have slightly less overhead and are always available early during boot, but they’re harder to resize, require the forethought to partition your disk for them, and you really shouldn’t need them at any point in the boot process.
Swapfiles are just a file, like /swapfile. They’re easy to create or resize and don’t require pre-planning with partitions.
How to Create Swap (Step-by-Step)
Here is a typical example creating a 2 GB swap file. All these commands assume you’re root.
First, create the file:
fallocate -l 2G /swapfile
Or:
dd if=/dev/zero of=/swapfile bs=1M count=2048
and then:
chmod 600 /swapfile
Next, format it as swap:
mkswap /swapfileFinally, enable it:
swapon /swapfile
You can use free(1) to check
# free -h
               total        used        free      shared  buff/cache   available
Mem:           3.8Gi       559Mi       3.2Gi       111Mi       512Mi       3.3Gi
Swap:          1.0Gi       706Mi       315Mi
Be sure to add an entry in /etc/fstabto enable at boot:
/swapfile none swap sw 0 0
Swappiness
In Linux, the swappiness parameter controls how aggressively the kernel moves pages from RAM to swap. Values range from 0 to 100.
| Value | Behavior |
|---|---|
| 0-10 | Avoid swap unless absolutely necessary |
| 10-30 | Good for most servers |
| 60 | Default kernel setting |
| 80+ | Aggressive swapping |
Most servers benefit from lowering swappiness.
You can check the current value by examining /proc:
cat /proc/sys/vm/swappiness
Default is usually 60.
To change it, use sysctl:
sysctl vm.swappiness=10
And to make this change permanent, edit /etc/sysctl.conf:
vm.swappiness = 10
And then apply it:
sysctl -p
Recommended Swap Sizes
This is really a black art and it all depends on what you’re doing. Here’s some good starting points:
| RAM | Swap |
|---|---|
| 1 GB | 1–2 GB |
| 2 GB | 2–4 GB |
| 4 GB | 2–4 GB |
| 8+ GB | 1–2 GB safety swap |
Not sure? 2GB.
The post Swap Is Back: High RAM Prices Are Bringing Back an Old Technology appeared first on LowEndBox.
]]>The post Are You Using All the Cloud Storage You’re Paying For? rclone Can Help You Use 100% for Backups! appeared first on LowEndBox.
]]> Do you subscribe to some kind of cloud storage? You’d be an outlier in 2026 if you don’t. Maybe you subscribe to a dedicated cloud storage platform like Dropbox or Google Drive. But you may also have other forms of cloud storage lying around that you’re not immediately thinking of.
For example,
- If you’re a Microsoft O365 subscriber, you’ve got 1TB of OneDrive. If you subscribe to family, that’s 5TB split over 5 accounts. I don’t personally use OneDrive in my personal life, so it’s sitting there unused.
- If you’re an Apple iCloud subscriber, you probably have 2TB or more.
- Even if you don’t explicitly subscribe to Google Drive for storage, you’ve got 15GB.
Etcetera.
rclone
I backup my data from one Synology to another locally. But I also backup most of it to the cloud in the event of a fire or other disaster. For this, I use rclone, which is a very flexible tool that speaks to the APIs provided by a huge variety of cloud providers.
I like Backblaze’s B2, but even though it’s dirt cheap, it can add up fast once you get into double-digit TBs. 10TB is $60/month. Dirt cheap in the grand scheme of things but still, a significant monthly budget item.
OTOH, I also subscribe to Dropbox, Microsoft O365, and Apple iCloud. Dropbox has been my main cloud storage since before competitors existed, O365 is really only for access to desktop apps, and iCloud because that’s how everyone in the family backs up their phones.
But looking at those accounts, I find:
- I’ve got about 1TB free on Dropbox.
- I use 2 of the 5 additional seats on my O365 account, leaving me 3 free accounts.
- I only use about 800GB of 2TB iCloud.
So that’s 5.2TB of space sitting unused. That means my monthly bill could be $30/month.
rclone speaks to all of these cloud storage APIs, so it’s just a question of configuring backups so various volumes/directories go to various destinations. For O365, it means creating 3 email accounts, which is trivial.
There are some quirks for each destination. For example, O365 moves deleted files to Trash, which you then have to manually clear out in the web interface. Even B2 has some quirks, such as needing to setup lifecycle rules. But to save $300+ a year, I’m willing to put up with a little hassle.
Of course, you might also have a storage VPS or other cloud storage destination. rclone supports those two (SFTP, etc.) It really is an amazing, flexible tool.
So make the most of your Big Tech spend! Leverage all of your cloud storage with rclone.
The post Are You Using All the Cloud Storage You’re Paying For? rclone Can Help You Use 100% for Backups! appeared first on LowEndBox.
]]>The post Do You Need PrepperDisk, the Off-The-Grid Raspberry Pi-Powered Reference Library? appeared first on LowEndBox.
]]> No doubt this is a reflection of the subs I browse, but I frequently see ads for the PrepperDisk.
The PrepperDisk – “Knowledge that Survives the Storm” – is a Raspberry Pi that has been kitted out with a few features:
- Local wi-fi router so you can connect to it with your phone, tablet, laptop, etc.
- Complete downloads of many freely available resources, such as Wikipedia, FEMA, various maps, etc.
- A zero-management, appliance model of presenting this information. You plug it in, connect with whatever client you want, and browse. You don’t need to be an engineer or computer wizard to use this device.
This idea is intriguing, though I think the utility is a little oversold.
Real World Disasters
Portland, Oregon is on a fault line and there will someday be an earthquake here. Let’s take that as a baseline scenario. If tomorrow there was a massive earthquake, the bridges would collapse, turning the city into various pockets of isolated areas that are only navigable by foot. Realistically, the citizenry would be on its own for some period of time until the arrival or FEMA and/or the United States Marine Corps (this is Portland, after all).
Now, keep in mind that the government has not fallen, nor have the North Koreans invaded. So while there will be a lot of short-term inconvenience, help is on the way from the start. You don’t need to know how to survive for decades, just long enough to be reconnected to society and your insurance adjuster.
There are many things you might need, ranging from food and water to emergency medical supplies to a good boomstick. But how much information do you need?
I’m not sure having 100% of Wikipedia will be all that helpful. Electricity will be out in all likelihood, as will natural gas, so you won’t need to repair those systems if they’ve broken. You’re not going to learn to fish from a book, and the real fishermen will swiftly decimate the local rivers anyway. There are some core survival skills that everyone should have, such as how to purify water and basic first aid, but I don’t think you need a massive library for that information.
Now, I’m not saying having info is useless. When I used to work downtown, I realized that if there was an earthquake, I would need to walk the 12 miles to my home, stopping at my daughter’s school on the way. Keeping a “go bag” at my desk, which included street maps, made a lot of sense, as did having a duplicate in my car’s trunk. The street maps were a useful information resource. But I would be hard pressed to name any other information resource I needed when I got home.
My core belief is that while more information is always good, when it comes to survival, you need the information well in advance and the preparations to go along with it.
Of course, depending on what scenario you’re planning for, keeping all this info on a relatively fragile consumer electronic device may not be ideal. There’s all sorts of environmental hazards, from floods to EMP, that could make this…well, it’s too light to be a brick but you get my point. And while SDs can last a long time, bit rot is real and eventually it’s going to fail.
Still…C’mon, It’s a Cool Idea
I have to admit, the kid-who-grew-up-in-1980s-survival-mania in me still thinks it’s a neat idea. All that information at your fingertips…
Having these kinds of resources may make more sense in a End of the World scenario, but so much of the information depends on preplanning and available supplies. You might know how to plant and raise corn, but you’re going to need good topsoil, seeds, tools, and cooperating weather to pull that off. Recognizing someone has a serious infection without a supply of antibiotics isn’t that useful. Etcetera. Still, I remember in all those “how to survive nuclear war” books I read in the 80s, there was always a list of books to have on hand.
I think scenarios that don’t involve desperate survival might be a better use case for this product. For example, you’ve rented a cabin and are staying there for a month, but there’s no cell signal and no Starlink. Having a catalog of documentation on major electric and plumbing systems, local mushrooms your dog might accidentally eat, recipes to prepare venison, etc. could be handy.
So do you need to spend $200 for one of these if you want this type of device.
Need? No. Nearly everything else on the PrepperDisk is publicly available (ready.gov, etc.). Their FAQ has a Q titled “Could I make my something like this on my own?” and kudos to them for answering it honestly. They point out some of their advantages:
- They include some licensed books that are not available for general download.
- They’ve spent time curating/smoothing out the information so maps, government docs, etc. are neatly organized.
- They’ve done the engineering on the case and testing everything.
So it’s like a lot of DIY scenarios: you can either spend money or your time.
Resources to check out if you want to DIY are Internet-in-a-Box, Kiwix and Rachel.
Pro Tip: this info source has a very limited life time unless you have solar power. I don’t mean your roof system, which may very well be damaged in a quake. I mean some sort of portable solar generation, like a solar-rechargeable USB battery. Granted, those are pretty cheap now so you should provision one if you go down this route.
Have you built something like this? Or do you own a PrepperDisk? Let us know your thoughts in the comments below!
The post Do You Need PrepperDisk, the Off-The-Grid Raspberry Pi-Powered Reference Library? appeared first on LowEndBox.
]]>The post Should You Run FreeBSD in 2026? Maybe, Maybe Not appeared first on LowEndBox.
]]> Linux dominates the VPS world, and for good reason. Debian, Ubuntu, Alma, and Rocky are everywhere, well-supported, and familiar. (And yes, you can run RedHat Enterprise for free under a dev license if you want to).
Linux has a number of big advantages, but it’s not the only OS on the planet. Besides Windows, there are also the BSDs: Free, Open, and Net. I won’t get into the last two, because honestly if you want to run either of those two, you’re already thoroughly immersed in the BSDverse.
But let’s talk FreeBSD for a moment. Should you run it? There are some pros and cons.
Pro: A Cohesive, Integrated Operating System
FreeBSD is developed as a complete operating system, not a kernel plus thousands of loosely coordinated userland projects. The base system is designed, documented, and versioned together.
This gives you several benefits:
- The documentation is excellent and thorough, in ways Linux honestly can only dream of.
- There is less “cascading change” effects. If one of the developers needs to make a change to a network utility, for example, they can also make changes to the kernel and other tools all at once to keep things consistent. This means that you’re not constantly changing firewall systems, network tools, etc. the way Linux historically has.
- There’s “one throat to choke” (the dev team’s) if something is broken. You don’t have the phenomenon of abandoned projects or code that gets less love and attention because that particular developer has lost interest. It’s all one grand codebase.
Pro: ZFS Is Still a Killer Feature
Yes, Linux has ZFS now, but FreeBSD’s ZFS integration remains best-in-class.
On FreeBSD, ZFS feels native because it is. Boot environments just work, and all the other benefits from ZFS (snapshots, replication, etc.) are just assumed.
So for storage-heavy VPS setups, backup nodes, etc. FreeBSD + ZFS is an excellent combination.
Con…or Pro? Semi-Pro?: Jails
Containers are everywhere, and FreeBSD doesn’t have Docker. But FreeBSD jails predate Docker by years.
Jails offer many if the same benefits, and have tight OS integration (once again, the OS assumes they exist and people will use them). Jail are “chroot” on steroids and feel a little “closer to the metal” than Docker, since you’re using the same kernel, whereas with Docker, you’e got more layers.
However, there such a huge number of people using Docker and so many Docker recipes that Jails can feel like you’re recreating things from scratch. No doubt, you can do many of the same things with Jails, it’s just that you don’t have reams and reams of tutorials with “docker pull” commands.
Con: Smaller Ecosystem
Pick any software you want to run on Linux and you can google a recipe that will show you step-by-step how to run it. Most people you talk to will run that software on Linux, and as a consequence, bugs on Linux will be fixed faster. There’s an order of magnitude more answers about Linux toics on StackOverflow, more tutorials, and more blog posts.
AI somewhat fills this gap, because it can show you how to install or configure something on FreeBSD as effortlessly as it can for Linux, but nevertheless, the mindshare and ecosystem is tons bigger on Linux that FreeBSD.
Con: Hardware and Software Gaps/Lags
FreeBSD hardware support lags behind Linux because there is a smaller army of developers working on drivers. Vendors who release their software routinely for Linux may not for FreeBSD.
Likewise, the ports/packages systems (FreeBSD’s analogue to apt, dnf, etc.) may have older versions, missing niche packages, and less robust testing.
Pro: Fight the Monoculture!
There was a time when the Unixverse was teeming with diversity. Today, it’s become largely a Linux landscape with many other Unices having fallen by the wayside. This is good and bad. Because Linux is a commodity, it makes adoption easy and usage widespread. However, it also means that there is less room for new ideas.
It’s easy to make the argument that once you learn the ps command on Linux, learning it with slightly different flags for BSD is a waste of time. And some of the Linux vs. BSD differences are purely “they chose this, we chose that” without any clear benefit of one over the other. Linux, of course, while SysV nominally, has a ton of BSD in it. Every Unix I’ve ever encountered is a blend of both family trees.
If I was setting up a new IT environment from scratch for a startup, it’d take a lot of convincing for me to chose something other than Linux or Windows for the server environment. But the joy of being a hobbyist is that you can choose and experiment with whatever you want. Maybe a FreeBSD VM is in your future? Why not give it a true? You might enjoy mixing demons with penguins in your LowEndEmpire.
The post Should You Run FreeBSD in 2026? Maybe, Maybe Not appeared first on LowEndBox.
]]>The post How to SSH in a Non-Permissive Environment (Behind an Unfriendly Firewall at Work or School) appeared first on LowEndBox.
]]> I think we’ve all been there. You’re at work or at school and you get a ping from a monitor you’ve got setup that one of your VPSes is having a problem.
Maybe disk is filling up or web sites aren’t responding. You want to jump in and quickly fix the issues…but you don’t have outbound SSH.
It’s great if you can switch networks to your phone’s hotspot, but that’s not always possible. If you don’t to wait until you get home (by which time you could have lost billions of dollars!), here are a few ways you can still connect.
Option 1: Use an SSH Web-Based Service
There are sites and services that make SSH available to you in your web browser. sshweb.com is one and googling “web ssh” will lead you to others. Since everything is going over port 443, as long as you can get to the web, you can use one of these services.
Be careful if you’re in one of those environments where your employer or educator puts an SSL cert on the browser and plays man-in-the-middle (aka “deep inspection”), in which case they’ll be able to read all of your SSH traffic.
Option 2: Host Your Own SSH Web-Based Service
This requires a little foresight, but you can host the same software that powers sshweb.com on a server of your choosing.
This may be better from the perspective of latency, and you can stand up as much redundancy as you wish.
Option 3: Your VM Provider’s Console
Most VM control panels come with console access. Connect to your provider and fire it up, and you’ll be looking at a login prompt. Once logging in, you can ssh from there to wherever you need to go.
One caveat is that in some cases, it’s VNC, which is a non-web connection that runs on a port which your unfriendly firewall may have blocked. But a lot of big providers offer web-based consoles.
Option 4: Spin Up a VM
I’m sure there are others, but if you go to Vultr and spin up a VM, you can immediately access it via console. Considering you only need their cheapest plan, you’d be paying $.005/hour as of this writing, and you can trash the VM as soon as you’re done. You might be able to fix your problem for less than one cent.
The post How to SSH in a Non-Permissive Environment (Behind an Unfriendly Firewall at Work or School) appeared first on LowEndBox.
]]>The post Hack the Urchin! What Are Those ‘utm’ URL Params Are All About Anyway, and How You Can Mess With Big Tech’s Mind appeared first on LowEndBox.
]]>
Urchin Analytics’ Pre-Google Logo
If you’ve ever looked at a web URL on social media, and in a lot of other places, you’ve seen links like these:
https://example.com/page?utm_source=twitter&utm_medium=social&utm_campaign=launch
What’s a “utm”?
If you don’t know, try to think of the strangest possible expansion of that acronym. 3…2…1…
It stands for “Urchin Tracking Module”. This sounds like some Orwellian big tech plot to tag the world’s poor, but in fact refers to Urchin Analytics. Urchin was a server log-based analytics system from the late 1990s that Google acquired in 2005. Urchin worked by adding query parameters to URLs, and then analyzing the web server logs. The product has since been renamed Google Analytics, but the Urchinisms live on.
Urchin was fine back when traffic was mostly full page reloads on every click, but in the era of single-page applications and JavaScript-heavy designs, it’s no long really sufficient. Eventually Google Analytics grew to incorporate more advanced tracking mechanisms, such as JavaScript page tags and cookies.
Fun fact: Until 2012, you could run your own self-hosted Urchin instances. After that, Google discontinued the software.
These URL params come from a less invasive time. They can’t track you personally, and they don’t add cookies by themselves. They really are only good for the site to answer questions like “how many hits did we get from our email campaign”.
The Param List
Here’s what each of the utm parameters mean:
-
utm_source – Where the traffic came from. For example “twitter” or “lowendbox”
-
utm_medium – How it came. For example “email”, “social”, etc.
- utm_campaign – Why it it came. Such as “black_friday”, “summer_sale”, etdc.
Less common:
-
utm_term – Keyword (mostly for paid search)
-
utm_content – Distinguish similar links (A/B tests, different buttons)
Fun and Games With URLs
You can always remove these tags. For example, if you ask ChatGPT for a link, it’ll add
https://example.com?utm_source=chatgpt.com
If you’re copying that link to something, you may not want to advertise the fact that it’s from AI.
But, of course, you can also modify them. For example, instead of
https://example.com/page?utm_source=twitter&utm_medium=social&utm_campaign=launch
why not
https://example.com/page?utm_source=whitehouse.gov&utm_medium=military&utm_campaign=mkultra
or
https://example.com/?utm_source=ouija_board&utm_medium=divine_intervention&utm_campaign=this_will_confuse_marketing
or
https://example.com/?utm_source=my_cat&utm_medium=misclick&utm_campaign=late_night_ideas
or if you want to show some love
https://example.com/page?utm_source=lowendbox.com
The post Hack the Urchin! What Are Those ‘utm’ URL Params Are All About Anyway, and How You Can Mess With Big Tech’s Mind appeared first on LowEndBox.
]]>The post Nyr’s Legendary Road Warrior Script: Still the Rock Solid Go-To for Easy VPN! appeared first on LowEndBox.
]]>I chose OpenVPN, admittedly because I’m familiar with it, but there is a WireGuard version as well.
In this tutorial, we’ll walk through setting up an OpenVPN server on a VPS you own, and then configuring Windows and macOS to connect to it.
I’ll be using a Debian 13 VPS on Vultr called vpn.lowend.party. The VPS you choose does not need hardly any RAM, so a small VPS is perfect. You should be able to get a VPN VPS for $15-20 a year. Or if you don’t need one for very long, pay by the hour at Vultr.
Setting Up the OpenVPN Server
GetNyr’s OpenVPN Road Warrior script and execute it:
wget https://git.io/vpn -O openvpn-install.sh && bash openvpn-install.sh
Now run it. You can take the defaults for most things. I’ll use Google’s DNS and name my VPN connection “vpn.lowend.party”. My responses are bolded.
Welcome to this OpenVPN road warrior installer!
I need to ask you a few questions before starting setup.
You can use the default options and just press enter if you are ok with them.

Which protocol do you want for OpenVPN connections?
   1) UDP (recommended)
   2) TCP
Protocol [1]: 1

What port do you want OpenVPN listening to?
Port [1194]: <return>

Select a DNS server for the clients:
   1) Default system resolvers
   2) Google
   3) 1.1.1.1
   4) OpenDNS
   5) Quad9
   6) Gcore
   7) AdGuard
   8) Specify custom resolvers
DNS [1]: 3

Finally, tell me a name for the client certificate.
Client name [client]: vpn.lowend.party

We are ready to set up your OpenVPN server now.
Press any key to continue...
After this, you’ll see a lot of text fly by as the script installs various packages and set up the VPN. Finally you’ll see:
Finished!
Your client configuration is available at: /root/client1.ovpn
If you want to add more clients, just run this script again!
Now look in your root directory:
root@vpn:~# ls -l /root
total 40
-rw-r--r-- 1 root root  8259 Dec  5 23:12 vpn_lowend_party.ovpn
-rw-r--r-- 1 root root 24962 Dec  5 23:09 openvpn-install.sh
That .ovpn file is what we need to configure on the client side. It is a text file. You can either scp it from your server, or just cat it (cat *.ovpn), copy the text, and paste it in a file on your client side. But make sure the file you save it as ends in .ovpn (not .txt).
Configuring Your Windows PC
To configure for Windows, we’ll use the official OpenVPN client. Go to OpenVPN.net and select the appropriate installer. We’re using Windows 10 in this example. Downloading the .exe and installing it is the usual next, next, next Windows process.
Once installed, either double-click the OpenVPN icon on your desktop or select it from the start menu.
![]()

You’ll get an error that there are no config files. Click OK.

Now find the OpenVPN GUI icon in your tray (lower right hand corner).
![]()
Right click and select “Import file…”

In the file selector, browse to the .ovpn file you copied from your VPN server.
Once you’ve clicked OK, you’ll get a message that it has been successfully imported:

Now right-click on the OpenVPN GUI icon in your tray again and select Connect:

You’ll get a notification that you’re connected:

And if you look in your tray, you’ll see the OpenVPN icon has now turned green:

At this point, if you go to something like What’s My IP, your browser will display the IP of your VPN server, not your home Internet, verifying that you’re VPN’d to your server.
To disconnect, right-click on the OpenVPN GUI and select Disconnect.

Configuring Your Mac (with Viscosity)
For Mac, I’m going to show you how to use SparkLab’s Viscosity, which is my favorite VPN client. It’s not free, so if you are looking for a free client, skip forward to the next section which uses an alternate client, Tunnelblick.
Installing Viscosity is the usual .dmg mount and click. Once it’s installed, run it from Applications. You’ll find a new icon (circle and padlock) on your menu bar:
![]()
Click it and select Preferences to setup your connection:

In the Preferences pane, hit the plus button in the lower left corner, and select Import Connection and then From File.

Browse to the .ovpn file you copied from your server earlier:

Once you’ve selected it and clicked OK, you’ll get a successful import message from Viscosity:

Click OK, then go back to your menu bar. Click the circle-and-padlock Viscosity icon again. your connection will show as “Disconnected”. Click it to connect.

After a moment, you’ll get a macOS notification that you’ve been connected:

At this point, if you go to something like What’s My IP, your browser will display the IP of your VPN server, not your home Internet, verifying that you’re VPN’d to your server.
To disconnect, click the Viscosity menu bar icon again and click on your connection name:

You’ll get a macOS notification that you’ve bene disconnected:

Configuring Your Mac (with Tunnelblick)
Tunnelblick is a free OpenVPN-compatible client for macOS. To obtain a copy, head over to tunnelblick.net. Installing it is the usual .dmg mount & click.
Once run, Tunnelblick will display its opening welcome:

Click “I have configuration files”. Tunnelblick will then tell you it doesn’t care. OK, not exactly, but it’ll tell you this isn’t the place to enter configuration files. Close the window.

In the menu bar, click the new Tunnelblick icon and select Add a VPN…

The Configurations pane that comes up. In Finder, browse to where you saved the .ovpn file, click it, and drag it to Configurations.

You’ll be asked if you want to install it for all users or just you. Make your choice:

Tunnelblick will then show it under Configurations. Close this window.
Back in your menu bar, click the Tunnelblick icon and select the Connect entry for your VPN:

After working for a bit, Tunnelblick will give you a nice bright green acknowledgement that you’re connected:
At this point, if you go to something like What’s My IP, your browser will display the IP of your VPN server, not your home Internet, verifying that you’re VPN’d to your server.
To disconnect, simply click the TunnelBlick menu bar icon again and click Disconnect:

The post Nyr’s Legendary Road Warrior Script: Still the Rock Solid Go-To for Easy VPN! appeared first on LowEndBox.
]]>The post Set Up Your Own Private Pastebin: Control Your Snippets and Secrets appeared first on LowEndBox.
]]> If you’ve ever relied on public pastebin services to share code snippets, logs, or sensitive configurations, you’ve probably worried about privacy and longevity. Public pastebins can delete content at any time, expose data to unwanted eyes, or fail to give you fine-grained control over who sees what. And what if they get hacked? Even if you’re anonymous, logs and other data could possibly trace things back to you. And if you’re stored anything sensitive there, they could be exposed.
The good news is that you can easily set up your own self-hosted Pastebin. That’s the LowEnd DIY way!
Advantages of Your Own Self-Hosted Pastebin
-
Security & Privacy: Your data stays in your environment, not a third-party service.
-
Customization: Add custom themes, logos, etc.
-
Longevity: Decide how long pastes live and what happens when they expire.
-
Integration: Tie it into internal systems, like issue trackers, or use it for logging and debugging. You control the backend so it’s easy to script things.
Choose a Self-Hosted Pastebin Project
There are several open-source pastebin projects available. A few popular ones include PrivateBin, Hastebin, and Pastey. For this guide, we’ll use PrivateBin because it only requires PHP and a web server.
Don’t feel like running your own server but still want your own PasteBin? Check out PikaPods where you can run a PrivateBin for only $1.20/month.
Step-by-Step Setup
Get a Low-Cost VPS
A basic VPS from providers featured on LowEndBox is more than enough. In this example I’ll use a spare 1GB/1 core VPS I have. You don’t need to dedicate an entire VPS to this, of course. I’ll use Debian 12 and my site is paste.lowend.party.
Install Dependencies
apt update && apt install -y nginx php-fpm unzipDownload and Configure PrivateBin
cd /var/www
wget https://github.com/PrivateBin/PrivateBin/archive/refs/tags/1.7.3.zip -O privatebin.zip
unzip privatebin.zip
mv PrivateBin-1.7.3 privatebin
chown -R www-data:www-data privatebin
Set Up Nginx
Create a new site config in /etc/nginx/sites-available/paste.lowend.party:
server {
    listen 80;
    server_name paste.lowend.party;

    root /var/www/privatebin;
    index index.php;

    location / {
        try_files $uri /index.php;
    }

    location ~ \.php$ {
        include snippets/fastcgi-php.conf;
        fastcgi_pass unix:/var/run/php/php8.2-fpm.sock;
    }
}
Enable the site and reload:
ln -s /etc/nginx/sites-available/paste.lowend.party /etc/nginx/sites-enabled/
systemctl restart nginx
Secure with SSL
Use Let’s Encrypt for free HTTPS:
apt install certbot python3-certbot-nginx
certbot --nginx -d paste.lowend.party
Success!
Here’s what it looks like:

If you look at the top, you can see some of PrivateBin’s cool features:
-
Password-Protect Pastes: PrivateBin supports optional passwords.
-
Expire Pastes: Configure default expiration times in cfg/conf.php.
-
Burn After Reading: SnapChat for your pastes
- Formats: supports plain text, source code, and Markdown
The post Set Up Your Own Private Pastebin: Control Your Snippets and Secrets appeared first on LowEndBox.
]]>The post Knock, Knock: How to Shield Your VPS From Port Scanning with Port Knocking appeared first on LowEndBox.
]]> Exposing port 22 to the internet invites bots and brute-force attacks. One approach is to change your SSH port, which is simple enough. This doesn’t improve your security per se in the sense that anyone scanning your specific box will still find your SSH port, but for hackers scanning entire net blocks for any IP that answers on port 22, you’ll be effectively invisible.
However, changing the port is not always desirable. You may have scripts or automation that expects port 22. Or you may just be philosophically opposed to “security by obscurity,” even in this one not-quite-that case.
One approach is to use Fail2Ban which will ban a client machine if it fails to login successfully to SSH after a certain number of attempts (which prevents brute force attacks).
Another approach is to implement port knocking, which adds a layer of security by blocking access to a port unless a specific action is taken. There are various ways to trigger this. For example:
- You have to send an email to the server, which is then processed by the system, and some script on the box opens the SSH port in the IP
- You have to change a certain web page which the box constantly scans
- You post a message in some kind of private chat (e.g., Telegram) which your server regularly checks for new messages
- You send a text to a certain number, and Twilio has some automation which alerts your server to open SSH for a certain port
etc. The possibilities are endless. The simplest solution is to implement firewall rules where you first have to “knock” on a secret port, and then your firewall unlocks SSH access for that IP.
Let’s show you how this is done.
Installing the Software
I’ll be using Debian 12 and we’ll pretend my client ID is 1.2.3.4. My knock port is 55025. There’s nothing special about that port number.
On Debian/Ubuntu:
apt update
apt install knockd iptables-persistent
If you want to use a RedHat-derived distro (Alma, Rocky, RHEL, etc.):
yum install epel-release
yum install knock knock-server iptables-services
Configure knockd
Edit the knockd config file:
vi /etc/knockd.conf
Paste this configuration:
[options]
        UseSyslog

[openSSH]
        sequence = 55025
        seq_timeout = 5
        command = /sbin/iptables -A INPUT -s %IP% -p tcp --dport 22 -j ACCEPT
        tcpflags = syn

[closeSSH]
        sequence = 55025,55025
        seq_timeout = 5
        command = /sbin/iptables -D INPUT -s %IP% -p tcp --dport 22 -j ACCEPT
        tcpflags = syn
What this does is to open port 22 with a single knock on port 55025, only for the IP that knocked. It will close port 22 after a double knock on port 55025. Under the covers the firewall is adding and removing a rule.
Lock down SSH by default
I’m assuming you don’t have any firewall rules. If you do, you’ll need to tweak to suit your needs.
Flush any existing rules:
iptables -F
Add a rule to block SSH (port 22) by default:
iptables -A INPUT -p tcp --dport 22 -j DROP
Allow everything else (tweak as needed):
iptables -A INPUT -m conntrack --ctstate ESTABLISHED,RELATED -j ACCEPT
iptables -A INPUT -p tcp --dport 80 -j ACCEPT
iptables -A INPUT -p tcp --dport 443 -j ACCEPT
iptables -A INPUT -i lo -j ACCEPT
Save your iptables rules. On Debian:
netfilter-persistent save
On RedHat-derived:
service iptables save # CentOS
Enable and start knockd
On Debian/Ubuntu (only):
Edit /etc/default/knockd and make this change:
START_KNOCKD=1
Then regardless of distro:
systemctl enable --now knockd
Setup Your Client Machine
Install the knock client:
On Debian/Ubuntu:
apt install knock
On macOS, install Homebrew and then:
brew install knockOn Windows, install the precompiled binary from the knock project: https://github.com/grongor/knock
Start Knockin’
Send the knock:
knock your-vps-ip 55025 # or knock.exe on Windows
Then try:
ssh your-user@your-vps-ip
You should now be able to connect via SSH.
Close the SSH Port When You’re Done
You can close the SSH access again with:
knock your-vps-ip 55025 55025 # or knock.exe on Windows
This triggers the closeSSH command in your knockd config.
The post Knock, Knock: How to Shield Your VPS From Port Scanning with Port Knocking appeared first on LowEndBox.
]]>The post What Happens When You Run a VPS with Zero Swap? appeared first on LowEndBox.
]]> For budget-conscious server admins, optimizing every MB of RAM and disk is second nature. But one setting that often flies under the radar—or gets intentionally left out—is swap space. You might ask: What happens if I just don’t have any swap at all? Do I really need it?
The answers are:
- Maybe nothing. Maybe disaster.
- It depends.
Why Would I Want a Flea Market, Anyway?
Swap space is disk-based virtual memory. That’s a fancy way of saying that when your VPS runs out of memory, the kernel will “swap out” some of the RAM you’re using to disk, freeing up memory.
For example, let’s say you’re on a 512MB VPS and you’re using 490MB. Now a new process starts which need 32MB. 490 + 32 = 522MB, which is more than what could fit it memory. The kernel will go through your RAM and find 10MB of RAM that hasn’t been accessed in a while and “swap” it out to disk.
That’s great – now your 512MB VPS can use 522MB. The only issue is that if some process needs to access that 10MB of RAM, it’s glacially slow. Instead of accessing at RAM speeds, you’re accessing at disk speeds. RAM speed is 10 to 100 nanoseconds. NVMe speed is 10 to 100 microseconds – 100x to 1000x slower. If you have SATA HDDs, it could be as much as 150,000x slower!
Usually, there are some background processes that are rarely accessed. In my experience, using a little swap is fine, but if you start to really lean into it, your system starts to crawl.
In theory you could have 32MB of RAM and 20TB of disk and have 20TB of virtual RAM. In practice, that would never work. Your kernel would spend all its time swapping with no time to do any actual work. That’s obviously an extreme example, but in general once you get to 2x RAM you’re probably getting in the danger zone.
Setting Up Swap
Often your server will come with swap pre-installed from whatever template the provider is using. Either there will be a dedicated swap partition:
# swapon -s
Filename     Type          Size     Used      Priority
/dev/md0     partition 16759804   303884            -2
Or there will be a swapfile:
# swapon -s
Filename     Type       Size      Used      Priority
/swapfile    file    2457596     20340            -2
If you have no swap, it’s easy to add:
# fallocate -l 1G /swapfile
# chmod 600 /swapfile
# mkswap /swapfile
# swapon /swapfile
Then add it to /etc/fstab for persistence:
/swapfile none swap sw 0 0So What Happens If You Have No Swap?
When you run a VPS with zero swap, here’s what you can expect.
If your VPS starts to exceed its available memory, the OOM (Out Of Memory) killer will start terminating processes to free up memory. There is a complex formula, that factors in how much memory a process is using, what its nice (priority) level is, and any custom adjustments you’ve added (in /proc/pid/oom_score_adj).
You can see a particular process’s oom score by looking at /proc/pid/oom_status. Lower scores mean a process is less likely to be killed. For example, on a Debian 12 server I have, the Nginx master process’s OOM score is 666.whereas my rtorrent process is 674. If push comes to shove, rtorrent will be killed first.
You can protect a process by doing something like this:
echo -1000 > /proc/pid/oom_score_adj
Or make it a higher priority for killing with this:
echo 1000 > /proc/pid/oom_score_adj
But really, if you’re at the point where you need to worry about OOM scores, you need more RAM or swap.
Running Without Swap
VPSes or servers without swap run just fine…until they don’t. Really what you’re losing is the cushion for bursting or unexpected load. And that may be just fine. If you’re running a small VPN server, for example, your memory footprint is extremely predictable. For a webserver handling a growing web site with variable demand, having some cushion would be very handy.
The post What Happens When You Run a VPS with Zero Swap? appeared first on LowEndBox.
]]>The post I Didn’t Know It Could Do That! Cool Google Sheets Tricks You Haven’t Seen Before appeared first on LowEndBox.
]]> I’m a big user of Google Sheets, the web-based spreadsheet. Although I use Excel at work (who doesn’t?), I prefer Sheets at home. It’s online, it’s easy to share with others, and it does everything I need. I’ve tried switching over to Apple’s Numbers, which has the unique ability to place multiple table-like spreadsheet blocks on a page, which eliminates the tedium of adjusting column sizes or getting into grid formats. But I keep coming back to Sheets. Habits die hard.
I find I’m still learning some of the things the app can do. Here are some of Sheets’ more obscure corners.
Percentages to Fractions
Recently, I was curious if it was possible to convert a percentage to a fraction. In other words, if cell A1 is “25%”, can cell B1 be a formula that displays “1/4”. And if A1 changes to 16.6%, have B1 change to “1/6,” etc. Can this be done?
Yup. Here’s B1:
=IF(A1="", "", TEXT(A1, "# ?/?"))
Example:

Pretty slick. The precision depends on how many question marks you use after the slash. As specified above, its’ limited to one-digit denominators. If we change the formula to:
=IF(A1="", "", TEXT(A1, "# ?/??"))
then we get more precision:

Mini Graphs
Google Sheets has all kinds of charts, but less well known are its mini graphs, called sparklines. These are mini line charts that fit in a single cell. Here’s an example:

When In Rome…
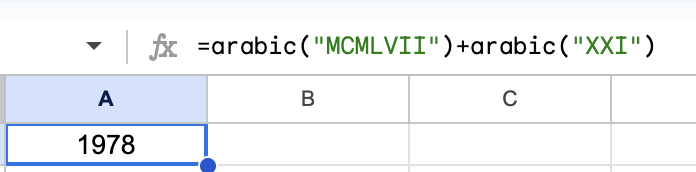
Arabic numerals are one of those technologies that should show up on the Civilization VII Tech Tree because they’re a huge step forward. If you disagree, try this experiment. Take two Roman numerals (for example, MCMLVII and XXI) and try to add them without mentally using Arabic numerals. If I tell you the numbers are 1957 and 21, you can do it in your head (1978), but I bet without Arabic numerals you’re going to be manually counting up or cheating.
However, Roman numerals are still useful. Maybe you’re looking at the copyright of an old movie, trying to sort Super Bowls, or trying to figure out which Leo is now Pope. Google Sheets has you covered with the ROMAN() function:

And if you want to go in the opposite direction:

And you can even solve that problem I posed:
The post I Didn’t Know It Could Do That! Cool Google Sheets Tricks You Haven’t Seen Before appeared first on LowEndBox.
]]>The post So How Exactly Do You Learn About Security Issues on Your VPS? appeared first on LowEndBox.
]]> If you’re a sysadmin – and if you’ve got a VPS, you are – how do you learn about new security threats?
If there’s another Heartbleed or Shellshock, you’d probably hear about it just from reading forums – or in the cases of issues that big, the mainstream news. But what if it’s something a little less dire? Might still affect you adversely.
With a galaxy of bad actors out there, how do you stay on top of security threats? Particularly if security is not your day job? If you work in a big company, there’s a phalanx of security professionals with industry subscriptions and vendors who alert them. But if you’re just Joe LowEnder with a Debian VM, you’re just as vulnerable without the seven-figure budget to stay on top of threats.
To do that, you need to…
Subscribe to the Appropriate Security Mailing Lists
Distros publish security alerts on email, explaining what the issue and how to rectify the problem. You really should be subscribed to the security announcement email list for your favorite distro. Here are some handy links:
Debian: debian-security-announce There’s also debian-security, which is discussion-oriented but sometimes is a little big ahead of formal announcements.
Ubuntu: ubuntu-security-announce
Alma: alma-security
Rocky: rocky-announce
Bonus Tip: Turn on Automatic Updates
This isn’t really “putting security on easy mode” as some people think. Security is something you should always be thinking about and there is no way to just wash your hands of it. But you can improve your posture by always applying the most recent updates. You can get them as soon as they’re published by enabling automatic updates:
Distros That Use apt (Debian, Ubuntu)
apt install unattended-upgrades
dpkg-reconfigure unattended-upgrades (and say Yes)
Distros That Use dnf (Alma, Rocky)
dnf install -y dnf-automatic
Edit /etc/dnf/automatic.conf and make sure apply_updates = yes
systemctl enable --now dnf-automatic.timer
The post So How Exactly Do You Learn About Security Issues on Your VPS? appeared first on LowEndBox.
]]>The post Running a Gopher Server on a VPS: Retro Internet with Modern Tools! appeared first on LowEndBox.
]]> Back before there was HTTP, much less HTTPS, there was an early menu-based protocol for sharing information called Gopher, which was described in RFC 1436. Developed at the University of Minnesota (whose mascot is the gopher), it was popular in the early 90s as a way of sharing information. There was a directory called Veronica, which was a sort of old school Google.
Unfortunately, in 1993 U-Minnesota made the catastrophic decision to announce that it would charge a licensing fee for its Gopher server. Use of the protocol precipitously cratered. The Web was coming on strong then, so mindshare moved to HTTP.
Fun fact: early web browsers like Mosaic supported the Gopher protocol using gopher:// URLs. Mozilla Firefox removed it in 2011, and Internet Explorer removed it after IE 6. Chrome and Safari never supported it.
The protocol still survives among hobbyists and retro-computing fans. Is there a need for it today? No. Anything you can do with Gopher you can do with HTTP. But people run FreeDOS, OpenBSD on SPARC, and FORTRAN-77 code, so why not spin up some Gopher for some retro computing fun?
Our Gopher Server
We’ll be using Debian 12 on a VM, and Gophernicus, which is a Gopher server in Debian’s apt repository. There’s also geomyidae but let’s be honest: Gophernicus is a lot cooler name. According to the project’s minimalist home page, Gophernicus is “a modern full-featured (and hopefully) secure gopher daemon”.
Installing Gophernicus
Couldn’t be easier:
apt update
apt install gophernicus
I’ll have a dedicated user own the content:
useradd -m gopher
Create Your Gopher Root
By default, Gophernicus serves content from /var/gopher. But Debian wants it to be in /srv/gopher. However, the apt package doesn’t actually create /srv/gopher.
You have two choices. If you want to use /srv, then:
# mkdir -p /srv/gopher
# chown -R gopher:gopher /srv/gopher
Or you can use the Gophernicus default:
# mkdir -p /var/gopher
# chown -R gopher:gopher /var/gopher
Now edit /etc/default gophernicus, as follows, adjusting your root if needed:
OPTIONS=-r /var/gopher -p 70 -h hostname.example.com
Those options are:
- -r: your gopher root where your gopher content will live, like a web root
- -p: port on which Gophernicus will run on. 70 is the default for the gopher protocol. (It was developed before HTTP, which is why the port is lower).
- -h: the hostname for your instance
-d (with no arguments) is another flag you could add if you want verbose debugging info in the logs.
I’ll be using /var/gopher so adjust below to /srv/gopher if you go that way.
Create Some Content
A gophermap is like an index page in a web directory.
Let’s put some starter content on our Gopher server:
cp /usr/share/doc/gophernicus/examples/gophermap.sample /var/gopher/gophermap
Firing Up Gophernicus
You can use inetd, or you can use systemd. I’ll use the latter because it’s 2025.
Create
/etc/systemd/system/gophernicus.service
with this, changing the -r flag to your gopher root if you’re using something different:
[Unit]
Description=Gophernicus Gopher Server
After=network.target

[Service]
ExecStart=/usr/sbin/gophernicus -r /var/gopher
User=gopher
Group=gopher
Restart=on-failure

[Install]
WantedBy=multi-user.target
You can look at the gophernicus man page to see other options. In my tests, if I put the -r option in /etc/default/gophernicus and not in the systemd unit file, Gophernicus threw a lot of errors. If I put it in the systemd unit file and not /etc/default/gophernicus, or in both places, it was happy.
Then:
sudo systemctl daemon-reload
sudo systemctl enable gophernicus
sudo systemctl start gophernicus
Open Up Port 70
If you’re using the UFW firewall:
ufw allow 70/tcp
Test It!
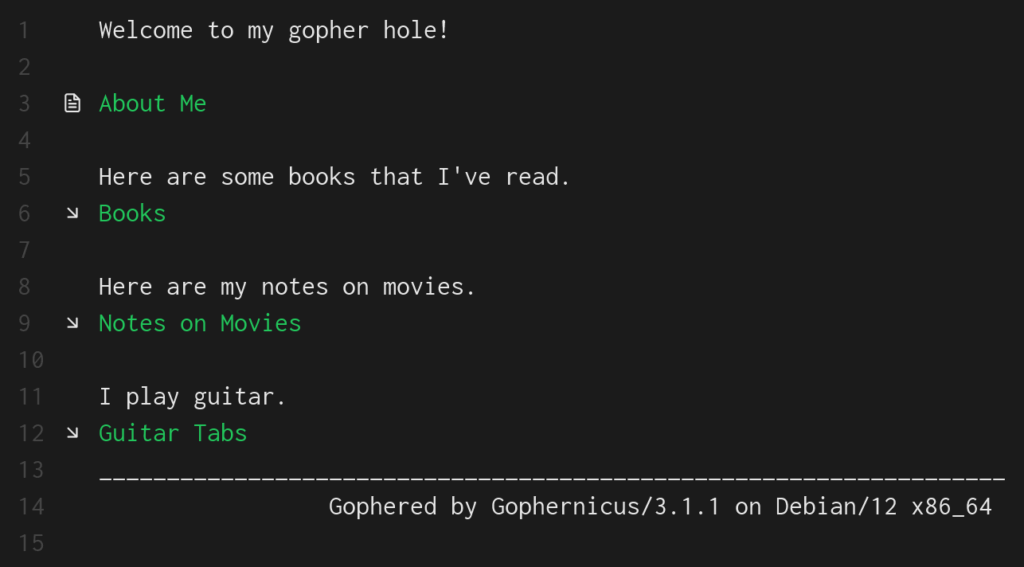
I’m using Gophie, which is a Gopher client that is available for Windows, Mac, and Linux. Here’s what it shows after I browse to my VM:

Sweet! Rockin’ like it’s 1991.
Making It Useful
If you open up that gophermap, you’ll see a lot of fancy tricks to display all kinds of info dynamically. But at its core, Gopher is sharing data in a hierarchical fashion. A lot of Gopher info is plain text.
A gophermap is like an index page in a web directory. Note that if you change your gophermap, you do not need to restart Gophernicus.
Let’s setup this structure:
f/var/gopher/
├── gophermap
├── about.txt
└── books/
└── books.txt
└── guitar/
└── tab1.txt
└── tab2.txt
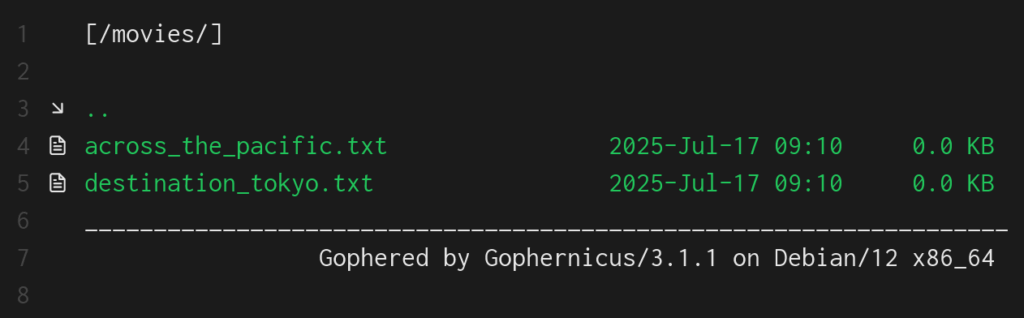
└── movies/
└── across_the_pacific.txt
└── destination_tokyo.txt
Edit this file:
/var/gopher/gophermap
and paste this:
Welcome to my gopher hole!
i<SPACE>
0About Me<TAB>about.txt
i<SPACE>
Here are some books that I've read.
1Books<TAB>books
i<SPACE>
Here are my notes on movies.
1Notes on Movies<TAB>movies
i<SPACE>
I play guitar.
1Guitar Tabs<TAB>guitar
Let’s break that down.
The format is:
[type_char][display_text]<TAB>[selector]<TAB>[host]<TAB>[port]
Not all fields are needed. Usually you can leave host and port off.
“i” as a type character means “informational message”. “1” is a directory.
So a line like this:
1Notes on Movies<TAB>movies
Means “create a display label saying ‘Notes on Movies'” and if the user clicks on it, go to the “movies” directory.
Let’s see it in action:
And if we click on “Notes on Movies”:
One interesting idea is to have scripts or jobs that drop files into your directories, providing daily reports or other information for you to browse to.
Where to Go From Here
We’ve only scratched the surface of what Gopher is capable of. To learn more:
- The README.gophermap in the Gophernicus Github has a lot of detailed info on what you can do with a Gopher server. You can offer archive files, images, binary files, dynamically produced content, and more.
- The sample gophermap also shows some neat ideas.
- RFC 1436 defines the Gopher protocol.
The post Running a Gopher Server on a VPS: Retro Internet with Modern Tools! appeared first on LowEndBox.
]]>The post Roll Your Own: How to Setup and Maintain a Minecraft Server on Your VPS appeared first on LowEndBox.
]]> In this tutorial, we’ll show you how to setup a Minecraft game server on a Ubuntu VPS. But we won’t stop at just starting the server but also will cover
- setting it up in systemd so it automatically starts/stops with the VPS boot
- securing your Minecraft server with whitelisting
- maintaining logs
- backing up your Minecraft server so you can roll back to earlier versions
Prepping the Server
I’m using a fresh Ubuntu 25.04 server with 2GB of RAM. As info, I’ve run a this size system (with Minecraft capped at 1.2GB of RAM) for 3-4 simultaneous players and have never had an issue. If you expect to host more players than that, you may want more RAM.
We’ll be using Ubuntu 25.04 because it ships with OpenJDK 21, which is the minimum for the current version of the Minecraft Java server as of this writing.
After imaging the VM, install the Java Runtime Environment required to run Minecraft, as well as wget on the off chance your particular Ubuntu setup doesn’t come with it:
apt -y install openjdk-25-jre-headless wget
There is no reason to run the Minecraft server as root, so we’ll create an unprivileged users called (cleverly) “minecraft”:
useradd -m -s /bin/bash minecraft && passwd minecraft
I’m going to setup things in /minecraft, so create that directory and make it owned by user minecraft. Then we’ll swich to the minecraft account:
mkdir /minecraft
chown minecraft:minecraft /minecraft
su - minecraft
Downloading the Minecraft Software
Visit the Minecraft server page and you should see a page like the one shown below. Make note of hte “Download minecraft_server_VERSION.jar” link and copy it. Because the server is periodically uploaded, you’ll need to copy the link from this page rather than copying it from this tutorial.
Now execute:
cd /minecraft
# replace this URL with one from the Minecraft server page
wget https://piston-data.mojang.com/v1/objects/6bce4ef400e4efaa63a13d5e6f6b500be969ef81/server.jar
Let’s tell the server we read the EULA so it doesn’t ask us:
echo "eula=TRUE" > /minecraft/eula.txt
Now we’ll create a couple start/stop scripts. Put hte following in /minecraft/server_start.sh:
#!/bin/bash
cd /minecraft
/usr/bin/java -Xms512M -Xmx1228M -jar server.jar nogui
Note the -Xms and X-mx parameters. Those are “minimum RAM for Java” and “maximum RAM for Java”. In this case, we’re saying “you get a minimum of 512MB and a maximum of 1228MB” (approximately 1.2GB). You should adjust these for your particular environment and needs.
Place the following in server_stop.sh:
#!/bin/bash
kill $(cat /minecraft/server.pid)
That command simply says “kill the process ID that the minecraft recorded as its process ID”.
Make both scripts executable:
chmod 755 /minecraft/start_server.sh
chmod 755 /minecraft/stop_server.sh
Then type “exit” to get out of your su session and go back to root.
Put the following in /etc/systemd/system/minecraft.service:
[Unit]
Description=Minecraft Server
After=network.target

[Service]
ExecStart=/minecraft/server_start.sh
ExecStop=/minecraft/server_stop.sh
Restart=always
PIDFile=/minecraft/server.pid
TimeoutStartSec=30
User=minecraft
Group=minecraft

[Install]
WantedBy=multi-user.target
Open the Minecraft port on your firewall:
ufw allow 25565
Now start the Minecraft server:
systemctl daemon-reload
systemctl start minecraft
After a few moments, a server.properties files and logs will be created in /minecraft.
Securing Minecraft
To prevent any random Internet user from joining your Minecraft, you can setup a whitelist so that only people you designate are allowed to join.
First, edit your /minecraft/server.properties file and change this line to true:
white-list=true
Next, gather the username and UUID from the players you want to join. Players can find their UUIDs via this guide.
https://www.minecraftforum.net/forums/support/java-edition-support/2392452-finding-your-uuid-using-your-minecraft-client
Next, edit /minecraft/whitelist.json and include those you wish to allow. Here is an example:
[
  {
    "uuid": "852d0812-f394-4cb8-91f4-fa5161ab0f3b",
    "name": "example1"
  },
  {
    "uuid": "ff042255-2be5-41b6-8404-f1899e3dcef5",
    "name": "example2"
  }
]
Now restart your Minecraft server:
systemctl restart minecraft
Maintaining Logs
The logs in /minecraft/logs will rotate automatically, so you don’t need to manage that. Over 3 months, I find that logs are a few MB at most. However if you want to prune old logs, you can add a job line this in your crontab. In this example, all logs older than 30 days will be removed every night at 1am. The MAILTO directive will send all output (both stdout and stderr) to that email address.
[email protected]
0 1 * * * find /minecraft/logs -type f -mtime +30 -exec rm -f {} ;
Backing Up Your Minecraft Server
The script below will backup your Minecraft server so that if something bad happens, you can roll back to an earlier day simply by removing /minecraft and replacing it with the contents of a backup tarball. It works by stopping Minecraft, creating a compressed tar of the /minecraft directory, and then restarting Minecraft.
First, create a backup directory:
mkdir /minecraft_backups
chown minecraft:minecraft /minecraft_backups
Then save this script as /minecraft_backups/backup_minecraft.sh. Update EMAIL to point to your email address and set DAYS_RETAIN to how many days back you want to save backups:
#!/bin/bash

[email protected]
DAYS_RETAIN=30

MINECRAFT_DIR=/minecraft
BACKUP_DIR=/minecraft_backups
LOG="/minecraft_backups/backup_minecraft.`date '+%Y%m%d'`.log"

echo "`date` starting" > $LOG
systemctl stop minecraft >> $LOG 2>&1
rc=$?
echo "`date` minecraft stop rc: $rc" >> $LOG
if [ $rc -ne 0 ] ; then
  echo "ERROR: could not stop minecraft!" >> $LOG
  mailx -s "backup minecraft failed" $EMAIL < $LOG
  exit 1
fi

tarfile="${BACKUP_DIR}/minecraft.`date '+%Y%m%d'`.tar.gz"
echo "`date` tarfile is $tarfile" >> $LOG
tar czf ${tarfile} ${MINECRAFT_DIR} >> $LOG 2>&1
ls -l ${tarfile} >> $LOG 2>&1

systemctl start minecraft >> $LOG 2>&1
rc=$?
echo "`date` minecraft start rc: $rc" >> $LOG
if [ $rc -ne 0 ] ; then
  echo "ERROR: could not start minecraft!" >> $LOG
  mailx -s "backup minecraft failed" $EMAIL < $LOG
  exit 1
fi

echo "`date` here are backup files to be removed:" >> $LOG
find ${BACKUP_DIR} -mtime +${DAYS_RETAIN} -print >> $LOG 2>&1
echo "`date` cleaning up files" >> $LOG
find ${BACKUP_DIR} -mtime +${DAYS_RETAIN} -exec rm -f {} ; >> $LOG 2>&1
echo "`date` finished" >> $LOG
Make it executable:
chmod 755 /minecraft_backups/backup_minecraft.sh
Here is an example of the log output from a backup:
$ cat /minecraft_backups/backup_minecraft.20200513.log
Wed 13 May 2020 02:00:01 AM PDT starting
Wed 13 May 2020 02:00:01 AM PDT minecraft stop rc: 0
Wed 13 May 2020 02:00:01 AM PDT tarfile is /minecraft_backups/minecraft.20200513.tar.gz
tar: Removing leading `/' from member names
-rw-r--r-- 1 root root 195796750 May 13 02:00 /minecraft_backups/minecraft.20200513.tar.gz
Wed 13 May 2020 02:00:08 AM PDT minecraft start rc: 0
Wed 13 May 2020 02:00:08 AM PDT here are files to be removed:
-rw-r--r-- 1 root root 195796630 Apr 12 02:00 /minecraft_backups/minecraft.20200412.tar.gz
Wed 13 May 2020 02:00:08 AM PDT cleaning up files
Wed 13 May 2020 02:00:08 AM PDT finished
To set this job to run automatically, put the following in your crontab.
0 2 * * * /minecraft_backups/backup_minecraft.sh
The post Roll Your Own: How to Setup and Maintain a Minecraft Server on Your VPS appeared first on LowEndBox.
]]>The post A Deep Dive Into Debian 13’s /tmp: What’s New, And What To Do If You Don’t Like It appeared first on LowEndBox.
]]> Debian 13 “Trixie” introduces an important change to /tmp. Traditionally, it’s been just another filesystem, albeit with some special permissions that allows everyone on the system to use it without being able to remove each other’s files.
In Trixie, it’s been moved off the disk into memory – specifically a type of memory called tmpfs. To quote the tmpfs man page:
The tmpfs facility allows the creation of filesystems whose contents reside in virtual memory. Since the files on such filesystems typically reside in RAM, file access is extremely fast.
They’re also extremely temporary…which is what you really want. There’s an old story about a user who was assigned to work on the Transportation Management Project. He logged into the server where he was supposed to store his work, saw the /tmp directory, found he could upload files there, and happily spent a couple months putting all his work there. Alas, when the server was rebooted…
Now that is undoubtedly an urban legend, but it illustrates the true nature of /tmp. It’s fine if you need a disposable log fine, a PHP session file, space for sorting something, etc. But you shouldn’t be storing anything there.
This isn’t a new thing in the Linux world. RedHat and its ilk have used tmps for /tmp for some time.
A more serious problem than people losing files is people who use too much /tmp. The system needs /tmp to do basic functions, so if it hits 100%, things will break. It’s really easy to think “I’m going to download and untar this big zip file into /tmp, and then I’ll remove it after I pull out the one file I need”…and forget to remove it. Now you’re hogging /tmp and over time, /tmp can be filled up with junk.
Debian 13’s tmpfs Comes With…Challenges. And Solutions
Now instead of filling up disk, you’re filling up memory. If you download a 300MB .zip file, expand it to 1GB, and forget it, now you’re chewing up 1GB of RAM. Ouch.
There are two mitigating factors. First, by default, Debian will only allocate a maximum of 50% of RAM to the tmpfs for /tmp. You can change this. To do so, type
systemctl edit tmp.mount
You’ll be popped into your editor (controlled by the EDITOR environment variable) with a form to update the settings. At the very bottom you’ll see a template, which you can copy and edit:
# [Mount]
# What=tmpfs
# Where=/tmp
# Type=tmpfs
# Options=mode=1777,strictatime,nosuid,nodev,size=50%%,nr_inodes=1m
Go back up to the part before the line “Edits below this comment will be discarded” and paste in something like this:
[Mount]
What=tmpfs
Where=/tmp
Type=tmpfs
Options=mode=1777,strictatime,nosuid,nodev,size=25%%,nr_inodes=1m
to change it to 25% or if you want a number:
[Mount]
What=tmpfs
Where=/tmp
Type=tmpfs
Options=mode=1777,strictatime,nosuid,nodev,size=1G,nr_inodes=1m
to change it to 1GB.
For example, I have a Debian 13 VPS with 4GB of RAM. After a fresh install, I see it’s using 2GB max for tmpfs:
# findmnt --target /tmp
TARGET SOURCE FSTYPE OPTIONS
/tmp   tmpfs  tmpfs  rw,nosuid,nodev,size=2007704k,nr_inodes=1048576,inode64
Note that this is a maximum. If there’s nothing in /tmp, /tmp does not use any memory.
After doing the systemctl edit, like this:

I get the message:

Before this change, /tmp was at 2GB (half of the 4GB RAM):
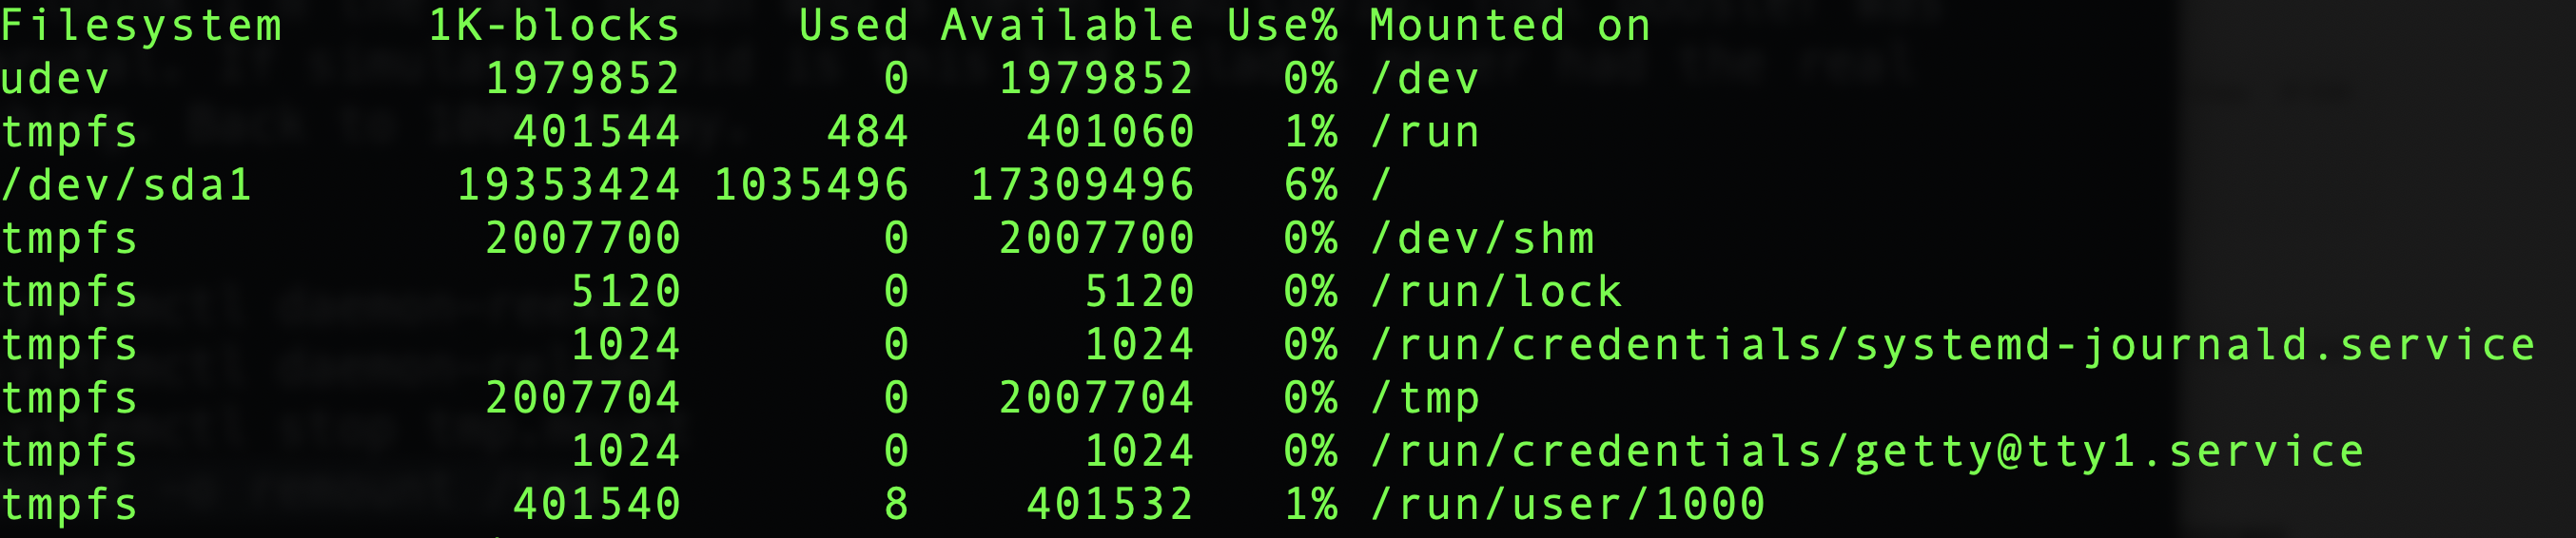
Now, after reloading systemd and restarting tmp.mount, I see /tmp is limited to 1GB:
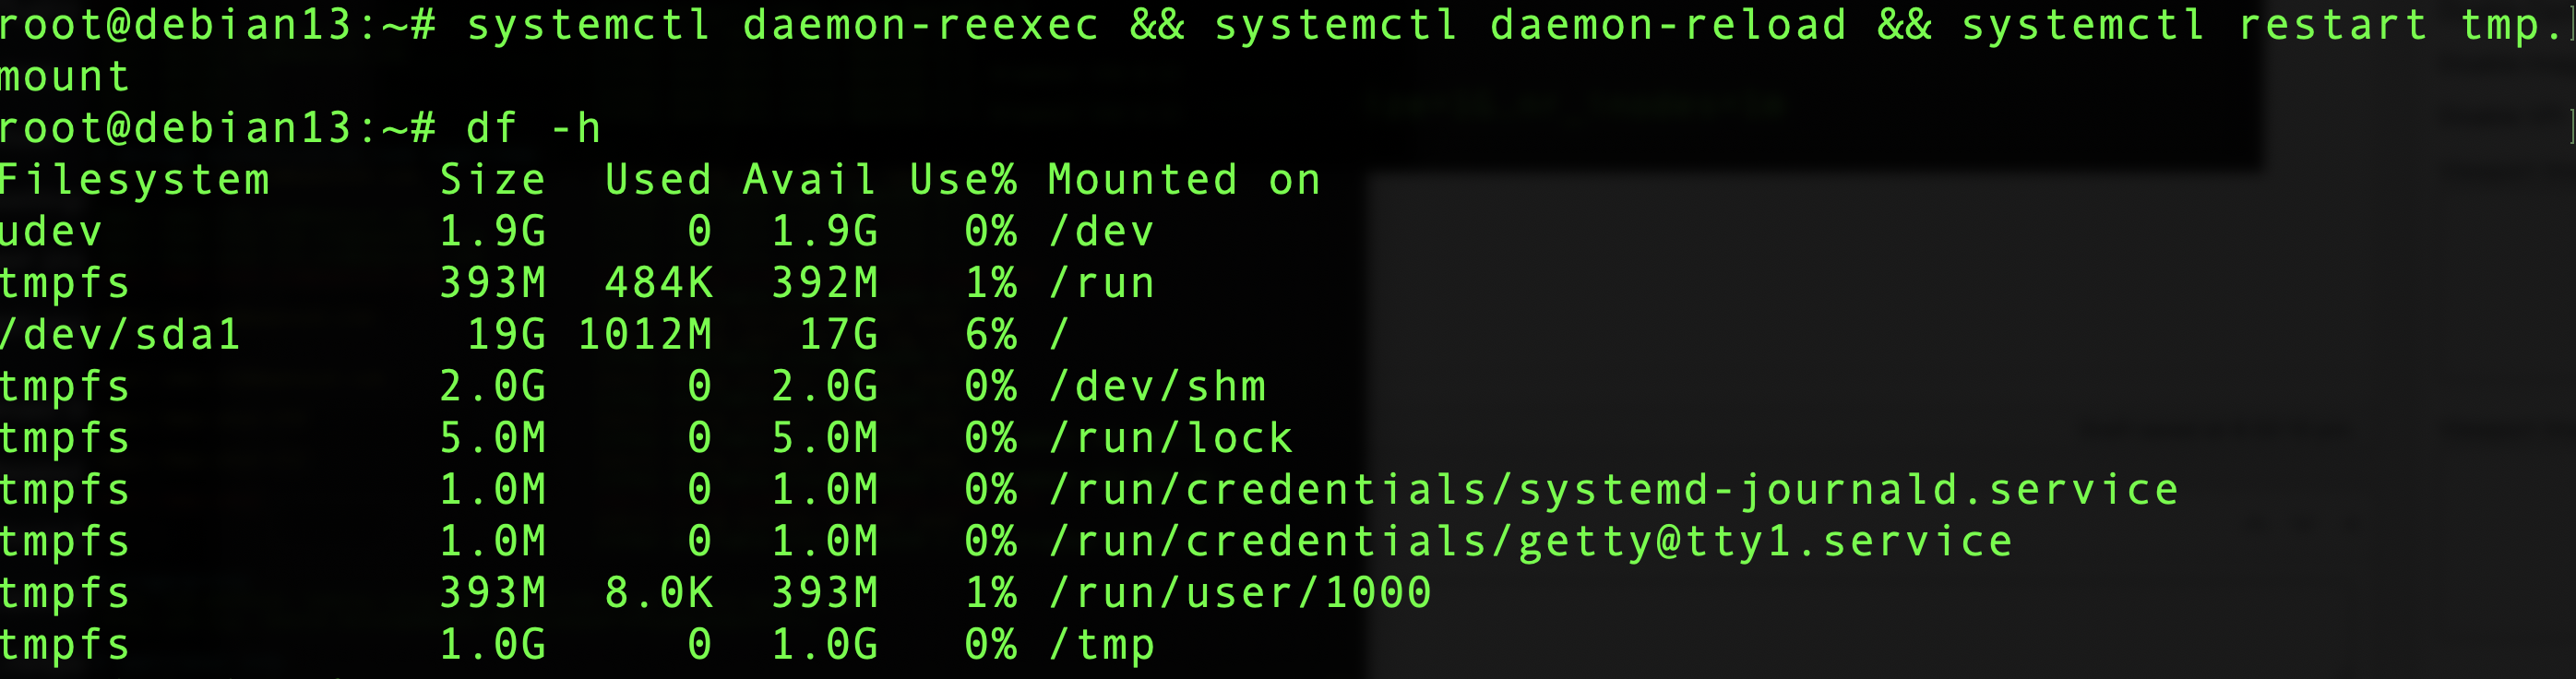
Cleanup
The second mitigating factor is that /tmp is now automatically cleaned up. Quoting the release notes:
The new default behavior is for files in
/tmpto be automatically deleted after 10 days from the time they were last used (as well as after a reboot). Files in/var/tmpare deleted after 30 days (but not deleted after a reboot).
You can modify these policies, exclude certain files (why? they’re temporary!), or even apply it to other directories. Consult the fine manual but I think for 99% of people, the defaults are just fine. I might be tempted to make the cleanup a little more aggressive, like 3 days.
Thinking in a LowEnd Context
One concern is for very low-memory systems. While 1GB has become the smallest VM for a lot of people, 512s are still sold. Allowing /tmp to consume 256MB out of 512 (which is really only 470-480 after the kernel and vital system processes are loaded) is a lot more impactful than consuming 256MB on a 10GB or 20GB filesystem.
Fortunately, opting out of the new tmpfs world is easy if you don’t like it:
systemctl mask tmp.mount
and reboot. I did that on the test box above:

Now I can put 17GB of junk there. Fortunately, it will be cleaned up as described above.
So how are you planning to handle Debian 13’s new tmpfs-based /tmp?
The post A Deep Dive Into Debian 13’s /tmp: What’s New, And What To Do If You Don’t Like It appeared first on LowEndBox.
]]>The post Run Your Own AI LLM Model on a LowEnd VPS for Only $2.49 a Month! Part One: Ollama and the Model appeared first on LowEndBox.
]]> Large Language Models (LLMs) have exploded in popularity, and typically they run in massive datacenters operated by tech giants. But here on LowEndBox, we’re all about democratizing computing. Is it possible to run your own AI on a cheap VPS?
Yes!
Now, to be clear, you can’t self-host a digital brain the size of ChatGPT or Claude. Those models have billions upon billions of parameters and require a lot of specialized compute (GPU) to run. Even something like Llama 3, which is a generation back from Meta’s latest model, is not going to be happy without a GPU, and consumer GPUs push prices outside the LowEnd realm.
So how can we run an LLM on a LowEnd VPS? Quantization.
What is Quantization?
Quantization is the process of reducing the precision of the numbers used to represent a neural network’s weights and activations. Most AI models are originally trained using float32 (32-bit floating-point numbers). These offer high precision but consume lots of memory and compute. Quantization shrinks this down to 8-bit, 4-bit, or even fewer bits, drastically reducing the model size.
So instead of 232 possible values per weight, you get 24, which is 16 possible values. This can radically shrink the size of models and hence the amount of RAM they use.
Of course, there’s a tradeoff. Because of the loss of precision, you lose subtlety in the language and weaker performance on complex tasks. Or to put it more simply, a 4-bit model is not going to be anywhere as good as a 32-bit model.
In this example, we’ll be using TinyLlama, which is a 1.1B-parameter 4-bit LLM model.
What Kind of VPS Do You Need?
I’m going to be using a RackNerd VPS with these specs:
- 3 vCPU Cores
- 60 GB Pure SSD Storage
- 3.5 GB RAM
- 5TB Monthly Transfer
- Only $29.89/YEAR!
That’s only $2.49/month which is a fantastic deal. You can GET YOUR OWN HERE. I placed mine in Los Angeles, CA but these are available in multiple datacenters in North America, including San Jose, Seattle, Chicago, Dallas, New York, Ashburn, and Toronto.
Setup
I’m using Debian 12 and Ollama, a tool for running LLMs.
Ollama is not in apt. You have a couple options.
Option #1: Install Script (recommended)
There’s a nice self-install script from Ollama. This will install the product and configure it to start at boot.
I recommend going this route. All you need to do is:
- Go to ollama.com
- Click Download in the upper right
- Select Linux
- Click the copy icon on the script and paste it into a root shell
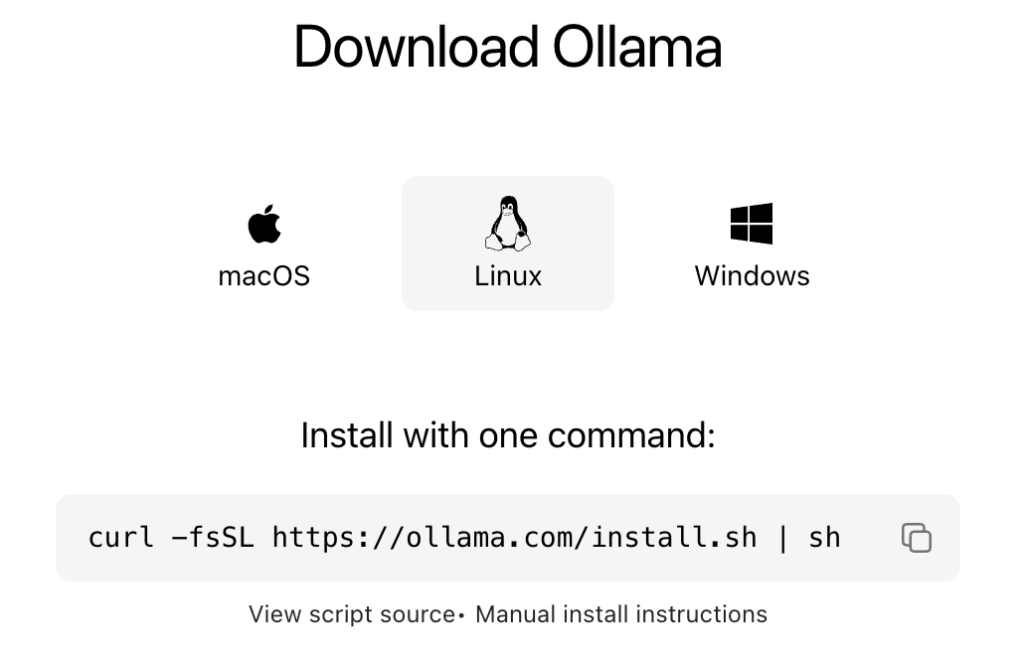
That will install Ollama, enable it, and start it.
Option #2: Homebrew Option
Ollama is in Homebrew. I initially went down this path but I’ve found Homebrew to be a bit awkward and buggy with Linux. It’s awesome on MacOS. But on Linux, it sets up a parallel systemd, and I kept running into errors and found others had the same experience. So again…almost mandatory for MacOS, but I prefer not to use it on Linux.
But if you want to try it out, perhaps your experience will be different (or perhaps I’m clueless).
To install Homebrew, visit brew.sh, copy the one-liner under “Install Homebrew,” and paste it in your Linux terminal. Homebrew will not mess with apt or your system package manager. You can have both Homebrew and apt running side by side with no issues. apt manages things it installs and Homebrew manages things it installs. My advice would be to use apt primarily, fill in anything missing with Homebrew, and don’t install the same packages with both.

Note: Homebrew will not install as root, so paste it in a non-root terminal. However, the user who’s installing Homebrew should have sudo capabilities. There are different ways to configure sudo, but the easiest is to install sudo (apt install sudo) and then add whatever user you’re using into the ‘sudo’ group in /etc/group.
Now install Ollama:
brew install ollama
Start Ollama:
brew services start ollama
Trying It Out
We need to get the TinyLlama LLM. Ollama makes this easy:
ollama pull tinyllama
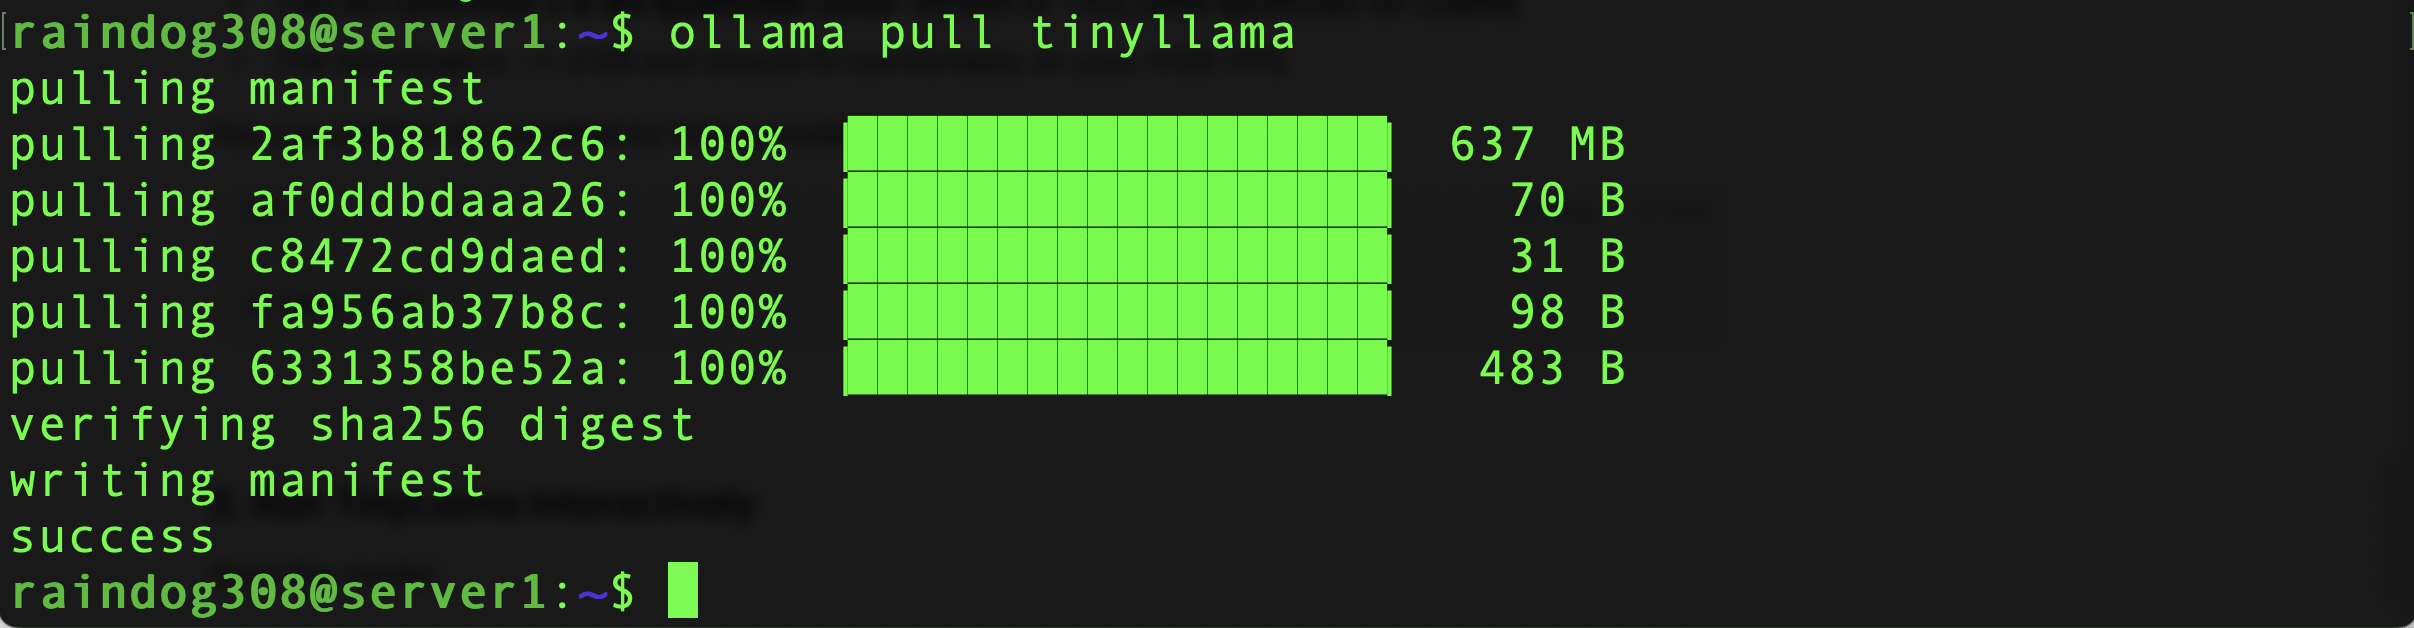
Now run it:
ollama run tinyllama
Here’s a video showing the experience of running a prompt. As you can see, it starts up quickly and output is pretty sprightly:
While this was running, the system was under heavy load:
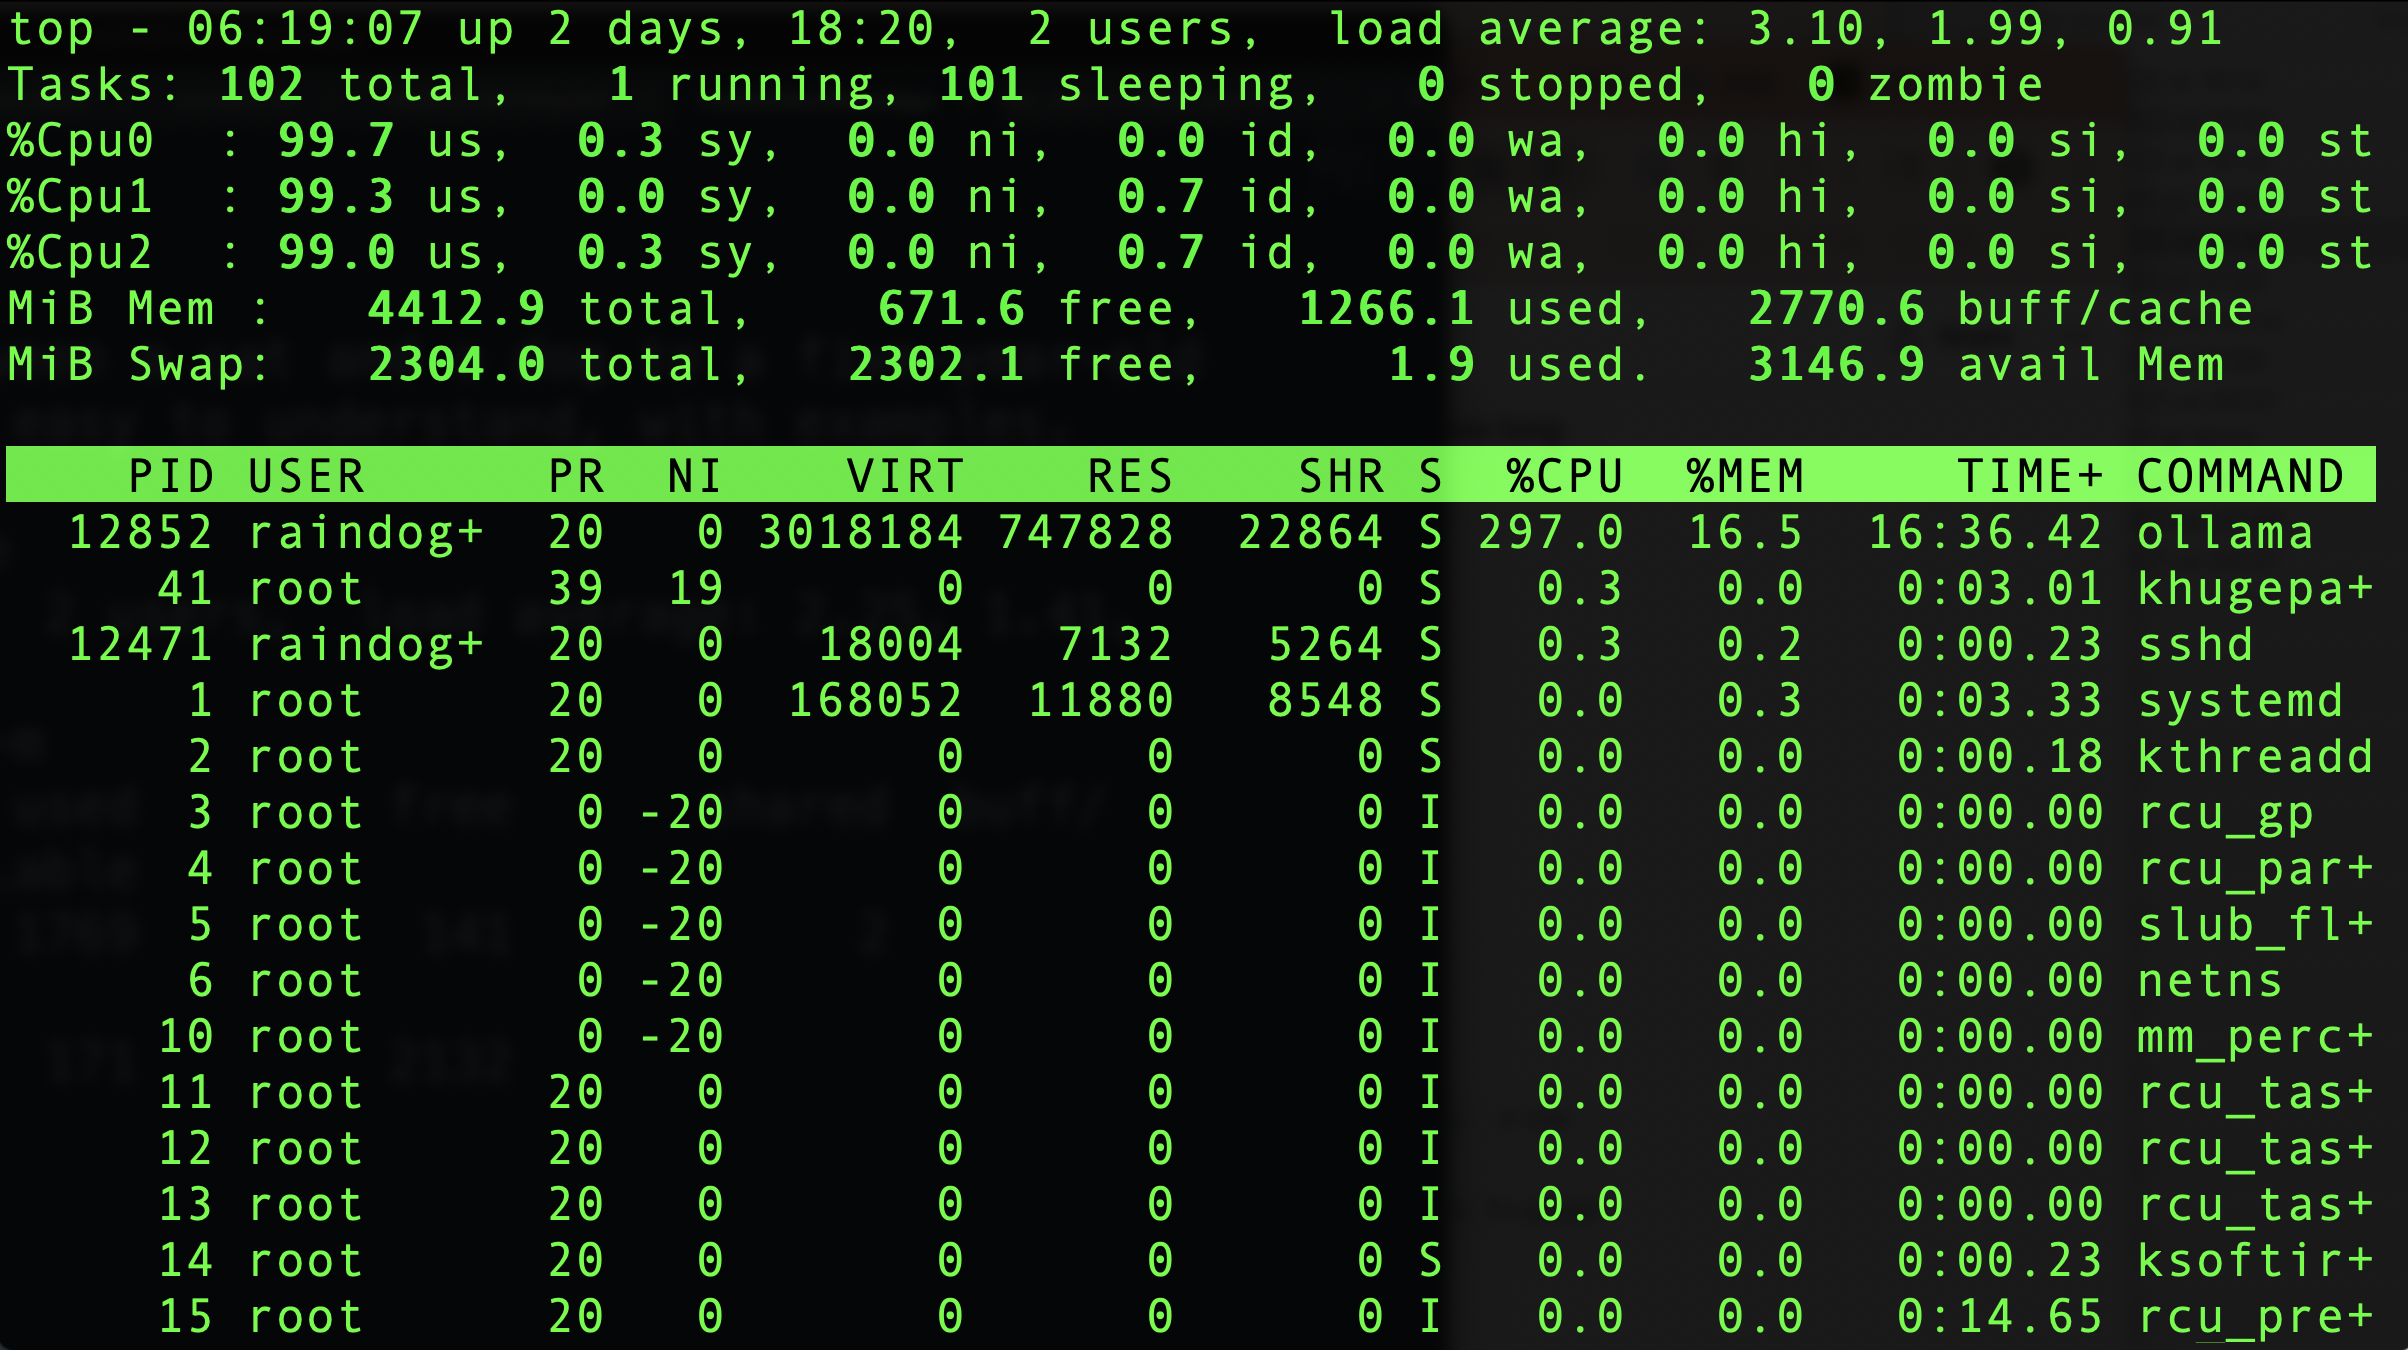
Still plenty of available RAM:

Now that we’ve got Ollama up and running, let’s turn this into a full-fledged web UI like ChatGPT. Stay tuned for part two!
The post Run Your Own AI LLM Model on a LowEnd VPS for Only $2.49 a Month! Part One: Ollama and the Model appeared first on LowEndBox.
]]>The post Tighten Up Your VPS With an SSH Audit! Let’s Look at the ssh-audit Package…Does OpenBSD Score Higher Than Debian? appeared first on LowEndBox.
]]> SSH is the de facto standard for connecting to a Linux or Unix system at the command-line. This Secure SHell protocol is surprisingly complicated under the hood.
When I started with Unix, we only had telnet, which was brain-dead simple. All it did was connected a tty given by the server to the client, and everything after that was handled by the OS. SSH does a lot more, because it needs to negotiate and properly encrypt the connection.
And while telnet is largely unchanged today, SSH evolves constantly. There’s no less than three different encryption components, and all of them are under constant cryptanalysis. What is considered a strong cipher today may be weak by the time you read this.
How can you stay on top of this? To some extent, you don’t have to. SSH is regularly patched and updated, though it’s likely that your particular distro’s SSH is a bit behind the latest release. For example, on Debian 12, the current version is 9.2, whereas OpenSSH 10 was released about 4 months ago. Nevertheless, the changing in and out of ciphers and algorithms (and more mundane bug squishing) happens routinely, so the SSH you run on your server today is probably quite different than the one you ran five years ago.
But if you want to go a step further, you can run ssh-audit.
First, let’s briefly discuss how SSH works.
How SSH Does What It Does
When your client opens a connection to a server (e.g., “ssh server.example.com”), the server responds with some basic info including the software version string. Then both parties discuss what they’re going to use for the following:
-
Key exchange algorithm (examples: curve25519-sha256, diffie-hellman-group14-sha256)
-
Encryption algorithm (examples: chacha20-poly1305, aes256)
-
Message authentication code (MAC) algorithm (examples: hmac-sha2-256, hmac-sha2-512)
-
Compression (on or off)
The server has a preferred list of these algorithms, and will start with its first choice and work down the list until it finds one the client also supports.
Once a key exchange (kex) algorithm is chosen, the server and client derive a shared session key (encryption algorithm) and MAC. These are then put in use, so from this point forward, the communication is encrypted, even though there’s been no authentication yet.
And that’s the next step. The server proves who it is through its host key, and the client either accepts this authentication or warns the user. Likewise, the user’s key (or passphrase) is used to authenticate the user.
Assuming everyone is who they say they are, client and server now begin exchanging encrypted packets, using the chosen encryption algorithm and validated with the chosen MAC.
All of this happens in the blink of an eye, but if you run ssh with -vv flag, you’ll see the complex procedure needed to establish a safe communication channel.
Audit!
Let’s take a look at ssh-audit. It’s available in apt, so just
apt update && apt -y install ssh-audit
You can run it by pointing it at an address. You probably want to point it at your server’s localhost:
ssh-audit 127.0.0.1
If you’ve changed SSH ports, then use the -p flag:
ssh-audit -p 2222 127.0.0.1
Here’s the output from a freshly updated Debian 12 system:
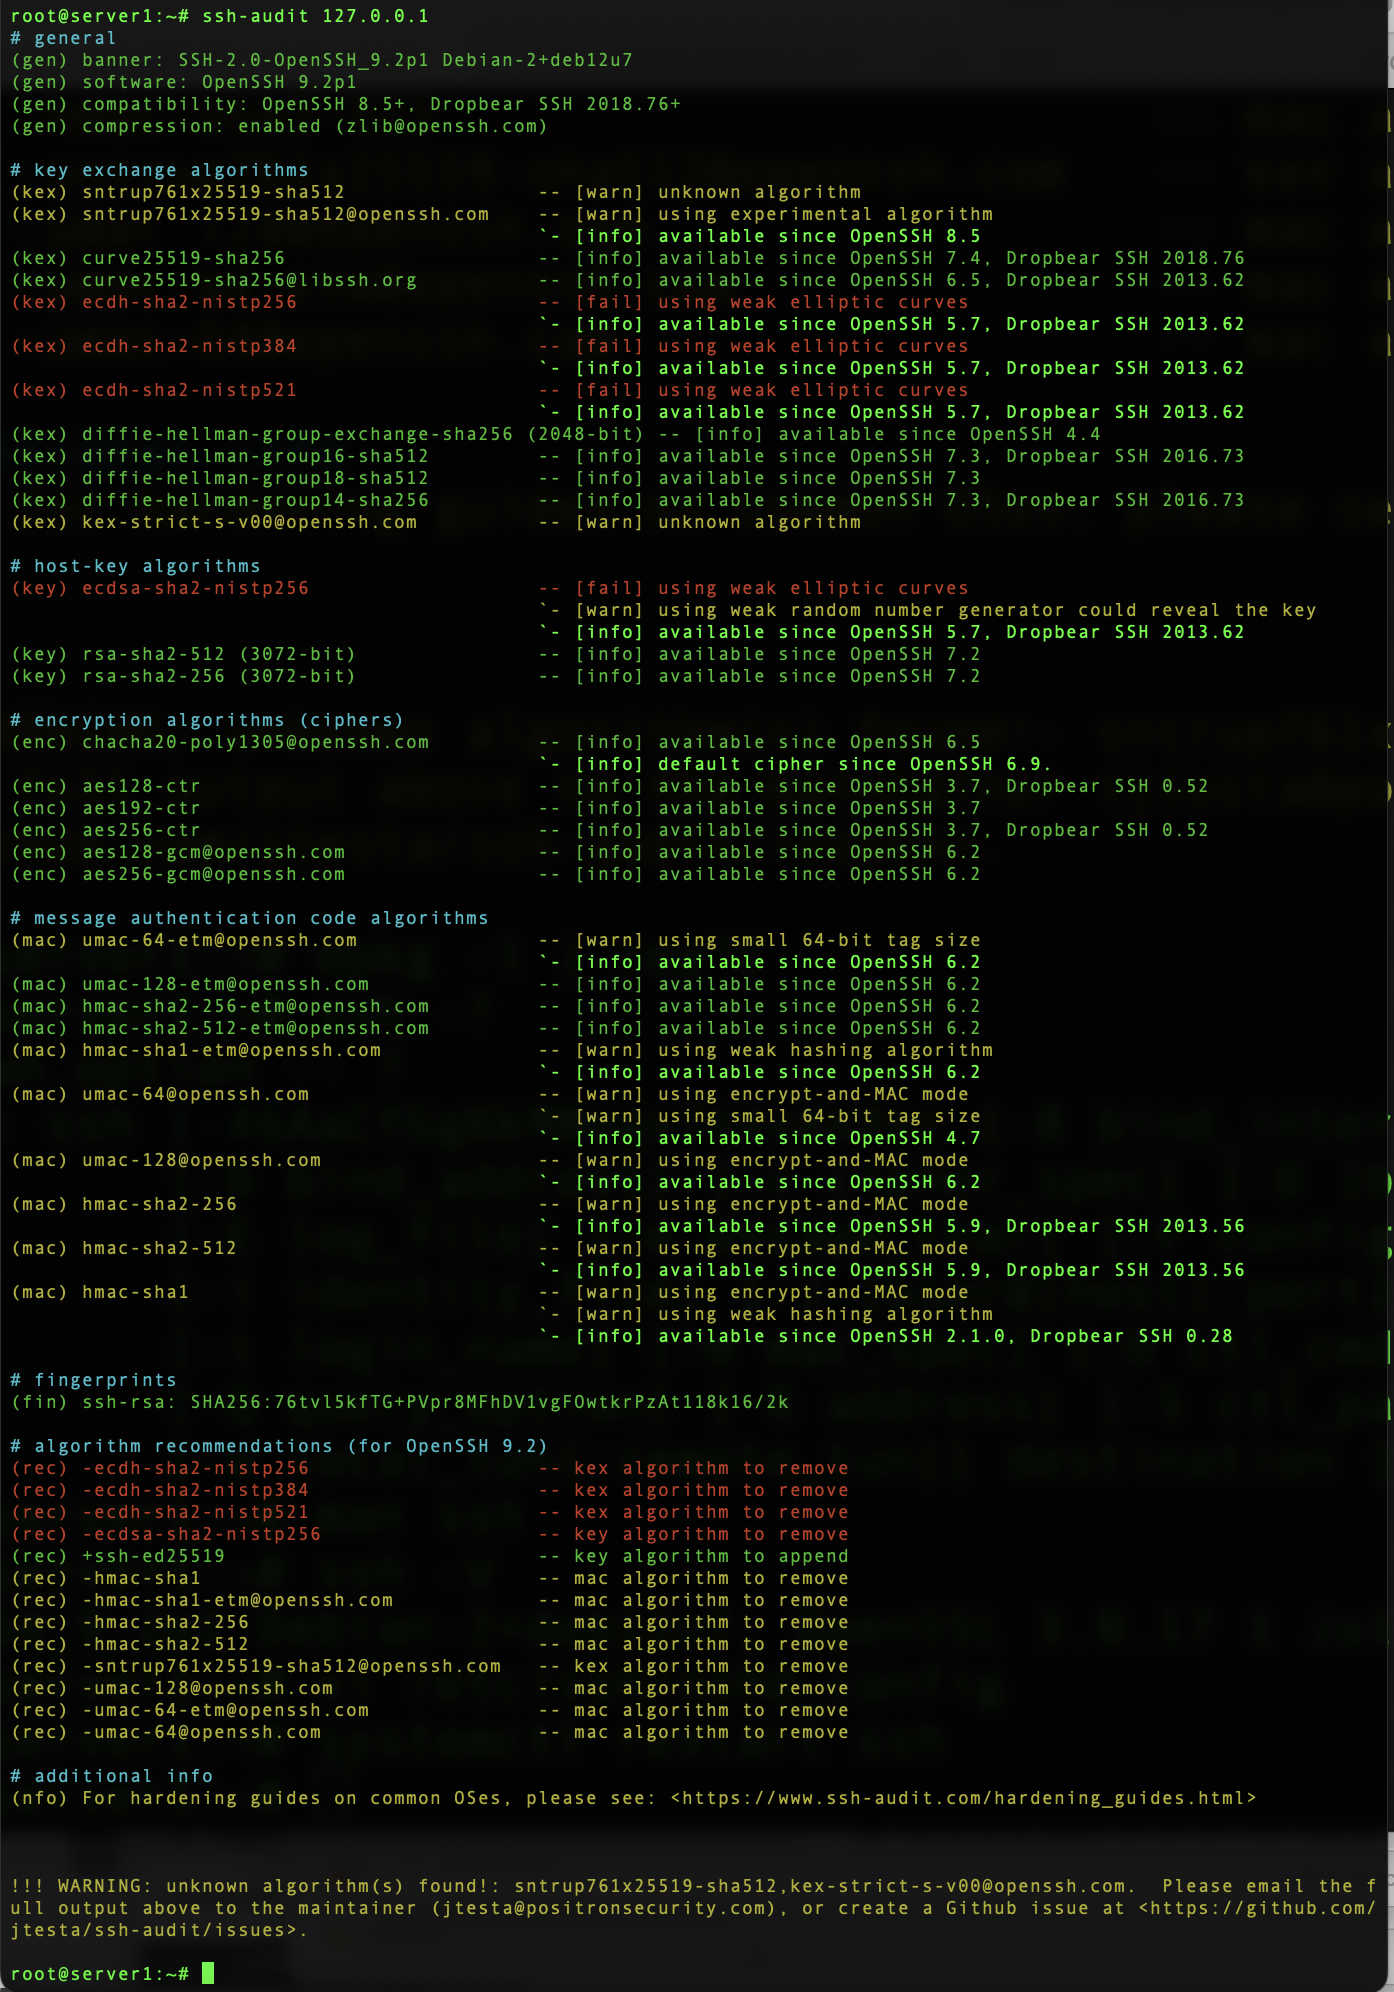
All that red! So what does this mean?
- There are some weak key exchange algorithms in use
- There’s a weak host key algorithm in use
Does this mean I’m going to be hacked!?!?
Not necessarily. A weak encryption algorithm doesn’t mean that it’s vulnerable, just that it’s not as strong as others. Cryptography is one of those fields where the subject matter is so complicated that best practice is to err way on the side of safety.
The cool thing is that you can go to the guide provided, click your OS, and it will give you the commands to fix all the problems. These involve regenerating keys using more secure ciphers, changing which keys are used, and restricting which algorithms are offered for use.
Also, you can implement improvements on the client side as well. If the client refuses to use weak algorithms, then the server won’t use them either. This is also covered in the guide.
I was curious how OpenBSD would perform, since OpenBSD is the home of the OpenSSH project. I fired up an OpenBSD 7.7, which was released on April 28, 2025 and includes OpenSSH 10.0. Here’s the report:
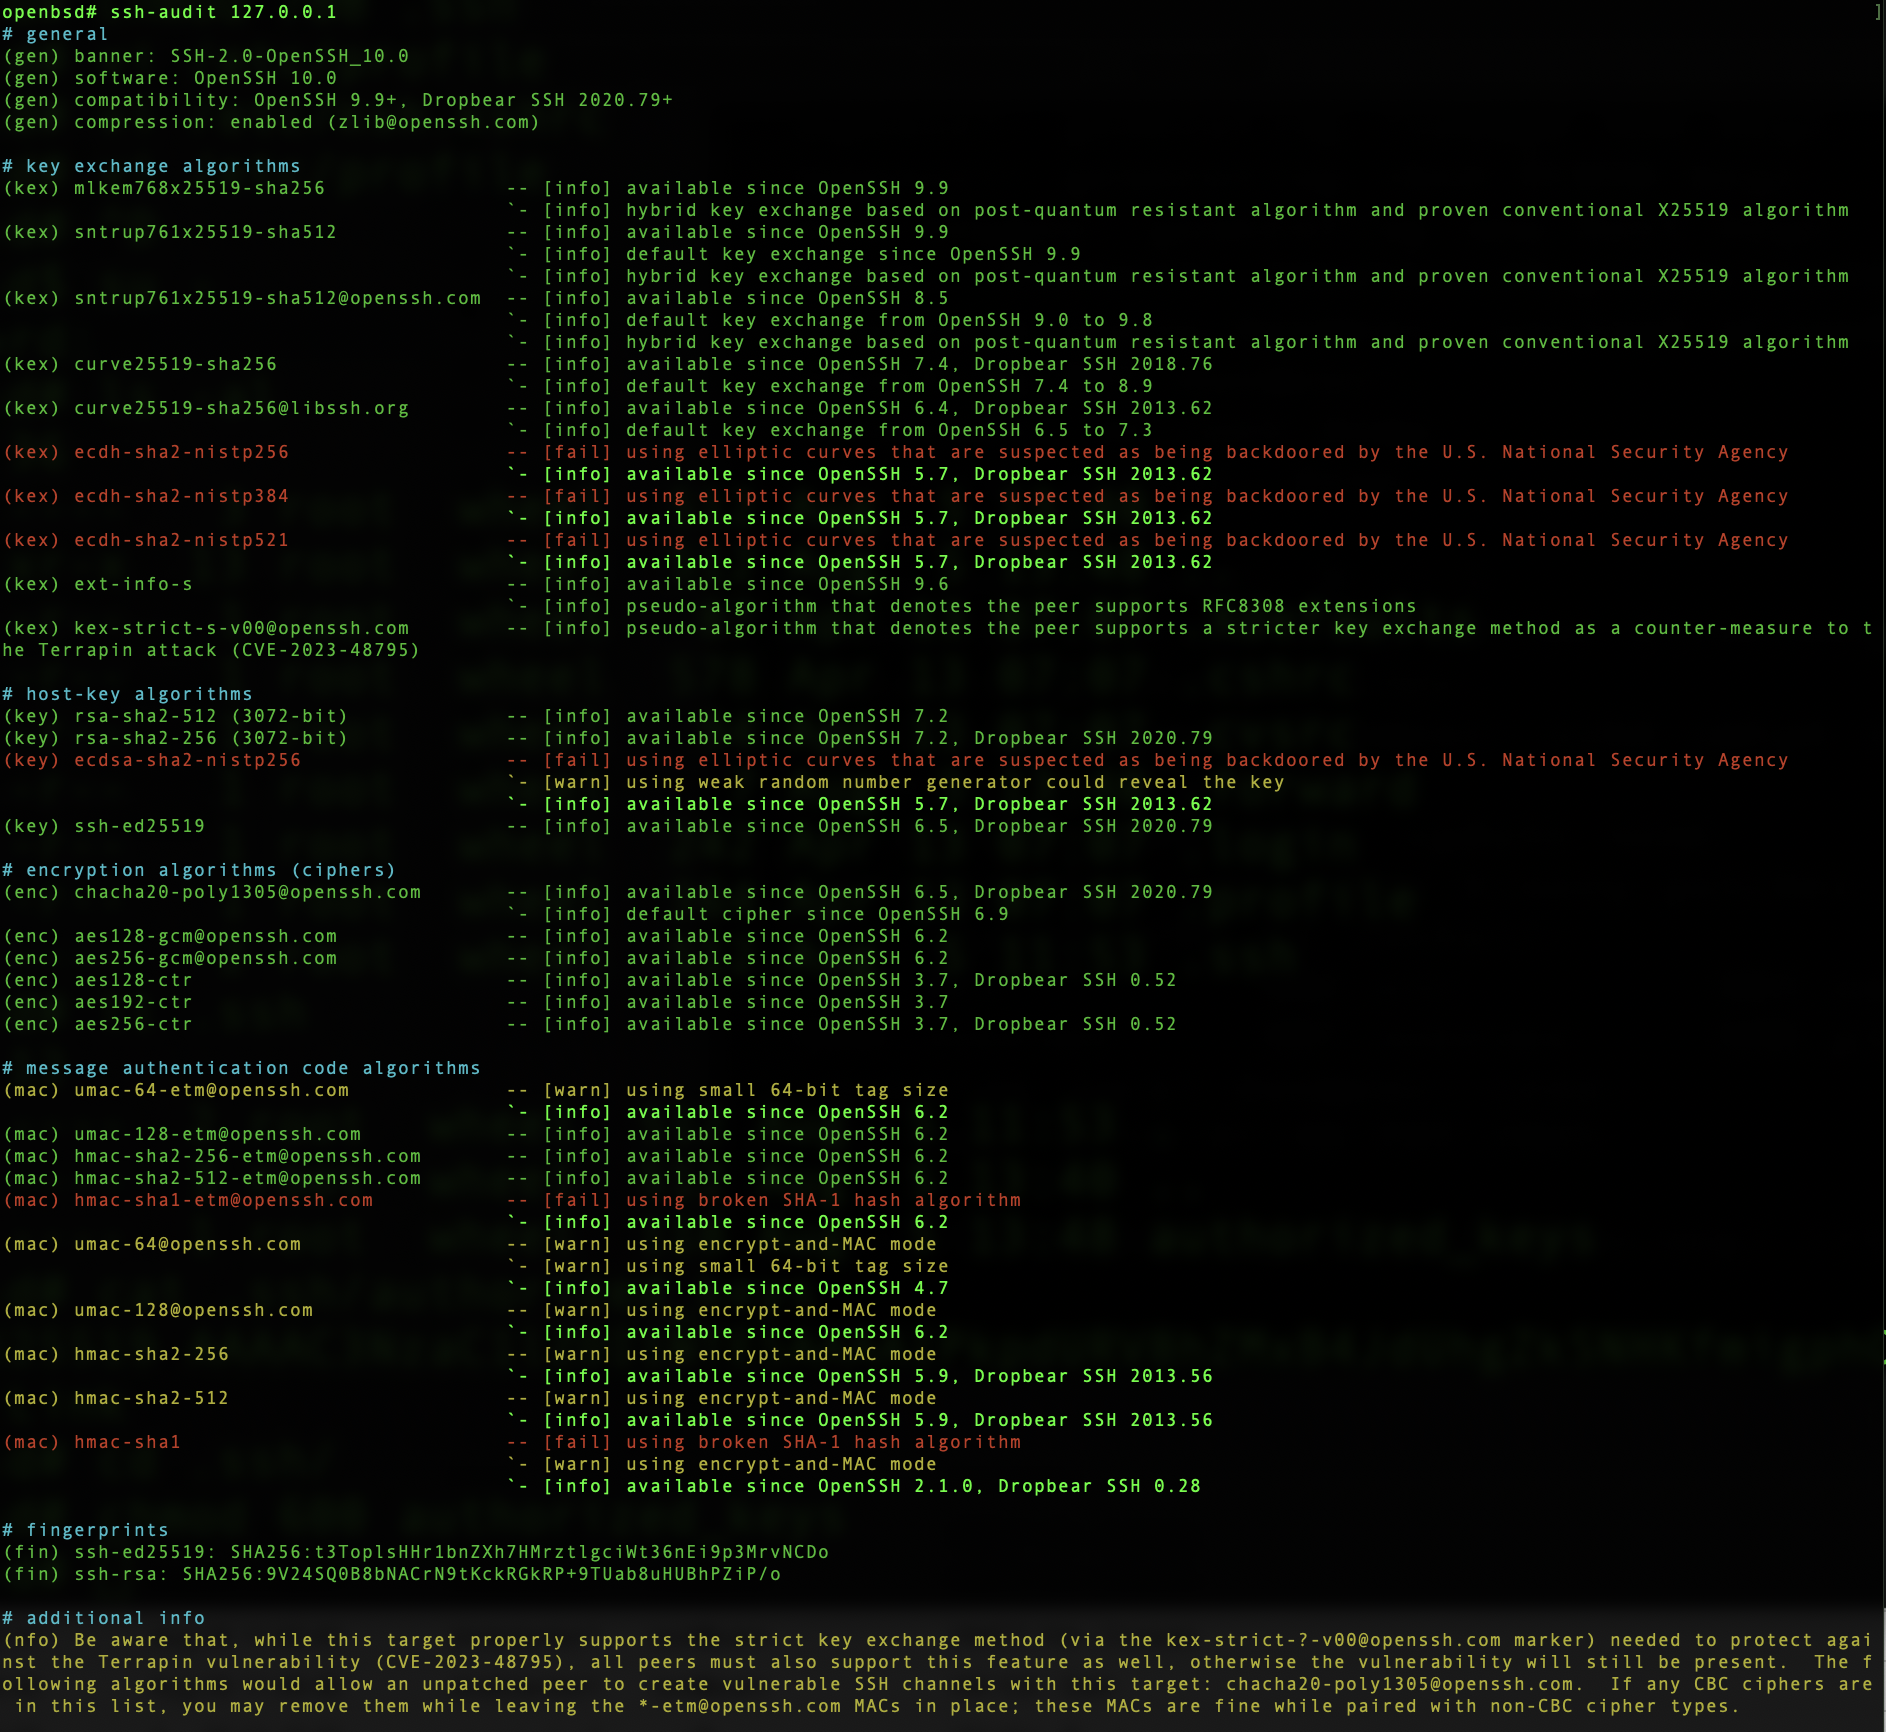
So not perfect either.
The post Tighten Up Your VPS With an SSH Audit! Let’s Look at the ssh-audit Package…Does OpenBSD Score Higher Than Debian? appeared first on LowEndBox.
]]>The post Hackers Love Default Windows RDP Ports: Here’s Why You Should Change Yours, and How to Do It appeared first on LowEndBox.
]]> Should you change your Windows RDP port?
This is the Windows equivalent to “should you change your SSH port?”
The answer is somewhat philosophical but I’d argue it is common sense. It’s true that changing your Windows RDP port is “security by obscurity” in the sense that if someone is trying to get into your server, they’ll find your Windows RDP port. That’s what port scanning is all about.
But while it wasn’t stop someone targeting your server, it will stop people broadcast targeting. There are script kiddies who’ll scan entire IP ranges for port 3389 (the default Windows RDP port). If they find the port open on an IP, they dive in with deeper attacks. If the port isn’t open, they move on to the next IP.
So while changing your port won’t protect your VPS from a determined attacker, it’ll make it less visible as a target. Make sense?
How to Change Your Windows RDP Port
Start by logging into your Windows VPS using the Remote Desktop Connection client, or whatever remote access method you use.
Start the Registry Editor (regedit.exe). You can do this by typing “regedit” in the search area.
Navigate to this key:
HKEY_LOCAL_MACHINE\System\CurrentControlSet\Control\Terminal Server\WinStations\RDP-Tcp
Find PortNumber, then click Edit->Modify. Click Decimal.
Type the new port number. What should it be? Really anything that works for you, but above 1024. Below 1024, most ports are reserved for well-known services. Don’t select something like port 6000, which is the X Window system port, because that is also scanned. Something above 10,000 is good.
Click OK.
If you’re using Windows Firewall, you need to update that. You can do it graphically, with a couple commands. Let’s be command line.
First, allow the new port through:
netsh advfirewall firewall add rule name="RDP Port 15320" protocol=TCP dir=in localport=15320 action=allow
Now make sure you can connect by closing your connection and reconnecting, specifying your new port. This is to make sure you don’t lock yourself out.
Assuming it works, issue another command to remove port 3389:
netsh advfirewall firewall delete rule name="Remote Desktop (TCP-In)"
And that’s it!
The post Hackers Love Default Windows RDP Ports: Here’s Why You Should Change Yours, and How to Do It appeared first on LowEndBox.
]]>The post Build Your Own Status Page with Uptime Kuma on a $1 Per Month VPS appeared first on LowEndBox.
]]>With a $1 VPS and an open-source tool called Uptime Kuma, you can have a professional-looking status page in minutes.
What is Uptime Kuma?
Uptime Kuma is a self-hosted monitoring tool that lets you monitor websites, servers, and network services (HTTP, TCP, ping, DNS, etc.). You can send alerts via email, Telegram, Slack, Discord, and many other integrations, and host a public-facing status page with uptime history.
What Do You Need?
A basic VPS with 1GB RAM and 10GB storage is more than enough for Uptime Kuma. Many of the providers featured on LowEndBox offer these low-cost plans. We even have a page full of $1 per month offers!
Don’t feel like doing the setup and maintenance yourself? Run Uptime Kuma on PikaPods from $1.70/month!
Step 1: Get Your VPS Ready
This guide assumes you have a fresh Debian 12 VPS. Mine is going to be called kuma.lowend.party and I’ll use it to monitor LowEndBox and LowEndTalk.
Starting with a fresh install, login as root and install Docker:
apt update && apt -y upgradeapt -y install docker.io docker-composesystemctl enable --now docker
Step 2: Install Uptime Kuma
Create a directory:
mkdir /opt/uptime-kuma && cd /opt/uptime-kumaCreate a docker-compose.yml file:
version: '3'
services:
  uptime-kuma:
    image: louislam/uptime-kuma:1
    container_name: uptime-kuma
    ports:
      - "3001:3001"
    volumes:
      - ./data:/app/data
    restart: always
Start it up:
docker-compose up -dStep 3: Configure a Status Page
Open your browser and visit:
http://kuma.your-domain.com:3001You’ll be prompted to create an admin account.

Once you’ve logged in, click Status Pages in the upper right.
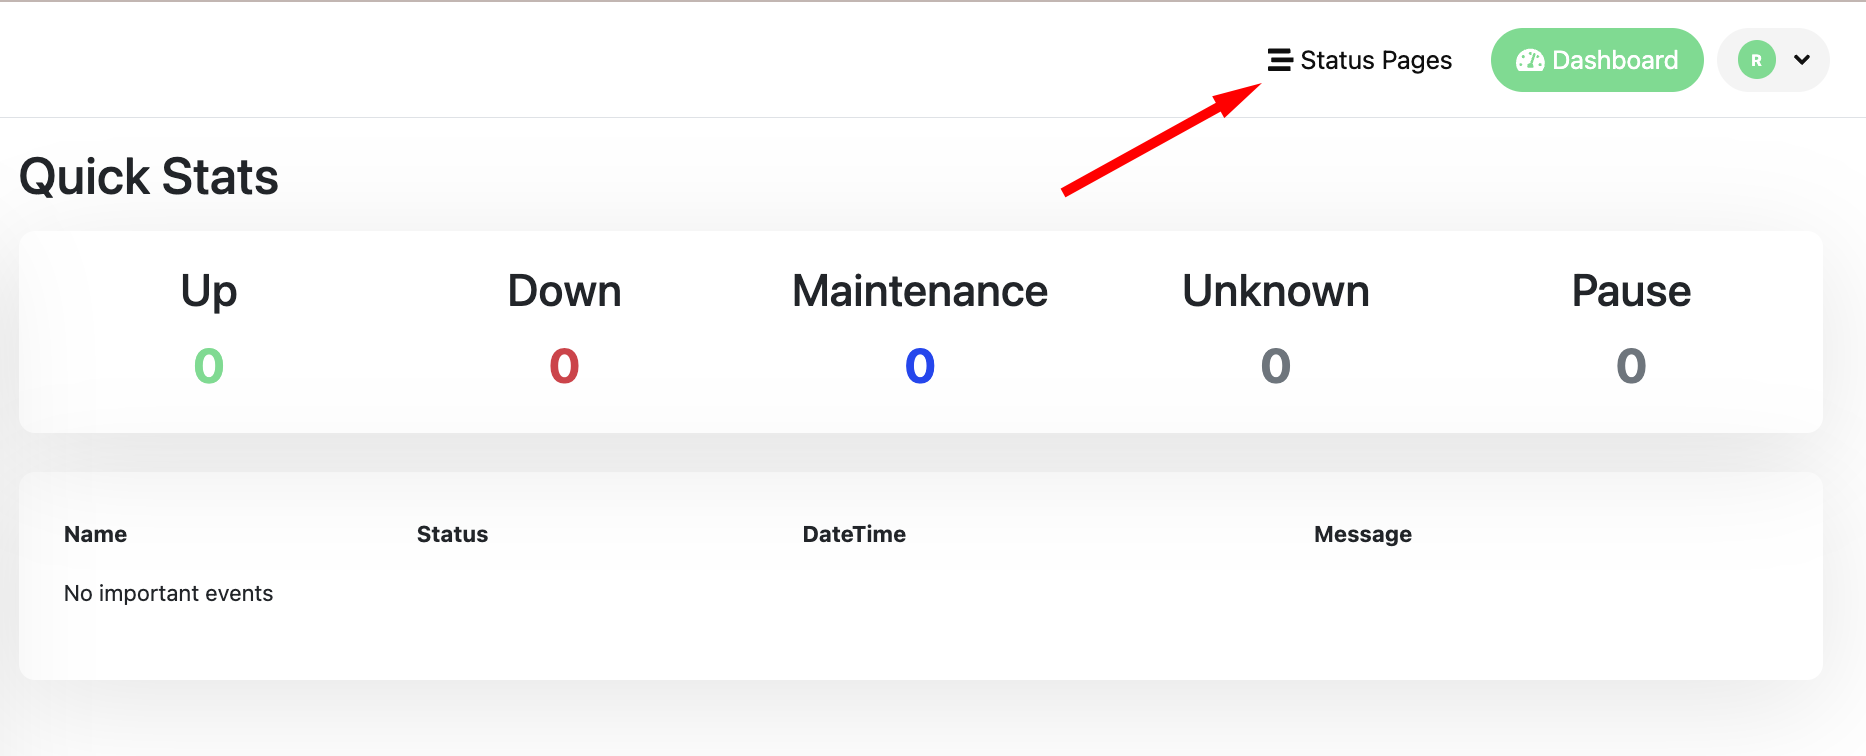
Click “New Status Page”

On the “Add New Status Page” page, fill out Name and Slug, then Next.

Now click “Add one” in the middle of the page to create a new monitor.

The form is easy to fill out for a basic HTTPS monitor. Just add the URL and a friendly name.

After a while, you’ll see it populating with data:

Now you can go back to your Status Page and click Add a Monitor. Since there’s only one in this case, there’s only one to select.

And that’s it! Now you can share that URL. Here’s how it looks in Incognito mode, demonstrating that I’m not logged in:

Step 4: Make it Look Professional
Right now, you’re presenting on port 3001. We want to present something like https://uptime.your-domain.com without the port.
We’ll finish by proxying port 3001 and creating a Let’s Encrypt certificate so the connection is secure.
Let’s install Nginx and certbot:
apt -y install nginx certbot python3-certbot-nginx

systemctl enable --now nginx
Make sure you have DNS all set. In this example, I’ll use uptime.lowend.party.
Edit
/etc/nginx/sites-available/uptime.lowend.party
and create as follows:
server {
  listen 80;
  server_name uptime.lowend.party;

  location / {
    proxy_pass http://127.0.0.1:3001;
    proxy_set_header Host $host;
    proxy_set_header X-Real-IP $remote_addr;
    proxy_set_header X-Forwarded-For $proxy_add_x_forwarded_for;
    proxy_set_header X-Forwarded-Proto $scheme;
  }
}
Now enable the configuration:
ln -s /etc/nginx/sites-available/uptime.lowend.party /etc/nginx/sites-enabled/
nginx -t
systemctl reload nginx
Next, add HTTPS via Let’s Encrypt:
certbot --nginx -d uptime.lowend.party
Follow the prompts. Your Nginx config will be automatically updated.
And now uptime.lowend.party works! No need for the port.
And https://uptime.lowend.party/status/lowendempire works as well as a public page:

There’s only one problem remaining. Uptime Kuma is still running on port 3001 on the public IP, which means that it’s a bit more exposed than I’d like it to be.
Let’s go back and edit /opt/uptime-kuma/docker-compose.yml. You only need to change one line (indicated with the <– comment below):
version: '3'
services:
  uptime-kuma:
    image: louislam/uptime-kuma:1
    container_name: uptime-kuma
    ports:
      - "127.0.0.1:3001:3001" # <-- bind only to localhost
    volumes:
      - ./data:/app/data
    restart: always
Then:
docker-compose down
docker-compose up -d
Now uptime.lowend.party works, but uptime.lowend.party:3001 doesn’t, which is what we want.
Enjoy!
The post Build Your Own Status Page with Uptime Kuma on a $1 Per Month VPS appeared first on LowEndBox.
]]>The post YOUR DATA IS GONE: How to Protect Your Synology From Being Ransomware’d appeared first on LowEndBox.
]]> I’ve been a fan of Synology NAS systems for a while. For a long time, I ran my home storage by stuffing hard drives into previous PCs and turning them in Linux file servers (if I was going to go down that route again, I’d be tempted to try TrueNAS today).
The problem with that approach is the energy cost. A rig big enough to hold four or eight drives is a usually a full-sized mobo with a decent CPU on it and a pretty big power supply. You end up with a pretty hefty power bill.
So some years ago I transitioned to Synology NAS devices for home use. They’re Linux-based but really are their own specialized OS. All kinds of packages and options, aimed at home and small business use. My own use is pretty basic: file storage, backups, media player, and that’s about it. I’d rather run databases, web apps, etc. on my own Linux VMs.
Anti-Ransomware Checklist
If you read Synology forums for a while, you inevitably run across people whose Synologys were ransomware’d. That’s heartbreaking – your files and your backups taken hostage by criminal scum.
There are some things you can do to prevent such misfortunes. Here’s a basic run down of securing your Synology. The box is pretty secure out of the box, but given the importance of what you’re probably using it for, it’s important to take all possible precautions.
First, do not connect your Synology to the Internet unless it’s absolutely can’t be avoided! Security is good, but why take the risk? I’d give the same advice for any system, so I’m not singling out Synology specifically.
 Follow the Security Audit: Login to your Synology (port 5000 by default) and from the main menu (upper left), select Security Advisor.
There’s a couple things you should look at. Look at the Overview to start. If anything isn’t a green checkmark, you should take action.
Then click Advanced and click View the checklist, which is a much more in-depth list of things you can do to improve security. There’s 49 categories and the status of each is indicated.
Clean Up Your Users: This is really easy to do and only takes a few minutes. Got to the Control Panel and click User & Group. You should deactivate/disable both “admin” and “guest”.
Enable 2-Factor Authentication: In the Control Panel, click on Security. Under Account, you can enforce 2FA for all users. It’s quite simple to do – just follow the prompts and use the authenticator of your chocie.
While you’re there, you can also explore the Firewall. Whatever you can do to limit access is advisable.
In the Control Panel, go to Login and consider changing the DSM port. That way if someone is on your network and is scanning for Synologies, they’re less likely to find yours.
Speaking of people on your network, keep in mind that other than direct Internet access, your most likely vector of attack is a compromised PC inside your network. Someone reads an email, clicks something they shouldn’t click, and how an external entity has control of a PC. If that PC has access to your Synology, expect them to encrypt and ransom the files.
The solution to this is twofold. First, train your users (or yourself!) to avoid phishing and malware. Second, limit access to files, directories, and shares only to those who truly need them.
You should look at immutable snapshots (requires DSM 7.2+ on supported hardware), which are the best protection if something goes bad. Search for (or add) the package “Snapshot Replication”. Open it, click Snapshots, select your share, and then click Settings to enable. Remember that these snapshots take space, though how much depends on how much data change there is in that share.
And finally, keep backups. You may need a second Synology and probably need an off-site backup.
The post YOUR DATA IS GONE: How to Protect Your Synology From Being Ransomware’d appeared first on LowEndBox.
]]>