Keep Reading...
The post Odoo POS Mobile App on Sunmi Platform appeared first on Mobikul.
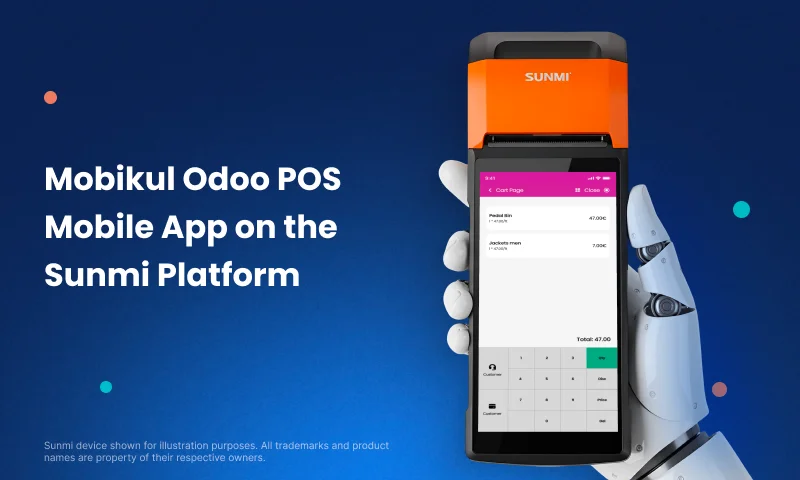
]]>This launch makes it simple for retail stores using Odoo Point of Sale (POS) to manage daily operations directly from Sunmi smart terminals.
It brings an easy and unified in-store setup for faster business handling.
Why This Listing Matters
With the official Sunmi listing, you can now install, update, and manage your Odoo POS Mobile App straight from the Sunmi App Store.
It guarantees smooth performance and full compatibility with all Sunmi POS devices.
Retailers can now use their POS on a professional Android terminal. No extra setup. No manual downloads. Just quick and reliable usage.
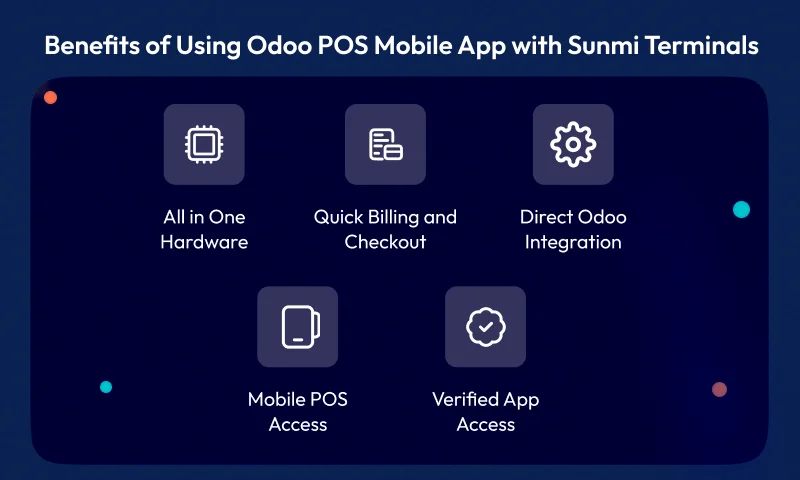
Benefits of Using Odoo POS Mobile App with Sunmi Terminals
All-in-One Hardware
Sunmi devices include a barcode scanner, printer, and touch screen.
This reduces extra hardware and keeps your store setup clean.
Quick Billing and Checkout
Create orders, print receipts, and take payments instantly through an easy-to-use interface.
Direct Odoo Integration
Your data stays in sync with the Odoo backend for live updates on stock, products, and orders.
Mobile POS Access
Move around the store and serve customers faster using portable Sunmi devices.
Verified App Access
Download and update the app safely from the official Sunmi marketplace.
How This Integration Improves In-Store Retail
With this setup, retailers can manage everything in one place:
- Product Browsing and Order Creation
- On-the-Spot Billing
- Customer Handling
- Inventory Updates
- Real-Time Reports
Whether you run a fashion outlet, café, grocery, or restaurant, Odoo POS on Sunmi helps deliver quick service and a smoother checkout flow.
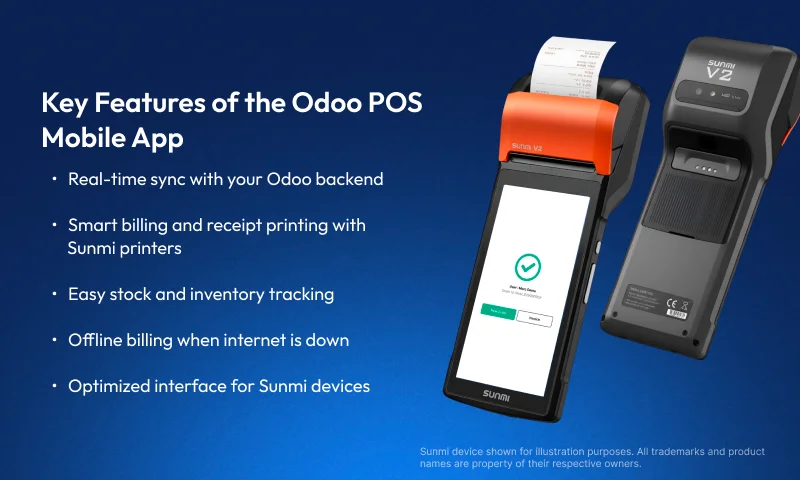
Key Features of the Odoo POS Mobile App
- Real-time sync with your Odoo backend
- Smart billing and receipt printing with Sunmi printers
- Easy stock and inventory tracking
- Customer records and loyalty management
- Offline billing when the internet is down
- Optimized interface for Sunmi devices
How to Install the Odoo POS Mobile App from the Sunmi App Store
- Open the Sunmi App Store on your device
- Search for “Odoo Mobikul POS”
- Tap Install
- Launch and link it to your Odoo account
- Start billing instantly from your Sunmi terminal
No complex setup. No manual file downloads. Just install and start selling.
Conclusion
This collaboration between Mobikul and Sunmi makes POS truly mobile and ready for modern retail.
Businesses can now use trusted Sunmi hardware with Mobikul’s POS for Odoo solution for a faster, more connected, and reliable store experience.
The post Odoo POS Mobile App on Sunmi Platform appeared first on Mobikul.
]]>Keep Reading...
The post How to Connect FlutterFlow with Supabase appeared first on Mobikul.
]]>Introduction
FlutterFlow works smoothly with Supabase, making it a great choice for your app’s backend. Supabase is like a ready-made server that helps you manage important features without extra effort.

What is FlutterFlow
FlutterFlow is a popular visual development tool built on Flutter, allowing developers to quickly design and build web and mobile apps using a drag-and-drop interface, without writing complex code.
What is Supabase
Supabase is an open-source Backend-as-a-Service (BaaS) that provides a Firebase alternative. Its services include authentication, database management, storage, and more.
Why use FlutterFlow with Supabase
1.Flutter and Supabase are open-source, which means they are open for everyone to use and don’t lock you into one company.
2. FlutterFlow handles the frontend, Supabase handles the backend, so you don’t waste time setting up infrastructure.
3. You can focus on app logic instead of boilerplate code for login, database connections, etc
4. Supabase’s free tier combined with FlutterFlow’s low-code approach reduces development costs.
5. Supabase supports live data sync, perfect for chats, dashboards, and notifications.
How to Create the User Interface usign the FlutterFlow
1.Create a New Project
Open FlutterFlow , start a new project and choose a blank page.
2.Add a Header Section
Drag a Container at the top, set the background color to purple, place a Text widget inside, and set it as “Simple UI” with bold styling.
3.Add a ListView for Products
Below the header, add a ListView widget to display multiple product cards.
4.Design Each Product Card
Inside the ListView, add a Container and include three Text widgets for Product Id, Product Name, and Product Price, styled with proper padding and spacing.
5.Preview the App
Run the preview and you’ll see the product list displayed as clean cards under the “Simple UI” header.
Create FlutterFlow UI
We created a product card with Product Id, Name, and Price inside a styled container.
The cards are displayed in a scrollable ListView for a clean and organized layout.

How to Create the Table using the Supabase
1. Login to Supabase
Sign in with Supabase and select your project or create a new one.
2. Open Table Editor
Go to the Database section, select Tables, and click “New Table” .
3. Define Table Name
Enter a table name.
4.Add Columns
Create columns with names, data types, and set a primary key.
5. Save the Table
Click Save to create the table, ready for data insertion.
How to Connect FlutterFlow with Supabase
1.Create a Supabase Project
Sign in to Supabase, create a new project, and note the API URL and anon/public key.
2.Open FlutterFlow Project
Go to your FlutterFlow project and open the Settings and Integrations section
3.Enable Supabase
Toggle on Supabase and enter the Project URL and anon/public key from your Supabase project.
4.Configure Database
Choose the tables you want to connect from Supabase and set permissions if needed.
5.Test Connection
Run the app in FlutterFlow preview or emulator to ensure data is fetched correctly from Supabase.

Here is the Output of the project
Create FlutterFlow UI using Supabase
FlutterFlow integrates seamlessly with Supabase, enabling easy backend management for user authentication, data storage, and real-time updates.

Conclusion
FlutterFlow with Supabase makes it easy to build data-driven apps. Connect the UI to Supabase tables via the URL and anon key, while Supabase manages the backend to keep the app dynamic and scalable.
Read more blogs related to mobile App technology.
The post How to Connect FlutterFlow with Supabase appeared first on Mobikul.
]]>Keep Reading...
The post How to create mock servers using Postman appeared first on Mobikul.
]]>Introduction
Mock servers simulate real API responses so developers can test without a live backend. Postman simplifies creating and managing mock APIs for efficient testing and collaboration.

Why Use Mock Servers
- Enable parallel development by allowing frontend and backend teams to work independently.
- Help test API responses before the actual backend is ready — simply set up a mock server.
- Simulate different scenarios like success, failure, or timeout responses.
- Save time by eliminating the need to wait for real APIs.
- Allow testing of edge cases that are hard to reproduce in live environments.
- Improve collaboration and communication between teams.
- Support faster prototyping and iterative development.
Creating a Mock API And Mock Server in Postman
1. Open Postman and Navigate to Mock Servers
Launch the Postman application on your computer. From the left sidebar, click on the Mock Servers tab.

2. Start Creating a New Mock Server
Click on the “Create Mock Server” button or the “+” icon next to the Collections tab to begin setting up a new mock server.

3. Create a Mock Request
To create a mock request, set the following:
- Method: Choose GET, POST, PUT, or DELETE.
- Request URL: Enter the endpoint path, e.g., api/users/123.
- Response Code: Choose a suitable HTTP code (e.g., 200 for success).
- Response Body: Paste a sample JSON response.
{
    "id": 123,
    "name": "John Doe",
    "email": "[email protected]",
    "age": 29,
    "registered_on": "2022-05-15T10:30:00Z"
}
Click Next to proceed.

4. Configure the Mock Server
In the configuration section:
- Mock Server Name: Set it to something like “Mock Users API”, or choose your own name.
- Save as Environment Variable: Check this to save the mock server URL for reuse.
- Click “Create Mock Server” at the bottom right to finish the setup.
Additional Options:
- Environment: Use environments to manage variables like base URLs or tokens.
- Make Mock Server Private: Enable this to secure your mock API with authentication.
- Simulate Fixed Network Delay: Use this to test how your app handles network latency or slow responses.

5. Test the Mock Request
Go to the Collections tab in the left sidebar, open the mock API collection you created, and select the api/users/123 request.

Click the Send button in the top right corner of Postman to view the sample JSON response from your mock server.

Conclusion
Mock servers in Postman simplify API testing and development by simulating real endpoints. They help teams work faster and more efficiently without waiting for the backend.
Thanks for reading this blog.
Please check my other blogs here.
The post How to create mock servers using Postman appeared first on Mobikul.
]]>Keep Reading...
The post Agentics Apps in Flutter appeared first on Mobikul.
]]>Introduction
Agentic apps in Flutter are applications that leverage autonomous, intelligent agents to perform tasks automatically.
These agents can make decisions, respond to real-time events, and operate in the background without constant user input.
By using intelligent logic and contextual awareness, these apps aim to simplify complex workflows and enhance user experiences through automation.
What is Agentics?
An agent is an entity that can perceive its environment, make decisions, and take actions to achieve goals. Agentics focuses on understanding or designing the behavior of such entities.
An agentic app is powered by an intelligent agent — combining an LLM, a user goal, and tools like APIs — to actively help users. Learn more in this Flutter guide on building agentic apps.
Instead of just displaying data, it thinks, plans, and acts to assist users proactively.
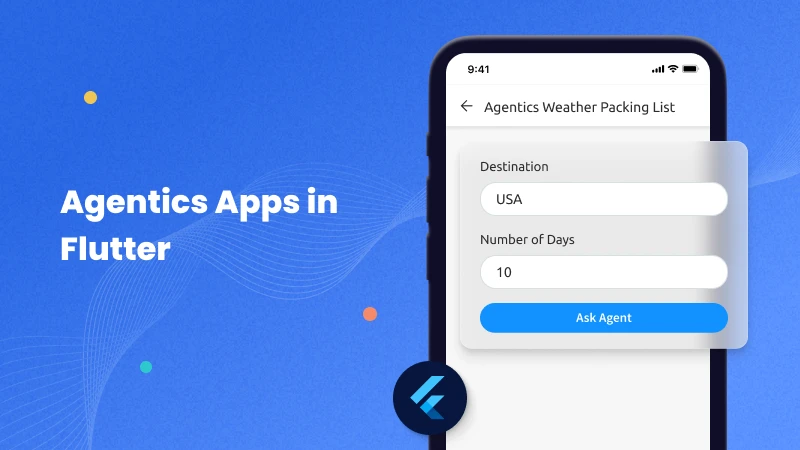
For example, a travel app that not only shows places but also creates a smart packing list based on your trip, or an email app that turns unread messages into an actionable to-do list.
How Does an Agentic App Work in Flutter?
An agentic app in Flutter connects your app UI with a backend powered by a Large Language Model (LLM) (like GPT-4), which can think and act like an assistant.
An agentic app is powered by an intelligent agent — combining an LLM, a user goal, and tools like APIs — to actively help users.
Instead of just displaying data, it thinks, plans, and acts to assist users proactively.
For example, a travel app that not only shows places but also creates a smart packing list based on your trip, or an email app that turns unread messages into an actionable to-do list.
Components:
- User Input (Goal) – The user enters a goal (e.g., “Plan my weekend trip”).
- LLM Agent (Brain) – The backend agent (using an LLM) understands the goal and decides what needs to be done. Read more about using open-source LLMs in mobile devices.
- Tools & APIs – The agent uses tools like weather APIs, calendar access, or email parsing.
- Output/Action – The Flutter app displays the results (like a packing list or a to-do list).
Why Do We Use Agentics ?
This are smart apps that use AI agents to think, make decisions, and take actions on their own to help users reach their goals — often without needing much input from the user.
We use this because they go beyond regular tools — instead of just helping you do something, they understand what you want and try to do it for you, like a helpful assistant.
1. They Do Tasks for You Automatically:
Agentic apps can handle big tasks with many steps by themselves.
Example: Book a full trip for you — checking weather, your likes, your budget, and visa rules.
2. They Help Without Being Asked:
These apps don’t wait for you to tell them what to do — they give smart suggestions on their own.
Example: Remind you to take an umbrella if it might rain and you have an event outside.
3. They Learn What You Like:
They get smarter over time by learning your habits and adjusting to them.
Example: A workout app that changes your exercise plan based on your sleep and progress.
4. They Understand Your Situation:
They use info like your location, schedule, and preferences to make better choices.
Example: Turn your phone to silent during meetings or choose the best driving route based on traffic.
Implementation
We are going to implement this using Flutter so we need to follow below steps to implement this topic.
Step 1:
First, we need to create a new Flutter project and add the following dependency to the pubspec.yaml file. You can find it on the pub.dev site.
dependencies:
  flutter:
    sdk: flutter
  http: ^1.4.0
You need to add latest version of this package.
Step 2:
In this step you need to create a StatefulWidget for the showing result at screen.
class AgenticHomePage extends StatefulWidget {
  const AgenticHomePage({Key? key}) : super(key: key);

  @override
  State<AgenticHomePage> createState() => _AgenticHomePageState();
}
Step 3:
Define Controllers and API Keys in this steps.
class _AgenticHomePageState extends State<AgenticHomePage> {
  final TextEditingController _locationController = TextEditingController();
  final TextEditingController _daysController = TextEditingController();
  String _response = "Enter destination, days, lat & lon to ask agent.";
  bool _isLoading = false;

  final String _geminiApiKey = "YOUR_GEMINI_API_KEY";
  final String _owmApiKey = "YOUR_OPENWEATHERMAP_API_KEY";

  double _lat = 25.276987; // Default lat
  double _lon = 55.296249; // Default lon
Step 4:
Define the _askAgent() method in the following steps:
- Validate the input and set Loading.
- Fetch weather data from OpenWeatherMap.
- Generate a prompt.
- Call the Gemini API.
- Extract and display the response.
Future<void> _askAgent() async {
    final dest = _locationController.text.trim();
    final days = _daysController.text.trim();
    if (dest.isEmpty || days.isEmpty) {
      setState(() => _response = "Please enter destination and days.");
      return;
    }

    setState(() {
      _isLoading = true;
      _response = "Agent is thinking...";
    });
    try {
      final weatherUrl = Uri.parse(
        'https://api.openweathermap.org/data/2.5/weather?lat=$_lat&lon=$_lon&appid=$_owmApiKey&units=metric',
      );
      final weatherRes = await http.get(weatherUrl);
      if (weatherRes.statusCode != 200) {
        throw Exception("Failed to fetch weather data.");
      }

      final weatherData = json.decode(weatherRes.body);

      print("Main Weather Data====>${weatherData}");
      final temp = weatherData['main']['temp'];
      final condition = weatherData['weather'][0]['description'];

      final weather = "Temperature: ${temp}°C, Conditions: $condition";

      print("Weather Data ===>${weather}");

      final prompt =
          "I'm traveling to $dest for $days days. The weather there is: $weather. Give me a detailed packing list.";

      final geminiUrl = Uri.parse(
        'https://generativelanguage.googleapis.com/v1/models/gemini-1.5-flash:generateContent?key=$_geminiApiKey',
      );

      final geminiResponse = await http.post(
        geminiUrl,
        headers: {'Content-Type': 'application/json'},
        body: json.encode({
          "contents": [
            {
              "parts": [
                {"text": prompt}
              ]
            }
          ]
        }),
      );

      print("asdjhad===>${geminiResponse.body}");

      if (geminiResponse.statusCode != 200) {
        throw Exception("Gemini API error: ${geminiResponse.body}");
      }

      final geminiData = json.decode(geminiResponse.body);
      final resultText = geminiData['candidates']?[0]?['content']?['parts']?[0]?['text'];

      setState(() {
        _response = resultText ?? "No response received from Gemini.";
      });
    } catch (e) {
      setState(() {
        _response = "An error occurred: $e";
      });
    } finally {
      setState(() => _isLoading = false);
    }
  }
Step 5:
In this steps we will create the UI, you need to add below mention code to build the Ui.
@override
  Widget build(BuildContext context) {
    return Scaffold(
      appBar: AppBar(
        title: const Text('Agentic Weather Packing List'),
        backgroundColor: Colors.blueGrey[800],
      ),
      body: Padding(
        padding: const EdgeInsets.all(16.0),
        child: Column(
          children: [
            TextField(
              controller: _locationController,
              decoration: const InputDecoration(
                labelText: 'Destination',
                hintText: 'e.g., Dubai',
              ),
            ),
            const SizedBox(height: 10),
            TextField(
              controller: _daysController,
              decoration: const InputDecoration(
                labelText: 'Number of Days',
                hintText: 'e.g., 5',
              ),
              keyboardType: TextInputType.number,
            ),
            const SizedBox(height: 20),
            ElevatedButton(
              onPressed: _isLoading ? null : _askAgent,
              child: _isLoading
                  ? const CircularProgressIndicator(color: Colors.white)
                  : const Text('Ask Agent'),
            ),
            const SizedBox(height: 30),
            Expanded(
              child: SingleChildScrollView(
                child: Text(
                  _response,
                  style: TextStyle(fontSize: 16, color: Colors.blueGrey[800]),
                ),
              ),
            )
          ],
        ),
      ),
    );
  }
}
Output
Agentics Apps in Flutter
Agentic apps in Flutter use AI agents to automate tasks like planning, decision-making, and content generation.
They combine user input, real-time data (e.g., weather), and APIs (like Gemini) to deliver smart, personalized results.
Conclusion
In this blog, we have explored how to use Agentics Apps in flutter.
You can also explore other informative blogs on Mobikul for more knowledge.
The post Agentics Apps in Flutter appeared first on Mobikul.
]]>Keep Reading...
The post How to Build Apps for Ubuntu Touch OS appeared first on Mobikul.
]]>Introduction
Ubuntu Touch OS is a mobile operating system designed for smartphones, tablets, and other smart screens. Originally developed by Canonical, it is now maintained by the UBports community.
Unlike typical Android or iOS devices, it runs a full Linux system like a desktop. This gives users greater control and privacy over their mobile device.
One of the biggest advantages of Ubuntu Touch is that it doesn’t rely on Google services. Unlike most smartphones, it offers an alternative that respects user privacy.

Usages of Ubuntu Touch
- Ubuntu Touch is a privacy-focused mobile OS with no Google tracking or dependencies.
- It offers full Linux terminal access, just like a desktop computer.
- The convergence feature allows your Ubuntu Touch phone to function like a full desktop computer when you connect it to a monitor, keyboard, and mouse.
- For native apps (best performance), use QML (like Morph Browser). For web apps, use HTML5 (like a Twitter PWA).
- The system is highly customizable for business and special use cases, like schools modifying tablets to only run e-book readers and math apps while blocking social media, all without expensive management software.
Popular Apps Available
- Morph Browser for private web browsing.
- UTTician provides a native Telegram messaging experience.
- OpenStore serves as the official app marketplace.
- The built-in File Manager offers easy file organization.
- Upad is a simple yet effective note-taking application.
Create a New Project for an Ubuntu Touch OS App
The best way to build high-performance, native apps for Ubuntu Touch is by using QML (Qt Modeling Language) with the Clickable tool.
Steps to Create a QML App
Open Terminal and hit these commands.
1. Install Clickable
First, install Clickable using the command below:
sudo snap install clickable --classic
2. Create a New Project
To check that your development environment is set up correctly for Clickable, create a new Clickable project:
clickable init
Select Template:
1 - QML Only
2 - C++
3 - Python
4 - HTML
5 - Go
6 - Rust
7 - Godot (Precompiled)
Choose from 1, 2, 3, 4, 5, 6, 7 [1]:
Title [App Title]:
Description [A short description of your app]:
App Name [appname]:
Namespace [yourname]:
Maintainer Name [Your FullName]:
Maintainer Email [[email protected]]:
Select License:
1 - GNU General Public License v3
2 - MIT license
3 - BSD license
4 - ISC license
5 - Apache Software License 2.0
6 - Not open source
Choose from 1, 2, 3, 4, 5, 6 [1]:
Copyright Year [2022]:
Git Tag Versioning [n]:
Save as Default [n]:

Successfully created app "appname.yourname"
Get started with the following commands:

 $ cd appname
3. Run your project
To build and run your Ubuntu Touch app on desktop, use the following commands:
// first build your project
clickable build

// after that run app on desktop
clickable desktop
After the above command, you will see a simple “Hello World” app like this:
Create a New Project for an Ubuntu Touch OS App
We created a demo Ubuntu Touch OS project using Clickable, covering setup, initialization, and running the app in three simple steps.

Create a demo app for Ubuntu Touch OS.
Create the App Components
We’ll start by creating a productApi.qml file in the qml/api folder.
ProductApi.qml
This QML code fetches product data from a fake store API. It uses QML to load and display product details like title, price, rating, and image.
import QtQuick 2.7
import QtQuick.XmlListModel 2.0

QtObject {
    id: productApi

    property ListModel productListModel: ListModel {}

    function fetchProducts() {
        var xhr = new XMLHttpRequest();
        xhr.open("GET", "https://fakestoreapi.com/products");
        xhr.onreadystatechange = function() {
            if (xhr.readyState === XMLHttpRequest.DONE && xhr.status === 200) {
                try {
                    var json = JSON.parse(xhr.responseText);
                    productListModel.clear();
                    for (var i = 0; i < json.length; ++i) {
                        productListModel.append({
                            title: json[i].title,
                            price: json[i].price,
                            image: json[i].image,
                            rating: json[i].rating.rate
                        });
                    }
                } catch (e) {
                    console.log("Error parsing JSON:", e);
                }
            }
        }
        xhr.send();
    }

    Component.onCompleted: fetchProducts()
}
ProductCard.qml
This QML code creates a stylish product card layout for a Ubuntu Touch app using Lomiri Components. It displays the product image, title, price, and rating in a clean and responsive design.
import QtQuick 2.7
import Lomiri.Components 1.3

LomiriShape {
    width: ListView.view.width - units.gu(2)
    height: units.gu(15)
    radius: "medium"
    aspect: LomiriShape.DropShadow

    RowLayout {
        anchors.fill: parent
        anchors.margins: units.gu(1)
        spacing: units.gu(2)

        // Product Image
        LomiriShape {
            Layout.preferredWidth: units.gu(12)
            Layout.preferredHeight: units.gu(12)
            radius: "small"
            aspect: LomiriShape.Flat

            Image {
                anchors.fill: parent
                source: model.image
                fillMode: Image.PreserveAspectFit
                asynchronous: true
            }
        }

        // Product Details
        ColumnLayout {
            Layout.fillWidth: true
            spacing: units.gu(0.5)

            Label {
                text: model.title
                wrapMode: Text.WordWrap
                maximumLineCount: 2
                elide: Text.ElideRight
                font.bold: true
            }

            Label {
                text: "$" + model.price.toFixed(2)
                color: LomiriColors.green
                font.bold: true
            }

            Row {
                spacing: units.gu(0.5)
                Icon {
                    name: "starred"
                    width: units.gu(1.5)
                    color: LomiriColors.orange
                }
                Label {
                    text: model.rating
                    color: LomiriColors.orange
                }
            }
        }
    }
}
Main.qml
This QML code creates the main view of a Ubuntu Touch app showing products from a fake store API. It uses a ListView with custom product cards and a loading indicator during data fetch.
import QtQuick 2.7
import Lomiri.Components 1.3
import "./api" as Api
import "./components" as Components

MainView {
    id: root
    objectName: 'mainView'
    applicationName: 'demo.demo'
    width: units.gu(45)
    height: units.gu(75)

    Api.ProductApi {
        id: productApi
    }

    Page {
        anchors.fill: parent
        header: PageHeader { title: "FakeStore Products" }

        ListView {
            anchors.fill: parent
            anchors.margins: units.gu(1)
            model: productApi.productListModel
            delegate: Components.ProductCard {}
            spacing: units.gu(1)

            ActivityIndicator {
                anchors.centerIn: parent
                running: parent.count === 0
            }
        }
    }
}
Now, save your code and run the app using the commands mentioned above.
Here is the Output of the project
How to Build Apps for Ubuntu Touch OS
Ubuntu Touch is a Linux-based mobile OS that offers more control and privacy compared to Android or iOS. It is maintained by the UBports community and works without Google services.
Conclusion
Ubuntu Touch OS allows building secure, Linux-based mobile apps using native or web tech. It offers a privacy-focused, customizable alternative in the mobile ecosystem.
Thanks for reading this blog.
Please check my other blogs here.
Read more blogs related to mobile app technology.
The post How to Build Apps for Ubuntu Touch OS appeared first on Mobikul.
]]>Keep Reading...
The post Live Streaming in Flutter appeared first on Mobikul.
]]>Introduction
Live streaming has become a crucial feature in many modern applications, from social media platforms to e-learning and fitness apps.
With Flutter’s growing ecosystem, developers can now build high-performance live streaming apps across Android and iOS with a single codebase.

What is Live Streaming?
Live streaming refers to transmitting audio and video content over the internet in real time. It enables users to broadcast or watch content without waiting for the whole video to download.
Why Do We Use Live Streaming?.
Live streaming is a great way for people and businesses to connect with others online. Here’s why it’s so useful:
1. Talk in Real-Time:
You can chat with people live while you stream. They can ask questions, leave comments, and you can respond right away.
2. Reach More People:
Anyone with internet can watch from anywhere in the world. You don’t have to be in the same place.
3. Feels More Real:
Live videos aren’t edited, so they feel more honest and natural. People trust what they see.
4. Great for Businesses:
Businesses use live streaming to:
- Show new products
- Show events
5. Good for Learning:
Live streaming has made learning easier and more flexible for both teachers and students. Here’s how it’s used in education:
- Teach online classes.
- Run workshops.
- Listen to lessons in real-time.
Implementation
We are going to implement how to we use Live Streaming in flutter.
We are going to implement two types of live streaming in Flutter: HLS and RTMP. For implementation please follow below mention steps.
Using HLS (HTTP Live Streaming) and RTMP (Real-Time Messaging Protocol) Method
HLS (HTTP Live Streaming) :
HLS is a way to stream videos over the internet, created by Apple. Instead of sending one big video file, it breaks the video into many small parts (usually a few seconds each).
Why Use HLS:
Better performance on slow internet: The video can change quality based on your internet speed.
Smoother playback: If your internet gets slower, the video doesn’t stop—it just switches to a lower quality.
RTMP (Real-Time Messaging Protocol):
RTMP (Real-Time Messaging Protocol) is a streaming protocol developed by Macromedia for live video/audio/data transmission over the internet.
It is used primarily for live streaming.
Why Use RTMP:
RTMP is known for lower latency than HLS, which makes it ideal for interactive live broadcasts, such as (Webinars,Live events,Game streaming).
Unlike HLS, which uses segmented files, RTMP streams data in a continuous flow, allowing quicker reaction times.
Steps 1:
First, we need to create a new Flutter project and add the following dependency to the pubspec.yaml file.
dependencies:
  flutter_vlc_player: any
You need to add latest version of this package.
Step 2:
In this step you need to create a StatelessWidget and add below mention code in this screen.
late VlcPlayerController _controller;

/// Add HLS Url
final String _hlsUrl = "your hlsUrl";

/// Add RMTP Url.
final String _rtmpUrl = "your rtmpUrl";
_hlsUrl and _rtmpUrl.@override
void initState() {
super.initState();
currentUrl = _hlsUrl;
_controller = VlcPlayerController.network(
currentUrl,
hwAcc: HwAcc.full,
autoPlay: true,
options: VlcPlayerOptions(),
);
}
After that you need to initialize the current stream controller in initState.
Step 3:
void _switchStream(String url) async {
  setState(() {
    currentUrl = url;
  });
  await _controller.setMediaFromNetwork(url);
  _controller.play();
}
Allows dynamic switching between HLS and RTMP streams at runtime.
-
setMediaFromNetwork()updates the media URL of the controller. -
play()restarts playback on the new stream.
Step 4:
Expanded(
  child: VlcPlayer(
    controller: _controller,
    aspectRatio: 16 / 9,
    placeholder: const Center(child: CircularProgressIndicator()),
  ),
),
-
Displays the video stream using
VlcPlayer. -
aspectRatio: 16/9gives a standard widescreen layout. -
A loading spinner is shown while the video buffers.
Step 5:
ElevatedButton(
  onPressed: () => _switchStream(_hlsUrl),
  child: const Text("Play HLS Video"),
),
ElevatedButton(
  onPressed: () => _switchStream(_rtmpUrl),
  child: const Text("Play RTMP video"),
),
-
This buttons for switching between HLS and RTMP sources dynamically.
Output
Live Streaming in Flutter
Live streaming has become a crucial feature in many modern applications, from social media platforms to e-learning and fitness apps.
With Flutter’s growing ecosystem, developers can now build high-performance live streaming apps across Android and iOS with a single codebase
Conclusion
In this blog, we have explored how to use Live Streaming in flutter.
Live streaming in Flutter using HLS and RTMP gives you the flexibility to build smooth and responsive video apps.
HLS is great for stable, high-quality streaming on all devices, while RTMP is perfect for low-latency, real-time interactions.
With tools like flutter_vlc_player, Flutter makes it easy to implement both. Choose the protocol that best fits your app’s needs and deliver a great live-streaming experience.
You can also check other blogs from here for more knowledge.
The post Live Streaming in Flutter appeared first on Mobikul.
]]>Keep Reading...
The post Odoo POS Mobile App Integration with SUNMI Mobile Terminal appeared first on Mobikul.
]]>In this blog, we’ll explore integrating SUNMI Android terminals with Odoo POS to utilise their thermal printing and hardware features.

What is a POS App?
A POS (Point of Sale) app helps businesses manage sales, track inventory, process payments, and generate receipts, commonly used in retail and hospitality industries.
It is the digital version of a traditional cash register, often enhanced with features like analytics, inventory management, and customer tracking.
To dive deeper, check out our comprehensive user guide on the Odoo POS Flutter App for everything you need to get started.
What is SUNMI Mobile Terminal?
A SUNMI Mobile Terminal is a smart, Android-based handheld device designed to streamline business operations by integrating multiple functionalities into a single, portable unit.
These terminals are widely used in sectors like retail, hospitality, logistics, and healthcare to facilitate tasks such as sales transactions, inventory management, and customer engagement.
Key Features:-
- Operating System: Runs on Android OS, often customised with SUNMI’s proprietary interface for enhanced business applications.
- Integrated Thermal Printer: Built-in high-speed thermal printers (e.g., 58mm or 80mm) allow for immediate receipt and label printing.
- Barcode Scanning: Equipped with 1D/2D barcode scanners for efficient product identification and inventory tracking.
- NFC and RFID Support: Facilitates contactless payments and access control through Near Field Communication (NFC) and Radio-Frequency Identification (RFID) technologies.
- Connectivity Options: Supports 4G/3G/2G networks, Wi-Fi, Bluetooth, and GPS to ensure seamless communication and location tracking.
Connecting SUNMI Terminal with the Odoo POS Flutter App
By connecting SUNMI printer with your POS App, you can send print commands for text, images, and structured rows.
Follow the step-by-step guide below to set up and use the printer efficiently:
Step 1:- Add the below Flutter package to your project
Add the Sunmi Printer Plus package to your project.
dependencies:
  sunmi_printer_plus: ^4.1.0
Then run:
flutter pub get
This package provides access to SUNMI’s built-in printer API for Flutter apps.
Step 2:- Import the Package in your code
At the top of your Dart file where you want to access the printer, add:
import 'package:sunmi_printer_plus/sunmi_printer_plus.dart';
Step 3: Print Text and Images with Sunmi Terminal
After initialising the SUNMI printer, you can send commands for styled text, images, and structured rows:
1. Printing Plain and Styled Text
You can follow the steps below to see the practical execution of the print commands of Sunmi’s built-in thermal printer:
await sunmiPrinterPlus.printCustomText(
                      sunmiText: SunmiText(
                          text: "Let Print Hello World"
                      )
                  );
2. Print Assets and Network Images
To print images on the Sunmi Terminal printer, convert the asset and network images to Uint8List before passing them to the print command.
await sunmiPrinterPlus.printImage(await getAssetImageAsUint8List("lib/assets/logo.jpeg"), align: SunmiPrintAlign.CENTER);  // For Assets Images

await sunmiPrinterPlus.printImage(await getNetworkImageAsUint8List("https://...../logo.png"), align: SunmiPrintAlign.CENTER); // For network Images
  Future<Uint8List> getAssetImageAsUint8List(String assetPath) async {
    ByteData byteData = await rootBundle.load(assetPath);
    return byteData.buffer.asUint8List();
  }
}

Future<Uint8List> getNetworkImageAsUint8List(String imagePath) async {
  ByteData byteData = await NetworkAssetBundle(Uri.parse(imagePath)).load("");
  return byteData.buffer.asUint8List();
}
How Sunmi Print Commands Work
The sunmi_printer_plus Sends print commands sequentially, meaning each function is executed in the order it’s called. This is crucial for formatting and flow.
await sunmiPrinterPlus.addText(...);
await sunmiPrinterPlus.printImage(...);
await sunmiPrinterPlus.printRow(...);
Important Note: Always use await to ensure each command completes before the next one begins. This guarantees proper alignment and avoids overlapping or out-of-order prints.
Check out the complete video guide on integrating the Odoo POS Mobile App with the SUNMI Mobile Terminal.
Conclusion
In this blog, we explored how to integrate the Odoo POS App with a SUNMI mobile terminal to leverage its built-in thermal printer.
By using the sunmi_printer_plus Flutter package, we demonstrated how to print text, images, and formatted invoice details directly from the app, all without relying on external hardware.
By combining Odoo’s powerful backend with SUNMI’s hardware and Flutter’s flexibility, you get a robust, professional-grade POS system — all from a single device.
The post Odoo POS Mobile App Integration with SUNMI Mobile Terminal appeared first on Mobikul.
]]>Keep Reading...
The post How to use Open source LLM in mobile devices appeared first on Mobikul.
]]>Introduction
LLM stands for Large Language Model a type of artificial intelligence trained on Large amounts of text data to understand and generate human-like language. These models can answer questions.
What is an Open-Source LLM
An Open-Source LLM (Large Language Model) in a mobile device refers to a freely available AI language model that can run directly on smartphones or tablets, without needing internet or cloud servers.
These models are designed to understand and generate human-like language, and when optimized properly.
The model weights are publicly available, anyone can download and use them.
Open-source, meaning its weights and code are freely available.

How Does It Work?
Choose a small model:
Mobile phones can’t handle huge models like the cloud can, so developers use small, efficient models.
Make the model even smaller:
This is done using a process called quantization, which reduces the file size so it fits in your phone’s memory.
Build a mobile app:
The app sends your question to the LLM (Large Language Model) running on the phone and gets the answer just like a chatbot, but everything happens offline.
Everything runs on your phone:
No internet needed, no sending data to the cloud. It’s private and fast.
Why Is This Useful?
Below mention some point why we use this.
Privacy:
With on-device LLMs, the model is running locally. Your inputs and outputs never leave your phone.
Offline Access:
You don’t need an internet connection to use the model.
Offline AI lets you interact with LLMs without relying on connectivity.
Speed:
On-device processing is faster because:
No network latency (delay due to sending/receiving data over the internet).
Free Usage – No API cost:
Running your own open-source LLM on your device – no cost per query.
Implementation
We are going to implement this using Flutter so we need to follow below steps to implement this topic.
Step 1:
First of all we need to create a new flutter project and create a StatefulWidget and add below mention code in this screen.
@override
  void initState() {
    super.initState();
   _downloadService = ModelDownloadService(
      modelUrl: widget.model.url,
      modelFilename: widget.model.filename,
      licenseUrl: widget.model.licenseUrl,
    );
    _downloadModel();
  }
Future<void> _downloadModel() async {
    if (widget.model.needsAuth && _token.isEmpty) {
      ScaffoldMessenger.of(context).showSnackBar(
        const SnackBar(content: Text('Please set your token first.')),
      );
      return;
    }

    try {
      await _downloadService.downloadModel(
        token:
            widget.model.needsAuth ? _token : '', // Pass token only if needed
        onProgress: (progress) {
          setState(() {
            _progress = progress;
          });
        },
      );
      setState(() {
        needToDownload = false;
      });
    } catch (e) {
      if (context.mounted) {
        ScaffoldMessenger.of(context).showSnackBar(
          const SnackBar(content: Text('Failed to download the model.')),
        );
      }
    } finally {
      setState(() {
        _progress = 0.0;
      });
    }
  }
We need to call this method _downloadModel() form method initState().
Future<void> downloadModel({
    required String token,
    required Function(double) onProgress,
  }) async {
    http.StreamedResponse? response;
    IOSink? fileSink;

    try {
      final filePath = await getFilePath();
      final file = File(filePath);

      // Check if file already exists and partially downloaded
      int downloadedBytes = 0;
      if (file.existsSync()) {
        downloadedBytes = await file.length();
      }

      // Create HTTP request
      final request = http.Request('GET', Uri.parse(modelUrl));
      if (token.isNotEmpty) {
        request.headers['Authorization'] = 'Bearer $token';
      }

      // Resume download if partially downloaded
      if (downloadedBytes > 0) {
        request.headers['Range'] = 'bytes=$downloadedBytes-';
      }

      // Send request and handle response
      response = await request.send();
      if (response.statusCode == 200 || response.statusCode == 206) {
        final contentLength = response.contentLength ?? 0;
        final totalBytes = downloadedBytes + contentLength;
        fileSink = file.openWrite(mode: FileMode.append);

        int received = downloadedBytes;

        // Listen to the stream and write to the file
        await for (final chunk in response.stream) {
          fileSink.add(chunk);
          received += chunk.length;

          // Update progress
          onProgress(totalBytes > 0 ? received / totalBytes : 0.0);
        }
      } else {
        throw Exception('Failed to download the model.');
      }
    } catch (e) {
      if (kDebugMode) {
        print('Error downloading model: $e');
      }
      rethrow;
    } finally {
      if (fileSink != null) await fileSink.close();
    }
  }
Above this code is helpful to download model using huggingface token.
Future<String> getFilePath() async {
    final directory = await getApplicationDocumentsDirectory();
    return '${directory.path}/$modelFilename';
  }
This function gets the app’s document directory and returns the full file path by appending modelFilename to it. It’s commonly used to locate where to read/write files locally in a Flutter app.
Step 2:
In this step we need to create an enum named Model, which will help in downloading models.
enum Model {
  gemma3GpuLocalAsset(
    // model file should be pre-downloaded and placed in the assets folder
    url: 'assets/gemma3-1b-it-int4.task',
    filename: 'gemma3-1b-it-int4.task',
    displayName: 'Gemma3 1B IT (CPU / Local)',
    licenseUrl: '',
    needsAuth: false,
    localModel: true,
    preferredBackend: PreferredBackend.gpu,
    modelType: ModelType.gemmaIt,
    temperature: 0.1,
    topK: 64,
    topP: 0.95,
  ),
final String url;
  final String filename;
  final String displayName;
  final String licenseUrl;
  final bool needsAuth;
  final bool localModel;
  final PreferredBackend preferredBackend;
  final ModelType modelType;
  final double temperature;
  final int topK;
  final double topP;

  // Constructor for the enum
  const Model({
    required this.url,
    required this.filename,
    required this.displayName,
    required this.licenseUrl,
    required this.needsAuth,
    this.localModel = false,
    required this.preferredBackend,
    required this.modelType,
    required this.temperature,
    required this.topK,
    required this.topP,
  });
}
This enum is helpful to download model.
Step 3:
In this step we need to create a StatefulWidget which name is ChatScreen and add below mention menthod code.
Future<void> _initializeModel() async {
    if (!await _gemma.modelManager.isModelInstalled) {
      final path = kIsWeb
          ? widget.model.url
          : '${(await getApplicationDocumentsDirectory()).path}/${widget.model.filename}';
      await _gemma.modelManager.setModelPath(path);
    }
    final model = await _gemma.createModel(
      modelType: super.widget.model.modelType,
      preferredBackend: super.widget.model.preferredBackend,
      maxTokens: 1024,
    );
    chat = await model.createChat(
      temperature: super.widget.model.temperature,
      randomSeed: 1,
      topK: super.widget.model.topK,
      topP: super.widget.model.topP,
      tokenBuffer: 256,
    );
    setState(() {
      _isModelInitialized = true;
    });
  }
Above code is helpful to initialize model at chat screen.
Step 4:
We need to create chat screen ui with below mention code. we need to add this code in ChatScreen.dart
import 'package:flutter/foundation.dart';
import 'package:flutter/material.dart';
import 'package:flutter_gemma/core/chat.dart';
import 'package:flutter_gemma/flutter_gemma.dart';
import 'package:flutter_gemma_example/chat_widget.dart';
import 'package:flutter_gemma_example/loading_widget.dart';
import 'package:flutter_gemma_example/models/model.dart';
import 'package:path_provider/path_provider.dart';

class ChatScreen extends StatefulWidget {
  const ChatScreen({super.key, this.model = Model.gemma3Gpu});

  final Model model;

  @override
  ChatScreenState createState() => ChatScreenState();
}

class ChatScreenState extends State<ChatScreen> {
  final _gemma = FlutterGemmaPlugin.instance;
  InferenceChat? chat;
  final _messages = <Message>[];
  bool _isModelInitialized = false;
  String? _error;

  @override
  void initState() {
    super.initState();
    _initializeModel();
  }

  @override
  void dispose() {
    super.dispose();
    _gemma.modelManager.deleteModel();
  }
  @override
  Widget build(BuildContext context) {
    return Scaffold(
       appBar: AppBar(
         backgroundColor: Colors.black,
         title: const Text(
          'Mobikul Chatbot',
          style: TextStyle(fontSize: 20),
        ),
      ),
      body: Stack(children: [
        Center(
          child: Image.asset(
            'assets/background.png',
            fit: BoxFit.fill,
            height: MediaQuery.of(context).size.height,
            width: MediaQuery.of(context).size.width,
          ),
        ),
        _isModelInitialized
            ? Column(children: [
                if (_error != null) _buildErrorBanner(_error!),
                Expanded(
                  child: ChatListWidget(
                    chat: chat,
                    gemmaHandler: (message) {
                      setState(() {
                        _messages.add(message);
                      });
                    },
                    humanHandler: (text) {
                      setState(() {
                        _error = null;
                        _messages.add(Message(text: text, isUser: true));
                      });
                    },
                    errorHandler: (err) {
                      setState(() {
                        _error = err;
                      });
                    },
                    messages: _messages,
                  ),
                )
              ])
            : const LoadingWidget(message: 'Initializing the model'),
      ]),
    );
  }
}
Step 5:
We need to create below mention method to show error text message when error is occurred.
Widget _buildErrorBanner(String errorMessage) {
    return Container(
      width: double.infinity,
      color: Colors.red,
      padding: const EdgeInsets.all(8.0),
      child: Text(
        errorMessage,
        style: const TextStyle(color: Colors.white),
        textAlign: TextAlign.center,
      ),
    );
  }
We need to add this method in ChatScreen, this method is helpful to display error message.
Output
How to use open source LLM in mobile devices
An LLM (Large Language Model) in a mobile device refers to a freely available AI language model that can run directly on smartphones or tablets, without needing internet or cloud servers.
Conclusion
In this blog, we have explored how to implement Open-source LLMs on mobile devices.
You can also check other blogs from here for more knowledge.
The post How to use Open source LLM in mobile devices appeared first on Mobikul.
]]>Keep Reading...
The post Why RAG is ideal for chatbot development in WooCommerce appeared first on Mobikul.
]]>These AI-driven models LLMs come with some drawbacks like not providing appropriate answers which is called hallucination.
To overcome those drawbacks RAG comes into play !!
RAG is used to create the question-answering system, Content generation, Summarization of documents or chat, Conversational Chatbot development etc.
Why RAG (Retrieval Augmented Generation)?
With the help of RAG (Retrieval Augmented generation) you can leverage large language models with your own content (Personal Data).
For example, If you ask a query to the search engine what is the colour of the sky?
It will crawl the data over the whole internet and provide you with the answer with a list of some contents or links and answers to your questions. You need to read it by yourself digest it and understand it.
What the generative AI LLMs will do is It will leverage the content over the internet instead of just listing the content. It will combine it assemble it and provide the answers to your queries.
And these LLMs are taking the complete experience to another level of productivity and accuracy.
Now Say you want the same experience but with your own content, Say a generative AI-chatbot on your e-commerce website or WooCommerce mobile app.
Who will answer the user’s queries then in that case this RAG architecture comes into role.

Flow Diagram for RAG-based Chatbot

RAG in chatbot development in Woocommerce?
AI-based Smart Chatbots are important as they help to provide accurate answers to the customer’s queries.
Say a person has an e-commerce website based on Woocommerce as an Opensource.
Now if he or she wants to provide efficient answers based on the data available on their website. i,e CMS pages, Products, Orders etc.
They can train the complete data set of the Woocommerce website with the Large language models (LLMs).
The chatbot is available on all the pages of a Woocommerce website, It will answer the user’s queries based on this data.
This completed process is known as an RAG-based chatbot for a Woocommerce website.
Note: We have created a Woocommerce-based chatbot. You can see how accurately it provides the answers to the queries
Application of RAG in Woocommerce Chatbot
Question and Answering Chatbots:
Some customers have some frequently asked questions and to provide the answers one can build a FAQ-based chatbot on their Woocommerce Website.
This improves the customer experience. They get the answers within a few seconds.
Smart Chatbot can reply on the basis of products and services, CMS pages like support and refund policies, Order status, Delivery information etc.

PDF/documents Chatbots:
It is also important in this growing Artificial intelligence era. Say you are selling some products on your Woocommerce website.
Which is having a detailed description of a product, and having multiple pdf of a single product.
Now here also RAG comes into the role where you can train the LLMs with the PDF and documents.
And the chatbots will reply based on the documents. It takes less time and effort from the customer end.
URL trained Chatbot:
Train the chatbot from a website URL content is unlocking the RAG-based chatbot potential to the next level.
It helps to provide tailored responses to user queries.

Benefits of RAG for Woocommerce Chatbot
It provides more accurate and user-friendly results without hallucination. With the help of this, one can use 24-hour customer support.
The benefits of RAG-based chatbots also provide multi-language support. The customer can ask queries to the chatbot in their native languages.

It helps to provide consistent communication with the customers.
With the help of chatbots, you can optimise the process which previously depended on human integrations.
It helps to speed up the response time, guiding the customer to make the purchase faster on an e-commerce website.
Conclusion
This is all about the basic idea of how efficiently you can use RAG-based Chatbot for your Woocommerce website.
You can also go through the Mobile App Development Services for end to end mobile app development
Thank you for reading the documentation. For any queries or doubts react to us at [email protected]
You can also raise a ticket at our Helpdesk system.
The post Why RAG is ideal for chatbot development in WooCommerce appeared first on Mobikul.
]]>