Artificial Intelligence (AI) is no longer a futuristic concept confined to science fiction. It's here, and it's everywhere. From our web browsers to our operating systems, AI is becoming an integral part of our digital lives. But as AI continues to permeate every aspect of our daily routines, one question arises: Is this always necessary?
The AI Everywhere Phenomenon
AI is being added to products and services at an unprecedented rate. Google recently announced AI integration in their Chrome browser, promising a more personalized browsing experience. OnePlus has introduced AI in its latest Oxygen OS 16 to create a Mind Space that collects and queries user data. Even Microsoft's SQL Server Management Studio (SSMS) version 22 comes with Copilot, an AI-powered assistant designed to streamline database management tasks.
While these advancements sound impressive, they also raise important questions about the necessity of AI in every tool we use. Is AI always an improvement, or are we risking overcomplication and potential security vulnerabilities?
In today's market, the mere mention of AI can be a powerful selling point. Products and services that incorporate AI often attract more attention and can command higher prices, simply because AI is seen as cutting-edge and innovative. This phenomenon is driven by a combination of consumer curiosity, the fear of missing out (FOMO), and the perception that AI-equipped products are more advanced or superior. However, this can lead to a situation where AI is added to products not because it genuinely enhances functionality or user experience, but because it is perceived as a valuable marketing tool. Companies may feel pressured to integrate AI to keep up with competitors, even if the actual benefits to the user are minimal or nonexistent.
The Problem with Forced AI Integration
One of the main issues with the current trend of AI integration is the lack of user choice. Many AI features are forced upon users without the option to opt out. This can be frustrating for those who prefer simplicity or have concerns about privacy. Imagine your grandparents trying to use a web browser or an operating system with AI features they don't understand or need. For them, these tools should be simple and intuitive, not filled with complex features they never asked for. For many, these tools are meant to be straightforward and efficient, and adding AI might complicate things without adding significant value.
Moreover, the forced integration of AI can lead to unnecessary complexity. Take the example of Google Chrome. For most users, a browser is a tool to access the internet quickly and securely. Adding AI might introduce new features, but it could also slow down the browser or introduce new vulnerabilities. The focus should be on improving core functionalities rather than adding flashy features that may not provide real value to the user.
Privacy and Security Concerns
With AI collecting and analyzing user data, there are significant implications for privacy and security. Users may be unaware of the extent to which their data is being collected and used. Transparency about data usage and robust security measures are essential to protect user information. Companies should provide clear options for users to control their data and opt out of AI-driven features if they choose.
Consider OnePlus's Oxygen OS 16, which uses AI to create a "mind space" that collects and queries user data. While this might sound innovative, it raises questions about the necessity of such features and the potential risks to user privacy. Do users really need an AI to manage their digital lives, or is this just another gimmick to stay competitive?
Consider the following scenario: A hacker gains access to the personalized AI models used by a popular operating system. Each user's AI model is tailored to their habits, preferences, and behaviors. With this information, the hacker can craft highly targeted phishing attacks, impersonate users with uncanny accuracy, and even manipulate users into revealing sensitive information. The impact of such a breach could be devastating, leading to identity theft, financial loss, and a loss of trust in AI technologies. This underscores the importance of robust security measures to protect user data and ensure that AI systems are not vulnerable to exploitation.
The Impact on Critical Thinking
One of the concerning trends with the increasing reliance on AI is the tendency for people to reduce their own critical thinking and reflection. Instead of taking the time to think through a problem or question, many individuals turn to AI for quick answers. While AI can provide information rapidly, it's not always accurate or tailored to the individual's specific context.
This over-reliance on AI can lead to a decrease in problem-solving skills and independent thinking. It's essential for users to understand that AI should be used as a tool to assist, rather than replace, their own cognitive processes. By relying too heavily on AI, we risk losing our ability to think critically and make well-informed decisions.
The Limitations of AI Training Data
It's crucial to remember that AI systems are trained on data created by humans. This data can come from various sources like code on GitHub, articles on Wikipedia, or other online content. However, not all of this data is accurate, relevant, or up-to-date.
For instance, code on GitHub may contain bugs or outdated practices, and articles on Wikipedia can have errors or biases. As a result, AI systems can inadvertently learn and propagate these inaccuracies. This highlights the importance of critically evaluating the information provided by AI and not assuming that it is always correct or unbiased.
The Economic Impact on Documentation Platforms
The increasing reliance on AI for quick answers and solutions is also having a significant impact on platforms that traditionally rely on advertising revenue from their documentation. For instance, Tailwind, a popular CSS framework, has seen an 80% decline in revenue due to a decrease in traffic to their documentation pages.
Similarly, journalism platforms are experiencing a drop in readership as users turn to AI for instant news summaries and answers. As more users turn to AI for instant answers, platforms like Tailwind and journalism websites are struggling to maintain their revenue streams. This shift highlights the broader economic implications of AI on the tech ecosystem and the need for alternative revenue models for open-source projects and documentation platforms.
As AI continues to reshape the digital landscape, even our favorite programming libraries and tools are at risk. How would you feel if your favorite programming library started to decline because users are turning to AI for quick answers instead of consulting the documentation? Would you be willing to see your favorite tools struggle to maintain their relevance and revenue streams?
The Balance Between Innovation and Necessity
Striking a balance between innovation and necessity is crucial. While AI has the potential to bring about groundbreaking improvements, it should not come at the cost of simplicity and usability. Companies should focus on identifying areas where AI can genuinely make a difference and avoid implementing it just because it's the latest trend.
For instance, Microsoft's SSMS version 22 with Copilot could potentially streamline database management tasks. However, it's important to ask whether AI is necessary for every tool or if we're risking overcomplication. User feedback and thorough testing can help determine where AI adds value and where it might be superfluous.
The Importance of User Choice
Giving users the choice to opt in or out of AI features is essential. This approach respects user preferences and allows individuals to customize their experience according to their needs and comfort levels. When companies force AI on users without providing an option to disable it, they risk alienating those who prefer a simpler, more straightforward experience.
The importance of user choice cannot be overstated. Currently, the extent of what AI gathers from users is not always clear. Users should have the ability to clearly define what data can and cannot be used by AI systems. This could be achieved through a transparent and user-friendly consent mechanism, similar to the cookie consent pop-ups we see on websites. Just as users can choose which cookies to allow, they should be able to specify what data AI can collect and how it can be used. This level of transparency and control would not only empower users but also build trust in AI technologies. Companies should prioritize clear communication about data usage and provide straightforward options for users to manage their preferences.
The Future of AI: Striking the Right Balance
As AI continues to evolve, it's important for companies to consider the actual needs and preferences of their users. AI should be an opt-in feature rather than a forced addition. By prioritizing simplicity, security, and user choice, we can ensure that AI is used responsibly and effectively.
User feedback and thorough testing are crucial in determining where AI adds value and where it might be superfluous. Companies should focus on areas where AI can genuinely make a difference and avoid implementing it just because it's the latest trend.
Conclusion
While AI has the potential to revolutionize many aspects of our lives, its widespread integration into every product and service is not always necessary or beneficial. It's crucial for companies to consider the actual needs and preferences of their users. By prioritizing simplicity, security, and user choice, we can ensure that AI is used responsibly and effectively.
However, there is hope on the horizon. Innovations in privacy-focused AI, such as Confer, created by the founder of Signal, are emerging. These tools prioritize user privacy and data security, demonstrating that it is possible to harness the power of AI without compromising personal information. As these privacy-first AI solutions continue to develop, they offer a promising alternative to the current trend of data-hungry AI systems.
What are your thoughts on the proliferation of AI in everyday tools? Do you think it's necessary or just a trend?
]]>It was 5:06 AM on December 6, 2025, when my phone lit up with a notification from my server hosting provider:
Your VPS plan has reached its CPU limit, which may cause your website or application to slow down, or even become temporarily unavailable.
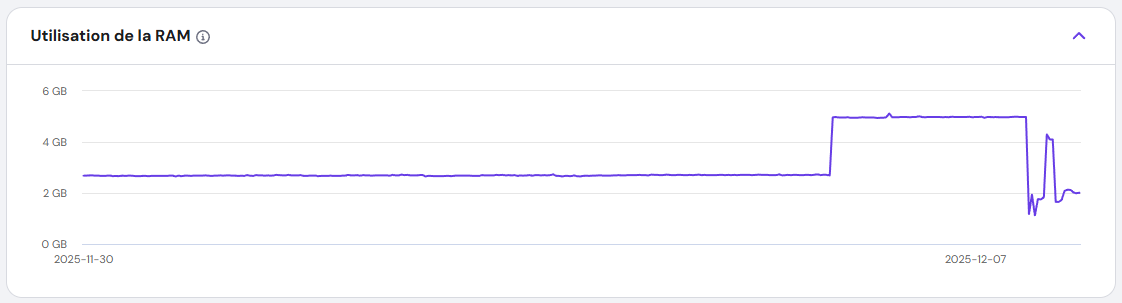
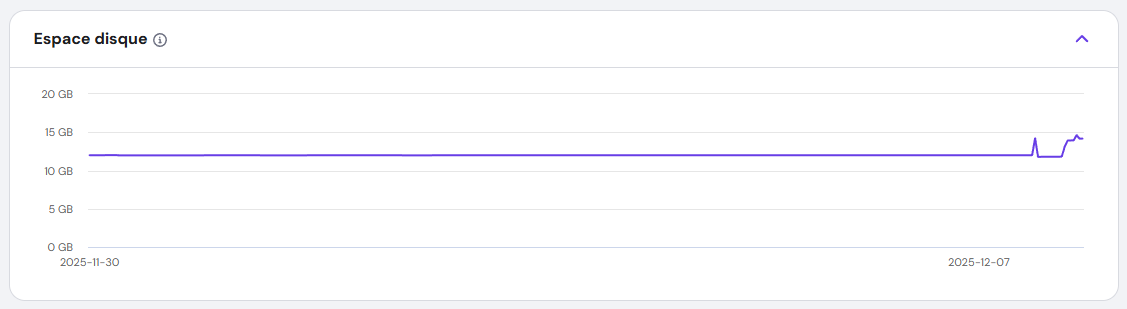
I rubbed my eyes, assuming it was a false alarm. But when I logged into my dashboard, the CPU usage graph told a different story: a flat line at 100%, stretching back over an hour. My VPS, which usually idled at a quiet 4%, was now screaming under full load.

I hadn’t touched the server in days. No new deployments. No configuration changes. Something was wrong.
Everything else seemed OK from my point of view.

The Hunt for the Culprit: Stopping the Bleeding
First Suspicions: DDoS or a Runaway Process?
I ruled out a DDoS attack quickly—my traffic logs were normal. Next, I wondered if one of my applications had gone into an infinite loop. I restarted the VPS, but the problem persisted. The CPU usage remained stubbornly at 100%.
The Breakthrough: Umami Analytics
I run multiple Docker containers managed by Dokploy. One by one, I stopped each container, watching the CPU graph like a hawk. And then—success. When I stopped the Umami Analytics container, the CPU usage plummeted.
Umami? It’s just an analytics tool. Why was it suddenly consuming all my resources?
Uncovering the Malware: A Hidden Crypto Miner
The Virus Scan
I installed a virus scanner and let it run. Within minutes, it flagged a suspicious binary: fghfg, buried in a Docker volume. But the real shock came when I found apache.sh, a shell script connecting to https://tr.earn.top.I didn't know exactly what it was, but it knew it was not something good.
The Next.js Connection
The files were in a folder named Nextjs. That’s when it clicked. Earlier that week, I’d read about CVE-2025-55182 and CVE-2025-66478, a critical vulnerability in React Server Components. I checked the Umami Analytics GitHub repo and saw the confirmation: a recent patch for the compromised Next.js 15.3.1 dependency.
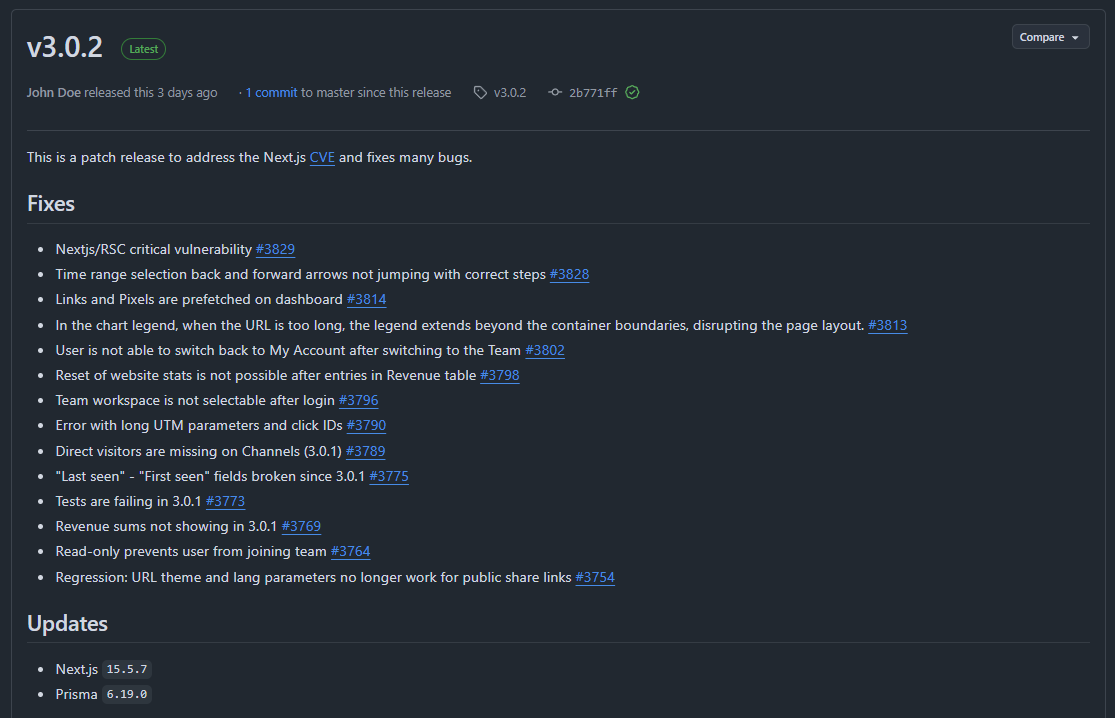
I was running Umami 2.18.1, which used the vulnerable version. The Next.js team’s official blog post confirmed my fears: attackers were exploiting this flaw to inject malicious code.


The Fix: Reclaiming My Server
Delete the Malware
I immediately deleted fghfg and apache.sh, but I knew the damage might run deeper.
Update and Rebuild
I pulled the latest Umami Analytics (3.0.2), which used the patched Next.js version. Then, I rebuilt the Docker container from scratch, ensuring no traces of the malware remained.
Watch the Recovery
I refreshed the CPU graph. The line dropped from 100% to normal levels within minutes. My VPS was finally breathing again.
The Bigger Lesson: Supply Chain Attacks in Node.js
This wasn’t just bad luck—it was a supply chain attack. Someone had exploited a vulnerability in a trusted library (Next.js) to turn my server into a crypto-mining slave. The scariest part? I never saw it coming.
Why This Matters
- Outdated dependencies are a ticking time bomb. Even one unpatched library can open the door to attackers.
- Docker volumes can hide malware. If you’re not scanning them, you might miss hidden threats.
- Supply chain attacks are rising. The Node.js ecosystem, with its vast dependencies, is a prime target.
How to Protect Yourself: Lessons from the Front Lines
Automate Updates
Set up automated dependency updates for your projects. Tools like npm audit and yarn audit can catch vulnerabilities before they become disasters.
Scan Your Containers
Use Trivy or Clair to scan Docker images for hidden threats. Don’t assume your containers are safe—verify it.
Monitor Relentlessly
CPU spikes? Unusual processes? Investigate immediately. Tools like Netdata or Prometheus can alert you before things spiral out of control.
Minimize Your Attack Surface
Use minimal base images for Docker. The fewer packages you have, the fewer opportunities for attackers.
Conclusion: A Wake-Up Call
That night, I learned a hard lesson: Security isn’t just about firewalls—it’s about vigilance. A single outdated dependency turned my VPS into a crypto-mining rig. But by acting fast—updating, scanning, and monitoring—I took back control.
While this was a serious cyber attack, there’s something oddly rewarding about facing such challenges. It forced me to dig deeper, learn more, and grow as a developer and sysadmin. Every problem is an opportunity to sharpen your skills, and this one reminded me just how important it is to stay proactive in the ever-evolving world of cybersecurity.
The digital world is full of hidden threats, but you don’t have to be a victim. Stay updated, stay alert, and never let your guard down. And remember: even the toughest challenges can become valuable lessons.
]]>Imagine your self-hosted Azure DevOps agents as a team of hardworking robots. They build, test, and deploy your code day in and day out—no coffee breaks, no complaints. But just like your laptop after months of downloads, they start to slow down, cluttered with old files, cached data, and forgotten artifacts.
Enter Azure DevOps Maintenance Jobs: the automated cleanup crew that keeps your agents running like they just rolled off the assembly line. No more manual deletions, no more "why is my pipeline failing?" mysteries—just smooth, efficient automation.
In this guide, we’ll walk through:
- What Azure DevOps is and why it’s a developer’s best friend
- The lowdown on agent pools, pipelines, and releases
- Self-hosted agents: the good, the bad, and the "why did my disk fill up?"
- A step-by-step guide to setting up maintenance jobs
- Why this tiny feature is a game-changer for your CI/CD workflow
Ready to give your agents the TLC they deserve? Let’s get started!
What Is Azure DevOps?
Azure DevOps is Microsoft’s all-in-one platform for planning, developing, testing, and deploying software. It combines:
- Repos (Git repositories)
- Pipelines (CI/CD automation)
- Boards (Agile project management)
- Test Plans (manual and automated testing)
- Artifacts (package management)
Whether you’re a solo developer or part of a large enterprise, Azure DevOps helps streamline workflows, reduce manual errors, and speed up releases.
What Are Agent Pools, Pipelines, and Releases?
Agent Pools
An agent pool is a collection of machines (agents) that execute jobs in your pipelines. Azure DevOps offers two types:
- Microsoft-hosted agents (managed by Azure, no maintenance required)
- Self-hosted agents (run on your own infrastructure, giving you full control)
Pipelines & Releases
- Pipelines automate builds, tests, and deployments.
- Releases manage the deployment of your application across different environments (dev, staging, production).
Self-hosted agents are great for customization but require manual maintenance—unless you set up maintenance jobs!
Self-Hosted Agents: Pros & Cons
Pros
- Full control over hardware, software, and security
- Cost-effective for long-running or high-frequency jobs
- Custom environments (specific tools, dependencies, or configurations)
Cons
- Maintenance overhead (updates, cleanup, monitoring)
- Risk of clutter (old jobs, cached files, disk space issues)
- Manual intervention required if not automated
Solution? Maintenance jobs!
How to Configure Maintenance Jobs in Azure DevOps
Maintenance jobs help automatically clean up old jobs, free disk space, and keep agents running efficiently. Here’s how to set them up:
Step-by-Step Guide
Go to Organization Settings. From your Azure DevOps home page, click on Organization settings on the bottom left corner.
Navigate to Agent Pools. Under Pipelines, select Agent pools.
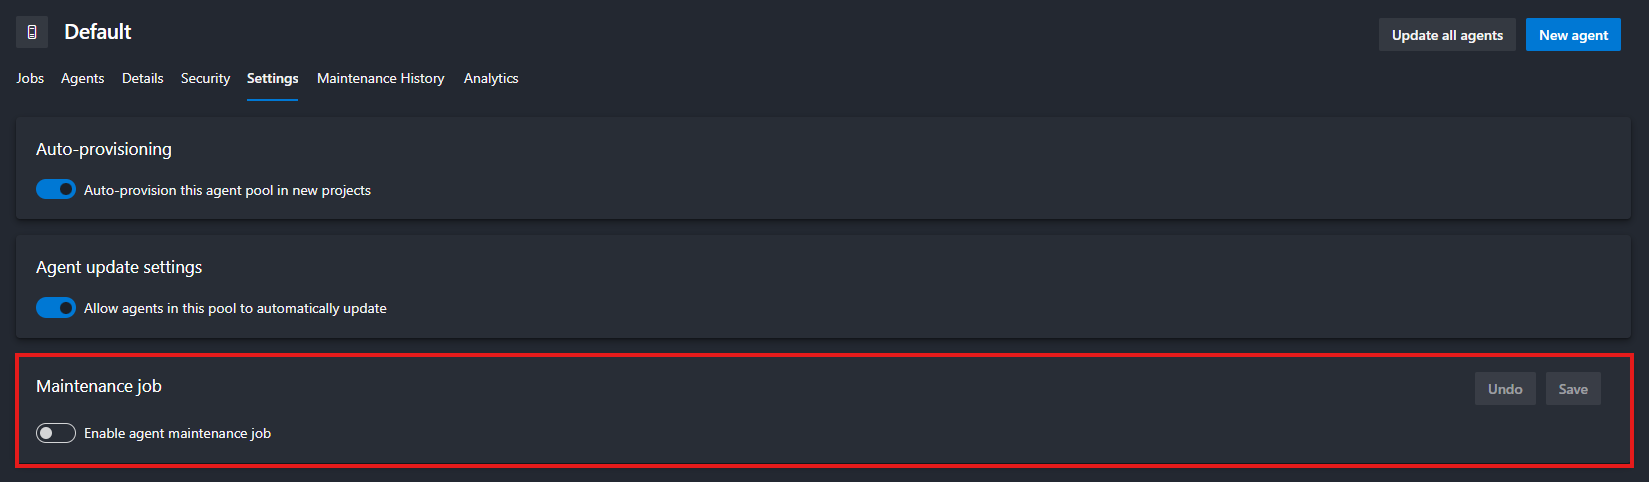
Choose the pool you want to configure (e.g., Default) then click the Settings tab at the top.
Toggle Enable maintenance jobs to On.
Configure the Schedule
- Set the frequency (daily, weekly, custom).
- Define retention policies (e.g., delete jobs older than 30 days).
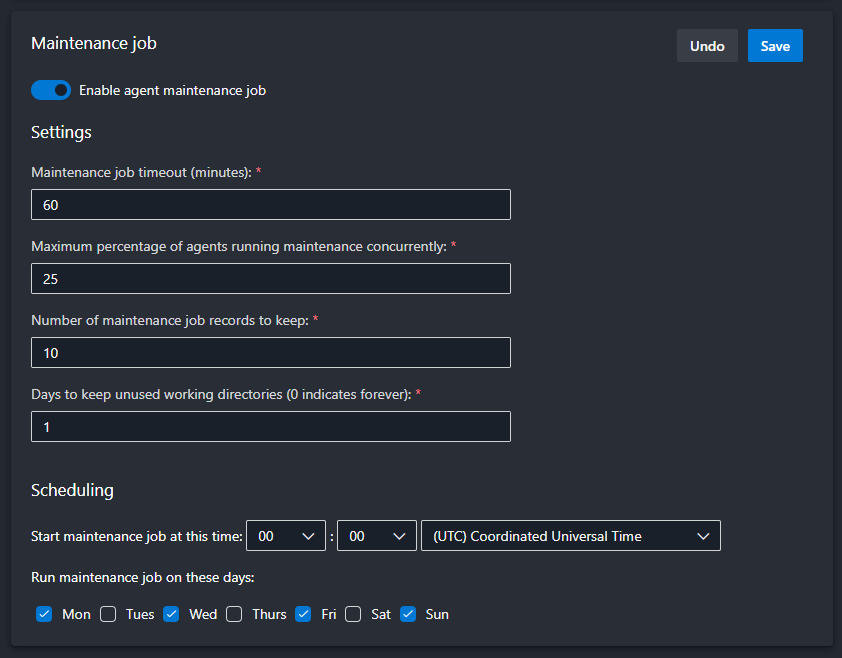
Don't forget to Save at the end.
Why Maintenance Jobs Are a Game-Changer
- Prevents disk space issues (no more failed jobs due to full storage!)
- Reduces manual cleanup (set it and forget it)
- Improves agent performance (faster builds, fewer errors)
- Enhances security (removes old, potentially vulnerable files)
Final Thoughts
Self-hosted agents give you power, but with great power comes great responsibility. Maintenance jobs are your secret weapon to keep things running smoothly without the hassle.
]]>Let’s be honest: most of us don’t think about online privacy until something goes wrong. Maybe it’s a creepy ad that just happens to know you were talking about buying a new toaster. Or maybe it’s the sinking feeling when you realize that photo of your kids you posted five years ago is now floating around on some shady data broker’s website.
Here’s the truth: The internet wasn’t built for privacy. It was built for convenience, for connection, and—let’s not sugarcoat it—for companies to make money off your data. But here’s the good news: You don’t have to accept that.
Now, before we dive in, let’s clarify what this article isn’t about. We’re not here to lecture you on multi-factor authentication (MFA), strong passwords, or random usernames—though those are important! Instead, we’re focusing on what you share, who sees it, and how to take back control of your digital life.
This isn’t about becoming a paranoid hermit who communicates only via carrier pigeon. It’s about making conscious choices—deciding what you share, with whom, and on your own terms. Because, let’s face it, the world doesn’t need to know what you had for breakfast, where you went on vacation, or what you Googled at 2 a.m. after binge-watching conspiracy theories.
So, why should you care? Let’s break it down.
The Social Issue: Oversharing in the Age of Algorithms
The World Doesn’t Need to Know Everything About Me
Remember the days when sharing your life meant inviting neighbors over for a slide show of your vacation photos? You’d gather in the living room, flip through a few dozen prints, and maybe endure a few eye rolls at Uncle Bob’s 200th sunset shot. It was personal. It was contained. And most importantly, it wasn’t permanent.
Fast forward to today, and we’ve replaced those slide shows with real-time broadcasts of our lives. Every meal, every gym session, every minor achievement—even the mundane, like what we had for breakfast or how we organized our sock drawer—gets uploaded, shared, and archived for hundreds, if not thousands, of people to see. Many of whom? Strangers. People we’ve never met, whose intentions we don’t know, and who—let’s be honest—probably don’t care as much as we think they do.
The Problem With Treating Life Like a Reality Show
We’ve been conditioned to believe that sharing equals connection. But at what cost?
- Your personal life isn’t a reality show. That photo of your kid’s first day of school? It’s adorable now, but in 10 years, will your child thank you for making it searchable forever? Kids grow up with digital footprints they never consented to—and once something’s online, it’s nearly impossible to erase. Imagine your most embarrassing childhood moment following you into job interviews. That’s the reality we’re creating for the next generation.
- Your home isn’t a public exhibit. Posting pictures of your house, your car, or even your daily routine might seem harmless, but it’s essentially handing out a map of your life to strangers. Burglars do use social media to scope out targets—vacation posts are basically neon signs saying, “My house is empty!” And let’s not forget the creepier side: geotagging your location in real-time is like sending an open invitation to anyone who wants to find you.
- Algorithms thrive on drama (and so do trolls). Ever notice how the more you engage with polarizing content, the more the algorithm shoves it in your face? That’s not an accident. Social media platforms profit from outrage, anxiety, and addiction. The more you react, the more they learn about you—and the more they can manipulate what you see. Before you know it, you’re stuck in a digital echo chamber, surrounded by content that’s designed to keep you scrolling, not to inform or uplift you.
- Would you hand a stranger your photo album? Probably not. So why do we willingly post our most intimate moments for the world to see, judge, and potentially exploit? We’ve blurred the line between sharing with friends and performing for an audience—and in the process, we’ve lost control over our own narratives.
The Psychological Toll of Living in a Fishbowl
Here’s the thing: Oversharing doesn’t just put your privacy at risk—it messes with your head.
- Comparison culture. When everyone’s life looks like a highlight reel, it’s easy to feel like you’re falling behind. But remember: No one posts their failures, their bad days, or their mundane moments. (Well, except for that one friend who loves complaining about their commute. You know who you are.)
- The pressure to perform. If you’re constantly documenting your life, you’re not just living—you’re directing. That’s exhausting. When did we decide that every moment needs to be content?
- Digital exhaustion. The more you share, the more you invite unsolicited opinions, judgments, and even harassment. Not everything needs an audience. Some memories are better kept just for you.
How to Share Mindfully (Without Becoming a Hermit)
Look, we’re not saying you should delete all your social media and move to a cabin in the woods (unless that’s your thing—no judgment). But it’s worth asking: What am I really gaining from this post?
- The 10-Year Rule: Before posting, ask yourself: Would I want this to be public in 10 years? If the answer is no, hit delete.
- The Stranger Test: If you wouldn’t show it to a random person on the street, don’t post it online.
- The Algorithm Audit: Notice how certain posts make you feel. If it’s stress, anxiety, or emptiness, it’s time to reevaluate.
Your life is yours. Not the internet’s. Not the algorithms’. Yours. And the beautiful thing about memories? The best ones don’t need an audience.
The Security Issue: Cybersecurity Nightmares
In Case of a Cyber Attack, the World Can Know Everything About You
Let’s talk about data breaches—those digital disasters that seem to happen almost weekly. You’ve heard the horror stories: hackers leaking passwords, credit card numbers, private messages, and even medical records. But here’s the part no one really talks about: Once your data is out there, it’s out there forever.
Think of the internet like a tattoo. You can try to cover it up, but it’s always there under the surface. That “deleted” tweet? Archived by multiple services. That “private” Facebook post? Screenshotted, shared, and potentially weaponized. That embarrassing photo from your college days? Living rent-free on some obscure server, just waiting to resurface at the worst possible moment.
And it’s not just about embarrassment. Your digital footprint is a goldmine for cybercriminals.
How Your Data Becomes a Weapon
- The "Deleted" Myth
- When you hit "delete," you’re not erasing your data—you’re just hiding it from your view.
- Wayback Machine, Google Cache, and data brokers ensure that almost nothing truly disappears.
- Example: Remember when old tweets from celebrities and politicians resurfaced years later, ruining careers? That could be you.
- Oversharing = A Hacker’s Treasure Map
- Phishing scams often start with publicly available info. Your pet’s name? Your mother’s maiden name? Your high school mascot? All common security questions—and all easily found on social media.
- Identity theft isn’t just about stealing credit card numbers. With enough personal details, criminals can open accounts, take out loans, or even file taxes in your name.
- Blackmail and doxxing are on the rise. That “harmless” rant you posted? It could be used against you.
- Your Data Is for Sale (Whether You Like It or Not)
- Ever gotten a call from "Microsoft Support" about a virus you definitely didn’t have? Congrats, your data was sold.
- Data brokers buy and sell your info like it’s a commodity. Your phone number, email, address, and even your shopping habits are packaged and traded in the shadows of the internet.
- Scammers don’t need to hack you—they just need to buy your data.
- The Domino Effect of a Single Breach
- One leaked password can unlock multiple accounts if you reuse credentials (which, let’s be honest, most of us do).
- Email breaches expose not just your inbox but every service tied to that email—banking, social media, subscriptions.
- Even "harmless" data (like your Netflix watch history) can be used to profile you for scams, ads, or even discrimination.
Real-Life Consequences (Because This Isn’t Just Theory)
- Job Loss: Employers do check social media. One ill-advised post can cost you a career.
- Financial Ruin: Identity theft can destroy your credit score in hours.
- Reputation Damage: Once something goes viral for the wrong reasons, you can’t unring that bell.
- Physical Safety: Stalkers and criminals use overshared info to track victims.
The Uncomfortable Truth: Nothing Is Truly Private Online
We like to think we’re in control. We set our profiles to "private," we delete old posts, we ignore those Terms & Conditions pop-ups. But here’s the hard truth: If it’s online, it’s vulnerable.
- Cloud backups? Hackable.
- Direct messages? Leakable.
- "Private" groups? Screenshotable.
The only real privacy is the data you never share in the first place.
What You Can Do (Without Becoming a Paranoid Recluse)
You don’t need to delete all your accounts and live off-grid (unless you want to). But you do need to adopt a mindset of digital minimalism.
- Assume Everything You Post Is Public—Forever.
- If you wouldn’t want it on a billboard, don’t put it online.
- Audit Your Digital Footprint.
- Google yourself. See what’s out there.
- Delete old accounts you no longer use.
- Use tools like HaveIBeenPwned to check if your data has been leaked.
- Lock Down What You Can’t Delete.
- Enable two-factor authentication (yes, even though we said we wouldn’t focus on security, this is non-negotiable).
- Use a password manager to avoid reusing passwords.
- Adjust privacy settings on social media—but remember, “private” ≠ “safe.”
- Be Skeptical of "Free" Services.
- If you’re not paying for the product, you are the product.
- Opt for privacy-focused alternatives (we’ll cover those later).
- Think Before You Share.
- Do you really need to post that? Will it add value to your life, or just clutter the internet?
- Who is this for? Friends? Family? Strangers? Adjust your audience accordingly.
Bottom Line: The Less You Share, the Less There Is to Steal
The internet is forever. And in a world where data breaches are inevitable, the best defense is not giving hackers, scammers, and data brokers anything to work with.
Your privacy isn’t just about hiding—it’s about protecting the life you’ve built. And trust us, future you will be grateful.
A Matter of Principle: Who Really Benefits From Your Data?
Companies Use Your Data to Sell It to Data Brokers—and You’re Footing the Bill
Let’s start with a hard truth: If you’re not paying for a product, you are the product. That “free” app, social network, or service isn’t doing you a favor. It’s trading your personal information for profit—and you’re none the wiser.
Your Data Is Big Business (And You’re Not Getting a Cut)
Imagine this: Every click, like, search, and location ping is collected, analyzed, and sold to the highest bidder. Companies like Google, Facebook (Meta), Amazon, and even lesser-known data brokers don’t just have your data—they package it, auction it, and use it to influence your behavior.
Ever had an ad so creepily accurate it felt like your phone was reading your mind? That’s not a coincidence. That’s surveillance capitalism—a business model where your attention, habits, and personal details are the currency.
- Google doesn’t just track your searches—it logs your location, emails, YouTube history, and even voice recordings (thanks, "Hey Google").
- Facebook (Meta) doesn’t just know who your friends are—it tracks your off-platform activity through pixels and third-party apps.
- Amazon doesn’t just sell you products—it monetizes your shopping habits, Alexa queries, and even what you almost bought.
This isn’t just advertising—it’s manipulation. The more they know about you, the better they can nudge you toward purchases, opinions, and even political beliefs.
But They Need My Data to Offer a Better Service! (Do They, Though?)
Sure, some data collection is necessary for functionality. If Spotify didn’t know what songs you listened to, it couldn’t generate your Discover Weekly playlist. If Google Maps didn’t access your location, it couldn’t give you directions.
But here’s the catch: Most apps demand far more data than they need—and they’re not always honest about why.
- Does a weather app really need access to your contacts, microphone, and precise location 24/7? (No.)
- Does a mobile game really need to scan your photos and files? (Absolutely not.)
- Does a flashlight app really need to track your location? (You already know the answer.)
These permissions aren’t just invasive—they’re a security risk. Every extra piece of data you hand over is another potential entry point for hackers, scammers, and data brokers.
The Slippery Slope of App Permissions: How "Convenience" Becomes Exploitation
Mobile apps have normalized outrageous data collection under the guise of "improving user experience." But let’s call it what it is: exploitation.
Here’s how it works:
- They Ask for More Than They Need
- Example: A fitness app asks for access to your contacts, camera, and browsing history. Why? Because they can sell that data—or use it to profile you for ads.
- They Bury the Real Reason in Legal Jargon
- Ever read a Terms & Conditions document? Neither have we. That’s the point. Companies count on you not paying attention.
- They Make It Hard to Say No
- "Allow access to proceed" isn’t a choice—it’s coercion. Deny permissions, and suddenly the app "doesn’t work properly." (Spoiler: It works fine. They just want your data.)
- They Sell Your Data to Third Parties
- Your info gets bundled and sold to data brokers, advertisers, and even government agencies. Ever wonder why you get spam calls from numbers you’ve never seen? Now you know.
The Rare Exceptions: When Data Collection Actually Benefits You
Not all data collection is evil. Some companies use your data for you—not for profit.
- Spotify’s Yearly Wrap is a fun, personalized recap because it’s designed for your enjoyment, not to sell you something.
- Duolingo’s streaks and progress tracking help you learn a language—not to manipulate you into buying ads.
- Password managers store your credentials to keep you secure, not to monetize your logins.
The key difference? These services give you value in return—they don’t exploit your data for hidden profits.
The Real Question: Is Convenience Worth the Cost?
We’ve been conditioned to trade privacy for convenience. But at what point do we ask: Is it really worth it?
- Do you really need to log in with Facebook to use a random quiz app?
- Is it really necessary to give a food delivery app access to your contacts?
- Are personalized ads really improving your life—or just making corporations richer?
Here’s the thing: You don’t have to quit the internet to protect your privacy. But you should question why companies want your data—and what they’re really doing with it.
What You Can Do: Take Back Control
You don’t have to boycott all tech to push back against surveillance capitalism. Start with these small but powerful steps:
- Deny Unnecessary Permissions
- If an app asks for access it doesn’t need, say no. (Yes, even if it complains.)
- Use Privacy-Focused Alternatives
- Ditch Google for DuckDuckGo.
- Swap Gmail for Proton Mail.
- Replace Chrome with Brave or Firefox.
- Opt Out of Data Collection
- Disable ad tracking in your phone settings.
- Use a VPN to mask your browsing activity.
- Request your data from companies (GDPR gives you this right!) and delete what you can.
- Support Ethical Companies
- Choose services that prioritize privacy (like Signal over WhatsApp, or Nextcloud over Google Drive).
- Pay for premium versions if it means no ads, no tracking.
- Spread the Word
- Talk about privacy with friends and family. The more people demand better, the more companies will have to listen.
Bottom Line: Your Data Is Yours—Act Like It
At the end of the day, your data belongs to you—not to Mark Zuckerberg, not to Google, and certainly not to some shady data broker.
Privacy isn’t about hiding—it’s about choice. It’s about deciding who gets to know what about you, and why.
So next time an app asks for more than it needs, ask yourself: Who’s really benefiting from this? And if the answer isn’t you—hit decline.
Best Practices: How to Protect Your Privacy Without Losing Your Mind
Let’s get one thing straight: You don’t need to live like a digital recluse to protect your privacy. You don’t have to delete all your social media, communicate in Morse code, or move to a cabin in the woods (unless you want to, in which case, more power to you). Privacy isn’t about paranoia—it’s about making smarter choices.
Here’s how to lock down your digital life without losing your mind—one simple step at a time.
Ask Yourself: "Do I Really Need an Account Here?"
We’ve all been there: You want to read an article, try a new app, or enter a giveaway, and suddenly, you’re forced to create an account. But before you hand over your email (or worse, your phone number), ask yourself:
- Would I give this information to a stranger on the street? If the answer is no, don’t give it to a random website.
- Is there a guest checkout option? Use it. Fewer accounts = fewer ways your data can leak.
- Do I actually need this service? If it’s a one-time thing, use a temporary email (like Temp-Mail) or skip it entirely.
Pro tip: If a service insists you create an account for something trivial (like reading a blog post), it’s not worth your privacy. Walk away.
Read the Terms and Conditions (Yes, Really)
We get it—no one actually reads the Terms & Conditions. They’re longer than a Game of Thrones novel and written in legalese so dense it could stop a bullet. But here’s the thing: If a company’s privacy policy is longer than a Harry Potter book, that’s a huge red flag.
You don’t need to read every word. Just skim for these key details:
What data do they collect?
- Are they tracking your location, contacts, browsing history, or biometrics? If so, why?
Who do they share it with?
- Do they sell your data to third-party advertisers, data brokers, or "partners"?
- Look for phrases like "we may share your data with trusted partners"—that’s code for "we sell your info."
How long do they keep it?
- Some companies delete your data after a set time. Others keep it forever. Guess which ones you should avoid?
Can you delete your data?
- If the answer is no (or buried in fine print), run.
Quick hack: Use tools like ToS;DR (Terms of Service; Didn’t Read) to get plain-English summaries of privacy policies.
Prioritize Tools That Respect Legal Standards
Not all countries (or companies) treat your privacy equally. Some have strong laws. Others? Not so much.
GDPR Compliance (EU Users, Rejoice!)
- The General Data Protection Regulation (GDPR) is one of the strictest privacy laws in the world.
- If a company is GDPR-compliant, it means they can’t just do whatever they want with your data.
- Look for this when choosing services—especially if you’re in the EU.
Avoid Tools Based in Countries with Weak Privacy Laws
- Some countries (looking at you, certain U.S. states) have lax data protection laws, meaning companies can sell your data with little oversight.
- China, Russia, and some Middle Eastern countries also have questionable data practices—be cautious with apps based there.
Rule of thumb: If a company is based in a country with strong privacy laws (like Switzerland, Germany, or Canada), they’re more likely to respect your data.
Choose Tools That Are Actually Private
Not all apps are created equal. Here’s what to look for in a truly privacy-focused tool:
End-to-End Encrypted (E2EE)
- No one—not even the company—can read your data.
- Examples: Signal (messaging), Proton Mail (email), Tresorit (cloud storage).
Offline-First (Or At Least Offline-Friendly)
- Less cloud dependency = less exposure to breaches.
- Examples: Joplin (notes), Cryptomator (encrypted files), KeePassXC (passwords).
Open-Source (Because Transparency Matters)
- Open-source tools let anyone inspect the code—so you know there’s no hidden tracking.
- Examples: Signal, Linux, Nextcloud, Firefox.
Easy to Delete (No Hostage Situations)
- If you can’t leave easily, it’s a trap.
- Red flag: Services that make you jump through hoops to delete your account.
- Green flag: Companies like Proton Mail and Tutanota let you nuke your data with one click.
Bonus: Look for tools that don’t require a phone number or real email to sign up. The less they know about you, the better.
Use Email Aliases to Catch Data Leaks (Like a Spy)
Ever wonder who’s selling your email to spammers? Here’s how to find out—and stop it.
Services like:
- SimpleLogin (now part of Proton)
- Firefox Relay
- AnonAddy
let you create unique email aliases for every site. Here’s why that’s genius:
Track Who Sells Your Data
- If you start getting spam at
[email protected], you know Amazon (or one of its partners) leaked your info.
Block Spam Before It Starts
- Disable an alias if it gets compromised. No more endless unsubscribe clicks.
Keep Your Real Email Private
- Never give out your real email again. Use aliases for everything—even friends who love forwarding chain emails.
Pro tip: Use a different alias for every service. That way, if one gets hacked, the rest stay safe.
But What Happens When Companies Refuse to Let You Use Aliases?
Just when you think you’ve got your privacy locked down, some companies actively work against you. A few years ago, a major gaming platform (you know the one) banned email aliases entirely, forcing users to hand over their real email addresses if they wanted to play. Suddenly, privacy tools like SimpleLogin and FastMail were off the table—and users had to choose between access and anonymity.
Why does this matter? Because it’s not just about gaming—it’s about control. And it’s a warning sign for all of us.
- Forcing Real Emails = More Data Collection
- The company claimed this was to "prevent fraud" and "improve security." But in reality, it was about controlling user data.
- By banning aliases, they ensured every user was tied to a real, traceable email, making it easier to track, profile, and monetize players.
- A Direct Attack on Privacy Tools
- Email aliases (like those from FastMail, SimpleLogin, or AnonAddy) are a key privacy tool. They let users mask their real email, reducing spam and tracking.
- By blocking aliases, the company removed a layer of privacy that many users relied on.
- Setting a Dangerous Precedent
- This wasn’t the first company to do this, and it won’t be the last. When big platforms force users to hand over real emails, it normalizes the idea that privacy is optional.
- Message to users: "Your convenience is less important than our data collection."
- The Hypocrisy of "Security" Claims
- The company framed this as a security measure, but real security doesn’t require sacrificing privacy.
- If they really cared about fraud, they could’ve implemented better verification methods—like two-factor authentication (2FA)—without banning aliases outright.
Prioritize Tools That Let You Actually Delete Your Account
Here’s a hard truth: If a company makes it difficult to leave, they don’t respect you. They see you as a product, not a person.
Red Flags (Run Away!)
- "Contact support to delete your account" (Why should you beg to leave?)
- "Your data will be retained for [vague time period]" (Translation: We’ll keep it forever.)
- No delete option at all (Yes, some apps still do this.)
Green Flags (Stay a While)
- "Delete my account" button in settings. (Looking at you, Proton Mail and Tutanota.)
- Automatic data deletion after inactivity.
- Clear explanations of what happens to your data when you leave.
Remember: If a service treats leaving like a breakup ("But why?! We can change!"), it’s not worth your time.
Beware of Default Settings: The Sneaky Data Leaks You Didn’t Sign Up For
Here’s a dirty little secret: Most apps and services are designed to share your data by default. They count on you not checking the settings—because if you did, you’d probably turn half of it off.
Why Default Settings Are a Privacy Nightmare
- They’re Set to "Share Everything"
- Example: That new app you downloaded? It’s probably sending your usage data, location, and device info to "improve the service" (aka sell to advertisers).
- Example: Windows 10/11 tracks your keystrokes, app usage, and even your voice data unless you manually disable it.
- They Bury the Opt-Out in Menus
- Example: Instagram’s default settings allow it to track your activity across other apps and websites. You have to dig into Settings > Ads > Ad Preferences to turn it off.
- Example: Many smart TVs send your viewing habits to manufacturers unless you opt out during setup (which most people skip).
- They Use Vague, Misleading Language
- "Help improve our services" = We’re selling your data.
- "Personalized experience" = We’re tracking everything you do.
- "Diagnostics and usage data" = We’re logging your every move.
- They Reset After Updates
- Example: iOS and Android sometimes re-enable tracking after updates. Always double-check your settings after installing a new version.
How to Fight Back: A Quick Settings Checklist
Before you use any new app or service, do this first (it takes 2 minutes and saves years of regret):
Check Privacy Settings Immediately
- Look for options like:
- "Data Sharing" (turn it OFF)
- "Analytics" (disable it)
- "Personalized Ads" (opt out)
- "Location Access" (set to "Never" or "While Using")
Deny Unnecessary Permissions
- Does a calculator app need your contacts? No.
- Does a game need your microphone? Probably not.
- Rule of thumb: If it doesn’t need the permission to function, don’t grant it.
Opt Out of "Improvement Programs"
- These are just fancy names for data collection.
- Example: Windows’ "Diagnostic Data" or Apple’s "iCloud Analytics."
Disable "Personalized Ads"
- Google: Ad Settings → Turn off ad personalization.
- Facebook/Instagram: Settings → Ads → Ad Preferences → Reset or turn off.
- iOS/Android: Go to your advertising ID settings and opt out.
Turn Off "Usage Data" Sharing
- Example: In Zoom, go to Settings → Telemetry and disable it.
- Example: In Spotify, turn off "Share my listening activity on Facebook."
Use a Burner Email for Sign-Ups
- SimpleLogin, Firefox Relay, or AnonAddy let you create aliases so your real email stays private.
Review App Permissions Regularly
- iOS: Settings → Privacy → See which apps have access to what.
- Android: Settings → Apps → Permissions → Revoke anything suspicious.
The Golden Rule: Assume the Worst and Adjust Accordingly
Companies want your data—it’s how they make money. Their default settings are designed to maximize collection, not protect you.
Your move:
- Before using any new app, check the settings.
- Opt out of everything that’s not essential.
- Repeat this every time you update an app.
It’s not paranoia—it’s basic digital hygiene. You wouldn’t eat food without checking the expiration date. Don’t use an app without checking its privacy settings.
Remember: If a company really cared about your privacy, they’d make it easy to opt out. The fact that they don’t? That’s your answer.
Bonus: Small Habits for Big Privacy Wins
You don’t need to overhaul your entire digital life to make a difference. Start with these easy, low-effort habits:
Log Out of Accounts When You’re Done
- Staying logged in = more tracking. Sign out when you’re not using a service.
Use Private/Incognito Mode (But Know Its Limits)
- It doesn’t make you anonymous, but it reduces tracking between sessions.
Turn Off Unused App Permissions
- Go to your phone’s settings and revoke access for apps that don’t need it.
Set a Quarterly "Privacy Cleanup" Reminder
- Delete old posts, clear cookies, and review app permissions every few months.
Think Before You Post
- Ask yourself: "Would I be okay with this being public forever?" If not, don’t hit share.
Tool Recommendations: Privacy-First Alternatives (Because You Deserve Better)
Tired of feeling like every app, website, and service is spying on you? You’re not alone. The good news? There are better, safer alternatives for almost everything. Here’s your privacy upgrade guide—no tech degree required.
Email: Ditch Gmail (And Reclaim Your Inbox)
Gmail is convenient, but it’s also a data collection machine. Google scans your emails for ads, tracks your activity, and shares your data with third parties. Time to switch.
Proton Mail (proton.me)
- End-to-end encrypted (even Proton can’t read your emails).
- Swiss-based (strong privacy laws).
- Ad-free, no tracking.
- Free tier available (with paid upgrades for more storage).
- Bonus: Works seamlessly with Proton VPN and Proton Calendar.
SimpleLogin (simplelogin.io)
- Mask your real email with unlimited aliases.
- Forward emails to your main inbox without exposing your address.
- Now owned by Proton, so it integrates perfectly with Proton Mail.
- Use case: Sign up for newsletters, online shops, or services without giving away your real email.
Fastmail (fastmail.com)
- Privacy-focused, with no ads or tracking.
- Custom domains (use your own email address).
- Great for professionals who need reliability + security.
- Bonus: Supports email aliases natively.
Tutanota (tutanota.com)
- Fully encrypted (emails, contacts, and calendar).
- Open-source and German-based (GDPR-compliant).
- Free plan available.
Why it matters:
- No more targeted ads based on your emails.
- No more data breaches exposing your private conversations.
- You control who sees your real email.
Browsers: Stop Feeding the Tracking Beast
Chrome, Edge, and Safari track your every move. These browsers don’t.
Brave (brave.com)
- Blocks ads and trackers by default (no extensions needed).
- Built-in Tor mode for extra privacy.
- Rewards you with crypto for viewing privacy-respecting ads (if you opt in).
- Faster than Chrome (because it’s not bogged down by trackers).
Firefox (mozilla.org)
- Open-source and non-profit (no corporate agenda).
- Strong privacy protections out of the box.
- Customizable with add-ons like:
- uBlock Origin (blocks ads and trackers).
- Privacy Badger (stops hidden trackers).
- HTTPS Everywhere (forces secure connections).
- Bonus: Works with Firefox Relay for email masking.
LibreWolf (librewolf.net)
- A hardened, privacy-focused fork of Firefox.
- No telemetry, no tracking, no BS.
- Pre-configured for security (no tweaking needed).
Why it matters:
- Fewer ads = faster browsing.
- No more creepy "recommended for you" content.
- Less risk of malware and phishing.
Search Engines: No More Google Snooping
Google logs every search—even in "incognito mode." These alternatives don’t.
DuckDuckGo (duckduckgo.com)
- No tracking, no search bubbles (you get unbiased results).
- Bang shortcuts (!Amazon, !Wikipedia) for quick searches.
- Blocks hidden trackers on websites you visit.
- Mobile app available (with built-in tracker blocking).
Qwant (qwant.com)
- European-based (strong privacy laws).
- No personalized ads or profiling.
- Separate search categories (news, social, images).
- Bonus: Qwant Maps is a privacy-friendly alternative to Google Maps.
Startpage (startpage.com)
- Gives you Google results without the tracking.
- Anonymous View lets you visit websites without leaving traces.
- No IP logging.
SearX (Self-hosted or searx.me)
- Open-source, decentralized search.
- No logs, no tracking.
- Customizable (you can host your own instance).
- Use case: For tech-savvy users who want full control.
Why it matters:
- Your searches stay private.
- No more ads following you around the web.
- No filter bubbles (you see the real internet, not just what algorithms think you want).
Note-Taking: Keep Your Thoughts Actually Private
Evernote, OneNote, and Google Keep store your notes in the cloud—where they can be hacked, leaked, or scanned. These tools keep your thoughts secure.
Standard Notes (standardnotes.com)
- End-to-end encrypted (only you can read your notes).
- Simple, distraction-free interface.
- Works offline (syncs when you’re online).
- Extensions for editors, spreadsheets, and tasks.
- Free plan available (with paid upgrades for more features).
Joplin (joplinapp.org)
- Open-source and self-hostable (you control your data).
- Markdown support (great for coders and writers).
- Syncs with Nextcloud, Dropbox, or WebDAV.
- Encrypted backups.
- Use case: Perfect for students, researchers, and writers who need secure, organized notes.
Obsidian (obsidian.md)
- Local-first (your notes stay on your device).
- Plain-text files (no vendor lock-in).
- Plugins for encryption, backlinks, and more.
- Use case: Ideal for knowledge workers and long-term note-takers.
CryptPad (cryptpad.fr)
- Encrypted, real-time collaboration (like Google Docs, but private).
- No account needed (just create a pad and share the link).
- Use case: Great for teams or sensitive projects.
A Physical Notebook (Yes, Really)
- No hacks, no breaches, no tracking.
- Bonus: Writing by hand boosts memory and creativity.
- Use case: For brainstorming, journaling, or anything you want to keep 100% offline.
Why it matters:
- Your ideas stay yours.
- No risk of cloud leaks or ransomware.
- Peace of mind knowing no one else can access your notes.
Video Streaming: Watch Without the Tracking
YouTube tracks everything you watch, serves you creepy ads, and recommends increasingly extreme content to keep you hooked. These alternatives let you watch in peace.
Invidious (invidious.io)
- Open-source YouTube front-end (no ads, no tracking).
- No account needed.
- Dark mode, keyboard shortcuts, and no algorithmic manipulation.
- Multiple instances available (if one goes down, try another).
- Use case: For casual viewers who want a cleaner YouTube experience.
PeerTube (joinpeertube.org)
- Decentralized, open-source video platform.
- No ads, no tracking, no algorithms.
- Anyone can host a server (decentralized = no single point of failure).
- Use case: For creators and viewers who want ethical, censorship-resistant video hosting.
Why it matters:
- No more ads interrupting your videos.
- No more "recommended" rabbit holes.
- Support for creators who aren’t algorithm-driven.
Bonus: More Privacy Tools You Might Not Know About
- Cloud Storage: Nextcloud (self-hosted) or Tresorit (end-to-end encrypted).
- Messaging: Signal (for texts/calls) or Element (for decentralized chat).
- Maps: OpenStreetMap or Organic Maps (offline maps).
- Calendars: Proton Calendar or EteSync (end-to-end encrypted).
Conclusion
Privacy Isn’t Paranoia—It’s Power and Basic Dignity
Look, we’re not saying you need to live in a bunker, communicate in smoke signals, or wrap your router in tinfoil (though if that’s your thing, we won’t judge). But in a world where your smart fridge might be gossiping about your grocery habits and your fitness tracker could be selling your heart rate to insurance companies, a little caution isn’t paranoia—it’s common sense.
Privacy isn’t about hiding—it’s about dignity. It’s like locking the bathroom door: You don’t do it because you’re ashamed of what’s happening in there. You do it because some things are none of anyone else’s business. The same goes for your emails, searches, location, and personal life. You’re not a criminal for wanting boundaries—you’re a human being who values control over your own information.
"I Have Nothing to Hide" Is a Dangerous Myth
We’ve all heard it: "I don’t care about privacy—I have nothing to hide!" But let’s be real—would you be okay with someone filming you in the bathroom just because you’re "not doing anything wrong"? Of course not. Privacy isn’t about guilt—it’s about basic respect.
Start Small (Because Even a Little Privacy Goes a Long Way)
You don’t need to go full hermit mode to protect yourself. Small, intentional changes make a big difference. Here’s how to start:
Swap one tool this week.
- Ditch Gmail for Proton Mail.
- Replace Chrome with Brave.
- Try DuckDuckGo instead of Google.
Read one privacy policy before signing up.
- Look for: What data they collect, who they share it with, and if you can delete it.
- Use ToS;DR for the SparkNotes version.
Ask yourself: "Would I be okay with this if the bathroom door were open?"
- Would I want this post/photo/data public forever?
- Who benefits from this? (If it’s not you, think twice.)
Delete one old account you no longer use.
- Use JustDeleteMe to find the escape hatch.
Turn off one unnecessary app permission.
- Does your flashlight app really need your location? (Spoiler: No.)
Set up one email alias for sign-ups.
- Use SimpleLogin or Firefox Relay to keep your real email under wraps.
Remember: The Internet Doesn’t Forget (But You Can Control What It Remembers)
Every photo, post, search, and click leaves a digital trail—and once it’s out there, it’s out there forever. But here’s the good news: You don’t have to be perfect. Every small step reduces your risk and puts you back in control.
- Switched to a privacy-focused browser? 🎉 Win.
- Deleted an old tweet? 🎉 Win.
- Actually read a Terms & Conditions page? 🎉 Legendary win.
So, What’s the First Change You’ll Make?
Maybe it’s installing a privacy tool, adjusting your settings, or just pausing before you hit "post."
Your data. Your dignity. Your power.
Now go lock that digital bathroom door—before someone walks in on your metaphorical privacy. (And remember: "I have nothing to hide" is the new "I’ll just leave the door unlocked—what’s the worst that could happen?")
]]>Git is a powerful version control system that allows developers to track changes in their codebase. While most commits include modifications to files, Git also supports empty commits—commits that contain no changes to the repository’s files. At first glance, empty commits might seem pointless, but they can be surprisingly useful in specific scenarios.
In this article, we’ll explore:
- What empty commits are
- How to create them
- Practical use cases
- Best practices and potential pitfalls
What Are Empty Commits?
An empty commit is a Git commit that doesn’t modify any files in the repository. It only updates the commit history with a new entry, timestamp, and message. Empty commits are created using the --allow-empty flag with the git commit command.
How to Create an Empty Commit
To create an empty commit, run:
git commit --allow-empty -m "Your commit message here"This command adds a new commit to the branch without staging any changes.
Why Use Empty Commits?
While empty commits might seem unnecessary, they serve several practical purposes:
1. Triggering CI/CD Pipelines
Some continuous integration/continuous deployment (CI/CD) systems trigger builds or deployments based on new commits. If you need to manually trigger a pipeline without changing code (e.g., to redeploy a configuration or test a build environment), an empty commit can be a quick solution.
2. Marking Significant Events
Empty commits can act as milestones in your repository’s history. For example:
- Marking the start or end of a sprint
- Documenting a decision or event (e.g., "Project paused due to dependency issues")
- Creating a placeholder for future work
3. Testing Git Hooks
If you’re developing or debugging Git hooks (e.g., pre-commit or post-commit hooks), empty commits allow you to test them without altering your codebase.
4. Resolving Merge Conflicts
In rare cases, empty commits can help resolve merge conflicts by creating a merge commit without introducing new changes.
Best Practices for Using Empty Commits
While empty commits can be useful, they should be used judiciously to avoid cluttering your repository’s history. Here are some best practices:
1. Use Descriptive Commit Messages
Always include a clear, descriptive message explaining the purpose of the empty commit. For example:
git commit --allow-empty -m "Trigger CI build for environment testing"2. Avoid Overuse
Empty commits should be an exception, not a rule. Frequent empty commits can make the commit history harder to navigate and understand.
3. Document Their Purpose
If your team uses empty commits for specific workflows (e.g., triggering deployments), document this practice in your project’s contribution guidelines.
4. Consider Alternatives
Before using an empty commit, ask yourself if there’s a better alternative:
- For CI/CD triggers, consider using a dedicated API or webhook.
- For milestones, use Git tags or annotations instead.
Potential Pitfalls
While empty commits are generally harmless, they can cause issues if misused:
1. Cluttered History
Too many empty commits can make it difficult to track meaningful changes in your repository.
2. Confusion Among Team Members
Team members unfamiliar with empty commits might find them confusing or unnecessary. Always communicate their purpose clearly.
3. Unintended CI/CD Triggers
If your CI/CD pipeline is configured to run on every commit, empty commits might trigger unnecessary builds, wasting resources.
Conclusion
Empty commits are a niche but powerful feature in Git. When used thoughtfully, they can help trigger CI/CD pipelines, mark important events, and test Git hooks. However, it’s essential to use them sparingly and document their purpose to maintain a clean and understandable commit history.
By understanding the use cases and best practices for empty commits, you can leverage them effectively in your development workflow.
]]>Data deletion is a deceptively complex problem in modern software systems.
Pressing delete in your application might seem harmless, but in production, it can mean permanent data loss, broken relationships, and compliance nightmares.
That’s where soft delete comes in — a development pattern that marks data as deleted instead of removing it entirely. It lets you safely hide, recover, or audit records without losing critical information.
In this article, we’ll explore:
- Why soft delete is important in real-world .NET applications
- How to implement it in Entity Framework Core using query filters and client-side cascade deletion
- Pros and cons of soft delete versus hard delete
- The privacy challenge it introduces under regulations like GDPR and how to handle user deletion requests correctly
By the end, you’ll understand not just how to implement soft delete in .NET, but also when to use it — and how to stay both safe and compliant.
Why Soft Delete Is Important
In any system with users, orders, or transactions, deleting records outright can be risky. Accidental deletions, debugging needs, or audit trails often require access to “deleted” data.
Soft delete solves this by introducing a simple boolean flag (IsDeleted) or timestamp (DeletedAt) that hides data from queries instead of removing it.
Key benefits include:
- Easy recovery from accidental deletions
- Full audit and compliance traceability
- Preserved referential integrity between related entities
- Safe testing and debugging environments
But it’s not just about convenience — it’s about data safety and trust.
How to Implement Soft Delete in EF Core
Entity Framework Core (EF Core) makes implementing soft delete straightforward with global query filters and client cascade relationships.
- Add a soft delete flag to your entities (
IsDeleted,DeletedAt). - Apply a global filter with
HasQueryFilter()to exclude soft-deleted rows from all queries. - Configure relationships with
.OnDelete(DeleteBehavior.ClientCascade)so related entities are also marked as deleted automatically. - Override
SaveChanges()to intercept EF’sEntityState.Deletedentries and turn them into soft deletes instead of physical deletes.
With this pattern, calling _db.Remove(entity) doesn’t issue a DELETE SQL statement.
Instead, EF Core updates the entity and its dependents to set IsDeleted = true — safe, reversible, and consistent.
Define the Soft Deletable Interface and Base Class
public interface ISoftDeletable
{
  bool IsDeleted { get; set; }
  DateTime? DeletedAt { get; set; }
}

public abstract class SoftDeletableEntity : ISoftDeletable
{
  public bool IsDeleted { get; set; }
  public DateTime? DeletedAt { get; set; }
}
This base abstraction makes it easy to apply the same logic across all your entities.
Create Your Entities
public class Customer : SoftDeletableEntity
{
  public int Id { get; set; }
  public string Name { get; set; } = default!;
  public List<Order> Orders { get; set; } = new();
}

public class Order : SoftDeletableEntity
{
  public int Id { get; set; }
  public string Description { get; set; } = default!;
  public int CustomerId { get; set; }
  public Customer Customer { get; set; } = default!;
}
Both entities inherit from the soft delete base class, meaning they’ll automatically support the IsDeleted flag and deletion timestamp.
Configure EF Core Model and Query Filters
public class AppDbContext : DbContext
{
  public DbSet<Customer> Customers => Set<Customer>();
  public DbSet<Order> Orders => Set<Order>();

  public AppDbContext(DbContextOptions<AppDbContext> options)
    : base(options) { }

  protected override void OnModelCreating(ModelBuilder modelBuilder)
  {
    base.OnModelCreating(modelBuilder);

    // Apply soft delete global filters
    modelBuilder.Entity<Customer>().HasQueryFilter(c => !c.IsDeleted);
    modelBuilder.Entity<Order>().HasQueryFilter(o => !o.IsDeleted);

    // Relationship: Client-side cascade for soft delete propagation
    modelBuilder.Entity<Order>()
      .HasOne(o => o.Customer)
      .WithMany(c => c.Orders)
      .OnDelete(DeleteBehavior.ClientCascade);
  }

  // Intercept SaveChanges to convert deletes into soft deletes
  public override int SaveChanges()
  {
    ConvertDeletesToSoftDeletes();
    return base.SaveChanges();
  }

  public override Task<int> SaveChangesAsync(CancellationToken cancellationToken = default)
  {
    ConvertDeletesToSoftDeletes();
    return base.SaveChangesAsync(cancellationToken);
  }

  private void ConvertDeletesToSoftDeletes()
  {
    // EF Core automatically marks related entities as Deleted due to ClientCascade
    var deletedEntries = ChangeTracker.Entries()
      .Where(e => e.State == EntityState.Deleted && e.Entity is ISoftDeletable)
      .ToList();

    foreach (var entry in deletedEntries)
    {
      var entity = (ISoftDeletable)entry.Entity;
      entity.IsDeleted = true;
      entity.DeletedAt = DateTime.UtcNow;

      // Prevent EF from issuing a physical DELETE
      entry.State = EntityState.Modified;
    }
  }
}
Key points:
- The global query filters ensure deleted rows are hidden from normal queries.
- The
ClientCascadeensures related entities are also marked as deleted in the change tracker. - The
ConvertDeletesToSoftDeletes()method intercepts before EF runs SQL, converting allDeletedentities into updates instead.
Usage Example
public class CustomerService
{
  private readonly AppDbContext _db;

  public CustomerService(AppDbContext db)
  {
    _db = db;
  }

  public async Task DeleteCustomerAsync(int customerId)
  {
    var customer = await _db.Customers
      .Include(c => c.Orders)
      .FirstOrDefaultAsync(c => c.Id == customerId);

    if (customer == null)
      throw new InvalidOperationException("Customer not found");

    _db.Customers.Remove(customer);
    await _db.SaveChangesAsync();
  }

  public async Task<List<Customer>> GetActiveCustomersAsync()
  {
    // Soft-deleted entities are automatically excluded
    return await _db.Customers.Include(c => c.Orders).ToListAsync();
  }

  public async Task<List<Customer>> GetAllCustomersIncludingDeletedAsync()
  {
    // Use IgnoreQueryFilters to view all entities, even deleted ones
    return await _db.Customers
      .IgnoreQueryFilters()
      .Include(c => c.Orders)
      .ToListAsync();
  }
}
When you call:
await customerService.DeleteCustomerAsync(1);EF Core:
- Marks the
Customerand relatedOrdersas deleted in the ChangeTracker (due toClientCascade). - The
ConvertDeletesToSoftDeletes()method intercepts these changes. - EF executes UPDATE statements, not DELETEs:
UPDATE Customers SET IsDeleted = 1, DeletedAt = '2025-10-23' WHERE Id = 1;
UPDATE Orders SET IsDeleted = 1, DeletedAt = '2025-10-23' WHERE CustomerId = 1;
All without manually traversing relationships or risking physical data loss.
Pros and Cons of Soft Delete
| Pros | Cons |
|---|---|
| ✅ Prevents accidental data loss | ⚠️ Data still exists (can be privacy-sensitive) |
| ✅ Enables recovery and undo | ⚠️ Requires custom handling for unique constraints |
| ✅ Maintains relational integrity | ⚠️ Can bloat database size over time |
| ✅ Improves auditability | ⚠️ Adds logic complexity for queries and updates |
The biggest downside? Privacy compliance — which brings us to the tricky part.
The Privacy Challenge: Handling User Deletion Requests with Anonymization
Soft delete ensures you don’t lose data accidentally — but for privacy compliance (GDPR, CCPA, etc.), you need to ensure personally identifiable information (PII) can’t be reconstructed once a user asks to be forgotten.
Instead of deleting rows entirely, you can anonymize user-related fields.
This way:
- You preserve relationships and historical data (for audits or reports)
- You remove personal identifiers
- You satisfy privacy requirements
Updated User Entity for Anonymization
Here’s an example of a user entity that supports both soft delete and anonymization:
public class User : SoftDeletableEntity
{
  public int Id { get; set; }
  public string Email { get; set; } = default!;
  public string FullName { get; set; } = default!;
  public bool IsAnonymized { get; set; }
}
Anonymization Service
Instead of deleting, we update sensitive fields with anonymized values. This preserves the row but renders it untraceable to the original user.
public class UserService
{
  private readonly AppDbContext _db;

  public UserService(AppDbContext db)
  {
    _db = db;
  }

  public async Task SoftDeleteUserAsync(int userId)
  {
    var user = await _db.Users.FindAsync(userId);
    if (user == null) return;

    user.IsDeleted = true;
    user.DeletedAt = DateTime.UtcNow;

    await _db.SaveChangesAsync();
  }

  public async Task AnonymizeUserAsync(int userId)
  {
    var user = await _db.Users
      .IgnoreQueryFilters()
      .FirstOrDefaultAsync(u => u.Id == userId);

    if (user == null || user.IsAnonymized)
      return;

    user.IsDeleted = true;
    user.IsAnonymized = true;
    user.DeletedAt = DateTime.UtcNow;

    // Anonymize identifiable information
    user.FullName = "Deleted User";
    user.Email = $"deleted-{Guid.NewGuid()}@example.com";

    await _db.SaveChangesAsync();
  }
}
What happens here:
- The record remains in the database (maintains foreign keys, reports, logs).
- Personal data is scrubbed.
- The record is clearly flagged as deleted and anonymized.
Optional: Automate Anonymization for Deletion Requests
If your application needs to delay anonymization (e.g., allow a “grace period” for account recovery), you can extend your model:
public class User : SoftDeletableEntity
{
  public bool PendingAnonymization { get; set; }
  public bool IsAnonymized { get; set; }
  public string Email { get; set; } = default!;
  public string FullName { get; set; } = default!;
}
Then schedule anonymization through a background job (e.g., Hangfire, Quartz.NET):
public class AnonymizationJob : BackgroundService
{
  private readonly IServiceScopeFactory _scopeFactory;

  public AnonymizationJob(IServiceScopeFactory scopeFactory)
  {
    _scopeFactory = scopeFactory;
  }

  protected override async Task ExecuteAsync(CancellationToken stoppingToken)
  {
    while (!stoppingToken.IsCancellationRequested)
    {
      using var scope = _scopeFactory.CreateScope();
      var db = scope.ServiceProvider.GetRequiredService<AppDbContext>();

      var cutoff = DateTime.UtcNow.AddDays(-30); // 30-day retention
      var users = db.Users
        .IgnoreQueryFilters()
        .Where(u => u.PendingAnonymization && !u.IsAnonymized && u.DeletedAt < cutoff);

      await foreach (var user in users.AsAsyncEnumerable())
      {
        user.IsAnonymized = true;
        user.Email = $"deleted-{Guid.NewGuid()}@example.com";
        user.FullName = "Deleted User";
      }

      await db.SaveChangesAsync();
      await Task.Delay(TimeSpan.FromHours(12), stoppingToken);
    }
  }
}
Why Anonymization Is Better Than Hard Delete
| Aspect | Hard Delete | Anonymization |
|---|---|---|
| Data loss | Permanent | Reversible for non-sensitive data |
| Referential integrity | Can break foreign keys | Preserved |
| Audit trails | Destroyed | Maintained |
| Privacy compliance | ✅ (if total removal) | ✅ (if properly scrubbed) |
| Business continuity | ⚠️ Risky | ✅ Safe and compliant |
In most enterprise or SaaS systems, anonymization is preferred because you often need to:
- Keep invoices, logs, or analytics records
- Retain relational data for business operations
- Ensure that data cannot identify the original user
Anonymization gives you privacy without losing data integrity.
Conclusion
Soft delete with EF Core gives you a safety net against accidental data loss — but it’s not the full story.
To stay compliant with privacy regulations, you must ensure that user data can’t be reconstructed after a deletion request.
That’s where anonymization shines:
it lets you keep business-critical and relational data intact while ensuring no personally identifiable information remains in your database.
In summary:
- Use soft delete for reversible, application-level deletes
- Use ClientCascade for automatic relationship propagation
- Use anonymization for privacy-compliant user deletion
Together, they form a robust, compliant, and developer-friendly data deletion strategy that protects both your system’s integrity and your users’ privacy.
]]>In PowerShell, many object properties are backed by enumerations (enums). Enums define a fixed set of values that a property can take. A common example is the StartType property of a Windows service, which is defined by the ServiceStartMode enum.
If you want to write reliable scripts or automate system tasks, it’s useful to know both the enum type and all the values it supports. This guide shows you how to:
- Determine the enum type of a Windows Service property
- Retrieve all available enum values with their names and numeric representations
Identify the Enum Type of a Property
Start by examining a service object. Running the following command returns the start type of the first service on your system:
(Get-Service)[0].StartTypeWhile this displays the value, it doesn’t reveal the actual enum type. To inspect the type, convert the property to XML:
(Get-Service)[0].StartType | ConvertTo-Xml -As StringInside the XML output, you’ll find a line like this:
<Object Type="System.ServiceProcess.ServiceStartMode">This shows that the property is based on the System.ServiceProcess.ServiceStartMode enum.
If the type doesn’t appear, you can increase the depth of the XML conversion:
(Get-Service)[0].StartType | ConvertTo-Xml -As String -Depth 10This command will display the FQCN (Fully-Qualified Class Name) of the associated enum.
You can also get the actual enum type using the GetType() method:
$service = Get-Service | Select-Object -First 1
$enumType = $service.StartType.GetType()
List All Values of the Enum
Once you know the enum type, you can use [enum]::GetValues() to display all available options. Here’s a script that outputs both the name and the integer value:
[enum]::GetValues([System.ServiceProcess.ServiceStartMode]) |
ForEach-Object {
  [PSCustomObject]@{
    Name  = $_.ToString()
    Value = [int]$_
  }
} | Format-Table -AutoSize
The result is a neat table showing every possible setting, such as:
- Automatic
- Manual
- Disabled
along with the integer values that represent them internally.
This command may throw en erorr like TypeNotFound.
To fix it, you'll have to manually specify the namespace of the library that contains the enum type like:
Add-Type -AssemblyName System.ServiceProcessIf you encounter this error, don't worry. You can use the second script from the previous section to use the actual enum type instead of the FQCN:
[enum]::GetValues($enumType) |
ForEach-Object {
  [PSCustomObject]@{
    Name  = $_.ToString()
    Value = [int]$_
  }
} | Format-Table -AutoSize
It will generate the same output and works in all environments.
Conclusion
By retrieving the enum type dynamically from the property, you avoid errors related to missing assemblies or incorrect type names. If that approach doesn’t work, you can still fall back to explicitly referencing the enum type after loading the appropriate assembly. Once you have the type, using [enum]::GetValues() makes it easy to display all valid options and their integer values. This method works not only for the StartType property of Windows services but also for any other property in PowerShell that is backed by an enum. It’s a simple, reusable approach that improves the reliability of your scripts and automation.
Adding a custom NuGet package source in Visual Studio is essential when working with private feeds, local folders, or network shares. Whether you're using internal packages, testing offline builds, or accessing secure third-party feeds, Visual Studio makes it easy to manage multiple NuGet sources.
This guide walks you through the steps to add a new NuGet package source in Visual Studio, including configuration tips and use cases.
What Is a NuGet Package Source?
A NuGet package source is a location from which Visual Studio retrieves .nupkg packages during development. These sources can be:
- Public repositories like
nuget.org - Internal feeds hosted on-premise or on the cloud (e.g., Azure Artifacts)
- Local or shared folders for testing and offline access
How to Add a New NuGet Package Source in Visual Studio
Step 1: Open the NuGet Package Manager
- Open your solution in Visual Studio.
- Right-click the Solution node in the Solution Explorer.
- Select Manage NuGet Packages for Solution.
Step 2: Open the NuGet Sources Settings
- In the top-right corner of the NuGet Manager, click the gear icon ⚙️ labeled
Package Sources.
Step 3: Add a New Source
In the Options window:
- Click the
+button to create a new source. - Provide a Name (e.g.,
MyInternalFeed,LocalNuget). - Enter the Source Path:
- A URL (e.g.,
https://myfeed.company.com/nuget) - A UNC path (e.g.,
\\Server\NuGetPackages) - A local folder (e.g.,
C:\Packages\NuGet)
- A URL (e.g.,
- Click Update or OK to save the new source.
Where Are NuGet Sources Saved?
When you add a new source through the Visual Studio UI, it is saved globally for the current user in the NuGet configuration, typically located at:
%APPDATA%\NuGet\NuGet.ConfigThis means:
- All projects in Visual Studio will have access to the new source.
- The setting applies only to the current user on that machine.
Common Use Cases for Custom NuGet Sources
- Private NuGet Feeds in enterprise environments
- Local testing with pre-release or experimental packages
- Offline development when internet access is limited
- Custom feeds hosted on services like GitHub Packages or Azure Artifacts
Tips for Managing NuGet Sources
- To edit or remove a source, return to the Package Sources window and select the desired entry.
- For team environments or CI/CD pipelines, include a custom
nuget.configfile in your solution or repository to define shared sources. - You can also use the CLI command:
nuget sources add -name "MyFeed" -source "https://your-feed-url"Conclusion
Managing NuGet sources in Visual Studio gives you full control over where your .NET projects retrieve packages. Whether you're using internal feeds, testing local builds, or ensuring secure package delivery, setting up a custom NuGet source is quick and easy.
Stay efficient and secure—configure your NuGet sources the right way.
]]>Managing Node.js versions across multiple projects can be challenging, especially when each project demands a different version. Switching between incompatible Node versions often leads to errors and wasted time. Fortunately, pnpm—a fast and efficient JavaScript package manager—now offers built-in Node.js version management. This allows you to install, switch, and lock Node.js versions seamlessly as part of your package management workflow.
This guide will walk you through installing pnpm, using it to manage Node.js versions, and optimizing your development environment for consistency and ease.
Understanding pnpm and Its Role in Node.js Version Management
pnpm stands out as a fast, disk space-efficient package manager for JavaScript projects. Unlike npm or yarn, pnpm uses a unique symlink system that avoids package duplication, saving both time and storage. More importantly, pnpm integrates Node.js version management, eliminating the need for separate tools like nvm or asdf.
By managing Node.js versions directly through pnpm, you simplify your workflow and maintain consistency across different environments.
Installing pnpm on Your System
Before you begin managing Node.js versions, ensure pnpm is installed on your machine.
- Using npm (note: this requires an existing Node.js installation):
npm install -g pnpm- On macOS with Homebrew:
brew install pnpm- On Windows via PowerShell:
Invoke-WebRequest https://get.pnpm.io/install.ps1 -UseBasicParsing | Invoke-ExpressionVerify installation by running:
pnpm --versionManaging Node.js Versions Using pnpm
Enable Corepack for Automatic Package Manager Management (Optional)
Starting with Node.js 16.13, Corepack is included to automatically manage package managers like pnpm. To enable it:
corepack enableThis step helps maintain consistent pnpm versions across environments but is optional.
Install Specific Node.js Versions
pnpm allows you to install and use specific Node.js versions with:
pnpm env use --global 18.16.0Using the --global flag makes the Node.js version available system-wide. Omitting it restricts the version to the current project directory.
Verify the Active Node.js Version
Check which Node.js version is currently active by running:
node -vSwitch Node.js Versions Between Projects
For projects that require different Node.js versions, pnpm makes switching simple. Navigate to your project folder and run:
pnpm env use 16or
pnpm env use 18pnpm will automatically switch Node.js versions according to your command, ensuring your projects run with compatible environments.
Lock Node.js Version Per Project Using .npmrc
To maintain consistent Node.js versions across teams and environments, specify the required Node.js version in your project’s .npmrc file:
node-version=18.16.0This enforces the Node.js version when running pnpm commands inside that project.
Additional pnpm Commands for Node.js Version Control
Listing Installed Node.js Versions
View all installed Node.js versions managed by pnpm with:
pnpm env listRemoving Unused Node.js Versions
To uninstall an unneeded version, use:
pnpm env rm 16This cleans up your environment by removing Node.js version 16.x, or whichever version you specify.
Updating Node.js Versions
To upgrade Node.js to a newer version globally:
pnpm env use --global 18.17.0This replaces the current global Node.js version with the specified release.
Common Troubleshooting Tips
- Avoid running multiple Node.js version managers like nvm alongside pnpm to prevent conflicts.
- Always confirm the
.npmrcorpackage.jsonfiles specify the correct Node.js version, especially in collaborative projects. - Ensure your system PATH prioritizes pnpm’s Node.js version when switching between versions.
Conclusion
Integrating Node.js version management into pnpm streamlines your development workflow and removes the need for additional tools. With pnpm env commands, you can easily install, switch, and lock Node.js versions per project or globally, ensuring compatibility and consistency.
By adopting pnpm’s Node.js management capabilities, you simplify environment setup, reduce errors, and focus more on coding. Explore pnpm’s official documentation for more advanced features and tips to enhance your JavaScript development experience.
]]>In today’s digital landscape, protecting your online accounts with just a strong password is no longer enough. Two-factor authentication (2FA) adds an essential second layer of security by requiring a one-time code in addition to your password. With version 2.51, KeePass—a free and trusted password manager—makes it easy to integrate 2FA into your workflow.
This guide will show you how to enable 2FA for a new entry in KeePass using its built-in OTP generator. With just a few configuration steps, you can greatly improve the security of your password-protected accounts.
Create a New Entry in KeePass
To begin using 2FA, you'll first need to create a new KeePass entry:
- Open KeePass
- Click the Add Entry button or use the shortcut
Ctrl + I
In the dialog that appears, enter your usual credentials:
- Title (e.g., the name of the service)
- Username
- Password
This entry will serve as the foundation for your 2FA setup.
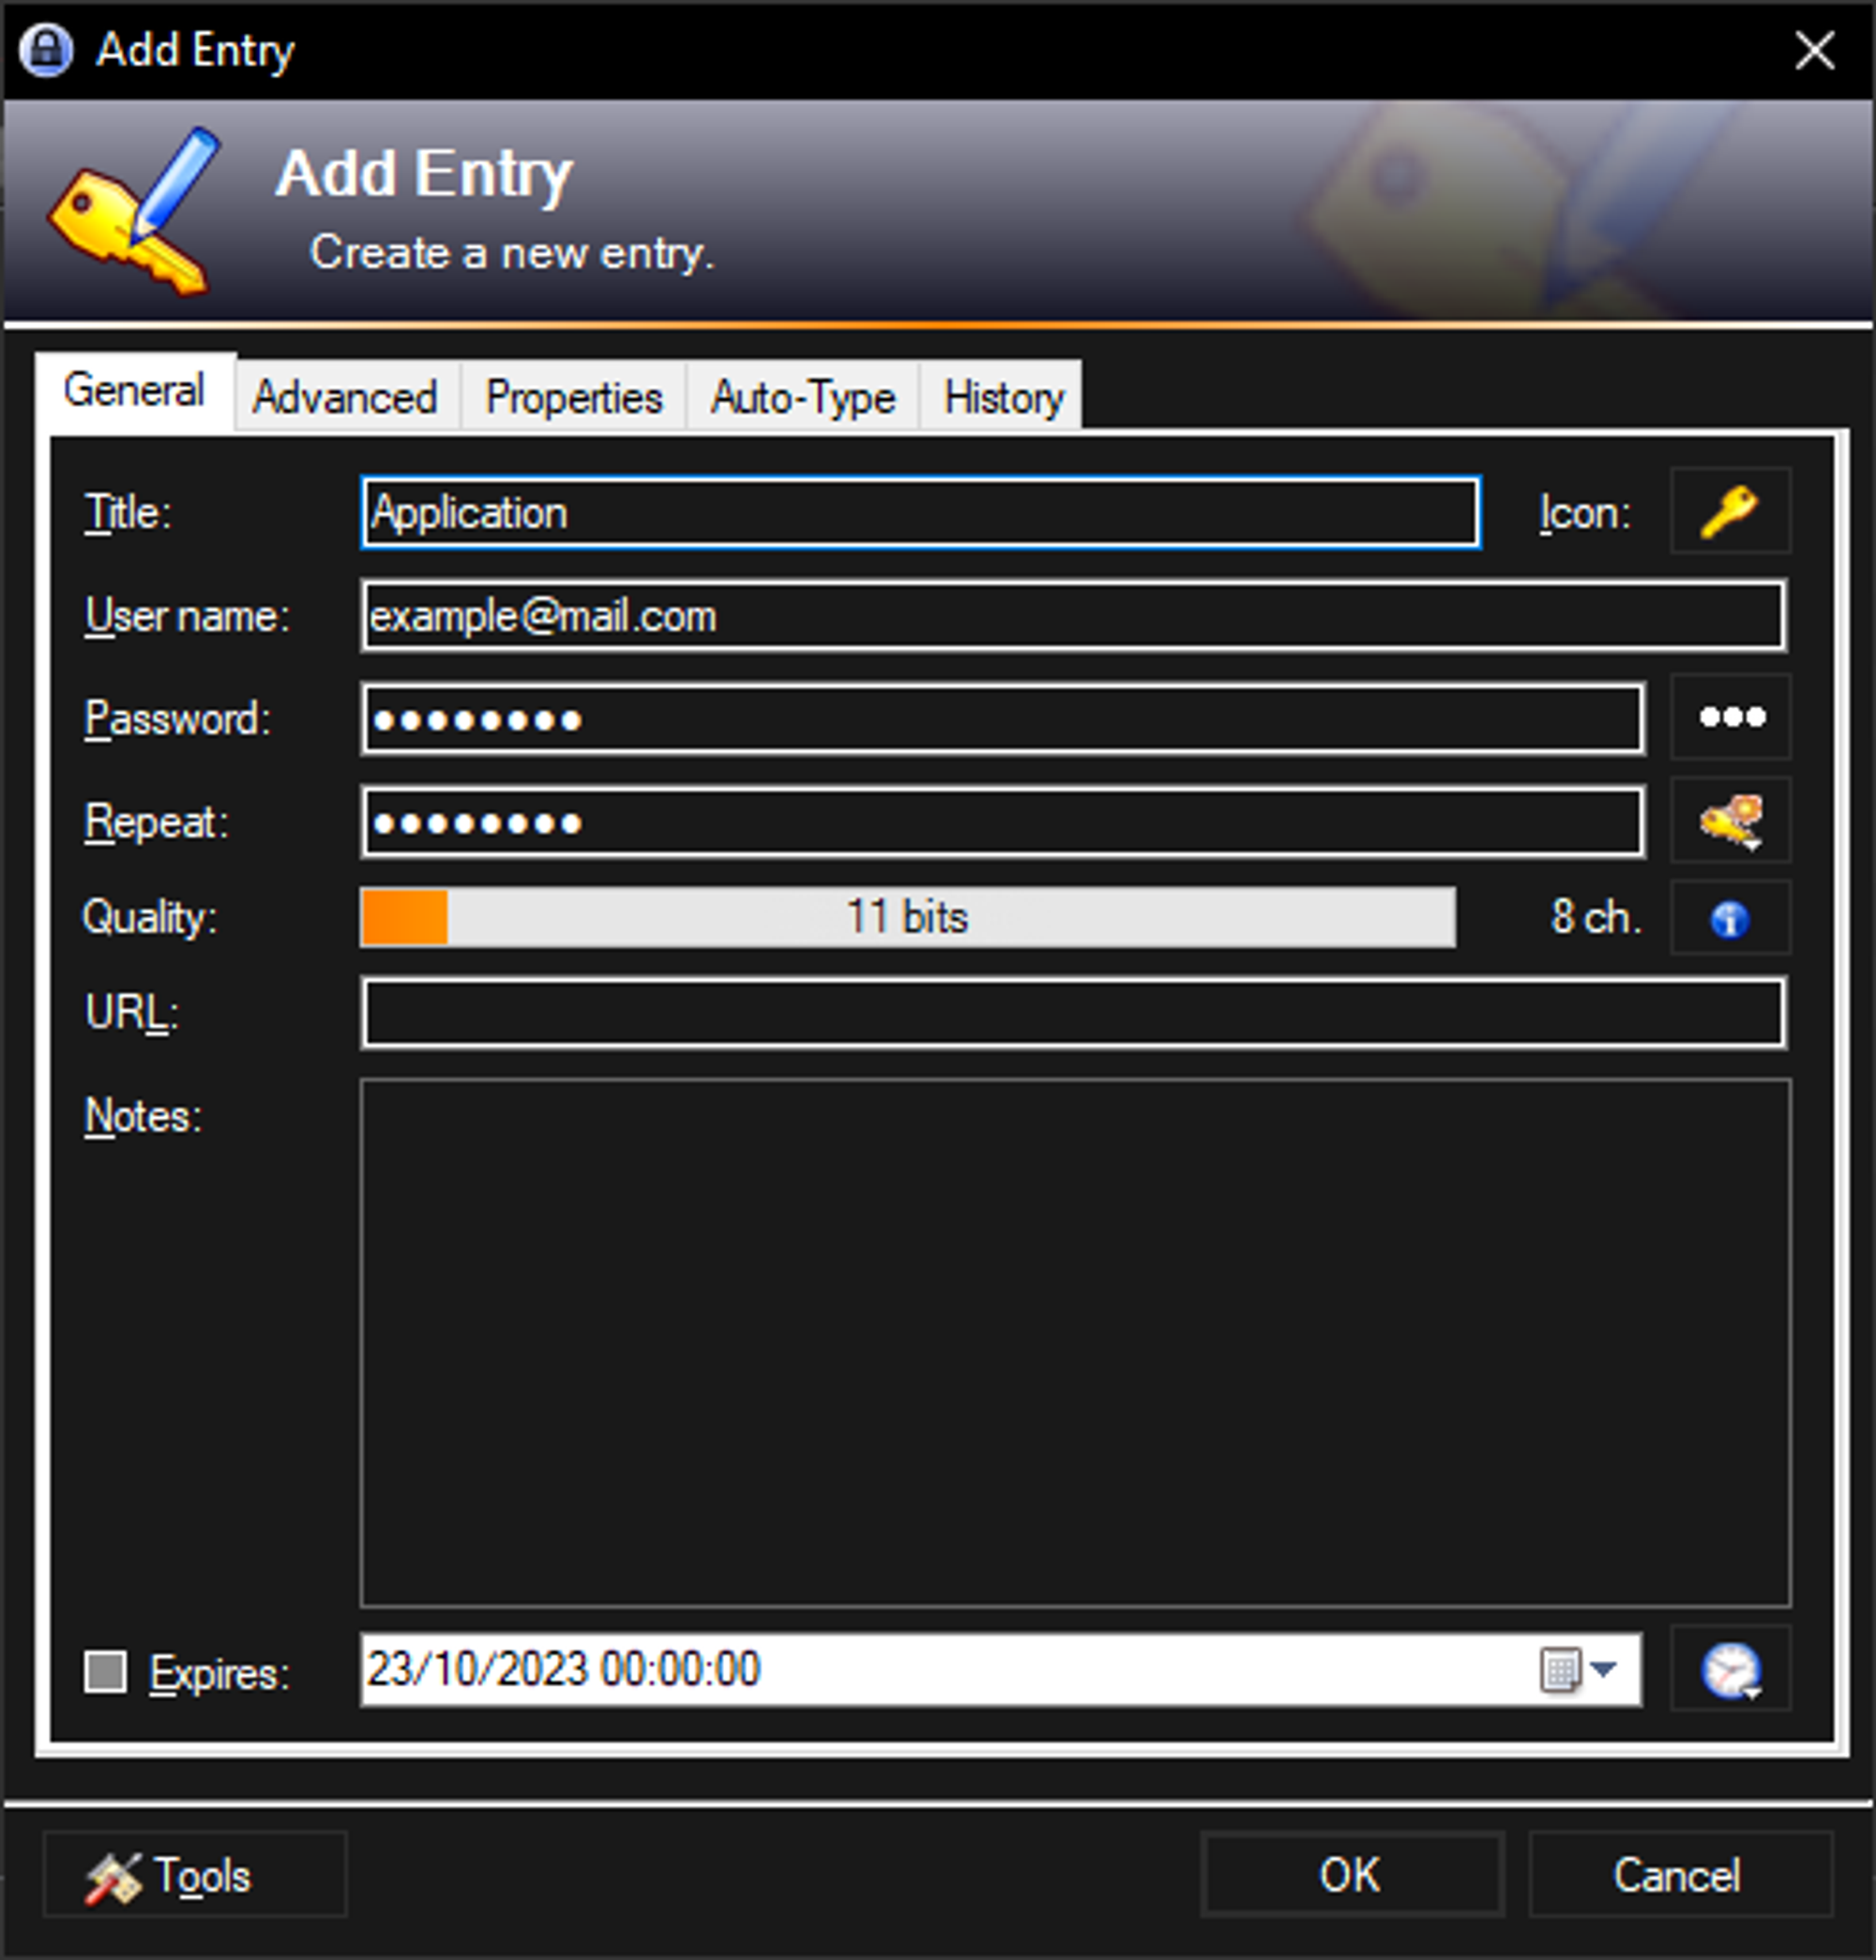
Set Up 2FA Using OTP Generator Settings
Once your entry is created, follow these steps to configure 2FA using a shared secret:
Access OTP Settings
- Navigate to the Advanced tab within your entry.
- In the String Fields section, click More, then select OTP Generator Settings.
Enter the Shared Secret
You’ll need a secret key from the service you're setting up 2FA for (usually available as a QR code or alphanumeric string in your account settings).
- Paste this key into the Shared Secret field.
- For this guide, we’re using a sample key:
SuperSecretToken.
Leave other settings at their default values unless the service you're using specifies otherwise.
Click OK to save your configuration.
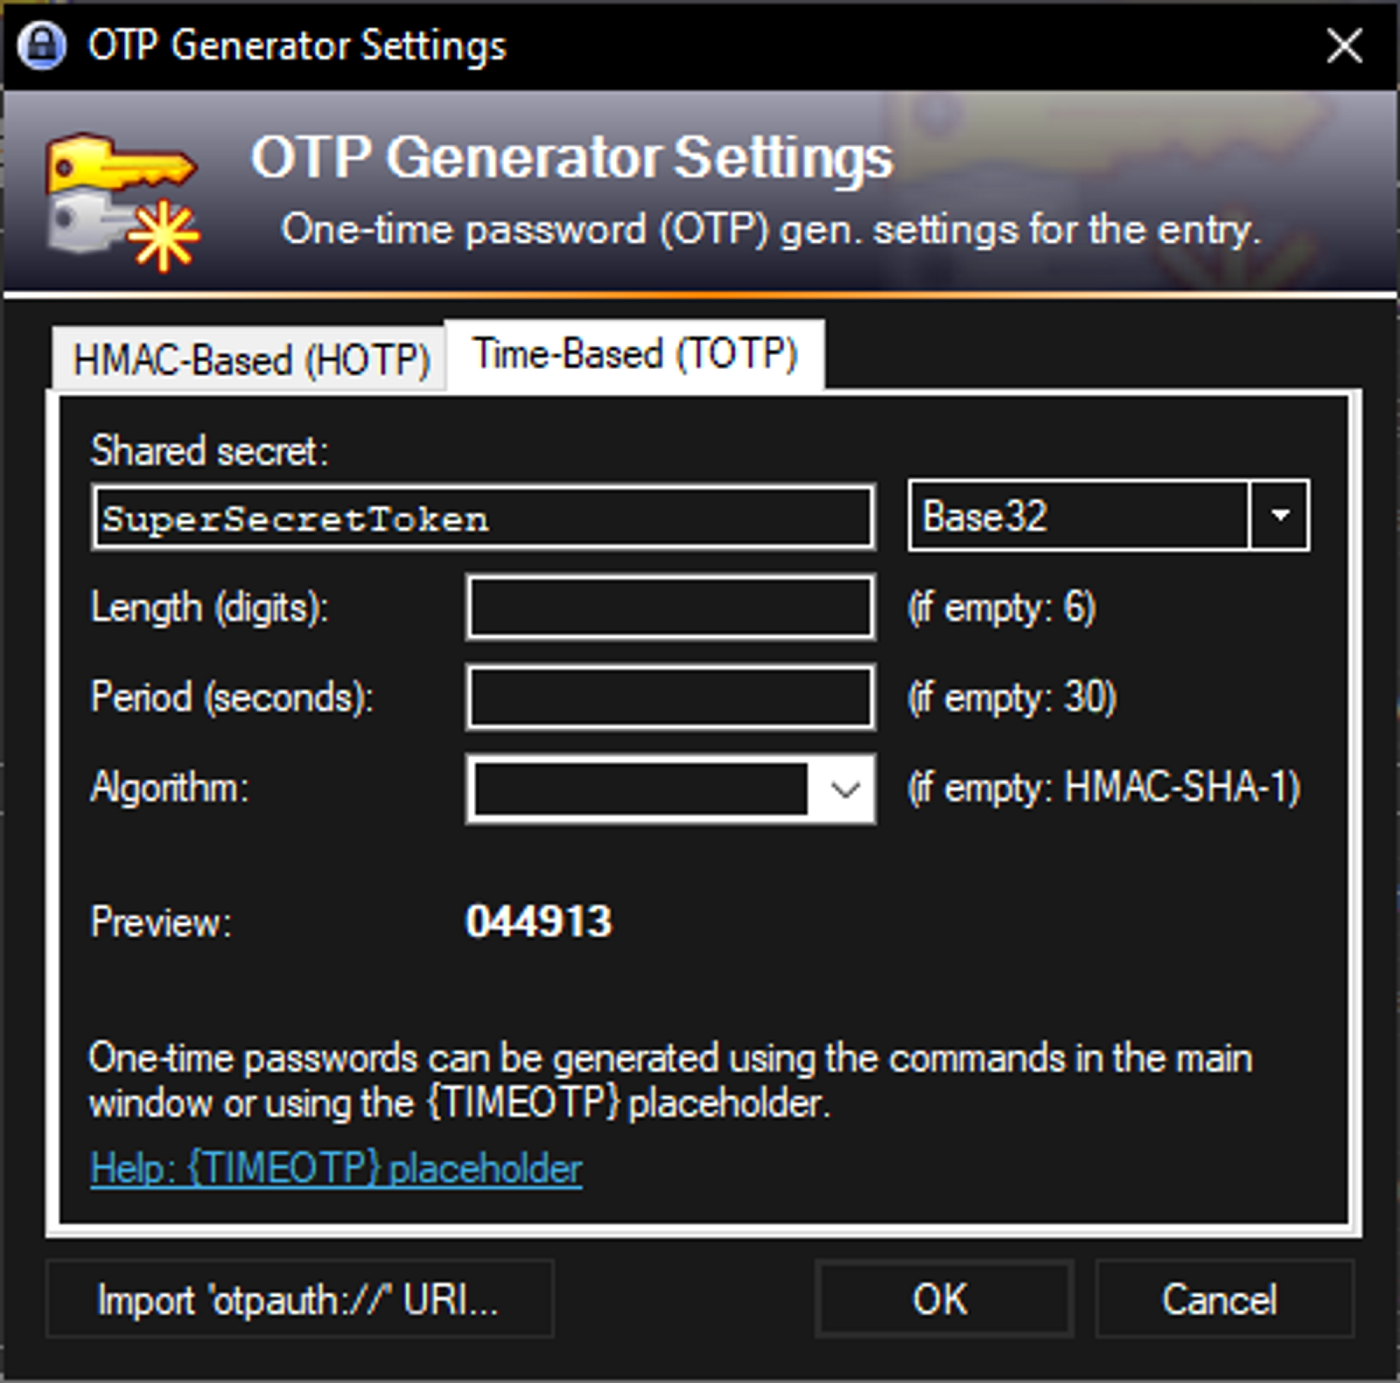
You’ll now see a time-based one-time password (TOTP) generated inside KeePass.
Use the 2FA Code During Login
Once you've configured the OTP generator:
- Use
Ctrl + Tin KeePass to copy the 2FA code to your clipboard. - Paste the code into the verification field when logging into the associated account.
This functionality eliminates the need to use a separate authenticator app and allows KeePass to become your one-stop tool for both passwords and 2FA codes.
Ensure Your Setup Is Working
After completing the steps:
- Log into the service using your username and password from KeePass.
- When prompted for a 2FA code, use the one generated by KeePass.
- If the service accepts the code, your configuration is successful.
You can also cross-check the code in KeePass with your authenticator app to ensure they’re in sync.
Conclusion
Enabling two-factor authentication in KeePass provides a practical and secure way to manage both passwords and one-time codes in a single place. With version 2.51 and newer, adding OTP support is simple and enhances your defense against unauthorized access.
By following this guide, you now have a more secure KeePass setup that helps safeguard your most important accounts. For more information on KeePass features and plugin support, visit the official KeePass documentation.
]]>In conclusion, this guide has taken you through the process of creating a REST API using Symfony 6, equipping you with the essential knowledge and skills to build powerful web applications. We started by setting up a new Symfony project, laying the foundation for our API development.
Using the Doctrine ORM, we defined entities that represented the data model of our API, providing a structured and efficient way to interact with the underlying database. With Symfony controllers tailored for JSON responses, we crafted endpoints that could seamlessly handle incoming requests and deliver appropriate JSON representations of our resources.
Implementing CRUD operations allowed us to create, read, update, and delete data through our API, enabling comprehensive data manipulation. Error handling mechanisms were put in place to gracefully handle exceptions and communicate relevant error messages to clients.
Recognizing the importance of efficient data retrieval, we explored how to implement a pagination system, allowing clients to retrieve data in manageable chunks, improving performance and user experience.
Securing our API, we delved into the authentication process by utilizing authentication header tokens, ensuring that only authorized users could access protected resources.
Quality assurance played a crucial role, as we explored how to conduct both unit and application tests using PHPUnit and Symfony's functional testing framework. These tests verify the correctness and robustness of our API, instilling confidence in its functionality.
Finally, we learned about the deployment process, discussing best practices to deploy our Symfony 6 REST API on a production server. This final step brings our API to life, making it accessible to users and opening up new opportunities for collaboration and integration.
By following this comprehensive journey, you now possess the necessary tools to create a REST API using Symfony 6. Whether you are building a small-scale project or a large-scale application, Symfony 6 empowers you to develop robust and scalable APIs that can meet the demands of modern web development. So go ahead, unleash your creativity, and build remarkable REST APIs with Symfony 6.
]]>In this part, we will see the different important steps to follow when putting a Symfony application in production. The steps we will follow are not only applicable to an API but can also be applied to the production of a website.
To perform these steps, we will use the AlwaysData service. This one proposes a free offer of 100Mb including PHP and MySQL hosting, it is thus ideal for our API. This service allows us to quickly test an application in a production environment for free.
Create an account
If you already have an account on AlwaysData, you can proceed to the next step.
First, you will need to create a free account in order to access the service. To do this, go to the registration page and then follow the instructions to create your account. This should not take more than a minute.
Choose your offer
Once your account is created, you should be redirected to the next page asking you to choose your offer. In our case, we will choose the free offer with 100MB of storage.
We will then enter a name for our project and a password that will be used for the database, FTP and SSH access.
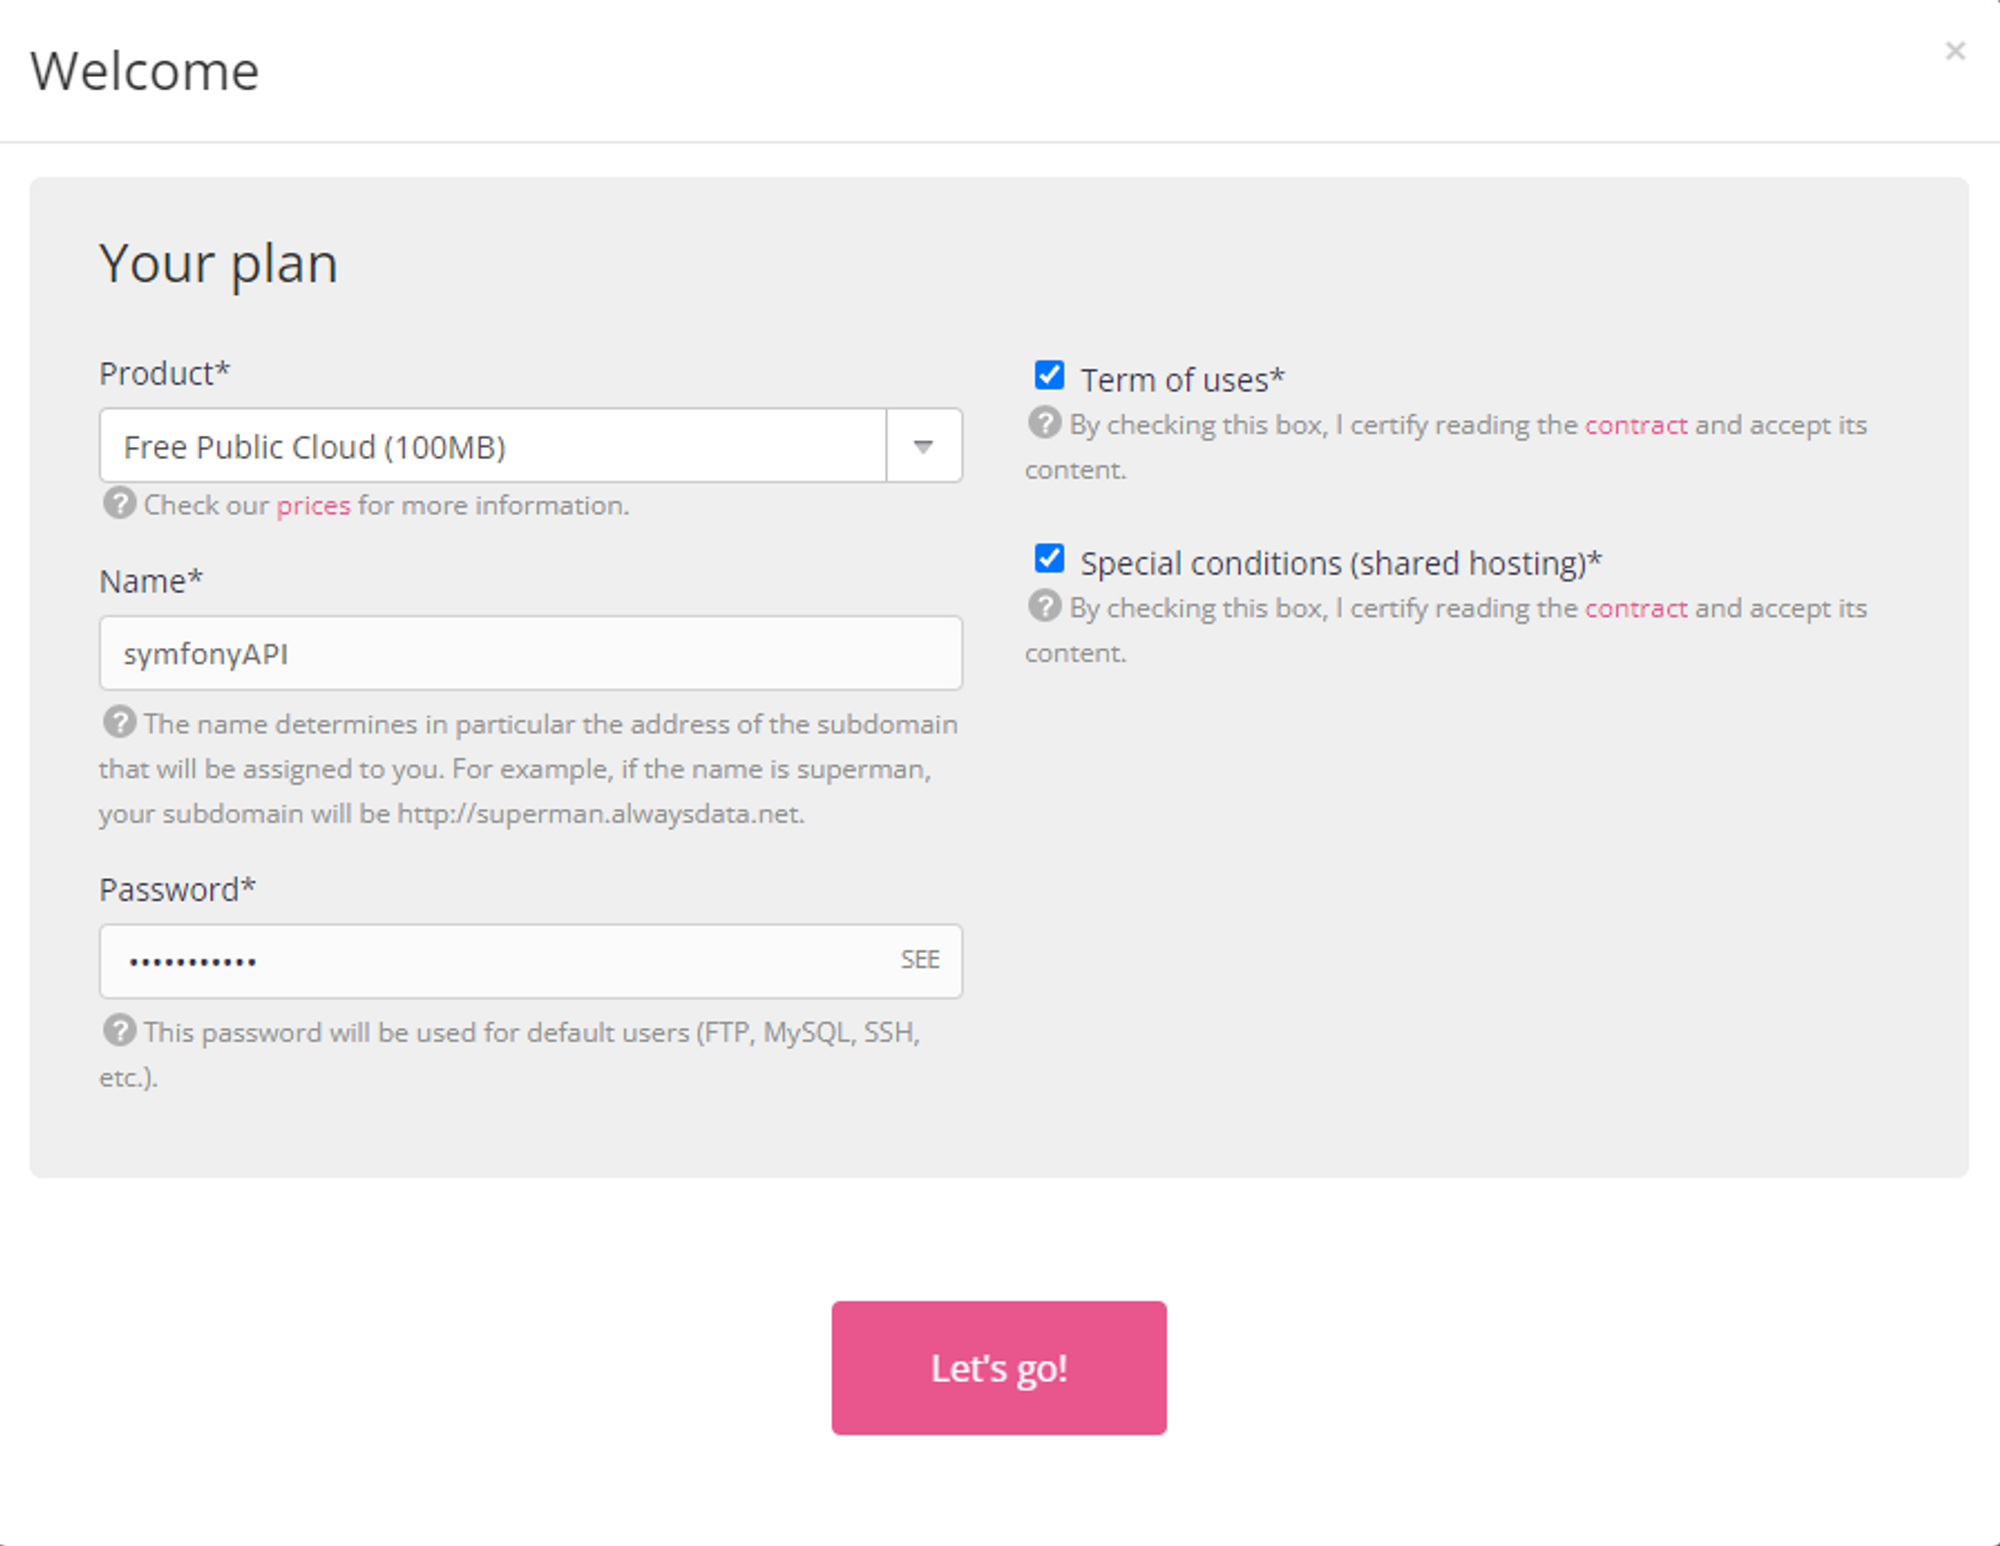
If you already have an account, just go to the Custom Area section, then Accounts and click on the Add account button. You will only have to enter the information we just mentioned.
File transfer
In order for our API to work on the remote server, we will have to send the different files we have created during development. To do this, we will use the FTP protocol. To make it easier for us, we are going to use Filezilla (If you use another FTP transfer software, you can use it, the configuration will be similar).
First of all, we will have to connect to the server. To do this, we will have to get some connection information that AlwaysData should give us.
Let's start with the address of the FTP server. To get it, go to the Remote Access section and then FTP. At the top of the page, you should see the address in question. It should look like this: ftp-project_name.alwaysdata.net.
As for the username and password, this is simply the information you filled in earlier. The username will be in lower case.
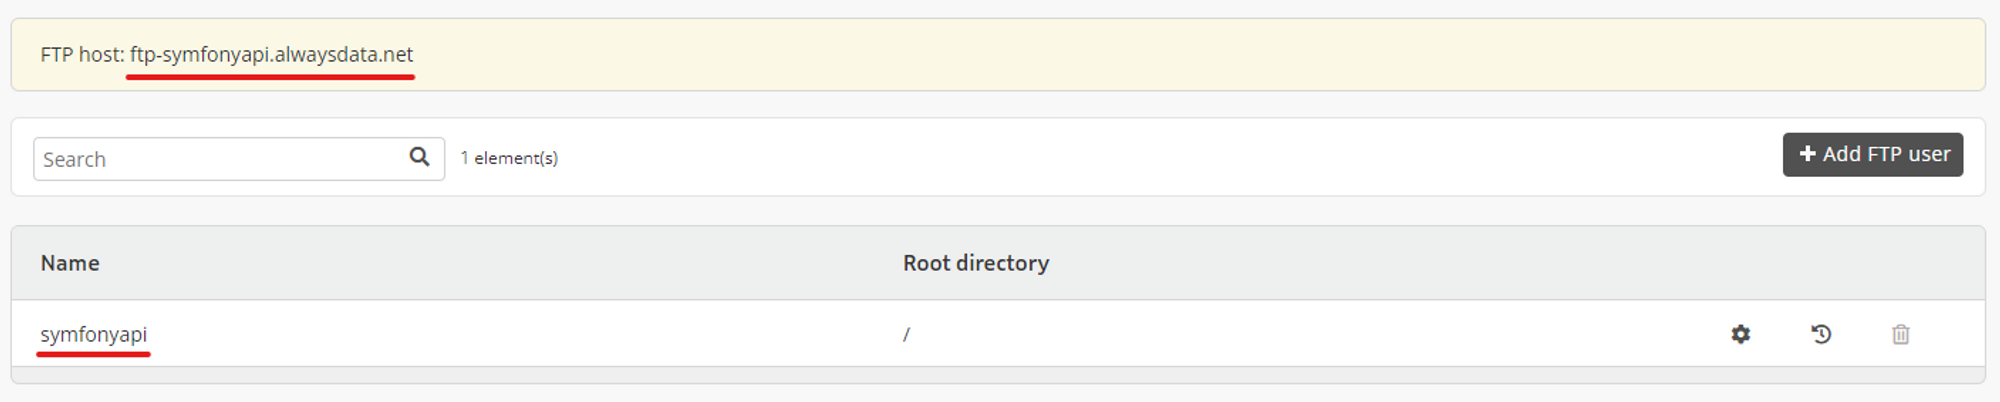
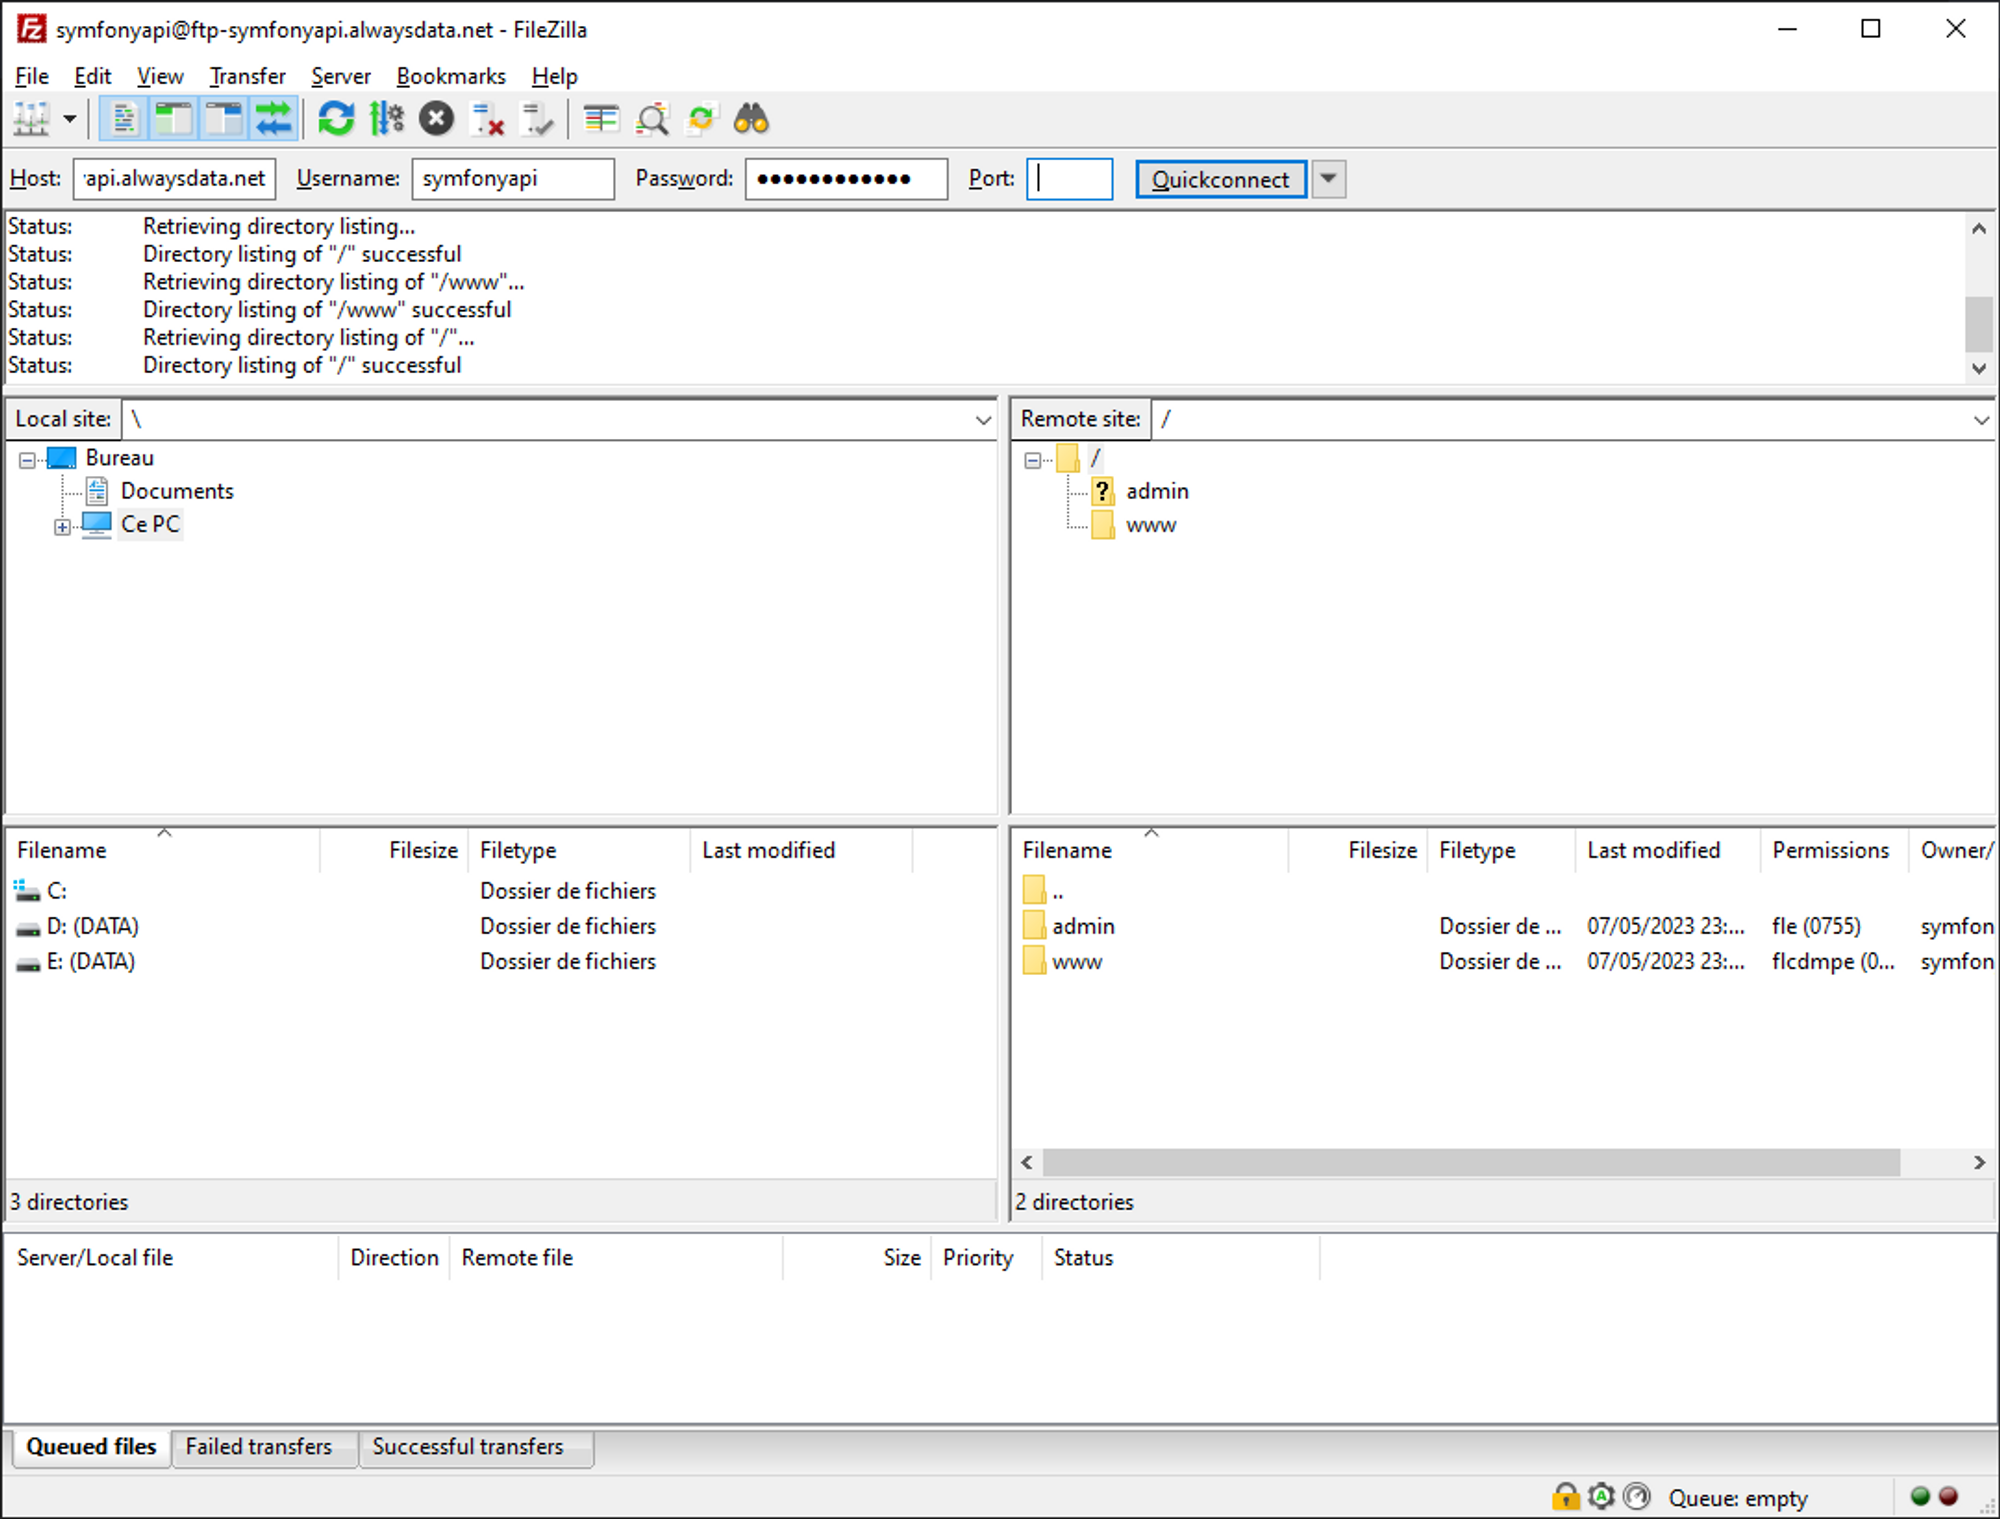
Once connected to the server, we will just have to transfer the files. First, open the www folder located on the right side of the window. You should see an index.html file. You can leave it for now.
Now just drag and drop the project files from your computer to the www folder on the server.
vendor and var folders. These can be regenerated later on the server.You should now see all the files in the lower right-hand corner.
Checking the versions
Before continuing, we will have to make sure that the versions of the languages correspond to the ones we use locally.
Actually, we only need to check the version of PHP as it is the only language we use. To do this, go to the Environment section and check the version indicated for PHP. This should be a version 8.1. Take for example the last available version which starts with 8.1, for me, it is 8.1.17.
Then click the Submit button at the bottom of the page to save.
Project configuration
As for the transfer of files via FTP, we will have to connect to the server via the SSH protocol thanks to the login to continue the configuration of the server and our project.
SSH account configuration
First of all, we'll need to modify the existing SSH user so that we can connect with it.
In the Remote Access section, then SSH, we will click on the setting icon for the symfonyapi user.
We will then check the box to Enable password login.
Then click Submit to save the changes.
Now we can connect to the server using this user. There are two possible methods:
- Use the web version of the terminal
- Use an external terminal on your computer that supports the SSH protocol like Git Bash
For me, I will use the second option but both are possible.
If you want to connect through the web version, just click on the web link in the Remote Access section and then SSH. You will then have to enter the desired user name : symfonyapi and the password.

If you want to use an external terminal, simply enter the following command: ssh [email protected] and then enter the password.
Installing Composer
Although Composer is available on the server, it is version 1. This version will cause problems when installing the libraries. We will have to install version 2.
We can check which version of composer is currently used on the server by running the following command.
composer -v
If the displayed version is 2.x.x, we're good. But if the displayed version is 1.x.x, then we'll have to install version 2.
To do this, go to the root of our project which should be in the /home/symfonyapi/www directory. To change directory and go there, run the following command.
cd ~/www
Then, we will simply follow the instructions proposed in the documentation of Composer. Thus, as indicated, to install Composer, we will execute the following commands.
php -r "copy('https://getcomposer.org/installer', 'composer-setup.php');"
php -r "if (hash_file('sha384', 'composer-setup.php') === '55ce33d7678c5a611085589f1f3ddf8b3c52d662cd01d4ba75c0ee0459970c2200a51f492d557530c71c15d8dba01eae') { echo 'Installer verified'; } else { echo 'Installer corrupt'; unlink('composer-setup.php'); } echo PHP_EOL;"
php composer-setup.php
php -r "unlink('composer-setup.php');"
Let's check that the version installed is version 2.
php composer.phar -v
Now the version should be 2.x.x. This is perfect.
1.x.x, simply run the command php composer.phar self-update --2. This will update Composer to version 2.Installation of dependencies
As for our local project, we will use Composer to manage and install the libraries necessary for our project to work.
To install the dependencies, we will run the following command.
php composer.phar install
Entry point configuration
By default, the entry point of our application is the www directory, which corresponds to our entire project. We will have to modify this value so that the server uses the directory www/public as entry point.
Indeed, if we go to the url of the project http://symfonyapi.alwaysdata.net/, we see the default page.
To change the entry point, go to the Web section and then Sites, then click on the settings icon for the site in question.
In the Configuration part, we'll change the Root directory field to /www/public and then click Submit at the bottom of the page.
Now, if we update the project url, we should see a Symfony page.
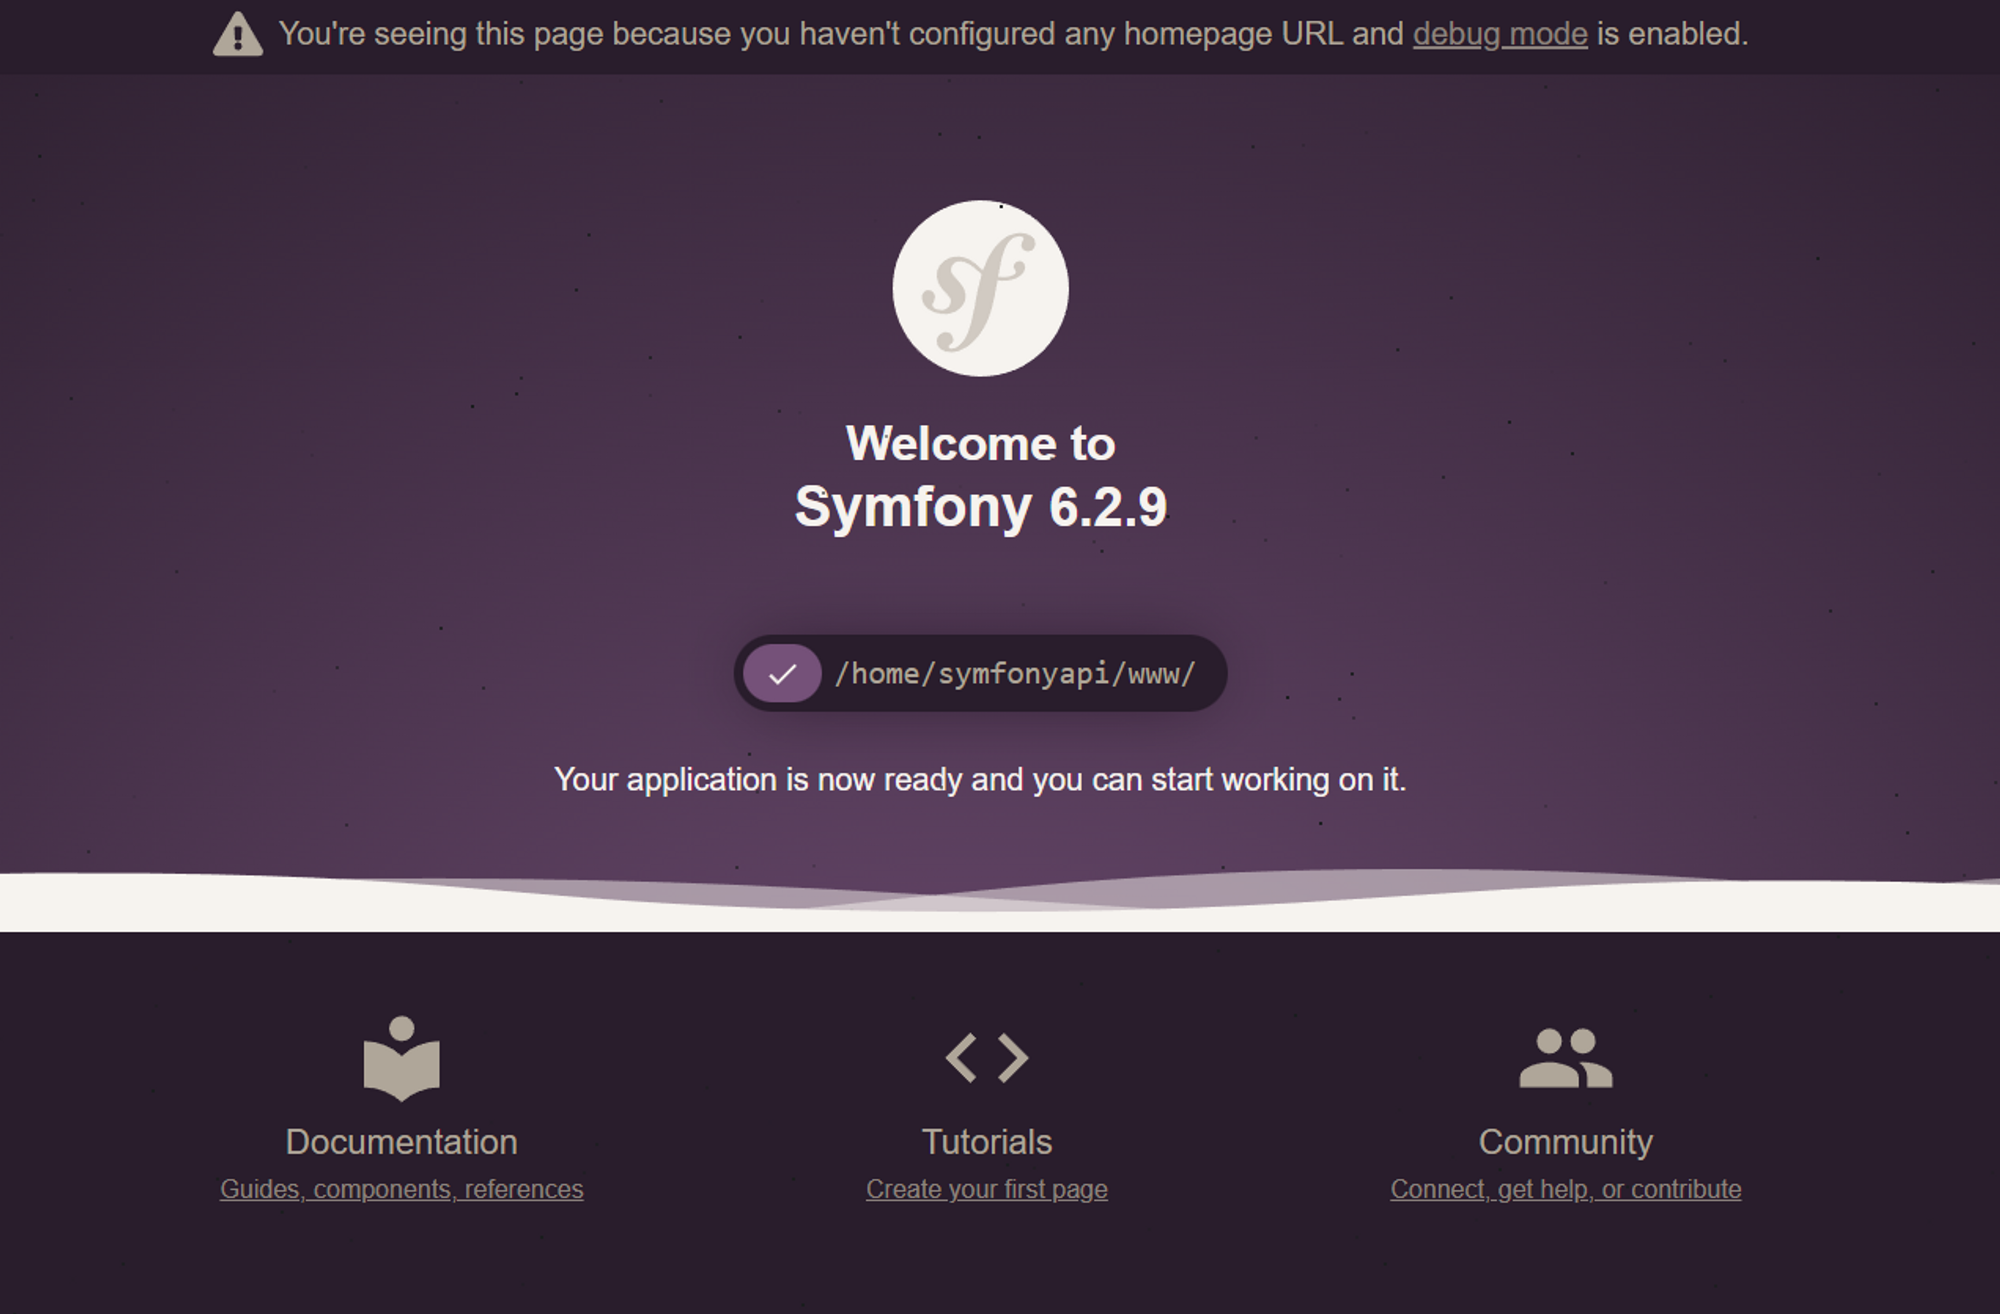
Creating the database
First of all, we will have to create the database that will contain all our data.
To do this, go to the Databases section and then MySQL. In the Databases tab, click on the Add Database button
In the form, displayed, fill in the name of the database. For example, put the name symfonyapi_db.
Then check that in the Permissions section, the All Rights option is selected. This way the user 312455 will be able to read and write to the database.
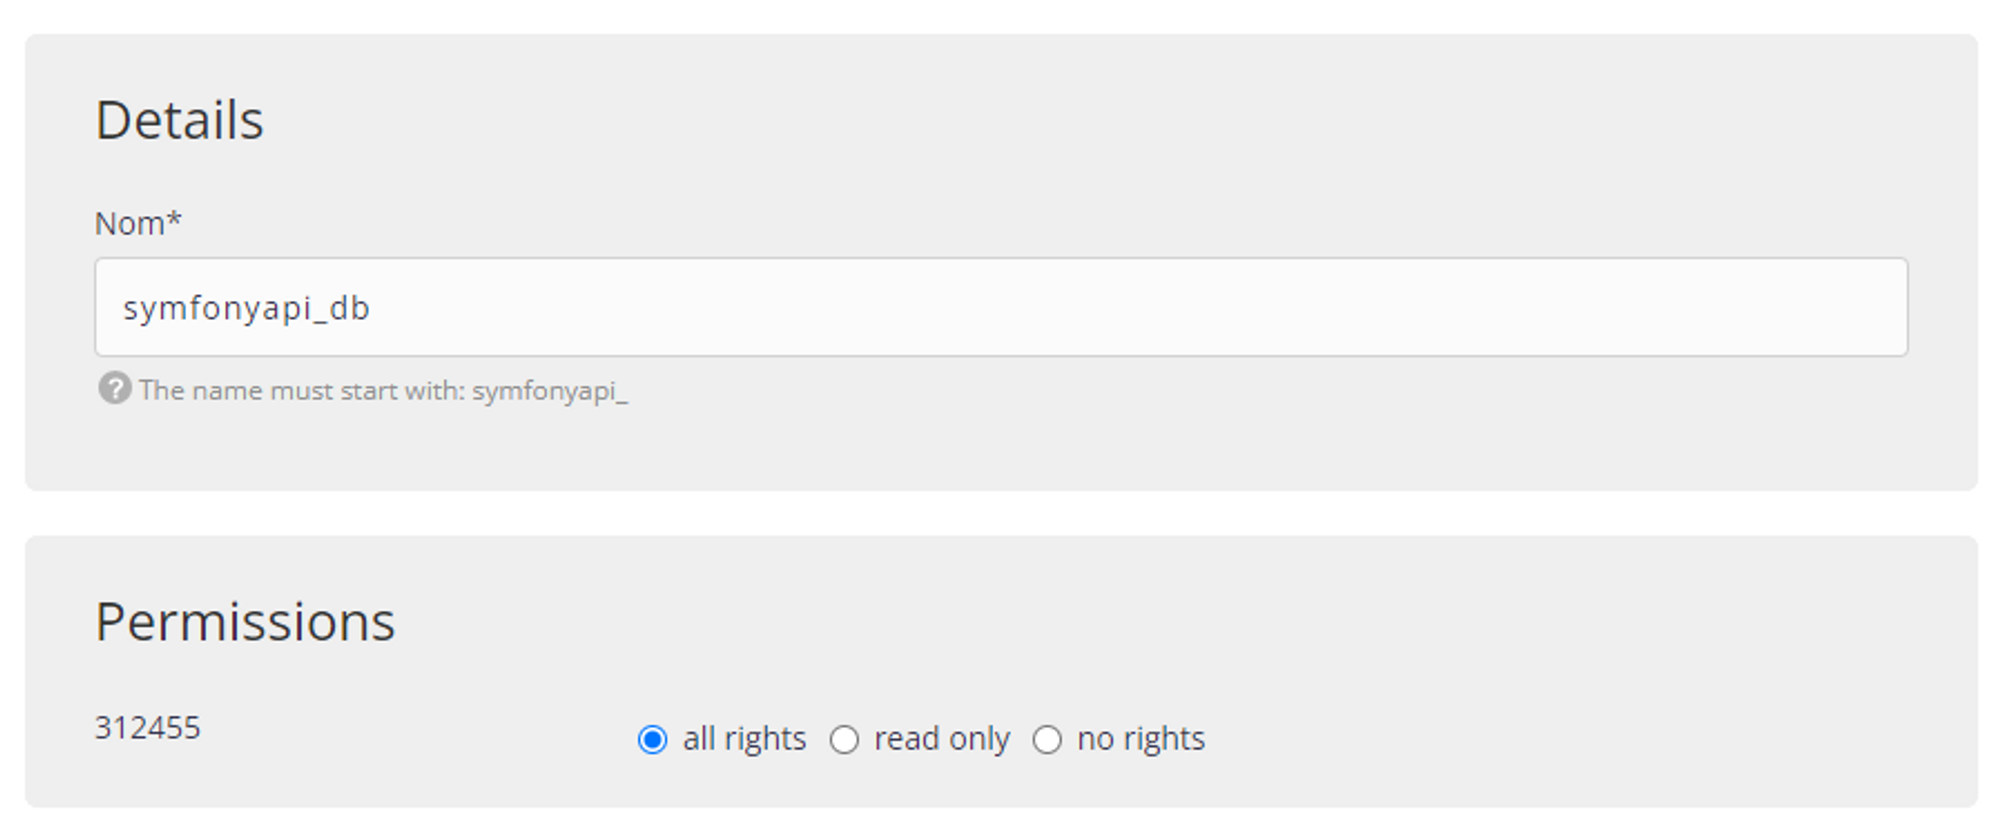
Then confirm by clicking on the Submit button.
Setting up the environment variables
We will now take care of the environment variables located in the .env file. Indeed, the variables in these files correspond to our development environment and not to the production one.
First of all, we will modify the .env file based on the development file. To do this, in your terminal, run the command :
cp .env.local .env
Then, we will modify its content to change the APP_ENV variable as well as the DATABASE_URL variable.
To do this, we will use the nano command.
nano .env
Then, we will fill in the following content.
###> symfony/framework-bundle ###
APP_ENV=prod
APP_SECRET=90e4e5d389dbd391301727099967a616
###< symfony/framework-bundle ###

###> doctrine/doctrine-bundle ###
DATABASE_URL="mysql://db_user:db_password@db_host:db_port/db_name?serverVersion=mariadb-10.6&charset=utf8mb4"
###< doctrine/doctrine-bundle ###
.env
Don't forget to replace the value of the fields db_user, db_password, db_host, db_port and db_name with your values.
- You will find the user name in the
Databasessection and thenMySQL. Then you just have to click on theUserstab.
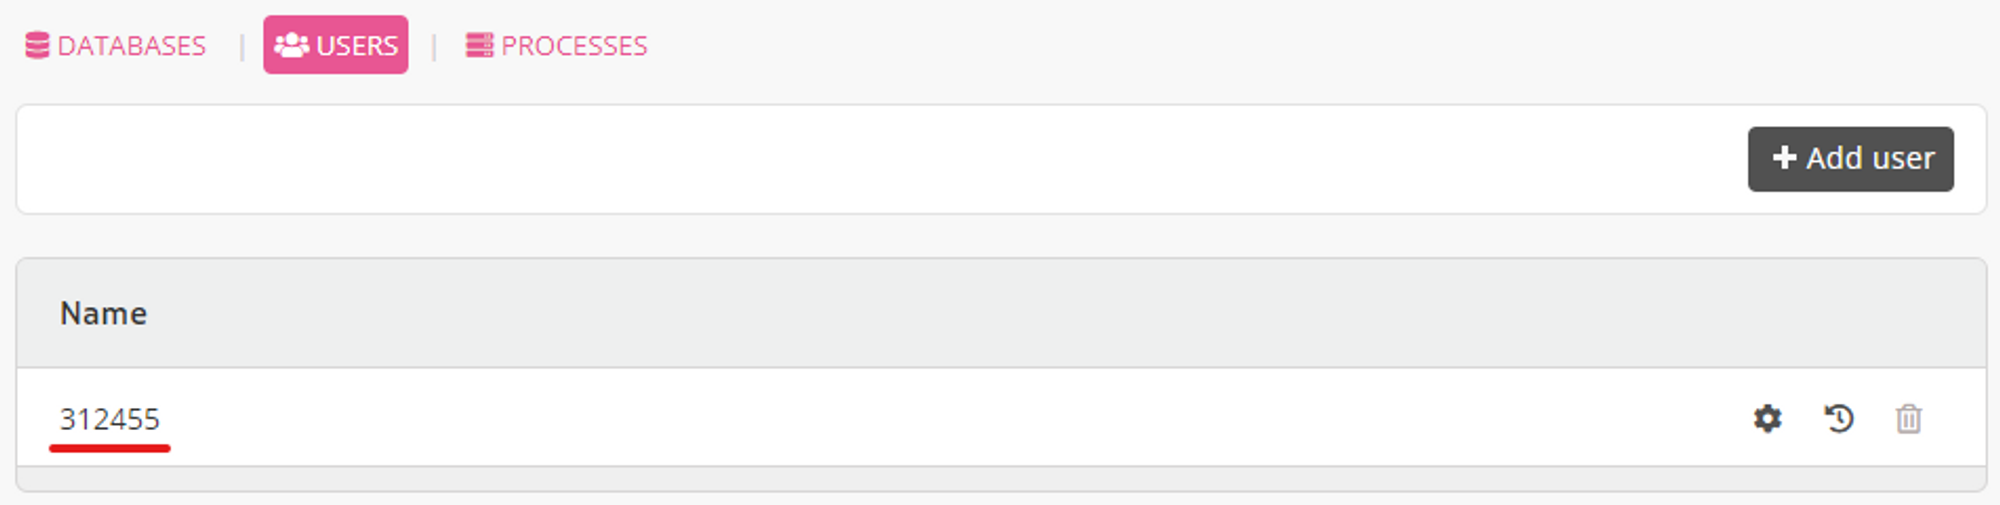
- Concerning the
db_passwordfield, it is the password you have filled in when creating the project on AlwaysData. - As for the
db_hostfield, it is simply the url of the database server proposed by AlwaysData. This url is available in the sectionDatabasesthenMySQL.

- For
db_port, it is port 3306 - Finally, for the
db_namefield, we will fill in the name we gave when creating the database (symfonyapi_db)
serverVersion field in the DATABASE_URL variable. To find this value, you will have to go to the PhpMyAdmin tool offered by AlwaysData. In the section Databases then MySQL, click on phpmyadmin. Then, enter the user name and the password of the user for the database.You will then find the MariaDB version on the right side for the
Server Version field.You will also need to prefix the version with
mariadb- which will give serverVersion=mariadb-10.6.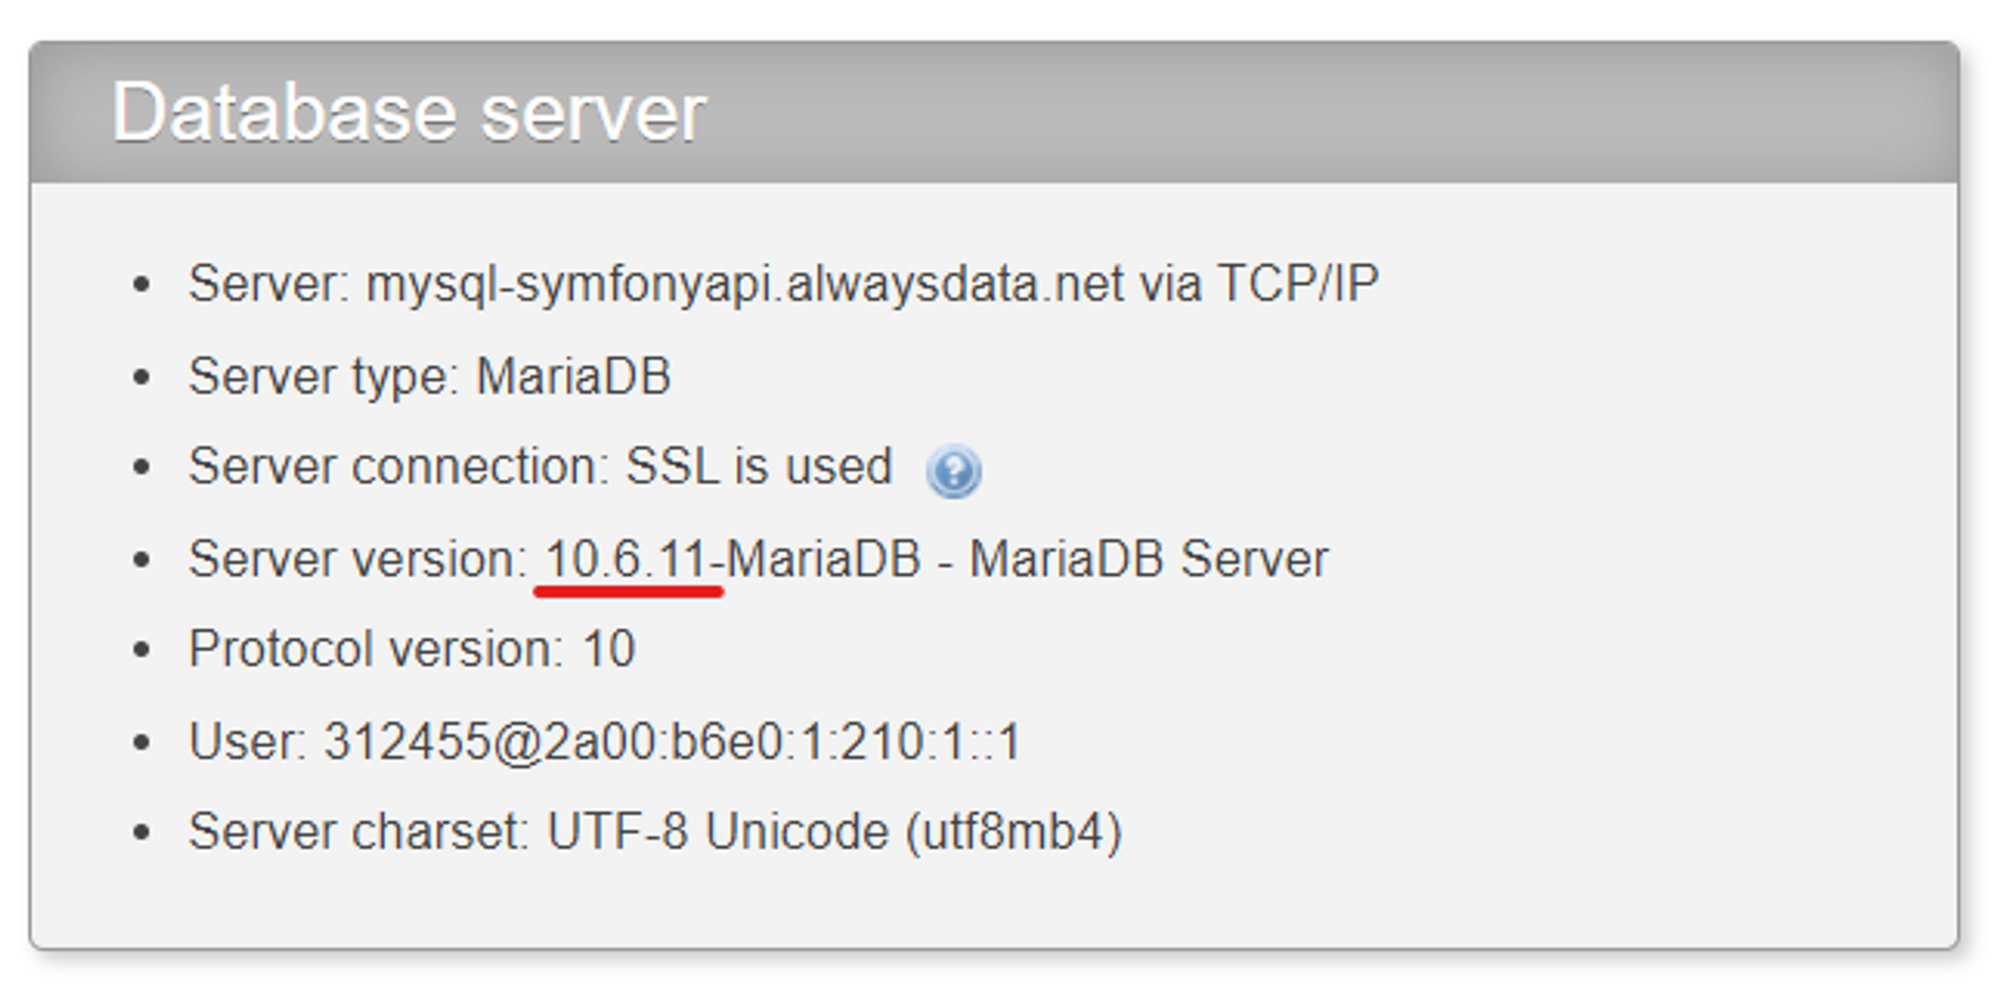
Finally, we will delete the .env.local and .env.test files as they no longer make sense in this environment.
rm .env.local .env.test
Creation of the tables
To create the different tables, we will use the migrations that were created during the development.
php bin/console doctrine:migrations:migrate
Or simply
php bin/console d:m:m
Creating fake data
Once again, we will use the same procedure as in development. To create fake data, we will use the DataFixtures.
php bin/console doctrine:fixtures:load
Or simply
php bin/console d:f:l
Unfortunately, this command does not work in a production environment. To correct this problem, we will temporarily switch back to dev mode in the .env file.
nano .env
Then modify the APP_ENV variable.
APP_ENV=dev
Now, if we run the command again
php bin/console d:f:l
This should work. We now have our tables and a dataset. We can check this by going to the phpmyadmin interface.
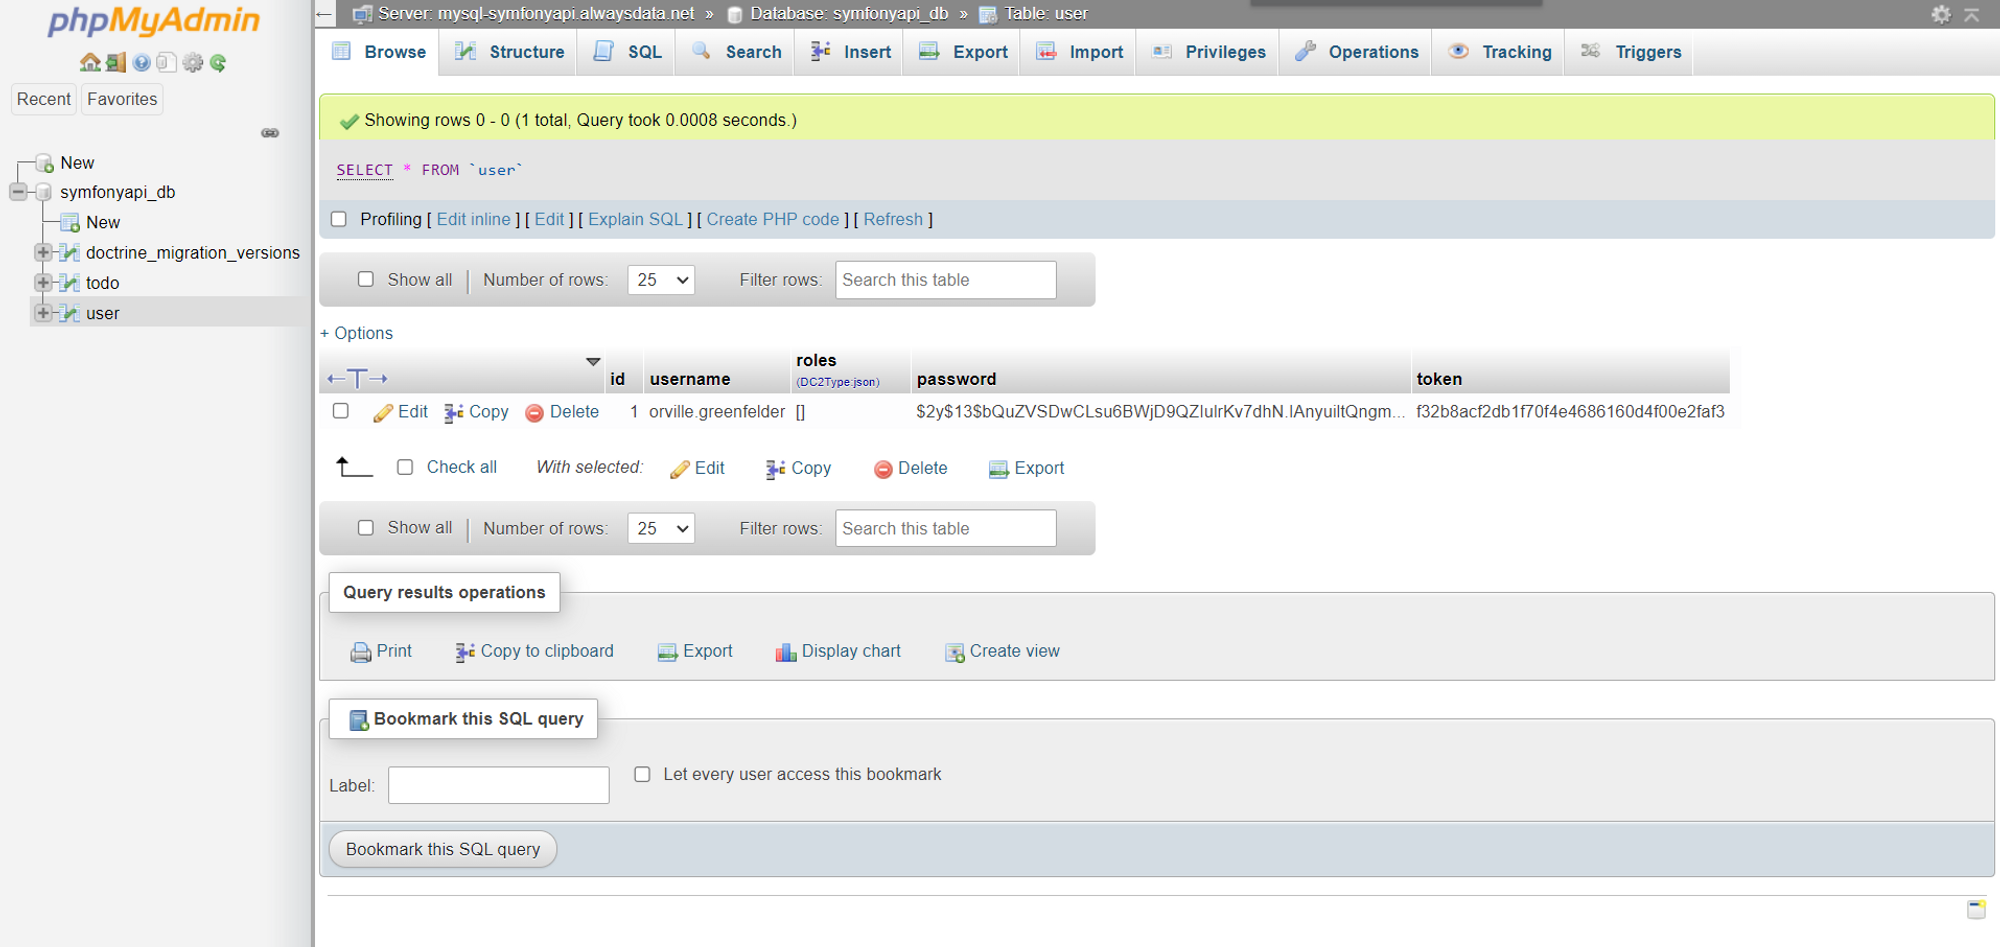
All that remains is to switch back to the production environment by modifying the .env file and setting the APP_ENV variable back to prod.
Apache configuration
Now, if we update the url of our project and try to go to one of the url like /api/todos, we notice that a 404 Not Found page is generated.
This problem is simply due to a lack of configuration with Apache.
To fix this problem, we will install a last library on the server: symfony/apache-pack. As indicated in the documentation, this library allows to enable URL rewriting or to redirect all requests to the index.php file located in the public folder of the project.
Like all the other libraries, we will install it by running the following command.
php composer.phar require symfony/apache-pack
You will then be asked a question: Do you want to execute this recipe? Click y to accept.
Now, if we update the project url and go to /api/todos, we see our data.
[
  "data": [
    {
      "id": 1,
      "title": "Adipisci velit, sed quia non numquam eius modi tempora incidunt ut labore et dolore magnam aliquam quaerat voluptatem",
      "createdAt": "2025-05-08T15:23:00+00:00",
      "updatedAt": "2025-05-08T15:23:00+00:00",
      "completed": false
    },
    {
      "id": 2,
      "title": "Ut enim ad minima veniam, quis nostrum exercitationem ullam corporis suscipit",
      "createdAt": "2025-05-08T15:23:00+00:00",
      "updatedAt": "2025-05-08T15:23:00+00:00",
      "completed": false
    },
    {
      "id": 3,
      "title": "Quis autem vel eum iure reprehenderit qui in ea voluptate velit esse quam",
      "createdAt": "2025-05-08T15:23:00+00:00",
      "updatedAt": "2025-05-08T15:23:00+00:00",
      "completed": false
    },
    {
      "id": 4,
      "title": "Nemo enim ipsam voluptatem quia voluptas sit aspernatur aut odit aut fugit",
      "createdAt": "2025-05-08T15:23:00+00:00",
      "updatedAt": "2025-05-08T15:23:00+00:00",
      "completed": false
    },
    {
      "id": 5,
      "title": "Quae ab illo inventore veritatis et quasi architecto beatae vitae dicta sunt explicabo",
      "createdAt": "2025-05-08T15:23:00+00:00",
      "updatedAt": "2025-05-08T15:23:00+00:00",
      "completed": false
    },
  ],
  "pagination": {
      "total": 10,
      "count": 5,
      "offset": 0,
      "items_per_page": 5,
      "total_pages": 2,
      "current_page": 1,
      "has_next_page": true,
      "has_previous_page": false
  }
]
With Postman, we can also test other routes for security
For example, for the /api/todos route with the POST method, if the X-AUTH-TOKEN header is not filled in, a 401 error is returned.
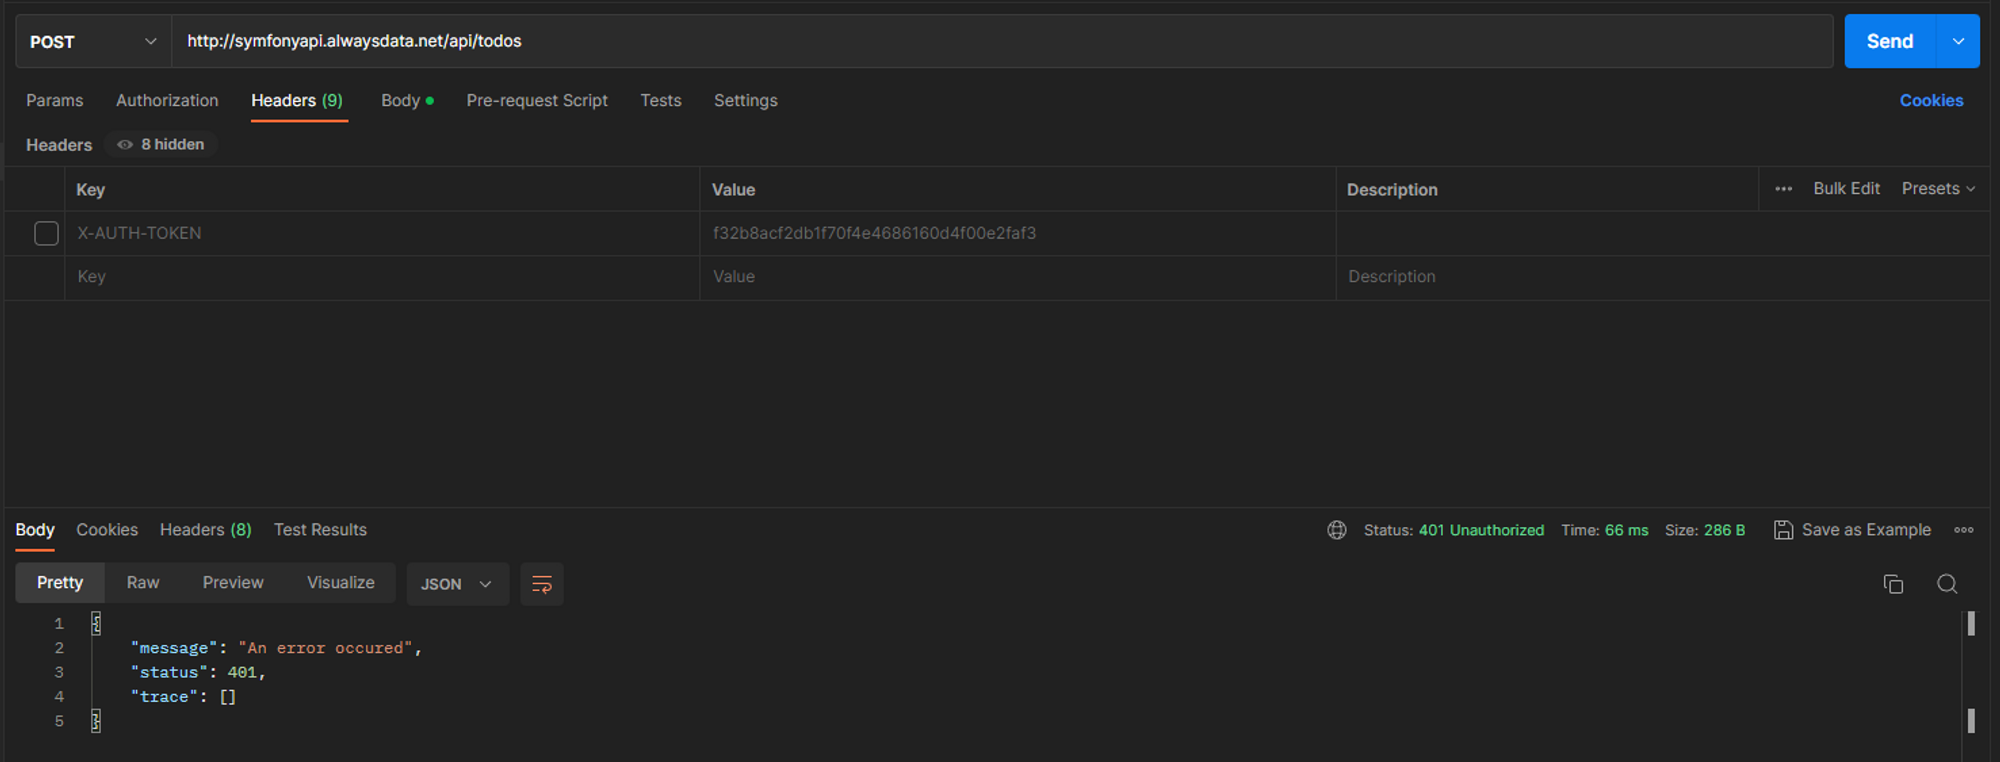
In summary
That's it, you have successfully put in production an API using Symfony.
In this lesson, we have the main steps to put a Symfony project in production. We have reviewed the database configuration, the server configuration, the SSH and FTP accounts, ...
Finally, the process to put a Symfony application in production is very often similar.
- File transfer
- Database configuration
- Change of environment variables
- Launching migrations to create tables
- (Optional) Creating a dataset
- Installing the
symfony/apache-packlibrary
These steps will often be the same.
]]>So far, we have basically spent our time developing and adding new features. However, to make our application more robust and simply to verify that our application works properly, we will have to test it.
Of course, we are not going to manually test our application by hand. Although it's a small api, we'll automate it instead.
Writing test files also allows us to ensure that our api works properly when we add new features. In other words, it guarantees the backward compatibility of the changes.
Several libraries exist to test a PHP program. We can mention Pest, Codeception or PhpSpec. Fortunately, Symfony already includes a tool to test our application: PHPUnit. This tool is particularly robust and is widely used, which means that in case of problem, you should easily find a solution.
Installing the library
As before, we will use composer to install the necessary libraries.
composer require --dev symfony/test-pack
This command allows us to install PHPUnit and other utility libraries in order to perform our tests.
In order to check that the installation works, let's run the command that allows us to execute our tests.
php bin/phpunit
If no errors are returned, all is good.
/tests folder and the class contained in that file ends with Test.Test structure
To test our application properly, we will create different types of test files. As indicated in the documentation, we can distinguish them in 3 categories:
- Unit tests: to test a single functionality
- Integration tests: to test a succession of functionalities
- Application (or functional) tests: to functionally test a feature via HTTP requests.
In our case, we will mainly create unit tests and application tests.
For example, we will create unit tests to check the getters and setters of our entities or to test our OptionsResolvers. On the other hand, we will also create application tests to check the correct functioning of our different urls.
Different types of classes
You will soon see that there are several types of test classes:
TestCase: For a class that does not need service injectionKernelTestCase: For a class that needs service injectionWebTestCase: For using the client to generate HTTP requestsApiTestCase: For testing API Platform related featuresPantherTestCase: To test a feature from end to end using a real browser.
Each type brings different functionalities according to the needs. Some will therefore be much more suitable than others.
Creating the first test file
Let's try to verify that our /api/todos route works properly. To start, we will have to create a test file with the following command.
php bin/console make:test
Next, we will choose the type WebTestCase. We don't choose the type ApiTestCase because for this type of test, we have to use API Platform, which is not our case.
We will then fill in the following name:
Controller\TodoControllerTest
In this way, the structure of the test files corresponds to the structure of the src folder.
You should have the following sequence of commands.
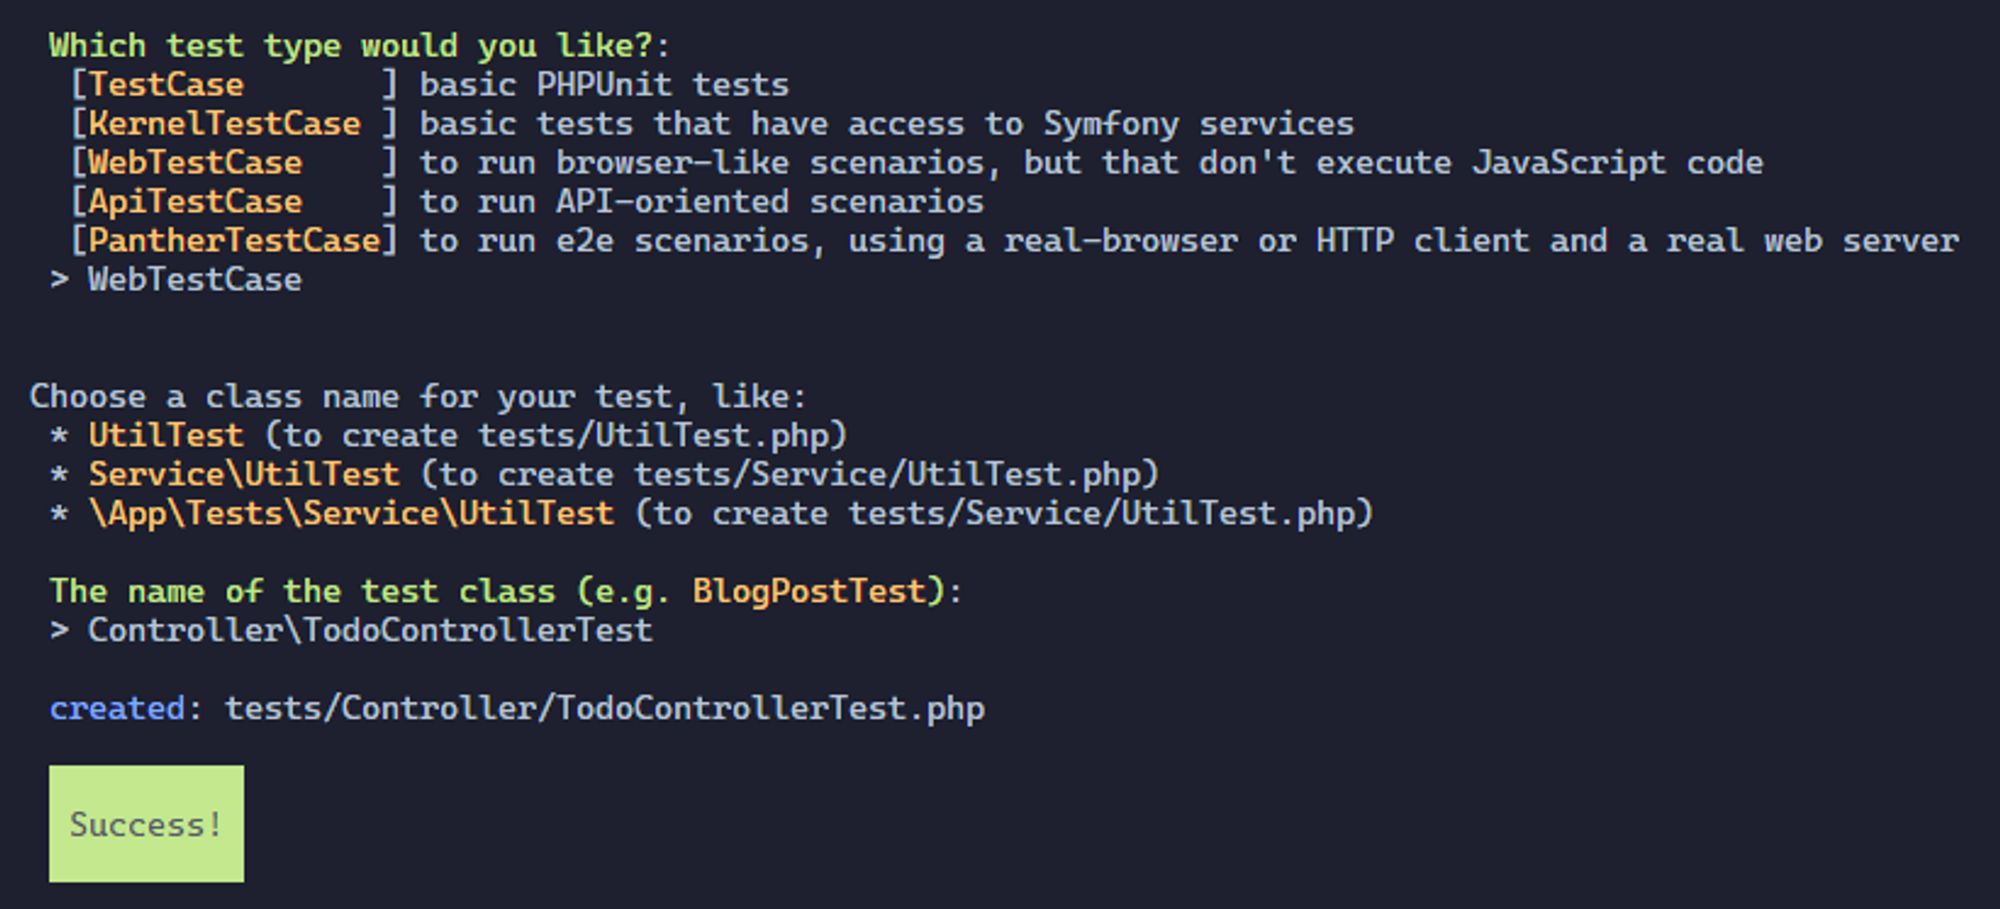
This command should have created a new TodoControllerTest file in the /tests/Controller directory with the following contents.
namespace App\Tests\Controller;

use Symfony\Bundle\FrameworkBundle\Test\WebTestCase;

class TodoControllerTest extends WebTestCase
{
  public function testSomething(): void
  {
    $client = static::createClient();
    $crawler = $client->request('GET', '/');

    $this->assertResponseIsSuccessful();
    $this->assertSelectorTextContains('h1', 'Hello World');
  }
}
tests/Controller/TodoControllerTest.php
We will slightly modify this test file because it does not allow to test correctly a REST API.
We will first modify the line
$crawler = $client->request('GET', '/');
tests/Controller/TodoControllerTest.php
by replacing the url.
$crawler = $client->request('GET', '/api/todos');
tests/Controller/TodoControllerTest.php
Then we will delete the line
$this->assertSelectorTextContains('h1', 'Hello World');
tests/Controller/TodoControllerTest.php
because in the context of an api, it doesn't make sense.
We now have the following code.
namespace App\Tests\Controller;

use Symfony\Bundle\FrameworkBundle\Test\WebTestCase;

class TodoControllerTest extends WebTestCase
{
  public function testSomething(): void
  {
    $client = static::createClient();
    $crawler = $client->request('GET', '/api/todos');

    $this->assertResponseIsSuccessful();
  }
}
tests/Controller/TodoControllerTest.php
Now let's run our test set with the command we saw earlier.
php bin/phpunit
Unfortunately, an error should appear.
Time: 00:00.154, Memory: 24.00 MB
There was 1 failure:
This is simply because this route, like many others, needs a database to retrieve the todo elements.
Setting up the test database
When we installed the symfony/test-pack library at the beginning of the lesson, a .env.test file was also created at the root of the project. This file, like the .env or .env.local file, allows to set environment variables specific to the test environment.
In our case, we will use this file to define the DATABASE_URL variable.
At the end of the file, we will add the following line.
DATABASE_URL="mysql://db_user:db_password@db_host:db_port/db_name"
.env.test
It is simply a copy of the line corresponding to the DATABASE_URL variable in the .env.local file.
test because Symfony will take care of that. For example, if you fill in the name api as the database name, Symfony will create the database under the name api_test so as not to conflict with other existing databases.Once done, it is enough to launch the commands allowing to create the base, create the structure and create false values.
php bin/console doctrine:database:create --env=test
php bin/console doctrine:migrations:migrate --env=test
php bin/console doctrine:fixtures:load --env=test
Once the commands are executed, you should see this new database appear on your database server with the _test suffix.
Now let's run our test set again and see the result.
php bin/phpunit
No more errors are returned. This is perfect.
Creating application tests
Unfortunately, writing tests of any kind is particularly repetitive. So to save you this tedious step, I'll give you the code and we'll go into more detail later.
namespace App\Tests\Controller;

use App\Entity\Todo;
use App\Entity\User;
use App\Repository\TodoRepository;
use App\Repository\UserRepository;
use Symfony\Bundle\FrameworkBundle\KernelBrowser;
use Symfony\Bundle\FrameworkBundle\Test\WebTestCase;
use Symfony\Component\HttpFoundation\Response;

class TodoControllerTest extends WebTestCase
{
  private TodoRepository $todoRepository;
  private UserRepository $userRepository;
  private KernelBrowser $client;

  /**
   * Initializing attributes
   */
  protected function setUp(): void
  {
    $this->client = static::createClient();

    $entityManager = self::getContainer()->get('doctrine')->getManager();
    $this->todoRepository = $entityManager->getRepository(Todo::class);
    $this->userRepository = $entityManager->getRepository(User::class);
  }

  /**
   * Test the format of a paginated response
   */
  private function testPaginatedResponseFormat(): void
  {
    // Retrieve the result of the response
    $response = $this->client->getResponse();
    $result = json_decode($response->getContent(), true);

    // Check the presence and the type of the "data" field
    $this->assertArrayHasKey("data", $result);
    $this->assertIsArray($result["data"]);

    // Check the format of each element within the "data" field
    foreach ($result["data"] as $todo) {
      $this->testTodoFormat($todo);
    }

    // Perform the same operations for the "pagination" field
    $this->assertArrayHasKey("pagination", $result);
    $this->assertIsArray($result["pagination"]);

    $paginationKeys = ["total", "count", "offset", "items_per_page", "total_pages", "current_page", "has_next_page", "has_previous_page", ];
    foreach ($paginationKeys as $key) {
      $this->assertArrayHasKey($key, $result["pagination"]);
    }
  }

  /**
   * Test the format of a todo element
   */
  private function testTodoFormat(array $todoAsArray): void
  {
    // Check the presence of each todo fields
    $todoKeys = ["id", "title", "createdAt", "updatedAt", "completed"];
    foreach ($todoKeys as $key) {
      $this->assertArrayHasKey($key, $todoAsArray);
    }
  }

  /**
   * Test the GET /api/todos route
   */
  public function testGetTodos(): void
  {
    // Make a request with default page parameter
    $this->client->request('GET', '/api/todos');

    // Check if the request is valid
    $this->assertResponseIsSuccessful();
    $this->assertResponseStatusCodeSame(Response::HTTP_OK);
    $this->assertResponseFormatSame("json");

    // Check the response format
    $this->testPaginatedResponseFormat();

    // Perform the same operations with a custom page parameter
    $this->client->request('GET', '/api/todos?page=2');

    $this->assertResponseIsSuccessful();
    $this->assertResponseStatusCodeSame(Response::HTTP_OK);
    $this->assertResponseFormatSame("json");

    $this->testPaginatedResponseFormat();

    // Perform the same operations with an invalid page parameter
    $this->client->request('GET', '/api/todos?page=hello');
    $this->assertResponseStatusCodeSame(Response::HTTP_BAD_REQUEST);
    $this->client->request('GET', '/api/todos?page=-2');
    $this->assertResponseStatusCodeSame(Response::HTTP_BAD_REQUEST);
  }

  /**
   * Test the GET /api/todos/{id} route
   */
  public function testGetTodo(): void
  {
    // Retrieve a todo from the database
    $todo = $this->todoRepository->findOneBy([]);

    // Make the request
    $this->client->request('GET', "/api/todos/{$todo->getId()}");

    // Check if it's successful
    $this->assertResponseIsSuccessful();
    $this->assertResponseStatusCodeSame(Response::HTTP_OK);
    $this->assertResponseFormatSame("json");

    // Check the response format
    $response = $this->client->getResponse();
    $result = json_decode($response->getContent(), true);
    $this->testTodoFormat($result);
  }

  /**
   * Test the POST /api/todo route
   */
  public function testCreateTodo(): void
  {
    // Make the request with body paramater without the "X-AUTH-TOKEN" header to chech the security
    $this->client->request('POST', "/api/todos", content: json_encode(["title" => "new Todo"]));

    // Check if the response status code is "401 Unauthorized"
    $this->assertResponseStatusCodeSame(Response::HTTP_UNAUTHORIZED);

    // Retrieve a user from the database
    $user = $this->userRepository->findOneBy([]);

    // Make the request with the token header and the same body parameter
    $this->client->request(
      'POST',
      "/api/todos",
      server: [
        "HTTP_X_AUTH_TOKEN" => $user->getToken()
      ],
      content: json_encode(["title" => "new Todo"])
    );

    // Check if the response if successful
    $this->assertResponseIsSuccessful();
    $this->assertResponseStatusCodeSame(Response::HTTP_CREATED);

    // Check the response format
    $response = $this->client->getResponse();
    $result = json_decode($response->getContent(), true);
    $this->testTodoFormat($result);

    $this->assertSame("new Todo", $result["title"]);
  }

  /**
   * Test the DELETE /api/todos/{id} route
   */
  public function testDeleteTodo(): void
  {
    // As for the previous method, we first make the request without the token header
    $todo = $this->todoRepository->findOneBy([]);
    $this->client->request('DELETE', "/api/todos/{$todo->getId()}");

    $this->assertResponseStatusCodeSame(Response::HTTP_UNAUTHORIZED);

    // Make the request with the token header
    $user = $this->userRepository->findOneBy([]);
    $this->client->request(
      'DELETE',
      "/api/todos/{$todo->getId()}",
      server: [
        "HTTP_X_AUTH_TOKEN" => $user->getToken()
      ],
    );

    // Check if the request is successful
    $this->assertResponseIsSuccessful();
    $this->assertResponseStatusCodeSame(Response::HTTP_NO_CONTENT);
  }

  /**
   * Test the PATCH /api/todos/{id} route
   */
  public function testPartialUpdate(): void
  {
    $todo = $this->todoRepository->findOneBy([]);
    $this->client->request('PATCH', "/api/todos/{$todo->getId()}");

    $this->assertResponseStatusCodeSame(Response::HTTP_UNAUTHORIZED);

    $user = $this->userRepository->findOneBy([]);
    $this->client->request(
      'PATCH',
      "/api/todos/{$todo->getId()}",
      server: [
        "HTTP_X_AUTH_TOKEN" => $user->getToken()
      ],
      content: json_encode(["title" => "Updated title"])
    );

    $this->assertResponseIsSuccessful();
    $this->assertResponseStatusCodeSame(Response::HTTP_OK);

    $response = $this->client->getResponse();
    $result = json_decode($response->getContent(), true);
    $this->testTodoFormat($result);

    $this->assertSame("Updated title", $result["title"]);
  }

  /**
   * Test the PUT /api/todos/{id} route
   */
  public function testFullUpdate(): void
  {
    $todo = $this->todoRepository->findOneBy([]);
    $this->client->request('PUT', "/api/todos/{$todo->getId()}");

    $this->assertResponseStatusCodeSame(Response::HTTP_UNAUTHORIZED);

    $user = $this->userRepository->findOneBy([]);

    // Missing parameter
    $this->client->request(
      'PUT',
      "/api/todos/{$todo->getId()}",
      server: [
        "HTTP_X_AUTH_TOKEN" => $user->getToken()
      ],
      content: json_encode(["title" => "Updated title"])
    );

    $this->assertResponseStatusCodeSame(Response::HTTP_BAD_REQUEST);

    // Valid request
    $this->client->request(
      'PUT',
      "/api/todos/{$todo->getId()}",
      server: [
        "HTTP_X_AUTH_TOKEN" => $user->getToken()
      ],
      content: json_encode(["title" => "Updated title", "completed" => true])
    );

    $this->assertResponseIsSuccessful();
    $this->assertResponseStatusCodeSame(Response::HTTP_OK);

    $response = $this->client->getResponse();
    $result = json_decode($response->getContent(), true);
    $this->testTodoFormat($result);

    $this->assertSame("Updated title", $result["title"]);
    $this->assertSame(true, $result["completed"]);
  }
}
tests/Controller/TodoControllerTest.php
The goal here is to test as many different things as possible in order to ensure the proper functioning of our api.
So we find several methods :
setUptestPaginatedResponseFormattestTodoFormattestGetTodostestGetTodotestCreateTodoTestDeleteTodoTestPartialUpdate
Each of these methods has a specific purpose. We can still distinguish these methods in 2 categories:
- Those which allow to configure the test class
- Those which allow to test a functionality
In this case, the setUp method simply initializes the various attributes of our class. Its operation is similar to that of a constructor.
All the other methods allow to test a functionality.
The code is commented to make it easier to understand.
We can now proceed to the unit tests
Creating unit tests
Entities
As with the application tests, we will write the code and then explain it. So here is the unit test file for the Todo entity.
namespace App\Tests\Entity;

use App\Entity\Todo;
use DateTimeImmutable;
use Doctrine\ORM\EntityManager;
use Symfony\Bundle\FrameworkBundle\Test\KernelTestCase;
use Symfony\Component\Validator\Constraints\Length;
use Symfony\Component\Validator\Constraints\NotBlank;
use Symfony\Component\Validator\ConstraintViolation;
use Symfony\Component\Validator\Validator\ValidatorInterface;

class TodoTest extends KernelTestCase
{
  private EntityManager $em;
  private ValidatorInterface  $validator;

  protected function setUp(): void
  {
    $this->em = self::getContainer()->get('doctrine')->getManager();
    $this->validator = self::getContainer()->get("validator");
  }

  public function testDefaultValues(): void
  {
    $todo = new Todo();

    // Test default values
    $this->assertNull($todo->getId());
    $this->assertNull($todo->getTitle());
    $this->assertNull($todo->getCreatedAt());
    $this->assertNull($todo->getUpdatedAt());
    $this->assertFalse($todo->isCompleted());
  }

  public function testTitle()
  {
    $todo = new Todo();

    // Test entity constraints
    /** @var ConstraintViolation[] $errors */
    $errors = $this->validator->validateProperty($todo, "title");
    $this->assertInstanceOf(NotBlank::class, $errors[0]->getConstraint());

    $todo->setTitle("Sed ut perspiciatis unde omnis iste natus error sit voluptatem accusantium doloremque laudantium, totam rem aperiam, eaque ipsa quae ab illo inventore veritatis et quasi architecto beatae vitae dicta sunt explicabo. Nemo enim ipsam voluptatem quia voluptas");
    /** @var ConstraintViolation[] $errors */
    $errors = $this->validator->validateProperty($todo, "title");
    $this->assertInstanceOf(Length::class, $errors[0]->getConstraint());

    // Test the title setter and getter methods
    $title = 'Test Todo';
    $todo->setTitle($title);
    $this->assertEquals($title, $todo->getTitle());
  }

  public function testCompleted()
  {
    $todo = new Todo();

    // Test the completed setter and getter methods
    $todo->setCompleted(true);
    $this->assertTrue($todo->isCompleted());
  }

  public function testDoctrineEvents()
  {
    $todo = new Todo();

    // Persist the entity (not flush) in order to generate the createdAt and updatedAt fields
    $this->em->persist($todo);

    // Test the createdAt and updatedAt setter and getter methods
    $this->assertInstanceOf(DateTimeImmutable::class, $todo->getCreatedAt());
    $this->assertInstanceOf(DateTimeImmutable::class, $todo->getUpdatedAt());

    // Detch the entity to prevent tracking unused entity
    $this->em->detach($todo);
  }
}
tests/Entity/TodoTest.php
Once again, we find the setUp method and a set of methods to test all the fields of the entity
The setUp method works in the same way as the one we presented earlier for the application tests.
We then test all the getters and setters in order to verify their correct operation.
Finally, in the testDoctrineEvents method, we persist the entity in order to check the functioning of the Doctrine events (PrePersist and PreUpdate).
For the User entity, we will apply exactly the same principle.
namespace App\Tests\Entity;

use App\Entity\User;
use Symfony\Bundle\FrameworkBundle\Test\KernelTestCase;

class UserTest extends KernelTestCase
{
  public function testDefaultValues(): void
  {
    $user = new User();

    // Test the ID getter method
    $this->assertNull($user->getId());
  }

  public function testUsername()
  {
    $user = new User();

    // Test the username setter and getter methods
    $username = 'test_user';
    $user->setUsername($username);
    $this->assertEquals($username, $user->getUsername());
    $this->assertEquals($username, $user->getUserIdentifier());
  }

  public function testRoles()
  {
    $user = new User();

    // Test the roles setter and getter methods
    $roles = ['ROLE_ADMIN', 'ROLE_USER'];
    $user->setRoles($roles);
    $this->assertEquals($roles, $user->getRoles());
  }

  public function testPassword()
  {
    $user = new User();

    // Test the password setter and getter methods
    $password = 'test_password';
    $user->setPassword($password);
    $this->assertEquals($password, $user->getPassword());
  }

  public function testToken()
  {
    $user = new User();

    // Test the token setter and getter methods
    $token = 'test_token';
    $user->setToken($token);
    $this->assertEquals($token, $user->getToken());
  }
}
tests/Entity/UserTest.php
The difference with the Todo entity test class is that, for the User class, we extend the TestCase class and not the KernelTestCase class because we do not need to inject a service. The User entity test class only needs the User entity to work.
Models
As you may have noticed, writing unit tests to test entities is very often similar. Come on, testing a model is not that complicated either. It works in a similar way.
namespace App\Tests\Model;

use App\Model\Paginator;
use Symfony\Bundle\FrameworkBundle\Test\KernelTestCase;

class PaginatorTest extends KernelTestCase
{
  private Paginator $paginator;

  public function setUp(): void
  {
    // Create the Query object
    $em = self::getContainer()->get('doctrine')->getManager();
    $query = $em->createQueryBuilder()
      ->select("t")
      ->from('App\Entity\Todo', 't')
      ->getQuery();

    // Create the Paginator object
    $this->paginator = new Paginator($query);
  }

  public function testTotal(): void
  {
    $this->assertIsInt($this->paginator->getTotal());
  }

  public function testData(): void
  {
    $this->assertIsArray($this->paginator->getData());
  }

  public function testCount(): void
  {
    $this->assertIsInt($this->paginator->getCount());
  }

  public function testTotalPages(): void
  {
    $this->assertIsInt($this->paginator->getTotalPages());
  }

  public function testCurrentPage(): void
  {
    $this->assertIsInt($this->paginator->getCurrentPage());
  }

  public function testOffset(): void
  {
    $this->assertIsInt($this->paginator->getOffset());
  }

  public function testItemsPerPage(): void
  {
    $this->assertIsInt($this->paginator->getItemsPerPage());
  }

  public function testHasNextPage(): void
  {
    $this->assertIsBool($this->paginator->hasNextPage());
  }

  public function testHasPreviousPage(): void
  {
    $this->assertIsBool($this->paginator->hasPreviousPage());
  }

  public function testIterator(): void
  {
    // Convert paginator to an array (it uses the getIterator)
    $arrayPaginator = $this->paginator->getIterator();
    $this->assertArrayHasKey("data", $arrayPaginator);
    $this->assertArrayHasKey("pagination", $arrayPaginator);

    $this->assertArrayHasKey("total", $arrayPaginator["pagination"]);
    $this->assertArrayHasKey("count", $arrayPaginator["pagination"]);
    $this->assertArrayHasKey("offset", $arrayPaginator["pagination"]);
    $this->assertArrayHasKey("items_per_page", $arrayPaginator["pagination"]);
    $this->assertArrayHasKey("total_pages", $arrayPaginator["pagination"]);
    $this->assertArrayHasKey("current_page", $arrayPaginator["pagination"]);
    $this->assertArrayHasKey("has_next_page", $arrayPaginator["pagination"]);
    $this->assertArrayHasKey("has_previous_page", $arrayPaginator["pagination"]);
  }
}
tests/Model/PaginatorTest.php
First, we initialize the variables needed to test our model. Then, as for the entities, we test each getters.
Now we have to test the two OptionsResolvers that we have created to validate the data sent by the user.
Options Resolver
Let's start with the PaginatorOptionsResolver. Here, the principle will be to test every aspect of our OptionsResolver such as mandatory fields, allowed values, normalization, ...
Here is the code for the PaginatorOptionsResolver.
namespace App\Tests\OptionsResolver;

use App\OptionsResolver\PaginatorOptionsResolver;
use PHPUnit\Framework\TestCase;
use Symfony\Component\OptionsResolver\Exception\InvalidOptionsException;

class PaginatorOptionsResolverTest extends TestCase
{
  private PaginatorOptionsResolver $optionsResolver;

  public function setUp(): void
  {
    $this->optionsResolver = new PaginatorOptionsResolver();
  }

  public function testValidPage(): void
  {
    $params = [
      "page" => "2"
    ];

    $result = $this->optionsResolver
      ->configurePage()
      ->resolve($params);

    $this->assertEquals(2, $result["page"]);
  }

  public function testNegativePage(): void
  {
    $params = [
      "page" => "-2"
    ];

    $this->expectException(InvalidOptionsException::class);

    $this->optionsResolver
      ->configurePage()
      ->resolve($params);
  }

  public function testDefaultPage()
  {
    $params = [];

    $result = $this->optionsResolver
      ->configurePage()
      ->resolve($params);

    $this->assertEquals(1, $result["page"]);
  }

  public function testStringPage()
  {
    $params = [
      "page" => "Hello World!"
    ];

    $this->expectException(InvalidOptionsException::class);

    $this->optionsResolver
      ->configurePage()
      ->resolve($params);
  }
}
tests/OptionsResolver/PaginatorOptionsResolverTest.php
As you can see, we test every possibility:
- With a valid value
- With a negative value
- Without the
pageparameter - With one that is not a number
This covers all aspects of our OptionsResolver.
Finally, concerning the TodoOptionsResolver, here is the code we got.
namespace App\Tests\OptionsResolver;

use App\OptionsResolver\TodoOptionsResolver;
use PHPUnit\Framework\TestCase;
use Symfony\Component\OptionsResolver\Exception\InvalidOptionsException;
use Symfony\Component\OptionsResolver\Exception\MissingOptionsException;

class TodoOptionsResolverTest extends TestCase
{
  private TodoOptionsResolver $optionsResolver;

  public function setUp(): void
  {
    $this->optionsResolver = new TodoOptionsResolver();
  }

  public function testRequiredTitle()
  {
    $params = [];

    $this->expectException(MissingOptionsException::class);

    $this->optionsResolver
      ->configureTitle(true)
      ->resolve($params);
  }

  public function testValidTitle()
  {
    $params = [
      "title" => "My Title"
    ];

    $result = $this->optionsResolver
      ->configureTitle(true)
      ->resolve($params);

    $this->assertEquals("My Title", $result["title"]);
  }

  public function testInvalidTitle()
  {
    $params = [
      "title" => 3
    ];

    $this->expectException(InvalidOptionsException::class);

    $this->optionsResolver
      ->configureTitle(true)
      ->resolve($params);
  }

  public function testRequiredCompleted()
  {
    $params = [];

    $this->expectException(MissingOptionsException::class);

    $this->optionsResolver
      ->configureCompleted(true)
      ->resolve($params);
  }

  public function testValidCompleted()
  {
    $params = [
      "completed" => true
    ];

    $result = $this->optionsResolver
      ->configureCompleted(true)
      ->resolve($params);

    $this->assertEquals(true, $result["completed"]);
  }

  public function testInvalidCompleted()
  {
    $params = [
      "completed" => "Hello World!"
    ];

    $this->expectException(InvalidOptionsException::class);

    $this->optionsResolver
      ->configureCompleted(true)
      ->resolve($params);
  }
}
tests/OptionsResolver/TodoOptionsResolverTest.php
As for the previous one, the goal is to test a maximum of possibilities to limit the appearance of problems when we add new features and make our API evolve.
Repository
To finish, we just have to test our repository TodoRepository. Indeed, it is the only repository that we have modified. So it is important to test our modifications.
namespace App\Tests\Repository;

use App\Entity\Todo;
use App\Model\Paginator;
use App\Repository\TodoRepository;
use Symfony\Bundle\FrameworkBundle\Test\KernelTestCase;

class TodoRepositoryTest extends KernelTestCase
{
  private TodoRepository $repository;

  public function setUp(): void
  {
    $em = self::getContainer()->get("doctrine")->getManager();
    $this->repository = $em->getRepository(Todo::class);
  }

  public function testFindAllWithPagination(): void
  {
    $result = $this->repository->findAllWithPagination(1);

    $this->assertInstanceOf(Paginator::class, $result);
    $this->assertEquals(1, $result->getCurrentPage());
  }
}
tests/Repository/TodoRepositoryTest.php
That's about all we have to do to test our API.
In summary
In this lesson, we have seen different ways to write tests in order to validate the good working of our API, especially thanks to the unit tests, integration tests and application tests.
We also discussed the different types of classes we could use depending on our needs (TestCase, KernelTestCase, ...).
We then continued by writing application tests by simulating HTTP requests in order to verify the returned results. Then, we took care of the different unit tests for the entities as well as for the different classes for which it is necessary to test functionalities.
In the next lesson, we will see how to deploy and put in production our API.
]]>Until now, the routes we created were available without access restrictions. Indeed, if our api was deployed, anyone could have requested it, which can be a problem especially for sensitive requests such as creation, update or deletion.
To correct this problem, we will implement an authentication system via api tokens. A user who is already authenticated will only have to fill in his personal token to use the api without restriction. To do this, we will use the security-bundle of Symfony which integrates a lot of tools to manage the connection, authentication and security in general.
Overview of the security component
First, like any other package, we will have to install it.
composer require symfony/security-bundle
In addition to installing the various libraries needed, this command also creates a new security.yaml configuration file in the /config/packages folder.
As the name suggests, this file is used to configure the security of our api:
- the way passwords are hashed
- firewalls
- the access controls
It is this file that we will modify later to create our own security system.
This security system is based on a particular class: User which does not exist yet. This class will allow a user to connect, to access protected resources, ...
It is precisely this class that we will create.
Creating the User class
You might be tempted to use the make:entity command to create the User class. However, as we mentioned, the User class is a bit special and requires a different command. Instead, we will use the following command.
php bin/console make:user
This command allows us to create the User class but also to execute all the related tasks.
You will be asked a series of questions afterwards. You will have to answer this:
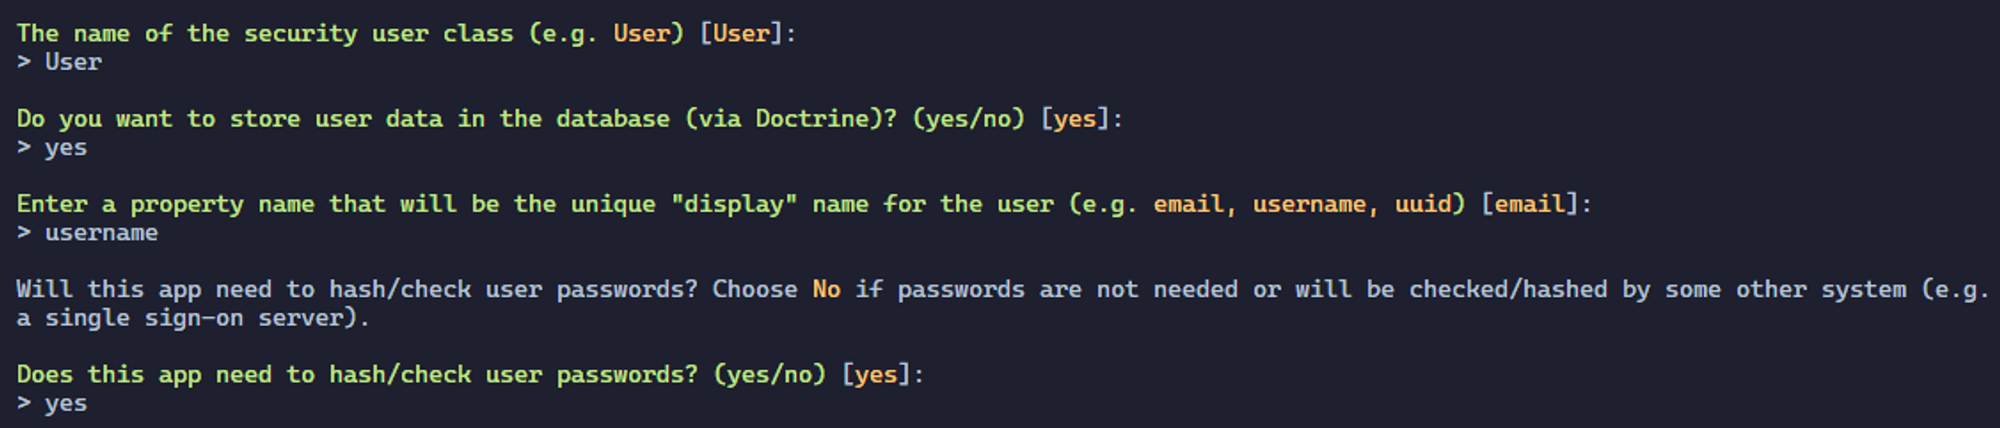
This command should have created a new entity: User in which the fields id, username, roles and password are located. To make this entity fit our needs, we will have to modify it.
To do this, we will use the following command.
php bin/console make:entity User
Next, we will add the new token field. This field will be of type string, will contain 36 characters and will not be nullable.
You should have something like this.
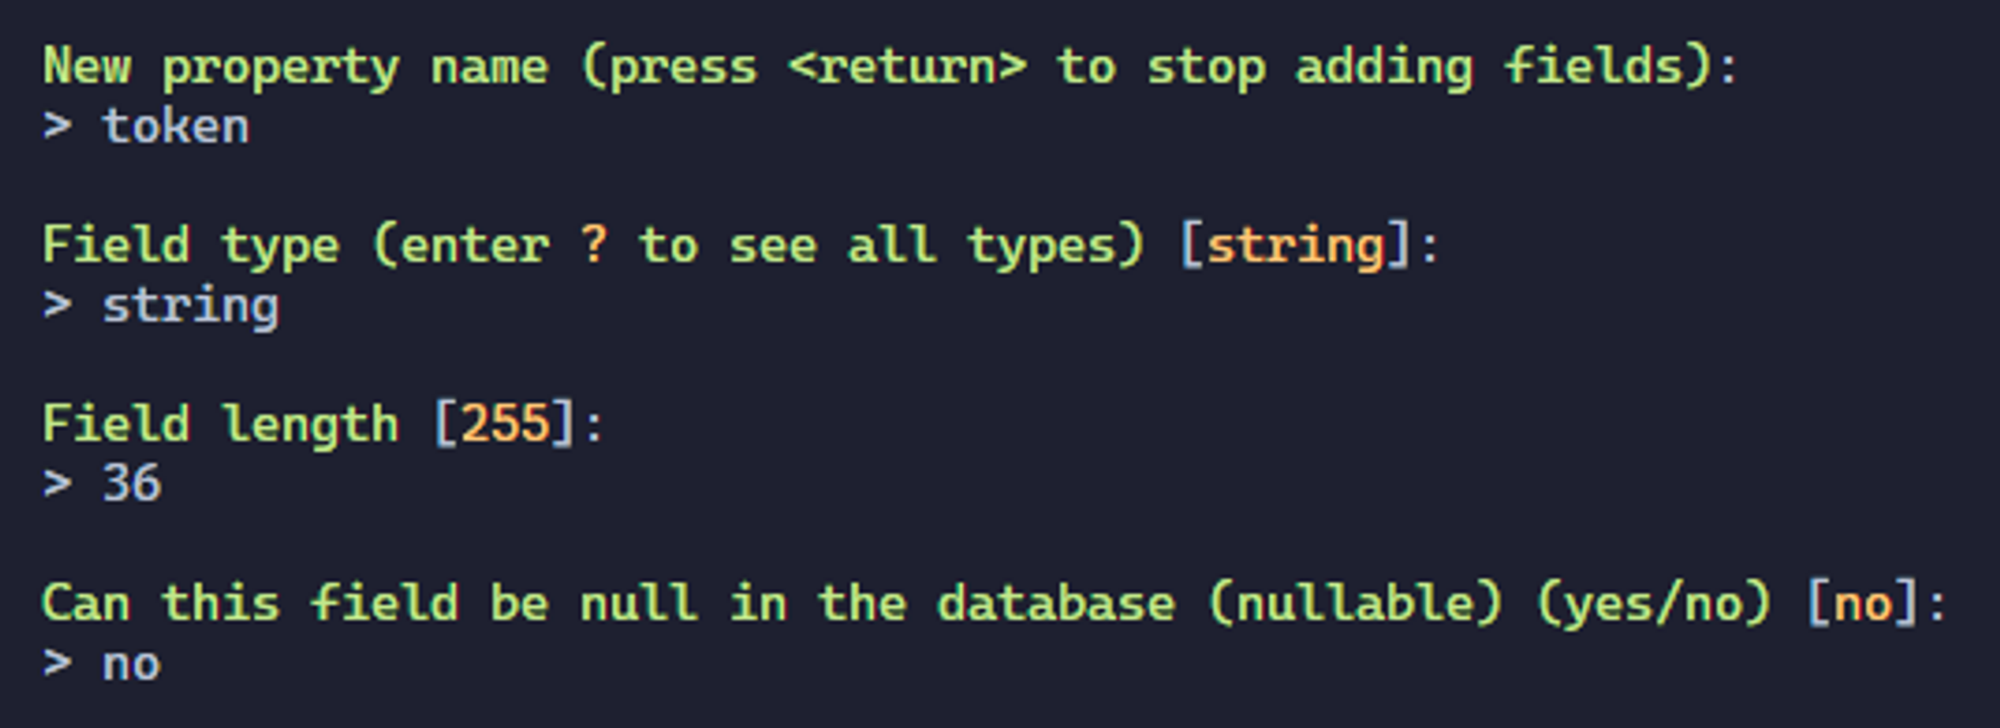
The new token field should have been added to our entity. Now we just need to create this new table in the database. As for the previous migrations, we will use the same command.
php bin/console make:migration
Then we will execute it.
php bin/console doctrine:migration:migrate
Or simply
php bin/console d:m:m
Creating the Factory
As with the Todo entity, we will create a Factory in order to facilitate the creation of fake data.
To do this, we will use the following command.
php bin/console make:factory
After filling in the User entity number, a new factory should appear in the src/Factory folder.
In the getDefaults method, we will fill in the following content.
protected function getDefaults(): array
{
  return [
    'password' => "password",
    'token' => bin2hex(random_bytes(18)),
    'username' => self::faker()->userName(),
  ];
}
src/Factory/UserFactory.php
The password we enter here is not the password that will be stored in the database. Indeed, we will have to hash it. To do this, we will use the initialize method. In this method, we will fill in the following content.
protected function initialize(): self
{
  return $this
    ->afterInstantiate(function (User $user) {
      $user->setPassword($this->passwordHasher->hashPassword($user, $user->getPassword()));
    })
  ;
}
src/Factory/UserFactory.php
However, in order for this to work, we will have to inject the service allowing us to hash passwords. So we will create a constructor for this class and fill in the following content.
use Symfony\Component\PasswordHasher\Hasher\UserPasswordHasherInterface;

public function __construct(private UserPasswordHasherInterface $passwordHasher)
{
  parent::__construct();
}
src/Factory/UserFactory.php
To make things easier, we use the PHP 8 syntax here.
In this way, for each user we create, the User object will first be created with a temporary password password which we then secure.
Creating the Fixture
Now we just have to create a fixture to dynamically create dummy users. To do this, we will first create a fixture with the following command.
php bin/console make:fixture UserFixtures
Then, in the src/Fixtures/UserFixtures.php file that has just been created, we will modify the load method.
use App\Factory\UserFactory;

public function load(ObjectManager $manager): void
{
  UserFactory::createOne();
}
src/DataFixtures/UserFixtures.php
For this example, we will create only one user. This will be enough to test our api.
Finally, we just have to launch our new fixture with the following command.
php bin/console doctrine:fixtures:load --group=UserFixtures --append
Or simply
php bin/console d:f:l --group=UserFixtures --append
This command allows to launch only the UserFixtures fixture thanks to the --group parameter. The --append parameter allows not to reset the database before launching the fixture. Indeed, by default, as soon as the doctrine:fixtures:load command is executed, the database is purged.
If we take a look at our database, we should see our user.
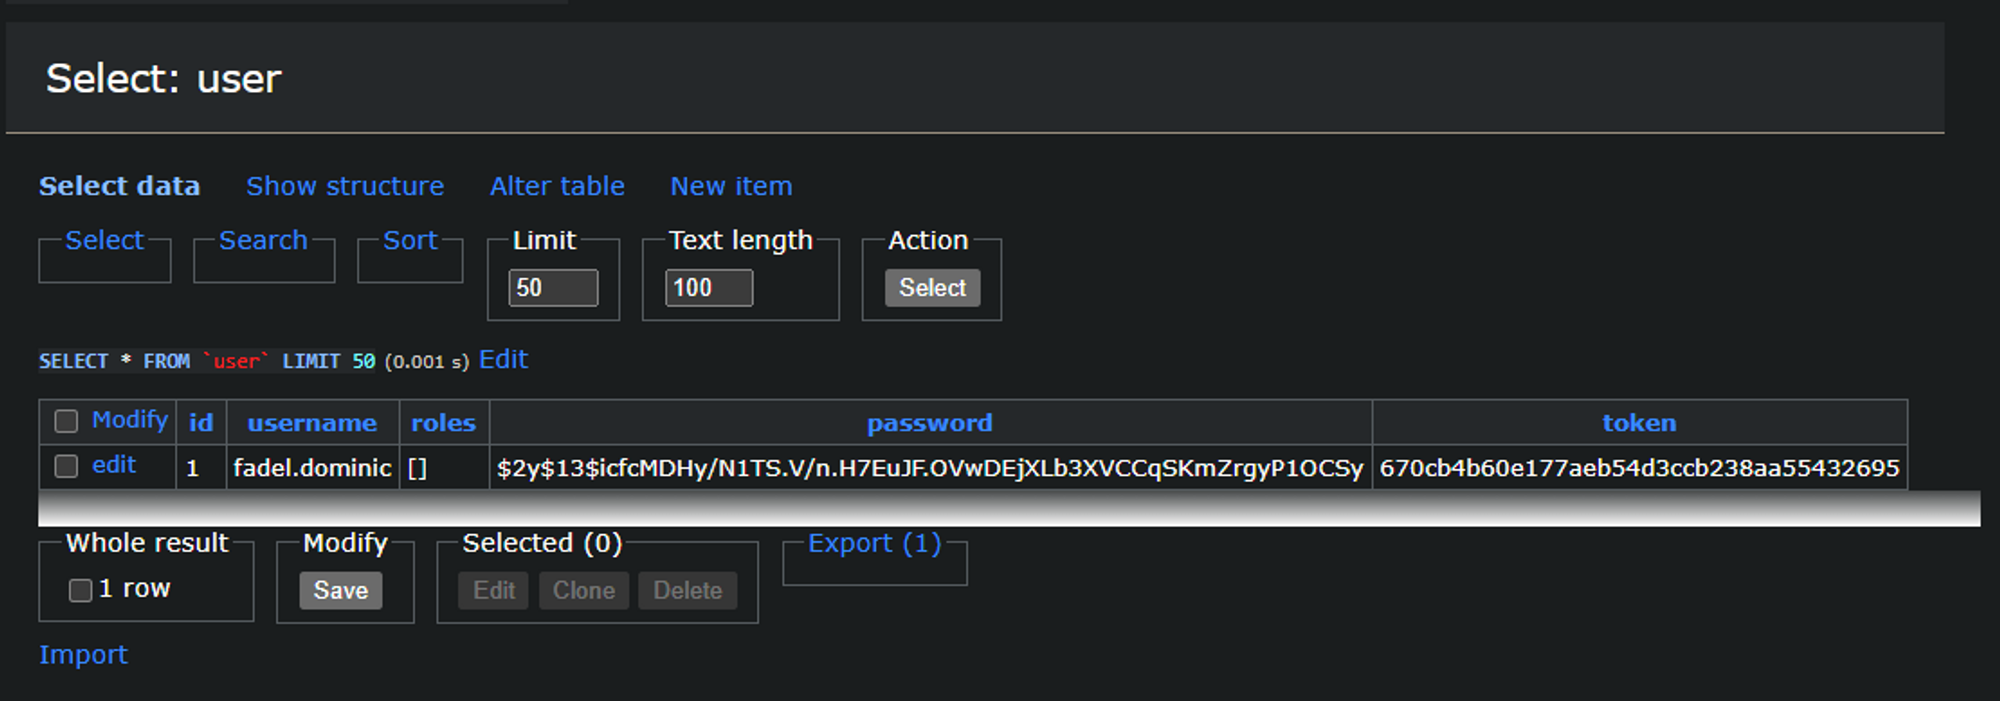
Perfect.
Creating an authenticator
An authenticator with Symfony is a class that will be called to authenticate the user in a certain context. This class will check the user's credentials and, if necessary, authenticate him.
There are already several authenticator preconfigured by Symfony but in our case, we will have to develop it ourselves.
Let's start by creating a new file called TokenAuthenticator.php in the src/Security directory (which doesn't exist yet).
In this file, we will add the following content.
namespace App\Security;

use Symfony\Component\Security\Http\Authenticator\AbstractAuthenticator;

class TokenAuthenticator extends AbstractAuthenticator
{
  // ...
}
src/Security/TokenAuthenticator.php
If you use a modern code editor, you should see the line class TokenAuthenticator extends AbstractAuthenticator underlined in red like this.
As stated in the error description, this error is simply because some methods are not yet implemented.
'App\Security\TokenAuthenticator' does not implement methods 'supports', 'authenticate', 'onAuthenticationSuccess', 'onAuthenticationFailure'
More precisely the :
supportswhich is used to fill in the conditions that must be met for the request to be accepted by theauthenticator.authenticatewhich is used to authenticate the user.onAuthenticationSuccesswhich is used to fill in the steps to follow after successful authentication.onAuthenticationFailurewhich is used to fill in the steps to follow after authentication failure.
We will have to add each of these methods to make our authenticator work.
Let's start with the supports method. As mentioned, this method must return a boolean to indicate whether or not the request can be handled by our authenticator.
In our case, we just need the request to contain the X-AUTH-TOKEN header.
X-AUTH-TOKEN header instead of an Authorization header with a bearer token because depending on the system, the latter is not transmitted to the PHP program. This is notably the case of Apache which does not relay this header to the PHP program. As a precaution, we will use here the X-AUTH-TOKEN header which will work in all cases.use Symfony\Component\HttpFoundation\Request;
public function supports(Request $request): ?bool
{
return $request->headers->has("X-AUTH-TOKEN");
}
src/Security/TokenAuthenticator.php
Concerning the authenticate method, we will use the following code.
use Symfony\Component\Security\Http\Authenticator\Passport\Passport;
use Symfony\Component\Security\Core\Exception\CustomUserMessageAuthenticationException;
use Symfony\Component\Security\Http\Authenticator\Passport\SelfValidatingPassport;

public function authenticate(Request $request): Passport
{
  $token = $request->headers->get('X-AUTH-TOKEN');
  if (null === $token) {
    throw new CustomUserMessageAuthenticationException('No API token provided');
  }

  return new SelfValidatingPassport(new UserBadge($token));
}
src/Security/TokenAuthenticator.php
We will first retrieve the authentication token from the request in order to use it in the auto-validated passport.
SelfValidatingPassport class because no password is needed. As soon as the authentication token is filled in, the process is valid.Then, for the onAuthenticationSuccess method, we will simply return null because no additional process is needed.
use Symfony\Component\Security\Core\Authentication\Token\TokenInterface;
use Symfony\Component\HttpFoundation\Response;

public function onAuthenticationSuccess(Request $request, TokenInterface $token, string $firewallName): ?Response
{
  return null;
}
src/Security/TokenAuthenticator.php
Finally, for the onAuthenticationFailure method, we will follow the same logic. We will simply return null.
use Symfony\Component\Security\Core\Exception\AuthenticationException;

public function onAuthenticationFailure(Request $request, AuthenticationException $exception): ?Response
{
  throw new AuthenticationException($exception->getMessage());
}
src/Security/TokenAuthenticator.php
That's all we need to do for authentication. Well, almost. Indeed, we will have to modify the /config/packages/security.yaml file in order to take into account our authenticator.
First, we will modify the property key of the app_user_provider. We will put the value token in it. This value corresponds to the token field of the User entity we created earlier. This modification allows us to indicate that this token field must be used to authenticate a user.
Finally, we will modify the firewalls part in order to use our authenticator.
To do this, we will modify the main key and add the following lines:
main:
  stateless: true
  provider: app_user_provider
  custom_authenticators:
    - App\Security\TokenAuthenticator
config/packages/security.yaml
The stateless field allows to say that each request must be managed independently from the others. The provider field allows you to specify the provider you want to use, which will then be injected into our authenticator. Finally, the custom_authenticators field allows to list the authenticators to use. In our case, we will only put our custom authenticator.
That's it.
Unfortunately, our system at the moment will not be able to restrict access to certain routes on its own. Indeed, we will also have to specify the routes concerned by this restriction. As we mentioned, we will restrict access to routes that concern creation, modification and deletion.
Restricting access to routes
As for a classic Symfony application, we will use the IsGranded annotation which allows us to restrict access to a route according to the user's role. In our case, we use the IS_AUTHENTICATED role which only allows us to check that the user is authenticated.
So, to restrict the routes concerned, we will add the following annotation before each method associated to a route. As a reminder, we will restrict access to the routes DELETE, POST, PATCH and PUT.
use Symfony\Component\Security\Http\Attribute\IsGranted;

#[IsGranted("IS_AUTHENTICATED")]
src/Controller/TodoController.php
This way, if a user tries to use a protected route without filling in the X-AUTH-TOKEN header, a 401 Unauthorized error is returned.
Now, if we try to use the api/todos/1 route with the DELETE method without specifying a token, we should get a 401 error.
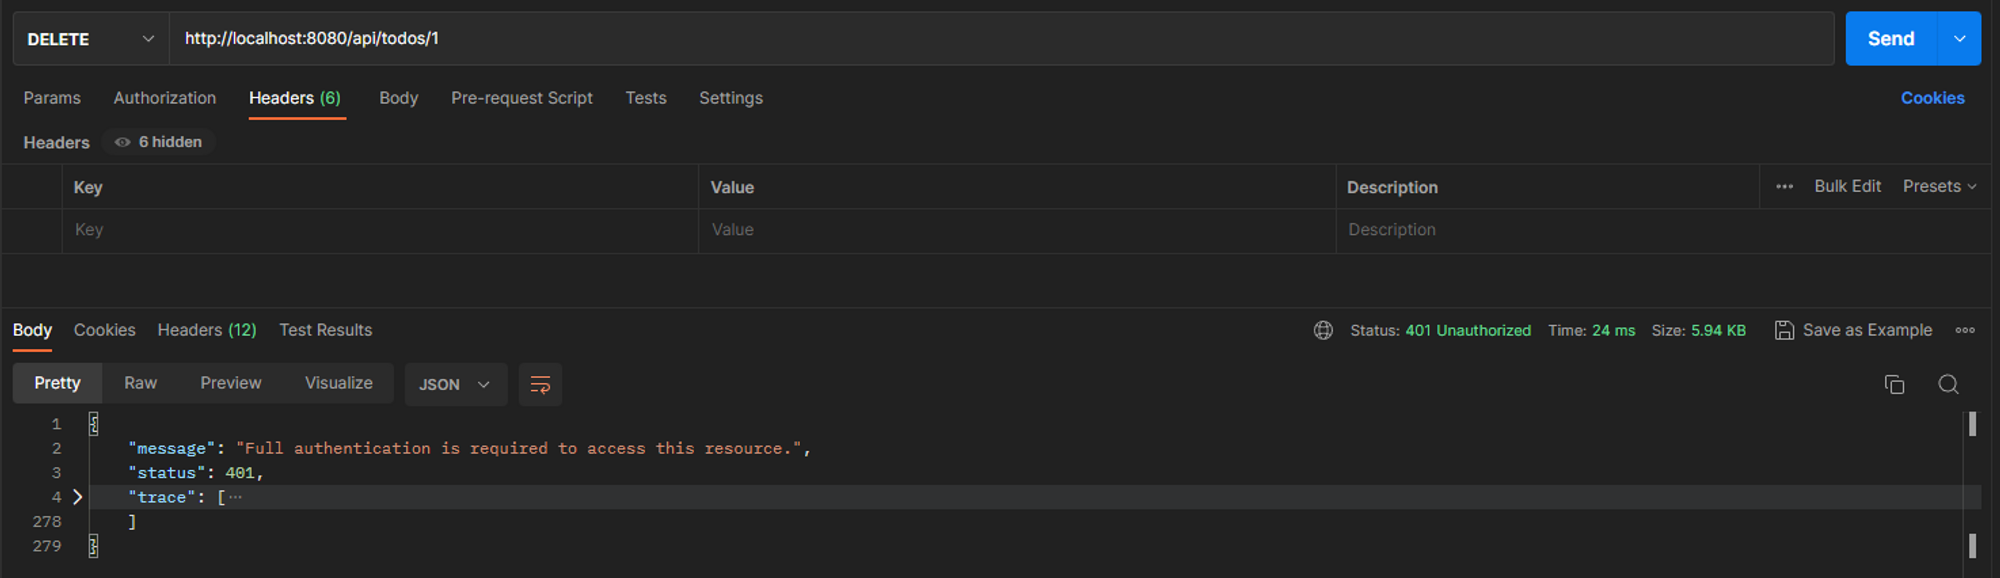
On the other hand, if we try this same route with the authentication header, the request should work.
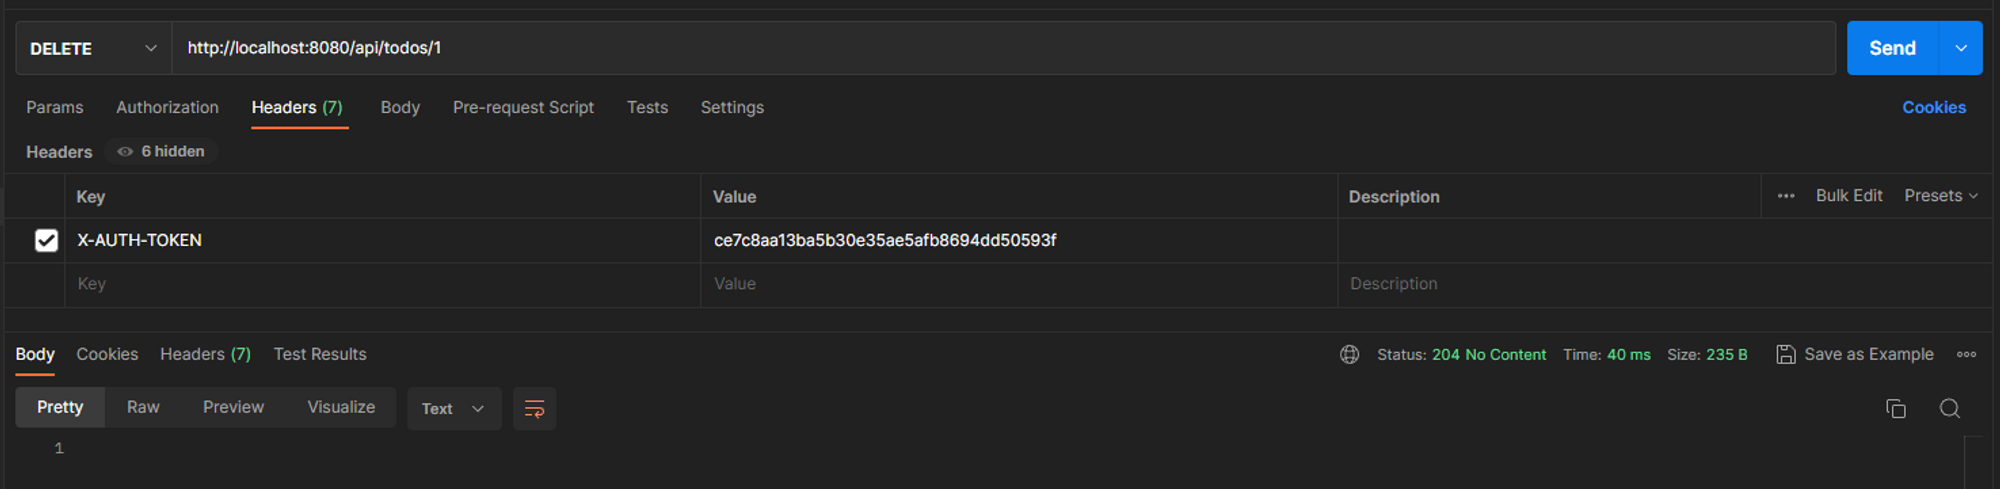
The value we need to fill in in the X-AUTH-TOKEN header must match the token column of one of the users in the user table in the database.
It's great.
We have now succeeded in making some roads safe. Of course, this is only an example, we could go much further. If you are interested in this topic, I suggest you to have a look at the Symfony Voters documentation. This component allows you to bring more details about route restrictions.
In summary
In this lesson, we have seen some very important notions to secure a Symfony api. We have seen what an authenticator is, how to create one and how to use it. Also, we discovered how to apply restricted access to some routes.
Finally, we saw how to create the most important class in a Symfony application: the User class. Indeed, this class can't be created like the other entities.
In the next lesson, we'll discover how to test an api thanks to functional and unit tests that can be done with PHPUnit and Symfony.
]]>In general, a pagination system allows to avoid returning too much data to the user. It also allows to know how much data there is in total, how many pages there are, ... It is a particularly useful tool when working with api. Unfortunately, this system does not apply to all cases. For example, in the case of reading a single element, it is not necessary to add a pagination. However, to list a lot of data, the pagination becomes important.
Here we will create our own pagination system based on the Doctrine one.
Introducing the Paging System
For this lesson, we will create a simple but effective system. From only 2 parameters, our paging system will retrieve the following information:
- the total
- the number of data on the current page
- the total number of pages
- the current page
- if there is a next page
- if there is a previous page
- ...
In idea, we will simply provide the desired page and the request coming from Doctrine to our pagination object and, on its side, it will retrieve the information we have quoted.
Pagination structure
In order to reinvent the wheel as little as possible, we will base our pagination system on the Doctrine one. In a folder called src/Model, we will create a new file called Paginator.php.
Here is the code for our Paginator object.
namespace App\Model;

use Doctrine\ORM\Query;
use Doctrine\ORM\QueryBuilder;
use Doctrine\ORM\Tools\Pagination\Paginator as DoctrinePaginator;
use ArrayIterator;

class Paginator extends DoctrinePaginator
{
  public const ITEMS_PER_PAGE = 5;

  private int $total;
  private array $data;
  private int $count;
  private int $totalpages;
  private int $page;

  public function __construct(QueryBuilder|Query $query, int $page = 1, bool $fetchJoinCollection = true)
  {
    $query->setFirstResult(($page - 1) * self::ITEMS_PER_PAGE);
    $query->setMaxResults(self::ITEMS_PER_PAGE);

    parent::__construct($query, $fetchJoinCollection);
    $this->total = $this->count();
    $this->data = iterator_to_array(parent::getIterator());
    $this->count = count($this->data);
    $this->page = $page;

    try {
      $this->totalpages = ceil($this->total / self::ITEMS_PER_PAGE);
    } catch (\DivisionByZeroError $e) {
      $this->totalpages = 0;
    }
  }

  public function getTotal(): int
  {
    return $this->total;
  }

  public function getData(): array
  {
    return $this->data;
  }

  public function getCount(): int
  {
    return $this->count;
  }

  public function getTotalPages(): int
  {
    return $this->totalpages;
  }

  public function getCurrentPage(): int
  {
    return $this->page;
  }

  public function getItemsPerPage(): ?int
  {
    return $this->getQuery()->getMaxResults();
  }

  public function getOffset(): ?int
  {
    return $this->getQuery()->getFirstResult();
  }

  public function hasNextPage(): bool
  {
    if ($this->getCurrentPage() >= 1 && $this->getCurrentPage() < $this->getTotalPages()) {
      return true;
    }

    return false;
  }

  public function hasPreviousPage(): bool
  {
    if ($this->getCurrentPage() > 1 && $this->getCurrentPage() <= $this->getTotalPages()) {
      return true;
    }

    return false;
  }

  public function getIterator(): ArrayIterator
  {
    return new ArrayIterator([
      'data' => $this->getData(),
      'pagination' => [
        'total' => $this->getTotal(),
        'count' => $this->getCount(),
        'offset' => $this->getOffset(),
        'items_per_page' => $this->getItemsPerPage(),
        'total_pages' => $this->getTotalPages(),
        'current_page' => $this->getCurrentPage(),
        'has_next_page' => $this->hasNextPage(),
        'has_previous_page' => $this->hasPreviousPage(),
      ],
    ]);
  }
}
src/Model/Paginator.php
As we have mentioned, our Paginator object can be made with only 2 parameters:
- The request
- The desired page
Here, the desired page will be used to fill in the offset. This offset will be used in the SQL query to retrieve only the elements corresponding to the desired page.
Let's take the time to detail the different methods.
- The
getTotal,getData,getCount,getTotalPagesandgetCurrentPagemethods are simplygetterfor thetotal,data,count,totalPagesandpageattributes. - The
getItemsPerPagemethod is a utility method that returns the number of items per page. The value corresponds to the limit given in the SQL query. It is also the same value that is filled in theITEMS_PER_PAGEconstant. - The
getOffsetmethod, like the previous one, is a utility method to retrieve the offset that is filled in the SQL query. - The
hasNextPagemethod allows to know if another page exists after the current page. - Conversely, the method
hasPreviousPageallows to know if a page existed before the current page. - Finally, the most important part, the
getIteratormethod allows to format the result of the pagination in the desired format. This result will be used when serializing the pagination object.
Going back to this getIterator method, we can notice that we define two main fields: data and pagination.
The data field simply lists the elements returned by the SQL query after pagination.
The pagination field, on the other hand, allows to return information about the pagination. It is here that we find the different methods we defined previously.
Now that we have our object allowing us to paginate a query, we just have to use it in our queries.
Implementation in existing code
The use of our Paginator is rather. We will mostly use it in repositories.
Let's take as support the /todos request with the GET method.
Currently, we have the following code:
#[Route('/todos', name: 'get_todos', methods: ["GET"])]
public function getTodos(TodoRepository $todoRepository): JsonResponse
{
  $todos = $todoRepository->findAll();

  return $this->json($todos);
}
src/Controller/TodoController.php
Unfortunately, the result returned by the findAll method is a list of all elements without any restriction. We'll try to use our pagination system instead. To do this, we'll have to start by creating a new method in the Todo repository. This method will return a paged list to the controller. Let's call this new method findAllWithPagination. Since our Paginator object needs the desired page, we'll need to enter it into our repository.
use App\Model\Paginator;

public function findAllWithPagination(int $page): Paginator
{
  // ...
}
src/Repository/TodoRepository.php
Then, we will simply have to create our query without filling in the limit or offset because they will be handled by the Paginator directly. In our case, we want to retrieve all the items sorted from oldest to newest.
$query = $this->createQueryBuilder('t')->orderBy('t.createdAt', 'DESC');
src/Repository/TodoRepository.php
Then, we will just have to fill this request to our Paginator object with the desired page, and it will be done.
return new Paginator($query, $page);
src/Repository/TodoRepository.php
You should end up with the following method.
public function findAllWithPagination(int $page): Paginator
{
  $query = $this->createQueryBuilder('t')->orderBy('t.createdAt', 'ASC');

  return new Paginator($query, $page);
}
src/Repository/TodoRepository.php
Finally, in the controller, rather than calling the findAll method, we will instead call our new findAllWithPagination method.
#[Route('/todos', name: 'get_todos', methods: ["GET"])]
public function getTodos(TodoRepository $todoRepository): JsonResponse
{
  $todos = $todoRepository->findAllWithPagination(1);

  return $this->json($todos);
}
src/Controller/TodoController.php
Now, if we go to /api/todos with the GET method you should get the following result.
{
  "data": [
    {
      "id": 1,
      "title": "Updated title",
      "createdAt": "2023-04-23T12:38:53+00:00",
      "updatedAt": "2023-04-23T13:29:52+00:00",
      "completed": false
    },
    {
      "id": 2,
      "title": "Updated title",
      "createdAt": "2023-04-23T12:38:53+00:00",
      "updatedAt": "2023-04-23T13:28:45+00:00",
      "completed": false
    },
    {
      "id": 3,
      "title": "Et et et vero vel aut assumenda et. Voluptatem repudiandae accusantium dolor ad quae exercitationem voluptas. Voluptatem quis aspernatur sed ab laudantium sequi. Id omnis accusantium laudantium culpa vero in sunt.",
      "createdAt": "2023-04-23T12:38:53+00:00",
      "updatedAt": "2023-04-23T12:38:53+00:00",
      "completed": false
    },
    {
      "id": 4,
      "title": "Animi velit et aut consequuntur. Tempora impedit quidem nobis explicabo nobis doloribus qui. Cumque cumque commodi illum voluptatem necessitatibus quia sed doloremque.",
      "createdAt": "2023-04-23T12:38:53+00:00",
      "updatedAt": "2023-04-23T12:38:53+00:00",
      "completed": false
    },
    {
      "id": 5,
      "title": "Reiciendis delectus ut sed delectus. Nihil esse voluptatem qui inventore. Eos ipsam eveniet ut molestiae. Tempore nihil consequatur ut labore aliquid aliquam ut.",
      "createdAt": "2023-04-23T12:38:53+00:00",
      "updatedAt": "2023-04-23T12:38:53+00:00",
      "completed": false
    }
  ],
  "pagination": {
    "total": 6,
    "count": 5,
    "offset": 0,
    "items_per_page": 5,
    "total_pages": 2,
    "current_page": 1,
    "has_next_page": true,
    "has_previous_page": false
  }
}
Unfortunately, for the moment, this route only returns the todos of the first page. So we will have to manage the pages via the query query parameters and the page change.
Page management
In many cases, the management of pages and other parameters such as sorting or the number of elements desired, are managed via the query parameters. These are the parameters found in the url after a ?. For example the url /api/todos?page=2 contains the query parameter page which has the value 2.
As for the validation of the data sent by the user, we will have to validate the page parameter in order to avoid errors. To do this, we will reuse the Options Resolver component.
First, let's create our Options Resolver. In the file /src/OptionsResolver/PaginatorOptionsResolver.php, let us fill in the following content.
namespace App\OptionsResolver;

use Symfony\Component\OptionsResolver\Options;
use Symfony\Component\OptionsResolver\OptionsResolver;

class PaginatorOptionsResolver extends OptionsResolver
{
  public function configurePage(): self
  {
    return $this
      ->setDefined("page")
      ->setDefault("page", 1)
      ->setAllowedTypes("page", "numeric")
      ->setAllowedValues("page", function ($page) {
        $validatedValue = filter_var($page, FILTER_VALIDATE_INT, [
          'flags' => FILTER_NULL_ON_FAILURE,
        ]);

        if(null === $validatedValue || $validatedValue < 1) {
          return false;
        }

        return true;
      })
      ->setNormalizer("page", fn (Options $options, $page) => (int) $page);
  }
}
src/OptionsResolver/PaginatorOptionsResolver.php
The principle is similar to the previous options resolver we were able to create. In the configurePage method, we specify the following:
- We indicate that the
pagefield exists - We set the default value of the
pagefield - We specify the allowed type. Although the page is an
integer, we cannot use theinttype because the variables from thequery parametersare necessarily of typestring. On the other hand, thenumerictype allows us to determine if a string corresponds to a number. - We define the allowed values. Here, we want the numeric value to be a positive integer
- Finally we create a
normalizerin order to format ourpagefield as an integer. Without this operation, the value of thepagefield will be of typestringand not of typeinteger.
To use it, as before, we just need to inject our Options Resolver into the desired method via the method parameters and then use it.
As a reminder, we will only use paging for the /api/todos request with the GET HTTP method.
So we end up with the following code.
use App\OptionsResolver\PaginatorOptionsResolver;

#[Route('/todos', name: 'get_todos', methods: ["GET"])]
public function getTodos(TodoRepository $todoRepository, Request $request, PaginatorOptionsResolver $paginatorOptionsResolver): JsonResponse
{
  try {
    $queryParams = $paginatorOptionsResolver
      ->configurePage()
      ->resolve($request->query->all());

    $todos = $todoRepository->findAllWithPagination($queryParams["page"]);

    return $this->json($todos);
  } catch(Exception $e) {
    throw new BadRequestHttpException($e->getMessage());
  }
}
src/Controller/TodoController.php
The principle is the same as before. We validate the query parameters from the $request->query->all() method. Then we use page in our repository.
Finally, we use a try catch so as to return a 400 Bad Request error instead of 500 Internal Server Error.
Now, if we try our /api/todos route again with the GET method, we end up with the same result as before. However, this time we can change the desired page by changing the page parameter in the url.
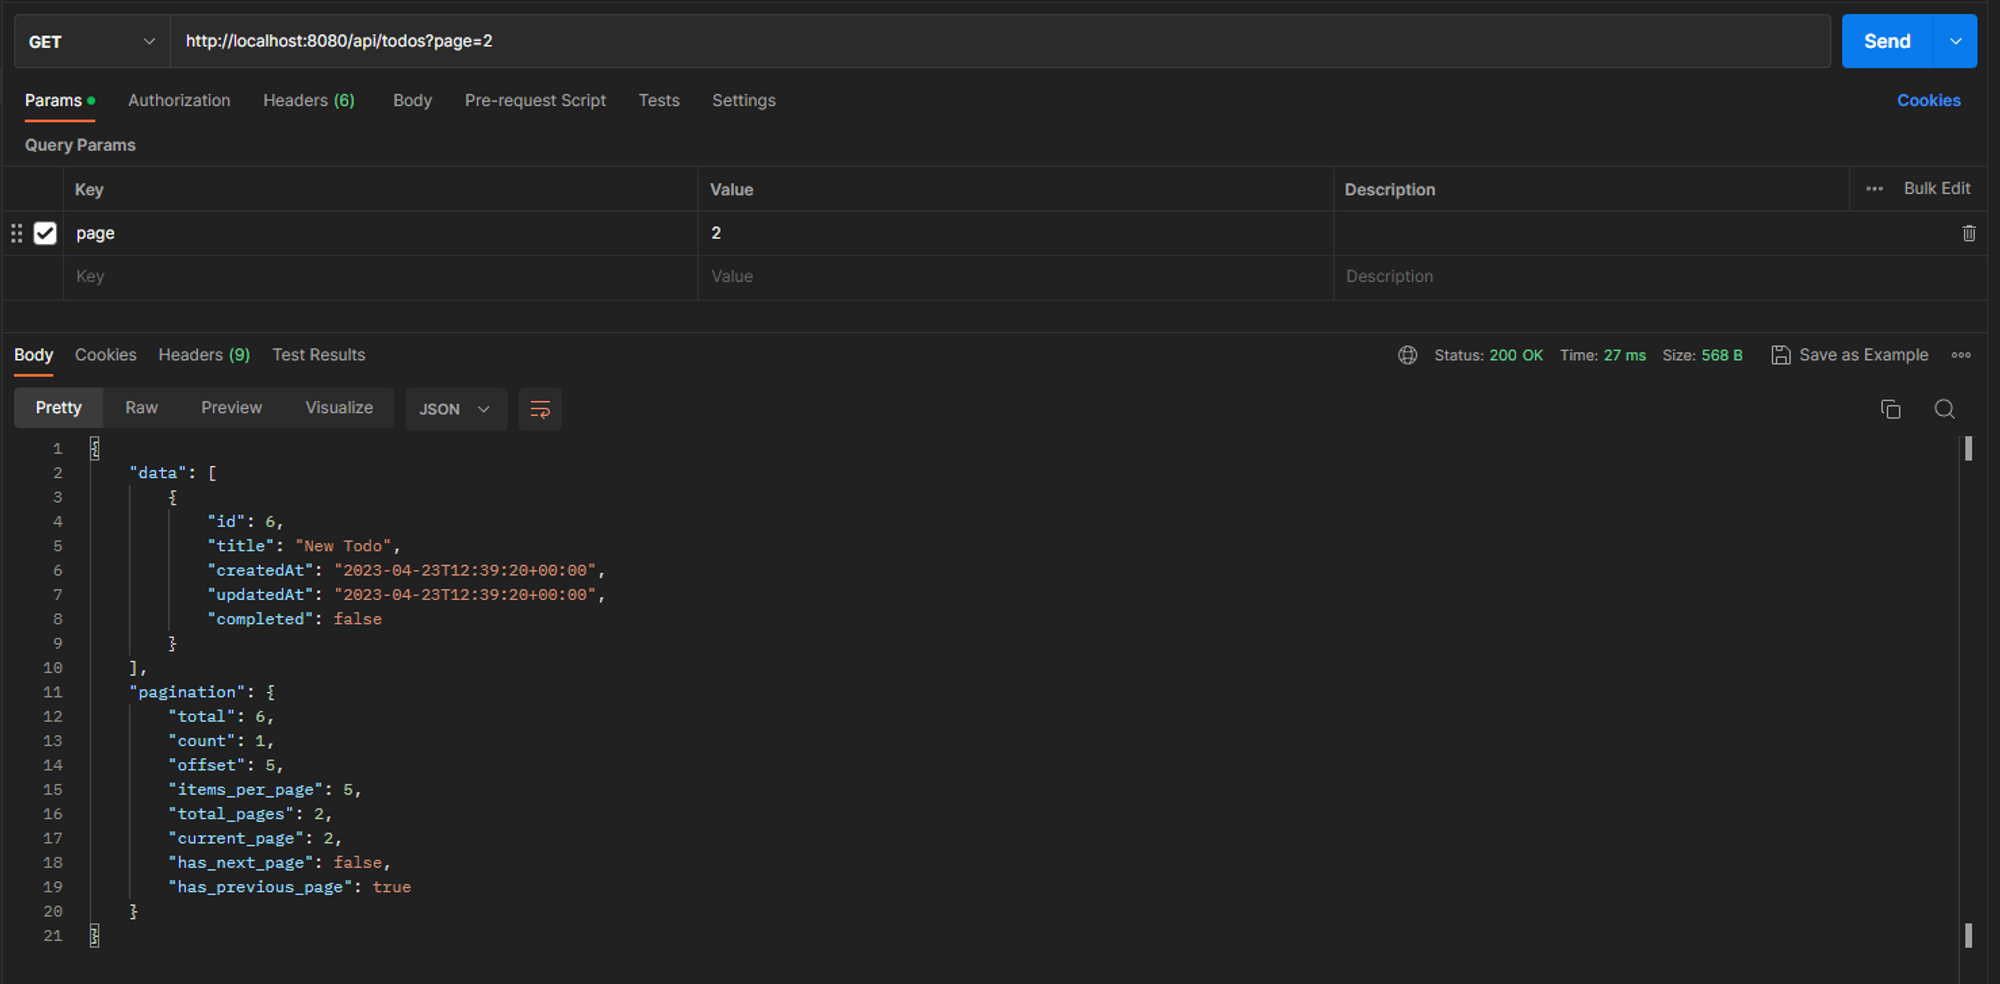
In summary
In this lesson we learned how to create a functional pagination from the Doctrine Paginator. We also reused the Options Resolver component in order to validate the page parameter that the user sends us. Finally, we discovered the :
setDefaultsetAllowedValuessetNormalizer
as part of the Options Resolvers.
The functional part of our api is now complete. In other words, the returned results will not change from now on. However, the course is not finished. Indeed, we still have to implement a security system to our api via the bearer token. This is the subject of the next lesson.