The post Create new SFTP User on Ubuntu for Apache on Specific Directory appeared first on Professional Application Development.
]]>sudo useradd -d /var/www demo_user -g www-data
sudo passwd demo_user
sudo service ssh restartThat’s it now use FileZilla or terminal to login to the server via SFTP  In case you face permissions issues please use chmod and chown commands to fix them.
The post Create new SFTP User on Ubuntu for Apache on Specific Directory appeared first on Professional Application Development.
]]>The post Django common commands cheat sheet appeared first on Professional Application Development.
]]>django-admin startproject app #(Create main project)All following commands are to be run from inside main app folder that we created with the first command.
python manage.py runserver #Run local server
python manage.py migrate #Run all database migrations
python manage.py makemigration #Create any new migration created file
python manage.py startapp <app_name> #Create new application within the main app folder
#application created using this command won't be automatically enabled,
#but we need to go in app/app/settings.py and need to add our new application name at the end of INSTALLED_APPS list.
python manage.py shell #To open interactive Django shell like Tinker for Laravel
Below is a sample code that tell us how we can benefit from interactive shell. Using that we easily created two database entries using Track model of an application’s model.
(react-tracks) python manage.py shell
Python 3.7.2 (default, Nov 10 2011, 15:00:00)
[GCC 8.3.0] on linux
Type "help", "copyright", "credits" or "license" for more information.
(InteractiveConsole)
>>> from tracks.models import Track
>>> Track.objects.create(title="Track 1", desc="Track 1 description...", url="https://track1.com")
<Track: Track object (1)>
>>> Track.objects.create(title="Track 2", desc="Track 2 description...", url="https://track2.com")
<Track: Track object (2)>
>>> exit()
The post Django common commands cheat sheet appeared first on Professional Application Development.
]]>The post Get up and running with Automatic Deployments using DeployHQ appeared first on Professional Application Development.
]]>DeployHQ’s free plan allows you to deploy a single project up to 10 times a day. Or you may go for their basic plan as per your need.
When you are done with account creation process the next process is the setup. Which I’m going to discuss in detail in coming sections.
Setup the deployment server
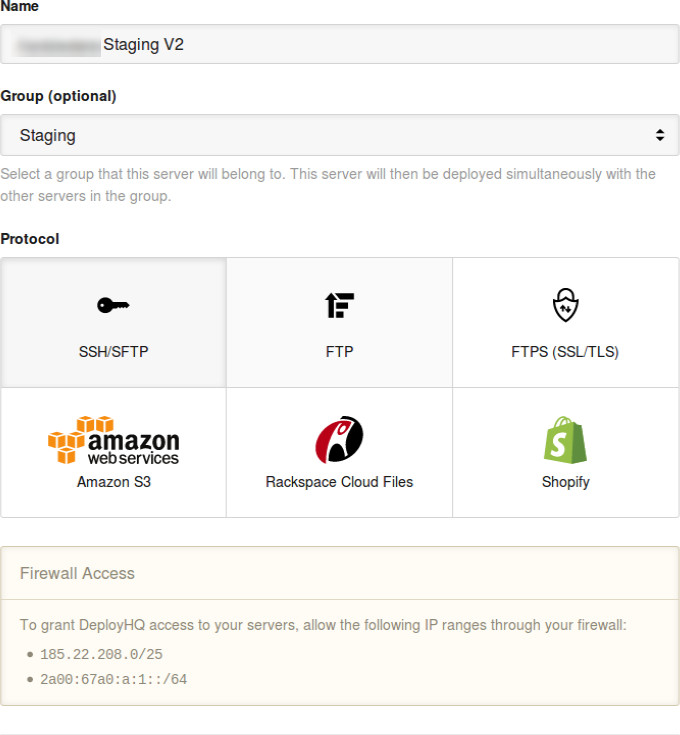
Inside “Servers & Groups” you need to
- Enter “Name” like “Staging server”
- Enter group for instance like “staging”
- Now time to choose protocol, choose your required protocol from their my choice is SSH/SFTP for this example
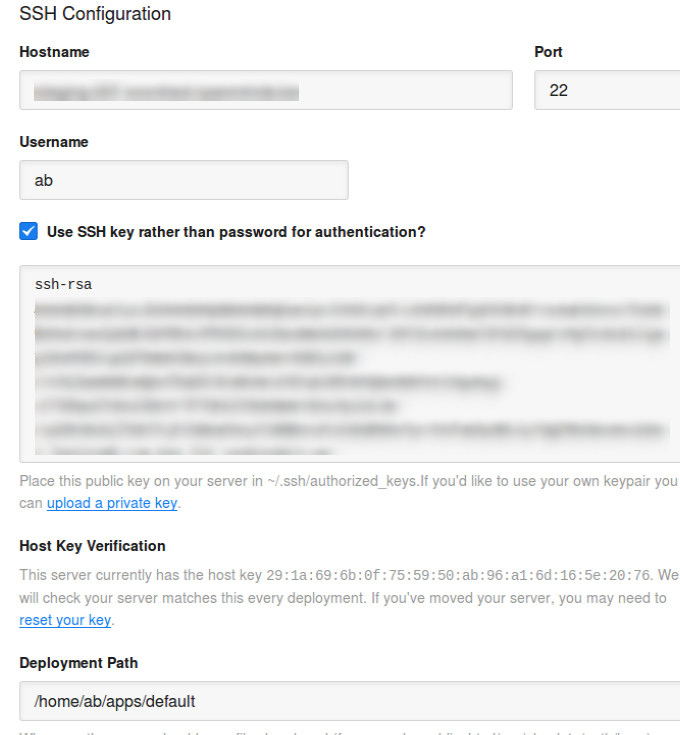
- Fill in your actual server’s SSH details like host, username, and then check “Use SSH key rather than password for authentication”.
- After clicking that check box copy the generated public key into your server’s
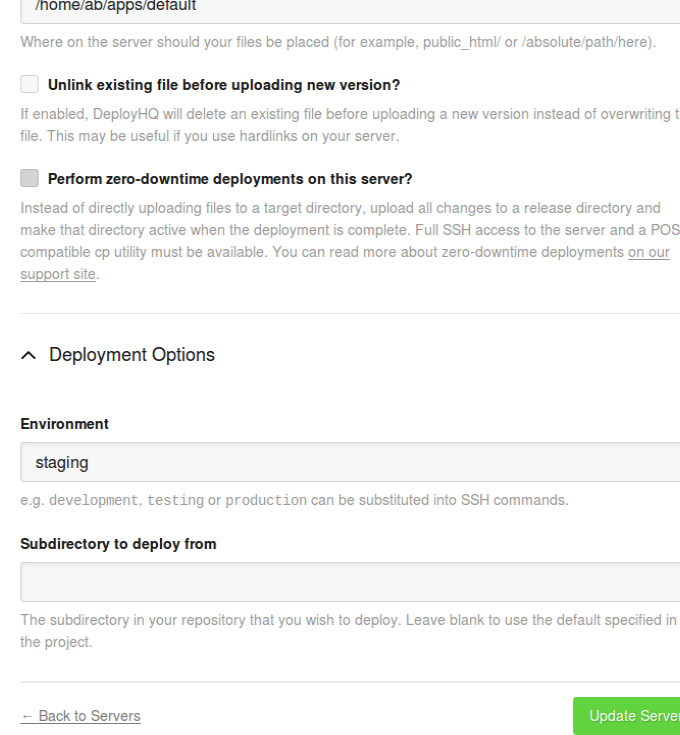
~/.ssh/authorized_keysfile. I recommend to paste it at the end outside of all comments to not disturb any automated generated keys, as they are normally placed inside some block of comments. Ensure that your save that file properly and after closing it do verify by opening it again that it is there. - Now its time to give your server’s Deployment Path, this is the path were the code of the repo needs to be pushed. For instance normally it can look something like /var/www/html/example.com/public_html or any other path.
- As per your need Check or keep unchecked the “Unlink existing file before uploading new version?”. I’ll keep it unchecked.
- I will also leave unchecked “Perform zero-downtime deployments on this server?”. The reason behind is that normally images are not part of repo and if you think if the directory of your code changes then it’ll still remain working based on code for instance if you are already using CDN for images then you are good to go with this option, otherwise if you are not sure I won’t recommend to go with this option for now until you become dam sure.
- Now in Deployments Options inside Environment you can just fill “Staging”.
- Now save the information and the information the we saved so far will look like below
Config Files
Normally files like .env are separate for development, staging and production servers. So this is place to create that file so that it never gets missing my deployment process. For me how it looks
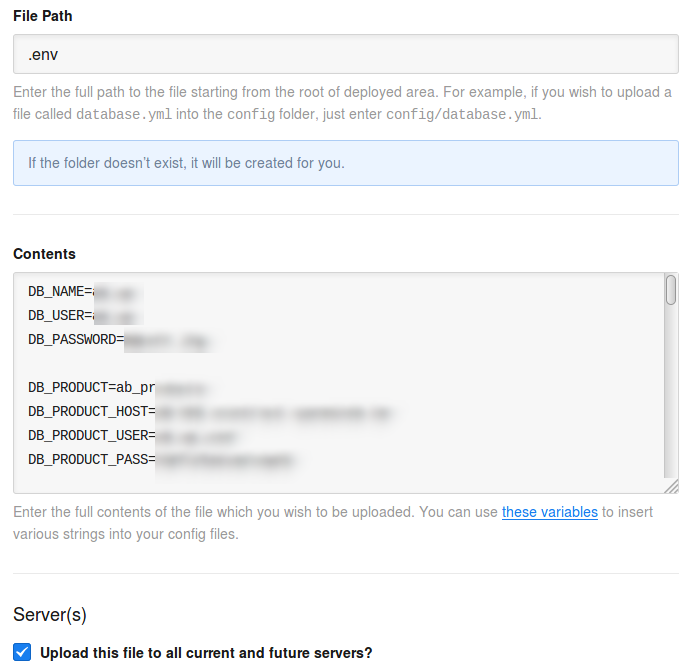
Now save it and lets skip the Excluded Files section for now as I don’t have anything to exclude but if you have something you can go ahead with that
Notification
In this section you can configure some notifications, I’ve configured slack notifications for me you can go with your choice. I can have some other post on that but normally you’ll find many useful posts on Internet to do that and in-case anything goes wrong DeployHQ live chat is much helpful and responsive you’ll be able to solve any of you issue within minutes.
SSH Commands
This section is quite important and it should be understood well too. Here you can fill out any commands that your want to execute Before Changes, Before Release Link (Only applicable for zero-down time) and After Changes. Lets now how these features can benefit us, for instance your application makes use composer update/install then this can be a place to perform that thing. And the right place to do that would be “After changes”, that’s what I’m using in my application too.
For build operations like
composer install or updatewe can use Build Pipeline as well but my experience with so far wasn’t good. As with normal deployment it takes just one minute, for the first time it may take more but afterwards that takes one minute. Whereas in case of Build Pipeline it takes around 20 minutes every-time.
So lets move ahead and fill out SSH Commands for “After changes” use case. Fill out description and give it some name like “Composer operations”. Now fill Command section and here are my list of commands
cd ~/apps/default; # Ensuring the commands will be running in my required directory
php ~/composer.phar self-update;
php ~/composer.phar install;
php ~/composer.phar update;
rsync -avz . ab@staging-002:~/apps/default; # Moving code from one staging server to the other, we are using load balance so code is placed on two servers
This is pretty much it for this section for other options you can go with default options, I’ve also checked “Stop the deployment if the command fails” and “Run this command on all current and future servers”.
Now save and move to the next section.
Automatic Deployments
This is the section that provide you a webhook URL so your code can be automatically pushed to the servers when it is pushed to Codebase or Github. For me it was Codebase and to associate this web hook there I went to Repo Settings >> Post-Receive Hooks >> Then pasted the Webhook URL and created the hook. Then I clicked on Test to verify it it went well and there was the success message. Which you can see from the screenshot below.
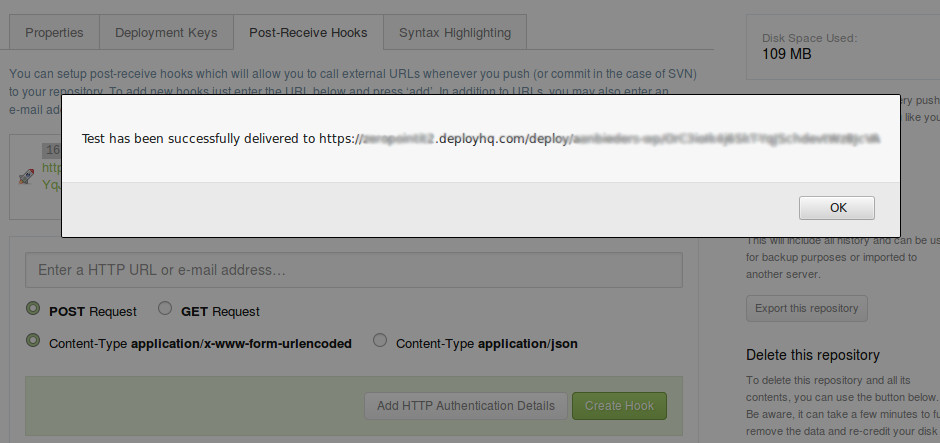
This is it we’ve successfully configured the automatic deployments. Now you can click on Deploy Project button to see if it went well. Please do utilize their “Chat with our team” service if you find anything difficult.
The post Get up and running with Automatic Deployments using DeployHQ appeared first on Professional Application Development.
]]>The post Configure firewall on Linux server or cloud to protect it via UFW appeared first on Professional Application Development.
]]>Don’t think that by just installing LAMP stack you are protected, your server can still be vulnerable by having too many ports opened which you even don’t know. So if you setup your server from scratch but haven’t installed firewall yet you should now think of doing that. And believe me it won’t take that time.
Check if UFW is already installed?
The service that I’m going to cover in this article is UFW (Uncomplicated Firewall). First of all we need to check if the service is already not installed. To verify that just enter ufw status and if you see something like below that means service is installed otherwise not.
# ufw status
Status: active

To                         Action      From
--                         ------      ----
Apache Full                ALLOW       Anywhere
22/tcp                     ALLOW       Anywhere
115/tcp                    ALLOW       Anywhere
Apache Full (v6)           ALLOW       Anywhere (v6)
22/tcp (v6)                ALLOW       Anywhere (v6)
115/tcp (v6)               ALLOW       Anywhere (v6)
Install and Configure UFW
sudo apt-get install ufw
sudo ufw allow ssh
sudo ufw allow sftp
#You need to change following two lines based on your web-server
sudo ufw allow 'Apache Full'
sudo ufw delete allow 'Apache'
#Two lines end here

#Alert! Before enabling it be sure that you've allowed your ssh and web server otherwise your website or SSH access from local machine can be denied and then you'll have to login to the server from web console to access the console via terminal to allow them. Or you'll have to contact your hosting service to do that.

sudo ufw enable
Now your firewall is configured and by typing `ufw status` you should see the output which I showed in previous section.
The post Configure firewall on Linux server or cloud to protect it via UFW appeared first on Professional Application Development.
]]>The post Basics of GIT for beginners appeared first on Professional Application Development.
]]>You’ll have to initialize git using `git init` command in your project or clone some repository using `git clone`
Order in which you execute git commands
git status
This command will display list of files that you have changed at this time you can spot any files which you don’t want to push and can revert or ignore them. But its normally good practice to see before what your going to push.
git add .
After making any changes to the code this can be your first or 2nd command to execute as it’ll add all files to the commit list that you’ve changed, added or deleted.
git commit -m “Meaningful name of your commit”
At this point your should give a meaningful name to your commit using the command above. Its always better to include the task number at start of commit on which you are working followed by some meaningful name. Examples of good commit name are “Ticket-1112: Fixed redirect issue”, “Fixed a fatal error on product page”. Now the examples of bad commit names “Testing commit”, “Fixed”, “Done”, because by seeing these commits nobody would know what you did in that commit.
git pull
Git pull is extremely important to run on this stage because it’ll fetch other developers changes to your local machine. And this is the point in which `conflicts` can arise and you’ll have to fix them here. If you see any conflicts in any file when git generates the message, you’ll now have to fix that conflict.
The conflicts can be fixed by opening the file which has conflicts then you’ll have to search through file for code in between <<<<<<<<< and >>>>>>>>>>. And there you’ll have to decide which code will remain and which will go. In case your don’t know what should remain and what should go its always better to ask from your peers for assistance though. But this step is important as your wrong choice at this point may remove the new fix of the other developer, so its always better to be sure what should be removed and what should be kept.
After fixing the conflict you’ll again have to run thegit add .,git commit -m "Fixed conflict",git pull
git push
This should be your final command in case somebody else doesn’t push code before you If that happens git will let you know and you won’t have to worry about that. You’ll just have to execute git pull first followed by git push.
The post Basics of GIT for beginners appeared first on Professional Application Development.
]]>The post Configure SMTP with WordPress appeared first on Professional Application Development.
]]>wp-config.php and add following two lines of code below .
Alert! This step is important otherwise when you’ll enter your password in the plugin form it’ll be saved as plain text, which isn’t secure.
define( 'WPMS_ON', true );

define( 'WPMS_SMTP_PASS', 'your_password' );//password of the email that you want to use to send emails- Login in to WordPress admin.
- Install WP Mail SMTP by WPForms and activate it
- Go to the plugin’s settings and fill “From email” address that you want to use for sending emails. Remember it should be a valid email otherwise the mails may go to spam.
- Give some meaningful “From name” and select your desired SMTP in case it’s not listed select other, for this example I’m using Zoho and I’ve selected the other.
- Now fill in SMTP host, select encryption and fill other required data as shown in below screenshot.
Now we are done with the setup, now scroll up and click on “Email Test”, and then fill in your own email address to get a test email. Remember the email that is sent from the test includes marketing messages so may go to your spam so better to see your spam as well. But the meaningful emails won’t go spams
The email you’ll get will look like something like below.

The post Configure SMTP with WordPress appeared first on Professional Application Development.
]]>The post Setup WordPress with UpCloud or Linode on LAMP stack appeared first on Professional Application Development.
]]>Before diving into the article let me give you the output which you’ll be able to see after performing the coming operations in the article. If you wordpress site currently displays URLs like https://abc.com/?post=123 or https://abc.com/index.php/page/test-post then this is the right article for you to follow. By following this you’ll be able to get rid of those ugly URLs and make them something like https://proappdev.com/php/hello-world/.
I highly recommend to follow this tutorial to install basic WordPress setup. But remember its a basic setup not the production ready with friendly URLs so there are more steps involved to achieve that which I would like to highlight below.
Configurations
Make sure that mod_rewrite is enabled on your server setup, to check this do following.
– Create phpinfo.php file in
/var/www/html/yoursite.com/public_html/– Place this code inside
<?php phpinfo();?>– Now save the file and visit https://yoursite.com/phpinfo.php, now find mod_rewrite in that if you see it then move ahead otherwise continue with this
–
sudo a2enmod rewrite–
sudo systemctl restart apache2Now at this stage we can now move ahead.
Edit the configuration file
sudo vi /etc/apache2/sites-available/yoursite.com.confNow modify the configurations as below
<VirtualHost *:80>
    <Directory /var/www/html/yoursite.com/public_html>
        Options Indexes FollowSymLinks MultiViews
        AllowOverride All
        Require all granted
    </Directory>
        ServerName yoursite.com
        ServerAlias www.yoursite.com
        ServerAdmin [email protected]
        DocumentRoot /var/www/html/yoursite.com/public_html

        ErrorLog /var/www/html/yoursite.com/logs/error.log
        CustomLog /var/www/html/yoursite.com/logs/access.log combined
</VirtualHost>
At this stage we are done with configurations, time to move to wordpress admin to make our URLs friendly.
WordPress settings
Go to WordPress Admin >> Settings >> Permalinks now you’ll be able to see the following screen
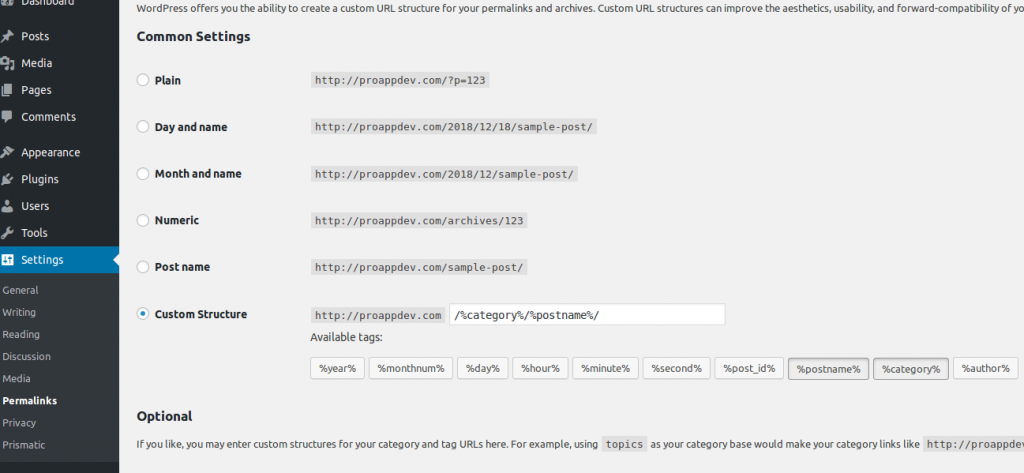
Now you can choose any friendly slug that you like and then click on save changes. Now you should be able to see your URLs in friendly form without index.php.
The post Setup WordPress with UpCloud or Linode on LAMP stack appeared first on Professional Application Development.
]]>