propiro.github.io 2026-01-13T21:49:48+01:00 piro https://propiro.github.io Naya Create - Oversold, Undercooked. piro https://propiro.github.io/naya-create-oversold-undercooked.html 2025-07-08T01:23:48+02:00 Why I shouldn't be allowed to have money, part 2137. I'll complain a lot, be prepared.
I've build few custom keyboards, know how to program them using commonly known tools like easyEVR / QMK / ZMK / whatever, so I'm not total noob. But I'm little bit butthurt about what was delivered, so whole review will have this tone in background.

This post is edited when there are updates to the situation, for now:
12.11.2025 - Finally got switches, touch module died while waiting for replacement of tune.
11.09.2025 - Tune module died, ongoing with support, most likely unrecoverable. Ordered new switches still didn't arrived.
15.07.2025 - After week of fetching e-mails with support in relation to wrong switches shipped, I've ordered new ones from website)
05.12.2025 - both switches and naya tune replacement were received. Typing is now passable, I've started using the touch typing tutor to get used to the keyboard. Tune module works. Touch module died in the meantime. Battery recovery mode didnt helped.
08.01.2025 - Replaced tune module developed coil whine when connected via ONLY ONE WORKING dual usb-c cable. Doesnt happen on non-working shipped cable. Tinnitus mode wasn't part of the deal.
13.01.2025 - After deassembling dead tune and dead touch module, and using lab power supply to slowly jolt the baterries to life, both are working. Both procedures voided the warranty, but i couldn't give a fuck  anymore. At this point I've officially concluded the adventure of naya create is over, and it'll work until it breaks.


I like nice things. I like gimmicky things. I often try to find arguments to buy some cool looking device, and with Naya Create it was no different - My work relies heavily on 3d design, and on my desk I have 3d connexion controller (you can read about it here), xencelabs keys+track wheel (here), and of course UHK keyboard, since for some reason Im getting older with every year passing, and my wrists start to hurt - hence split keyboard, heavily tented (a little about it here).

Wanted to always update my setup, I've caught a nice looking kickstarter campaign in early 2023 - Naya Create. Oh wow! Modular, split, tented keyboard, wireless, and with 3d dongle AND turning wheel replacement! What could go wrong!

Being unreasonably price'y (after all the taxes and shipping, it ended up being ~1k usd / 4k pln at the time of writing this (below 385EUR is keyboard only - they sold modules separately on their site, not through kickstarter) - I think thats the median net monthly salary in Poland at this moment btw  It was dominand NET salary in Poland in ~2024 apperently), which is fine - I use my PC to earn money, so if something can make the process of earning money smoother and more comfortable - I can pay for it. (Or at least thats one of the arguments to explain my shopping habits). But like with all the kickstarters, I've picked my favorite, tactile type switches, all four modules (tune - turning wheel, track - trackball, touch - touchpad, and float - 3d mouse-style device),  paid for everything, and forget about it for... 2 years, until Naya developers finally started shipping the keyboards after delays. Just pay additional taxes (haha poland privilige), And it'll be sent to you.

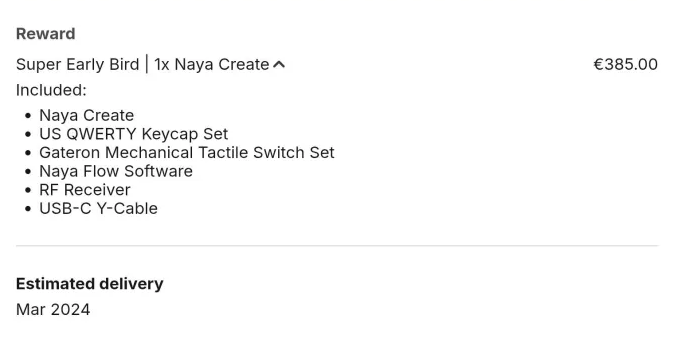
(edit: keep in mind this is keyboard only, no modules/additional switches (more about it later)/taxes/shipping for everything)

Hey, at least they're shipping something, so its good - its not vaporware/scam, at least at this point. I should be happy, right?
Some photos of the insides:

So, let me start with the usual kickstarter issues, that are somehow acceptable. Mentioned delays - the usual, no biggie - UHK was delayed half a year later as well.
Lack of 3d module also no biggie, even if it was one of main reasons to get an upgrade - some development problems, want to refine experience, yadda yadda - alright, make it good.
Problems started right after opening the package - and touching the keyboard for the first time, pressing one button - NO CLICK
NO. CLICK.
I've triple checked my order - TACTILE, Gateron:

What was under the black, shiny caps:

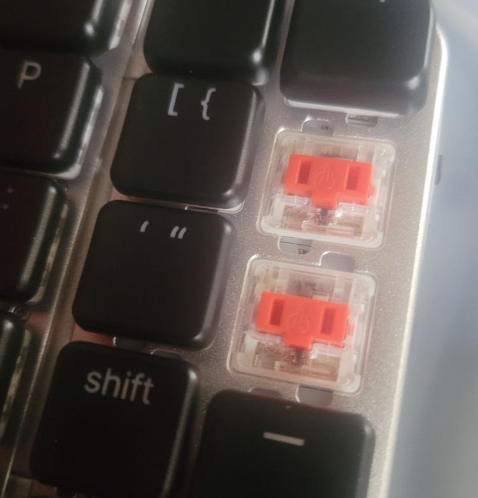
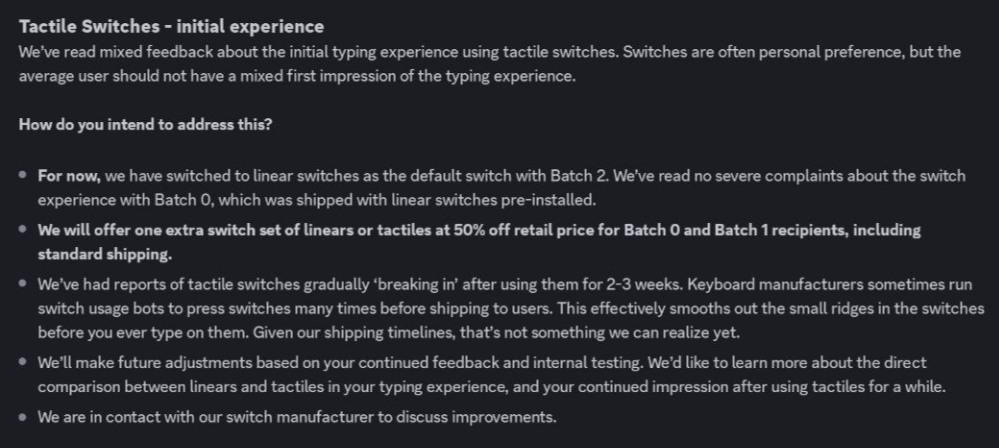
I can't stress enough how much I dislike red linear switches. Hate them. Don't like them. Don't want to type on them. I need that tactile feedback under my fingers. Currently being ignored on discord (which for some reason is main way to get any information/help/support related to the device - I guess were living in dickord times now, where documentation is obsolete), I've wrote support about that.
I dont have high hopes, because apperently (and this is again a thing I had to read on discord, maybe it was in one of the e-mails, but thats not the biggest issue) devs decided to change the tactile switches to linears, because of reasons. Some feedback from testers. Great, so I've got completely different thing I've wanted.

i don't think that's legal, I'm not a lawyer - But I'm sure that's a dick move. Message was sent 6 June 2025, my unit has been sent in batch 2.2 in 1 June 2025. Even if I saw the message earlier, my unit has been ALREADY SENT. With wrong switches. Cool.

But hey, its hot swap switch keyboard, so just blow up another 50 bucks on low profiles, and no problems, right? I have already bags of switches, so not even a purchase/wait for delivery thing, no problem, right?
Of couse naya have custom switches - you cant buy them from any place other than their shop - their pinout/footpring is different. Thats another great hackability/sustainability trait of the keyboard.

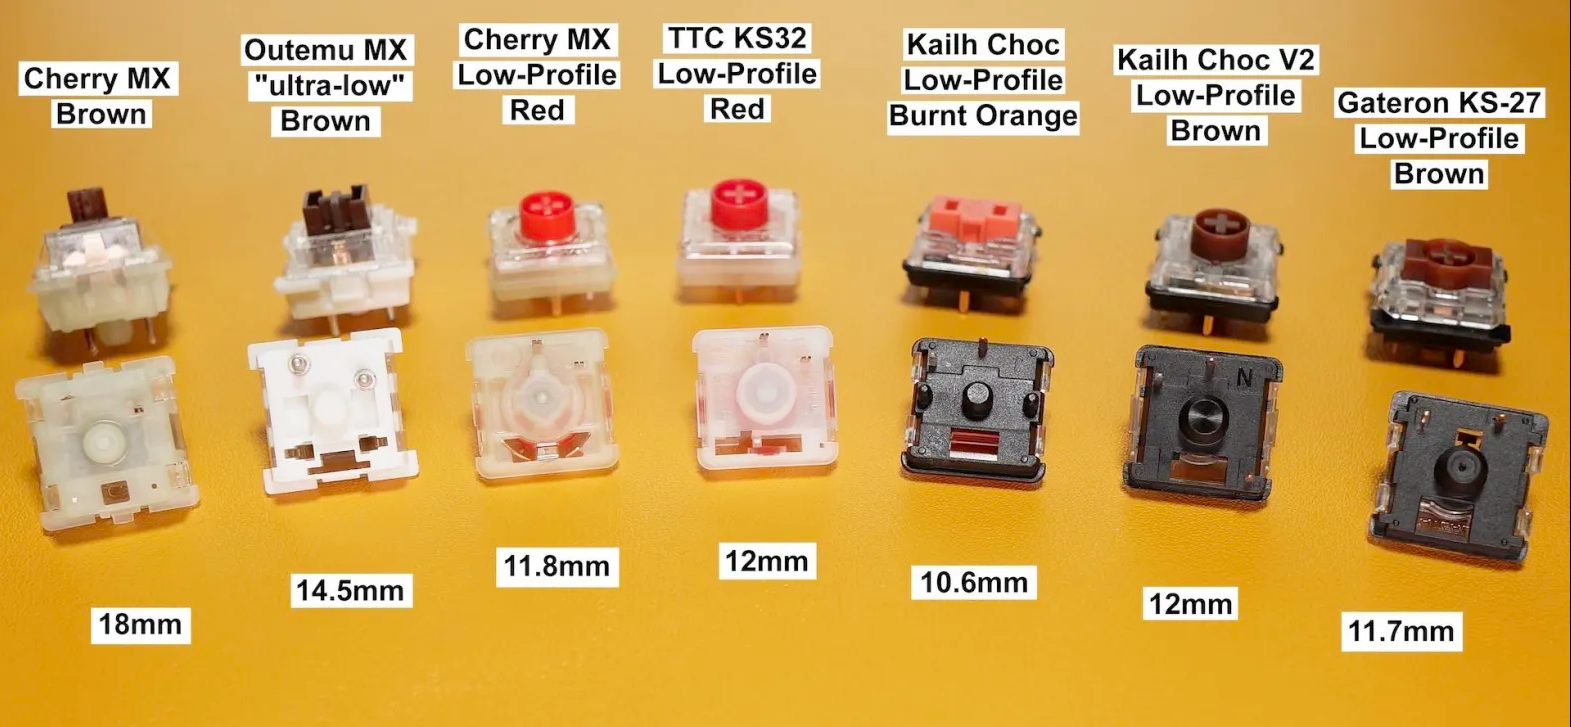
NONE of the above types will fit - pinout is slightly different, apperently theyre custom Kailh OEMs now, that cant be purchased easily anywhere. It's almost like they never researched their target audience.

Heres the difference between propertiary switch (right) and Choc Robin (left), one of species of well-known low-profile keys:

I apologise for bad photo quality - but issue should be obvious - left one have pin centered, while right one is off-set. Compare it to earlier, yellow-background picture, You'll see that only the Gateron KS-27 (previous brown switch, but it was replaced by reds) have this pinout. Sucks. 
And I'm in batch 2.2, so no discount code, no nothing. Pay up piggy, you've paid 1k for keyboard, you can pay 65 bucks for bag of switches you wont ever use again.
Kindly reminding, no support was given or explanation except "we've decided to swap it, suck it up".

Okay, enough of me bitching about switches as its annoying even me - be an adult, learn to type on reds while cursing under your nose, no big deal that you didn't got what you paid for, right?

From what I've saw on discord, there's fair share of dissapointed users that can't use their favorite switches. Some tried modding the provided switches, but everything seems like a chore and a band-aid on a bigger issue that was unnecessary and artificially created in the name of... what? Corporate-style product lock-in? Maximising profits from selling propertiary switches? Silly, silly decision. 

Let me continue with the experience.
Quality-built, its on acceptable kickstarter product level. From distance it looks a bit (hardcore soy redditors skip next word) chinky (hardcore soy redditors may continue reading) aliexpress chinese keyboard quality, but from up close, its much better. Probably because of glossy caps and lightly-brushed aluminium. See pictures below:


Its... Acceptable. Seen worse.

Overall, hinges are sturdy, we'll see in a year. Some users were plagues with dead modules, some hack was developed to jolt them with higher current to re-start battery charging - mine worked alright, only one was dead but charged without issue (Modules have wireless charging coils on bottom, I've used samsung wireless charger to fill them up. Your experience may be different).
Ok, but it works, right? 
Well... Kinda. Software at this moment is in very development stage - breaks connection, ignores changes, dont allow you to configure modules (theyre blinking annoyingly with RGB lights, all of them), set their function or speed other than default (There are some pre-built functions for tune you control through keyboard shortcuts, but its barely acceptable). 

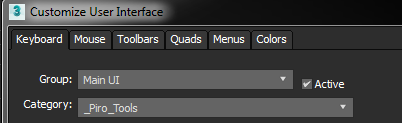
Anyway - after connecting the keyboard for first time, it glows like a rainbow - you know these cheap aliexpress RGB keyboards? That's the experience. You CAN'T control the rgb as for now from the software, nor fine-tune them - you need to rely on keyboard shortcuts to do so:

Screenshot from the software - notice how sharp and hard to read the text is - get used to it. Very early development stages.

After setting it to pure non bliking non breathing non exploding non spazzing white and testing the keys (gross red switches, bleh), lets flash the firmware. Using attached Y-type cable (usbC -> 2x usbC)  and finding the right USB port (not every of them will work, best is to connect it to usb controller itself - its very picky about any interference, and you do not want to brick the keyboard), and clicking UPDATE LEFT HALF and then UPDATE RIGHT HALF, we flash new firmware.
Another surprise - after flashing firmware, keys are dead.
It lights, system shortcuts (lights or connection type) doesn't work. Of course first thought is - Oh yeah, I've bricked it. After asking on discord (because that's what cool kids do now, get groomed  look for documentation on glorified IRC clients) I got informed that it sometimes does that, and i need to re-flash the keymaps. Ok, how do I do that?
By using this arrow, dummy:

Assuming keyboard hold the connection long enough not to make the software drop it. Which happened a lot of times. And if it does that, you can still click it, It'll think a bit, and give you zero information about what happened (unless you enable debugging). Thats what I did before asking, and expected it to work.
After flashing, it started working. 
OH YEAH BABE 
I CAN TYPE NOW
So, next logical thing is to check the keymaps, make neccessary modifications, set up modules, and push your profile to keyboard, right?

Yeah, almost.
As mentioned, modules cant be configured for now. None of them. You cant check the battery level, cant disable annoying rgb light (i know i know, update will fix it), cant set up touchpad sensitivity/speed. Or fix the bindings. Or gestures. Or track rotation issues.
Worst thing is however, it drops your profiles - you'll make new one (probably by duplicating the default one), configure it the way you want, set is as onboard default, flash it - and it wont get recognised. Or keymap will be missing. Or it wont detect changes for next 5,8,10 flashes. And then start working.
Why? No idea. Software related, hopefully. If you edit and flash the default one, it'll work fine, learned it hard way. 

Some of the issues above are to be adressed in future software updates, or it is promised to. First hand experience is very meek though. "Kickstarter things"?

Provided Speedlink adapter doesnt work yet. So no wireless, unless you use bluetooth.
Of course documentation doesn't mention that, I had to ask on discord to get informed its not me being technically retarded, but it just doesn't work by default. Bluetooth It requires some luck pairing, as it didn't want to do it for the first 3 or 4 times, but after that, works fine right after turning on. Oh, and check the software bindings, as documentation refers to nonexistend (yet?) binds related to connectivity:


Now, lets complain some about modules:
As mentioned - they tend to die, for first batches. Probably will be fixed for normal customers, but be aware of that.

Naya Track - Trackball - tends to scratch the ball on the case. Nice, big. Buttons bit uncomfortable to use, but thats no biggie. Cant remap them for now. Biggest issue with how the trackball works, detecting sometimes ball horizontal rotation as a scroll, when youre doing vertical rotation (to move cursor). Shines RGB that you cant disable, yet.

Naya Tune - the encoder wheel. Looks nice. By default is very expensive volume wheel, can be configured using keyboard shortcuts (no software support at this point) to be very  expensive screen brightness wheel, or very expensive mouse wheel. Last option seems most usable.
Top surface is supposed to be gesture-enabled, however I did not managed to get a consistent functionality out of it - sometimes it minimises windows, sometimes tries to show desktop, sometimes moves the window to left side of the screen. Just don't touch it for now, it'll be fine. Shines RGB that you cant disable, yet.

Naya Touch - touchpad - so far the least flawed from the pack (maybe for exception of "nonexisting" trait of Naya Float) - just works, Very fast compared to mouse/trackball, cant configure atm. Some users reported extreme jagginess on 144hz screens, Can't verify this. Shines RGB that you cant disable, yet.

Naya Float - nonexistent, promised to be shipped for free "when its done". I bet it shines RGB light too. But software will allow you to disable it, I promise :^


After all, I'm not completely dissapointed with the purchase - long waiting time made me forget about initial payment, so all I had to pay were taxes. With exception of bad software, wrong switches, issues with profiles and not working 100% modules, nonexistent documentation, its still nice keyboard, especially in tenting mode that my wrists like. I cope hope that software will fix most of flaws, and the 3d dongle will be delivered somewhere in the next two years, so I'll be able to fullfill my initial plan of replacing my current keyboard, 3d mouse and xencelab keys/trackwheel.

Short summary:

Pros:
- Looks nice and futuristic
- Half of the flaws should be fixed by software
- Modules have high quality feel
- Solid hinges allows you to tent the keyboard
- Modules have separate wireless charging capabilities

Cons:
- Expensive for what it delivers
- Propertiary switches
- Average quality keycaps that you wont replace
- terrible first-hand experience with flashing
- terrible support edit: barely acceptable support
- terrible documentation (nonexistent, and PDFs have wrong/old HW version on it)
- Reported dead modules
- No float module, lack of module support from the start.


Question is - should you buy it?
Unless you have disposable income that you're willing to spend and don't regret it, probably no, there's ton of better keyboards rich in features, that are much more modding friendly, have better support (QMK / ZMT / easyAVR), allows you to swap any switches you want, or keycaps you want. If you want good out of box experience, you can always buy UHK with modules. If you want good hackability - you can get some halcyon or ergodox or any other out of many splits on the market.


Edit as for 15.07.2025 - after e-mailing support back and forth, after I've bought blue and brown set of switches (adding another ~125usd  to whole deal), they mercifully told me they'll apply 60% off for one set of them.
Look, I wont complain since I've already ordered them, but whole situation would be avoided if you didn't switch them first place, and notify me after my unit was shipped.
From the good things, I can see development of the software, and less things get broken. 

Oh btw, I still hate red switches - tried to type on them for 15 minutes, had around 4-7 WPM - contrary to normal ~95 WPM the loss is absurdly big to ignore.
Except some posts in future about experience with more matured version of software, and hopefully exchanged switches.

Edit as for 11.09.2025 - naya tune died while I've waited for switches - new software update dropped, I've decided to take the keyboard out of box and flash new firmware to everything and charge it, turns out Tune module (the metal wheel thingy) died. In contact with customer support, but for now it looks like its dead and unrecoverable.

Edit as for 12.11.2025 - another update, slightly optimistic one.


Switches were successfully delivered, two sets of them. after swapping, it is now possible to type on the darn thing.
WHO
THOUGHT
IT
WAS
GOOD DECISION
TO SWAP THEM TO REDS
it makes no sense to me. I''ve started typing on it already, using some teaching websites (I really like https://www.keybr.com ), having a stunning 35wpm speed - but hey, I'll reach my 75-80 boomer speed in no-time.
In the meantime of last 3 months:
- Ive been told "near future" when asked for delivery status,
- found one of the devs to harass him to get my broken tune module replaced after confirming that electronics broke (thanks dude,  without you support would ignore me for another 3 months),
- touch module died (probably same issue as tune),
- got told the supplied Y splitter cable is bad from the start and its my problem, i can buy new one,
- and most funny enough - kailh, the supplier of switches, made v2 of the tactile/clicky ones, so i got the suboptimal experience batch of switches - allegedly there are supposed to be free replacements at the cost of shipping, but based on current experiences, it might take a while.

To be fair, after ~10months, 40+ emails and 3 email chains involving at least 4 people, getting gaslighted (i fucking hate that word, and there is no better one for the situation) by some smartasses on discord that "i shouldnt complain the product is wrong and broken it makes them read that negativity" - eat a bowl of dick you dumdum, I got somewhat what I've paid for.
Except working software, including macros, app profiles, rgb control and more advanced module control.
And no naya float, the 3d dongle - The one thing i wanted the most, to replace three devices on my desk.

But fuck me, I like the typing on the keyboard now, so probably in next 10 months ill even say I'm happy when finally everything from the 2023 kickstarter is there!

]]>
Savage 1911 Rail Adapter prototype piro https://propiro.github.io/savage-1911-rail-adapter-prototype.html 2024-06-27T19:37:48+02:00 Got myself a nice birthday present - stainless steel Savage 1911 automatic colt pistol.

Savage 1911 Stainless Steel + Tymbark Colove Cherry.
 SAVAGE 1911 GOVT STYLE STAINLESS kal. 45ACP

Initially I've wanted a very classic 1911, without any "tacticoolness", but after few shooting sessions, It struck me - what IF i want to mount flashlight on it, even if i don't carry it or use it in anything-but-perfect shooting range light conditions?

Gotta model some plastic cancer growth for it, obviously!

After some measurements, quick prototype was made:

After getting an OK fit, some re-designing, details and adjustments were applied, so its snug and functional. As well possible to be milled on my friend's CNC, as I dont trust 3d printed plastic on .45 that much.

3d printed rail adapter savage 2011 acp automatic colt pistol
pretty happy with the design, allows for comfortable finger placement during gripping, lets print it!
And after several tweaks and a handfull

of prototypes, it became a thing that might have a potential. Here it is, mounted on the gun itself, not screwed in together yet (Waiting for proper screw lengths).


]]>
MAXSCRIPT: Hide license username from UI // delayed startup piro https://propiro.github.io/maxscript-hide-license-username-from-ui-delayed-startup.html 2023-12-15T02:34:52+01:00 Recently (since 2020 or so) Autodesk made 3DS max display username on frontend of 3DS max, which made me and few other people, who share / record lot of materials, bit unhappy. After no clear solution except for "just change it", I've wrote this script that should get rid of the license name owner, as well do some startup - actions when you open max. Copy below code, put it in maxscript editor, save and evaluate, you can put it in delayedExecution.ms file, and copy that file in your startup folder of 3ds max 
( For example: C:\Program Files\Autodesk\3ds Max 2024\scripts\Startup
or
C:\Users\piro\AppData\Local\Autodesk\3dsMax\2024 - 64bit\ENU\scripts\startup 
It may depend on your installation and account settings.) to run every time you open 3dsmax.exe.

Get it from github delayedExecution.ms

-- put me into startup folder
clearListener()
try (destroyDialog delayedExecutionDialog) catch()
curMaxVersion = ((maxversion())[1] / 1000)
print "Max version: " + curMaxVersion as string
-- various functions you might want to run at start of 3ds max
fn fn_hideLicence = -- hides licence owner name from 3ds max interface
(
qtMax = (python.import "qtmax")
(((((qtMax.GetQMaxMainWindow()).menuBar()).children())[2].children())[3]).setFixedHeight 0
	--messageBox "Licence Name should be hidden"
	--sleep (3)
	
)

fn fn_openLayerExplorer = -- opens layer explorer (preferably docked or tabbed to scene explorer)
(
macros.run "Scene Explorer" "SELayerExplorer"	
	
)

	
fn fn_displayStats = -- toggles displaying viewport statistics
(
	(
	struct view (id, tm)
	local prev = viewport.activeViewport

	with redraw off local views = for v = 1 to viewport.numViews collect
	(
		viewport.activeViewport = v
		actionMan.executeAction 0 "40829"  -- Tools: Show Statistics Toggle
		view id:v tm:(viewport.GetTM())
	)

	viewport.activeViewport = prev
	views
)	
	
		
)
	
	
	timerValUp = 0
Rollout delayedExecutionDialog "Delayed Exectution v0.01"
(

	
	label lbl1 "Delayed execution::" align:#center enabled:false
	label lbl2 "Executing in 5" align:#center enabled:false height:70
	timer clock20 "testClock" interval:1000 -- 1st-5th ticks delay, 6th tick execution, 7th-9th ticks exit delay, 10th tick exit and dialog destroy

-- 500ms means whole operation will take 500ms * 10 ticks = 5 seconds	
	
	
	on clock20 tick do
		(
		timerValUp = timerValUp+1
		case timerValUp of
			(
			1: ( lbl2.text = ("Executing in 5"))
			2: ( lbl2.text = ("Executing in 4"))
			3: ( lbl2.text = ("Executing in 3"))
			4: ( lbl2.text = ("Executing in 2"))
			5: ( lbl2.text = ("Executing in 1"))
			6: ( 
				lbl2.text = ("Executing commands:")
				lbl2.text = lbl2.text + "\nHiding licence owner UID."				
				fn_hideLicence()
				
				--fn_setStatistics()
				lbl2.text = lbl2.text + "\nToggling stats on all viewports."
				fn_displayStats()
				
				lbl2.text = lbl2.text + "\nEnabling Layer Explorer."
				fn_openLayerExplorer()
				
				)
			7: ( lbl2.text)
			8: ( lbl2.text = ("Commands Executed."))
			9: ( lbl2.text = ("Exiting."))
			10:((try (destroyDialog delayedExecutionDialog) catch() ))

				
			)	
		)
)
createDialog delayedExecutionDialog 200 100
]]>
Photography: Sheepdog Knives, Extreme Ratio Knives piro https://propiro.github.io/photography-sheepdog-knives-extreme-ratio-knives.html 2023-08-09T03:03:34+02:00 Had some fun time with my camera again, this time only knives:

Kizer Sheepdog C01C Mini
Kizer Sheepdog C01C Vanguard Black
Kizer Sheepdog C01C XL Titanium Black
All three, folded
all three, unfolded
Sheepdog, young specimen


Sheepdog, adult specimen
Sheepdog, elder specimen
 
 
And Extreme Ratio RAO2 and Caimano Nero Automat
RAO2 - larger than you'd expect
Caimano Nero 2 - Automatic version


As you can see, I like knives, so expect more of them.


]]>
Xencelabs Quickkeys, aka why I shouldn't have money. piro https://propiro.github.io/xencelabs-quickkeys-aka-why-i-shouldnt-have-money.html 2023-08-09T02:47:21+02:00 I've been eyeballing Xencelabs Quickkeys  for some time now, but couldn't justify its 130usd pricetag. (Un)Lucky for me, recently they were under heavy promotion, going as cheap as for 50 USD (200 polish new onions) - So of course I had to get one.

They arrived in nice, premium packaging, and despite being marketed as add-on for drawing tablet, they work standalone without problem - included in packaging we have carry case, USB C-A cable, USB C-A adapter, and wireless dongle. Software required to run under windows is easy and simple, allows to create per-application profiles, as well one global profile that's active if there is no profiled application focused. 

software setup
software - profile setup

While being happy with it almost immediately, I didn't liked its low profile while lying on desk. As split keyboard owner and user (for last few years I'm using UHK (Ultimate Hacking Keyboard) v1, and couldn't been happier with it), ideal placement of the macro key device would be between the halves, like that:

position in center
position in center, between two halves

So I've quickly jumped into 3ds max, and created this:

quick keys elevated, angled stand - 3ds max project

And after printing, I've ended with this:

(TBD - add finished photo when base ends printing)

Cont:

Base has been printed and assembled:

And that would be end of story, if not for friends, who always have great ideas right after you print the "final" version of your design. After short exchange of ideas, New version happened:

new design
new design

This is what feedback do to the product. Now, its easier to assemble, much more visually coherent, and there is absolutely no chance of device falling down from it, while still providing access to charging port and power button.

Quick measurements, and first version fits perfectly:

And finished product is here:

Someone might ask - Adam, why do you need another gizmo on your desk?
Isn't it ~~compulsory spending~~? 
Device itself is extremaly usefull for controlling things with timelines, allowing me to quickly preview/adjust keyframes, like this animation example:

 You can get the print files here on my printables:

https://www.printables.com/model/551334-xencelabs-quickkeys-stand-modular


]]>
MAXSCRIPT: Cycling through views in active viewport piro https://propiro.github.io/maxscript-cycling-through-views-in-active-viewport.html 2023-07-08T09:02:00+02:00 Since I consider using viewport cube a suboptimal, slow way to get certain view, and most of keyboard keys re-binded to different things, I've wrote a quick cycle script to bind under one key/key combination (on my side, its either ctrl+space or shift-space). Its divided to two functions:

macroScript viewportToggle category:"_Piro_Tools" tooltip:"UI: viewportToggle" buttontext:"UI: viewportToggle"
(
    
    fn showGrid_fn =
        (
            for i = 1 to viewport.numViews do ( viewport.setGridVisibility i true )
        )

    fn hideGrid_fn =
        (
            for i = 1 to viewport.numViews do ( viewport.setGridVisibility i false )
        )

    viewportType = viewport.getType()
    case viewportType of
        (
        #view_front:         (viewport.setType(#view_left); showGrid_fn();)
        #view_back:         (viewport.setType(#view_left); showGrid_fn();)
                
        #view_left:         (viewport.setType(#view_top); showGrid_fn();)
        #view_right:         (viewport.setType(#view_top); showGrid_fn();)
            
        #view_top:            (viewport.setType(#view_front); viewport.setType(#view_persp_user); hideGrid_fn();)
        #view_bottom:        (viewport.setType(#view_front); viewport.setType(#view_persp_user); hideGrid_fn();)
        
        #view_persp_user:    (viewport.setType(#view_front); showGrid_fn();)
        #view_iso_user:        (viewport.setType(#view_front); showGrid_fn();)            
        )    

which is default cycling, and

macroScript viewportToggleAlt category:"_Piro_Tools" tooltip:"UI: viewportToggleAlt" buttontext:"UI: viewportToggleAlt"
(
    
    fn showGrid_fn =
        (
            for i = 1 to viewport.numViews do ( viewport.setGridVisibility i true )
        )

    fn hideGrid_fn =
        (
            for i = 1 to viewport.numViews do ( viewport.setGridVisibility i false )
        )

    viewportType = viewport.getType()
    case viewportType of
        (
        #view_front:         (viewport.setType(#view_back); showGrid_fn();)
        #view_back:         (viewport.setType(#view_front); showGrid_fn();)
            
        #view_left:         (viewport.setType(#view_right); showGrid_fn();)
        #view_right:         (viewport.setType(#view_left); showGrid_fn();)
            
        #view_top:            (viewport.setType(#view_bottom); showGrid_fn();)
        #view_bottom:        (viewport.setType(#view_top); showGrid_fn();)
                    
        #view_persp_user:    (viewport.setType(#view_front); viewport.setType(#view_iso_user); showGrid_fn();)
        #view_iso_user:        (viewport.setType(#view_front); viewport.setType(#view_persp_user); showGrid_fn();)        
        )    
        
)

Which allows you to cycle through front-back, top-bottom, persp-iso or left-right views, depending on which one is currently active.

How to use scripts? Check this post on my blog about other maxscript for instructions on bottom: MAXSCRIPT: Open Max File Location


]]>
3d:  Hardsurface practice references piro https://propiro.github.io/3d-hardsurface-practice-references.html 2023-07-06T05:40:26+02:00 Collection of various accessories that are perfect hardsurface modelling exercises. Most people problems when it come to modelling complex items are based on inability of observing the item and dividing into smaller parts - objects rarely are uniform, one-piece structures, they are assembled from many smaller parts - guns, cars, rtv equipment, construction machinery, you name it. By doing few of these items, level by level, you should get the idea how to get from simple item that is assembled from 1-5 objects, to much more complex items that are assemblies of multiple parts.

Starting from simple ones like these:

To middle-level ones like these:

To complicated ones, like these:


You can get the zip with whole package from my mega upload: 

https://mega.nz/file/pRFWWCqK#EA5QZfZG70G6I6jE6kJG9d6cBHcsvU4nQ517PhmujgQ

]]>
Photography: Mr Cat, Kizer CyberBlade Titanium, Nitecore TINI2, Zippo Circuit piro https://propiro.github.io/photography-mr-cat-kizer-cyberblade-titanium-nitecore-tini2-zippo-circuit.html 2023-07-03T07:52:43+02:00 Recently I've picked new hobby - photography, if I may call taking pictures of random thing like that. always used phone camera,  never bothered to use "proper" or "serious" camera set up, so I've decided to play with some color lights, scene setup and bought used A6300 Camera. Results are below:

Mr cat in its full glory
A duo of mikov knives, with AFT knife in the middle.
Kizer Cyberblade, inspired by cybertruck. Titanium covers, s35vn blade steel.
Zippo Circuit, with double butane jet inserts
Nitecore TINI2, very powerfull for its size - it ended my friendship with Convoy flashlight


]]>
MAXSCRIPT: Toggle trackbar / statusbar piro https://propiro.github.io/macroscript-movescale-uv-chunks-by-value-2.html 2023-05-06T00:14:27+02:00 Maxscript I wrote  to salvage these 50 or so pixels on ther bottom area, especially when I'm doing some more devlook oriented tasks, not animating or duplicating / rotating / transforming objects. It'll hide trackbar slider + trackbar then status bar when you click it, and after third click, will show them again.

macroScript toggleTrackbarUI 
    category:"_Piro_Tools"
    internalCategory:"UU: toggleTrackbar" 
    tooltip:"UV: toggleTrackbar"
    ButtonText:"toggleTB" 
    autoUndoEnabled:false
    Icon:#("SchematicView",1)
    (
        if (trackbar.visible == true) then (
            timeSlider.setVisible (false) -- hide time slider
            trackbar.visible = false -- hide track bar
        ) else (
            if (statusPanel.visible == true) then (
                statusPanel.visible = false
            ) else (
                timeSlider.setVisible (true) -- show time slider
                trackbar.visible = true -- show track bar
                statusPanel.visible = true -- show status panel
            )
        )
    )

As always, you'll find it here:


]]>
Grocery Shopping: T4M Training Glock Pistol piro https://propiro.github.io/grocery-shopping-t4m-training-glock-pistol.html 2023-05-05T03:30:56+02:00 Word of caution first. These things are often sold as "self defence tools" - they are not suitable for self defence, unless you want to smack someone with pistol frame itself. Sellers who feed upon unknowing people selling false feeling of safety should really be hold accountable for misinforming any potential buyers. However, it is still nice looking piece, and it has some potential for being "training" item. 

Due to accidental shopping cart clearing, I've acquired an Umarex TPM 1 RAM T4E Law Enforcement .43 training pistol. While I like to shoot Glock 17, the gun that this training pistol was modelled on, I had no idea what to expect from this weird-market-niche product. Here's a store picture:

Product image of Umarex TPM 1 RAM T4E Law Enforcement .43
Product image of training pistol in question.

Upon receiving the package and taking it out of shipping cardboard box, in sight we have nice plastic casing, not really looking like original Glock one:

T4E company logo embedded on plastic protective case.

With opening of two plastic latches (the one that can break off easily, just being part of the case mold, not separate pieces with hinges), we have whole content presented before us: 

Gun itself, rubber cleaning tool for barrel (to clean from rubber/oil residue), spare magazine spring, hex key to tighten co2 capsule. Papers (Instruction and service manual) are hidden under top foam.

While handling the gun, we have a very nice iron sights with orange paint accents at disposal - weird colour choice, but it fits the blue-training frame (That's metal! Probably zn-al though, so don't expect it to be durable) of the gun. It compliments the colour theme well, and is much easier on the eyes than contrast red colour near blue one.

Ironsights
Nice and visible iron sights. Note the fake-stamping plate on back of the slide, normally you'd have a piece that can be removed to install... third party enhancement to your gun. 


In front of pistol, under barrel, there's short accessory rail, that will allow you to mount unnecessary ad-dons like lasers and flashlights if you really want to:

DBAL-PL mounted on short rail under barrel, sticking out comically. Probably smaller aparatus would fit it better, but i didnt had anything else close to me.
DBAL-PL mounted on short rail under barrel, sticking out comically. Probably smaller apparatus would fit it better, but i dint had anything else close to me.

On picture above, note the distance slide is moved back - that's the max distance distance it travels, which have its pros and cons:
Pros - less CO2 gas would be wasted after shot for moving that part, as blowback (the movement of slide back and forth, that in real gun would cause ejection of casing when backing, and loading new round when moving forward) here is purely cosmetic, and not required by the way gun operates.
Cons - Blowback would be really low, almost nonexistent. Also, it's not very realistic if we consider it a "training" model, which might cause people to expect slide on real thing to also travel such small distance, potentially risking hurting fingers if they wander not where they should be. That's enough about complains about that, there's more on the way anyway. Picture below shows what we see when slide is locked in back position - this isn't a "bullet chamber", nor part of barrel:

top of magazine, shown through fake "ejection window" in slide
Top of magazine, shown through fake "ejection window" in slide.


This is top part of magazine, and that means whole shooting mechanism is done by magazine itself - gas valve, release button, seals, everything is contained in magazine itself - that means magazines will be very expensive, and technically you can shoot the bullet without the gun, just releasing gas manually without gun itself (not recommended). Here's magazine itself:

That concludes visual tour around the item. This article will be updated when I have time and peace to shoot myself with it some target board at 10m to tell more about its accuracy, but I don't expect lot from smooth barrel and CO2 as propellant.


]]>