Electricity is the flow of electrons through a conductor (like wires). It powers lights, devices, and machines.
Alternating Current (AC)
Alternating Current (AC) is electricity that reverses direction as it flows, moving back and forth instead of in one direction. This change happens rapidly and repeatedly in a wave-like pattern. AC is commonly used to deliver electricity to homes, schools, and businesses through power lines because it can travel long distances efficiently. Devices like lights, refrigerators, and televisions typically use AC power from wall outlets.
AC is preferred for power distribution over Direct Current (DC) because it is easier and more efficient to transmit over long distances. Transformers can easily adjust AC voltage levels. Power companies increase the voltage to very high levels to reduce energy loss during long-distance transmission, then lower it before it reaches homes and buildings. This makes AC ideal for large power grids and delivering electricity to cities and communities.
- Pros:
- It can be easily stepped up or down in voltage using transformers.
- Efficient for long-distance transmission with minimal energy loss.
- Powers homes, buildings, and large appliances.
- Widely available from the power grid.
- Cons:
- Cannot be stored directly in batteries.
- Electronics often require DC power, so AC must be converted.
- High voltages can be dangerous if not handled properly.
Direct Current (DC)
Direct Current (DC) is electricity that flows in one direction only, with electrons moving consistently without reversing. Unlike alternating current, the voltage remains steady. DC power is commonly produced by batteries, solar panels, and power supplies, and it is used in many electronic devices such as smartphones, laptops, and small electronics.
DC is primarily used in electronics and battery-powered devices because it provides a steady and constant flow of electricity, which many components require to function properly. Devices like smartphones, laptops, LED lights, and microcomputers use DC power, typically supplied by batteries, USB power, or adapters that convert AC from wall outlets into DC.
- Pros:
- Stable and constant voltage, ideal for electronics.
- It can be stored in batteries for later use.
- Works with small devices such as phones, laptops, and microcontrollers.
- Cons:
- Harder to transmit over long distances (more energy loss).
- Cannot easily change voltage levels without special equipment.
- Not suitable for powering homes or large buildings directly.
Overview
- Direction of Current – AC changes direction, DC flows one way.
- Voltage Behavior – AC varies (wave), DC is constant.
- Sources – AC: wall outlets, power plants; DC: batteries, solar panels.
- Applications – AC: homes, appliances, power grids; DC: electronics, devices.
- Transmission – AC is better for long distances; DC is better for short distances.
- Conversion – AC can be stepped up/down easily; DC requires converters.
- Safety – AC can be more dangerous at high voltages; DC is steadier but still hazardous.
- Storage – DC can be stored in batteries; AC cannot.
- Efficiency – AC efficient for transmission; DC efficient for device operation.
Volt
A volt is the unit of measurement for electric potential difference or electrical pressure that drives electric current through a conductor, such as a wire. It measures the force that pushes electrons from one point to another in an electrical circuit. Using a water analogy, voltage is like the pressure that pushes water through a hose. The higher the voltage, the stronger the push that moves the electrons (current) through the circuit.
Voltage exists between two points in a circuit and is essential for the flow of current; without it, electrical devices cannot operate. Voltages can vary widely, ranging from low-voltage batteries (1-12 volts) to high-voltage power lines (thousands of volts).
Formula
Volts = Watts / Amps
110 Volts = 1000 Watts / 9.1 Amps
Current or Amps
Electric current is the rate at which electrons flow through a conductor, such as a wire, in an electrical circuit. It measures the quantity of electric charge passing a point in the circuit per unit of time. In simpler terms, it indicates how much electricity is moving through the circuit.
Using a water analogy, current is like the amount of water flowing through a hose. The more water that flows, the higher the current. Electric current can be either direct (DC), where electrons flow in a single direction, or alternating (AC), where electrons periodically reverse direction.
Current is measured in amperes (A). Understanding current is essential for designing circuits, selecting appropriate wire sizes, and protecting devices from overcurrent that can cause damage.
Formula
Amps = Watts / Volts
9.1 Amps = 1000 Watts / 110 Volts
Watt
A watt is the unit of electrical power, representing the rate at which an electric device consumes or produces energy. It measures the amount of work being done by the electrical current as it flows through a circuit.
Using a water analogy, wattage is like the power delivered by water from a hose. More power can be achieved either by increasing the flow rate (more water, analogous to higher current) or by increasing the pressure (stronger push, analogous to higher voltage).
Formula
Watts = Amps x Volts
1000 Watt = 9.1 Amps * 110 Volts
]]>A software application that delivers web content, such as HTML pages, images, videos, and other resources, to end users over the internet or a network. When a user requests a web page in a browser, the web server processes the request, retrieves the requested content, and sends it back to the client using HTTP or HTTPS. Two of the most common web servers are Apache and Nginx. Apache uses a thread-based approach, creating a separate thread for each incoming request, which allows it to handle requests individually and can make it faster in some scenarios, especially when processing dynamic content. Nginx, on the other hand, uses an event-driven, asynchronous architecture that efficiently handles a large number of simultaneous connections, making it highly suitable for serving static content and acting as a reverse proxy or load balancer.
Apache Web Server
You can download an Apache web server using the apt-get command
sudo # Run the command with superuser (administrator) privileges
apt-get # Linux package management command used to handle software packages
update # Option to refresh the local package index with the latest versions available from repositories
(RPi) sudo apt-get updatesudo # Run the command with superuser (administrator) privileges
apt-get # Linux package management command used to handle software packages
install # Option to install a specified package
apache2 # Specify that you want to install the apache2 package
(RPi) sudo apt-get install apache2After installing it, you need to start it, Apache runs in the background, so you will need to start the Apache service using the systemctl command
sudo # Run the command with superuser privileges
systemctl # Command to control systemd services
start # Option to start the specified service immediately
apache2 # The apache2 service to be started
(RPi) sudo systemctl start apache2Web servers serve web content on port 80. To check if apache2 is listening on port 80, you can use the netstat command
sudo # Run the following command with superuser (root) privileges
netstat # Network statistics tool that shows network connections, routing tables, interface stats, etc.
-t # Show TCP connections only
-u # Show UDP connections only
-p # Show the PID and name of the program using each socket
-l # Show only listening sockets (services waiting for connections)
-a # Show all sockets (both listening and non-listening)
-n # Show numerical addresses instead of resolving hostnames
(RPi) sudo netstat -tuplan
Active Internet connections (servers and established)
Proto Recv-Q Send-Q Local Address           Foreign Address         State       PID/Program name
tcp        0      0 0.0.0.0:22              0.0.0.0:*               LISTEN      548/sshd: /usr/sbin
tcp6       0      0 :::80                   :::*                    LISTEN      4524/apache2
tcp6       0      0 :::22                   :::*                    LISTEN      548/sshd: /usr/sbin
udp        0      0 0.0.0.0:68              0.0.0.0:*                           536/dhcpcd
udp        0      0 0.0.0.0:5353            0.0.0.0:*                           386/avahi-daemon: r
udp        0      0 0.0.0.0:42997           0.0.0.0:*                           386/avahi-daemon: r
udp6       0      0 :::546                  :::*                                536/dhcpcd
udp6       0      0 :::5353                 :::*                                386/avahi-daemon: r
udp6       0      0 :::36316                :::*                                386/avahi-daemon: r
You can browse the default web content (index.html) that is served by Apache using the curl or wget commands
curl # Command-line tool to transfer data from or to a server using various protocols (HTTP, HTTPS, FTP, etc.)
127.0.0.1 # The IP address of the local machine (localhost), so curl requests the server running on the same device
(RPi) curl 127.0.0.1

<!DOCTYPE html PUBLIC "-//W3C//DTD XHTML 1.0 Transitional//EN" "http://www.w3.org/TR/xhtml1/DTD/xhtml1-transitional.dtd">
<html xmlns="http://www.w3.org/1999/xhtml">
  <head>
...
...
The index.html location is /var/www/html/index.html, you can change its content using echo or nano commands
sudo # Run the command with superuser (administrator) privileges
/bin/bash # Use the Bash shell to execute the command
-c # Tells Bash to execute the following string as a command
“echo ‘Hello World'” # Prints the text ‘Hello World’
> /var/www/html/index.html # Redirects the output to the file index.html in the web server directory, overwriting it if it exists
(RPi) sudo /bin/bash -c "echo 'Hello World' > /var/www/html/index.html"When an end-user asks for the web content, they will be getting Hello World
curl # Command-line tool to transfer data from or to a server using various protocols (HTTP, HTTPS, FTP, etc.)
127.0.0.1 # The IP address of the local machine (localhost), so curl requests the server running on the same device
(RPi) curl 127.0.0.1
Hello World
To stop the Apache web server, use the systemctl command
sudo # Run the command with superuser privileges
systemctl # Command to control systemd services
stop # Option to stop the specified service immediately
apache2 # The apache2 service to be started
(RPi) sudo systemctl stop apache2You can double-check that by using systemctl status or check if port 80 is still used using the netstat command
sudo # Run the command with superuser privileges
systemctl # Command to control systemd services
status # Option to show the current status of the specified service
apache2 # The apache2 service to be started
(RPi) sudo systemctl status apache2
● apache2.service - The Apache HTTP Server
     Loaded: loaded (/lib/systemd/system/apache2.service; enabled; vendor preset: enabled)
     Active: inactive (dead) since Sun 2023-08-20 20:38:08 PDT; 1s ago
       Docs: https://httpd.apache.org/docs/2.4/
    Process: 7251 ExecStop=/usr/sbin/apachectl graceful-stop (code=exited, status=0/SUCCESS)
   Main PID: 6883 (code=exited, status=0/SUCCESS)
        CPU: 191ms
Or, netstat (Notice that nothing is listening on port 80)
sudo # Run the following command with superuser (root) privileges
netstat # Network statistics tool that shows network connections, routing tables, interface stats, etc.
-t # Show TCP connections only
-u # Show UDP connections only
-p # Show the PID and name of the program using each socket
-l # Show only listening sockets (services waiting for connections)
-a # Show all sockets (both listening and non-listening)
-n # Show numerical addresses instead of resolving hostnames
(RPi) sudo netstat -tuplan
Active Internet connections (servers and established)
Proto Recv-Q Send-Q Local Address           Foreign Address         State       PID/Program name
tcp        0      0 0.0.0.0:22              0.0.0.0:*               LISTEN      548/sshd: /usr/sbin
tcp6       0      0 :::22                   :::*                    LISTEN      548/sshd: /usr/sbin
udp        0      0 0.0.0.0:68              0.0.0.0:*                           536/dhcpcd
udp        0      0 0.0.0.0:5353            0.0.0.0:*                           386/avahi-daemon: r
udp        0      0 0.0.0.0:42997           0.0.0.0:*                           386/avahi-daemon: r
udp6       0      0 :::546                  :::*                                536/dhcpcd
udp6       0      0 :::5353                 :::*                                386/avahi-daemon: r
udp6       0      0 :::36316                :::*                                386/avahi-daemon: r
Netcat Webserver
You can create a simple web server using netcat that listens for incoming connections and servers them HTTP header and content, the header HTTP/1.1 200 OK indicates a successful response, and <h1>Hello World</h1> is the content.
sudo # Run the command with superuser (administrator) privileges
apt-get # Linux package management command used to handle software packages
update # Option to refresh the local package index with the latest versions available from repositories
(RPi) sudo apt-get updatesudo # Run the command with superuser (administrator) privileges
apt-get # Linux package management command used to handle software packages
install # Option to install a specified package
netcat # Specify that you want to install the netcat package
(RPi) sudo apt-get install netcatcat # Display file content; here used to create a new file
> script.sh # Redirect the input into a file named script.sh, creating it if it doesn’t exist or overwriting if it does
<<EOF # Start a “here document” (heredoc) that allows you to type multiple lines into the file until the EOF marker is reached
while true; # Infinite loop: keeps running the following commands repeatedly
do
echo -e # Print the string with interpretation of backslash escapes
“http/1.1 200 OK\n\n<h1>Hello World</h1>” # This is an HTTP response with status line 200 OK and a simple HTML body
| # sends that text directly to nc (netcat), which then sends it over the network to any client
nc (netcat) # Command-line utility for network connections
-l # Listen mode (server)
-k # Keep listening after client disconnects
-p 8080 # Listen on port 8080
-q 1 # Quit 1 second after EOF on stdin (optional cleanup)
done
EOF # End of the heredoc; closes file input
(RPi) cat > script.sh <<EOF
while true;
  do echo -e "http/1.1 200 OK\n\n<h1>Hello World</h1>" | nc -l -k -p 8080 -q 1;
done
EOF
chmod # Change file permissions on a Linux/Unix file
+x # Add execute permission, allowing the file to be run as a program or script
script.sh # The filename to which the permission change is applied
(RPi) chmod +x script.sh./ # Run a program or script located in the current directory
script.sh # The executable script file to run
(RPi) ./script.shA decoy application or system, commonly known as a honeypot, is a carefully designed and intentionally vulnerable tool used as bait to attract and trap cyber attackers. By simulating real systems, services, or applications, honeypots create realistic targets that appear valuable to threat actors. This approach enables organizations to observe attacker behavior, study tactics, techniques, and procedures (TTPs), and collect valuable intelligence about potential threats. All of this occurs within a controlled and isolated environment, ensuring that the organization’s actual systems, sensitive data, and network infrastructure remain safe from compromise.
- Purpose
- Detection: To identify the presence of potential cyber threats by mimicking real systems or applications.
- Monitoring: To observe the behavior of threat actors, including how they attempt to exploit vulnerabilities.
- Analysis: To gather intelligence on attack methods, tools used, and tactics employed by cybercriminals.
- Types
- Low-Interaction: Designed to simulate minimal services.
- Primarily captures connection attempts, allowing administrators to log who is probing the system and when.
- Useful for detecting automated attacks or scanning activities.
- Medium-Interaction: Simulates more realistic services than low-interaction honeypots.
- Captures connection attempts and login credentials, providing insight into attempted attacks and brute-force attempts.
- Allows limited interaction with attackers while still containing potential risks.
- High-Interaction: Provides a fully interactive environment that mimics real systems.
- Captures connection attempts, login credentials, and attacker actions, allowing detailed behavioral analysis.
- Can perform multiple functions and respond to client requests, offering deeper insight into attack methods, tools, and tactics.
- Low-Interaction: Designed to simulate minimal services.
- Components
- Decoy Systems: These can include virtual machines, servers, or network devices that simulate real infrastructure.
- Decoy Applications: Software applications that mimic critical business systems, such as databases or web services.
- Benefits
- Early Warning: Provides early detection of intrusion attempts before they reach actual production systems.
- Threat Intelligence: Provides valuable insights into the latest attack techniques and helps refine security strategies.
- Cost-Effective: Enables organizations to obtain threat intelligence without dedicating resources to full-scale incident response.
- Challenges
- False Positives: Ensuring that legitimate activities are not mistaken for malicious behavior.
- Maintenance: Keeping decoys up to date and relevant to current threat landscapes.
- Ethical Considerations: Balancing the need for security with ethical concerns related to the surveillance of attackers.
- Example Use Cases
- Phishing Simulations: Using decoy email systems to analyze phishing attempts.
- Vulnerability Exploits: Setting up virtual machines to detect and study exploit kits targeting specific vulnerabilities.
- Network Intrusions: Creating simulated network segments to monitor lateral movement by threat actors within an organization.
Honeypots Projects
There are different honeypots projects that can be installed on the Raspberry Pi operating system, the following are steps to install one of the open source projects called honeypots
Install the honeypots package using pip
PIP_BREAK_SYSTEM_PACKAGES=1 # Environment variable telling pip to ignore warnings about installing packages that could overwrite system-managed Python packages
pip3 # Python 3 package installer (pip for Python 3)
install # Command to install Python packages
“bcrypt<4.0.0” # Install the ‘bcrypt’ package but restrict version to less than 4.0.0 (dependency compatibility)
honeypots # Install the ‘honeypots’ Python package
(RPi) PIP_BREAK_SYSTEM_PACKAGES=1Run the honeypots project, this command will run the ftp honeypot
sudo # Run the command with superuser (administrator) privileges
-E # Preserve the user’s environment variables (like PIP_BREAK_SYSTEM_PACKAGES)
python3 # Use Python 3 interpreter to run the module
-m honeypots # Run the Python module named ‘honeypots’
–setup ftp:21 # Command-line argument for the module; sets up a honeypot service to simulate an FTP server on port 21
(RPi) sudo -E python3 -m honeypots --setup ftp:21
[!] For updates, check https://github.com/qeeqbox/honeypots
[x] Use [Enter] to exit or python3 -m honeypots --kill
[x] Parsing honeypot [normal]
{"action": "process", "dest_ip": "0.0.0.0", "dest_port": "21", "password": "test", "server": "ftp_server", "src_ip": "0.0.0.0", "src_port": "21", "status": "success", "timestamp": "2023-08-22T18:00:26.430681", "username": "test"}
[x] QFTPServer running..
[x] Everything looks good!
Connect to the ftp honeypot from the host using an ftp client, you need to change janedoe.local to the hostname you picked and enter a username and password
ftp> # Indicates you are in an interactive FTP client session
open # FTP command to connect to a remote FTP server
jdoe.local # The hostname or local network address of the FTP server you want to connect to
ftp> open jdoe.local
421 Service not available, remote server has closed connection
Connected to jdoe.local.
220 ProFTPD 1.2.10
Name (jdoe.local:pc): user123
331 Password required for user123.
Password:
530 Sorry, Authentication failed.
ftp: Login faile
The ftp honeypot recorded the user name and password
{"action": "connection", "dest_ip": "0.0.0.0", "dest_port": "21", "server": "ftp_server", "src_ip": "192.168.2.1", "src_port": "50173", "timestamp": "2023-08-22T18:00:29.081757"}
{"action": "login", "dest_ip": "0.0.0.0", "dest_port": "21", "password": "pass123", "server": "ftp_server", "src_ip": "192.168.2.1", "src_port": "50173", "status": "failed", "timestamp": "2023-08-22T18:00:35.037311", "username": "user123"}A network protocol is a standardized set of rules procedures and conventions that govern how data is formatted transmitted and received between devices on a network These protocols ensure that devices regardless of their manufacturer operating system or hardware can communicate reliably and efficiently enabling the seamless exchange of information across networks.
Network protocols define several critical aspects of communication including how devices initiate and terminate connections how data is packaged into packets how errors are detected and corrected and how devices address each other to ensure messages reach the correct destination They also determine how devices respond in case of congestion interruptions or conflicting requests.
Examples of widely used network protocols include TCP/IP which underlies the internet and governs how data travels between computers HTTP/HTTPS which enables web communication FTP used for file transfers and SMTP which manages email transmission By following these standardized rules devices can understand each other interpret data correctly and maintain reliable and secure communication even across diverse networks or geographical locations.
Network protocols are the foundation of all digital communication ensuring that information flows smoothly accurately and securely between devices in both small local networks and vast global networks like the internet.
Message Queuing Telemetry Transport (MQTT)
MQTT is a publish-and-subscribe communication protocol designed for IoT devices, enabling them to communicate effectively in high-latency and low-bandwidth environments.
- For Windows, use the MQTT installer
- For Linux-bases or Mac OS, use
brew install mosquitto - Go to terminal or command line and type
mosquitto -v
Light switch & Mobile App MQTT Example
In a smart home, a light switch is equipped with the capability to send information to a home mobile app.
- MQTT Broker: The MQTT broker serves as a central server that receives messages and distributes them to all clients subscribed to specific topics.
mosquitto -v
- MQTT Subscriber: The home app acts as an MQTT subscriber. It subscribes to the topic
smarthome/lights/office. When the smart light switch publishes an update, the home app receives the message and updates the light’s status accordinglymosquitto_sub -t 'smarthome/lights/office'
- MQTT Publisher: The smart light switch functions as an MQTT publisher. When you turn the light on or off, the switch sends a message to a specific topic on the MQTT broker, such as
smarthome/lights/office.mosquitto_pub -t 'smarthome/lights/office' -m 'ON'
Open 3 terminal windows or tabs and paste the following
Demo (Tab 1)
(RPi) mosquitto -v
1757318742: mosquitto version 2.0.22 starting
1757318742: Using default config.
1757318742: Starting in local only mode. Connections will only be possible from clients running on this machine.
1757318742: Create a configuration file which defines a listener to allow remote access.
1757318742: For more details see https://mosquitto.org/documentation/authentication-methods/
1757318742: Opening ipv4 listen socket on port 1883.
1757318742: Opening ipv6 listen socket on port 1883.
1757318742: mosquitto version 2.0.22 running
Demo (Tab 2)
(RPi) mosquitto_sub -t 'smarthome/lights/office'
ON
Demo (Tab 3)
(RPi) mosquitto_pub -t 'smarthome/lights/office' -m 'Hello, MQTT!'You can also do the same thing using Python
Demo (Tab 1)
(RPi) mosquitto -v
1757318742: mosquitto version 2.0.22 starting
1757318742: Using default config.
1757318742: Starting in local only mode. Connections will only be possible from clients running on this machine.
1757318742: Create a configuration file which defines a listener to allow remote access.
1757318742: For more details see https://mosquitto.org/documentation/authentication-methods/
1757318742: Opening ipv4 listen socket on port 1883.
1757318742: Opening ipv6 listen socket on port 1883.
1757318742: mosquitto version 2.0.22 running
MQTT in Python
You can create an MQTT server in Python. In MQTT terminology, you can create an MQTT server in Python. In MQTT terminology, the server is called a broker, which receives messages from publishers and distributes them to subscribers. Python can be used either to run an MQTT broker (server) or to create MQTT clients, which are devices or programs that publish messages to topics or subscribe to topics to receive messages.
listener.py (Listens to one topic)
import paho.mqtt.client as mqtt_client # Import the Paho MQTT client library
client = mqtt_client.Client(mqtt_client.CallbackAPIVersion.VERSION2, client_id=”client_1″) # Create MQTT client with API version 2 and client IDdef on_connect(client, userdata, flags, rc, properties): # Callback function triggered when the client connects to the broker
print(f”Connected: reason_code={rc}”) # Print the connection result codedef on_message(client, userdata, msg): # Callback function triggered when a subscribed message is received
print(f”{msg.topic}: {msg.payload.decode()}”) # Print the topic and decoded message payloaddef on_disconnect(client, userdata, rc): # Callback function triggered when the client disconnects
print(f”Disconnected: reason_code={rc}”) # Print the disconnection reason codeclient.on_connect = on_connect # Assign the connection callback function
client.on_message = on_message # Assign the message callback functionif client.connect(“localhost”, 1883, 60) == 0: # Connect to the MQTT broker on localhost using port 1883 with 60s keepalive
try:
client.subscribe(“smarthome/lights/office”, qos=1) # Subscribe to the topic with Quality of Service level 1
client.loop_forever() # Start the network loop and listen for messages continuously
except Exception: # Catch any runtime errors
print(“Error”) # Print error message if an exception occurs
finally:
client.disconnect() # Disconnect from the broker when the program exits
import paho.mqtt.client as mqtt_client

client = mqtt_client.Client(mqtt_client.CallbackAPIVersion.VERSION2, client_id="client_1")

def on_connect(client, userdata, flags, rc, properties):
    print(f"Connected: reason_code={rc}")

def on_message(client, userdata, msg):
    print(f"{msg.topic}: {msg.payload.decode()}")

def on_disconnect(client, userdata, rc):
    print(f"Disconnected: reason_code={rc}")

client.on_connect = on_connect
client.on_message = on_message

if client.connect("localhost", 1883, 60) == 0:
    try:
        client.subscribe("smarthome/lights/office", qos=1)
        client.loop_forever()
    except Exception:
        print("Error")
    finally:
        client.disconnect()
client.py (Publish to a topic)
import paho.mqtt.client as mqtt_client # Import the Paho MQTT client library
client = mqtt_client.Client(mqtt_client.CallbackAPIVersion.VERSION2) # Create an MQTT client using callback API version 2
def on_connect(client, userdata, flags, rc, properties): # Function called when the client connects to the broker
print(f”Connected: reason_code={rc}”) # Print the connection result codedef on_disconnect(client, userdata, rc): # Function called when the client disconnects from the broker
print(f”Disconnected: reason_code={rc}”) # Print the disconnection reason codeclient.on_connect = on_connect # Assign the connect callback function to the client
if client.connect(“localhost”, 1883, 60) == 0: # Connect to the MQTT broker running on localhost using port 1883
try:
client.publish(“smarthome/lights/office”, “ON”, 0) # Publish the message “ON” to the topic with QoS level 0
except Exception as e: # Catch any exceptions that occur during publishing
print(e) # Print the error message
finally:
client.disconnect() # Disconnect from the MQTT broker
import paho.mqtt.client as mqtt_client

client = mqtt_client.Client(mqtt_client.CallbackAPIVersion.VERSION2)

def on_connect(client, userdata, flags, rc, properties):
    print(f"Connected: reason_code={rc}")

def on_disconnect(client, userdata, rc):
    print(f"Disconnected: reason_code={rc}")

client.on_connect = on_connect

if client.connect("localhost", 1883, 60) == 0:
    try:
        client.publish("smarthome/lights/office", "ON", 0)
    except Exception as e:
        print(e)
    finally:
        client.disconnect()
Output
Connected: reason_code=Success
smarthome/lights/office: ONA computer network is a system of interconnected devices such as computers, servers, routers, and other hardware that communicate to share data, resources, and services. Networks create pathways and infrastructure for the flow of information between devices, enabling activities such as sending emails, browsing the web, streaming video, or participating in video calls.
Computer networks vary in scale and complexity. Local Area Networks (LANs) connect devices within a small area, such as a home, office, or school, while Wide Area Networks (WANs) span larger geographic regions, linking offices, data centers, or even countries. The internet is the largest global network, connecting billions of devices worldwide.
Networks are essential for daily digital activities, supporting personal communication, business operations, online education, healthcare systems, financial transactions, cloud computing, and more. They rely on protocols, hardware, and security measures to ensure efficient, reliable, and safe data transmission between devices.
Network Security
Network security involves methods, technologies, and procedures to protect computer networks and their resources from unauthorized access, misuse, modification, or disruption. It ensures that sensitive information such as personal data, financial records, and confidential business information remains safe while maintaining the availability and integrity of network services.
Network security includes:
- Access Control: Restricting who can connect to the network or access specific resources using passwords, authentication systems, or multi-factor authentication (MFA).
- Firewalls: Devices or software that monitor and filter network traffic to block malicious activity.
- Intrusion Detection and Prevention: Systems that detect unusual or suspicious activity and respond to potential threats.
- Encryption: Protecting data in transit by converting it into a format unreadable by unauthorized users.
- Network Monitoring: Continuously observing network traffic and performance to identify potential security breaches or vulnerabilities.
- Regular Updates and Patching: Ensuring network devices and software are up to date to protect against known vulnerabilities.
Effective network security not only prevents unauthorized access but also reduces the risk of data breaches, malware infections, and service disruptions, helping maintain trust, reliability, and operational continuity for individuals and organizations.
Information Technology (IT) Network
An Information Technology (IT) network combines hardware, software, and protocols to monitor, manage, and control the flow of electronic data within an organization or between interconnected systems. This setup allows devices such as computers, servers, routers, and storage systems to communicate, share resources, and access information efficiently and securely.
Hardware components in an IT network include servers, switches, routers, firewalls, and cables. Software components encompass network management tools, monitoring systems, security programs, and communication applications. Together, these elements enable organizations to store, transmit, and protect data, ensuring the smooth operation of digital services and facilitating user collaboration.
IT networks can vary in size and scope, from small local area networks (LANs) in offices to large wide area networks (WANs) that connect multiple sites across cities, countries, or continents. They rely on standards and protocols to ensure interoperability, reliability, and security of data transmission.
A well-managed IT network is critical to the daily operations of modern organizations, supporting tasks such as email, cloud computing, database management, video conferencing, and online transactions. By integrating monitoring, control, and security mechanisms, IT networks help maintain operational efficiency, protect sensitive information, and respond quickly to disruptions or threats.
Overview
- Purpose: Handle data and information within organizations.
- Focus: Computers, servers, databases, email, cloud services.
- Protocols/Technologies: TCP/IP, HTTP/HTTPS, DNS, VPN, Wi-Fi, Ethernet.
- Characteristics:
- Security-focused
- Data-centric
- High reliance on standardized IT hardware and software
- Example: Corporate LANs, cloud servers, email systems.
- CIAAN Prioritization
- Confidentiality
- Data should not be accessed without permission (Data is stored in a safe place)
- Sending a message to a specific target
- Data should not be accessed without permission (Data is stored in a safe place)
- Integrity
- Data should not be modified by unauthorized users/objects (Data is reliable and accurate)
- Sending a message to a specific target and ensuring that the target receives the exact message without being tampered with
- Data should not be modified by unauthorized users/objects (Data is reliable and accurate)
- Availability
- Data should be available to authorized users/objects whenever they need it (Data is available when needed)
- Sending a message to a target, and the target can receive it
- Data should be available to authorized users/objects whenever they need it (Data is available when needed)
- Authenticity
- The identity and origin of a user, system, or data are trusted
- The sender and the communication channel are trusted
- The identity and origin of a user, system, or data are trusted
- Non-repudiation
- The individual or system cannot deny having carried out a specific action.
- The sender cannot deny having sent a message
- The individual or system cannot deny having carried out a specific action.
- Confidentiality
Topology
Internet <-> Firewall <-> IT Network- Internet (Untrusted): The public web. By default, all unsolicited inbound traffic is blocked to prevent external intrusions.
- Firewall (The Gatekeeper): A physical or virtual appliance using Stateful Packet Inspection (SPI). It ensures that the only data entering the network is a direct, verified response to a request initiated by an internal user.
- IT Network (Trusted / Corporate): Houses workstations, Electronic Health Record (EHR) systems, and administrative servers. It is protected from the public web but remains the most likely entry point for phishing.
Operational Technology (OT) Network
An Operational Technology (OT) network combines hardware, software, and communication systems designed to monitor, control, and manage industrial equipment and operational processes. Unlike traditional IT networks, which primarily handle data and information, OT networks focus on the physical operation of machinery, production lines, utilities, and other critical industrial systems.
Hardware components in OT networks include sensors, actuators, programmable logic controllers (PLCs), industrial robots, and supervisory control and data acquisition (SCADA) systems. Software components consist of control applications, monitoring platforms, and analytics tools that help operators manage processes, optimize performance, and respond to events in real time.
OT networks are widely used in industries such as manufacturing, energy, transportation, water treatment, and oil and gas. They enable organizations to automate complex processes, ensure safety, maintain efficiency, and reduce downtime by providing precise control over physical operations.
Security and reliability are critical in OT networks because disruptions can cause physical damage, production losses, environmental hazards, or safety risks. OT systems often operate in environments where downtime is costly or dangerous, making real-time monitoring, fail-safes, and secure communication protocols essential.
OT networks bridge the digital and physical worlds, enabling control, monitoring, and coordination of industrial systems to ensure operational efficiency, safety, and regulatory compliance.
Overview
- Purpose: Manage and control physical devices, machinery, and industrial processes.
- Focus: Sensors, actuators, PLCs (Programmable Logic Controllers), SCADA systems.
- Protocols/Technologies: Modbus, DNP3, OPC UA, PROFIBUS, EtherNet/IP.
- Characteristics:
- Safety and reliability-critical
- Real-time or near real-time operations
- Legacy systems often coexist with modern ones
- Example: Factory floor control systems, water treatment plants, power grids.’
- CIAAN Prioritization
- Availability
- Data should be available to authorized users/objects whenever they need it (Data is available when needed)
- Sending an event to a specific actuator, and the actuator can receive it
- Data should be available to authorized users/objects whenever they need it (Data is available when needed)
- Integrity
- Data should not be modified by unauthorized users/objects (Data is reliable and accurate)
- Sending an event to a specific actuator and ensuring that the actuator receives the exact event without being tampered with.
- Data should not be modified by unauthorized users/objects (Data is reliable and accurate)
- Confidentiality
- Data should not be accessed without permission (Data is stored in a safe place)
- Sending an event to a specific actuator
- Data should not be accessed without permission (Data is stored in a safe place)
- Authenticity
- The identity and origin of a user, system, or data are trusted
- The sender and the communication channel are trusted
- The identity and origin of a user, system, or data are trusted
- Non-repudiation
- The individual or system cannot deny having carried out a specific action.
- The sender cannot deny having sent a message
- The individual or system cannot deny having carried out a specific action.
- Availability
Topology
Internet <-> Firewall <-> IT Network <-> Secure Gateway / DMZ <-> OT Network- Secure Gateway / DMZ (The Air-Lock): The most critical security layer. It creates a physical and logical “buffer” so that the IT and OT networks never communicate directly.
- Data Brokerage: It terminates the connection from one side and starts a new one on the other, acting as a middleman for machine data.
- Protocol Isolation: It strips away IT-based protocols (which carry malware/ransomware) and only allows specific industrial “languages” (Modbus, BACnet, DICOM) to pass.
- OT Network (Mission-Critical Zone): The “Heart” of the facility (e.g., life-support, surgery robots, PLCs). It is protected by two layers of security, making it invisible to the public internet.
Internet of Things (IoT) Network
An Internet of Things (IoT) network is a system of interconnected devices, sensors, appliances, and software that communicate and exchange information autonomously without direct human intervention. These devices collect data from their environment, share it across the network, and can respond or act based on the information they receive, creating a dynamic ecosystem of smart automated systems.
IoT networks include a wide variety of devices, such as smart home appliances like thermostats, lights, and security cameras, wearable health monitors, industrial sensors, connected vehicles, and even environmental monitoring equipment. Each device is equipped with the necessary hardware and software to sense, transmit, process, or act on data, often using wireless communication protocols such as Wi-Fi, Bluetooth, Zigbee, or cellular networks.
The primary goal of an IoT network is to enhance efficiency, automation, and decision-making by enabling devices to work together intelligently. For example, a smart thermostat can adjust room temperature based on occupancy data collected from motion sensors. In contrast, industrial IoT sensors can monitor machinery performance and trigger maintenance alerts before failures occur.
IoT networks rely heavily on data analytics, cloud computing, and edge computing to process large volumes of information generated by connected devices. Security is a major consideration, as unsecured IoT devices can be vulnerable to cyberattacks, potentially affecting privacy, safety, and the network’s functionality.
IoT networks are revolutionizing how humans interact with technology, providing automation, convenience, and real-time insights across homes, businesses, and industries while enabling smarter, more responsive systems.
Overview
- Purpose: Connect everyday devices to the internet for monitoring, control, and data collection.
- Focus: Consumer devices, home automation, wearables, smart appliances.
- Protocols/Technologies: MQTT, CoAP, Zigbee, LoRaWAN, Wi-Fi, Bluetooth.
- Characteristics:
- Often low-power devices
- Cloud connectivity and analytics-driven
- Usually not mission-critical (compared to OT)
- Example: Smart thermostats, fitness trackers, connected cameras.
- CIAAN Prioritization
- Availability
- Data should be available to authorized users/objects whenever they need it (Data is available when needed)
- Sending an event to a specific actuator, and the actuator can receive it
- Data should be available to authorized users/objects whenever they need it (Data is available when needed)
- Integrity
- Data should not be modified by unauthorized users/objects (Data is reliable and accurate)
- Sending an event to a specific actuator and ensuring that the actuator receives the exact event without being tampered with.
- Data should not be modified by unauthorized users/objects (Data is reliable and accurate)
- Confidentiality
- Data should not be accessed without permission (Data is stored in a safe place)
- Sending an event to a specific actuator
- Data should not be accessed without permission (Data is stored in a safe place)
- Authenticity
- The identity and origin of a user, system, or data are trusted
- The sender and the communication channel are trusted
- The identity and origin of a user, system, or data are trusted
- Non-repudiation
- The individual or system cannot deny having carried out a specific action.
- The sender cannot deny having sent a message
- The individual or system cannot deny having carried out a specific action.
- Availability
Topology
Internet <-> Firewall <-> IT Network <-> Secure Gateway / DMZ (IoT inside)- Secure Gateway / DMZ (Semi-Trusted / IoT Sandbox): By isolating IoT (Smart TVs, HVAC, Printers) here, you prevent “Lateral Movement.”
- Inbound Control: The Gateway allows IoT devices to reach the Internet for necessary firmware updates.
- Outbound Restriction: The Gateway strictly blocks IoT devices from initiating any connection to the IT Network, ensuring a hacked “Smart TV” cannot access private patient data.
Industrial Internet of Things (IIoT) Network
An Industrial Internet of Things (IIoT) network is a system of interconnected sensors, devices, machines, and software designed specifically for industrial environments, allowing them to communicate. Exchange information autonomously without direct human intervention. Unlike general IoT networks, which often focus on consumer applications, IIoT networks are tailored to industries such as manufacturing, energy, transportation, oil and gas, and utilities, where reliable, real-time monitoring and control of equipment is critical.
IIoT devices collect data from industrial processes, machinery, or environmental conditions and share it across the network to enable automation, predictive maintenance, operational optimization, and safety improvements. Examples include vibration sensors on factory equipment to predict failures, smart meters in energy grids to monitor consumption, and temperature and humidity sensors in warehouses to maintain optimal storage conditions.
The network typically combines hardware components like sensors, actuators, and programmable logic controllers PLCs with software platforms for data collection, processing, and analytics. Communication often occurs via industrial protocols or wireless standards suitable for harsh environments, ensuring reliability, low latency, and secure data transmission.
IIoT networks enable organizations to reduce downtime, increase efficiency, and make data-driven decisions by continuously monitoring industrial operations. Security and resilience are major concerns, as disruptions or breaches can lead to production loss, equipment damage, or safety hazards. Therefore, IIoT networks often include strong cybersecurity measures, redundant systems, and monitoring tools to maintain operational continuity.
An IIoT network integrates advanced sensing, connectivity, and analytics in industrial settings, enabling machines and systems to operate more intelligently, safely, and efficiently with minimal human intervention.
Overview
- Purpose: Industrial version of IoT for operational efficiency, predictive maintenance, and automation.
- Focus: Industrial machinery, sensors, robotics, heavy equipment.
- Protocols/Technologies: Industrial Ethernet, MQTT, OPC UA, Modbus TCP, edge computing.
- Characteristics:
- Combines IT and OT principles
- Real-time monitoring and control
- Data-driven decision making and analytics
- Example: Smart factories, automated manufacturing lines, predictive maintenance systems.
- CIAAN Prioritization
- Availability
- Data should be available to authorized users/objects whenever they need it (Data is available when needed)
- Sending an event to a specific actuator, and the actuator can receive it
- Data should be available to authorized users/objects whenever they need it (Data is available when needed)
- Integrity
- Data should not be modified by unauthorized users/objects (Data is reliable and accurate)
- Sending an event to a specific actuator and ensuring that the actuator receives the exact event without being tampered with.
- Data should not be modified by unauthorized users/objects (Data is reliable and accurate)
- Confidentiality
- Data should not be accessed without permission (Data is stored in a safe place)
- Sending an event to a specific actuator
- Data should not be accessed without permission (Data is stored in a safe place)
- Authenticity
- The identity and origin of a user, system, or data are trusted
- The sender and the communication channel are trusted
- The identity and origin of a user, system, or data are trusted
- Non-repudiation
- The individual or system cannot deny having carried out a specific action.
- The sender cannot deny having sent a message
- The individual or system cannot deny having carried out a specific action.
- Availability
Topology
Internet <-> Firewall <-> IT Network <-> Secure Gateway / DMZ (IoT inside) <-> OT Network (IIoT inside)- Zone Separation (IoT vs. IIoT):
- IoT (In DMZ): Non-critical facility devices (Cameras, Guest Wi-Fi) are sandboxed in the DMZ. If compromised, the impact is contained.
- IIoT (In OT Zone): Industrial sensors and smart clinical tools (IIoT) live inside the OT Network. Their data is vital for real-time operations, and they are protected by the full “Air-Lock” logic of the Secure Gateway.
- Ultimate Isolation: This flow ensures that a breach on the Internet or a malware in the IT Office cannot physically reach or disrupt the mission-critical machines in the OT zone.
The Windows File System is basically how Windows organizes, stores, and manages all the data on a computer’s drives.
C:\– Root of the main system drive- Top-level directory containing all files and folders on the drive. Everything on the system exists under this root.
- Important: Compromise at this level can affect the entire system; attackers often target the root drive to plant malware or gain persistent access.
C:\Windows– Main OS folder- Stores core operating system components, including subfolders like
System32,WinSxS, and Logs. - Important: High-value target for attackers; modification can lead to system instability, privilege escalation, or malware persistence.
- Stores core operating system components, including subfolders like
C:\Windows\System32– Core executables and system libraries- Contains DLLs, system utilities, and essential programs such as
cmd.exe,taskmgr.exe,regedit.exe,ipconfig.exe. - Important: Frequent target for malware; replacing or tampering with files here can bypass security controls or allow rootkits to hide.
- Contains DLLs, system utilities, and essential programs such as
C:\Program Files– Default location for 64-bit applications- Each application has its own subfolder containing program files, libraries, and resources (e.g.,
C:\Program Files\Google\Chrome). - Important: Protected by the system; only administrators can modify. Malware often attempts to write here to persist.
- Each application has its own subfolder containing program files, libraries, and resources (e.g.,
C:\Program Files (x86)– Default location for 32-bit applications on 64-bit Windows- Separation prevents conflicts between 32-bit and 64-bit software (e.g.,
C:\Program Files (x86)\Mozilla Firefox). - Important: Same as above; attackers may target this folder for persistence or installing malicious apps.
- Separation prevents conflicts between 32-bit and 64-bit software (e.g.,
C:\Users– Stores user profiles and personal data- Each user has a folder containing
Desktop,Documents,Downloads,Pictures, and the hiddenAppDatafolder.
- Example structure:
C:\Users\AdministratorC:\Users\john\
- Example structure:
- Important: Primary target for credential theft, sensitive document access, and ransomware.
- Each user has a folder containing
C:\Users<user>\AppData– Application-specific dataLocal: machine-specific settingsRoaming: settings that move with the user profileLocalLow: low-security application data- Important: Malware often hides here because it can run with user permissions and persists across sessions.
C:\ProgramData– Hidden folder for shared application data- Stores license info, databases, and configuration files used by all users.
- Important: Attackers may place scripts or configs here to affect all users.
C:\Windows\Temp– Temporary OS files- Stores cached data, session files, and logs created by Windows and applications.
- Important: Often scanned by malware to inject temporary scripts or payloads; can reveal forensic evidence.
C:\Users\<user>\AppData\Local\Temp– Temporary files for user applications- Often cleaned automatically.
- Important: Common location for malicious downloads or scripts executed by users.
C:\Windows\System32\winevt\Logs– System logs- Contains Security, System, and Application logs.
- Important: Critical for auditing, detecting intrusions, and forensic analysis. Attackers may attempt to clear or tamper with these logs.
C:\Windows\System32\drivers– Device drivers- Software that allows Windows to interact with hardware (network, disk, USB devices).
- Important: Malicious drivers can run at the kernel level, bypassing security controls.
C:\Windows\Boot– Boot files- Stores Boot Configuration Data (BCD) and boot manager; EFI System Partition contains UEFI boot files.
- Important: Targeted by bootkits or ransomware to prevent recovery or achieve early execution.
C:\Windows\inf– Driver installation information- Stores .inf files used for installing hardware drivers.
- Important: Malware may attempt to modify or inject malicious drivers here.
C:\Windows\System32\spool– Print spooler files- Manages printing tasks and queued documents.
- Important: Print spooler vulnerabilities (like
PrintNightmare) can allow privilege escalation or remote code execution.
C:\Windows\System32\Config– Registry storage files- Stores system-wide configuration in files backing
HKLM,HKCU, and other registry hives. - Important: Corrupting or exfiltrating these files can give full system access, credential theft, or malware persistence.
- Stores system-wide configuration in files backing
Linux-Based OS File System
The Linux-based OS File System is how Linux-based OS organizes, stores, and manages all the data on a computer’s drives.
/– Root of the filesystem- Contains all system files, user folders, and directories. Only the superuser (root) can modify critical system directories.
- Important: Altering anything here can break the system or escalate privileges.
/bin– Essential binaries likels,cp,mv- Important: malware might replace binaries here to hide activity.
/sbin– System binaries for administrative tasks- Only root can execute most files.
/usr– User programs and libraries- Contains
/usr/bin,/usr/libfor installed applications.
- Contains
/liband/lib64– Shared libraries for system programs- Important: corrupt libraries can compromise the system.
/etc– System configuration files- Examples:
/etc/passwd(user accounts),/etc/ssh/sshd_config(SSH server config) - Important: target for attackers to gain unauthorized access.
- Examples:
/home/<user>– User personal directories- Stores
documents,downloads, and hidden folders like.ssh/or.config/ - Important: private data, credentials, and application settings reside here.
- Stores
/root– Superuser’s home- Important: stores root-specific configs; high-value target for attackers.
/var– Variable data like logs (/var/log), mail, print spools- Important: logs here can be analyzed for forensic investigation.
/tmp– Temporary files- Used by the system and applications. Permissions usually allow all users to write, but with the “sticky bit” set to prevent others from deleting their files.
/dev– Device files representing hardware- Important: Accessing device files improperly can compromise the system.
/procand/sys– Virtual filesystems providing runtime system info- Important: Attackers can read the system state or try to manipulate kernel parameters.
/opt– Optional software installed manually- Important: Third-party software location; could be abused by malware.
/mntand/media– Mount points for drives and removable media
Windows vs Linux-Based OS
- Root of the System
- Windows:
C:\– The top-level directory where everything resides. Protecting this ensures system integrity. - Linux:
/– Top of the filesystem hierarchy, containing all system and user files.
- Windows:
- System Core / Executables
- Windows:
C:\Windows\Temp,C:\Users\<user>\AppData\Local\Temp– Stores transient files, session data, and caches. It can be exploited by malware, but it is safe to clear periodically. - Linux:
/bin,/sbin,/usr/bin,/usr/sbin,/lib,/lib64– Core system commands, admin binaries, and libraries. Integrity is critical to prevent system compromise.
- Windows:
- User Profiles / Personal Data
- Windows:
C:\Users\<user>– StoresDocuments,Downloads,Desktop, andAppData(hidden). Sensitive files, credentials, and configs are here, often targeted by malware. - Linux:
/home/<user>– Contains user files, hidden configs (.ssh/, .config/), and personal data.
- Windows:
- Administrator / Root Account
- Windows:
C:\Users\Administrator– Superuser account folder, high-value target for privilege escalation. - Linux:
/root– Root user’s home directory. Access is restricted to prevent misuse.
- Windows:
- Temporary Files
- Windows:
C:\Windows\Temp,C:\Users\<user>\AppData\Local\Temp– Stores transient files, session data, and caches. Can be exploited by malware but is safe to clear periodically. - Linux:
/tmp,/var/tmp– Temporary files and session data, often writable by all users; malware sometimes hides here.
- Windows:
- Application Data / Configuration
- Windows:
C:\Users\<user>\AppData(Local,Roaming,LocalLow),C:\ProgramData– Stores per-user and shared app settings, caches, and configuration data. Critical for persistence mechanisms. - Linux:
/home/<user>/.config,/home/<user>/.local,/etc,/opt,/usr/local– User and system application configurations, system-wide app settings, and third-party software locations.
- Windows:
- Installed Applications
- Windows:
C:\Program Files (64-bit),C:\Program Files (x86) (32-bit)– Applications installed for all users. Permissions prevent standard users from modifying files. - Linux:
/usr/bin,/usr/sbin,/opt,/usr/local/bin– Installed software and user-executable programs. Security depends on file permissions and ownership.
- Windows:
- Boot / Startup Files
- Windows:
C:\Windows\Boot, EFI System Partition – Bootloader files, Boot Configuration Data (BCD). Tampering here can prevent boot or install rootkits. - Linux:
/boot,/boot/efi– Kernel, GRUB, initramfs. Protecting these prevents kernel-level attacks.
- Windows:
- Device Drivers / Hardware Interfaces
- Windows:
C:\Windows\System32\drivers, sometimesC:\Windows\inf– Drivers for hardware. Compromised drivers can be used for privilege escalation. - Linux:
/dev,/lib/modules– Device files and kernel modules. Malicious modifications can lead to root-level compromise.
- Windows:
- System Logs
- Windows:
C:\Windows\System32\winevt\Logs– Event logs for Security, System, and Application. Useful for forensic analysis. - Linux:
/var/log– Logs for system, authentication, services, and applications. Key for monitoring and intrusion detection.
- Windows:
- Registry / Configuration Storage
- Windows:
HKLM,HKCU,HKCR,HKU,HKCC – Stores system and user settings; backed by files inC:\Windows\System32\config. Target for malware persistence. - Linux:
/etc,/home/<user>/.config– Stores system-wide and user-specific configuration. Equivalent to registry for many purposes.
- Windows:
- File System Security
- Windows: NTFS permissions, Access Control Lists (ACLs), User Account Control (UAC), BitLocker. Protects system and user files from unauthorized access.
- Linux: File permissions, ownership, SUID/SGID bits, SELinux/AppArmor policies. Protects critical system and user files.
Online digital forensics is conducted while the system is running and may be connected to a network. This approach captures volatile data, such as RAM contents, running processes, network connections, open files, and active sessions, information that would be lost if the system were shut down.
This method is particularly useful in incident response, malware analysis, and detecting ongoing attacks. Investigators must handle live systems carefully to avoid inadvertently altering evidence.
- Advantages
- Captures evidence that would otherwise be lost.
- Detects live malware or intrusions.
- Drawbacks
- Risk of changing evidence during collection.
- Potential interference from malware or attackers.
- Examples
- Taking a memory dump from a live server to find encryption keys.
- Monitoring network traffic during an active breach.
Offline Digital Forensics
Offline digital forensics involves investigating digital evidence without connecting the device to any network. This approach works with physically acquired data, such as hard drives, USB drives, and memory cards.
Typically, investigators create a bit-for-bit forensic image of the storage media to preserve the original evidence. Offline analysis allows tools to examine files, metadata, logs, and deleted or hidden data. The main focus is on maintaining evidence integrity and avoiding contamination.
- Advantages
- Safer, with no risk of remote tampering or malware activation.
- Provides full access to files and system data.
- Drawbacks
- Cannot capture volatile information like RAM contents, active processes, or open network connections.
- Some logs or system states may be lost after shutdown.
- Examples
- Cloning a suspect’s hard drive to recover deleted files.
- Analyzing data from a crashed USB stick.
Accessing Environment Variables
Password or secret keys can be stored in environment variables; the application or service accesses those variables when a password or secret key is needed; you can use the env command to review them
To add an environment variable, you can use the export command
export # Shell built-in: sets an environment variable and makes it available to all child processes
SECRET_A_API # Name of the environment variable
= # Assign operator
8vjZYsQxW9v6a4hA # Value being assigned to the environment variable
(RPi) export SECRET_A_API=8vjZYsQxW9v6a4hATo review them using env command
env # Shell command that prints all environment variables and their current values
(RPi) env
SHELL=/bin/bash
NO_AT_BRIDGE=1
PWD=/home/pi
LOGNAME=pi
XDG_SESSION_TYPE=tty
MOTD_SHOWN=pam
HOME=/home/pi
LANG=en_GB.UTF-8
SECRET_A_API=8vjZYsQxW9v6a4hA
Accessing Startup Service
Also known as System V init is also known as an old init daemon used for startup items (E.g., a script that started when the operating system started). Startup items are saved in the /etc/init.d/ folder and have specfiic structure
grep # Command-line utility to search for text patterns within files
-n # Show the line number of each matching line
-r # Recursively search directories and their subdirectories
-I # Ignore binary files (do not search inside non-text files)
Default-Start # The text pattern to search for (commonly used in SysV init scripts to indicate runlevels)
/etc/init.d # Directory containing traditional init scripts for services
(RPi) grep -nrI Default-Start /etc/init.d
/etc/init.d/cron:10:# Default-Start:            2 3 4 5
/etc/init.d/ssh:7:# Default-Start:              2 3 4 5
/etc/init.d/rpcbind:9:# Default-Start:          S
/etc/init.d/avahi-daemon:8:# Default-Start:     2 3 4 5
Systemd
A newer init daemon is used for parallel startup items/services (E,.g. a script that runs when the operating system starts). Usually, the system-wide startup items/services saved in the /etc/systemd/system folder and have a specific structure
ls # List directory contents
-l # Long listing format: shows permissions, owner, group, size, and modification date
-a # Show all files, including hidden files (those starting with a dot)
/etc/systemd/system # Directory containing systemd service unit files and custom overrides
(RPi) ls -la /etc/systemd/system
total 88
drwxr-xr-x 20 root root 4096 Aug 20 10:35 .
drwxr-xr-x  5 root root 4096 May  2 17:07 ..
drwxr-xr-x  2 root root 4096 May  2 17:08 bluetooth.target.wants
lrwxrwxrwx  1 root root   42 May  2 17:09 dbus-fi.w1.wpa_supplicant1.service -> /lib/systemd/system/wpa_supplicant.service
lrwxrwxrwx  1 root root   37 May  2 17:08 dbus-org.bluez.service -> /lib/systemd/system/bluetooth.service
lrwxrwxrwx  1 root root   40 May  2 17:09 dbus-org.freedesktop.Avahi.service -> /lib/systemd/system/avahi-daemon.service
lrwxrwxrwx  1 root root   40 May  2 17:09 dbus-org.freedesktop.ModemManager1.service -> /lib/systemd/system/ModemManager.service
lrwxrwxrwx  1 root root   45 May  2 17:07 dbus-org.freedesktop.timesync1.service -> /lib/systemd/system/systemd-timesyncd.service
lrwxrwxrwx  1 root root   36 May  2 17:16 default.target -> /lib/systemd/system/graphical.target
drwxr-xr-x  2 root root 4096 May  2 17:04 default.target.wants
drwxr-xr-x  2 root root 4096 May  2 17:09 dev-serial1.device.wants
drwxr-xr-x  2 root root 4096 May  2 17:12 dhcpcd.service.d
lrwxrwxrwx  1 root root   35 May  2 17:11 display-manager.service -> /lib/systemd/system/lightdm.service
drwxr-xr-x  2 root root 4096 May  2 17:36 getty.target.wants
drwxr-xr-x  2 root root 4096 May  2 17:16 [email protected]
drwxr-xr-x  2 root root 4096 May  2 17:09 graphical.target.wants
drwxr-xr-x  2 root root 4096 May  2 17:08 halt.target.wants
drwxr-xr-x  2 root root 4096 May  2 17:36 multi-user.target.wants
drwxr-xr-x  2 root root 4096 May  2 17:09 network-online.target.wants
drwxr-xr-x  2 root root 4096 May  2 17:08 poweroff.target.wants
drwxr-xr-x  2 root root 4096 May  2 17:15 printer.target.wants
drwxr-xr-x  2 root root 4096 May  2 17:09 rc-local.service.d
drwxr-xr-x  2 root root 4096 May  2 17:08 reboot.target.wants
drwxr-xr-x  2 root root 4096 May  2 17:08 remote-fs.target.wants
drwxr-xr-x  2 root root 4096 May  2 17:15 sockets.target.wants
lrwxrwxrwx  1 root root   31 May  2 17:36 sshd.service -> /lib/systemd/system/ssh.service
-rw-r--r--  1 root root  179 Aug 20 10:35 update.service
drwxr-xr-x  2 root root 4096 May  2 17:09 sysinit.target.wants
lrwxrwxrwx  1 root root   35 May  2 17:05 syslog.service -> /lib/systemd/system/rsyslog.service
drwxr-xr-x  2 root root 4096 May  2 17:05 timers.target.wants
To access the SSH service, you can view the .service file that contains the configuration
cat # Reads the contents of a file and outputs to standard output
/etc/systemd/system/sshd.service # Path to the systemd service unit file for SSH daemon (sshd)
(RPi) cat /etc/systemd/system/sshd.service

[Unit]
Description=OpenBSD Secure Shell server
Documentation=man:sshd(8) man:sshd_config(5)
After=network.target auditd.service
ConditionPathExists=!/etc/ssh/sshd_not_to_be_run

[Service]
EnvironmentFile=-/etc/default/ssh
ExecStartPre=/usr/sbin/sshd -t
ExecStart=/usr/sbin/sshd -D $SSHD_OPTS
ExecReload=/usr/sbin/sshd -t
ExecReload=/bin/kill -HUP $MAINPID
KillMode=process
Restart=on-failure
RestartPreventExitStatus=255
Type=notify
RuntimeDirectory=sshd
RuntimeDirectoryMode=0755

[Install]
WantedBy=multi-user.target
Alias=sshd.service
Recent Accessed Files/Folders
The find command can get a list of the most recently accessed files or folders (E.g., files/folders were read). The following will print the last files that were read
sudo # Run the following command with superuser (root) privileges
find # Search for files and directories in a directory hierarchy
. # Start searching from the current directory
-type f # Restrict results to files only (ignore directories)
-atime -1 # Match files that were last accessed within the last 1 day
-printf “%Ad-%Am-%AY %AH-%AM-%AS %h%f\n” # Custom output format:(%Ad) day of last access. (%Am) month of last access.(%AY) year of last access.(%AH) hour of last access.(%AM) minute of last access.(%AS) second of last access.(%h) directory path containing the file.(%f) file name(\n) newline at end of each output line
| # Pipe: send output of find to the next command
sort -n # Sort the output numerically (here sorts by date/time fields)
(RPi) sudo find . -type f -atime -1 -printf "%Ad-%Am-%AY %AH-%AM-%AS %h%f\n" | sort -n
10-08-2023 21-24-54.9930529990 ./app/b/run.py
10-08-2023 21-24-55.3170477670 ./app/a/run.py
10-08-2023 21-24-55.9250379500 ./creds
10-08-2023 23-38-19.0940423980 ./temp
Recent Modified Files/Folders
The find command can be used to get a list of the most recent modified files (E.g., content changed). The following will print the last files whose content changed
sudo # Run the following command with superuser (root) privileges
find # Search for files and directories in a directory hierarchy
. # Start searching from the current directory
-type f # Restrict results to files only (ignore directories)
-ctime -1 # Match files whose status (metadata) changed in the last 1 day
-printf “%Cd-%Cm-%CY %CH-%CM-%CS %h%f\n” # Custom output format: (%Cd) day of last status change. (%Cm) month of last status change. (%CY) year of last status change. (%CH) hour of last status change. (%CM) minute of last status change. (%CS) second of last status change. (%h) directory path containing the file. (%f) file name. (\n) newline at the end of each output line.
| # Pipe: send output of find to the next command
sort -n # Sort the output numerically (here sorts by date/time fields)
(RPi) sudo find . -type f -mtime -1 -printf "%Td-%Tm-%TY %TH-%TM-%TS %h%f\n" | sort -n
10-08-2023 23-26-38.4205909130 ./.bash_history
10-08-2023 23-46-33.2525871390 ./x
10-08-2023 23-50-39.9322762010 ./creds
10-08-2023 23-51-11.2037410210 ./api.p
10-08-2023 23-51-21.4755656850 ./run.sh
Recent Changed Files/Folders
The find command can be used to get a list of the most recently changed files (E.g., permissions changed). The following will print the last files whose meta data changed
sudo # Run the following command with superuser (root) privileges
find # Search for files and directories in a directory hierarchy
. # Start searching from the current directory
-type f # Restrict results to files only (ignore directories)
-mtime -1 # Match files whose **content was modified** in the last 1 day
-printf “%Td-%Tm-%TY %TH-%TM-%TS %h%f\n” # Custom output format: (%Td) day of last modification. (%Tm) month of last modification. (%TY) year of last modification. (%TH) hour of last modification. (%TM) minute of last modification. (%TS) second of last modification. (%h) directory path containing the file. (%f) file name. (\n) newline at the end of each output line.
| # Pipe: send output of find to the next command
sort -n # Sort the output numerically (here sorts by date/time fields)
(RPi) sudo find . -type f -ctime -1 -printf "%Cd-%Cm-%CY %CH-%CM-%CS %h%f\n" | sort -n
10-08-2023 23-17-50.0660037610 ./.cache/lxsession/LXDE-pi/run.log
10-08-2023 23-26-38.4245907720 ./.bash_history
10-08-2023 23-46-33.2525871390 ./x
10-08-2023 23-50-39.9322762010 ./creds
10-08-2023 23-51-01.4439078220 ./contract
Accessing accounts shadow
A file that has encrypted user passwords
sudo # Run the following command with superuser (root) privileges
cat # Display the contents of a file to standard output
/etc/shadow # Path to the shadow password file on Linux
(RPi) pi@jdoe:~ $ sudo cat /etc/shadow
root:*:19480:0:99999:7:::
daemon:*:19480:0:99999:7:::
bin:*:19480:0:99999:7:::
sys:*:19480:0:99999:7:::
sync:*:19480:0:99999:7:::
games:*:19480:0:99999:7:::
man:*:19480:0:99999:7:::
lp:*:19480:0:99999:7:::
mail:*:19480:0:99999:7:::
news:*:19480:0:99999:7:::
uucp:*:19480:0:99999:7:::
proxy:*:19480:0:99999:7:::
www-data:*:19480:0:99999:7:::
backup:*:19480:0:99999:7:::
list:*:19480:0:99999:7:::
irc:*:19480:0:99999:7:::
gnats:*:19480:0:99999:7:::
nobody:*:19480:0:99999:7:::
systemd-network:*:19480:0:99999:7:::
systemd-resolve:*:19480:0:99999:7:::
_apt:*:19480:0:99999:7:::
pi:$5$SD.7RGax6g$cA9SFp3QDYnU9D4ncl.KxRBvyOaeG/gg5fN/bIZI49A:19480:0:99999:7:::
systemd-timesync:*:19480:0:99999:7:::
messagebus:*:19480:0:99999:7:::
_rpc:*:19480:0:99999:7:::
statd:*:19480:0:99999:7:::
sshd:*:19480:0:99999:7:::
avahi:*:19480:0:99999:7:::
dnsmasq:*:19480:0:99999:7:::
lightdm:*:19480:0:99999:7:::
rtkit:*:19480:0:99999:7:::
pulse:*:19480:0:99999:7:::
saned:*:19480:0:99999:7:::
colord:*:19480:0:99999:7:::
hplip:*:19480:0:99999:7:::
rpi-first-boot-wizard:*:19480:0:99999:7:::
systemd-coredump:!*:19480::::::
Bash history
Bash is a command language interpreter that is used for working with files and data, sometimes there are different shells are installed, and you can list them using cat /etc/shells; the Bash shell usually saves the user input commands into a file called .bash_history
cat # Display the contents of a file to standard output
~/.bash_history # Path to the current user’s Bash history file (contains commands previously run in the shell)
(RPi) cat ~/.bash_history
./run.sh
sudo ./run.sh
Logs
The logs location in Linux distros is /var/log/, not IoT devices enable logging because it consumes their resources.
/var/log/auth.log (user logins and authentication)
cat # Display the contents of a file to standard output
/var/log/auth.log # Path to the authentication log file; records all login attempts, sudo usage, and authentication-related events
(RPi) cat /var/log/auth.log
May  2 17:36:45 jdoe systemd-logind[456]: New seat seat0.
May  2 17:36:45 jdoe systemd-logind[456]: Watching system buttons on /dev/input/event0 (vc4-hdmi-0)
May  2 17:36:45 jdoe systemd-logind[456]: Watching system buttons on /dev/input/event1 (vc4-hdmi-1)
May  2 17:36:46 jdoe sshd[587]: Server listening on 0.0.0.0 port 22.
May  2 17:36:46 jdoe sshd[587]: Server listening on :: port 22.
May  2 17:36:52 jdoe login[620]: pam_unix(login:session): session opened for user pi(uid=1000) by LOGIN(uid=0)
May  2 17:36:52 jdoe systemd-logind[456]: New session 1 of user pi.
May  2 17:36:52 jdoe systemd: pam_unix(systemd-user:session): session opened for user pi(uid=1000) by (uid=0)
May  2 17:37:11 jdoe sshd[879]: Connection closed by 192.168.2.1 port 50356 [preauth]
Aug 20 10:22:07 jdoe sshd[892]: Invalid user pc from 192.168.2.1 port 50357
Aug 20 10:22:09 jdoe sshd[892]: pam_unix(sshd:auth): check pass; user unknown
Aug 20 10:22:09 jdoe sshd[892]: pam_unix(sshd:auth): authentication failure; logname= uid=0 euid=0 tty=ssh ruser= rhost=192.168.2.1
deamon.log (background processes – called daemons)
cat # Display the contents of a file to standard output
/var/log/daemon.log # Path to the daemon log file; contains messages from background services (daemons) on the system
(RPi) tail /var/log/daemon.log
Aug 20 10:37:33 jdoe sh[1950]: Ncat: Listening on :::4444
Aug 20 10:37:33 jdoe sh[1950]: Ncat: Listening on 0.0.0.0:4444
Aug 20 10:38:32 jdoe systemd[1]: session-3.scope: Succeeded.
Aug 20 10:38:32 jdoe systemd[1]: session-3.scope: Consumed 33.015s CPU time.
Aug 20 10:38:35 jdoe systemd[1]: Started Session 4 of user pi.
Aug 20 10:47:54 jdoe systemd[1]: Starting Discard unused blocks on filesystems from /etc/fstab...
Aug 20 10:47:56 jdoe fstrim[2113]: /: 113.9 GiB (122311024640 bytes) trimmed on /dev/mmcblk0p2
Aug 20 10:47:56 jdoe fstrim[2113]: /boot: 203.7 MiB (213555200 bytes) trimmed on /dev/mmcblk0p1
Aug 20 10:47:56 jdoe systemd[1]: fstrim.service: Succeeded.
Aug 20 10:47:56 jdoe systemd[1]: Finished Discard unused blocks on filesystems from /etc/fstab
syslog.log (Global logs)
head # Display the first part of a file (default: first 10 lines)
/var/log/syslog.log # Path to the system log file; contains general system messages, kernel logs, and service events
(RPi) head /var/log/syslog.log
May  2 17:36:45 jdoe kernel: [    0.000000] Booting Linux on physical CPU 0x0000000000 [0x410fd083]
May  2 17:36:45 jdoe systemd-modules-load[147]: Failed to find module 'lp'
May  2 17:36:45 jdoe kernel: [    0.000000] Linux version 6.1.21-v8+ (dom@buildbot) (aarch64-linux-gnu-gcc-8 (Ubuntu/Linaro 8.4.0-3ubuntu1) 8.4.0, GNU ld (GNU Binutils for Ubuntu) 2.34) #1642 SMP PREEMPT Mon Apr  3 17:24:16 BST 2023
May  2 17:36:45 jdoe kernel: [    0.000000] random: crng init done
May  2 17:36:45 jdoe kernel: [    0.000000] Machine model: Raspberry Pi 4 Model B Rev 1.5
May  2 17:36:45 jdoe kernel: [    0.000000] efi: UEFI not found.
May  2 17:36:45 jdoe kernel: [    0.000000] Reserved memory: created CMA memory pool at 0x000000000ec00000, size 512 MiB
May  2 17:36:45 jdoe kernel: [    0.000000] OF: reserved mem: initialized node linux,cma, compatible id shared-dma-pool
May  2 17:36:45 jdoe systemd-modules-load[147]: Failed to find module 'ppdev'
May  2 17:36:45 jdoe kernel: [    0.000000] Zone ranges:
Sudoers
A file that is used to determine if a user has permission to run commands or not, the sudoers file location is /etc/sudoers
sudo # Run the following command with superuser (root) privileges
cat # Display the contents of a file to standard output
/etc/sudoers # Path to the sudoers configuration file; defines which users/groups can run commands with elevated (sudo) privileges
(RPi) sudo cat /etc/sudoers
# This file MUST be edited with the 'visudo' command as root.
# Please consider adding local content in /etc/sudoers.d/ instead of
# directly modifying this file.
# See the man page for details on how to write a sudoers file.
Defaults        env_reset
Defaults        mail_badpass
Defaults        secure_path="/usr/local/sbin:/usr/local/bin:/usr/sbin:/usr/bin:/sbin:/bin"
root    ALL=(ALL:ALL) ALL
%sudo   ALL=(ALL:ALL) ALL
pi ALL=(root) NOPASSWD: /usr/bin/vi
@includedir /etc/sudoers.d
Wifi Passwords
Wifi password are saved in /etc/NetworkManager/system-connections/???.nmconnection where ??? is the SSID (Name of the wireless network)
ls # List directory contents
-l # Long listing format: shows permissions, owner, group, size, and modification date
-a # Show all files, including hidden files (those starting with a dot)
/etc/NetworkManager/system-connections/ # Directory containing saved network connection profiles managed by NetworkManager
(RPi) ls -la /etc/NetworkManager/system-connections/
total 12
drwxr-xr-x 2 root root 4096 Aug 20 12:22 .
drwxr-xr-x 7 root root 4096 Feb 22 19:59 ..
-rw------- 1 root root  264 Aug 20 12:22 LINKSYS22.nmconnection
sudo # Run command as superuser (needed to access protected files)
cat # Risplay the contents of a file
/etc/NetworkManager/system-connections/ # Directory storing saved network connections
LINKSYS22.nmconnection # Specific network configuration file for the Wi-Fi named LINKSYS22
(RPi) sudo cat /etc/NetworkManager/system-connections/LINKSYS22.nmconnection
[connection]
id=LINKSYS22
uuid=230dcf1d-70cf-4c1d-824e-c37b4cb752dc
type=wifi
interface-name=wlp4s0

[wifi]
hidden=true
ssid=LINKSYS22

[wifi-security]
key-mgmt=wpa-psk
psk=9SP28RFH38JE

[ipv4]
method=auto

[ipv6]
addr-gen-mode=stable-privacy
method=auto

[proxy]
Passwords
The grep command can be used to find any file that has a specific pattern or string
grep # Search for text patterns in files
-R # Recursive; search in current directory and all subdirectories
-i # Case-insensitive search (matches Pass, pass, PASS, etc.)
-e # Specifies the pattern to search
“pass\|user” # Pattern matches lines containing either “pass” OR “user”
. # Search starting from the current directory
(RPi) grep -Rie "pass\|user" .
./.bashrc:# set variable identifying the chroot you work in (used in the prompt below)
./.hidden_p: password=S8NR9VAFY1RN0GKNP61MIoT Security involves safeguarding Internet of Things (IoT) devices and the networks they connect to from unauthorized access, misuse, data breaches, and other cyber threats. IoT devices frequently operate with limited computing power, minimal built-in security, and are deployed in large numbers, making them attractive targets for attackers seeking to exploit vulnerabilities.
A major challenge is that many IoT devices are not adequately secured by default. Common issues include weak or hardcoded passwords, outdated firmware, insufficient encryption, and inadequate patching mechanisms. This exposes devices such as smart cameras, wearable technology, industrial sensors, and home automation systems to risks like malware infections, botnet recruitment, and data theft.
However, awareness of these risks is growing. In recent years, governments, industry groups, and standards organizations have implemented laws, regulations, security standards, and best practices to improve IoT security. Examples include requirements for stronger authentication, regular software updates, encrypted communication, and transparency about how data is collected and stored. These measures are expected to significantly reduce the number of insecure devices in the coming years.
Ultimately, IoT security is not just about protecting individual devices; it also involves safeguarding entire ecosystems from personal smart home networks to critical infrastructure across industries such as healthcare, transportation, and energy. As IoT adoption expands, robust security practices will be essential to maintain user trust and ensure the safe integration of billions of connected devices into daily life.
Initial IoT Devices Security Steps
After purchasing an IoT device with inadequate security measures, the risk of exploitation begins almost immediately. Studies have shown that unsecured IoT devices can be discovered and compromised by automated scanning tools or malicious actors within just a few minutes of being connected to the internet. Once compromised, these devices may be used in a botnet, subjected to surveillance, or manipulated in ways that threaten your data, privacy, and network security.
To mitigate these risks, it’s important to take proactive steps before and after connecting the device to the internet. Here are some key actions you can take:
- Check Manufacturer Information: Visit the manufacturer’s website for details on security features, firmware updates, and recommended setup practices.
- Review Security Advisories: Many vendors provide security advisories, patch releases, or guides to help configure devices more securely.
Practical Steps to Secure IoT Devices
- Change Default Passwords: Replace factory-set credentials with strong, unique passwords. Default passwords are widely known and are often the first thing attackers try.
- Update Firmware and Applications: Always install the latest updates to close known vulnerabilities. Enable automatic updates if supported to ensure security patches are applied promptly.
- Enable Logging: Turn on activity logs to track access attempts, configuration changes, or unusual behavior. Logs can help identify suspicious activity early.
- Disable Unused Features and Services: Shut down unnecessary services, such as remote management, Bluetooth, or Universal Plug and Play (UPnP). Each unnecessary feature is a potential entry point for attackers.
- Enable Multi-Factor Authentication (MFA): If available, require MFA for logins. This adds an extra layer of security even if your password is compromised.
- Block Unused Ports: Restrict network access by closing or filtering ports that the device does not use. This reduces exposure to external attacks.
- Connect to Wi-Fi Carefully: Place IoT devices on a separate network or VLAN rather than your main network. If one device is compromised, it will be harder for it to spread to other systems, such as laptops and phones. For some devices, consider not connecting them to the internet if connectivity isn’t essential.
- Review Application Permissions: Check what kind of data the device’s companion app collects (e.g., location, microphone, contacts) and restrict permissions to only what is necessary.
- Turn Devices Off When Not in Use: Shutting down devices when not in use minimizes their exposure to online threats.
- Monitor Device Activity: Use your router’s interface or a network monitoring tool to watch for unusual traffic patterns. Early detection of suspicious behavior can prevent larger compromises.
By implementing these steps, you create multiple layers of defense that significantly reduce the likelihood of exploitation of your IoT devices. This approach, often called “defense in depth,” ensures that if one safeguard fails, others remain in place to protect your devices and network.
Vulnerabilities vs Misconfiguration
A misconfiguration occurs when a system, application, or device is set up incorrectly, deviating from security best practices (e.g., using weak or hard-coded passwords, having permissive firewall rules, running unnecessary services, or exposing interfaces unnecessarily). While a vulnerability is a flaw or weakness in software, hardware, or protocols that can be exploited to compromise security (e.g., an outdated SSH version with known exploits or design flaws in interfaces).
Top IoT Vulnerabilities/Misconfiguration
- Weak or Hard-Coded Passwords
- Type: Misconfiguration
- Why: Choosing a weak password or leaving a default/hard-coded password is a configuration choice. These passwords can be easily guessed or cracked by attackers.
- Insecure Service
- Type: Could be vulnerability or misconfiguration, depending on context
- If the service itself has a flaw (like an old SSH version with a known exploit):
- Type: Vulnerability
- Why: The service contains inherent security flaws that attackers can exploit.
- If it’s running unnecessarily or open to the network without need:
- Type: Misconfiguration
- Why: Running unnecessary services or exposing them to the network without proper justification is a configuration error.
- If the service itself has a flaw (like an old SSH version with a known exploit):
- Type: Could be vulnerability or misconfiguration, depending on context
- Insecure Configuration
- Type: Misconfiguration
- Why: By definition, misconfiguration occurs when system settings are insecure (e.g., permissive firewall rules, open ports). These settings leave systems vulnerable to attacks.
- Insecure Interface
- Type: Usually a vulnerability, if the interface itself has design flaws
- If the interface itself has design flaws:
-
- Type: Vulnerability
-
- Why: Design flaws in interfaces can allow attackers to exploit vulnerabilities.
- If it’s exposed unnecessarily:
- Type: Misconfiguration
- Why: Exposing an interface that should be protected is a configuration error.
- If the interface itself has design flaws:
- Type: Usually a vulnerability, if the interface itself has design flaws
- Lack of Updates
- Type: Misconfiguration (or operational issue)
- Why: Not applying patches is a configuration/maintenance failure that leaves systems exposed to known vulnerabilities.
- Use Outdated Modules
- Type: Misconfiguration (or operational issue)
- Why: Similar to lack of updates; continuing to use old libraries or modules is a choice/configuration oversight. These outdated components may contain security flaws.
- Poor Physical Security
- Type: Misconfiguration (or security control failure)
- Why: Leaving hardware unprotected is a misconfiguration of physical security measures. Proper physical security controls are essential to prevent unauthorized access to devices.
By understanding these classifications and their underlying reasons, you can better identify and address potential security issues in your IoT devices, thereby enhancing overall system security.
Changing the default password
You can change the password of the user pi using the passwd command, keep in mind that the ssh will not drop
passwd # Linux command used to change the password of the currently logged-in user
(RPi) passwd
Changing password for pi.
Current password:
New password:
Retype new password:
passwd: password updated successfully
or, one-liner, if you use a different username, you need to change pi to your username, this will bypass the password security controls like password length
(RPi) # Indicates the command is executed on the Raspberry Pi device
echo # Prints the string to standard output
‘pi:P@ssw0rd!’ # String in the format username:password to update the password
| # Pipe operator; passes the output of echo as input to the next command
sudo # Run the command with superuser (administrator) privileges
chpasswd # Linux command that reads username:password pairs and updates user passwords
(RPi) echo 'pi:P@ssw0rd!' | sudo chpasswdForce user to change password next login
You can change the expiry information of the user pi using passwd --expire <user>, and use chage -l <user> to check the info
sudo # Run the command with superuser (administrator) privileges
passwd # Linux command used to change a user’s password
–expire # Option to immediately expire the user’s password, forcing a reset on next login
pi # The username of the account whose password will be expired (default Raspberry Pi user)
(RPi) sudo passwd --expire pi
passwd: password expiry information changed.
Then
chage # Linux command used to view or modify user password aging information
-l # Option to list the current password aging settings for a user
pi # The username of the account whose password aging information is being displayed
(RPi) chage -l pi
Last password change                    : password must be changed
Password expires                    : password must be changed
Password inactive                    : password must be changed
Account expires                        : never
Minimum number of days between password change        : 0
Maximum number of days between password change        : 99999
Number of days of warning before password expires    : 7
Remove nopasswd feature
The nopasswd feature allows a user to run the command as a sudo user without having to enter a password. This can be disabling or removing the 010_pi-nopasswd
sudo # Run the command with superuser (administrator) privileges
rm # Linux command to remove/delete files
/etc/sudoers.d/ # Directory containing additional sudo configuration files
010_* # Wildcard pattern matching all files starting with “010_” in the directory
(RPi) sudo rm /etc/sudoers.d/010_*Or,
sudo # Run the command with superuser (administrator) privileges
visudo # Open the sudoers file in a safe editor that checks for syntax errors before saving
sudo visudochange this
Defaults env_resetto
Defaults env_reset,timestamp_timeout=0Update & upgrade Raspberry Pi OS
Use the apt-get update to update the package sources list (It does not install or upgrade any package). Then, apt-get upgrade to install or upgrade the packages currently installed on the system from /etc/apt/sources.list
sudo # Run the command with superuser (administrator) privileges
apt-get # Linux package management command used to handle software packages
update # Option to refresh the local package index with the latest versions available from repositories
(RPi) sudo apt-get updateThen
sudo # Run the command with superuser (administrator) privileges
apt-get # Linux package management command used to handle software packages
update # Option to install the latest versions of all currently installed packages
(RPi) sudo apt-get upgradeOr one liner
sudo # Run the command with superuser (administrator) privileges
apt-get # Linux package management command used to handle software packages
update # Option to refresh the local package index with the latest versions available from repositories
&& # Logical AND operator; runs the next command only if the previous one succeeds
sudo # Run the following command with superuser privileges
apt-get # Linux package management command
upgrade # Option to install the latest versions of all currently installed packages
(RPi) sudo apt-get update && sudo apt-get upgradeEnable Logging
Debain OS 12 has a new way of logging using systemd-journald which it saves the logs in a centralized journal, you can access the logs using journalctl command, or you can replace that with classic logging using rsyslog
Reviewing the last 2 hours logs
journalctl # Linux command to query and display system logs managed by systemd
–since # Option to filter logs starting from a specific time
“2 hour ago” # Time specification; shows logs from the last 2 hours
(RPi) journalctl --since "2 hour ago"Classic Logs, install rsyslog
sudo # Run the command with superuser (administrator) privileges
apt-get # Linux package management command used to handle software packages
install # Option to install a specified package
rsyslog # System logging daemon package to collect and manage logs
(RPi) sudo apt-get install rsyslogStart the rsyslog service
sudo # Run the command with superuser privileges
systemctl # Command to control systemd services
start # Option to start the specified service immediately
rsyslog # The logging service to be started
(RPi) sudo systemctl start rsyslogEnable it when the system starts
sudo # Run the command with superuser privileges
systemctl # Command to control systemd services
enable # Option to configure the service to start automatically at boot
rsyslog # The logging service to be enabled
(RPi) sudo systemctl enable rsyslogReview the logs
tail # Linux command to view the last lines of a file
/var/log/syslog # Path to the system log file where rsyslog writes messages
(RPi) tail /var/log/syslogConfigure SSH key-based authentication
The best practice is not to use a password, but key-based authentication
First, you need to create ssh-key (Enter the needed info)
ssh-keygen # Generate a new SSH key pair (private + public) on the host machine
(Host) ssh-keygenYou need to copy the public key to the Raspberry Pi
cat # Command to display the contents of a file
~/.ssh/id_rsa.pub # Path to the host’s public SSH key
| # Pipe operator: send the output of the previous command to the next command
ssh # Command to connect to a remote machine via SSH
[email protected] # Remote username (pi) and host (jdoe.local)
‘ # Start of the remote command in single quotes
mkdir -p .ssh/ # On the remote machine: create the .ssh directory if it doesn’t exist (-p avoids errors)
&& # Logical AND: run next command only if previous succeeds
cat >> .ssh/authorized_keys # Append the incoming key to the authorized_keys file on the remote machine
‘ # End of the remote command
(Host) cat ~/.ssh/id_rsa.pub | ssh [email protected] 'mkdir -p .ssh/ && cat >> .ssh/authorized_keys'or
ssh-copy-id # Utility to copy a public SSH key to a remote host’s authorized_keys
-i # Option to specify the identity (public key file) to copy
~/.ssh/id_rsa.pub # Path to the host’s public SSH key to copy
[email protected] # Remote username (pi) and host (jdoe.local)
(Host) ssh-copy-id -i ~/.ssh/id_rsa.pub [email protected]ssh to the Pi
ssh # The SSH command used to securely connect to a remote machine
[email protected] # Specifies the remote username (pi) and hostname or IP address (jdoe.local)
(Host) ssh [email protected]You need to re-configure sshd
sudo # Run the following command with superuser (root) privileges
nano # Opens the nano text editor in the terminal
/etc/ssh/sshd_config # Path to the SSH server configuration file on the Pi
(RPi) sudo nano /etc/ssh/sshd_configChange the values of these (Remove # at the beginning) and save the file
PermitRootLogin no
PasswordAuthentication no
ChallengeResponseAuthentication no
UsePAM no
Now, you need to reload sshd service
sudo # Run the following command with superuser (root) privileges
systemctl # The systemd command to control system services
reload # Reload the service configuration without fully stopping the service
sshd # The SSH daemon (server) service
(RPi) sudo systemctl reload sshdIf you try to connect without a key, it will output Permission denied (publickey)
ssh # Command to connect to a remote machine via SSH
[email protected] # Remote username (pi) and hostname (jdoe.local)
-o # Option flag to specify a configuration setting for this SSH session
PubKeyAuthentication=no # Disable public key authentication for this session (forces password login)
(Host) ssh [email protected] -o PubKeyAuthentication=noCurrent Connections
You can check current connections using the netstat command
sudo # Run the following command with superuser (root) privileges
netstat # Network statistics tool that shows network connections, routing tables, interface stats, etc.
-t # Show TCP connections only
-u # Show UDP connections only
-p # Show the PID and name of the program using each socket
-l # Show only listening sockets (services waiting for connections)
-a # Show all sockets (both listening and non-listening)
-n # Show numerical addresses instead of resolving hostnames
(RPi) sudo netstat -tuplan
Active Internet connections (servers and established)
Proto Recv-Q Send-Q Local Address           Foreign Address         State       PID/Program name
tcp        0      0 0.0.0.0:22              0.0.0.0:*               LISTEN      569/sshd: /usr/sbin
tcp        0      0 127.0.0.1:631           0.0.0.0:*               LISTEN      1221/cupsd
tcp6       0      0 :::22                   :::*                    LISTEN      569/sshd: /usr/sbin
tcp6       0      0 ::1:631                 :::*                    LISTEN      1221/cupsd
tcp6       0    476 2601:1d3:xxxx:xxxx:c:22 2601:1d3:xxxx:xxx:52976 ESTABLISHED 2246/sshd: pi [priv
udp        0      0 0.0.0.0:5353            0.0.0.0:*                           357/avahi-daemon: r
udp        0      0 0.0.0.0:68              0.0.0.0:*                           477/dhcpcd
udp        0      0 0.0.0.0:631             0.0.0.0:*                           1223/cups-browsed
udp        0      0 0.0.0.0:56974           0.0.0.0:*                           357/avahi-daemon: r
udp6       0      0 :::5353                 :::*                                357/avahi-daemon: r
udp6       0      0 :::47980                :::*                                357/avahi-daemon: r
udp6       0      0 :::546                  :::*                                477/dhcpcd
Disable a service
You can disable a service using the systemctl command. Let’s say that you want to stop, then disable the xyz service. So, you will use systemctl stop xyz, then systemctl disable xyz
systemctl # The systemd command to manage services, units, and dependencies
–reverse # Shows reverse dependencies: which units depend on the specified unit
list-dependencies # List all dependencies (or reverse dependencies with –reverse) for the specified unit
cups.* # Target unit(s): all services matching the pattern “cups.*” (CUPS printing services)
(RPi) systemctl --reverse list-dependencies cups.*
cups.socket
● ├─cups.service
● └─sockets.target
●   └─basic.target
●     └─multi-user.target
●       └─graphical.target

cups.service
● └─cups-browsed.service

cups.path
● ├─cups.service
● └─multi-user.target
●   └─graphical.target
Next
sudo # Run the following command with superuser (root) privileges
systemctl # The systemd command to manage services, units, and their states
stop # Stop the specified service(s) or unit(s) immediately
cups # Target unit/service (CUPS, Common Unix Printing System)
cups.service # Explicitly stop the main CUPS service unit
cups.socket # Stop the socket unit for CUPS (handles incoming connections)
cups.path # Stop any path-based triggers for CUPS
(RPi) sudo systemctl stop cups cups.service cups.socket cups.pathThen
sudo # Run the following command with superuser (root) privileges
systemctl # The systemd command to manage services, units, and their states
disable # Disable the specified unit(s) from starting automatically at boot
cups # Target unit/service (CUPS, Common Unix Printing System)
cups.service # Explicitly stop the main CUPS service unit
cups.socket # Stop the socket unit for CUPS (handles incoming connections)
cups.path # Stop any path-based triggers for CUPS
(Physical or VM) sudo systemctl disable cups cups.service cups.socket cups.pathBlock a Port or IP
You can configure the host-based firewall ufw in Raspberry Pi OS, which is a frontend for iptables. ufw may need to be installed. Be extra careful, any mistake may block your connection. To check the list of apps, you can use sudo ufw app list
Example (Enabling only SSH)
Install the UFW and iptables
sudo # Run the following command with superuser (root) privileges
apt-get # Debian/Ubuntu package manager command (handles installing, updating, removing packages)
install # Tells apt-get to install the following package(s)
ufw # Installs UFW (Uncomplicated Firewall) for easier firewall management
iptables # Installs iptables, the low-level Linux firewall tool used by UFW and for custom rules
Deny all incoming connection to the systemsudo # Run the following command with superuser (root) privileges
ufw # Uncomplicated Firewall command-line tool
default # Modify default firewall policy
deny # Action to take on incoming connections (block)
incoming # Applies the action to incoming traffic
(RPi) sudo ufw default deny incomingsudo # Run the following command with superuser (root) privileges
ufw # Uncomplicated Firewall command-line tool
default # Modify default firewall policy
allow # Permit traffic (action to take)
outgoing # Apply this action to outgoing connections
(RPi) sudo ufw default allow outgoingsudo # Run the following command with superuser (root) privileges
ufw # Uncomplicated Firewall command-line tool
allow # Permit traffic (action to take)
ssh # Service name to allow (default TCP port 22, used for remote SSH connections)
(RPi) sudo ufw allow sshsudo # Run the following command with superuser (root) privileges
ufw # Uncomplicated Firewall command-line tool
enable # Turn on the firewall with all the currently defined rules
(RPi) sudo ufw enableTo check the UFW logs
sudo # Run the following command with superuser (root) privileges
ufw # Uncomplicated Firewall command-line tool
status # Display the current status of the firewall (active or inactive)
verbose # Show detailed information, including default policies and all configured rules
(RPi) sudo ufw status verboseThen
sudo # Run the following command with superuser (root) privileges
less # Open a file in a scrollable, read-only pager (you can navigate with arrows, page up/down)
/var/log/ufw* # Path to all UFW log files (the asterisk * includes ufw.log and any rotated logs like ufw.log.1)
(RPi) sudo less /var/log/ufw*Disable Bluetooth (not applicable)
If the Bluetooth feature is not needed, you can disable it
sudo # Run the following command with superuser (root) privileges
echo # Print the text or string provided to standard output
“dtoverlay=disable-bt” # The text/string to append; in this case, a device tree overlay that disables Bluetooth
>> # Append operator: adds the output to the end of the specified file without overwriting it
/boot/config.txt # The target file where the string will be appended (Raspberry Pi boot configuration file)
(RPi) sudo echo "dtoverlay=disable-bt" >> /boot/config.txtDisable WiFi (not applicable)
If the WiFi feature is not needed, you can disable it
sudo # Run the following command with superuser (root) privileges
echo # Print the text or string provided to standard output
“dtoverlay=disable-wifi” # The text/string to append; in this case, a device tree overlay that disables Wi-Fi
>> # Append operator: adds the output to the end of the specified file without overwriting it
/boot/config.txt # The target file where the string will be appended (Raspberry Pi boot configuration file)
(RPi) sudo echo "dtoverlay=disable-wifi" >> /boot/config.txtBackup
If you want to backup a target folder, you can use the rsync command
rsync # Remote file synchronization tool for copying files and directories efficiently
-avzPi # Combined options: (a) Archive mode: preserves symbolic links, permissions, timestamps, etc. (v) Verbose: shows detailed output of what is being copied. (z) Compress: compress data during transfer for efficiency. (P) Partial + progress: keeps partially transferred files and shows progress. (i) Itemize changes: shows a summary of what changes were made to files
-e ssh # Specifies the remote shell to use (SSH) for secure transfer
[email protected]:/home/ # Source: user ‘pi’ on host ‘192.168.10.2’, path ‘/home/’
/destination # Destination path on the local host where files will be copied
(Host) rsync -avzPi -e ssh [email protected]:/home/ /destinationIf you want to do a full backup, it’s recommended that you do it on a running system, not remotely (You can use the dd command with gzip).
To perform a full backup
sudo # Run the following command with superuser (root) privileges
dd # Disk dump tool: copies raw data from one location to another
if=/dev/mmcblk0 # Input file: the entire SD card (mmcblk0 is the main storage device for Raspberry Pi)
bs=4M # Block size: read/write 4 megabytes at a time (improves performance)
status=progress # Show ongoing progress while copying
| # Pipe operator: send the output of dd to the next command
gzip # Compress the raw disk image using gzip
> pi.gz # Redirect the compressed output to a file named pi.gz
(RPi) sudo dd if=/dev/mmcblk0 bs=4M status=progress | gzip > pi.gz To restore from a full backup
gunzip # Decompress gzip-compressed files
–stdout # Output decompressed data to standard output (do not create a file)
> pi.gz # Redirect standard output to pi.gz (this actually overwrites pi.gz instead of sending to dd)
| # Pipe operator: send output from left side to right side (does not work correctly with ‘> pi.gz’)
sudo # Run the following command with superuser (root) privileges
dd # Disk copy tool: writes raw data to a device
of=/dev/mmcblk0 # Output file: the SD card device
bs=4M # Block size: write 4 MB at a time
status=progress # Show ongoing progress while writing
(RPi) gunzip --stdout > pi.gz | sudo dd of=/dev/mmcblk0 bs=4M status=progress]]>
Also known as a system-on-a-chip (SoC) or single-board computer (SBC), this type of device is a compact, integrated unit that combines most of the essential components of a traditional computer onto a single circuit board or chip. It typically includes a central processing unit (CPU), memory, input/output interfaces, and, sometimes, specialized components such as graphics processors or networking modules. These computers can perform various tasks and run full operating systems, making them suitable for a wide range of applications. While they are used in general computing, they are often optimized for efficient data processing, supporting embedded systems, mobile devices, Internet of Things (IoT) applications, and other environments where resource efficiency is crucial.
Example
- Raspberry Pi 4: A single-board computer
- VisionFive 2: A high-performance quad-core RISC-V single board computer
Uses
- Desktop: A desktop computer is designed for use at a fixed location, usually on a desk or workstation. It offers high processing power, storage, and connectivity, making it suitable for tasks such as office work, programming, gaming, media editing, and general-purpose computing. Desktops are not portable and typically rely on external monitors, keyboards, and mice.
- Web Server: A web server is a system specifically configured to host, manage, and deliver web content over the Internet or intranet. It processes HTTP requests, serves webpages, files, and applications, and may include features like security, load balancing, and database integration. Web servers are essential for websites, web applications, and online services.
- Raspberry Pi Oscilloscope: A Raspberry Pi oscilloscope is a system built using a Raspberry Pi and additional electronics to display and analyze the waveform of electrical signals. It allows users to measure voltage over time, detect signal patterns, and troubleshoot circuits. This setup is widely used in electronics labs, DIY projects, and hobbyist experimentation.
- Home Automation System: A home automation system controls electronic devices and appliances within a home, such as lighting, heating, security cameras, smart locks, and entertainment systems. These systems enhance convenience, energy efficiency, and security, often managed via mobile apps, voice assistants, or automated schedules.
- Media Server: A media server stores, manages, and delivers media content (such as videos, music, and images) to other devices over a network. It can stream content to smart TVs, computers, or mobile devices and may include features like transcoding, library management, and remote access.
- Raspberry Pi Retro Gaming Machine: A Raspberry Pi-based system that emulates and runs classic video games from vintage consoles and computers. These systems are popular for nostalgic gaming, hobbyist projects, and educational purposes, enabling play without the original hardware.
- Wi-Fi Repeater: A Wi-Fi repeater extends the coverage area of an existing Wi-Fi network by receiving, amplifying, and retransmitting the signal. It helps eliminate dead zones, improve connectivity, and increase network reach in homes, offices, and public spaces.
- VPN Server: A VPN server hosts and delivers Virtual Private Network (VPN) services, enabling users to securely connect to a network over the internet. VPN servers encrypt traffic.
Raspberry Pi 4 Model B 8G
A single-board computer (SBC) that was officially introduced by the Raspberry Pi Foundation in 2012. The concept for this device dates back to 2006, when the foundation began prototyping to create a low-cost, accessible tool to help students and beginners learn about computing and programming. The primary goal was educational—to provide schools, hobbyists, and learners with an affordable way to explore coding, computer science, and electronics without the expense of traditional desktop computers.
Over time, the Raspberry Pi has grown far beyond its original purpose. Today, it is widely used not only in classrooms but also by hobbyists, researchers, and professionals worldwide. Its compact size, affordability, and versatility make it a popular choice for developing and testing software, building prototypes, automating tasks, and even deploying small-scale servers or Internet of Things (IoT) projects.
Despite its popularity and community-driven ecosystem, the Raspberry Pi is not open-source hardware. The design diagrams are copyrighted, and the hardware is developed and maintained under the foundation’s control.
The Raspberry Pi’s evolution demonstrates how a tool originally designed for education has become a powerful platform for innovation, experimentation, and real-world applications, all while maintaining its accessibility and low cost.
Raspberry Pi 4 Model B 8G Specifications
- Release: 24 June 2019
- CPU Speed: 4× Cortex-A72 1.5 GHz or 1.8 GHz
- RAM: 8 GB
- USB 2: 2
- USB 3: 2
- USB OTG: 1 (Power USB-C)
- HDMI: 2× HDMI (rev 2.0) via Micro-HDMI
- Ethernet: 10/100/1000 Mbit/s
- Wifi: b/g/n/ac dual band 2.4/5 GHz
- Bluetooth: 5.0
Raspberry Pi 4 Model B 8G – Front-Side

Raspberry Pi 4 Model B 8G – Back-Side

General Purpose Input/Output Pins
GPIO (General Purpose Input/Output) pins are versatile connectors found on microcontrollers, single-board computers such as the Raspberry Pi and Arduino, and other electronic devices. These pins enable the device to interact with the external environment by sending or receiving electrical signals. GPIO pins can be programmed to operate as inputs (to read signals) or outputs (to drive signals), making them highly adaptable for a wide range of applications.
Digital pins
Digital pins are input/output (I/O) interfaces on microcontrollers and single-board computers that can be used to read or set specific voltage levels. They operate using binary states, meaning they can recognize or output only two distinct conditions: LOW or HIGH.
For example, when controlling an LED, setting a digital pin to LOW turns the LED off, while setting it to HIGH turns the LED on. These states correspond to specific voltage levels. Typically, any voltage level above approximately 2.5V is interpreted as HIGH, while anything below this threshold is considered LOW. The exact threshold values may vary depending on the specific microcontroller or board being used.
In practice, digital pins are not limited to controlling LEDs; they are widely used for tasks such as reading the state of a button (pressed or not), controlling relays, sending signals to sensors, or driving other electronic components. Since digital pins can only represent two states, they are best suited for on/off or true/false conditions, unlike analog pins, which can represent a continuous range of values.
Analog pins
Analog pins are input/output (I/O) interfaces on microcontrollers and single-board computers that can read a continuous range of voltage levels, rather than just two discrete states like digital pins. Typically, they can measure voltages between 0V and 5V, though the range may vary depending on the board. This makes analog pins especially useful for applications that require precise or variable input values.
By connecting a potentiometer (a variable resistor) to an analog pin, the microcontroller can measure different voltage levels based on the knob’s position. Turning the knob changes the resistance, which in turn alters the voltage being read, producing a value that can range from 0 to 5V. This allows the program to interpret a wide spectrum of inputs rather than just “on” or “off.”
Internally, analog pins use an Analog-to-Digital Converter (ADC) to translate the continuous voltage into a digital value that the processor can understand. For instance, with a 10-bit ADC, the input voltage range (0–5V) is divided into 1024 discrete steps, producing values from 0 to 1023. This enables fine-grained measurement of signals that vary over time, such as light intensity (from a photoresistor), temperature (from a sensor), or sound levels (from a microphone).
Some analog pins can also be configured for output, but this functionality is limited. Instead of producing a true continuous voltage, they typically use Pulse Width Modulation (PWM) to simulate analog signals. PWM rapidly switches a digital pin between HIGH and LOW states at different duty cycles, creating a variable-voltage effect. This allows controlling devices such as motors, LEDs (for brightness control), or audio output.
Analog pins are essential whenever your project requires working with gradual changes or input value ranges, offering flexibility that digital pins alone cannot provide. They are ideal for tasks involving sensors and actuators that require precise control and measurement.

A microcontroller is a compact, integrated computing device designed to perform specific, dedicated tasks rather than general-purpose computing. Unlike a typical computer, a microcontroller does not run a full operating system; instead, it executes a single program or set of instructions stored in its memory to control or interact with hardware devices. Microcontrollers typically include a processor (CPU), memory (RAM and ROM/flash), and input/output peripherals all on a single chip, enabling direct interface with sensors, actuators, displays, motors, and other electronics.
Microcontrollers are widely used in embedded systems such as home appliances, automotive electronics, robotics, industrial machines, and IoT devices. They excel in environments where reliability, low power consumption, and real-time control are crucial. This integration enables microcontrollers to operate efficiently and reliably with minimal external components.
Valued for their low power consumption, cost-effectiveness, compact size, and ability to perform deterministic, real-time operations, microcontrollers form the backbone of countless modern electronic devices and systems.
Examples
- Arduino Uno: An open-source micro-controller platform
- Raspberry Pi Pico: A low-cost, high-performance micro-controller
Uses
- A sunrise alarm clock is designed to wake users gradually by simulating the natural light of a sunrise. Instead of using a sudden burst of light, it gradually increases the light intensity to mimic the morning sunlight. This can help regulate circadian rhythms, improve mood, and make waking up more natural and gentle. Some sunrise alarm clocks also offer soothing sounds, such as birdsong or soft music, to complement the light.
- A weather monitoring system collects, analyzes, and reports various weather data, including temperature, humidity, air pressure, wind speed, and rainfall. These systems can send notifications or alerts about current or forecasted weather conditions. They are used in homes, farms, schools, and research projects to help people make informed decisions about daily activities, agriculture, and safety.
Arduino Uno Specifications
- Release: 2010
- Chip: ATmega328P
- EEPROM: 1 KB
Arduino Uno – Front-Side
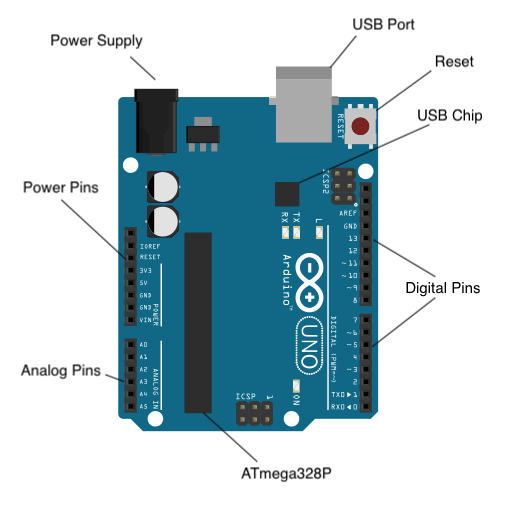
General Purpose Input/Output Pins
GPIO (General Purpose Input/Output) pins are versatile connectors found on microcontrollers, single-board computers such as the Raspberry Pi and Arduino, and other electronic devices. These pins enable the device to interact with the external environment by sending or receiving electrical signals. GPIO pins can be programmed to operate as inputs (to read signals) or outputs (to drive signals), making them highly adaptable for a wide range of applications.
Digital pins
Digital pins are input/output (I/O) interfaces on microcontrollers and single-board computers that can be used to read or set specific voltage levels. They operate using binary states, meaning they can recognize or output only two distinct conditions: LOW or HIGH.
For example, when controlling an LED, setting a digital pin to LOW turns the LED off, while setting it to HIGH turns the LED on. These states correspond to specific voltage levels. Typically, any voltage level above approximately 2.5V is interpreted as HIGH, while anything below this threshold is considered LOW. The exact threshold values may vary depending on the specific microcontroller or board being used.
In practice, digital pins are not limited to controlling LEDs; they are widely used for tasks such as reading the state of a button (pressed or not), controlling relays, sending signals to sensors, or driving other electronic components. Since digital pins can only represent two states, they are best suited for on/off or true/false conditions, unlike analog pins, which can represent a continuous range of values.
Analog pins
Analog pins are input/output (I/O) interfaces on microcontrollers and single-board computers that can read a continuous range of voltage levels, rather than just two discrete states like digital pins. Typically, they can measure voltages between 0V and 5V, though the range may vary depending on the board. This makes analog pins especially useful for applications that require precise or variable input values.
By connecting a potentiometer (a variable resistor) to an analog pin, the microcontroller can measure different voltage levels based on the knob’s position. Turning the knob changes the resistance, which in turn alters the voltage being read, producing a value that can range from 0 to 5V. This allows the program to interpret a wide spectrum of inputs rather than just “on” or “off.”
Internally, analog pins use an Analog-to-Digital Converter (ADC) to translate the continuous voltage into a digital value that the processor can understand. For instance, with a 10-bit ADC, the input voltage range (0–5V) is divided into 1024 discrete steps, producing values from 0 to 1023. This enables fine-grained measurement of signals that vary over time, such as light intensity (from a photoresistor), temperature (from a sensor), or sound levels (from a microphone).
Some analog pins can also be configured for output, but this functionality is limited. Instead of producing a true continuous voltage, they typically use Pulse Width Modulation (PWM) to simulate analog signals. PWM rapidly switches a digital pin between HIGH and LOW states at different duty cycles, creating a variable-voltage effect. This allows controlling devices such as motors, LEDs (for brightness control), or audio output.
Analog pins are essential whenever your project requires working with gradual changes or input value ranges, offering flexibility that digital pins alone cannot provide. They are ideal for tasks involving sensors and actuators that require precise control and measurement.
