[Consultation and remote installation available upon request.]
This is a complete guide for securing a ArchLinux server for OpenClaw AI bot and other web applications. https://archlinux.org/ is a popular distribution of Linux due to its flexibility and continuous updates. You get lots of control and since Arch Linux is a rolling release distribution model compared to Debian, Ubuntu, Linux Mint, and Fedora, follow the point release model. Most importantly Arch doesn’t install anything by default. You’re installing components one-by-one for your specific needs.
Choose this for a learning experience and easier updates. Don’t choose it if you want a solid stable Linux version for a production server. I have another guide for that.
It’s more like a DIY approach and having Archwiki is known to be the most comprehensive reference for Linux there is. Here’s what’s covered in detail:
Table of Contents
- Initial Server Setup
- Install Essential Tools
- User Management
- SSH Keys
- SSH Hardening
- Firewall Configuration
- Install Web Servers
- Web Server Security
- Intrusion Prevention
- Vulnerability Audit
Initial Server Setup
You can use OpenClaw on a VPS but that costs a monthly fee. You should install it on a separate computer you already own and at a minimum, alternative option is to use a virtual machine on your main computer. The reason is that OpenClaw needs permissions to your computer’s file system far beyond what a browser uses so knowledge of network security is critical. OpenClaw uses costly API keys and needs many system privileges to be more effective.
I’m using a Mac so you can certainly run OpenClaw inside virtual machine software called UTM. You can download the UTM here for free and the Arch Linux package here from the gallery page. Provide the UTM the default configuration such as 2gb (8gb is recommended but no less than 4gb) of memory and shared network to get going. Start the instance and you’ll get root access as the username root. We’re going to install most of the packages as the root user and then switch to a more secure user for future maintenance. If you don’t have linux experience, this guide will try to help you understand the setup process.
Update System Packages
We will be using the pacman command which is the Arch Linux main package installer. Other Linux distributions use apt-get and dnf. All the commands included in this guide may not be necessary for your purpose but it’s better to include as many as feasible for OpenClaw to use. Here are commonly used pacman commands which you don’t need to memorize but you will be using often:
Important pacman commands
| Command | Purpose |
|---|---|
pacman -Syu | Update system |
pacman -S [package] | Install package |
pacman -R [package] | Remove package |
pacman -Rs [package] | Remove with dependencies |
pacman -Ss [keyword] | Search for package |
pacman -Q | List installed packages |
pacman -Qi [package] | Show package info |
pacman -Qdt | List orphan packages |
pacman -Sc | Clean package cache |
pacman -Qkk | Verify package integrity |
Please note that this setup already runs as a root (full-privileged) user in Arch Linux. Alternatively all commands can be prefixed with the word sudo to give privileged to non-root users. For example: sudo pacman. Going forward we will omit sudo in the command snippets since we are using root.
Since the date of publishing this post and your installation date can vary, your virtual machine image (VM) might have older packages so let’s update them to the current one since security relies on the latest updates which include security patches.
# Update package database and upgrade all packages
pacman -Syu
Side note: Updates the local package database and upgrades all installed packages. In ArchLinux, partial upgrades are not supported – always perform full system upgrades.
# Refresh package database only
pacman -Sy
Install Essential Tools
# Install essential utilities
pacman -S --needed base-devel vim wget curl git htop mlocate
Installs essential development tools and utilities. These will likely be used to clawbot and definitely needed if you want to work with code and files from the internet. --needed skips packages that are already installed.
# Install network utilities
pacman -S net-tools dnsutils whois
Installs network diagnostic tools including netstat, dig, and whois. These are helpful for troubleshooting the network and getting internet protocol (IP) address information.
Set Hostname
# Set the server hostname
sudo hostnamectl set-hostname openclaw
Sets the system hostname which is easier to remember than an IP address. This identifies your server on the network when you want to add more machines to the network and refer to them by name.
# Verify hostname
hostnamectl

# Update hosts file adding your hostname
sudo vim /etc/hosts
127.0.1.1 openclaw
Configure Timezone
# Set timezone
sudo timedatectl set-timezone UTC
Sets system timezone to UTC (recommended for servers). UTC avoids daylight saving time issues. This is necessary when dealing with databases and cron jobs. Cron jobs are automated commands which run at specific intervals so if you explicitly set the timezone, you will have an easier time knowing when cron jobs execute. Querying databases for info when it’s time-related, the timezone also becomes critical to get the right data.
# List available timezones
timedatectl list-timezones
# Enable NTP time synchronization
sudo timedatectl set-ntp trueThis is an extra explicit step for network timing. Enables automatic time synchronization using systemd-timesyncd. Network Time Protocol (NTP) is an internet protocol used to synchronize with computer clock time sources in a network.
# Verify time settings
timedatectl status
Output
               Local time: Tue 2027-03-10 00:39:02 UTC
           Universal time: Tue 2027-03-10 00:39:02 UTC
                 RTC time: Tue 2027-03-10 00:39:56
                Time zone: UTC (UTC, +0000)
System clock synchronized: yes
              NTP service: active
          RTC in local TZ: no
User Management
Create Non-Root User
You don’t want to run OpenClaw as a root user because that is considered a security concern. Always set a secondary user to run as clawbot or any other automated software because you are setting the explicit controls for that user. This helps in tracking issues and logging history which is also important for any system. Use clawbot or any name of your choice for the username.
# Create new user with home directory and default groups
sudo useradd -m -G wheel,storage,power -s /bin/bash clawbot-m: Creates home directory-G: Adds to supplementary groups (wheel for sudo)-s: Sets default shell
# Set user password
sudo passwd clawbot
Configure Sudo Access
Since using Arch Linux, the sudo package is not installed by default. Sudo stands for “substitute user and do”.
# Install sudo (if not installed)
sudo pacman -S sudo
Output
resolving dependencies...
looking for conflicting packages...

Package (1)  Old Version  New Version  Net Change

core/sudo    1.9.17.p2-2  1.9.17.p2-2    0.00 MiB

Total Installed Size:  8.72 MiB
Net Upgrade Size:      0.00 MiB

:: Proceed with installation? [Y/n] y
(1/1) checking keys in keyring                                   [------------------------------------] 100%
(1/1) checking package integrity                                 [------------------------------------] 100%
(1/1) loading package files                                      [------------------------------------] 100%
(1/1) checking for file conflicts                                [------------------------------------] 100%
(1/1) checking available disk space                              [------------------------------------] 100%
:: Processing package changes...
(1/1) reinstalling sudo                                          [------------------------------------] 100%
:: Running post-transaction hooks...
(1/4) Creating temporary files...
(2/4) Reloading system manager configuration...
(3/4) Restarting marked services...
(4/4) Arming ConditionNeedsUpdate...
---
# Edit sudoers file safely
sudo EDITOR=vim visudoThese changes will allow OpenClaw to run your computer as server using nginx and httpd. It’s not necessary if you don’t want to use httpd or nginx. Opens sudo configuration with syntax validation. Never edit /etc/sudoers directly!
Uncomment this line:
%wheel ALL=(ALL:ALL) ALLAdd specific permissions:
# Allow user to run specific commands without password
clawbot ALL=(ALL) NOPASSWD: /usr/bin/systemctl restart nginx
clawbot ALL=(ALL) NOPASSWD: /usr/bin/systemctl restart httpd
Set Up SSH Keys
SSH keys are currently the most secure way to login to your server instance when using a VPS or a remote server. It’s not needed if you’re using a VM on your computer or a secondary computer that’s a dedicated server for personal use. The SSH key is just a lock and key analogy as strings made using cryptography. This requires a hidden folder called ssh in your home directory.
# Switch to new user
su - clawbot

# Create SSH directory
mkdir ~/.ssh
chmod 700 ~/.ssh
Switch user to clawbot
[root@alarm ~]# su - clawbot
[clawbot@openclaw ~]$
# Generate SSH key pair (run on your local machine)
ssh-keygen -t ed25519 -C "[email protected]"This is the common secure type used for keys. Generates Ed25519 SSH key pair, which is more secure and faster than RSA. The actual key will look similar to this: jvTEGMLzoastwqlLTKG8uAudZKUcM5xDBr+Pl8wZKEw
Output
Generating public/private ed25519 key pair.
Enter file in which to save the key (/home/clawbot/.ssh/id_ed25519):
Enter passphrase for "/home/clawbot/.ssh/id_ed25519" (empty for no passphrase):
Enter same passphrase again:
Your identification has been saved in /home/clawbot/.ssh/id_ed25519
Your public key has been saved in /home/clawbot/.ssh/id_ed25519.pub
The key fingerprint is:
SHA256:jvTEGMLzoastwqlLTKG8uAudZKUcM5xDBr+Pl8wZKEw [email protected]
The key's randomart image is:
+--[ED25519 256]--+
|..o              |
| + o             |
| E= + o          |
|= .= = =         |
|+=./ = =         |
|o+% X . o        |
|o= =             |
|=o.              |
+----[SHA256]-----+
[clawbot@openclaw ~]$
# Copy SSH public key to server (run on your local machine)
ssh-copy-id clawbot@server-ip# Set proper permissions (on server)
chmod 600 ~/.ssh/authorized_keysSSH Hardening
Hardening is a more stringent process for securing server communication and ports. This process is akin to setting a whitelist vs a blacklist.
Configure SSH Daemon
# Backup SSH configuration
sudo cp /etc/ssh/sshd_config /etc/ssh/sshd_config.backup

# Edit SSH configuration
sudo vim /etc/ssh/sshd_config
Apply these security settings:
# Change default SSH port (choose a port between 1024-65535)
Port 2222

# Disable root login via SSH
PermitRootLogin no

# Enable public key authentication
PubkeyAuthentication yes

# Disable password authentication (only after SSH keys are set up!)
PasswordAuthentication no

# Disable empty passwords
PermitEmptyPasswords no

# Limit authentication attempts
MaxAuthTries 3

# Set login grace time (seconds)
LoginGraceTime 60

# Enable strict modes
StrictModes yes

# Configure keepalive
ClientAliveInterval 300
ClientAliveCountMax 2

# Disable X11 forwarding
X11Forwarding no

# Restrict to specific users or groups
AllowUsers clawbot username2
# or
AllowGroups ssh-users

# Use only SSH protocol 2 (default in modern systems)
Protocol 2

# Disable GSSAPI authentication
GSSAPIAuthentication no

# Disable DNS lookups
UseDNS no

# Enable PAM
UsePAM yes

# Configure SFTP subsystem
Subsystem sftp /usr/lib/ssh/sftp-server
WARNING! Disabling root login and forgetting your SSH key will require you to delete your server instance and start over. These settings harden SSH against common attacks. Most important: disable root login when using a VPS. This is not necessary on your VM or home computer.
# Test SSH configuration before restarting
sudo sshd -t
No output means the configuration is valid.
# Restart SSH service
sudo systemctl restart sshd
At this point, we have completed to server access security part after restarting the SSH daemon (sshd). It applies the new SSH configuration. Keep your current session open until you verify the new connection works. From here we configure the security for incoming server traffic.
Firewall Configuration
UFW (Uncomplicated Firewall)
# Install UFW
sudo pacman -S ufw
UFW provides a simpler interface for managing firewall rules. It is the newer and simplified firewall and is necessary if you want to run any web applications on your server.
# Set default policies
sudo ufw default deny incoming
sudo ufw default allow outgoing
# Allow SSH (CRITICAL - do this first!)
sudo ufw allow 2222/tcp comment 'SSH'# Allow HTTP and HTTPS
sudo ufw allow 80/tcp comment 'HTTP'
sudo ufw allow 443/tcp comment 'HTTPS'# Rate limit SSH connections
sudo ufw limit 2222/tcp comment 'SSH rate limit'# Allow from specific IP only
sudo ufw allow from 192.168.1.100 to any port 2222 proto tcp# Enable UFW
sudo ufw enable# Check status
sudo ufw status verbose# Enable UFW service
sudo systemctl enable ufw
sudo systemctl start ufwWeb Server Security
OpenClaw can use Apache as a reverse proxy among other purposes so we should install php-apache and nginx which are both server software for supplying files to inbound server requests. I’ve included sudo in the commands from here since we are no longer using the root user.
Apache Security Hardening
# Install Apache
sudo pacman -S apache
# Install PHP (if needed)
sudo pacman -S php php-apache# Edit Apache configuration
sudo vim /etc/httpd/conf/httpd.conf# Test configuration
sudo apachectl configtest# Start and enable Apache
sudo systemctl start httpd
sudo systemctl enable httpd
Nginx Security Hardening
# Install Nginx
sudo pacman -S nginx
# Start and enable Nginx
sudo systemctl start nginx
sudo systemctl enable nginx
Intrusion Prevention
In this part, we protect our server from explicit login and port scanning attacks. No matter if your server get no traffic or lots of traffic, inevitably somebody will try to hack it so Fail2Ban will prevent or at least mitigate this attack. Make sure to change the email address to your own if you want to get notifications.
Install and Configure Fail2Ban
# Install Fail2Ban
sudo pacman -S fail2ban
# Create local configuration
sudo cp /etc/fail2ban/jail.conf /etc/fail2ban/jail.local
sudo vim /etc/fail2ban/jail.local[DEFAULT]
# Ban duration (1 hour)
bantime = 3600
# Time window for counting failures
findtime = 600
# Number of failures before ban
maxretry = 5
# Backend for log monitoring
backend = auto
# Email notifications (optional)
destemail = [email protected]
sendername = Fail2Ban
mta = sendmail
# Action on ban
action = %(action_mwl)s
[sshd]
enabled = true
port = ssh,2222
filter = sshd
logpath = /var/log/auth.log
maxretry = 3
bantime = 3600
[apache-auth]
enabled = true
port = http,https
filter = apache-auth
logpath = /var/log/httpd/*error_log
maxretry = 5
[apache-badbots]
enabled = true
port = http,https
filter = apache-badbots
logpath = /var/log/httpd/*access_log
[nginx-http-auth]
enabled = true
port = http,https
filter = nginx-http-auth
logpath = /var/log/nginx/error.logSave and exit the file then restart the fail2ban process.
```bash
# Start and enable Fail2Ban
sudo systemctl start fail2ban
sudo systemctl enable fail2ban
```

```bash
# Check status
sudo fail2ban-client status
```

```bash
# Check SSH jail
sudo fail2ban-client status sshd
At this point we have installed and configured the security needed for our server so let’s run an audit by installed another package. We can also included additional precautions to streamline updates and reduce manual maintenance to our server. These are optional depending on how much time you want to spend with your server. Arch-audit is the package used so we will set it to run daily at midnight. If this is your VM or personal sever, the cron job is not necessary.
Check for Security Vulnerabilities
# Install arch-audit
sudo pacman -S arch-audit
# Check for vulnerable packages
arch-audit# Show only upgradable vulnerable packages
arch-audit --upgradable# Create daily security check cron job
sudo crontab -e# Daily security check at midnight
0 0 * * * /usr/bin/arch-audit | mail -s "Arch Security Updates" [email protected]OUTPUT
resolving dependencies...
looking for conflicting packages...

Package (1)       Old Version  New Version  Net Change

extra/arch-audit  0.2.0-4      0.2.0-4        0.00 MiB

Total Installed Size:  4.29 MiB
Net Upgrade Size:      0.00 MiB

:: Proceed with installation? [Y/n] y
(1/1) checking keys in keyring                                   [------------------------------------] 100%
(1/1) checking package integrity                                 [------------------------------------] 100%
(1/1) loading package files                                      [------------------------------------] 100%
(1/1) checking for file conflicts                                [------------------------------------] 100%
(1/1) checking available disk space                              [------------------------------------] 100%
:: Processing package changes...
(1/1) reinstalling arch-audit                                    [------------------------------------] 100%
:: Running post-transaction hooks...
(1/3) Reloading system manager configuration...
(2/3) Restarting marked services...
(3/3) Arming ConditionNeedsUpdate...
[clawbot@openclaw ~]$ arch-audit
libxml2 is affected by denial of service. High risk!
pam is affected by arbitrary filesystem access. High risk!
apr is affected by information disclosure. Medium risk!
coreutils is affected by information disclosure. Medium risk!
nginx is affected by insufficient validation. Medium risk!
openssl is affected by arbitrary command execution, certificate verification bypass. Medium risk!
perl is affected by signature forgery, directory traversal, unknown. Medium risk!
systemd is affected by information disclosure. Medium risk!
wget is affected by information disclosure. Medium risk!
SUMMARY
Let’s summarize what we did with a checklist:
- System packages fully updated (
pacman) - Non-root user created with sudo access
- SSH key-based authentication configured
- SSH root login disabled
- SSH password authentication disabled
- SSH port changed from default 22
- Firewall enabled and configured
- Only necessary ports open (SSH, HTTP, HTTPS)
- Web server security headers configured
- Fail2Ban installed to prevent login hacks
- Security auditing with arch-audit
This ends the guide on security configuration for Arch Linux servers for you to run OpenClaw. ArchLinux requires more manual configuration than other distributions, but offers greater control and understanding of your system. Regular monitoring and updates are essential to maintain security which we will describe in another post. Always test changes in development before applying to production.
Additional ArchLinux Resources
The Arch Wiki is an excellent resource for detailed configuration information and troubleshooting.
- Arch Wiki Security: https://wiki.archlinux.org/title/Security
- Arch Wiki Firewall: https://wiki.archlinux.org/title/Firewall
- Arch Wiki SSH Keys: https://wiki.archlinux.org/title/SSH_keys
- ArchWiki Web Server: https://wiki.archlinux.org/title/Web_server
I used to be like you, a non-believer, and molded by years of “product advertising” which compelled me to buy things in order to improve myself. I freed myself from this mentally when I journeyed throughout the world engaging my mind with foreign languages. I learned to speak and understand 7 languages. If I have this capability, how can I apply it to learning and memorizing other things? It was not easy but I debunked the “memory loss” myth. In this article, I will explain how I unblocked my memory’s potential using key memory systems.
Just a heads up, this is not a type of training that will immediately make you remember everything you see, hear and read. It is specifically about memorizing intentional things like key concepts, dates, lists, and figures. Memory advancement can be progressive and increase through training just as it can decrease through inactivity, anxiety, and poor health. These things are related so for the most optimal memory gains, clear, unobstructed focus is beneficial.
As a brief background, concepts like neuroplasticity and cognitive behavior are good to understand. Like driving a car, you don’t need to know how the car’s internal mechanics work in order to drive it. But it is very helpful to understand the “how” of the mechanics. I’ve been fascinated with neurocognition, psychology and neurolinguistic programming for many years and I’ve been able to use it to my personal advantage, even help others. Furthermore, memory, on its own, is very powerful and complex.
Neuroplasticity is the ability of the brain to form and reorganize your synaptic connections in response to learning and experience. What fires together, wires together as they say.
Based on evidence of neuroplasticity, it is possible to re-wire your brain whether young or old. It’s not like kids in school don’t forget things. They do forget just as adults. We all have a limited attention span and need mental clarity to optimize our memory. This can be done with key memory systems which utilize both sides of your brain. You would think that using the logical left brain is typical and sufficient but it’s not. It needs to be used in combination with the creative right brain thus maximizing your memory’s capability and retention.
The combined brain hemispheres apply memory principles which include:
- imagination
- association
- exaggeration
- absurdity
- color
- sight
- hearing
- sensuality
Let’s start off with a solid example to start your training. The Number-Shape Memory system will utilize your left brain’s logic for the count of 1 to 10 and your right brain’s visual imagination. The main concept of memorizing new things is association with existing things in your mind. You already know how to count and it’s permanently ingrained in your brain from years of using numbers so let’s associate the numbers 1 through 10 with visual shapes. I’m going to include my visual items I have memorized but you should create your own. The idea is to think of a word that visually represents each number. Nothing complex, just what comes to your mind first. Here are mine:
- magic wand
- gooseneck
- lips
- upside-down chair
- wheelchair
- spiral
- gun
- race-track
- umbrella
- goal post
In reference to databases, these 10 items can be considered your index keys. Your numbers now have a visual element known as the key and you can insert any new item you are learning by imagining them together. Let’s test it with an exercise. Take a stopwatch and set it to 2 minutes to visually combine your key items, with the following 10 new items in your mind.
- airplane
- 1776
- Leonardo Davinci
- dog food
- chemistry
- Rock music
- December 25
- Tony
- Orlando city
- sandwich
Time’s up! After 2 minutes, write down this list of new words from memory on a separate page or sheet of paper. How many words were you able to remember using the number-shape system? If you liked that exercise, there are many more.
What is great about memory training, is that continual practice like this will rewire your synapses engaging your hippocampus as well as your both of your brain’s hemispheres. You can apply this number-shape system starting today to your daily tasks, agenda, events, studies and work. There are more and longer number systems like this to learn about. You can progressively load your brain with more than 10 key index items.
For memory retention, your newly memorized concepts should be repeated within 2 hours of learning, then repeated 24 hours later and another day later. Also practice, the number-shape system in reverse and randomized 1-10. To expand your list of 10 items with another 10 items, use the number-rhyme system.
The number-rhyme system is more auditory for the numbers 1-10 still using the imagination. Think of words that rhyme with each number like “one – bun” and write down the words that come to your mind quickly and clearly. Here’s my list:
- bun
- chew
- tree
- door
- lives
- sticks
- eleven
- gate
- lime
- tent
Spend a couple minutes to memorize your new list and practice for a few days with new concepts you are learning. Use the numbers as your database index and insert new data into your mind’s database. Hopefully, you have understood the key concepts were enlightened with memory improvement and your brain’s powerful neuroplasticity. Futhermore, to expand beyond 20 key elements, look for the Roman Room System, the Major System, and Long Number System. Don’t proceed with these more advanced systems until you got the first 2 basic systems fully memorized. Don’t quit either. Many people apply these techniques without anyone else even noticing. They just think that person is brilliant so go forth and be brilliant! Your mind will thank you because these mental exercises will enhance your neurocognition and make learning more exciting.
Concepts:
- Mental Exercices
- Memory Systems
- Database indexing
- Number-shape system
- Number-rhyme system
Mobile app development doesn’t have to be an overwhelming maze of complex frameworks and endless tutorials. The secret to mastering this lucrative skill lies in choosing the right learning path that matches your background and goals. Whether you’re a complete beginner or transitioning from web development, the most effective approach combines hands-on project building with structured learning. Start with a single cross-platform framework like React Native, Ionic, Swift or Flutter.
This comprehensive guide focuses on mobile dev coming from web dev based on today’s competitive market. Unlike generic tutorials that teach isolated concepts, we’ll walk you through the components that are the same and different in ReactJS. You’ll discover exactly which technologies to learn first, how to avoid common pitfalls that derail beginners, and why building real projects from day one accelerates your learning exponentially.
This is a tutorial guide on how to build an android mobile app using React Native + Expo for testing and deployment. React Native Expo is an excellent tool which speeds up your development time. Prior to trying Expo, I tested building an android app using other methods such as Ionic Framework, Flutter, Kotlin, and Swift. Kotlin and Swift are too far off-base from my existing skillset so I rejected them. Flutter is newer, cross-platform capable, with a rendering engine on-par to native thus making it more appealing. Since it has a deep learning curve and I don’t plan on being a full-time Flutter developer so I dropped that as well.
OUTLINE
- Mobile App frameworks
- Prerequisite installation
- React Native boilerplate
- Step 1: Stack Screen, SafeAreaView and Text
- Step 2: Webview and Platform
- Step 3: Adding a logo image
- Step 4: Adding Menu Links and ScrollView
- Step 5: Adding Pages and Contact Form
- Step 6: Embedding Custom Fonts & Icon
- Last step is to build and deploy
Your result will look like this and the github repo is linked at the end of this article. If you’re running into errors from the code snippets here, ensure it matches the code from the updated repo.

Mobile App Frameworks
Ionic seems easiest for programmers with javascript experience so it was my first choice. Afterwards, I researched into deploying the app to the Google Play Store and that’s when my decision fell apart. Ionic also is rated lower in performance compared to React Native with less support content available. This is when I discovered https://expo.dev/ which streamlines the deployment process including making app testing very easy by downloading the expo app to an android phone. We will reference the building and deployment part later in this article.
Which Should You Choose?
Choose React Native if: You have JavaScript/React experience and want to leverage existing skills for mobile development. It offers the best balance of performance, community support, and job opportunities.
Choose Ionic if: You’re a web developer who wants to quickly transition to mobile using familiar HTML/CSS/JS skills, or you need to target web and mobile simultaneously.
Choose Flutter if: You want cutting-edge performance and don’t mind learning Dart. It’s Google’s bet on the future of cross-platform development and shows tremendous growth potential.
Choose Swift if: You’re focusing exclusively on iOS development, need maximum performance, or want to build apps that deeply integrate with Apple’s ecosystem.
For beginners, React Native offers the most practical starting point due to its large community, extensive job market, and transferable JavaScript skills that remain valuable across web and mobile development.
Since I’m a full-stack engineer with extensive experience using ReactJS so inherently, I thought using React Native would be the best choice for making an android app but I didn’t want to immediately rule out other methods. Although, I did rule out coding in native android using java. That’s out for me since I don’t want to mess too much with Android Studio and you don’t need to with Expo.
If you’re a beginner to mobile app development and you’re coming from a web dev background or as a front-end engineer, this is exactly for you! React Native offers many resources including official documentation and a github community page. Recently, React Native has picked up pace on development including a major architecture change of its engine. It’s possible that some of the API in this article may have been outdated already like in most of the programming world.
Let’s begin with the development of the React Native app with explanations along the way. The type of app we are building is similar to a website which has several pages with a navigation menu, a radio group submission form, a contact form, and a separate back-end to process the form submissions. For the back-end we will use Python with flask and the code will be provided with a summary. The only 3rd party services we will use is free and streamlines the process for packaging the app for deployment; that is Expo.
While it’s possible to “vibe code” a mobile app, you should understand the basics of coding it first so you can make changes, additions, and continue a path in mobile app development.
Prerequisite Installation
There are a few pre-requisites to start which is to setup your environment and we’ll do that for Mac OS using terminal’s command line. Ensure you have the following software installed:
NodeJS https://nodejs.org/en or in terminal: brew install node
-Node Expo Package:
npm install exp[email protected] -for existing projects use:
npx install-expo-modules@latest
Expo Go App for testing. Optionally, you can install Android Studio for the simulator
Code editor: https://code.visualstudio.com/

After installation, check your node, npx and npm version number to ensure compatibility. As of this article, we have v24.6.0
node -vnpm -v
npx -v
Navigate to your working directory and start a new project:
npx create-expo-app my-react-native This will setup boilerplate code with the files:
README.md         components        node_modules      tsconfig.json
app               constants         package-lock.json
app.json          eslint.config.js  package.json
assets            hooks             scripts
We won’t be using all the boilerplate code. It’s too much to start with so let’s run the reset command:
npm run reset-project
Expo has scripts to run your project so if you inspect package.json you will see:
   "start": "expo start",
    "reset-project": "node ./scripts/reset-project.js",
    "android": "expo start --android",
    "ios": "expo start --ios",
    "web": "expo start --web",
    "lint": "expo lint"
  },
npx expo start
loads your project locally in the browser with options to open it in the Expo App on your android device with the listed keyboard shortcuts. The following commands are displayed to give you the option to load the app in a browser, iOS simulator and Android simulator.
Starting Metro Bundler
[QR CODE SHOWN FOR THE EXPO APP]
› Metro waiting on exp://192.168.8.173:8081
› Scan the QR code above with Expo Go (Android) or the Camera app (iOS)

› Web is waiting on http://localhost:8081

› Using Expo Go
› Press s │ switch to development build

› Press a │ open Android
› Press i │ open iOS simulator
› Press w │ open web

› Press j │ open debugger
› Press r │ reload app
› Press m │ toggle menu
› shift+m │ more tools
› Press o │ open project code in your editor

› Press ? │ show all commands

The qr code is the same as the address exp://192.168.8.173:8081 which is designed to load in the Expo Go app. After resetting the boilerplate, your app load a plain gray window with “index” shown at the top. From here we can continue adding our own codes.
You can follow along using my github repo located at http://github.com/rutkat/react-expo-tutorial/ and checkout different branches for each step.
-From here check out branch step01
The first similarity to ReactJS you will notice is the file structure and typescript support as the default:
app
assets
components
constants
hooks
scripts
app.json
package.json
tsconfig.json
We also have file-based routing: two screens: app/(tabs)/index.tsx and app/(tabs)/explore.tsx. The layout file in app/(tabs)/_layout.tsx sets up the tab navigator. However in this tutorial, we will use simpler routing using <Stack.Screen> in the app/_layout.tsx file. That’s the default. The name parameter should correspond to the file name and the options include a tilte and headerShown which we will hide.
#_layout.tsx
import { Stack } from "expo-router";

export default function RootLayout() {
  return (
    <Stack>
      <Stack.Screen name="index" options={{ title: 'Home', headerShown: false }} />
    </Stack>
  );
}
Here we renamed the title and hid the header. Let’s also modify the index contents by adding a container and stylesheet. You’ll immediately notice CSS styles which are not entirely identical to web CSS. We’re also including the component <SafeAreaView>. It will ensure our top menu and footer will render without being cropped.
In order to use any components, they have to be imported at the top of the file and many of them have to be installed as a package through npm so in index.tsx import: SafeAreaView, StyleSheet.
import { SafeAreaView, StyleSheet, Text, View } from "react-native";

export default function Index() {
  return (
    <SafeAreaView style={styles.container}>
      <View style={styles.bodyContainer}>
        <Text>...</Text>
      </View>
    </SafeAreaView>
  );
}

const styles = StyleSheet.create({
  container: {
  },
  bodyContainer: {
  },
});
We moved the inline styles from <View> into a const variable. This is how to style components. React Native uses modified CSS which non-integer property values need to be in quotes and property names in camelCase. Also they are more specific for certain styles such as marginHorizontal.
What is <View> and <Text>? What are these funky React tags??
Well, they are not ReactJS, not HTML and due to the unique rendering engine, HTML is not supported! OH THE HORROR! You thought you were going to code just like ReactJS… Sorry but no and I felt the same way so I understand if you want to “nope” outta here. <Text> is just for strings; the equivalent to NSAttributedString on iOS and SpannableString on Android. <View> is a layout like a <div> which supports flexbox styling but NOT scrolling. Unbelievable!
For scrolling, you need a different component called <SrollView> because after all this is not for a web browser engine and scrolling ability is not a default android behavior. Let’s add a list because that should be easy-peazy right? Another shocking moment!
There is no default list support or a list tag. You have to wrap <Text> in <ScrollView> and use character codes for the bullet icons wrapped in curly braces. Update the index.tsx file with:
import { SafeAreaView, StyleSheet, Text, View } from "react-native";

export default function Index() {
  return (
    <SafeAreaView style={styles.container}>
      <View style={styles.bodyContainer}>
        <Text style={styles.bodyContainer}>
          <Text style={styles.bodyTitle}>
            How It Works
          </Text>
          <Text>
            {'\n\n'}Lorem ipsum dolor sit amet consectetur adipiscing elit. Quisque faucibus ex sapien vitae pellentesque sem placerat. In id cursus mi pretium tellus duis convallis. Tempus leo eu aenean sed diam urna tempor. Pulvinar vivamus fringilla lacus nec metus bibendum egestas. Iaculis massa nisl malesuada lacinia integer nunc posuere. Ut hendrerit semper vel class aptent taciti sociosqu. Ad litora torquent per conubia nostra inceptos himenaeos.
            {'\n\n'}Pulvinar vivamus fringilla lacus nec metus bibendum egestas. Iaculis massa nisl malesuada lacinia integer nunc posuere. Ut hendrerit semper vel class aptent taciti sociosqu. Ad litora torquent per conubia nostra inceptos himenaeos.
            {'\n'}
          </Text>
          <Text>{'\n\u2022'} Bullet-style List Item 1</Text>
          <Text>{'\n\u2022'} Bullet-style List Item 2</Text>
          <Text>{'\n\u2022'} Bullet-style List Item 3</Text>
        </Text>
      </View>
    </SafeAreaView>
  );
}

const styles = StyleSheet.create({
  container: {
    flex: 1,
    flexDirection: "column",
    alignItems: "center",
    color: '#00cbff;',
    backgroundColor: '#FFF',
    marginBottom: 20,
  },
  bodyContainer: {
    marginHorizontal: 18,
    padding: 18,
    fontSize: 14,
    textAlign: 'center',
  },
});
Big change and big goals! We’re done with step01, preview it by running npx expo start. Let’s proceed to the next step with git checkout step02
Let’s a add a new page which allows loading content from a live website. This is what corporations commonly do for terms & conditions which are long bodies of text without styling. Since it’s actual legalese, accuracies is very important so the content needs one source of truth instead of duplicating in separate codebases. Update the _layout.tsx file and create a new file terms.tsx.
We introduce <Platform> and <Webview> components which will allow conditional rendering between an iframe and android’s webview. Without this, <Webview> will not render in your web browser and iframes won’t render on Android. <Platform> detects the operating system.
//_layout.tsx
<Stack>
  <Stack.Screen name="index" options={{ title: 'Home', headerShown: false }} />
  <Stack.Screen name="terms" options={{ title: 'Policy & Terms', headerShown: true }} />
</Stack>
This time we show the header for the terms page. We don’t have a menu yet, but you can access the terms.tsx page directly by url http://localhost:8081/terms
import { StyleSheet, Platform } from 'react-native';
import { WebView } from 'react-native-webview';

export default function Terms() {
  const url = "https://www.lipsum.com/"

  return Platform.OS === "web" ? (
    <iframe src={url} height={'100%'} width={'100%'} />
  ) : (
    <WebView
        originWhitelist={['*']}
        style={styles.webview}
        source={{ uri: url }}
    />
  );
}

const styles = StyleSheet.create({
  webview: {
    flex: 1,
    alignItems: 'center',
    width: '100%',
    marginTop: 22,
  },
});
When you’re testing this on your Android simulator or Expo Go app, localhost won’t automatically fetch the live website. That’s why we have the property originWhitelist set to allow all. This feature can be used for other purposes too since it’s an android wrapper of a website but user experience will be less smooth. That’s it for step02.
git checkout step03
Adding a logo image!
Let’s add something cute which will be a cute cartoon logo I drew myself. We will separate it as a component so it can be included by a single tag. Create a components folder and logo.tsx inside of it. Feel free to use any graphic of your choice if you disapprove of my drawn character.
React Native has several image components so we’ll use the standard one <Image> and place it inside a container with styles then import logo.tsx in your index.tsx file. Don’t forget to add the image file under assets/images/. The falsely included React logo was removed since it served no purpose.
// components/logo.tsx
import { View, Image, StyleSheet} from 'react-native';

const srcLogo = require('@/assets/images/myyellow.png');

export default function Logo() {

  return(
    <View style={styles.safeContainer}>
      <Image
        style={styles.logo}
        source={srcLogo}
      />
    </View>
  )
}

const styles = StyleSheet.create({
  safeContainer: {
   alignItems: "center",
  },
  logo: {
    backgroundSize: "contain",
    width: 300,
    height: 220,
  },
});
Open your browser, enable browser dev tools and enable the mobile view screen so it better resembles a phone device. Did you notice the content cropping? The logo pushes the text down and you can’t scroll down! So bizarre for React Native not to enable scrolling by default. We must add it using the <ScrollView> component so let’s included it after <SafeAreaVIew>
// index.tsx
import Logo from '@/components/logo'
<SafeAreaView style={styles.container}>
  <ScrollView>
    <Logo />
    ...
  </ScrollView>
</SafeAreaView>
Great! Now that we can scroll because we have a big graphic and lots of text for a small device screen, let’s add fixed footer which is always visible and discover more irregular CSS styles. We also introduce the <Link> tag which enables navigation within the app. Preview the progress with npx expo start
git checkout step04
Static-positioned Footer
To add a footer we will make a component so create the file footer.tsx in the components folder. Then we can include the component anywhere in our app using the import statement. We make our terms.tsx page linkable here so the user can tap or click on it.
// footer.tsx
import { View, StyleSheet, Text } from "react-native";
import { Link } from 'expo-router';
export default function Footer() {
return (
<View style={styles.footer}>
<Text style={styles.text}>Developed by Runastartup.com
<Link href={"/terms"} style={styles.link}>Terms</Link>
</Text>
</View>
)
}
const styles = StyleSheet.create({
footer: {
display: "flex",
flexDirection: "row",
justifyContent: "center",
position: "fixed",
width: "100%",
bottom: 0,
backgroundColor: "aqua",
padding: 6,
},
text: {
color: "#515151",
fontSize: 11,
},
link: {
textDecorationLine: "underline",
}
})We use the same tags as before View, Text, Stylesheet in addition to Link. Notice the inclusion of CSS position property along with flex from Flexbox’s properties. This ensures our footer is centered, fixed on the bottom, and doesn’t break positioning of other components. Insert the components in index.tsx between <ScrollView> and <SafeAreaView>.
// index.tsx
import Footer from '@/components/footer'

<SafeAreaView style={styles.container}>
  <ScrollView>
  ...
  </ScrollView>
  <Footer />
</SafeAreaView>
Since we introduced <Link> we can also make a menu with additional linkable pages so under components create menu.tsx with button-like styling:
// menu.tsx
import { View, StyleSheet } from 'react-native';
import { Link } from 'expo-router';

export default function Menu() {

  return (
    <View style={styles.navContainer}>
      <Link href="proxy.php?url=/" style={styles.button} push>
        HOME
      </Link>
      <Link href="proxy.php?url=/about" style={styles.button}>
        ABOUT
      </Link>
      <Link href="proxy.php?url=/form" style={styles.button}>
        FORM
      </Link>
      <Link href="proxy.php?url=/contact" style={styles.button}>
        CONTACT
      </Link>
    </View>
  );
}

const styles = StyleSheet.create({
  navContainer: {
    flexDirection: "row",
    alignItems: "center",
    justifyContent: "space-around",
    alignSelf: "stretch",
    padding: 10,
  },
  button: {
    fontSize: 12,
    fontFamily: "SpaceMono",
    textDecorationLine: 'none',
    color: '#00cbff',
    backgroundColor: "#ffeebc",
    paddingHorizontal: 8,
    paddingVertical: 4,
    marginHorizontal: 4,
    borderRadius: 10,
  },
});
We styled the menu to be at the top and using flexbox’s space-around even positioning, but we still need to add the pages to _layout.tsx and import them.
// _layout.tsx
import { useFonts } from 'expo-font';
import React, { useEffect } from 'react';
import { SplashScreen, Stack } from 'expo-router';

export default function RootLayout() {

  return (
    <Stack>
      <Stack.Screen name="index" options={{ title: 'Home', headerShown: false }} />
      <Stack.Screen name="about" options={{ title: 'About', headerShown: false }} />
      <Stack.Screen name="form" options={{ title: 'App', headerShown: false }} />
      <Stack.Screen name="contact" options={{ title: 'Contact', headerShown: false }} />
      <Stack.Screen name="terms" options={{ title: 'Policy & Terms', headerShown: true }} />
    </Stack>
  );
}
Now import the menu into index.tsx and while the pages are still missing, you should still be able to see the menu.
// index.tsx
import Menu from '@/components/menu'

  <SafeAreaView style={styles.container}>
   <Menu />
   <ScrollView>
        <Logo />
        <Text style={styles.bodyContainer}>
          <Text style={styles.bodyTitle}>
            How It Works
          </Text>
          <Text>
            {'\n\n'}Lorem ipsum dolor sit amet consectetur adipiscing elit. Quisque faucibus ex sapien vitae pellentesque sem placerat. In id cursus mi pretium tellus duis convallis. Tempus leo eu aenean sed diam urna tempor. Pulvinar vivamus fringilla lacus nec metus bibendum egestas. Iaculis massa nisl malesuada lacinia integer nunc posuere. Ut hendrerit semper vel class aptent taciti sociosqu. Ad litora torquent per conubia nostra inceptos himenaeos.
            {'\n\n'}Pulvinar vivamus fringilla lacus nec metus bibendum egestas. Iaculis massa nisl malesuada lacinia integer nunc posuere. Ut hendrerit semper vel class aptent taciti sociosqu. Ad litora torquent per conubia nostra inceptos himenaeos.
            {'\n'}
          </Text>
          <Text>{'\n\u2022'} Bullet-style List Item 1</Text>
          <Text>{'\n\u2022'} Bullet-style List Item 2</Text>
          <Text>{'\n\u2022'} Bullet-style List Item 3</Text>
        </Text>
      </ScrollView>
      <Footer />
    </SafeAreaView>
Additional Pages with a Contact Form
We finished step04, let’s do step05.
git checkout step05
So our menu doesn’t stay broken, we need to add the additional pages ABOUT, FORM, CONTACT.
About will be static content i.e. just text information, Form will contain a radio input group and a form submission going to a python backend. Contact will be an email contact form also going to a python backend. Since this article focuses on React Native, we won’t explain the details of the python code but it will be included in the github code repository. You can also the backend with your own API (advanced devs).
Create the following files in the app folder and we will fill them out with code:about.tsx
form.tsx
contact.jsx
Here’s the details of the about page, so copy and paste it because there’s nothing new about it relative to the previous components of this tutorial:
import Footer from '@/components/footer';
import Logo from '@/components/logo';
import Menu from '@/components/menu';
import React from 'react';
import { SafeAreaView, ScrollView, StyleSheet, Text } from 'react-native';

export default function About() {
  return (
    <SafeAreaView style={styles.container}>
      <Menu />
      <ScrollView>
        <Logo />
        <Text style={styles.bodyContainer}>
          <Text style={styles.bodyTitle}>
            About{'\n'}{'\n'}
          </Text>
          Lorem ipsum dolor sit amet, consectetur adipiscing elit, sed do eiusmod tempor incididunt ut labore et dolore magna aliqua. Proin tortor purus platea sit eu id nisi litora libero. Neque vulputate consequat ac amet augue blandit maximus aliquet congue. Pharetra vestibulum posuere ornare faucibus fusce dictumst orci aenean eu facilisis ut volutpat commodo senectus purus himenaeos fames primis convallis nisi.
          {'\n'}{'\n'}Phasellus fermentum malesuada phasellus netus dictum aenean placerat egestas amet. Ornare taciti semper dolor tristique morbi. Sem leo tincidunt aliquet semper eu lectus scelerisque quis. Sagittis vivamus mollis nisi mollis enim fermentum laoreet.
          {'\n'}{'\n'}Curabitur semper venenatis lectus viverra ex dictumst nulla maximus. Primis iaculis elementum conubia feugiat venenatis dolor augue ac blandit nullam ac phasellus turpis feugiat mollis. Duis lectus porta mattis imperdiet vivamus augue litora lectus arcu. Justo torquent pharetra volutpat ad blandit bibendum accumsan nec elit cras luctus primis ipsum gravida class congue.
          {'\n'}Let us know what you think!
        </Text>
      </ScrollView>
      <Footer />
    </SafeAreaView>
  );
}

const styles = StyleSheet.create({
  container: {
    flex: 1,
    justifyContent: 'center',
    alignItems: 'center',
    backgroundColor: "#FFF",
    marginBottom: 26,
  },
  bodyContainer: {
    marginHorizontal: 14,
    padding: 14,
    lineHeight: 20,
    fontSize: 12,
    color: '#000',
    borderWidth: 3,
    borderRadius: 10,
    borderStyle: "solid",
    borderColor: '#ffeebc',
    fontFamily: "SpaceMono",
    textAlign: "center",
  },
  bodyTitle: {
    fontSize: 24,
    fontWeight: "bold",
    color: '#00cbff',
  },
});
Here’s the Contact page code followed by the contact page component. We do have a new addition and that’s the <KeyboardAvoidView> component. This component temporarily adds padding to the input content when dealing with input fields since the user’s device will open the keyboard window. Without the component, it’s very likely the user won’t see what they typed on the keyboard.
// contact.tsx
import Footer from '@/components/footer'
import Logo from '@/components/logo'
import Menu from '@/components/menu'
import React from 'react'
import {
    KeyboardAvoidingView,
    SafeAreaView,
    ScrollView,
    StyleSheet,
    Text
} from 'react-native'

export default function Contact() {

  return (
    <SafeAreaView style={styles.container}>
      <Menu />
      <ScrollView>
        <Logo />
        <KeyboardAvoidingView style={styles.formContainer}>
          <Text style={styles.formTitle}>
            Contact
          </Text>
        <EmailContactForm />
        </KeyboardAvoidingView>
      </ScrollView>
      <Footer />
    </SafeAreaView>
  );
}

const styles = StyleSheet.create({
  container: {
    flex: 1,
    justifyContent: 'center',
    backgroundColor: "#FFF",
    marginBottom: 20,
  },
  formContainer: {
    marginHorizontal: 15,
    marginBottom: 30,
    padding: 12,
    fontSize: 12,
    color: '#000',
    borderWidth: 3,
    borderRadius: 10,
    borderStyle: "solid",
    borderColor: '#ffeebc',
  },
  formTitle: {
    fontSize: 24,
    fontWeight: "bold",
    color: '#00cbff',
    textAlign: 'center',
    fontFamily: "SpaceMono",
  },
});
Now create a new file emailContactForm.tsx and place it under the components folder which will be the code to send emails with a backend. This is a long one. Thankfully, the React code and useState hook is identical to what you would use to ReactJS. A new component is added here <TouchableOpacity> which is helpful for user experience on button presses. It modifies the button opacity upon user touch and the default opacity amount is 0.2.
We also include error validation on the front-end, a status loader and error messaging which are essential for proper user experience. Backend validation is also necessary. Attention: the backend endpoint for receiving the form is not included. You will have to create your own.
// emailContactForm.jsx
import React, { useState } from 'react';
import {
  View,
  Text,
  TextInput,
  TouchableOpacity,
  StyleSheet,
  ScrollView,
  ActivityIndicator,
  Alert
} from 'react-native';

export default ContactForm = () => {
  const [name, setName] = useState('');
  const [email, setEmail] = useState('');
  const [message, setMessage] = useState('');
  const [alertMessage, setAlertMessage] = useState('');
  const [isLoading, setIsLoading] = useState(false);
  const [errors, setErrors] = useState({});

  const NETWORK_ERR_MSG = 'Network error. Please check your connection and try again.';
  const SUBMIT_ERR_MSG = 'Error submitting form:';

  const POST_URL = '/your-own-api-endpoint'

  const validate = () => {
    const newErrors = {};

    if (!name.trim()) newErrors.name = 'Name is required';

    if (!email.trim()) {
      newErrors.email = 'Email is required';
    } else if (!/\S+@\S+\.\S+/.test(email)) {
      newErrors.email = 'Email is invalid';
    }

    if (!message.trim()) newErrors.message = 'Message is required';
    setErrors(newErrors);
    return Object.keys(newErrors).length === 0;
  };

  const handleSubmit = async () => {
    setAlertMessage('');
    if (!validate()) return;
    setIsLoading(true);

    try {
      const response = await fetch(POST_URL, {
        method: 'POST',
        headers: {
          'Content-Type': 'application/json',
        },
        body: JSON.stringify({
          name,
          email,
          message,
        }),
      });

      const data = await response.json();

      if (response.ok) {
        Alert.alert('Success', data.message);
        // setAlertMessage(SENT_MSG)
        setAlertMessage(data.message)
        // Reset form
        setName('');
        setEmail('');
        setMessage('');
        setErrors({});
      } else {
        Alert.alert('Error', data.message || 'Something went wrong. Please try again.');
      }
    } catch (error) {
      Alert.alert('Error', NETWORK_ERR_MSG);
      console.error(SUBMIT_ERR_MSG, error);
    } finally {
      setIsLoading(false);
    }
  };

  return (
    <ScrollView contentContainerStyle={styles.container}>
      <View style={styles.inputContainer}>
        {alertMessage !== '' && <Text style={styles.alertText}>{alertMessage}</Text>}
        <Text style={styles.label}>Name</Text>
        <TextInput
          style={[styles.input, errors.name && styles.inputError]}
          value={name}
          onChangeText={setName}
          placeholder="Your name"
        />
        {errors.name && <Text style={styles.errorText}>{errors.name}</Text>}
      </View>

      <View style={styles.inputContainer}>
        <Text style={styles.label}>Email</Text>
        <TextInput
          style={[styles.input, errors.email && styles.inputError]}
          value={email}
          onChangeText={setEmail}
          placeholder="Your email"
          keyboardType="email-address"
          autoCapitalize="none"
        />
        {errors.email && <Text style={styles.errorText}>{errors.email}</Text>}
      </View>

      <View style={styles.inputContainer}>
        <Text style={styles.label}>Message</Text>
        <TextInput
          style={[styles.textArea, errors.message && styles.inputError]}
          value={message}
          onChangeText={setMessage}
          placeholder="Your message"
          multiline
          numberOfLines={4}
          textAlignVertical="top"
        />
        {errors.message && <Text style={styles.errorText}>{errors.message}</Text>}
      </View>

      <TouchableOpacity
        style={styles.button}
        onPress={handleSubmit}
        disabled={isLoading}
      >
        {isLoading ? (
          <ActivityIndicator color="#fff" />
        ) : (
          <Text style={styles.buttonText}>Submit</Text>
        )}
      </TouchableOpacity>
    </ScrollView>
  );
};

const styles = StyleSheet.create({
  container: {
    padding: 20,
    backgroundColor: '#ffffff',
  },
  inputContainer: {
    marginBottom: 15,
  },
  label: {
    fontSize: 16,
    marginBottom: 5,
    fontWeight: '500',
  },
  input: {
    borderWidth: 1,
    borderColor: '#ddd',
    borderRadius: 8,
    padding: 12,
    fontSize: 16,
    width: '100%',
  },
  textArea: {
    borderWidth: 1,
    borderColor: '#ddd',
    borderRadius: 8,
    padding: 12,
    fontSize: 16,
    minHeight: 100,
    width: '100%',
  },
  inputError: {
    borderColor: 'red',
  },
  alertText: {
    fontSize: 16,
    color: '#00d311',
    fontStyle: 'italic',
    marginBottom: 15,
    marginTop: 0,
    textAlign: 'center'
  },
  errorText: {
    color: 'red',
    fontSize: 12,
    marginTop: 5,
  },
  button: {
    backgroundColor: 'aqua',
    borderRadius: 8,
    padding: 15,
    alignItems: 'center',
    marginTop: 10,
  },
  buttonText: {
    color: 'white',
    fontSize: 16,
    fontWeight: 'bold',
  },
});
We finished step05, let’s do step06. Let’s take a break from the longer part of the code and show how you can include custom fonts and splash screens.
git checkout step06
Embedding Custom Fonts & App Icon
You may have noted that the previous code already includes a custom font “SpaceMono” in the styling but we didn’t it’s still not loaded in the app. For the font to be used app-wide, we will add useFonts from expo-font. This is another one-of-many installable pieces used in the expo ecosystem. The font file is already included in the repo under react-expo-tutorial/my-react-native/assets/fonts
In _layout.tsx import useFonts from expo-font and add the line below export default:
// _layout.tsx
import { useFonts } from 'expo-font';
import React, { useEffect } from 'react';
import { Stack } from 'expo-router';

export default function RootLayout() {
  useFonts({
    'SpaceMono': require('@/assets/fonts/SpaceMono-Regular.ttf'),
  });

return (
    <Stack>
     ...
    </Stack>
  );
To render this custom font, we have to specify it in the StyleSheet for each component. You should apply it to any <Text> tag because container tags will ignore it. The font is inherited for any child <Text> tag. I’ve applied it to all components which have the style <Text style={styles.bodyContainer}> and the menu.tsx button.
// index.tsx, about.tsx, form.tsx
const styles = StyleSheet.create({
  bodyContainer: {
    marginHorizontal: 18,
    padding: 18,
    borderWidth: 3,
    borderRadius: 10,
    backgroundColor: '#FFF',
    borderStyle: "solid",
    borderColor: '#ffeebc',
    lineHeight: 20,
    fontSize: 14,
    fontFamily: "SpaceMono",
    textAlign: 'center',
  },
});

// menu.tsx
const styles = StyleSheet.create({
  button: {
    fontFamily: "SpaceMono",
    fontSize: 12,
    textDecorationLine: 'none',
    color: '#00cbff',
    backgroundColor: "#ffeebc",
    paddingHorizontal: 8,
    paddingVertical: 4,
    marginHorizontal: 4,
    borderRadius: 10,
  },
});
Reload the app in your browser or device and you should see the new font.
For the icon, there are two steps. Add the image as a png graphic to your assets folder and modify the app.json file. Image dimensions of 1024 x 1024 pixels are recommended.
// app.json
{
  "expo": {
    "name": "my-react-native",
    "slug": "my-react-native",
    "version": "1.0.0",
    "orientation": "portrait",
    "icon": "./assets/images/icon.png",
    "scheme": "myreactnative",
    "userInterfaceStyle": "automatic",
    "newArchEnabled": true,
    "ios": {
      "supportsTablet": true
    },
    "android": {
      "adaptiveIcon": {
        "foregroundImage": "./assets/images/adaptive-icon.png",
        "backgroundColor": "#ffffff"
      },
      "edgeToEdgeEnabled": true
    },
    "web": {
      "bundler": "metro",
      "output": "static",
      "favicon": "./assets/images/favicon.png"
    },
    "plugins": [
      "expo-router",
      [
        "expo-splash-screen",
        {
          "image": "./assets/images/splash-icon.png",
          "imageWidth": 200,
          "resizeMode": "contain",
          "backgroundColor": "#ffffff"
        }
      ]
    ],
    "experiments": {
      "typedRoutes": true
    }
  }
}
Build and Deploy cli
Finally, we have reached the greatest benefit of React Expo which is the command-line tool for building and deploying. We’re going to summarize the official documentation which I recommend.
You’re learned the start command for development npx expo start and now we can use the additional commands. For this process, it’s recommended to sign-up on the website. There’s a free plan which allows 30 builds per month. https://expo.dev/signup
The EAS CLI doesn’t come installed by default or it may have a newer version when you try so install it with the command:
npm install -g eas-cli

// list of commands available from EAS:
EAS command line tool
VERSION
eas-cli/16.6.1 darwin-arm64 node-v24.6.0
USAGE
$ eas [COMMAND]
TOPICS
account manage account
branch manage update branches
build build app binaries
channel manage update channels
credentials manage credentials
deploy deploy your Expo Router web build and API Routes
device manage Apple devices for Internal Distribution
env manage project and account environment variables
fingerprint compare fingerprints of the current project, builds, and updates
metadata manage store configuration
project manage project
update manage individual updates
webhook manage webhooks
workflow manage workflows
COMMANDS
analytics display or change analytics settings
autocomplete display autocomplete installation instructions
build start a build
config display project configuration (app.json + eas.json)
credentials manage credentials
deploy deploy your Expo Router web build and API Routes
diagnostics display environment info
help Display help for eas.
init create or link an EAS project
login log in with your Expo account
logout log out
onboarding continue onboarding process started on the https://expo.new website.
open open the project page in a web browser
submit submit app binary to App Store and/or Play Store
update publish an update group
whoami show the username you are logged in asYou can choose to build the software package for Android and iOS. There’s a step through process the first time you build it when you run:
eas build:configure
EAS project not configured.
? Would you like to automatically create an EAS project for @rtgbro/my-react-native? › (Y/n)
 Created @rtgbro/my-react-native: https://expo.dev/accounts/[username]/projects/my-react-native on EAS
Linked local project to EAS project cdeg23-k235-31f9-8d10-f153212a4361
Created @rtgbro/my-react-native: https://expo.dev/accounts/[username]/projects/my-react-native on EAS
Linked local project to EAS project cdeg23-k235-31f9-8d10-f153212a4361
 The following process will configure your iOS and/or Android project to be compatible with EAS Build. These changes only apply to your local project files and you can safely revert them at any time.
? Which platforms would you like to configure for EAS Build? › - Use arrow-keys. Return to submit.
❯ All
iOS
Android
The following process will configure your iOS and/or Android project to be compatible with EAS Build. These changes only apply to your local project files and you can safely revert them at any time.
? Which platforms would you like to configure for EAS Build? › - Use arrow-keys. Return to submit.
❯ All
iOS
AndroidThis will generate a new file called eas.json and update your app.json file with the projectId.
We choose Android for this tutorial. Run the command again but without “configure”. You’ll be asked to create package name, credentials and Android Keystore file. The defaults are “Yes”. This will take a few minutes.
eas build
✔ Select platform › Android
Resolved "production" environment for the build. Learn more: https://docs.expo.dev/eas/environment-variables/#setting-the-environment-for-your-builds
No environment variables with visibility "Plain text" and "Sensitive" found for the "production" environment on EAS.

📝  Android application id Learn more: https://expo.fyi/android-package
✔ What would you like your Android application id to be? … com.[username].myreactnative
No remote versions are configured for this project, versionCode will be initialized based on the value from the local project.
✔ Incremented versionCode from 1 to 2.
✔ Using remote Android credentials (Expo server)
✔ Generate a new Android Keystore? … yes
Detected that you do not have keytool installed locally.
✔ Generating keystore in the cloud...
✔ Created keystore

Compressing project files and uploading to EAS Build. Learn more: https://expo.fyi/eas-build-archive
✔ Uploaded to EAS 1s
✔ Computed project fingerprint

See logs: https://expo.dev/accounts/[username]/projects/my-react-native/builds/[hash-string]

✔ Build finished

🤖 Android app:
https://expo.dev/artifacts/eas/3kj4h5lk3j4l6jh34l.aab
From the expo.dev website, your app’s aab file becomes available for download and deployment to the Play store. Alternatively, you can execute a “preview” build for sharing and testing using the –profile parameter:
eas build --platform android --profile preview

THE END
Tutorial github repo: https://github.com/rutkat/react-expo-tutorial/
I also wrote a quick start guide to building a React Native app wrapper to a website https://runastartup.com/react-native-expo-quickstart-guide/
References:
https://ionic.io/resources/articles/ionic-react-vs-react-native
https://docs.expo.dev/build/setup
https://hackernoon.com/react-native-vs-native-app-development-making-the-right-choice
]]>I’m writing this as the progress I’ve achieved over the years learning cumulatively about meta-learning, health, energy, focus and psychology. While the strategies and techniques in this article can be applied to general success, I’m going to focus on “reading to learn” as the specific goal I want to get across to you, the audience. Tip #1: Beginning now, I command you to read this article in one sitting without getting distracted because you will instantly be a better reader than you were before  In fact, this is an example of a neuro-linguistic programming (NLP) technique that you can use on yourself for self-discipline. Command yourself, in other words take full control.
Tip #2 Anytime while you’re reading and your mind wonders off being unaware what was the last paragraph about, re-read the paragraph again.
To make this actionable-strategy more relatable to others, here’s a little bit of a background on why I decided to write this and why more people should help themselves.
Problems
In this day and age, humans have the shortest attention span in history. Goldfish have longer attention spans than some humans https://time.com/3858309/attention-spans-goldfish/.
Our goal is to get into flow-state/focus state and stay there for an extended period of time. This can be incredibly difficult in modern times with stimuli overload. It’s an ongoing battle; I hate it! Phones in our palms and social media apps designed to suck our souls dry are the number one offenders. Other distractions consist of outdoor noises, television, music, games, luxury toys, cars, food, pets and parties. I am ashamed of the time spent on social media as a consumer, trying to do copy popular behavior from other posters. I used to hoard cameras, gadgets and retro items not realizing it became an addiction just to buy, buy, buy! I was properly trained by the algorithms of the evil corporations to do their bidding. Before the 2020s we had windows shopping at malls, now we have doom-scroll shopping on social media.
If you avoid it, try to be different then it’s other people that try to shame you or at least make you feel like an outsider. Did you surround yourself with the wrong people? Which do you choose?
Do you every ask yourself “What do these tangible things really give you in the long term”? I’d argue that it’s nothing besides an emotional roller-coaster. It’s short-term fun at a cost of potential long-term benefits of learning. Shopping is also a big distraction taken away from self-improvement activities. We have the “shiny toy syndrome” when we feel a need to shop for unnecessary items. It’s okay to admit it, even I have it from advertising. Advertisements beam product-ads into our retinas manipulating our brain logic. I knew about this since my teenage years but did I know the true cost? Did I understand it? Sadly, no.
The true cost is not the actual monetary value, but the lost time and opportunity cost that you could have spent self-improving. When we get too comfortable, and recently I’ve been way too comfortable, we need to make a sacrifice. Any sacrifices of any stimuli because your focus span is selectable from 0 to 100% so you have to learn to self-control and wield your attention span like a volume knob. There’s no 110% or even 200% that some gurus proclaim or when the army sergeant shouts at you “Give me 110%”. It’s just psychological.
Even after several big accomplishments, why stop? Yes, you can enjoy the comforts you earned because they are the fruits of your labor but the “road to hell is heaven and the road to heaven is hell”. Well maybe, I’m not certain but it does make some sense. In the past, my personal self-learning of software engineering has gained me lucrative jobs. My commitment to learn finance and investing has multiplied my money. It was the best time I spent which required lots of focus and more sacrifice. If you want to get higher on the ladder, you have to maintain focus while rejecting fun. When I stepped off the ladder to pursue fun dreams, it just made me realize I’m an idealist without fighting for my ideals. So I had enough money for myself and got too comfortable. When that happens, you fall off the ladder and have to accept reality.
In other words, I didn’t get what I truly wanted and had to accepted what was being offered. Even being a believer of spirituality and a Buddhist enthusiast, you cannot live in the present all the time. You have to be aware of the future because if you don’t improve mentally, physically and financially, the world can leave you behind as a spec in the dust. Don’t wait for that moment. I hope I’m not crushing your dreams and you shouldn’t get discouraged in any sense but getting a dose of reality is a step in the right direction.
Benefits
Have you guilted yourself enough before? Accept your problems and laziness in order to change. Be open to the endless possibilities in your future. Seeing positive outcomes, the benefits you can realize and the future that could be the present is truly inspiring and motivational. It’s one day or day one with small progressive steps. You will get there and you will have to do it alone; nobody is going to hold your hand but you can find assistance in a form of tools, beliefs and loans.
Your intellectual capacity is determined by time and commitment. Your confidence is determined by your intent. Rewire your brain to alter the chain of causality and get into the flow-state to increase your brain’s neuro-plasticity. Neurons that fire together, wire together. You are an adaptive human being.
Use assistive tools as training wheels. I hated reading school text books since childhood but certain books with cool caricatures of dinosaurs, ghosts, and monsters made books more appealing. I loved it when books included stickers or funny book-markers. Those were assisting me to read more. I recall the joyful moment of choosing folders for grade school. The folder covers were glossy with illustrations of exotic cars, skateboarding and early 3D-generated sci-fi environments. I assigned each one to a different grade school subject so the design made me memorize which class it was for.
Eventually, I became the reader of the most amount of books in my family. Books can be academic, fictional and non-fictional. Others can be self-help ones which are meant to make you feel better when you read them. You may not learn science or math from the self-help books but they help you get in the habit of reading. The more you read the easier it is to get into flow-state. You build-up momentum just as you do from other long-term activities. Visualize your success, speak of success and you will reap the success because doing these things you begin to re-wire your brain.
Accept the Pain
You’ll see this quote from motivational speakers such as Wiktor Miesok from The Grim Hustle and it struck a chord with me. To work is hard, but to be broke is harder. You can choose an easy life or a disciplined life. You cannot have both. Even David Goggins mentions it when he ran marathons with inured legs. Stop with the daily stimulations from social media you see on your screen. They are not real life. They are not you. Those emotion-inducing activities affect your mind like real live events because your subconscious mind can’t distinguish reality from simulation. This form of stimuli is depriving your of learning opportunities and self-improvement activites. Nobody cares how you feel and nobody cares what you watch.
Part of the pain will be working alone to educate yourself. Most people don’t like to be lonely; as human beings we were designed to be part of a tribe. However, to advance yourself and go fast, you must accept the loneliness, discipline yourself and sacrifice fun for work. Also realize that loneliness is only temporary, you don’t have to be lonely for a long time, just during your extended focus sessions.
The pain tolerance doesn’t even have to be very high but it will seem like it at the beginning because you are making psychological changes in your brain. It’s a method know as “dopamine transfer” where you condition yourself to get rewarded from your personal accomplishments instead of simulated ones like video games. I heard this concept from Charlie Morgan’s youtube channel, but I’m sure you can find it from other places. I just mention Charlie Morgan because he’s the type of speaker that’s not a motivational speaker. His advice is dry and to-the-point through making sacrifices. He tells you to help yourself not through learning self-improvement but strictly doing the work you need to do, to be where you want to be. Like what I’m doing now is not to write a self-help article but to write more and improve my writing. How am I doing so far?
Don’t quit your simulation activities cold-turkey. Do a progressive transition because it is more effective. Those neurons that are wired for pleasure won’t give up so easily. They will put a fight until you give in. Don’t give in! If you want to be 100% focused, you don’t need to be 100% lonely. You can choose the “build in public” technique where you share your progress online. This can be on posts on X, a blog, discord, or forums. It’s possible you’ll get fans along the way or even an accountability buddy if you message like-minded people on those platforms. There’s another saying: “If you want to go fast, go alone but if you want to go far, go together.” Do you have hobbies? You can’t have hobbies if you want to focus 100%. Hobbies will prevent you from re-wiring your brain for productivity.
Do you want to learn more or learn at a faster rate? Then you’ll have to earn less while in the stage of learning. To minimize your financial losses for learning purposes, commit to learning through listening such as listening to an audiobook during work down-time or reading a book during your lunch break. Try to take notes because your work will distract you from memorizing what you read. My favorite non-reading learning technique is to convert text or videos into audio files and transferring them to my phone. This allows me to learn during other activities such as cooking, jogging, and exercising. Why are scholars and professors smarter than the average person? Because they spent more of their time learning instead of working.
Understanding brain chemistry
People change for two reasons: either their minds opened up or their hearts have been broken. Knowing a bit about brain chemistry and emotional intelligence significantly helps you to start making changes in your habits. The previous section about accepting the pain is typically the threshold for people to do something different. They are forced to make a change because the pain becomes almost intolerable. In dramatic life events, understanding brain chemistry doesn’t matter. Pain was your teacher of change since you were born and kids are quick to learn from their mistakes when injured. Their bodies are also more resilient than adult bodies so making mistakes are normal.
When your comprehension of emotional intelligence is well-adapted, your self-control is higher than the average person and you can replace your reward mechanisms more easily from bad habits to good habits. Some people are well-disciplined and emotionally supported from childhood that they may never participate in bad habits such as smoking, drinking, overeating, and being lazy. I wish I was that type of person but they are far and few compared to the rest of us in the world that are driven by selfishness and egos. You can debate that some social-economical classes have privilege of always “having it good” or never experiencing harsh conditions but that just isn’t true.
After visiting many countries and meeting people from all kinds of backgrounds, everyone experiences emotional problems. Whether you are living in poverty or a mansion, majority of people behave the same being reactive vs proactive about their emotions. I will even claim that the people who have the highest emotional intelligence are considered “weird” by the masses. The impeccable self-control and cold-faced expressions are not weird, they are trained to the level that emotions are replaced with logic and planning for specific goals in life such as wealth, not happiness.
If you’re unable to control your emotions, how do you expect to have control over others? To start reaping benefits, you need dopamine detox because you’re likely to be desensitized from stimuli overload. There are more than four brain neurotransmitters but knowing the following four covers the basis to improve your learning rate:
- Dopamine
- Serotonin
- Oxytocin
- Adrenaline
Dopamine:
This is the pleasure neurotransmitter, the reward circuit, the feeling mostly easily manipulated by direct actions we can voluntarily make.
Serotonin:
This is the mood regulator, the relaxing neurotransmitter that changes your sleep, anxiety, sexuality, appetite and pain. Changes derive from the gut so what you eat and when you sleep have a great impact on your wellness and energy.
Oxytocin:
This is the love and bonding neurotransmitter. It plays a big role in relationships, loyalty and trust. The amount of empathy and compassion you have determines your connections to others. It’s beneficial for your personal growth through communities.
Adrenaline:
This neurotransmitter is your flight or fight response mechanism. It is your central nervous system and defense against stress. It can be beneficial to speed up physical activities through breathing and your heart rate. Adrenaline sharpens your decisions and reactions.
Take those neurotransmitters into consideration the next time you have a dramatic feeling, to begin to understand how they work, when the emotions start and stop for you to be able to gain control. For example, when you’re doom-scrolling on social media, you engage in a simulation in your body raising your serotonin watching funny and cute animal videos, you raise your adrenaline watching news of danger or harmful content. Those feelings are completely simulated from the screen into your subconscious mind but your brain doesn’t know if they are real or not. Your neurotransmitters fire away and your mood changes when it really doesn’t need to. These emotions are not earned by real life events from actions you took. This is why it’s important for to do “dopamine detox” and remove yourself from these simulations. Overtime your brain gets re-wired and your neurotransmitters become desensitized. Your reward mechanism gets programmed to feel good from inaction and very little work.
It is completely possible to reverse this and allow yourself to get the positive feelings from traditional work, studying and improving your well-being. The key to this success is to do it progressively and to commit 30-days to instill any permanent change to your daily routine and integrate new habits.
Environment
In the previous section, you learned about brain chemistry, neurotransmitters, and how your brain manipulates your feelings from your actions. To continue improving yourself by reducing stimuli is to have an appropriate environment that eliminates distraction.
Your environment is your #1 distraction!
Your external factors become your environment and changing it may prove to be difficult in today’s economy of difficult times. Don’t forget that changing your environment shouldn’t be too costly. The easiest choice is your home and hopefully your peaceful quiet room. If you have mixed feelings or distractions in your home other options include public libraries, cafes, public parks, and break rooms at your workplace. The location and past experiences of specific locations play a big role in the amount of distractions surrounding you. After settling in an ideal location, ensure you have a desk and a comfortable chair to work from. This determines the length of time you’re able to study/work without muscle or back aches. Preventing discomfort from poor posture is crucial for long-term benefits.
Ambiance noise can be controlled in your private room but not public places. If you must listen to something, then listen to music that doesn’t have vocals which will engage your logic and distract you. Avoid upbeat and pleasurable music which raises your dopamine because that dopamine should be earned from your work. Remember, part of re-wiring your brain is to have your reward be work’s result, not an external stimuli. Great examples of music to help focusing are classical music, nature sounds, buddhism chanting, and white noise. Whatever noise you have to deal with, don’t fight it. The average time to get into flow-state is 20 minutes so resisting urges especially during that time is important. Utilize the pomodoro 25-minute timer for assitance.
Eating
At this point you have accomplished a lot and are halfway to getting your habits and productivity improved. You’re swapping your wasteful time from stimuli to working on your goals by controlling your emotions and resisting your dopamine urges. Your progress is gaining momentum and you want to optimize the remainder of your free time. The next progression will have to be your eating habits and your diet. Not many people realize how eating affects personal productivity and what you can do about it. Given the fact that marketing and advertising of food is ever-present in western countries, we are trained from a young age to eat processed food and over-consume. This harmful behavior includes learning the “food pyramid” scam we were taught in grade school.
Why is the food pyramid considered bad? It’s because of the food portions showing carbohydrates should be eaten the most. To provide context for my answer, I’d like to tell a brief story first. In my early twenties, I began to take my health seriously so I began learning nutrition and fitness. In high school, we were fed very unhealthy food such as chicken nuggets, pizza, burgers with french fries, spaghetti and not even the tuna salads were healthy. These are the types of foods that are heavy in salts, fats, and carbohydrates with very little protein which is the key nutrient.
From those diets and recommended “food pyramid” my body experienced post-meal fatigue. Nearly every time I would get drowsy when I had to sit after lunch. I was one of those students known to fall asleep face flat on the desk. It took years, well into my twenties to find out that the culprit of my fatigue was the massive amount of carbohydrates. I first heard about it from another nutritional expert who experienced the same fatigue problem. Considering the food pyramid which recommends 5-6 portions daily of carbohydrates, who does that benefit? Certainly not you as the consumer. It benefits the food corporations who turn a big profit selling food from the low-cost ingredient of flower. It’s easy to turn a $2 bag of flour into $20. That one bag of flour produces 4 bread loafs which sell for $5 each for a profit of $18. Easy money and empty calories!
From now on we need to reduce our carb intake which takes away focus time and energy from our productivity but how? The easiest method is intermittent fasting. If you don’t desire to change your diet, you simply must reduce the quantity. Instead of falling for another big propaganda lie from media, you should skip breakfast. A healthy morning meal is not the start for a great day. If you’ve never tried intermittent fasting then you won’t know the clarity and focus you’re missing in the morning.
Let’s consider how digestion works. Anytime food is consumed, energy is being converted and your body puts in that energy to digest the food. The blood circulating in your body has to redirect some to your stomach for digestion. Why do that in the morning, when you can remain with an empty stomach and have your blood maximize allocation to the brain? This is a result of intermittent fasting, which means eating exclusively in a 7-8 hour timeframe and the remainder of the day you don’t eat. Drinking is still fine but your drinks shouldn’t can’t have calories (sugar nor fat).
What if you cannot give up carbohydrates? This is absolutely normal because many carbohydrates are made of gluten which is addictive. The keto diet is my favorite diet for health and fitness although it’s not the tastiest. Some people eat for health, others eat for happiness aka dopamine spikes. Science has proven that the keto diet strengthens the brain and prevents alzheimer’s. Check this link for yourself https://pubmed.ncbi.nlm.nih.gov/31405021/
You might say that to work hard, you have to sit dormant many hours throughout the day and sweets help you cope with that. It’s true, the lack of mobility and work-related stress induces people to eat more unhealthy foods so their stress hormone is accompanied by dopamine making the hard work more tolerable. If you’re going to have sweets, then at the minimum you should practice intermittent fasting. Perhaps you thought about replacing sugar with artificial sweeteners. Don’t! It’s not a net positive benefit. Artificial sweeteners may seem benign at first but they are more harmful than a moderate amount of sugar. While sugar can be processed normally by the gut, artificial sweeteners are not. They cause more tissue inflammation, increase your risk of diabetes and disrupt metabolism. See this list of problematic sweeteners https://draxe.com/nutrition/artificial-sweeteners/
Here’s an additional study showing negative side effects https://www.sciencedirect.com/science/article/pii/S0273230017301265 Did you know sucralose was originally found through the development of a new insecticide? https://pmc.ncbi.nlm.nih.gov/articles/PMC3856475/
Okay you get the point right but what’s eating have to do with my ability to focus? Here’s a list:
- Time spent cooking and eating too frequently can be time spent learning. Preparing meals with healthy ingredients for 1-3 days is the solution to spend time more efficiently.
- Poor diet leads to fatigue, sicknesses, and lack of energy which are big long-term problems.
- Food that spike your dopamine, while helping reduce stress, will lead to addiction and mood swings.
- Practicing fasting regularly minimizes time spent digesting, prevents obesity, and maintains consistent energy levels.
- High levels of caffeine lead to anxiety, jitters, and eventually poor sleeping habits. Minimize caffeine intake to 1 cup of coffee per day and get 7-8 hour of sleep.
The very word “disease” means a state of unhappiness – “dis-ease.”
Social Media Atrophy
The war of information, emotion and narratives. Social media started off beautifully as a way to keep in contact with friends and distant relatives, sharing our memories with them. In recent years, social media platforms have been engineered as a way to make us weak and control us through fear and propaganda. This is the most negative topic and I don’t want to perpetuate the sentiment. By keeping this section brief, I will provide you the solution and benefits without further dramatic narratives.
By following these principles, you can improve your focus, mental positivity and increased productivity:
Abstain:
from watching mainstream news, instagram, tiktok, and youtube. If there’s an emergency, a friend or family member will notify you.
Make the algorithm work for you:
If you must watch video reels, then follow only educational channels in the niche you are learning. Then explicitly hide the random posts in your feed by selecting “Don’t show this type of content” or “Don’t show posts from this user” from the item’s context-menu. After a few times this action is performed, the algorithm will understand.
Feed the algorithm if you’re publishing:
If it’s your business to create content and publish it, then you can apply the same tactic. Dedicate your profile to be strictly for business and not personal. Don’t combine both because you’ll end up doom-scrolling.
Remove yourself from email lists:
Emails are inevitable and you need one to do anything online. Keep one email account personal and one for business purposes. Don’t join any unimportant newsletters such as shopping deals, trip discounts, news updates, because you will regret it when your inbox fills up and you have to waste time reading through it. The best alternative method is to bookmark the content or blogs you like and visit those sites at your free will.
The take-away form this is read between the lines. Understanding the agenda behind narratives are typically political and have a net negative purpose. Who benefits from you believing what’s on social media?
Learning – The final and best chapter
This is the best information I’ve learned and discovered which has helped me on my learning journey. It is notes from years of trials and tribulations. I cover myths and false beliefs people typically have about learning anything new. “Old dogs, can’t learn new tricks!” The reason people believe this myth is because they are probably stuck in some routine after years of repetition. They state that only kids can learn a second language, not adults. Well I’m an adult and speak 6 languages and I’m still learning. This false belief can be disrupted intent, time commitment and discipline. Yes, it’s easier as a kid because kids don’t have responsibilities like grown ups. They are surrounded in educational environments and others learning the same subjects.
As an adult, you can’t eliminate your responsibilities but you’re probably working 8 hours at a day job and have free time during the weekends. That leaves plenty of time for you to learn new subjects. This is how hobbies are started so choose your hobbies wisely. The fun ones may not benefit you in the long-run. Consider what will be valuable for you to know a year or two from now. Don’t fall in the trap of societal conditioning tell you, that you can’t do it. You’re not too old, you have the capability and aptitude with the right support and guidance. If you’re unsure of how to guide yourself, start by reading books or consult with a coach.
Multi-tasking is not a practical method for productivity. It’s a distractor and only useful for activities that doesn’t require a thought-process. Don’t fall for this trap. Instead practice context-switching. The difference is with context-switching you are staying within the same subject matter and jumping between resources. It’s like being on the same vertical path but using an index to skip to linearly to additional information. An example would be reading two books on the same subject and comparing chapters to see what each author has to say on the matter. Valid reasons for doing this include:
- The current information advances in a non-linear path
- The topic is getting too advance too soon
- Just-in-time (JIT) learning means to reference material only when needed
- Each author’s experience and writing style is different
The source quality will always vary – content from a source that is popular doesn’t indicate quality. It could be so cutting-edge that very few people understand the content. A good author should be humble in his thoughts and not overly promising. A bit of exuberance is okay too.
I have unconventional ways of reading and I learned this only when I took the time to learn about more effective reading. In grade school, we were trained to just read from A to B from one book source, perhaps 2 books for certain subjects. That is just one way to read and it’s boring. Here are other ways that are more effective.
Scan read for an overview:
Read by skimming through paragraphs starting at the table of contents to be aware of all the content. If you’re new to the subject, skim through the earlier chapters until you understand nothing. If you’re familiar with the subject, skim through the chapters most useful to you. Take notes which chapters contain the information you need to learn and read them at a normal pace.
Non-sequential reading:
Use a book as reference extracting only the details you need to know at that moment in time. If it’s a pdf book then do a keyword search otherwise check the table of contents first.
Throughput vs accuracy:
You may think that the faster you read the better, but if you’re not absorbing what you just read was your time wasted? Yes so you may have to read the content twice. Once for awareness and a second time for details memorization.
Reverse reading:
Movies do this occasionally to build up suspense and curiosity. It’s like getting the reward of the book you just purchased and then figuring out the details over time. Read the final ending, then the chapter endings skimming until the beginning of the chapter followed by previous chapters.
Outdated content:
Ensure the subject matter of the book you are choosing is not outdated or replaced by newer tech before investing in learning it. Otherwise, you’re wasting time.
Re-reading:
I find it useful to re-read self-improvement books I’ve previously read and considered them valuable. If you can’t remember the benefits from the book, then it’s time to read it again.
Take breaks:
When reading, there’s no doubt that your eyes strain and get tired. Using the pomodoro technique, take breaks every 25 minutes. Close your eyes completely and cover them reducing any light source. Staring at a specific position for extended times is irregular for eye muscles. Do some eye exercises such as rotating them around, switching focus between up-close and distant objects, using moisturizing eye drops.
Slow down:
When you are reading quickly but find yourself unable to capture what you just read, you have to slow down. Scroll up line by line until you recognize the previous thought you had in your brain before your mind went off tangent. A method I use to slow down reading is to tilt your head slightly to the right or left, like a confused dog would do. This tells your brain that something is off, because you just tilted your horizon line. Our brains expect a balance and because of gravity we’re not spinning in a 360 degree environment. Now your brain has to re-focus without doing much effort.
Slowing down to any rate that makes each line comprehensible and more memorable. This is slightly better than re-reading the same content.
Here are a few supportive proverbs that I’ve learned through my own research so I wish to pass them upon to you and please commit your habit changes to a minimum of 30 days before you quit.
People change, when they hurt enough they choose to change. When they see enough, they are inspired enough. When they learn enough, they want to and when they receive enough, they are able to.
Harvard psychologists studied the correlation between happiness and criminality and concluded that the old Dutch proverb: Happy people are never wicked.
]]>Cheerful businessmen who “looked on the bright side of things” were more successful than pessimistic businessmen.
NodeJS: npm, pnpm, yarn
Ruby: RubyGems
PHP: Composer
Python: Anaconda (conda), Virtualenv (venv), pyenv, uv
These tools are mandatory to understand and use for your programming projects. They help to maintain code packages in your local server environment. When conflicting package version numbers cause errors, package managers are there to isolate them. It simplifies complex tasks in managing packages, dependencies, and environments. The benefits for locking in package version numbers are compatibility, consistency and integrity. These allow you to ensure your code works across different servers, deployments, and testing. For example, a development team working on different parts of a codebase should ensure they have matching package version numbers to prevent errors.
If you’re new to Python, AI, or Machine Learning, you will notice multiple package managers such as venv, conda, and pyenv.
Choose conda because it was built with Data Science in mind supporting multiple languages. It may be replaced with another tool like Uvicorn but conda is still very popular. Conda supports non-python dependencies such as C++ libraries and cross-platform scientific applications. It also has a larger online community to help you build more and resolve issues.
The downside of conda is that it is larger when installing more dependencies than venv. It can also be problematic for web development projects because of the extra dependencies which may not be necessary. If you don’t plan on integrating AI or machine learning then stick with venv for the simplicity so you’ll get quicker builds in your pipelines and containerization.
To install conda, choose an installer from the official Aanaconda website or type:
brew install --cask anacondaFor clarification, conda is a package manager, and Anaconda is the distribution. It means distribution is a pre-configured collection of packages that can be installed. A package manager is a tool which allows the installation, removal, and updating of code packages.
To get you familiarized with conda, you should memorize these commands because you will need them for every project you work on.
10 Most used conda commands:
conda create --name myenv
Purpose: Create a new isolated environment namedmyenv.
Example:conda create --name ml-env python=3.10conda activate myenv
Purpose: Activate (switch to) a specific environment.
Example:conda activate ml-envconda deactivate
Purpose: Exit the current environment and return to the base environment.conda install package-name
Purpose: Install a package in the active environment.
Example:conda install numpyconda update package-name
Purpose: Update a specific package to the latest compatible version.
Example:conda update pandasconda list
Purpose: Show all installed packages in the current environment.conda remove package-name
Purpose: Uninstall a package from the current environment.
Example:conda remove matplotlibconda env list
Purpose: Display all environments you’ve created (with their paths).conda info
Purpose: Display system information and details about your Conda setup.conda env export > environment.yml
Purpose: Export your environment to a YAML file for sharing or backup.
I also don’t have anything against venv. If you prefer to choose it over conda, it is more lightweight and easier for smaller python-only projects.
The 6 most common venv commands:
python -m venv myenv
Purpose: Create a new virtual environment namedmyenv.source myenv/bin/activate(on macOS/Linux)
Purpose: Activate the virtual environment so you can use it.
Example (Linux/macOS):source venv/bin/activatedeactivate
Purpose: Exit the current virtual environment.pip install package-name
Purpose: Install a package inside the active environment.
Example:pip install requestspip list
Purpose: Show all installed packages in the current environment.pip freeze
Purpose: Output a list of installed packages and their versions (useful for saving dependencies).
One of the rarely mentioned benefits of conda is the Anaconda repository code repository which scans for vulnerabilities in python packages. It is a critical factor to consider for data science and machine learning projects. Here’s a cited quote regarding this fact:
]]>60% Reduced risk of breaches from addressable attacks with security and governance controls in the Anaconda AI Platform
https://tei.forrester.com/go/anaconda/anaconda
In case you want to develop a mobile app very quickly for Android or IOS, this is the guide for you. I’ll explain common methods of developing a mobile app and how you can benefit with free tools. The important reasons why you should make a mobile app today are:
- To grow your audience reach
- To add another revenue channel for your business
- To improve customer experience and convenience
Having just a website is okay too, but you will probably want to grow your business sooner or later. Don’t worry, we’re not going to produce this code with AI just because AI is trending nor do we want AI slop. The goal of this article is to show you the options you how quickly you can deploy a mobile app using React Expo which can be seen at http://expo.dev
As a pre-requisite, you should have knowledge of the functionality of websites, installing software on Mac or Windows, and using the terminal command line. This is more of a quickstart guide so it’s not code heavy.
The first approach is to understand the options available to build mobile apps. The obvious platforms are Android and iOS which have their own unique app ecosystems. The origins of iOS app development started with Objective-C which evolved to Swift and Dart programming languages. For Android, it’s Java and Kotlin. Those are known as the native programming languages that get you the best possible performance for mobile device hardware yet are the most intricate to build with. You don’t need to use these languages unless you intend to have a full-time Android or iOS development career.
There are tools and languages available which can convert your website and web app into a mobile app without the hassle of using Java or Swift. The tradeoff is app performance and access to all hardware features if you choose the alternate methods. Those mobile app building methods can be:
So far I’ve tried building with Ionic, React Native and LynxJS. I can tell you that recent changes to the React Native architecture have convinced me to follow their path to building an app. They say that the app performance is very near to that of the native coding language. In addition, the React Expo ecosystem for faster testing and deployments for Android+iOS is helps your workflow tremendously.
The biggest lie is thinking that React Native is akin to coding in ReactJS. It is not and I don’t think the name “React” should even be used in “React Native”. I’ll go as far as to provide this analogy: “Javascript is to Java” as “ReactJS is to React Native”.
That’s my opinion so don’t be offended. There are actually a few shared concepts between React Native such as page routing, import statements, and function logic.
Steps to build
In the following process, you’ll learn to:
- Install React Expo SDK 53
- Start a project
- Debug/Test with the Expo emulator
- Deploy app with EAS
What do we want to accomplish? A mobile app but a really basic app for learning purposes. So does it matter if the app loads content from the internet or the phone itself? The early app-generator frameworks were just placing wrappers around GUIs, websites and other elements; essentially websites wrapped by mobile apps. This is what we are going to do giving you exposure to React Expo so you can get a taste of it without dedicating time to build a full-fledged React Native app.
Afterwards, I’ll show you the commands to test your app locally (real-time previews), on your phone and generate the necessary files to do a real installation of the app. Without React Expo, you would have to install Android Studio which is ~7gb in size and compile or build code to see each change. This is unlike web development which has a smoother workflow.
Here are 2 amazing parts that speed up making a mobile app unlike any other:
npx create-expo-app myNewApp(creates your app boilerplate)eas build --platform all(builds your app file for deployment to the app store)
Now for the quickstart guide to create a mobile app based of a website. We’re going to use the webview method to render our website inside the React Native code. This is in no way the best method to build an app; I am simply demonstrating the conveniences and speed of the process using React Expo.
Ensure you have NodeJS installed including npm & npx so you can run the appropriate commands. Download NodeJS here and then install npx with the global flag:
npm install -g npx
Now install the boilerplate code provided by Expo:
npx create-expo-app myNewApp
cd myNewApp
Next, install the webview component by command line. This is how 95% of adding parts to your app looks like.
npx expo install react-native-webviewNavigate to your webview/app/(tabs) folder and delete explore.tsx and replace the contents of index.tsx. We won’t use those.
import { WebView } from 'react-native-webview';
import { StyleSheet } from 'react-native';

export default function App() {
  return (
    <WebView
      style={styles.container}
      source={{ uri: 'https://expo.dev' }}
    />
  );
}
// Styling
const styles = StyleSheet.create({
  container: {
    flex: 1,
    marginTop: 20,
  },
});
After you replaced the index.tsx file you can preview your project in the browser and android phone by the command:
npx expo start

This screen shows the benefits of running one React Expo command which doubles as your local web server, allows you to open Android Studio, iOS simulator, reload the app, etc.
Type “w” and your browser will open with an error.
React Native WebView does not support this platform.
This occurs because, ironically, the webview feature does not load the website from your code as shown source={{ uri: 'https://expo.dev' }} because it’s not Android. So the next step is to preview the app on your android with “Expo Go” instead of Android Studio. Download Expo Go from the Google Play Store.
Then connect WIFI on your phone to the same network as your computer. This is what the Expo Go app looks like.

Scan the QR code with your phone, make sure internet is available and your app should render the website https://expo.dev.
If you’re satisfied with your app, then build it and submit it to the app store. Ensure you have an account on Expo, there’s a free plan available.
Use the command below and Expo.dev will generate the build files for you:
eas build --platform allNow you’re ready to publish to the App Store!
]]>I’ll answer more questions for you such as “what is the meaning of context size”, “why are my AI responses degrading”, and more importantly, OpenAI. Since I’m technical and like engineering, I became determined to understand the magic behind the LLM boxes. Should you choose to stay with the magic of not knowing the technical aspect of chatGPT and LLMs, then don’t read this article. Otherwise, I will help you utilize chatGPT more effectively.
For a brief introduction to chatGPT and LLMs (large language models), they are massive datasets running as a neural network looking for patterns. The GPT in chatGPT means “generative pre-trained transformer” which is the interface between you, the user, and the AI system. You can interact with an LLM using text or audio but technically, it is just text that is accepted as input because audio becomes transcoded into text, then tokenized and processed by the LLM to provide you intelligent answers.
Should I keep you in suspense or just get to the point about chatGPT not being able to converse with a human? First, you should understand the input-output of these chat models. They accept a list of text messages as inputs and return a text message as output typically in JSON format. Initially, the requests to chatGPT are one-task requests so OpenAI called them “completions” as represented in this code:
messages = [
    {"role": "system", "content": "Describe the role chatGPT should be"},
    {"role": "user", "content": "User request goes here"}
]
response = openai.chat.completions.create(model="gpt-4o-mini", messages=messages)
print(response.choices[0].message.content)
The OpenAI method receives the message and selects the model shown in the parameter. If you sent another another message, chatGPT will treat it as new since it has no inherent memory. You have to program it in as we’ll see in the next step. Now you can see the reason you’re not having a conversation with chatGPT. It is because every request using this chat model is a new message and chatGPT has no recollection of your previous message. How do we solve this? Can we have an ongoing conversation with chatGPT? Yes and no.
As a precaution, the API method openai.chat.completions.create() is for OpenAI and will be different for other AI providers. However, “completions” means AI will attempt to complete your request. If you want to send subsequent messages continuing a topic you have to include your chat history with each request. Additional message increase the message history length therefore increasing the context size being sent to chatGPT.
For the next part, we pass the message history to the model which appears the same as before so we need to put this code block in a loop and accept user input via command line:
while True:
    user_input = input("You: ")
    if user_input.strip() in {"exit", "quit"}:
        break

    messages.append({"role": "user", "content": user_input})

     response = openai.chat.completions.create(
        model=MODEL,
        messages=messages,
        temperature=0.2
     )
     print(messages)
     reply = response.choices[0].message.content
     messages.append({"role": "assistant", "content": reply})
So with each user input, the messages will be appended and re-sent to the LLM. We see this when printing the message variable into the terminal. This means context size (token count) increases but the LLM becomes aware of the previous requests in order to respond with the best answer. Your requests should be separated manually if you’re switching topics or changing tasks. Only keep the conversation going if you want clarification of you previous request or need additional details.
Here’s a brief tutorial if you want to try it yourself running LLM locally on your personal computer. The API used in this example is v1 and may change by the time you’re reading this.
from openai import OpenAI

# Configure OpenAI client to use the local server
API_BASE = "http://127.0.0.1:1234/v1"
API_KEY = "not-needed"  # Placeholder, required even if not used
MODEL = "hermes-3-llama-3.2-3b"

openai = OpenAI(base_url=API_BASE, api_key=API_KEY)

# Initialize chat history with system prompt
messages = [
    {"role": "system", "content": "You are a helpful assistant."}
]

print("Chat with your local LLM. Type 'exit' to quit.")

while True:
    user_input = input("You: ")
    if user_input.strip() in {"exit", "quit"}:
        break

    messages.append({"role": "user", "content": user_input})

    try:
        response = openai.chat.completions.create(
            model=MODEL,
            messages=messages,
            temperature=0.2
        )

        reply = response.choices[0].message.content
        print(reply)
        messages.append({"role": "assistant", "content": reply})
    except Exception as e:
        print(f"Error: {e}"

)
Update since March 2025
OpenAI has added a new method for invoking it’s AI model. It’s called “responses” and it offloads more logic from the developer. Although it also reduces some fine-grained control and it’s seems to be only supported by OpenAI. The existing chat.completions may or may not be deprecated in the future.
Here’s the API code snippet https://api.openai.com/v1/responses
response = client.responses.create(
    model = "gemma-3-4b-it",
    input = [
        {
            "role": "user",
            "content": "Say 'double bubble bath' ten times fast.",
        },
    ]
)
print(json.loads(response.output_text))
The output is no longer deep into the object as the previous response response.choices[0].message.content, instead it’s just response.output_text
Streaming, multiple messages known as chain of thought, images by url and images by base64 are supported by this one method.
See https://platform.openai.com/docs/api-reference/responses for more details and usage.
]]>The objective of this guide is not about “model training”; it is geared for individuals new to the field of AI who want a better understanding and leverage the technology. You can build with AI, not over it, so after reading this guide, the knowledge gained shall be understanding general concepts, usage, and measuring accuracy. In this AI guide, you will learn the following:
- Category of Models
- Corresponding Tasks of Models
- Naming Convention of Models
- Accuracy Performance of Models
As a beginner or just hearing about the popular tools, make note that there isn’t one type, multi use-case model that does everything you ask it to do. From the interface, it may appear that you are just typing to a chatbot, but there is a lot more being executed in the background. Business analysts, product managers, and engineers adopting AI can identify the what objective they have a select from a category of AI models.
Here are 4 categories of models among many:
- Natural Language Processing (general)
- Generative (Image, Video, Audio, Text, Code)
- Discriminative (Computer Vision, Text Analysis)
- Reinforcement Learning
While most models specialize in one category, others are multi-modal with different levels of accuracy. Every model has been trained on specific data and therefore can do specific tasks related to the data it trained on. Here’s a list of common tasks each category of models can do:
Natural Language Processing
Enables computers to interpret, understand and generate natural human language using tokenization and statistical models. Examples are chat bots and the most common one is chatGPT which stand for “generative pre-trained transformer”. Most models are actually pre-trained transformers.
Generative (Image, Video, Audio, Text, Code)
They are Generative Adversarial Networks (GAN) which use two sub-models known as a generator and a discriminator. Realistic imagery, audio, text and code can be produced based on tons of data it was trained on. Stable Diffusion is the most popular method of generating images and videos.
Discriminative (Computer Vision, Text Analysis)
These use algorithms designed to learn different classes of datasets for decision-making. They include sentiment analysis, optical recognition, and sentiment analysis.
Reinforcement Learning
Using trial-and-error methods and human enforcement to produce goal-oriented outcomes, such as robotics, game playing, and autonomous driving.
Naming Convention of Models
Now that you understand the types of models and their tasks, the next step is to identity the model quality and performance. This begins with the name of the models. Let’s break down a model naming. There’s no official convention to naming AI models but the most popular ones will just have a name followed by the version number such as chatGPT#, Claude #, Grok #, Gemini #. However, the smaller open-source, and task-specific models will have longer names. This can be seen on huggingface.co which will contain the organization name, model name, parameter size, and lastly the context size. Let’s elaborate with an examples:
mistralai/Mistral-Small-3.1-24B-Instruct-2053
- Mistralai is the organization
- Mistral-Small is the model name
- 3.1 is the version number
- 24B-Instruct is the parameter count in billions or training data
- 2053 is the context size or token count
google/gemma-3-27b
- Google is the organization
- Gemma is the model name
- 3 is the version number
- 27B is the parameter size in billions
Additional details which you will see and need to know are the quantization format in bits. The higher the quantization format, the more computer ram and storage is required to operate the model. A quantization format is represented in floating point such as 4, 6, 8, and 16. Other formats can include GPTQ, NF4, and GGML which indicate usage for specific hardware configurations.
Accuracy Performance of Models
If you’ve seen news headlines about a new model release, do not immediately trust the results that are claimed. AI performance competition is so competitive right now that companies cook-up the performance numbers for marketing hype. How many people will test them on their own instead of trusting the marketing hype? Not many at all so don’t fall for the “hallucinated figures”. References https://techcrunch.com/2025/04/07/meta-exec-denies-the-company-artificially-boosted-llama-4s-benchmark-scores/ and https://lmarena.ai/?leaderboard
The real way to determine model quality is to check benchmark scores and leaderboards. There have been several tests which you could say are semi-standardized or maybe fully standardized but in reality, we are testing “black boxes” with tons of variables. The best measure is to check answer responses from AI with facts and other scientific sources.
Leaderboard websites will show sortable rankings with votes, confidence interval scores usually in a percentage value. The common benchmarks are tests that prompt the AI model with questions and get answers which are measured. They can include: AI2 Reasoning Challenge, HellaSwag, MMLU, TruthfulQA, WinoGrande, GSM8K, HumanEval.
Here are brief descriptions of those benchmark tests:
AI2 Reasoning Challenge (ARC) – 7787 multiple-choice science questions from grade school
HellaSwag – commons sense reasoning exercises through sentence completion
MMLU – Massive multitask language Understanding of problem solving
TruthfulQA – assess truthfulness by encouraging falsehoods and avoiding responses like “I’m not sure”.
WinoGrande – Winograd schema challenge with two near-identical sentences based on a trigger word
GSM8K – 8,000 grade school level math questions
HumanEval – measures ability to generate correct python code across 164 challenges
Leaderboard websites
https://www.designarena.ai/leaderboard
https://gorilla.cs.berkeley.edu/leaderboard.html
https://www.vellum.ai/blog/llm-benchmarks-overview-limits-and-model-comparison
https://huggingface.co/spaces/open-llm-leaderboard/open_llm_leaderboard#/
https://huggingface.co/spaces/hf-audio/open_asr_leaderboard
https://artificialanalysis.ai/leaderboards/models
https://epoch.ai/data/notable-ai-models
https://openlm.ai/chatbot-arena
https://lmarena.ai/?leaderboard
Now using these facts and knowledge you can take a little extra research time beyond reading the next Ycombinator/Tech Crunch headline to determine if a new model performs the same or worse than stated by press releases.
]]>With all the sales lingo and terminology which makes you grind your teeth, I’ll try to explain it better. We can re-define the sales funnel in a friendlier manner using simpler terms. Are you comfortable bartering? Well we can start with that.
A sales funnel is the bartering method for the contemporary millennial era.
The virtual barter: to gain a visitor’s attention for provide a form of value and/or transaction.
Sales funnels are also known as click funnels but it’s not cylindrical plastic cone in this case. What’s the first thing you imagine when you hear sales funnel? How about a click funnel? I see the Atari game Tempest clicking with neon colored particles through a black tunnel.
Well okay, perhaps sales words are necessary to communicate knowledge between sellers, but are they needed for consumers? If you want to buy something from me, do you step in my sales funnel? Have we previously established some kind of rapport which makes you trust me?
Probably not; this is the internet after all. Therefore, if I want to sell a digital product among many similar other products online, how will you find me? It’s easier said than done.
For first-timers to sell digital products online, here’s my suggested process which is similar to other methods. I have to establish the presence, value and communication of my product to find you online. Actually, it’s more like allowing you to find my product faster. Notice how I mentioned three elements so allow me to elaborate:
- Presence – There must be an easily-reachable, fixed-location which contains the content, details and price of the product I want to sell for a monetary exchange.
- Value – There must be some form of representation (digital content) of what the product contains, offers, and allows you to do. (Preferably with proof)
- Communication – There must be widespread distribution of the information noted in presence and value of the product. This is the information targeting the end product user.
Next, I will focus on how to build your digital product’s value-exchange. Best of all, it will be using tools such as WordPress which do not have monthly fees.
Granted that hosting a website online has some associated fees but that’s also true if you don’t want to sell anything. Having your own website is good for proof authenticity of your digital product. Nearly all alternative options for selling digital products have monthly fees, take commissions and don’t guarantee that you will have sales so why would you start spending money if you haven’t tested the waters? For example, clickfunnels.com starts at $127 per month and mailchimp.com for $13/month.
Let’s cover the rapport-building, value exchange also known as the sales funnel. Here are the main components of a sales funnel including descriptions:
- Website – where prospects can find you
- Landing page – your proposition and offer
- Email registration – initial value exchange
- Drip Campaign – building rapport with more value
- Monetary Transaction – getting paid for your specialty knowledge
A website is needed with a public domain name and access to a server which allows you to upload software to it. We will use the free software content management system called WordPress.
The landing page is where prospects will arrive after making initial interest in your product. This page will contain any details to persuade the prospect and allow further communication with you. It is done mainly through email messages, but can also be done with chat. It is very typical for a prospect to show interest but not be ready to buy your product so it’s essential to provide more information.
If your proposition (landing page) got the prospect’s email address without lies, then good job! Nowadays, your brief 3-page colored PDF or virtual gift of spam will not gain you someone’s legit email address. The average landing-page visitor is smart enough not to give away their precious inbox after enduring years of spam. This part should be highly-targeted for your niche to grow your email list.
The drip campaign, which is another silly term, is where your prospect becomes a lead. We will call it an email campaign. This is where you should send email message offering more value to your lead. Trust is earned and rapport is not free (paying attention). From the emails you send, you are building the lead’s trust in you. This is also why chat bots are popular but not very effective as real-time chat. Break that trust and you have no sale!
As a sales analogy to real life, think of a stranger approaching you and the first question they ask is: “Hi, you look out of shape, would you like to buy my exercise book?” How dare you!?! You won’t buy it unless you get to know exactly how the book can help you and if the salesman is trustworthy. Perhaps he will let you read the first chapter.
The last but not final step is getting the ultimate value-exchange; money! We want the lead to pay us for the help we’ve provided. The lead becomes a customer. So even if our emails gave away 50% of the product without being paid, we should have built enough trust and thirst for the lead to buy-in.
Now let’s get technical and start building. Here are the steps I will walk you through to build your own value-exchange system. Free tools will be used where applicable staring with WordPress, a software system that’s been around for years to reach maturity and mass adoption. It is one of the reasons we can keep our expenses low.
The outline of the steps are:
- Server hosting
- WordPress Install
- WordPress Theme
- Email Opt-in Plugin
- Email Messaging Campaign Plugin
- Ecommerce sales plugin
- Merchant Payment Processor
Server Hosting
Get your web hosting from wherever, whoever, I don’t care who you choose as long as they have cpanel and QuickInstall, it will be easier for you. With QuickInstall, which is located in cpanel, you can choose to install WordPress using your email address and domain name.


WordPress Install
Once you receive your confirmation email from the WordPress CMS, login and you will be at the dashboard page. Ensure you have the latest WordPress core installed for security. According to WordPress, this update could be everyday. Just kidding, but it seems like it. Then you will want to disable all the bloat plugins which pretend to be free, but make you pay if you want to use them at full capacity. Uninstall them!
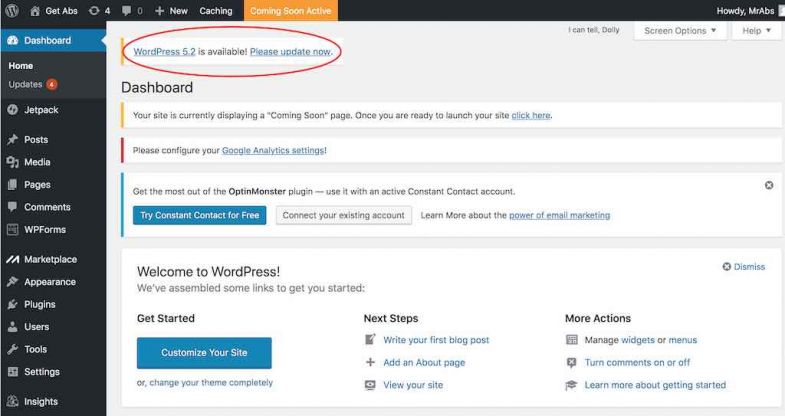

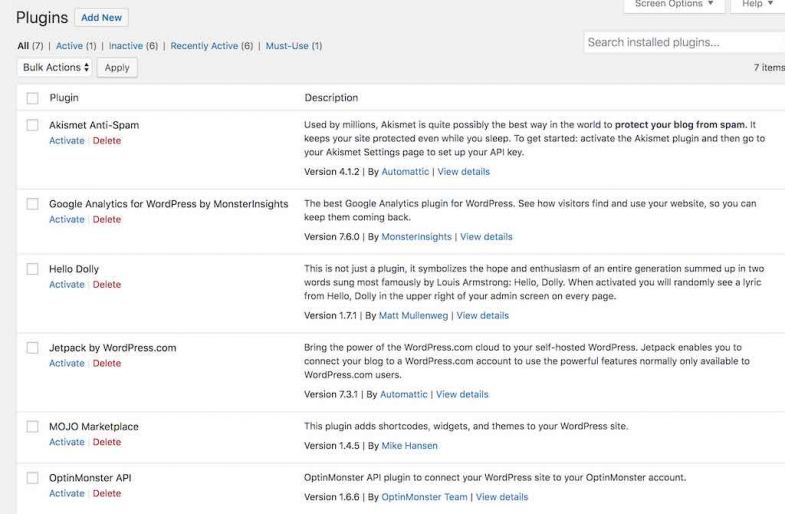
WordPress Theme
Don’t be an amateur by accepting one of the default themes pre-installed. Go out there and find something more appealing. You can check themeforest.net for many themes, including one free theme per month if you’re a registered user. I use them too.
After installing your delightful new theme, you should customize it! Each theme has configurations through the settings panel so your website can be unique. Uploading your own logo and making at least one post should be the minimum if you’re lazy and want to test it out.

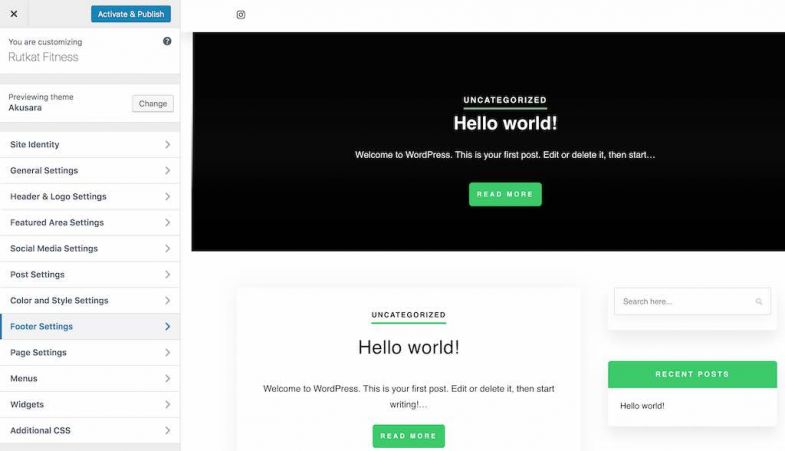
Email Opt-in Plugin
From here we will need a premium plugin. The features of this plugin are amazing. You get analytics just as you would with MailChimp, Constant Contact, Get Response, Aweber etc. Those service owners are rich. I’m not. You might be flabbergasted to find out Mailster is a big round $0 per month. Here are just a few of the features you will get from a premium plugin, which I purchased for myself but not affiliated with:
- html email templates
- Personalized high-dpi logo
- Email mx record verification
- Tracking email opens
- Email notifications
- Import/export subscribers
- Cron jobs

The plugin is not free but it’s worth the one-time price. After getting and installing the plugin. You will need to configure it. Here’s how followed by screenshots:
- Create List
- Create a form, set List Options and Double-Opt-in
- Create a subscribed thank you page for the double opt-in
- Click the Use It! Button and copy the shortcode [newsletter_signup_form id=1] to use on your landing page. (Widget and iframe available)
- Create campaign Autoresponders


An email campaign is the email messages you will send periodically to your list of prospects. An auto-responder is a message you want to email out after a set period of time after a visitors signs up on your landing page. Creating a new auto-responder opens a new campaign form. The difference between the two is that auto-responders have two triggers for the message to be sent; an event trigger and a time period trigger. A campaign is triggered only at a specific time period.
This part requires good strategy because at this point you have earned a prospect’s email address turning them into a lead. With the double opt-in method, the email address is verified. Now to decide how many auto-responder messages you should send.

Congrats, but you’re not done yet! Now you are ready to sell or ask your prospects for a donation but you will need another plugin to receive a payment. This way you can automate your transaction in exchange for delivering digital goods.
I recommend a bank account, an online payment gateway such as Stripe and the premium plugin Digital Paybox, which I spent hours researching. Digital Paybox has:
- Multiple payment gateway such as stripe and even bitcoin
- Multiple currencies
- Fixed and flexible pricing
- Temporary download links to prevent theft
Once you install and activate Digital Paybox, fill out the settings section with a charming message your new customer will receive. Below the message section are fields for each payment processor to be added. Choose the one you would like to use.


Well done! That is the A-Z process of a sales funnel. If you had any difficulties setting this up or need me to setup a sales funnel for you, reach out to me on my twitter.com/therutkat or email.
]]>Telegram’s popularity has risen because of its speedy performance and versatility as a communication app; it actually supports html and js. There are many free bots you can get to enhance Telegram’s features including Pomodoro bot to set yourself a timer; Insta bot to download videos and photos from instagram; and a text-to-speech bot. Check out the bots here https://storebot.me/
Here’s how you can change your public channel to private or vice versa, please note that you have to the creator of the channel:
Access your channel and click the ellipses in the top-right corner, click info, then click Edit to see the channel type and name.


You will have to delete the text of the channel name after the t.me/ part to be able to change the channel type.

After deleting the text part of the channel name, you should be able to select Private for the channel type and a invite link will appear automatically.
The difference between a public and private channel is the way it’s accessed to non-members. A public channel name is searchable and can be accessed by anyone, this includes spammers and scammers! This alone is a great reason to make your channel private. Also the channel’s content and history is permanent so you may not want that publicly available.
In case you haven’t started your own channel, look for the search bar with the pen icon next to it. Clicking the pen icon will allow you to create a secret 1-1 chat, a new channel or a new group. See screenshot below:

]]>