The post How to Install LEMP Stack on Ubuntu 24.04.1 LTS appeared first on Shapehost.
]]>The LEMP stack is one of the most practical foundations for modern web hosting. It combines Linux, Nginx, MariaDB, and PHP into a fast and flexible platform for running WordPress, Laravel, custom PHP applications, APIs, and lightweight web services. On Ubuntu 24.04.1 LTS, you also get a stable long-term support base with current package versions and predictable maintenance.
In this guide, we deploy a fresh Ubuntu 24.04.1 LTS server on Shape.Host CloudStack, install the latest practical LEMP components for this platform, configure Nginx with PHP-FPM, install MariaDB 11.8 from the official MariaDB repository, and verify the stack with a live browser test page.
What Is a LEMP Stack?
LEMP stands for Linux, Engine-X (Nginx), MariaDB, and PHP. It is a popular alternative to the traditional LAMP stack because Nginx is efficient under concurrency, PHP-FPM integrates cleanly with it, and MariaDB offers a mature open-source database platform with excellent compatibility.
Stack Versions Used in This Tutorial
| Component | Version Verified | Source |
|---|---|---|
| Ubuntu | 24.04.1 LTS | Fresh Shape.Host VM deployment |
| Nginx | 1.24.0 | Ubuntu 24.04 package |
| PHP | 8.3.6 | Ubuntu 24.04 package |
| MariaDB | 11.8.6 | Official MariaDB 11.8 repository |
Why Use LEMP on Ubuntu 24.04.1 LTS?
- Nginx handles concurrent traffic efficiently and is widely used for reverse proxy and application hosting.
- PHP 8.3 delivers strong performance and is compatible with most current PHP applications.
- MariaDB 11.8 gives you a current long-term support database branch without relying on older distro defaults.
- Ubuntu 24.04.1 LTS provides long support windows, stable package maintenance, and a familiar server administration experience.
LEMP vs LAMP
| Stack | Web Server | Best Fit |
|---|---|---|
| LEMP | Nginx | High-concurrency PHP sites, reverse proxy setups, leaner web serving |
| LAMP | Apache | Legacy PHP apps, heavy .htaccess workflows, Apache module compatibility |
Prerequisites
- A fresh Ubuntu 24.04.1 LTS server
- Root or sudo access
- An IPv4 address reachable on port 80
- At least 2 vCPU, 4 GB RAM, and 50 GB storage for a comfortable base deployment
1. Verify the Operating System
Start by confirming that the server is running Ubuntu 24.04.1 LTS.
cat /etc/os-release
2. Update the Server and Install Base Utilities
Update the package index, apply upgrades, and install the tools needed for repository management and package handling.
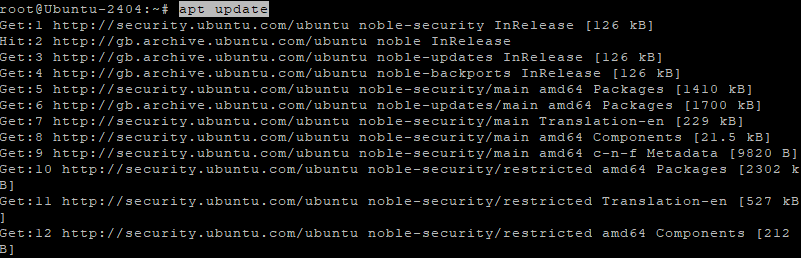
apt-get update
apt-get -y upgrade
apt-get install -y curl ca-certificates gnupg lsb-release apt-transport-https software-properties-common unzip
3. Install Nginx and PHP 8.3
Ubuntu 24.04 ships with PHP 8.3, which makes it a convenient base for modern PHP applications. Install Nginx, PHP-FPM, and the most common PHP modules you will need for dynamic websites.
apt-get install -y nginx php-fpm php-cli php-mysql php-curl php-xml php-mbstring php-zip
4. Add the Official MariaDB 11.8 Repository
Ubuntu’s default database packages are not always the newest branch you may want for a fresh application stack. For this deployment, we added the official MariaDB 11.8 repository before installation.
curl -LsS https://downloads.mariadb.com/MariaDB/mariadb_repo_setup | bash -s -- --mariadb-server-version=mariadb-11.8
5. Install MariaDB Server and Client
Once the MariaDB repository is configured, refresh the package index and install the server and client packages.
apt-get update
apt-get install -y mariadb-server mariadb-client
6. Configure Nginx, PHP-FPM, and a Test Site
To verify the full LEMP path, create a simple PHP application, enable PHP handling in Nginx, and configure a local MariaDB-backed test page. A minimal default server block for Ubuntu 24.04.1 looks like this:
server {
    listen 80 default_server;
    listen [::]:80 default_server;

    root /var/www/html;
    index index.php index.html index.htm;
    server_name _;

    location / {
        try_files $uri $uri/ /index.php?$query_string;
    }

    location ~ \.php$ {
        include snippets/fastcgi-php.conf;
        fastcgi_pass unix:/run/php/php8.3-fpm.sock;
    }
}
After writing the server block and the test page, validate Nginx and reload the service:
nginx -t
systemctl reload nginx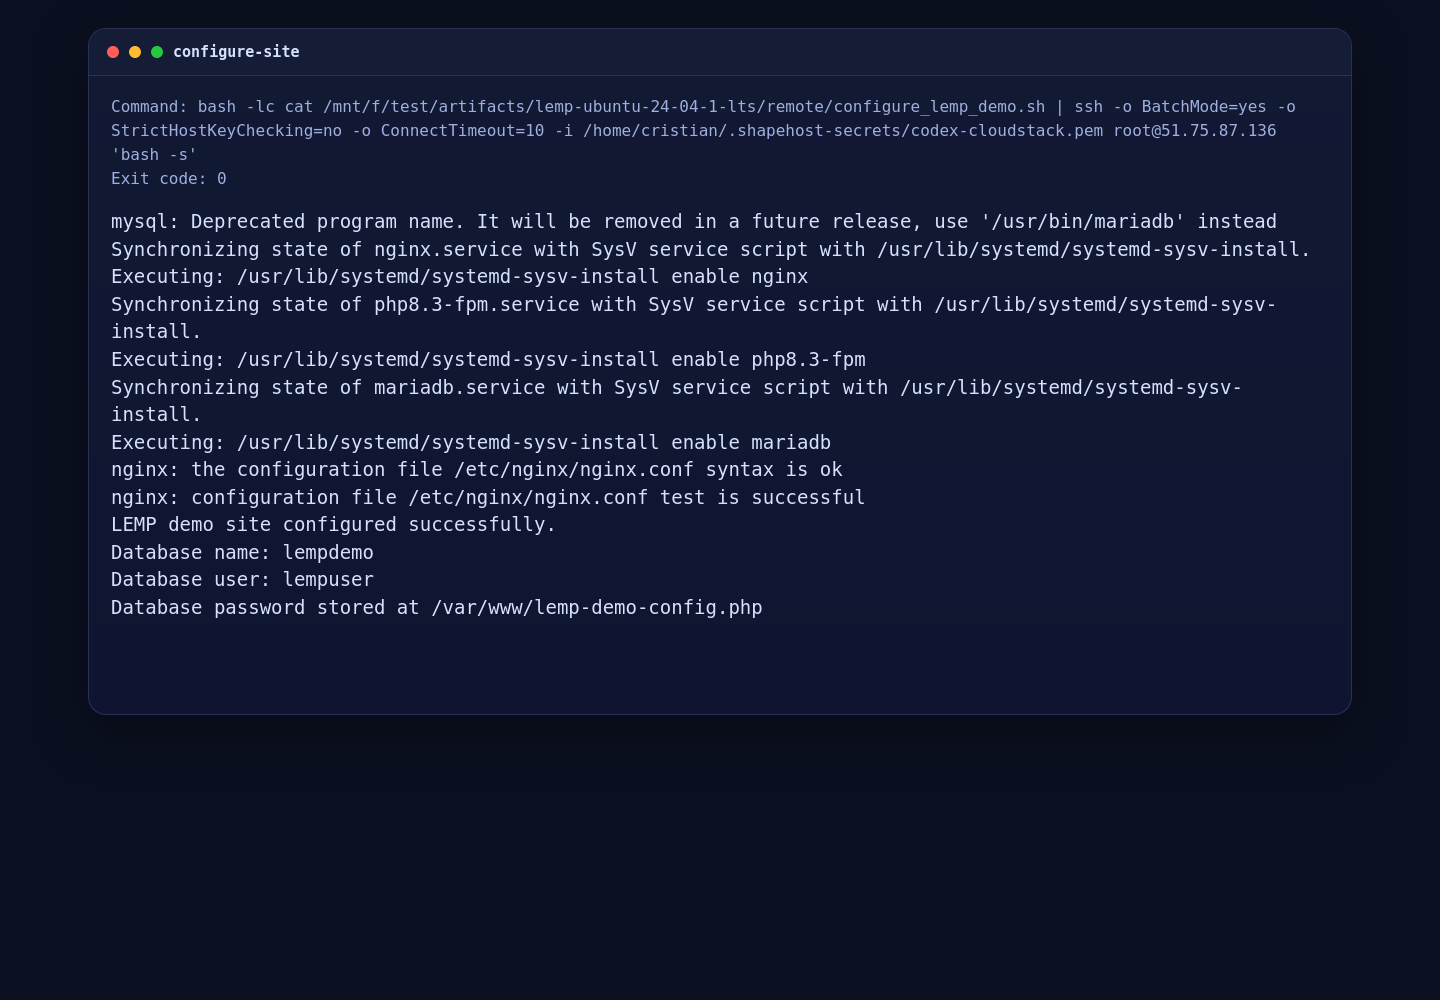
7. Verify the Installed Versions
Use the following commands to verify the exact versions on your server:
nginx -v
php -v
mariadb --version
On this Shape.Host deployment, the installed versions were:
- Nginx 1.24.0
- PHP 8.3.6
- MariaDB 11.8.6

8. Confirm the LEMP Stack in a Browser
Finally, open your server IP address in a browser. The demo page below confirms that PHP-FPM is running behind Nginx and that the PHP application can connect to MariaDB successfully.

Conclusion
You now have a working LEMP stack on Ubuntu 24.04.1 LTS with Nginx 1.24.0, PHP 8.3.6, and MariaDB 11.8.6. This combination is a strong starting point for PHP applications, content management systems, APIs, and custom websites that benefit from Nginx performance and a current MariaDB branch.
If you plan to use this server in production, the next sensible steps are enabling HTTPS, tightening your Nginx server blocks, restricting database access, and deploying your application code on top of this verified base stack.
The post How to Install LEMP Stack on Ubuntu 24.04.1 LTS appeared first on Shapehost.
]]>The post How to Install MeshCentral on AlmaLinux 9 (Self-Hosted Remote Management) appeared first on Shapehost.
]]>(Self-Hosted Remote Management + Node.js + Nginx + SSL)
MeshCentral is a powerful, open-source remote management and remote access platform that allows administrators to securely control, monitor, and manage computers and servers through a web browser. It supports remote desktop, terminal access, file transfer, device grouping, user and role management, and optional out-of-band management, all without relying on third-party cloud services.
Unlike proprietary tools such as TeamViewer or AnyDesk, MeshCentral can be fully self-hosted, giving you complete ownership of devices, credentials, and connection data. This makes it an excellent choice for system administrators, MSPs, DevOps teams, and privacy-focused organizations.
Running MeshCentral on AlmaLinux 9, a RHEL-compatible, enterprise-grade Linux distribution, provides long-term stability, predictable updates, and strong security defaults. AlmaLinux 9, combined with Node.js LTS, Nginx, and HTTPS (SSL), offers a production-ready foundation for a secure and scalable remote management server.
Architecture Overview
| Layer | Component | Role |
|---|---|---|
| OS | AlmaLinux 9 | Enterprise-grade, RHEL-compatible Linux base |
| Runtime | Node.js LTS (18 / 20) | Runs the MeshCentral server |
| Application | MeshCentral | Web UI, device management, relay services |
| Database | Built-in (NeDB / SQLite) | Stores users, devices, and settings |
| Reverse Proxy | Nginx (recommended) | HTTPS termination and routing |
| TLS | Let’s Encrypt / PKI | Encrypted secure connections |
| Clients | Browsers + Mesh Agents | Remote access and device control |
MeshCentral uses a single-service, lightweight architecture, which makes it easy to deploy, maintain, and scale.
Why Use MeshCentral?
- Fully self-hosted — no vendor lock-in
- Remote desktop & terminal — browser-based access
- Agent-based management — Windows, Linux, macOS
- Granular permissions — users, groups, roles
- WebSocket-based connections — fast and efficient
- File transfer & power controls
- Multi-tenant capable — suitable for MSPs
- Open-source & actively maintained
- Very low resource usage
MeshCentral is designed for secure, scalable remote administration with full infrastructure control.
MeshCentral vs Other Remote Management Tools
| Feature / Capability | MeshCentral | TeamViewer | AnyDesk | Apache Guacamole |
|---|---|---|---|---|
| Hosting | Self-hosted | Cloud only | Cloud only | Self-hosted |
| Open-source |  Yes Yes |  No No | No | Yes |
| Data ownership | Full control | Vendor-controlled | Vendor-controlled | Full control |
| Agent-based | Yes | Yes | Yes | No |
| Web UI | Yes | No | No | Yes |
| Cost | Free | Paid | Paid | Free |
MeshCentral stands out for privacy, transparency, and flexibility.
Security & Best Practices on AlmaLinux 9
- Always run MeshCentral over HTTPS.
- Use Let’s Encrypt SSL certificates with automatic renewal.
- Bind MeshCentral to 127.0.0.1 and expose it via Nginx.
- Store secrets only in configuration files or environment variables.
- Disable public account creation if not required.
- Enforce strong passwords and role-based access.
- Enable SELinux (enforcing mode) and label Docker/Node paths correctly.
- Configure firewalld and allow only ports 80 / 443.
- Keep AlmaLinux, Node.js, and MeshCentral updated.
- Regularly back up:
- MeshCentral data directory
- Configuration files
- Monitor logs for authentication and device activity.
Typical Use Cases
- Remote server administration
- IT support and helpdesk operations
- MSPs managing multiple clients
- Home labs and self-hosted environments
- Device inventory and monitoring
- Secure alternative to TeamViewer or AnyDesk
- Enterprise or compliance-sensitive environments
Deploying MeshCentral on AlmaLinux 9 gives you a secure, scalable, and fully self-hosted remote management solution — combining modern Node.js performance with enterprise-grade Linux stability, strong encryption, and full control over your infrastructure.
Step 1: Create a Server Instance on Shape.Host
Before installing MeshCentral, you need a VPS with a public IP address.
Log in to https://shape.host
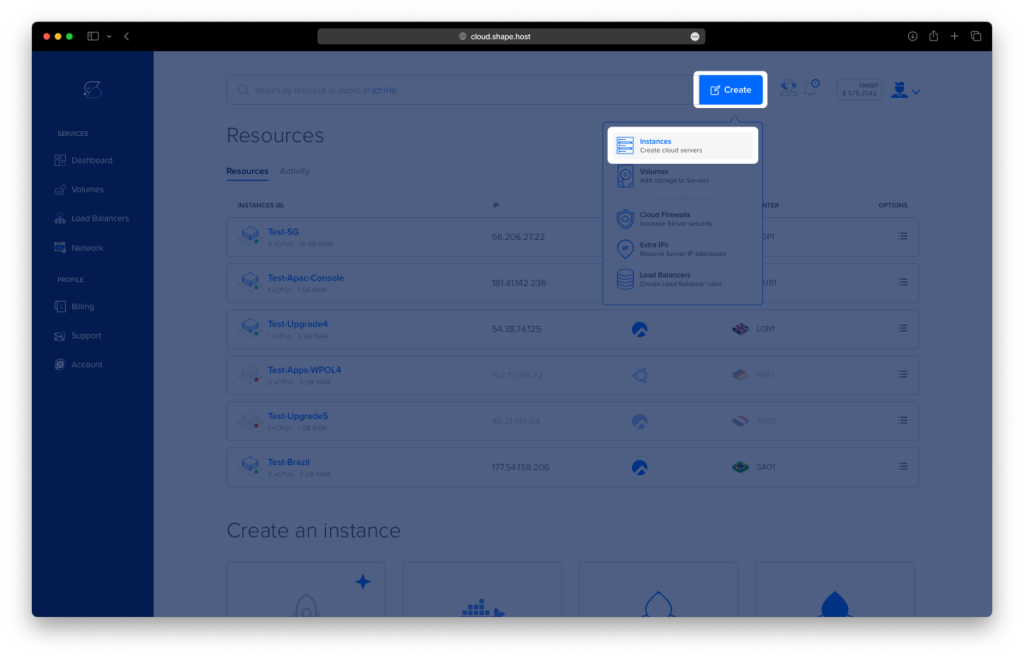
Click Create → Instance

Choose a data center close to your users

Select a plan with at least:
2 CPU cores
4 GB RAM
30–40 GB SSD
Choose AlmaLinux 9 (64-bit) as the operating system

Create the instance and wait for provisioning

Copy the public IP address

Step 2: Connect to the Server (Linux, macOS & Windows)
Linux / macOS
ssh root@YOUR_SERVER_IP
Windows (PowerShell / Windows Terminal)
ssh root@YOUR_SERVER_IP
Windows (PuTTY)
- Host Name:
YOUR_SERVER_IP - Port:
22 - Connection Type: SSH
- Username:
root
Step 3: Update the System
dnf update
This command:
- Updates all installed packages
- Applies security patches
- Prepares the system for Node.js and MeshCentral installation

Step 4: Install Required Dependencies
dnf install curl ca-certificates gnupg
These packages are required to:
- Securely download external scripts (
curl) - Validate HTTPS connections (
ca-certificates) - Verify repository signatures (
gnupg)

Step 5: Install Node.js 20 (Required by MeshCentral)
MeshCentral requires a modern Node.js runtime.
curl -fsSL https://rpm.nodesource.com/setup_20.x | bash -

- Adds the official NodeSource repository for Node.js 20
dnf install nodejs

Verify installation:
node -v
npm -v

Step 6: Install MeshCentral
Create the application directory:
mkdir -p /opt/meshcentral
cd /opt/meshcentral
Install MeshCentral using npm:
npm install meshcentral

Create the data directory:
mkdir -p /opt/meshcentral/meshcentral-data
This directory will store:
- Configuration files
- SSL certificates
- Runtime data and logs
Step 7: Initial MeshCentral Configuration
Create the configuration file:
nano /opt/meshcentral/meshcentral-data/config.json
Initial configuration:
{
  "settings": {
    "cert": "almalinux-tutorials.shape.host",
    "port": 443,
    "redirPort": 80,
    "selfUpdate": false
  },
  "domains": {
    "": {
      "title": "MeshCentral",
      "newAccounts": true
    }
  }
}
What this configuration does
- Sets the domain MeshCentral will use
- Runs MeshCentral on HTTPS (443) and redirects HTTP (80)
- Disables automatic updates (recommended for stability)
- Allows creation of the first administrator account

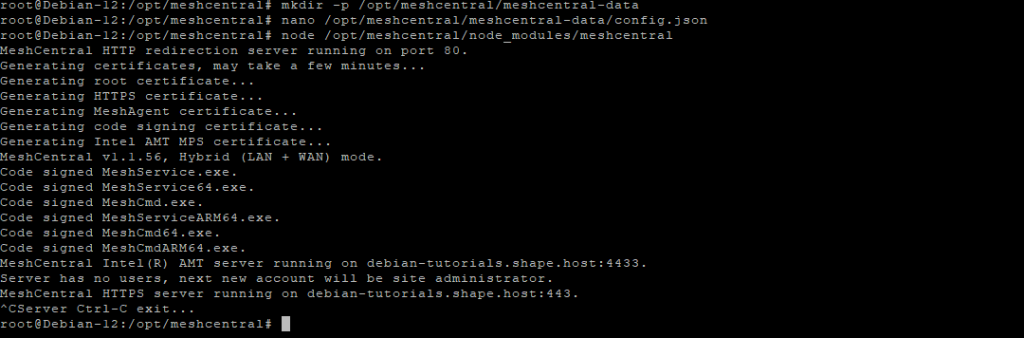
Test-run MeshCentral manually:
node /opt/meshcentral/node_modules/meshcentral
- Confirms MeshCentral starts correctly
- Stop it with Ctrl + C after verification

Step 8: Create a systemd Service
Create the systemd service file:
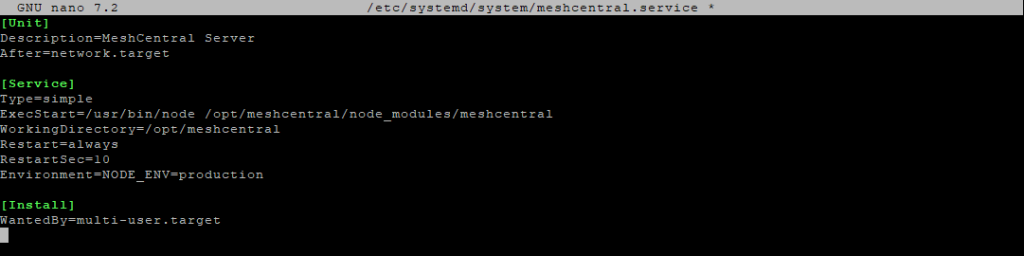
nano /etc/systemd/system/meshcentral.service
Paste the following:
[Unit]
Description=MeshCentral Server
After=network.target

[Service]
Type=simple
ExecStart=/usr/bin/node /opt/meshcentral/node_modules/meshcentral
WorkingDirectory=/opt/meshcentral
Restart=always
RestartSec=10
Environment=NODE_ENV=production

[Install]
WantedBy=multi-user.target

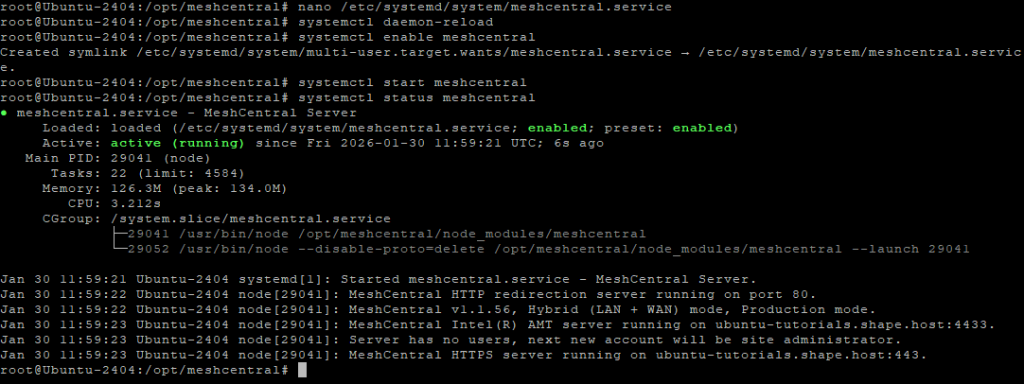
Reload systemd configuration:
systemctl daemon-reload
Enable and start MeshCentral:
systemctl enable meshcentral
systemctl start meshcentral
Check service status:
systemctl status meshcentral

Step 9: Enable Let’s Encrypt SSL
Edit the configuration file again:
nano /opt/meshcentral/meshcentral-data/config.json
Final production configuration:
{
  "settings": {
    "cert": "almalinux-tutorials.shape.host",
    "port": 443,
    "redirPort": 80,
    "selfUpdate": false,
    "letsencrypt": {
      "email": "[email protected]",
      "names": "almalinux-tutorials.shape.host",
      "production": true
    }
  },
  "domains": {
    "": {
      "title": "MeshCentral",
      "newAccounts": false
    }
  }
}
What changed
- Enables automatic Let’s Encrypt SSL
- Issues a trusted HTTPS certificate
- Disables public account creation (recommended for security)

Restart MeshCentral to apply changes:
systemctl restart meshcentral

Step 10: Access MeshCentral
Open your browser:
https://almalinux-tutorials.shape.host
You now have:
- A fully self-hosted MeshCentral server
- Running on AlmaLinux 9
- Secured with Let’s Encrypt HTTPS
- Managed as a systemd service


You installed MeshCentral on AlmaLinux 9, configured it to run persistently as a system service, and secured it with Let’s Encrypt SSL. This setup provides a robust, centralized, and secure platform for remote management of systems and devices.
For production-grade hosting with full root access, high performance, and long-term stability, Shape.Host Linux SSD VPS is an excellent foundation for running platforms like MeshCentral.
The post How to Install MeshCentral on AlmaLinux 9 (Self-Hosted Remote Management) appeared first on Shapehost.
]]>The post How to Install MeshCentral on Debian 12 (Self-Hosted Remote Management) appeared first on Shapehost.
]]>(Self-Hosted Remote Management + Node.js + Nginx + SSL)
MeshCentral is a powerful, open-source remote management and remote access platform used to securely control, monitor, and administer computers and servers from a web browser. It provides remote desktop, terminal access, file transfer, device grouping, user and role management, and optional out-of-band management — all without relying on third-party cloud services.
Unlike proprietary tools such as TeamViewer or AnyDesk, MeshCentral can be fully self-hosted, giving you complete ownership of devices, credentials, and connection data. This makes it especially attractive for system administrators, MSPs, DevOps teams, and privacy-focused organizations.
Running MeshCentral on Debian 12 (Bookworm) offers a stable, security-first, and long-term supported operating system. Debian 12 ships with OpenSSL 3, systemd 252, and a mature Node.js ecosystem, making it a solid foundation for a production-grade remote management server.
Architecture Overview
| Layer | Component | Role |
|---|---|---|
| OS | Debian 12 (Bookworm) | Stable, long-term supported Linux base |
| Runtime | Node.js LTS (18 / 20) | Runs the MeshCentral server |
| Application | MeshCentral | Web UI, device management, relay |
| Database | Built-in (NeDB / SQLite) | Stores users, devices, settings |
| Reverse Proxy | Nginx (recommended) | HTTPS termination and routing |
| TLS | Let’s Encrypt / PKI | Encrypted secure connections |
| Clients | Browsers + Mesh Agents | Remote access and device control |
MeshCentral uses a single-service architecture, which keeps deployments lightweight, fast, and easy to maintain.
Why Use MeshCentral?
- Fully self-hosted — no vendor lock-in
- Remote desktop & terminal — browser-based access
- Agent-based management — Windows, Linux, macOS
- Granular permissions — users, groups, roles
- WebSocket-based connections — efficient and responsive
- File transfer & power controls
- Multi-tenant capable — suitable for MSPs
- Open-source & actively maintained
- Very low resource usage
MeshCentral is built for secure, scalable remote administration with full infrastructure control.
MeshCentral vs Other Remote Management Tools
| Feature / Capability | MeshCentral | TeamViewer | AnyDesk | Apache Guacamole |
|---|---|---|---|---|
| Hosting | Self-hosted | Cloud only | Cloud only | Self-hosted |
| Open-source | Yes | No | No | Yes |
| Data ownership | Full control | Vendor-controlled | Vendor-controlled | Full control |
| Agent-based | Yes | Yes | Yes | No |
| Web UI | Yes | No | No | Yes |
| Cost | Free | Paid | Paid | Free |
MeshCentral stands out for privacy, transparency, and flexibility.
Security & Best Practices on Debian 12
- Always run MeshCentral over HTTPS.
- Use Let’s Encrypt SSL certificates with automatic renewal.
- Bind MeshCentral to 127.0.0.1 and expose it via Nginx.
- Store secrets only in config files or environment variables.
- Disable public account creation if not required.
- Enforce strong passwords and role-based access.
- Use UFW or nftables and allow only ports 80 / 443.
- Keep Debian, Node.js, and MeshCentral updated.
- Regularly back up:
- MeshCentral data directory
- Configuration files
- Monitor logs for authentication attempts and device activity.
Typical Use Cases
- Remote server administration
- IT support and helpdesk operations
- MSPs managing multiple clients
- Home labs and self-hosted environments
- Device inventory and monitoring
- Secure alternative to TeamViewer or AnyDesk
- Enterprise or compliance-sensitive environments
Deploying MeshCentral on Debian 12 gives you a secure, scalable, and fully self-hosted remote management solution — combining modern Node.js performance with Debian’s proven stability, strong encryption, and full control over your infrastructure.
Step 1: Create a Server Instance on Shape.Host
Before installing MeshCentral, you need a VPS with a public IP address.
Log in to https://shape.host
Click Create → Instance

Choose a data center close to your users

Select a plan with at least:
2 CPU cores
4 GB RAM
30–40 GB SSD
Choose Debian 12 (Bookworm) as the operating system

Create the instance and wait for provisioning

Copy the public IP address

Step 2: Connect to the Server (Linux, macOS & Windows)
Linux / macOS
ssh root@YOUR_SERVER_IP
Windows (PowerShell / Windows Terminal)
ssh root@YOUR_SERVER_IP
Windows (PuTTY)
- Host Name:
YOUR_SERVER_IP - Port:
22 - Connection type: SSH
- Username:
root
Step 3: Update the System
apt update
- Refreshes the Debian package index
apt upgrade -y
- Installs all available system and security updates
- Ensures compatibility with Node.js and MeshCentral

Step 4: Install Required Dependencies
apt install curl ca-certificates gnupg
These packages are required for:
- Secure HTTPS downloads
- Adding external repositories
- Verifying cryptographic signatures

Step 5: Install Node.js 20 (Required by MeshCentral)
MeshCentral requires a modern Node.js runtime.
curl -fsSL https://deb.nodesource.com/setup_20.x | bash -

- Adds the official NodeSource repository for Node.js 20
apt install nodejs
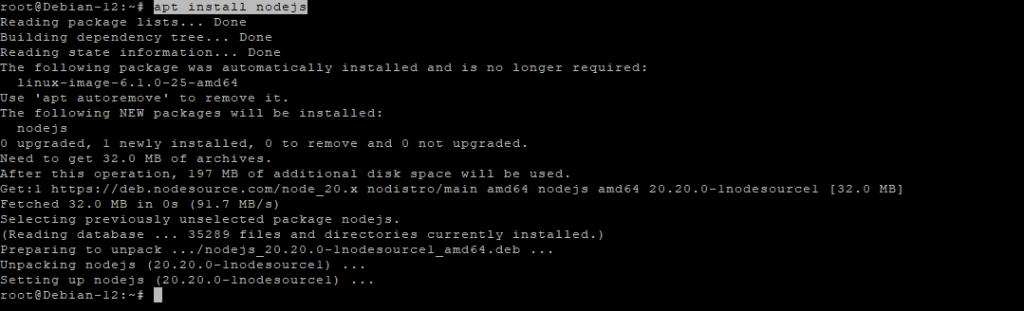
Verify installation:
node -v
npm -v

Step 6: Install MeshCentral
Create the application directory:
mkdir -p /opt/meshcentral
cd /opt/meshcentral
Install MeshCentral via npm:
npm install meshcentral

Create the data directory:
mkdir -p /opt/meshcentral/meshcentral-data
This directory stores configuration files, certificates, and runtime data.
Step 7: Initial MeshCentral Configuration
Create the configuration file:
nano /opt/meshcentral/meshcentral-data/config.json
Initial configuration:
{
  "settings": {
    "cert": "ubuntu-tutorials.shape.host",
    "port": 443,
    "redirPort": 80,
    "selfUpdate": false
  },
  "domains": {
    "": {
      "title": "MeshCentral",
      "newAccounts": true
    }
  }
}
What this configuration does
- Sets the domain MeshCentral will use
- Listens on HTTPS (443) and redirects HTTP (80)
- Disables automatic self-updates
- Allows creation of the first admin account

Test-run MeshCentral manually:
node /opt/meshcentral/node_modules/meshcentral
- Confirms MeshCentral starts correctly
- Stop it with Ctrl + C after verification
Step 8: Create a systemd Service
Create the service file:
nano /etc/systemd/system/meshcentral.service
Paste:
[Unit]
Description=MeshCentral Server
After=network.target

[Service]
Type=simple
ExecStart=/usr/bin/node /opt/meshcentral/node_modules/meshcentral
WorkingDirectory=/opt/meshcentral
Restart=always
RestartSec=10
Environment=NODE_ENV=production

[Install]
WantedBy=multi-user.target

Reload systemd:
systemctl daemon-reload
Enable and start MeshCentral:
systemctl enable meshcentral
systemctl start meshcentral
Check service status:
systemctl status meshcentral

Step 9: Enable Let’s Encrypt SSL
Edit the configuration file again:
nano /opt/meshcentral/meshcentral-data/config.json
Final production configuration:
{
  "settings": {
    "cert": "ubuntu-tutorials.shape.host",
    "port": 443,
    "redirPort": 80,
    "selfUpdate": false,
    "letsencrypt": {
      "email": "[email protected]",
      "names": "ubuntu-tutorials.shape.host",
      "production": true
    }
  },
  "domains": {
    "": {
      "title": "MeshCentral",
      "newAccounts": false
    }
  }
}
What changed
- Enables Let’s Encrypt SSL
- Issues a trusted HTTPS certificate automatically
- Disables public account registration for security

Restart MeshCentral:
systemctl restart meshcentral
Step 10: Access MeshCentral
Open your browser:
https://ubuntu-tutorials.shape.host
You now have:
- A fully self-hosted MeshCentral server
- Running on Debian 12
- Secured with Let’s Encrypt HTTPS
- Managed as a persistent systemd service


You have installed MeshCentral on Debian 12, configured it to run as a system service, and secured it with Let’s Encrypt SSL. This setup provides a secure, centralized platform for managing remote systems and devices with full control over your infrastructure.
For reliable hosting, full root access, and long-term stability, Shape.Host Cloud VPS is a strong foundation for running production-grade remote management platforms like MeshCentral.
The post How to Install MeshCentral on Debian 12 (Self-Hosted Remote Management) appeared first on Shapehost.
]]>The post How to Install MeshCentral on Ubuntu 24.04 (Self-Hosted Remote Management) appeared first on Shapehost.
]]>(Self-Hosted Remote Management + Node.js + Nginx + SSL)
MeshCentral is a powerful, open-source remote management and remote access platform used to control, monitor, and administer computers and servers over the internet or local networks. It supports remote desktop, terminal access, file transfer, device grouping, user permissions, and out-of-band management, all through a secure web interface.
Unlike proprietary tools such as TeamViewer or AnyDesk, MeshCentral can be fully self-hosted, giving you complete ownership of devices, credentials, and connection data. This makes it ideal for system administrators, MSPs, IT teams, and privacy-focused organizations.
Running MeshCentral on Ubuntu 24.04 LTS (Noble Numbat) provides a modern, secure, and long-term supported operating system. Ubuntu 24.04 ships with systemd 255, OpenSSL 3, and excellent Node.js support, making it a solid foundation for a production-grade remote management server.
Architecture Overview
| Layer | Component | Role |
|---|---|---|
| OS | Ubuntu 24.04 LTS | Stable, long-term supported Linux base |
| Runtime | Node.js LTS (18 / 20) | Runs the MeshCentral server |
| Application | MeshCentral | Web UI, device management, relay |
| Database | Built-in (NeDB / SQLite) | Stores users, devices, settings |
| Reverse Proxy | Nginx (optional) | HTTPS termination and routing |
| TLS | Let’s Encrypt / PKI | Secure encrypted connections |
| Clients | Browsers + Agents | Remote access and device control |
MeshCentral uses a single-service architecture, which makes it lightweight, easy to deploy, and simple to maintain.
Why Use MeshCentral?
- Fully self-hosted — no vendor lock-in
- Remote desktop & terminal — browser-based access
- Agent-based management — Windows, Linux, macOS
- Granular permissions — users, groups, roles
- WebSocket-based connections — efficient and fast
- File transfer & power controls
- Multi-tenant capable — ideal for MSPs
- Open-source & actively maintained
- Very low resource usage
MeshCentral is designed for secure, scalable remote administration without relying on third-party clouds.
MeshCentral vs Other Remote Management Tools
| Feature / Capability | MeshCentral | TeamViewer | AnyDesk | Guacamole |
|---|---|---|---|---|
| Hosting | Self-hosted | Cloud only | Cloud only | Self-hosted |
| Open-source | Yes | No | No | Yes |
| Data ownership | Full control | Vendor-controlled | Vendor-controlled | Full control |
| Agent-based | Yes | Yes | Yes | No |
| Web UI | Yes | No | No | Yes |
| Cost | Free | Paid | Paid | Free |
MeshCentral stands out for control, transparency, and scalability.
Security & Best Practices on Ubuntu 24.04
- Always run MeshCentral over HTTPS.
- Use Let’s Encrypt SSL certificates with automatic renewal.
- Bind MeshCentral to localhost and expose it via Nginx.
- Store secrets only in environment variables or config files.
- Disable public account creation if not needed.
- Use strong passwords and role-based access.
- Enable UFW firewall and allow only ports 80 / 443.
- Keep Ubuntu, Node.js, and MeshCentral updated.
- Regularly back up:
- MeshCentral data directory
- Configuration files
- Monitor logs for authentication and connection events.
Typical Use Cases
- Remote server administration
- IT support and helpdesk operations
- MSPs managing multiple clients
- Remote access for home labs
- Device monitoring and inventory
- Secure alternative to TeamViewer
- Enterprise or privacy-sensitive environments
Deploying MeshCentral on Ubuntu 24.04 gives you a secure, scalable, and fully self-hosted remote management solution — combining modern Node.js performance with full infrastructure control, strong encryption, and long-term OS stability.
Step 1: Create a Server Instance on Shape.Host
Before starting, you need a VPS with a public IP address.
Log in to https://shape.host
Click Create → Instance
Choose a data center close to your location

Select a plan with at least:
2 CPU cores
4 GB RAM
30–40 GB SSD
Choose Ubuntu 24.04 (64-bit)

Create the instance and wait for provisioning

Copy the public IP address

Step 2: Connect to the Server (Linux, macOS & Windows)
Linux / macOS
ssh root@YOUR_SERVER_IP
Windows (PowerShell / Windows Terminal)
ssh root@YOUR_SERVER_IP
Windows (PuTTY)
- Host Name:
YOUR_SERVER_IP - Port:
22 - Connection type:
SSH - Username:
root
Step 3: Update the System
apt update
- Refreshes the package index
apt upgrade -y
- Installs all available security and system updates
- Ensures compatibility with Node.js and MeshCentral
Step 4: Install Required Dependencies
apt install curl ca-certificates gnupg
This installs:
- curl – used to download external scripts and resources
- ca-certificates – ensures secure HTTPS connections
- gnupg – required for repository verification

Step 5: Install Node.js 20 (Required by MeshCentral)
MeshCentral requires a modern Node.js version.
curl -fsSL https://deb.nodesource.com/setup_20.x | bash -
- Adds the official NodeSource repository for Node.js 20
apt install nodejs

Verify installation:
node -v
npm -v

Step 6: Install MeshCentral
Create the application directory:
mkdir -p /opt/meshcentral
cd /opt/meshcentral
Install MeshCentral via npm:
npm install meshcentral

Create the data directory:
mkdir -p /opt/meshcentral/meshcentral-data
Step 7: Initial MeshCentral Configuration
Create the configuration file:
nano /opt/meshcentral/meshcentral-data/config.json

Initial configuration:
{
  "settings": {
    "cert": "mesh.example.com",
    "port": 443,
    "redirPort": 80,
    "selfUpdate": false
  },
  "domains": {
    "": {
      "title": "MeshCentral",
      "newAccounts": true
    }
  }
}
What this does
- Sets the domain name used by MeshCentral
- Listens on ports 443 (HTTPS) and 80 (redirect)
- Disables automatic self-updates
- Allows initial account creation
Start MeshCentral manually (test run):

node /opt/meshcentral/node_modules/meshcentral
Stop it with Ctrl + C after confirming it starts correctly.

Step 8: Create a systemd Service
Create the service file:
nano /etc/systemd/system/meshcentral.service
Paste:
[Unit]
Description=MeshCentral Server
After=network.target

[Service]
Type=simple
ExecStart=/usr/bin/node /opt/meshcentral/node_modules/meshcentral
WorkingDirectory=/opt/meshcentral
Restart=always
RestartSec=10
Environment=NODE_ENV=production

[Install]
WantedBy=multi-user.target
Reload systemd:
systemctl daemon-reload
Enable and start MeshCentral:
systemctl enable meshcentral
systemctl start meshcentral
Check status:
systemctl status meshcentral
Step 9: Enable Let’s Encrypt SSL
Edit the configuration file again:
nano /opt/meshcentral/meshcentral-data/config.json
Final production configuration:
{
  "settings": {
    "cert": "ubuntu-tutorials.shape.host",
    "port": 443,
    "redirPort": 80,
    "selfUpdate": false,
    "letsencrypt": {
      "email": "[email protected]",
      "names": "ubuntu-tutorials.shape.host",
      "production": true
    }
  },
  "domains": {
    "": {
      "title": "MeshCentral",
      "newAccounts": false
    }
  }
}
What changed
- Enables Let’s Encrypt SSL
- Uses a real domain and email
- Disables public account creation (recommended for security)

Restart MeshCentral:
systemctl restart meshcentral
Step 10: Access MeshCentral
Open your browser:
https://ubuntu-tutorials.shape.host
You now have:
A fully self-hosted MeshCentral server
Running on Ubuntu 24.04
Secured with Let’s Encrypt HTTPS
Managed via systemd


You installed MeshCentral on Ubuntu 24.04, configured it as a persistent system service, and secured it with Let’s Encrypt SSL. This setup is ideal for managing remote systems, servers, and devices in a secure, centralized way.
For hosting remote management platforms with stability, performance, and full root access, Shape.Host Linux SSD VPS provides a reliable and scalable foundation for production environments.
The post How to Install MeshCentral on Ubuntu 24.04 (Self-Hosted Remote Management) appeared first on Shapehost.
]]>The post How to Install Jitsi Meet on Rocky Linux 9 (Docker-Based, Self-Hosted Video Conferencing) appeared first on Shapehost.
]]>(Self-Hosted Video Conferencing + Nginx + SSL)
Jitsi Meet is a powerful, open-source video conferencing platform that allows secure audio and video meetings directly in the browser, without requiring user accounts, plugins, or proprietary software. It supports HD video, screen sharing, chat, meeting moderation, recording/streaming, and optional end-to-end encryption (E2EE), making it a strong alternative to Zoom, Google Meet, or Microsoft Teams.
Unlike cloud-only conferencing solutions, Jitsi Meet can be fully self-hosted, giving you complete control over meeting data, media traffic, and access rules. This makes it especially suitable for organizations that value privacy, compliance, and infrastructure ownership.
Running Jitsi Meet on Rocky Linux 9, a RHEL-compatible, enterprise-grade Linux distribution, provides long-term stability, predictable updates, and strong security defaults. When combined with Nginx and HTTPS (SSL), Rocky Linux 9 offers a production-grade foundation for secure, scalable, self-hosted video conferencing.
Architecture Overview
| Layer | Component | Role |
|---|---|---|
| OS | Rocky Linux 9 | Enterprise-grade, RHEL-compatible Linux base |
| Web Server | Nginx | HTTPS termination and web access |
| Web App | Jitsi Meet | Browser-based meeting interface |
| Media Server | Jitsi Videobridge | Handles audio/video streams |
| Signaling | Prosody + Jicofo | Authentication, signaling, room control |
| Transport | UDP / TCP | Real-time media transport (WebRTC) |
| TLS | Let’s Encrypt / PKI | Encrypted connections |
Jitsi’s modular architecture allows it to scale from small private meetings to large multi-participant conferences.
Why Use Jitsi Meet?
- Open-source & self-hosted — no vendor lock-in
- No user accounts required — join meetings via simple links
- High-quality audio & video — WebRTC-based
- Screen sharing & chat — built-in collaboration tools
- Meeting moderation — lobby, passwords, participant controls
- End-to-end encryption (E2EE) — optional enhanced privacy
- Browser-based — works on all modern browsers
- Scalable architecture — suitable for teams and organizations
Jitsi Meet is ideal for users who want private, secure video conferencing without SaaS dependencies.
Jitsi Meet vs Other Video Conferencing Platforms
| Feature / Capability | Jitsi Meet | Zoom | Google Meet | Microsoft Teams |
|---|---|---|---|---|
| Hosting | Self-hosted | Cloud only | Cloud only | Cloud only |
| Open-source | Yes | No | No | No |
| Data ownership | Full control | Vendor-controlled | Vendor-controlled | Vendor-controlled |
| Accounts required | No | Yes | Yes | Yes |
| E2EE | Yes | Partial | Partial | Partial |
| Cost | Free (self-hosted) | Free / Paid | Free | Paid |
Jitsi stands out for privacy, flexibility, and full infrastructure control.
Security & Best Practices on Rocky Linux 9
- Serve Jitsi only over HTTPS.
- Use Let’s Encrypt SSL certificates with automatic renewal.
- Open required ports:
- 443/TCP — HTTPS
- 10000/UDP — media traffic
- Optional fallbacks: 4443/TCP, 5349/TCP
- Configure firewalld to restrict unused ports.
- Enable room moderation (passwords, lobby).
- Keep Rocky Linux and Jitsi packages updated regularly.
- Monitor CPU, RAM, disk, and network bandwidth usage.
- Use a dedicated domain or subdomain (e.g.
meet.example.com). - Tune Nginx and Videobridge settings for performance.
- For large deployments, consider multiple Jitsi Videobridge nodes.
Typical Use Cases
- Team meetings and daily stand-ups
- Private business calls
- Remote education and training
- Internal company conferencing
- Privacy-focused organizations
- Self-hosted alternatives to Zoom or Google Meet
- Government, NGO, or compliance-sensitive environments
Deploying Jitsi Meet on Rocky Linux 9 gives you a secure, scalable, and fully self-hosted video conferencing solution — combining modern WebRTC technology with full data ownership, strong encryption, and enterprise-grade Linux stability.
Step 1: Create a Server Instance on Shape.Host
Before installing Jitsi, you need a VPS with a public IP address.
Log in to https://shape.host
Click Create → Instance

Choose a data center close to your users

Select a plan with at least:
2 CPU cores (4 recommended)
4 GB RAM
40 GB SSD storage
Choose Rocky Linux 9 (64-bit)

Create the instance and wait for provisioning

Copy the public IP address

Step 2: Connect to the Server
Linux / macOS
ssh root@YOUR_SERVER_IP
Windows (PowerShell / Windows Terminal)
ssh root@YOUR_SERVER_IP
Windows (PuTTY)
- Host Name:
YOUR_SERVER_IP - Port:
22 - Connection type:
SSH - Username:
root
Step 3: Update the System
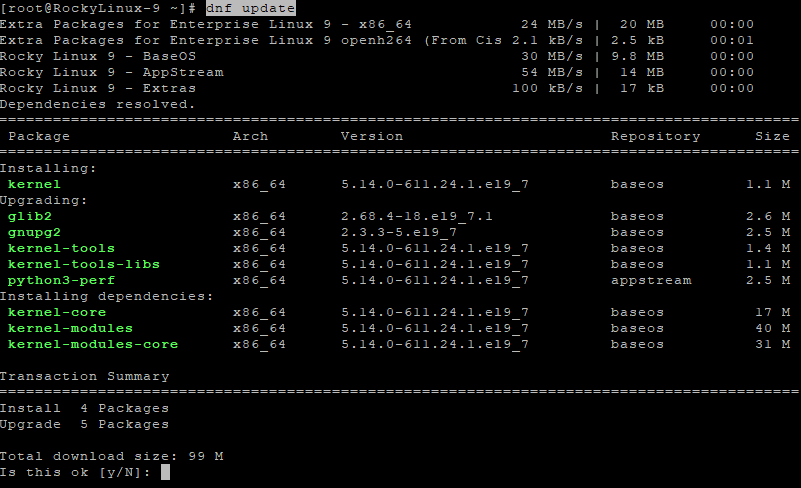
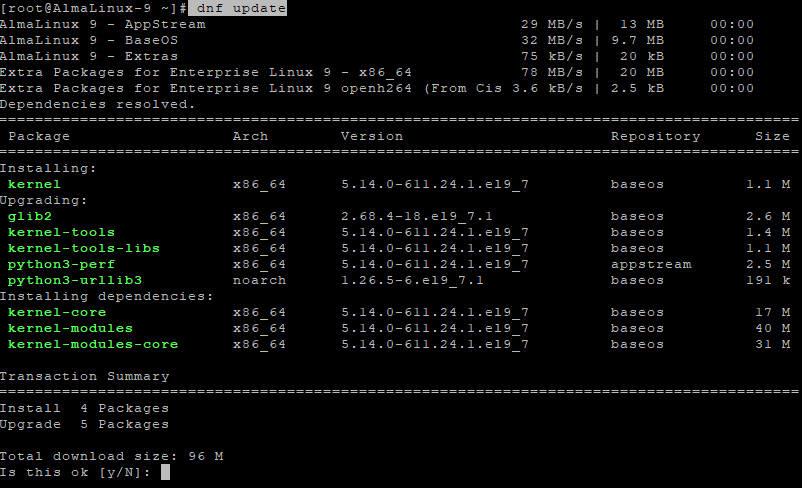
dnf update
- Updates all installed packages
- Applies security patches
- Ensures compatibility with Docker and firewall components
Step 4: Set Hostname (Required by Jitsi)
Jitsi requires a valid fully qualified domain name (FQDN).
hostnamectl set-hostname rockylinux-tutorials.shape.host
Edit the hosts file:
nano /etc/hosts
Add or update:
127.0.0.1       localhost
YOUR_PUBLIC_IP  meet.example.com

Verify hostname:
hostname

Update again and reboot:
dnf update
reboot
Reconnect via SSH after reboot.
Step 5: Disable SELinux (Required for Docker-Jitsi)
Docker-Jitsi-Meet does not function correctly with SELinux enforcing.
Edit SELinux configuration:
nano /etc/selinux/config
Set:
SELINUX=disabled

Disable SELinux immediately:
setenforce 0
Reboot to apply permanently:
reboot
Verify SELinux status:
getenforce
Expected output:
Disabled

Step 6: Clean Repositories and Prepare System
Remove any leftover Jitsi repository:
rm -f /etc/yum.repos.d/jitsi.repo
Clean and rebuild cache:
dnf clean all
dnf makecache
dnf repolist


Install repository management tools:
dnf install dnf-utils

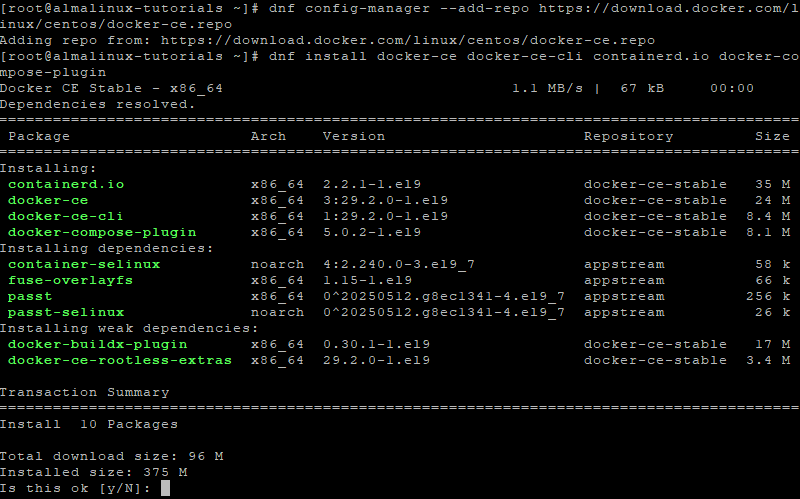
Step 7: Install Docker and Docker Compose
Add Docker repository:
dnf config-manager --add-repo https://download.docker.com/linux/centos/docker-ce.repo
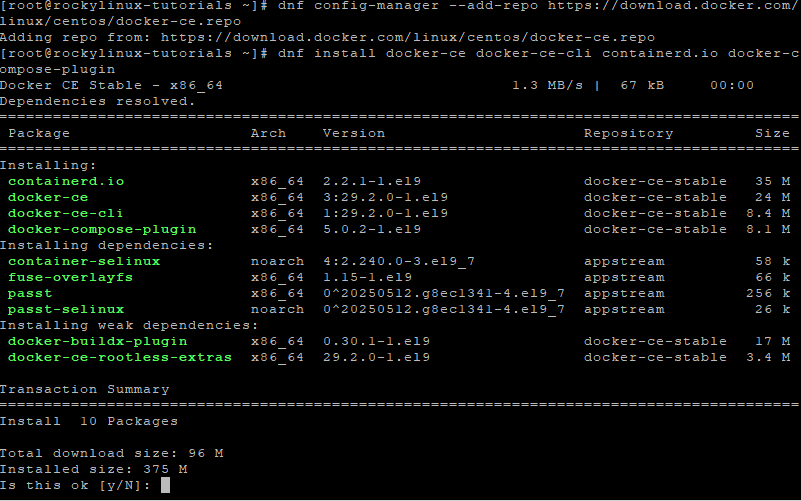
Install Docker components:
dnf install docker-ce docker-ce-cli containerd.io docker-compose-plugin
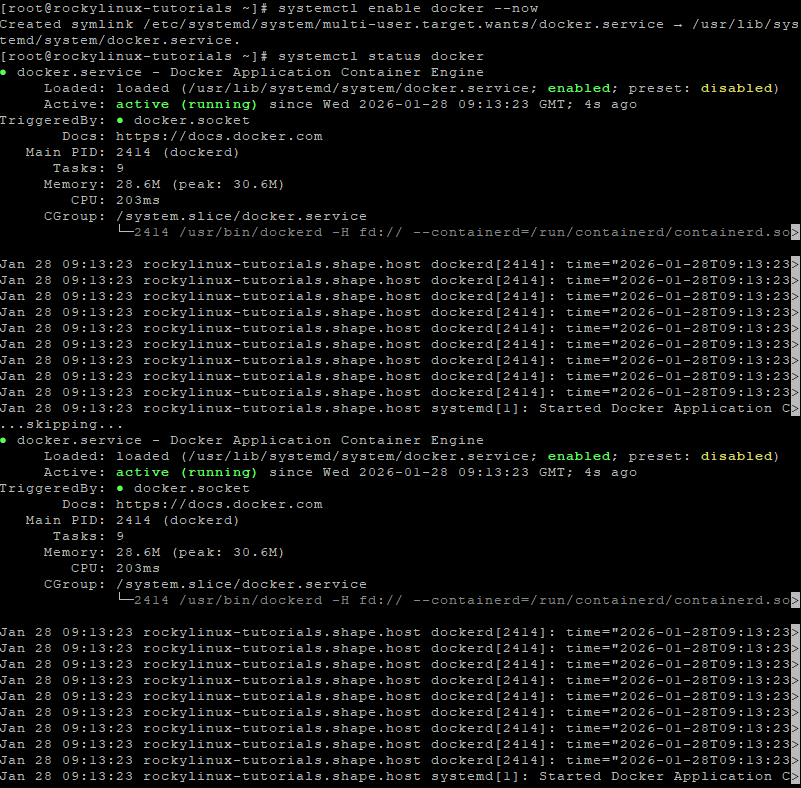
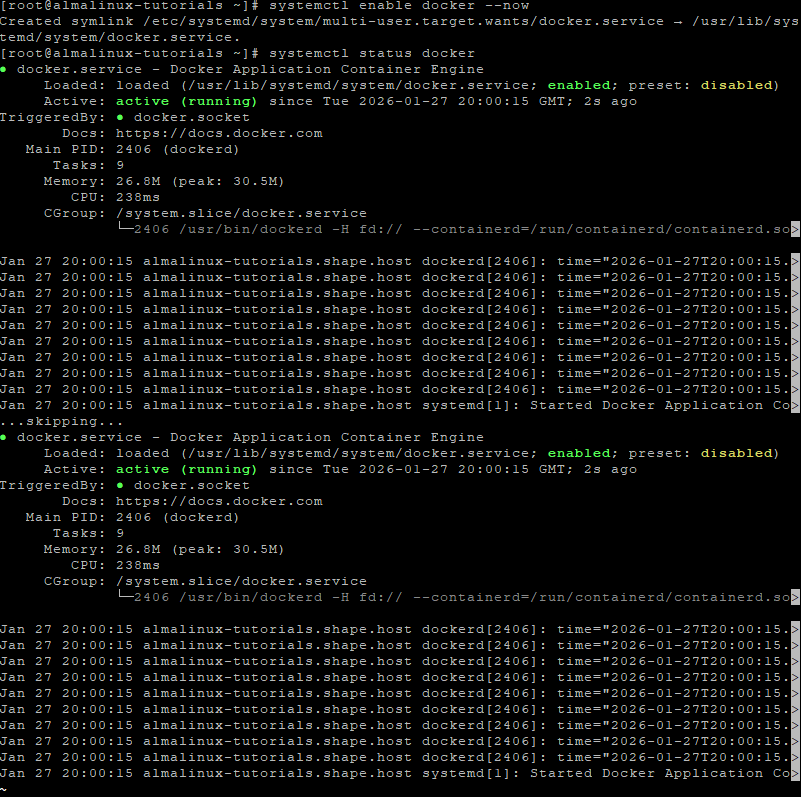
Enable and start Docker:
systemctl enable docker --now
Verify Docker status:
systemctl status docker
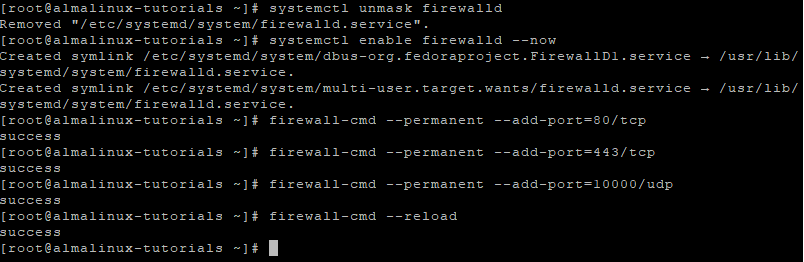
Step 8: Configure Firewall (Firewalld)
Enable firewalld:
systemctl unmask firewalld
systemctl enable firewalld --now

Open required Jitsi ports:
firewall-cmd --permanent --add-port=80/tcp
firewall-cmd --permanent --add-port=443/tcp
firewall-cmd --permanent --add-port=10000/udp
Apply rules:
firewall-cmd --reload

Verify:
firewall-cmd --list-ports

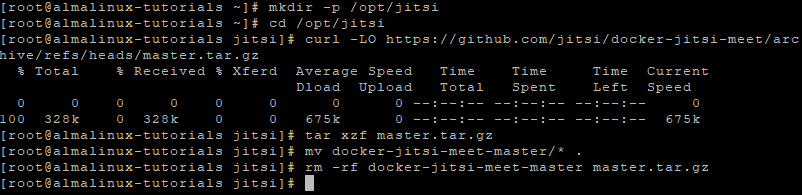
Step 9: Download Docker-Jitsi-Meet
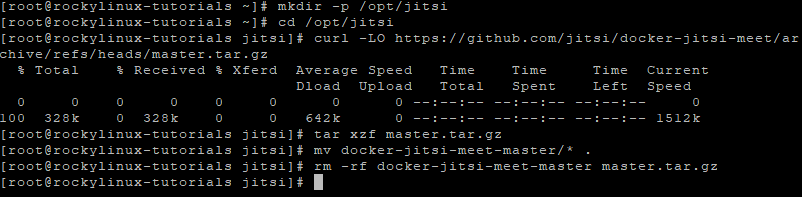
Create working directory:
mkdir -p /opt/jitsi
cd /opt/jitsi
Download project:
curl -LO https://github.com/jitsi/docker-jitsi-meet/archive/refs/heads/master.tar.gz
Extract and clean:
tar xzf master.tar.gz
mv docker-jitsi-meet-master/* .
rm -rf docker-jitsi-meet-master master.tar.gz
Step 10: Configure Jitsi Environment
Copy example environment file:
cp env.example .env
Generate strong internal passwords:
./gen-passwords.sh
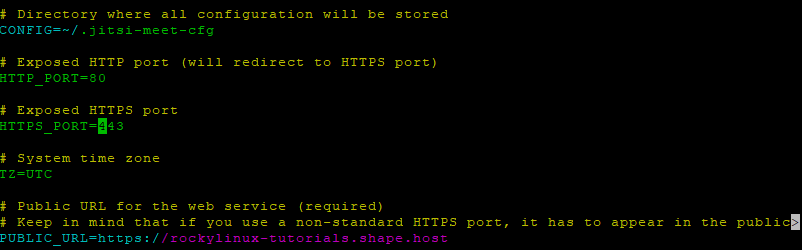
Edit configuration:
nano .env
Set the following values:
# Public URL
PUBLIC_URL=https://meet.example.com

# Force correct ports
HTTP_PORT=80
HTTPS_PORT=443

# Timezone
TZ=Europe/Bucharest

# Enable Let's Encrypt
ENABLE_LETSENCRYPT=1
LETSENCRYPT_DOMAIN=meet.example.com
[email protected]
What this configuration does
- Enables automatic Let’s Encrypt SSL
- Defines your public Jitsi domain
- Forces correct HTTP/HTTPS ports
- Sets system timezone for logs and containers

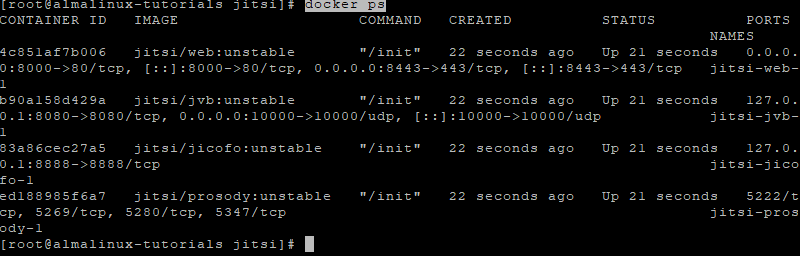
Step 11: Start Jitsi Meet
docker compose up -d
This command:
- Pulls all required Jitsi containers
- Automatically requests SSL certificates
- Starts Prosody, Jicofo, Videobridge, Web, and Let’s Encrypt services

View logs (optional):
docker compose logs -f
Verify running containers:
docker ps

Step 12: Access Jitsi Meet
Open your browser:
https://meet.example.com
Your Jitsi Meet instance is now:
- Fully self-hosted
- Running on Rocky Linux 9
- Secured with Let’s Encrypt SSL
- Ready for production video conferencing

You installed Jitsi Meet on Rocky Linux 9 using Docker-Jitsi-Meet, configured hostname, SELinux, firewall rules, and enabled automatic HTTPS with Let’s Encrypt. This Docker-based setup is stable, scalable, and easy to maintain, making it ideal for production use.
For reliable performance, full root access, and scalable infrastructure, Shape.Host Cloud VPS is an excellent choice for hosting real-time communication platforms like Jitsi Meet.
The post How to Install Jitsi Meet on Rocky Linux 9 (Docker-Based, Self-Hosted Video Conferencing) appeared first on Shapehost.
]]>The post How to Install Jitsi Meet on AlmaLinux 9 (Docker-Based, Self-Hosted Video Conferencing) appeared first on Shapehost.
]]>(Self-Hosted Video Conferencing + Nginx + SSL)
Jitsi Meet is a robust, open-source video conferencing platform that enables secure audio and video meetings directly in the browser—no user accounts, plugins, or proprietary software required. It supports HD video, screen sharing, chat, meeting moderation, recording/streaming, and optional end-to-end encryption (E2EE), making it a compelling alternative to Zoom, Google Meet, or Microsoft Teams.
Unlike cloud-only video platforms, Jitsi Meet can be fully self-hosted, giving you complete control over meeting data, media traffic, and access policies. This makes it especially suitable for organizations that value privacy, compliance, and infrastructure ownership.
Running Jitsi Meet on AlmaLinux 9, a RHEL-compatible, enterprise-grade Linux distribution, provides long-term stability, predictable updates, and strong security defaults. AlmaLinux 9 pairs well with Nginx and HTTPS (SSL), offering a production-ready foundation for secure, self-hosted video conferencing.
Architecture Overview
| Layer | Component | Role |
|---|---|---|
| OS | AlmaLinux 9 | Enterprise-grade, RHEL-compatible Linux base |
| Web Server | Nginx | HTTPS termination and web access |
| Web App | Jitsi Meet | Browser-based meeting interface |
| Media Server | Jitsi Videobridge | Handles audio/video streams |
| Signaling | Prosody + Jicofo | Authentication, signaling, room control |
| Transport | UDP / TCP | Real-time media transport (WebRTC) |
| TLS | Let’s Encrypt / PKI | Encrypted connections |
Jitsi’s modular architecture allows it to scale from small private meetings to large multi-participant conferences.
Why Use Jitsi Meet?
- Open-source & self-hosted — no vendor lock-in
- No user accounts required — join meetings via simple links
- High-quality audio & video — WebRTC-based
- Screen sharing & chat — built-in collaboration tools
- Meeting moderation — lobby, passwords, participant controls
- End-to-end encryption (E2EE) — optional enhanced privacy
- Browser-based — works on all modern browsers
- Scalable architecture — suitable for teams and organizations
Jitsi Meet is ideal for users who want private, secure video conferencing without SaaS dependencies.
Jitsi Meet vs Other Video Conferencing Platforms
| Feature / Capability | Jitsi Meet | Zoom | Google Meet | Microsoft Teams |
|---|---|---|---|---|
| Hosting | Self-hosted | Cloud only | Cloud only | Cloud only |
| Open-source | Yes | No | No | No |
| Data ownership | Full control | Vendor-controlled | Vendor-controlled | Vendor-controlled |
| Accounts required | No | Yes | Yes | Yes |
| E2EE | Yes | Partial | Partial | Partial |
| Cost | Free (self-hosted) | Free / Paid | Free | Paid |
Jitsi stands out for privacy, flexibility, and infrastructure control.
Security & Best Practices on AlmaLinux 9
- Serve Jitsi only over HTTPS.
- Use Let’s Encrypt SSL certificates with automatic renewal.
- Open required ports:
- 443/TCP — HTTPS
- 10000/UDP — media traffic
- Optional fallbacks: 4443/TCP, 5349/TCP
- Configure firewalld to restrict unused ports.
- Enable room moderation (passwords, lobby).
- Keep AlmaLinux and Jitsi packages updated regularly.
- Monitor CPU, RAM, disk, and network bandwidth.
- Use a dedicated domain or subdomain (e.g.
meet.example.com). - Tune Nginx and Videobridge settings for performance.
- For larger deployments, consider multiple videobridges.
Typical Use Cases
- Team meetings and daily stand-ups
- Private business calls
- Remote education and training
- Internal company conferencing
- Privacy-focused organizations
- Self-hosted alternatives to Zoom or Meet
- Government, NGO, or compliance-sensitive environments
Deploying Jitsi Meet on AlmaLinux 9 gives you a secure, scalable, and fully self-hosted video conferencing solution—combining modern WebRTC technology with full data ownership, strong encryption, and enterprise-grade Linux stability.
Step 1: Create a Server Instance on Shape.Host
Before starting, create a VPS.
Log in to https://shape.host
Click Create → Instance

Choose a data center close to your users

Select a plan with at least:
2 CPU cores (4 recommended)
4 GB RAM
40 GB SSD
Choose AlmaLinux 9 (64-bit)

Create the instance and wait for provisioning

Copy the public IP address

Step 2: Connect to the Server
Linux / macOS
ssh root@YOUR_SERVER_IP
Windows (PowerShell / Windows Terminal)
ssh root@YOUR_SERVER_IP
Windows (PuTTY)
- Host Name:
YOUR_SERVER_IP - Port:
22 - Connection type:
SSH - Username:
root
Step 3: Update the System
dnf update
- Updates all installed packages
- Applies security patches
- Prepares the system for Docker and firewall configuration
Step 4: Set Hostname (Required by Jitsi)
Jitsi requires a valid fully qualified domain name (FQDN).
hostnamectl set-hostname almalinux-tutorials.shape.host
Edit hosts file:
nano /etc/hosts
Add or adjust:
127.0.0.1       localhost
YOUR_PUBLIC_IP  meet.example.com

Verify hostname:
hostname

Update again and reboot:
dnf update
reboot
Reconnect via SSH after reboot.
Step 5: Disable SELinux (Required for Docker-Jitsi)
Docker-Jitsi-Meet does not work reliably with SELinux enforcing.
Edit SELinux config:
nano /etc/selinux/config
Set:
SELINUX=disabled

Temporarily disable SELinux:
setenforce 0
Reboot to apply permanently:
reboot
Verify:
getenforce
Output must be:
Disabled

Step 6: Prepare Repositories and Docker
Clean any old Jitsi repo references:
rm -f /etc/yum.repos.d/jitsi.repo
dnf clean all
dnf makecache
dnf repolist

Install repository tools:
dnf install dnf-utils

Add Docker repository:
dnf config-manager --add-repo https://download.docker.com/linux/centos/docker-ce.repo
Install Docker:
dnf install docker-ce docker-ce-cli containerd.io docker-compose-plugin
Enable and start Docker:
systemctl enable docker --now
Verify Docker:
systemctl status docker
Step 7: Configure Firewall (Firewalld)
Enable firewalld:
systemctl unmask firewalld
systemctl enable firewalld --now
Open required ports:
firewall-cmd --permanent --add-port=80/tcp
firewall-cmd --permanent --add-port=443/tcp
firewall-cmd --permanent --add-port=10000/udp
Apply rules:
firewall-cmd --reload
Verify:
firewall-cmd --list-ports

Step 8: Download Docker-Jitsi-Meet
Create project directory:
mkdir -p /opt/jitsi
cd /opt/jitsi
Download Docker-Jitsi-Meet:
curl -LO https://github.com/jitsi/docker-jitsi-meet/archive/refs/heads/master.tar.gz
Extract and clean:
tar xzf master.tar.gz
mv docker-jitsi-meet-master/* .
rm -rf docker-jitsi-meet-master master.tar.gz
Step 9: Configure Jitsi Environment
Copy example environment:
cp env.example .env
Generate secure passwords:
./gen-passwords.sh
Edit .env:
nano .env
Set the following values:
ENABLE_LETSENCRYPT=1
LETSENCRYPT_DOMAIN=meet.example.com
[email protected]

PUBLIC_URL=https://meet.example.com

TZ=Europe/Bucharest

HTTP_PORT=80
HTTPS_PORT=443
What these settings do
- Enables Let’s Encrypt SSL
- Defines your Jitsi domain
- Sets timezone for logs
- Exposes ports 80/443 for HTTPS access
Step 10: Start Jitsi Meet
docker compose up -d
This will:
- Pull all required Jitsi containers
- Automatically request SSL certificates
- Start Prosody, Jicofo, Videobridge, Web, and Let’s Encrypt services

Verify containers:
docker ps
Step 11: Verify SSL Connection
openssl s_client -connect almalinux-tutorials.shape.host:443 -servername almalinux-tutorials.shape.host
A valid certificate chain confirms SSL is working correctly.
Step 12: Access Jitsi Meet
Open your browser:
https://meet.example.com
You now have:
- A self-hosted Jitsi Meet instance
- Running fully in Docker
- Protected by Let’s Encrypt SSL
- Ready for secure video conferences

You installed Jitsi Meet on AlmaLinux 9 using Docker-Jitsi-Meet, configured hostname, firewall, and SELinux, and enabled automatic HTTPS with Let’s Encrypt. This setup is production-ready, scalable, and much easier to maintain than native package installations.
For hosting real-time communication platforms with full control, performance, and reliability, Shape.Host Linux SSD VPS provides a strong foundation for modern self-hosted infrastructure.
The post How to Install Jitsi Meet on AlmaLinux 9 (Docker-Based, Self-Hosted Video Conferencing) appeared first on Shapehost.
]]>The post How to Install Jitsi Meet on Debian 12 (Self-Hosted Video Conferencing) appeared first on Shapehost.
]]>(Self-Hosted Video Conferencing + Nginx + SSL)
Jitsi Meet is a powerful, open-source video conferencing platform that allows secure audio and video meetings directly in the browser — without requiring user accounts, plugins, or proprietary software. It supports HD video, screen sharing, chat, meeting moderation, recording/streaming, and optional end-to-end encryption (E2EE), making it a strong alternative to Zoom, Google Meet, or Microsoft Teams.
Unlike cloud-based video conferencing services, Jitsi Meet can be fully self-hosted, giving you complete control over meeting data, media traffic, and user access. This makes it especially suitable for organizations that care about privacy, compliance, and infrastructure ownership.
Running Jitsi Meet on Debian 12 (Bookworm) provides a stable, security-focused, and long-term supported operating system. Debian 12 includes OpenSSL 3, systemd 252, and mature networking packages, making it an excellent foundation for a production-grade, self-hosted video conferencing server.
Architecture Overview
| Layer | Component | Role |
|---|---|---|
| OS | Debian 12 (Bookworm) | Stable, long-term supported Linux base |
| Web Server | Nginx | HTTPS termination and web access |
| Web App | Jitsi Meet | Browser-based meeting interface |
| Media Server | Jitsi Videobridge | Handles audio/video streams |
| Signaling | Prosody + Jicofo | Authentication, signaling, room control |
| Transport | UDP / TCP | Real-time media transport (WebRTC) |
| TLS | Let’s Encrypt / PKI | Encrypted connections |
Jitsi’s modular design allows it to scale from small private meetings to large multi-participant conferences.
Why Use Jitsi Meet?
- Open-source & self-hosted – no vendor lock-in
- No user accounts required – join meetings via simple links
- High-quality audio & video – WebRTC-based
- Screen sharing & chat – built-in collaboration tools
- Meeting moderation – lobby, passwords, participant controls
- End-to-end encryption (E2EE) – optional enhanced privacy
- Browser-based – works on all modern browsers
- Scalable architecture – suitable for teams and organizations
Jitsi Meet is ideal for users who want private, secure video conferencing without SaaS dependencies.
Jitsi Meet vs Other Video Conferencing Platforms
| Feature / Capability | Jitsi Meet | Zoom | Google Meet | Microsoft Teams |
|---|---|---|---|---|
| Hosting | Self-hosted | Cloud only | Cloud only | Cloud only |
| Open-source | Yes | No | No | No |
| Data ownership | Full control | Vendor-controlled | Vendor-controlled | Vendor-controlled |
| Accounts required | No | Yes | Yes | Yes |
| E2EE | Yes | Partial | Partial | Partial |
| Cost | Free (self-hosted) | Free / Paid | Free | Paid |
Jitsi stands out for privacy, flexibility, and infrastructure control.
Security & Best Practices on Debian 12
- Serve Jitsi only over HTTPS.
- Use Let’s Encrypt SSL certificates with automatic renewal.
- Open required ports:
- 443/TCP – HTTPS
- 10000/UDP – media traffic
- Optional fallbacks: 4443/TCP, 5349/TCP
- Use UFW or nftables to restrict unused ports.
- Enable room moderation (passwords, lobby).
- Keep Debian and Jitsi packages updated regularly.
- Monitor CPU, RAM, disk, and network bandwidth.
- Use a dedicated domain or subdomain (e.g.
meet.example.com). - Tune Nginx and Videobridge settings for performance.
- For larger deployments, consider multiple videobridges.
Typical Use Cases
- Team meetings and stand-ups
- Private business calls
- Remote education and training
- Internal company conferencing
- Privacy-focused organizations
- Self-hosted alternatives to Zoom or Meet
- Government, NGO, or compliance-sensitive environments
Deploying Jitsi Meet on Debian 12 gives you a secure, scalable, and fully self-hosted video conferencing solution — combining modern WebRTC technology with full data ownership, strong encryption, and Debian’s proven stability.
Step 1: Create a Server Instance on Shape.Host
Before installing Jitsi Meet, you need a VPS with a public IP address.
Log in to https://shape.host
Click Create → Instance

Choose a data center close to your users

Select a plan with at least:
2 CPU cores (4 recommended for multiple participants)
4 GB RAM
40 GB SSD storage
Choose Debian 12 (Bookworm) as the operating system

Create the instance and wait for provisioning

Copy the public IP address of the server

Step 2: Connect to the Server (Linux, macOS & Windows)
Linux / macOS
ssh root@YOUR_SERVER_IP
Windows (PowerShell / Windows Terminal)
ssh root@YOUR_SERVER_IP
Windows (PuTTY)
- Host Name:
YOUR_SERVER_IP - Port:
22 - Connection type:
SSH - Username:
root
After connecting, you should see a root shell prompt.
Step 3: Update the Operating System
apt update
- Refreshes the local package index
apt upgrade -y
- Installs all available security and system updates
- Ensures compatibility with Jitsi dependencies

Step 4: Set the Hostname (Mandatory for Jitsi)
Jitsi requires a fully qualified domain name (FQDN) to function correctly.
hostnamectl set-hostname debian-tutorials.shape.host
- Sets the system hostname permanently
Edit the hosts file:
nano /etc/hosts
Add or update the following lines (replace the IP):
127.0.0.1       localhost
YOUR_SERVER_IP  meet.example.com
This ensures local hostname resolution works correctly.

Verify hostname:
hostname

Update package lists again:
apt update
apt upgrade

Reboot the server to fully apply hostname changes:
reboot
Reconnect via SSH after reboot.
Step 5: Install and Configure Firewall (UFW)
Jitsi requires several ports for signaling, media, and NAT traversal.
apt install ufw

ufw allow 22/tcp
- Allows SSH access
ufw allow 80/tcp
ufw allow 443/tcp
- Allows HTTP and HTTPS traffic
ufw allow 10000/udp
- Main Jitsi video/audio media port
ufw allow 3478/udp
- STUN/TURN (UDP)
ufw allow 5349/tcp
- TURN over TCP (fallback for restricted networks)
Enable firewall:
ufw enable

Check firewall status:
ufw status

Step 6: Install Java Runtime Environment
Jitsi components require Java to run.
apt install openjdk-17-jre-headless
- Installs Java 17 runtime (recommended for Debian 12)

Verify Java installation:
java -version

If multiple Java versions are present, select Java 17:
update-alternatives --config java
Step 7: Add Jitsi Package Repository
Install GPG support:
apt install gnupg
Download and store the Jitsi signing key:
curl -fsSL https://download.jitsi.org/jitsi-key.gpg.key | gpg --dearmor > /usr/share/keyrings/jitsi-keyring.gpg
Verify the key exists:
ls -lah /usr/share/keyrings/jitsi-keyring.gpg
Add the Jitsi repository:
echo "deb [signed-by=/usr/share/keyrings/jitsi-keyring.gpg] https://download.jitsi.org stable/" > /etc/apt/sources.list.d/jitsi-stable.list
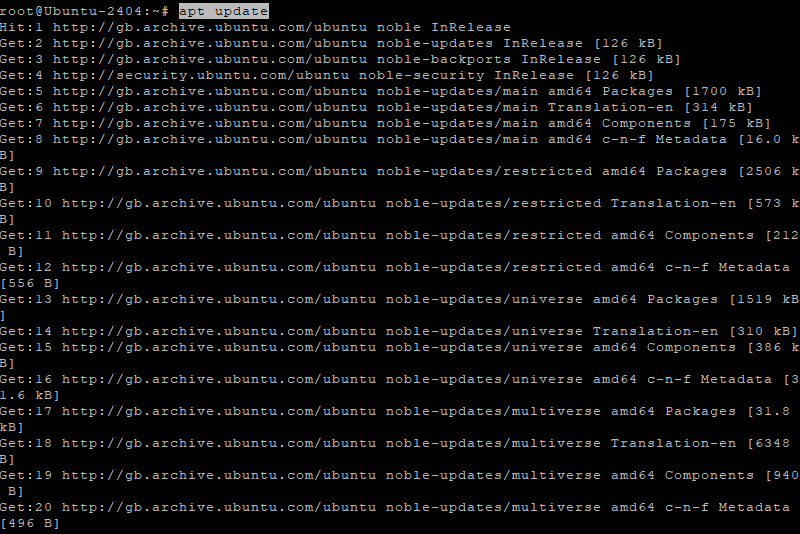
Update package lists:
apt update

Step 8: Install Jitsi Meet
apt install jitsi-meet
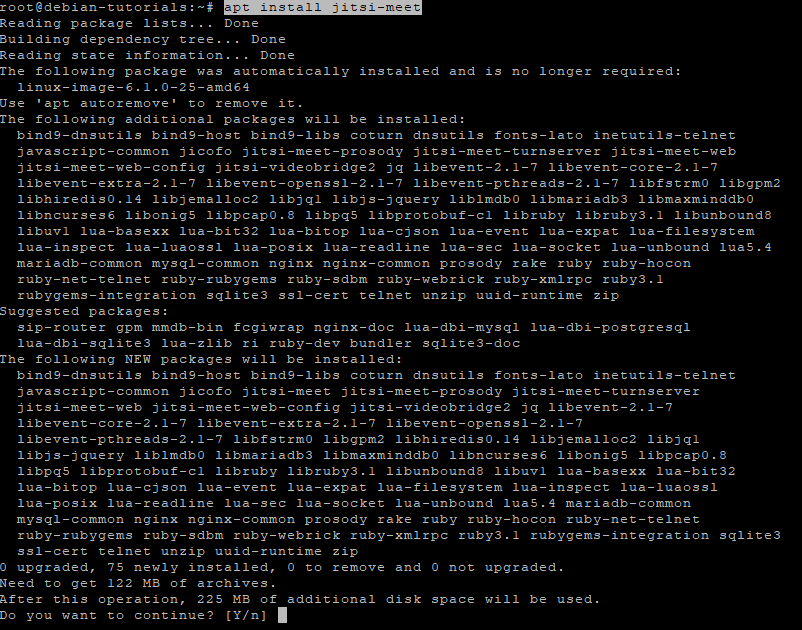
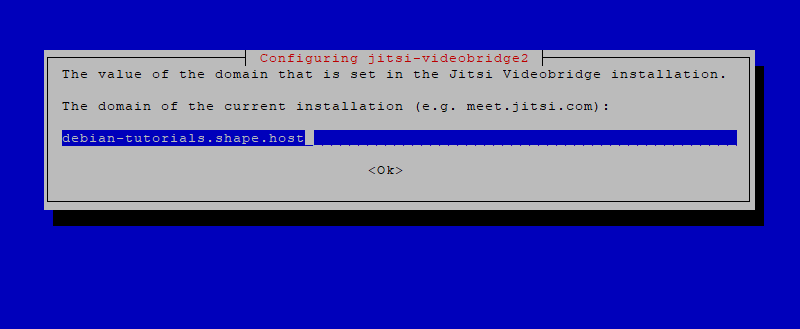
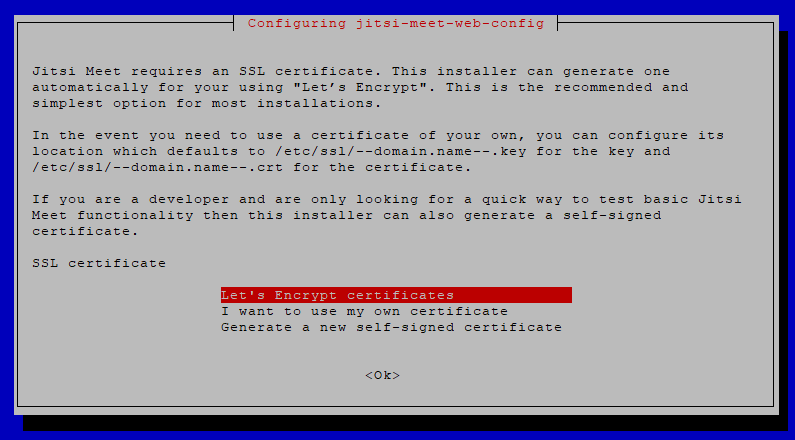
During installation you will be prompted:
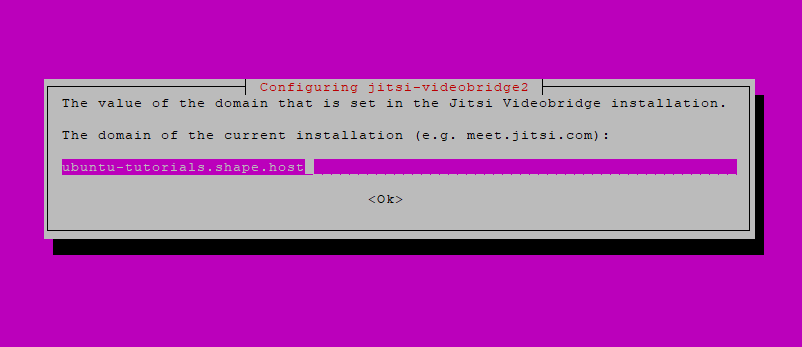
Hostname
meet.example.com
SSL certificate
- Choose Generate a new self-signed certificate
This certificate is temporary. You can later replace it with Let’s Encrypt if needed.

Step 9: Restart Jitsi Services
After installation, restart all Jitsi components to ensure everything loads correctly.
systemctl restart prosody
systemctl restart jicofo
systemctl restart jitsi-videobridge2
systemctl restart nginx
Check service status:
systemctl status prosody jicofo jitsi-videobridge2 nginx
All services should be active (running).
Step 10: Access Jitsi Meet
Open your browser:
https://meet.example.com
You now have:
- A self-hosted Jitsi Meet server
- Running on Debian 12
- Ready for secure video conferencing

You installed Jitsi Meet on Debian 12, configured the required hostname and firewall rules, installed all necessary dependencies, and verified that all core services are running correctly. This setup is suitable for private meetings, internal company communication, or public conferencing without relying on third-party providers.
For hosting real-time communication platforms with reliability, performance, and full root access, Shape.Host Cloud VPS provides a stable and scalable foundation for production deployments.
The post How to Install Jitsi Meet on Debian 12 (Self-Hosted Video Conferencing) appeared first on Shapehost.
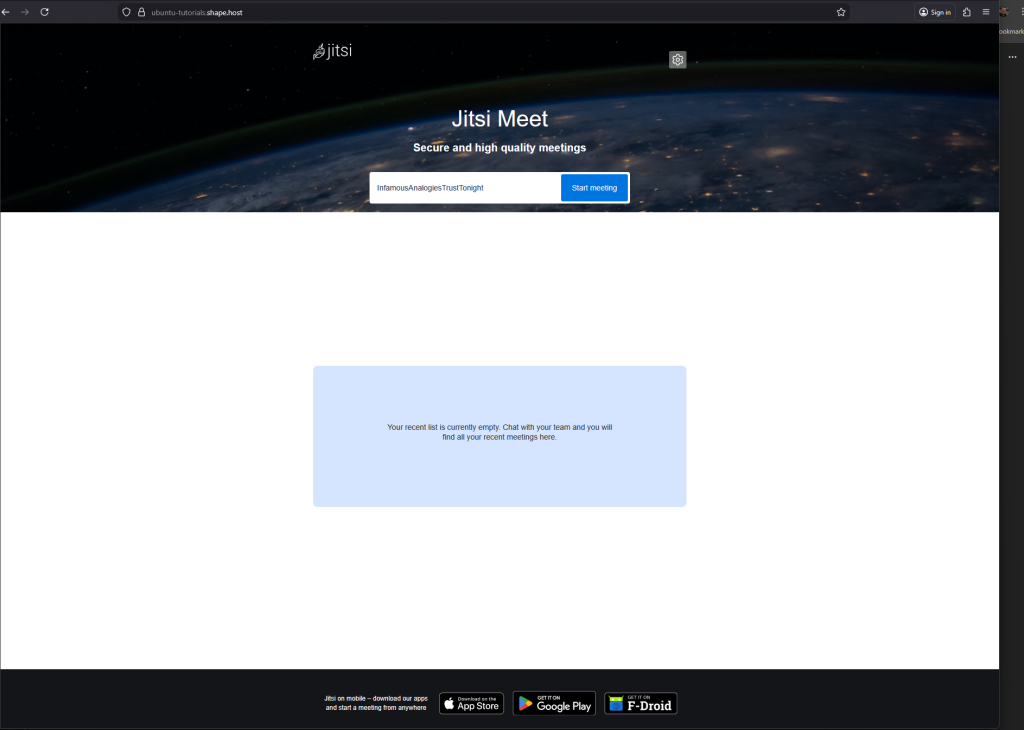
]]>The post How to Install Jitsi Meet on Ubuntu 24.04 (Self-Hosted Video Conferencing) appeared first on Shapehost.
]]>(Self-Hosted Video Conferencing + Nginx + SSL)
Jitsi Meet is a powerful, open-source video conferencing platform that enables secure audio and video meetings directly in the browser — without requiring user accounts or proprietary software. It supports HD video, screen sharing, chat, meeting recording, moderation controls, and end-to-end encryption (E2EE), making it a strong alternative to Zoom, Google Meet, or Microsoft Teams.
Unlike commercial SaaS video platforms, Jitsi Meet can be fully self-hosted, giving you complete control over meeting data, media traffic, and user access. This makes it ideal for organizations that value privacy, compliance, and infrastructure ownership.
Running Jitsi Meet on Ubuntu 24.04 LTS (Noble Numbat) provides a modern, secure, and long-term supported operating system. Ubuntu 24.04 includes systemd 255, OpenSSL 3, and up-to-date networking components, making it an excellent base for a production-grade, self-hosted video conferencing server.
Architecture Overview
| Layer | Component | Role |
|---|---|---|
| OS | Ubuntu 24.04 LTS | Stable, long-term supported Linux base |
| Web Server | Nginx | HTTPS termination and web access |
| Application | Jitsi Meet (Web UI) | Browser-based meeting interface |
| Media Server | Jitsi Videobridge | Handles audio/video streams |
| Signaling | Prosody + Jicofo | Authentication, room control, signaling |
| Transport | UDP / TCP | Real-time media transport |
| TLS | Let’s Encrypt / PKI | Encrypted connections |
Jitsi uses a modular architecture, allowing it to scale from small private meetings to large multi-participant conferences.
Why Use Jitsi Meet?
- Open-source & self-hosted – no vendor lock-in
- No user accounts required – join meetings via simple links
- High-quality video & audio – WebRTC-based
- Screen sharing & chat – built-in collaboration tools
- Meeting moderation – lobby, passwords, participant controls
- End-to-end encryption (E2EE) – optional enhanced privacy
- Mobile & desktop support – works in all modern browsers
- Scalable architecture – suitable for teams or organizations
Jitsi Meet is ideal for users who want private, secure video conferencing without SaaS dependencies.
Jitsi Meet vs Other Video Conferencing Platforms
| Feature / Capability | Jitsi Meet | Zoom | Google Meet | Microsoft Teams |
|---|---|---|---|---|
| Hosting | Self-hosted | Cloud only | Cloud only | Cloud only |
| Open-source | Yes | No | No | No |
| Data ownership | Full control | Vendor-controlled | Vendor-controlled | Vendor-controlled |
| Accounts required | No | Yes | Yes | Yes |
| E2EE | Yes | Partial | Partial | Partial |
| Cost | Free (self-hosted) | Free / Paid | Free | Paid |
Jitsi stands out for privacy, flexibility, and infrastructure control.
Security & Best Practices on Ubuntu 24.04
- Run Jitsi only over HTTPS.
- Use Let’s Encrypt SSL certificates with automatic renewal.
- Open required ports:
- 443 TCP (HTTPS)
- 10000 UDP (media traffic)
- Optional fallback ports (TCP 4443 / 5349)
- Enable UFW firewall and restrict unused ports.
- Set strong room moderation (passwords, lobby).
- Keep Ubuntu and Jitsi packages updated regularly.
- Monitor CPU, RAM, and bandwidth usage.
- Use a dedicated domain or subdomain (e.g.
meet.example.com). - Enable rate limiting and headers in Nginx.
- For larger deployments, consider horizontal scaling with multiple videobridges.
Typical Use Cases
- Team meetings and daily stand-ups
- Private business calls
- Remote education and training
- Internal company conferencing
- Privacy-focused organizations
- Self-hosted alternatives to Zoom or Meet
- Government, NGO, or compliance-sensitive environments
Step 1: Create a Server Instance on Shape.Host
Before installing Jitsi Meet, you need a VPS with a public IP address.
Log in to https://shape.host
Click Create → Instance

Choose a data center close to your users

Select a plan with at least:
2 CPU cores (4 recommended for multiple participants)
4 GB RAM
40 GB SSD storage
Choose Ubuntu 24.04 (64-bit) as the operating system

Create the instance and wait for provisioning

Copy the public IP address of your server

Step 2: Connect to the Server (Linux, macOS & Windows)
Linux / macOS
ssh root@YOUR_SERVER_IP
Windows (PowerShell / Windows Terminal)
ssh root@YOUR_SERVER_IP
Windows (PuTTY)
- Host Name:
YOUR_SERVER_IP - Port:
22 - Connection type:
SSH - Username:
root
Once connected, you should see a root shell prompt.
Step 3: Update the Operating System
apt update
- Updates the local package index
apt upgrade -y
- Installs all available security and system updates
- Ensures compatibility with Jitsi dependencies
Step 4: Set the Hostname (Critical for Jitsi)
Jitsi requires a valid fully qualified domain name (FQDN).
hostnamectl set-hostname ubuntu-tutorials.shape.host
Sets the system hostname permanently
Edit the hosts file:
nano /etc/hosts
Add or update (replace IP accordingly):
127.0.0.1       localhost
YOUR_SERVER_IP  meet.example.com
This ensures local hostname resolution works correctly.

Verify hostname:
hostname

Refresh system state:
apt update
apt upgrade

Reboot to fully apply hostname changes:
reboot
Reconnect via SSH after reboot.
Step 5: Configure Firewall (UFW)
Jitsi requires several ports for media, signaling, and TURN/STUN.
ufw allow 22/tcp
- Allows SSH access
ufw allow 80/tcp
ufw allow 443/tcp
- Allows HTTP and HTTPS traffic
ufw allow 10000/udp
- Main Jitsi video/audio media port
ufw allow 3478/udp
- STUN/TURN (media traversal)
ufw allow 5349/tcp
- TURN over TCP (fallback for restricted networks)
Enable firewall:
ufw enable

Check status:
ufw status

Step 6: Install Java and Core Dependencies
Jitsi components require Java.
apt install gnupg2 curl apt-transport-https openjdk-11-jre-headless
openjdk-11-jre-headless→ Required for Jicofo & Videobridgegnupg2,curl→ Needed for repository verification

Verify Java:
java -version

Step 7: Add Jitsi Repository
Import Jitsi GPG key:
curl https://download.jitsi.org/jitsi-key.gpg.key | gpg --dearmor > /usr/share/keyrings/jitsi-keyring.gpg
Add Jitsi repository:
echo "deb [signed-by=/usr/share/keyrings/jitsi-keyring.gpg] https://download.jitsi.org stable/" > /etc/apt/sources.list.d/jitsi-stable.list
Update package list:
apt update

Step 8: Install Jitsi Meet
apt install jitsi-meet

During installation you will be prompted:
Hostname
meet.example.com
SSL certificate
Generate a new self-signed certificate
This certificate is temporary and will be replaced with Let’s Encrypt in the next step.
Step 9: Enable Let’s Encrypt SSL
Install Certbot:
apt install certbot

Run Jitsi’s built-in SSL installer:
/usr/share/jitsi-meet/scripts/install-letsencrypt-cert.sh
This script:
- Requests a Let’s Encrypt certificate
- Automatically configures Jitsi + Nginx
- Sets up auto-renewal


Step 10: Restart Jitsi Services
systemctl restart prosody
systemctl restart jicofo
systemctl restart jitsi-videobridge2
systemctl restart nginx

Check service status:
systemctl status prosody jicofo jitsi-videobridge2 nginx
All services should be active (running).
Step 11: Access Jitsi Meet
Open your browser:
https://meet.example.com
You now have:
- A fully self-hosted Jitsi Meet instance
- Secured with Let’s Encrypt SSL
- Ready for private video conferences
You have installed Jitsi Meet on Ubuntu 24.04, configured the required networking and firewall rules, and secured the platform with HTTPS. This setup is suitable for private meetings, internal company calls, or public conferencing—without relying on third-party services.
For hosting real-time communication platforms with reliability, performance, and full root access, Shape.Host Linux SSD VPS provides a solid and scalable foundation for production deployments.
The post How to Install Jitsi Meet on Ubuntu 24.04 (Self-Hosted Video Conferencing) appeared first on Shapehost.
]]>The post How to Install Akaunting (Free Accounting Software) on Debian 12 appeared first on Shapehost.
]]>(PHP 8.2/8.3 + MySQL/MariaDB + Nginx or Apache + SSL)
Akaunting is a modern, open-source accounting and business management platform built for small businesses, freelancers, and startups. It covers the essentials of day-to-day accounting, including invoicing, expenses, bank accounts, payments, taxes, financial reports, and multi-currency support, all through a clean, web-based interface.
Unlike proprietary accounting SaaS tools, Akaunting can be fully self-hosted, which means you keep complete ownership of your financial data, avoid recurring license fees, and can customize or extend the platform using apps and integrations as your business grows.
Running Akaunting on Debian 12 (Bookworm) provides a stable, security-focused, and long-term supported operating system. Debian 12 ships with OpenSSL 3, systemd 252, and a mature PHP ecosystem, making it an excellent foundation for a reliable, production-grade accounting system.
Architecture Overview
| Layer | Component | Role |
|---|---|---|
| OS | Debian 12 (Bookworm) | Stable, long-term supported Linux base |
| Web Server | Nginx or Apache | Serves the Akaunting web application |
| Runtime | PHP 8.2 / 8.3 (PHP-FPM) | Executes Akaunting backend logic |
| Database | MySQL / MariaDB | Stores accounting data and settings |
| Application | Akaunting (Laravel) | Accounting, invoicing, reporting |
| TLS | Let’s Encrypt / PKI | Encrypted HTTPS access |
| Extensions | Akaunting Apps | Add payroll, CRM, POS, and more |
Akaunting is built on Laravel, ensuring clean architecture, strong security practices, and long-term maintainability.
Why Use Akaunting?
- Free & open-source accounting software
- Self-hosted – full control over financial data
- Invoices & bills – manage income and expenses easily
- Multi-currency & tax support – suitable for international businesses
- Bank accounts & transactions – track balances and cash flow
- Professional reports – profit & loss, balance sheet, taxes
- App marketplace – extend functionality as needed
- Modern, user-friendly UI – accessible even for non-accountants
Akaunting is ideal for businesses that want simple accounting without SaaS lock-in.
Akaunting vs Other Accounting Platforms
| Feature / Capability | Akaunting | QuickBooks | Xero | Odoo Accounting |
|---|---|---|---|---|
| Hosting | Self-hosted | Cloud only | Cloud only | Self / Cloud |
| Open-source | Yes | No | No | Partial |
| Data ownership | Full control | Vendor-controlled | Vendor-controlled | Partial |
| Invoicing | Yes | Yes | Yes | Yes |
| Multi-currency | Yes | Yes | Yes | Yes |
| Cost | Free (self-hosted) | Paid | Paid | Free / Paid |
Akaunting stands out for simplicity, transparency, and cost efficiency.
Security & Best Practices on Debian 12
- Serve Akaunting only over HTTPS.
- Use PHP-FPM with Nginx or Apache for better isolation.
- Restrict database access to localhost only.
- Store sensitive data (DB credentials, app keys) in
.env. - Set correct file permissions for
storage/andbootstrap/cache/. - Use UFW or nftables and allow only ports 80 and 443.
- Configure cron jobs for recurring tasks and reports.
- Regularly update:
- Debian system packages
- PHP extensions
- Akaunting core and apps
- Back up:
- Database
.envfile- Uploaded documents and invoices
- Restrict admin access and enforce strong passwords.
Typical Use Cases
- Small businesses handling daily accounting
- Freelancers & consultants issuing invoices and tracking expenses
- Startups needing a lightweight but reliable accounting system
- International companies working with multiple currencies
- Self-hosted business stacks combined with CRM or ERP tools
- Accountants managing multiple small clients
Deploying Akaunting on Debian 12 gives you a secure, stable, and fully self-hosted accounting solution — combining essential financial tools with full data ownership and Debian’s well-known reliability.
Step 1: Create a Server Instance on Shape.Host
Before installing Akaunting, you need a VPS with root access.
Log in to https://shape.host
Click Create → Instance

Choose a data center location close to your users

Select a VPS plan with at least:
2 CPU cores
4 GB RAM
40 GB SSD storage
Choose Debian 12 (Bookworm) as the operating system

Create the instance and wait for provisioning

Copy the public IP address of your server

Step 2: Connect to the Server
Linux & macOS
ssh root@YOUR_SERVER_IP
Windows (PowerShell / Windows Terminal)
ssh root@YOUR_SERVER_IP
Windows (PuTTY)
- Host Name:
YOUR_SERVER_IP - Port:
22 - Connection type:
SSH - Username:
root
After connecting, you should see a shell prompt indicating you are logged in as root.
Step 3: Update the Operating System
apt update
- Refreshes the package index
- Ensures Debian knows about the latest available packages
apt upgrade -y
- Installs all pending updates
- Reduces security risks and compatibility issues
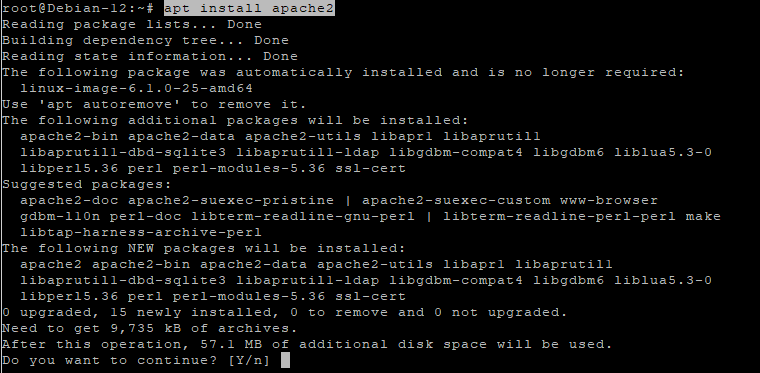
Step 4: Install Apache Web Server
apt install apache2
- Installs the Apache HTTP server
systemctl enable apache2
- Configures Apache to start automatically at boot
systemctl start apache2
- Starts Apache immediately
systemctl status apache2
- Confirms Apache is running correctly
Apache will serve Akaunting’s web interface.

Step 5: Install and Configure MariaDB
apt install mariadb-server
- Installs the MariaDB database server

systemctl enable mariadb
- Enables MariaDB at boot
systemctl start mariadb
- Starts the database service

Secure the database
mysql_secure_installation
This interactive script:
- Sets the MariaDB root password
- Removes anonymous users
- Disables remote root login
- Removes test databases

Create the Akaunting database
mariadb
Inside the MariaDB shell:
CREATE DATABASE akaunting CHARACTER SET utf8mb4 COLLATE utf8mb4_unicode_ci;
- Creates a database with full Unicode support
CREATE USER 'akaunting'@'localhost' IDENTIFIED BY 'StrongPasswordHere';
- Creates a dedicated database user
GRANT ALL PRIVILEGES ON akaunting.* TO 'akaunting'@'localhost';
- Grants full access only to the Akaunting database
FLUSH PRIVILEGES;
EXIT;

Step 6: Install PHP 8.1 (Sury Repository)
Akaunting officially supports PHP 8.1, so we use the trusted Sury PHP repository.
apt install ca-certificates apt-transport-https lsb-release curl
- Installs required tools for secure repository management

apt install gnupg
- Installs GPG for verifying repository signatures
mkdir -p /etc/apt/keyrings
- Creates a secure location for repository keys
curl -fsSL https://packages.sury.org/php/apt.gpg | gpg --dearmor -o /etc/apt/keyrings/php.gpg
- Imports and stores the PHP repository signing key
echo "deb [signed-by=/etc/apt/keyrings/php.gpg] https://packages.sury.org/php/ bookworm main" > /etc/apt/sources.list.d/php.list
- Adds the PHP repository to Debian
apt update
- Reloads package metadata

Step 7: Install PHP 8.1 and Required Extensions
apt install php8.1 libapache2-mod-php8.1 php8.1-mysql php8.1-bcmath php8.1-curl php8.1-gd php8.1-intl php8.1-mbstring php8.1-xml php8.1-zip php8.1-fileinfo php8.1-tokenizer php8.1-opcache
These extensions are required for:
- Database communication
- File uploads
- PDF generation
- Localization
- Performance and caching

Verify PHP:
php -v

Step 8: Configure PHP for Akaunting
nano /etc/php/8.1/apache2/php.ini
Update or confirm the following values:
memory_limit = 512M
upload_max_filesize = 64M
post_max_size = 64M
max_execution_time = 300
date.timezone = Europe/Bucharest
These settings ensure:
- Large invoices and attachments work correctly
- Long-running operations do not fail
- Correct timezone handling
Apply changes:
systemctl restart apache2

Step 9: Download and Prepare Akaunting
cd /var/www
- Moves to the web root directory
wget https://akaunting.com/download.php?version=latest -O akaunting.zip
- Downloads the latest Akaunting release

apt install unzip
- Installs the unzip utility

unzip akaunting.zip -d akaunting
- Extracts Akaunting into
/var/www/akaunting
Set correct permissions
chown -R www-data:www-data /var/www/akaunting
- Assigns ownership to Apache
chmod -R 755 /var/www/akaunting
- Sets secure default permissions
chmod -R 775 /var/www/akaunting/storage
chmod -R 775 /var/www/akaunting/bootstrap/cache
- Allows Akaunting to write cache, logs, and uploads

Step 10: Configure Apache Virtual Host
nano /etc/apache2/sites-available/akaunting.conf
Paste:
<VirtualHost *:80>
    ServerName yourdomain.com
    DocumentRoot /var/www/akaunting

    <Directory /var/www/akaunting>
        AllowOverride All
        Require all granted
    </Directory>

    ErrorLog ${APACHE_LOG_DIR}/akaunting_error.log
    CustomLog ${APACHE_LOG_DIR}/akaunting_access.log combined
</VirtualHost>

Enable the site and required module:
a2ensite akaunting.conf
a2enmod rewrite
systemctl reload apache2

Step 11: Enable SSL with Let’s Encrypt
apt install certbot python3-certbot-apache
- Installs Certbot with Apache integration

certbot --apache -d debian-tutorials.shape.host
Replace with your real domain:
yourdomain.com
Certbot will:
- Issue a free SSL certificate
- Automatically configure HTTPS
- Enable auto-renewal

Step 12: Complete Akaunting Web Installation
Open your browser:
https://yourdomain.com
Follow the Akaunting installer:

Enter database credentials
Configure company information

Create the admin account


Finish installation

Dashboard

You have successfully installed Akaunting on Debian 12 using Apache, MariaDB, and PHP 8.1, secured with Let’s Encrypt SSL. This setup is stable, secure, and fully suitable for production accounting workloads.
For hosting accounting and business-critical applications with full control, performance, and scalability, Shape.Host Cloud VPS offers a reliable foundation for modern self-hosted infrastructure.
The post How to Install Akaunting (Free Accounting Software) on Debian 12 appeared first on Shapehost.
]]>The post How to Install Akaunting (Free Accounting Software) on Ubuntu 24.04 appeared first on Shapehost.
]]>(PHP 8.3/8.2 + MySQL/MariaDB + Nginx or Apache + SSL)
Akaunting is a modern, open-source accounting and business management platform designed for small businesses, freelancers, and startups. It provides essential financial tools such as invoicing, expense tracking, bank accounts, payments, taxes, reports, and multi-currency support — all accessible through a clean, web-based interface.
Unlike proprietary accounting SaaS platforms, Akaunting can be fully self-hosted, giving you full ownership of your financial data, predictable costs, and the freedom to customize or extend the system using apps and integrations.
Running Akaunting on Ubuntu 24.04 LTS (Noble Numbat) provides a secure, modern, and long-term supported operating system, making it an excellent foundation for a production-grade accounting system. Ubuntu 24.04 includes OpenSSL 3, systemd 255, and up-to-date PHP and database packages, ensuring compatibility, performance, and security.
Architecture Overview
| Layer | Component | Role |
|---|---|---|
| OS | Ubuntu 24.04 LTS | Stable, long-term supported Linux base |
| Web Server | Nginx or Apache | Serves the Akaunting web application |
| Runtime | PHP 8.3 / 8.2 (FPM) | Executes Akaunting backend logic |
| Database | MySQL / MariaDB | Stores accounting data and settings |
| Application | Akaunting (Laravel) | Accounting, invoicing, reporting |
| TLS | Let’s Encrypt / PKI | Encrypted HTTPS access |
| Extensions | Akaunting Apps | Add features like payroll, CRM, POS |
Akaunting is built on Laravel, which ensures a clean architecture, strong security practices, and long-term maintainability.
Why Use Akaunting?
- Free & open-source accounting software
- Self-hosted – full control over financial data
- Invoices & bills – manage income and expenses easily
- Multi-currency & tax support – ideal for international businesses
- Bank accounts & transactions – track balances and cash flow
- Professional reports – profit & loss, balance sheet, taxes
- App marketplace – extend functionality as your business grows
- Modern UI – easy to use, even for non-accountants
Akaunting is ideal for businesses that want simple accounting without SaaS lock-in.
Akaunting vs Other Accounting Platforms
| Feature / Capability | Akaunting | QuickBooks | Xero | Odoo Accounting |
|---|---|---|---|---|
| Hosting | Self-hosted | Cloud only | Cloud only | Self / Cloud |
| Open-source | Yes | No | No | Partial |
| Data ownership | Full control | Vendor-controlled | Vendor-controlled | Partial |
| Invoicing | Yes | Yes | Yes | Yes |
| Multi-currency | Yes | Yes | Yes | Yes |
| Cost | Free (self-hosted) | Paid | Paid | Free / Paid |
Akaunting stands out for simplicity, transparency, and cost efficiency.
Security & Best Practices on Ubuntu 24.04
- Serve Akaunting only over HTTPS.
- Use PHP-FPM with Nginx or Apache for better isolation.
- Restrict database access to localhost only.
- Store sensitive data (DB credentials, app keys) in
.env. - Set correct file permissions for
storage/andbootstrap/cache/. - Enable UFW and allow only ports 80 and 443.
- Schedule cron jobs for recurring tasks and reports.
- Regularly update:
- Ubuntu system packages
- PHP extensions
- Akaunting core and apps
- Back up:
- Database
.envfile- Uploaded documents and invoices
- Restrict admin access and use strong passwords.
Typical Use Cases
- Small businesses managing daily accounting
- Freelancers & consultants issuing invoices and tracking expenses
- Startups needing basic but reliable accounting
- International companies working with multiple currencies
- Self-hosted business stacks combined with CRM or ERP tools
- Accountants managing multiple small clients
Deploying Akaunting on Ubuntu 24.04 gives you a secure, modern, and fully self-hosted accounting solution — combining essential financial tools with full data ownership, long-term OS support, and zero mandatory licensing costs.
Step 1: Create a Server Instance on Shape.Host
Before installing Akaunting, you need a VPS.
Log in to https://shape.host
Click Create → Instance

Choose a data center close to your users

Select a VPS plan with at least:
2 CPU cores
4 GB RAM
40 GB SSD storage
Choose Ubuntu 24.04 (64-bit) as the operating system

Create the instance and wait for provisioning

Copy the public IP address of the server

Step 2: Connect to the Server
After your VPS is created, you must connect to it via SSH as the root user.
Option A: Linux & macOS
Open a terminal and run:
ssh root@YOUR_SERVER_IP
- Replace
YOUR_SERVER_IPwith the public IP address of your server - Confirm the fingerprint when prompted
- You will be logged in as
root
Option B: Windows (PowerShell / Windows Terminal)
Modern versions of Windows (Windows 10 and newer) include a built-in SSH client.
- Open PowerShell or Windows Terminal
- Run:
ssh root@YOUR_SERVER_IP
- Type
yeswhen asked to confirm the host key - Enter the root password (or SSH key authentication will be used if configured)
You are now connected to the server.
Option C: Windows (PuTTY)
If you prefer PuTTY:
- Download PuTTY from the official site
- Open PuTTY
- In Host Name (or IP address), enter your server IP
- Set:
- Port:
22 - Connection type:
SSH
- Port:
- Click Open
- Log in as:
- Username:
root - Password: your server password
- Username:
Once connected, you will see a Linux shell prompt and can continue with the installation.
Step 3: Update the Operating System
apt update
- Refreshes the package index
- Ensures the system knows about the latest available packages
apt upgrade -y
- Installs all available system updates
- Improves security and stability before installing new software
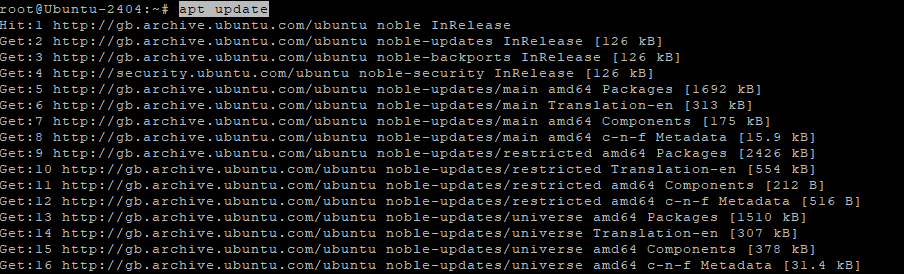
Step 4: Install Apache Web Server
apt install apache2
- Installs the Apache HTTP web server

systemctl enable apache2
- Configures Apache to start automatically at boot
systemctl start apache2
- Starts the Apache service
systemctl status apache2
- Verifies that Apache is running correctly
Apache will serve Akaunting’s web interface.

Step 5: Install and Configure MariaDB
apt install mariadb-server
- Installs the MariaDB database server

systemctl enable mariadb
- Enables MariaDB at system startup
systemctl start mariadb
- Starts the database service

Secure the database
mysql_secure_installation
This interactive script:
- Sets a root password
- Removes anonymous users
- Disables remote root login
- Removes test databases

Create the Akaunting database
mariadb
Inside MariaDB:
CREATE DATABASE akaunting CHARACTER SET utf8mb4 COLLATE utf8mb4_unicode_ci;
- Creates a database using full Unicode support
CREATE USER 'akaunting'@'localhost' IDENTIFIED BY 'StrongPasswordHere';
- Creates a dedicated database user
GRANT ALL PRIVILEGES ON akaunting.* TO 'akaunting'@'localhost';
- Grants full access only to the Akaunting database
FLUSH PRIVILEGES;
EXIT;

Step 6: Install PHP 8.1 and Required Extensions
Akaunting officially supports PHP 8.1, so we install it via the Ondřej Surý PPA.
apt install ca-certificates apt-transport-https software-properties-common
- Installs tools required to add external repositories

add-apt-repository ppa:ondrej/php
- Adds the PHP repository with multiple PHP versions

apt update
- Refreshes package lists
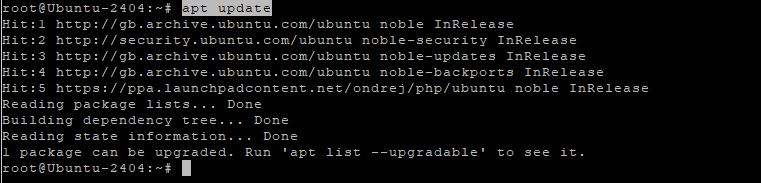
apt install php8.1 libapache2-mod-php8.1 php8.1-mysql php8.1-bcmath php8.1-curl php8.1-gd php8.1-intl php8.1-mbstring php8.1-xml php8.1-zip php8.1-fileinfo php8.1-tokenizer php8.1-opcache
These extensions are required for:
- Database access
- File uploads
- PDF generation
- Localization
- Performance optimization

Verify PHP:
php -v

Step 7: Configure PHP for Akaunting
nano /etc/php/8.1/apache2/php.ini
Update or confirm the following values:
memory_limit = 512M
upload_max_filesize = 64M
post_max_size = 64M
max_execution_time = 300
date.timezone = Europe/Bucharest
These settings ensure:
- Large invoices and attachments work correctly
- Long-running operations don’t fail
- Correct timezone handling
Apply changes:
systemctl restart apache2

Step 8: Download and Prepare Akaunting
cd /var/www
- Moves to the web root directory
wget https://akaunting.com/download.php?version=latest -O akaunting.zip
- Downloads the latest Akaunting release

apt install unzip
- Installs the unzip utility

unzip akaunting.zip -d akaunting
- Extracts Akaunting into
/var/www/akaunting
Set correct permissions
chown -R www-data:www-data /var/www/akaunting
- Assigns ownership to Apache
chmod -R 755 /var/www/akaunting
- Sets secure default permissions
chmod -R 775 /var/www/akaunting/storage
chmod -R 775 /var/www/akaunting/bootstrap/cache
- Allows Akaunting to write cache, logs, and uploads

Step 9: Configure Apache Virtual Host
nano /etc/apache2/sites-available/akaunting.conf
Paste:
<VirtualHost *:80>
    ServerName yourdomain.com
    DocumentRoot /var/www/akaunting

    <Directory /var/www/akaunting>
        AllowOverride All
        Require all granted
    </Directory>

    ErrorLog ${APACHE_LOG_DIR}/akaunting_error.log
    CustomLog ${APACHE_LOG_DIR}/akaunting_access.log combined
</VirtualHost>

Enable the site and required modules:
a2ensite akaunting.conf
a2enmod rewrite
systemctl reload apache2

Step 10: Enable SSL with Let’s Encrypt
apt install certbot python3-certbot-apache
- Installs Certbot with Apache integration

certbot --apache -d ubuntu-tutorials.shape.host
Replace with your actual domain:
yourdomain.com
Certbot will:
- Issue a free SSL certificate
- Automatically configure HTTPS
- Enable automatic certificate renewal

Step 11: Complete Akaunting Web Installation
Open your browser:
https://yourdomain.com
Follow the Akaunting installer:

Enter database credentials

Configure company details
Create the admin account


Finish installation.

Dashboard.

You have successfully installed Akaunting on Ubuntu 24.04 using Apache, MariaDB, PHP 8.1, and secured it with Let’s Encrypt SSL. This setup is stable, secure, and fully suitable for production accounting workloads.
For hosting financial and business-critical applications with full control, performance, and scalability, Shape.Host Linux SSD VPS provides a reliable foundation for modern self-hosted infrastructure.
The post How to Install Akaunting (Free Accounting Software) on Ubuntu 24.04 appeared first on Shapehost.
]]>