Until ModemManager 1.18.2, the procedure was automatically run for the FCC unlock procedures we knew about, but this will no longer happen. Once 1.18.4 is out, the procedure will need to be explicitly enabled by each user, under their own responsibility, or otherwise implicitly enabled after installing an official FCC unlock tool provided by the manufacturer itself.
See a full description of the rationale behind this change in the ModemManager documentation site and the suggested code changes in the gitlab merge request.
If you want to enable the ModemManager provided unofficial FCC unlock tools once you have installed 1.18.4, run (assuming sysconfdir=/etc and datadir=/usr/share) this command (*):
sudo ln -sft /etc/ModemManager/fcc-unlock.d /usr/share/ModemManager/fcc-unlock.available.d/*
The user-enabled tools in /etc should not be removed during package upgrades, so this should be a one-time setup.
(*) Updated to have one single command instead of a for loop; thanks heftig!
]]>
The libqmi and libmbim libraries are every day getting more popular to control your QMI or MBIM based devices. One of the things I’ve noticed, though, is that lots of users are writing applications in e.g. Python but then running qmicli or mbimcli commands, and parsing the outputs. This approach may work, but there is absolutely no guarantee that the format of the output printed by the command line programs will be kept stable across new releases. And also, the way these operations are performed may be suboptimal (e.g. allocating QMI clients for each operation, instead of reusing them).
Since the new stable libqmi 1.26 and libmbim 1.24 releases, these libraries integrate GObject Introspection support for all their types, and that provides a much better integration within Python applications (or really, any other language supported by GObject Introspection).
The only drawback of using the libraries in this way, if you’re already using and parsing command line interface commands, is that you would need to go deep into how the protocol works in order to use them.
For example, in order to run a DMS Get Capabilities operation, you would need to create a Qmi.Device first, open it, then allocate a Qmi.Client for the DMS service, then run the Qmi.Client.get_capabilities() operation, receive and process the response with Qmi.Client.get_capabilities_finish(), and parse the result with the per-TLV reader method, e.g. output.get_info() to process the Info TLV. Once the client is no longer needed, it would need to be explicitly released before exiting. A full example doing just this is provided in the libqmi sources.
In the case of MBIM operations, there is no need for the extra step of allocating a per-service client, but instead, the user should be more aware of the actual types of messages being transferred, in order to use the correct parsing operations. For example, in order to query device capabilities you would need to create a Mbim.Device first, open it, create a message to query the device capabilities, send the message, receive and process the response, check whether an error is reported, and if it isn’t, fully parse it. A full example doing just this is provided in the libmbim sources.
Of course, all these low level operations can also be done through the qmi-proxy or mbim-proxy, so that ModemManager or other programs can be running at the same time, all sharing access to the same QMI or MBIM ports.
P.S.: not a true Python or GObject Introspection expert here, so please report any issue found or improvements that could be done 
And special thanks to Vladimir Podshivalov who is the one that started the hard work of setting everything up in libqmi. Thank you!
Enjoy!
]]>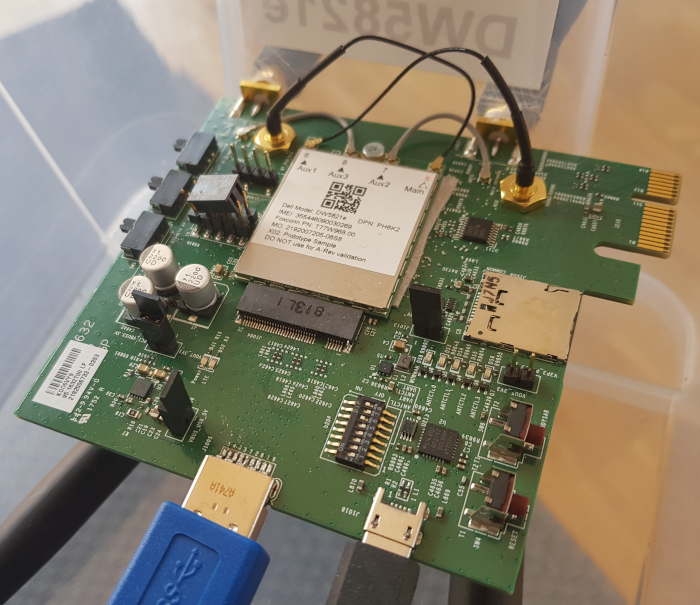
The Dell Wireless 5821e module is a Qualcomm SDX20 based LTE Cat16 device. This modem can work in either MBIM mode or QMI mode, and provides different USB layouts for each of the modes. In Linux kernel based and Windows based systems, the MBIM mode is the default one, because it provides easy integration with the OS (e.g. no additional drivers or connection managers required in Windows) and also provides all the features that QMI provides through QMI over MBIM operations.
The firmware update process of this DW5821e module is integrated in your GNU/Linux distribution, since ModemManager 1.10.0 and fwupd 1.2.6. There is no official firmware released in the LVFS (yet) but the setup is completely ready to be used, just waiting for Dell to publish an initial official firmware release.
The firmware update integration between ModemManager and fwupd involves different steps, which I’ll try to describe here so that it’s clear how to add support for more devices in the future.
1) ModemManager reports expected update methods, firmware version and device IDs
The Firmware interface in the modem object exposed in DBus contains, since MM 1.10, a new UpdateSettings property that provides a bitmask specifying which is the expected firmware update method (or methods) required for a given module, plus a dictionary of key-value entries specifying settings applicable to each of the update methods.
In the case of the DW5821e, two update methods are reported in the bitmask: “fastboot” and “qmi-pdc“, because both are required to have a complete firmware upgrade procedure. “fastboot” would be used to perform the system upgrade by using an OTA update file, and “qmi-pdc” would be used to install the per-carrier configuration files after the system upgrade has been done.
The list of settings provided in the dictionary contain the two mandatory fields required for all devices that support at least one firmware update method: “device-ids” and “version”. These two fields are designed so that fwupd can fully rely on them during its operation:
- The “device-ids” field will include a list of strings providing the device IDs associated to the device, sorted from the most specific to the least specific. These device IDs are the ones that fwupd will use to build the GUIDs required to match a given device to a given firmware package. The DW5821e will expose four different device IDs:
- “USB\VID_413C“: specifying this is a Dell-branded device.
- “USB\VID_413C&PID_81D7“: specifying this is a DW5821e module.
- “USB\VID_413C&PID_81D7&REV_0318“: specifying this is hardware revision 0x318 of the DW5821e module.
- “USB\VID_413C&PID_81D7&REV_0318&CARRIER_VODAFONE“: specifying this is hardware revision 0x318 of the DW5821e module running with a Vodafone-specific carrier configuration.
- The “version” field will include the firmware version string of the module, using the same format as used in the firmware package files used by fwupd. This requirement is obviously very important, because if the format used is different, the simple version string comparison used by fwupd (literally ASCII string comparison) would not work correctly. It is also worth noting that if the carrier configuration is also versioned, the version string should contain not only the version of the system, but also the version of the carrier configuration. The DW5821e will expose a firmware version including both, e.g. “T77W968.F1.1.1.1.1.VF.001” (system version being F1.1.1.1.1 and carrier config version being “VF.001”)
- In addition to the mandatory fields, the dictionary exposed by the DW5821e will also contain a “fastboot-at” field specifying which AT command can be used to switch the module into fastboot download mode.
2) fwupd matches GUIDs and checks available firmware versions
Once fwupd detects a modem in ModemManager that is able to expose the correct UpdateSettings property in the Firmware interface, it will add the device as a known device that may be updated in its own records. The device exposed by fwupd will contain the GUIDs built from the “device-ids” list of strings exposed by ModemManager. E.g. for the “USB\VID_413C&PID_81D7&REV_0318&CARRIER_VODAFONE” device ID, fwupd will use GUID “b595e24b-bebb-531b-abeb-620fa2b44045”.
fwupd will then be able to look for firmware packages (CAB files) available in the LVFS that are associated to any of the GUIDs exposed for the DW5821e.
The CAB files packaged for the LVFS will contain one single firmware OTA file plus one carrier MCFG file for each supported carrier in the give firmware version. The CAB files will also contain one “metainfo.xml” file for each of the supported carriers in the released package, so that per-carrier firmware upgrade paths are available: only firmware updates for the currently used carrier should be considered. E.g. we don’t want users running with the Vodafone carrier config to get notified of upgrades to newer firmware versions that aren’t certified for the Vodafone carrier.
Each of the CAB files with multiple “metainfo.xml” files will therefore be associated to multiple GUID/version pairs. E.g. the same CAB file will be valid for the following GUIDs (using Device ID instead of GUID for a clearer explanation, but really the match is per GUID not per Device ID):
- Device ID “USB\VID_413C&PID_81D7&REV_0318&CARRIER_VODAFONE” providing version “T77W968.F1.2.2.2.2.VF.002”
- Device ID “USB\VID_413C&PID_81D7&REV_0318&CARRIER_TELEFONICA” providing version “T77W968.F1.2.2.2.2.TF.003”
- Device ID “USB\VID_413C&PID_81D7&REV_0318&CARRIER_VERIZON” providing version “T77W968.F1.2.2.2.2.VZ.004”
- … and so on.
Following our example, fwupd will detect our device exposing device ID “USB\VID_413C&PID_81D7&REV_0318&CARRIER_VODAFONE” and version “T77W968.F1.1.1.1.1.VF.001” in ModemManager and will be able to find a CAB file for the same device ID providing a newer version “T77W968.F1.2.2.2.2.VF.002” in the LVFS. The firmware update is possible!
3) fwupd requests device inhibition from ModemManager
In order to perform the firmware upgrade, fwupd requires full control of the modem. Therefore, when the firmware upgrade process starts, fwupd will use the new InhibitDevice(TRUE) method in the Manager DBus interface of ModemManager to request that a specific modem with a specific uid should be inhibited. Once the device is inhibited in ModemManager, it will be disabled and removed from the list of modems in DBus, and no longer used until the inhibition is removed.
The inhibition may be removed by calling InhibitDevice(FALSE) explicitly once the firmware upgrade is finished, and will also be automatically removed if the program that requested the inhibition disappears from the bus.
4) fwupd downloads CAB file from LVFS and performs firmware update
Once the modem is inhibited in ModemManager, fwupd can right away start the firmware update process. In the case of the DW5821e, the firmware update requires two different methods and two different upgrade cycles.
The first step would be to reboot the module into fastboot download mode using the AT command specified by ModemManager in the “at-fastboot” entry of the “UpdateSettings” property dictionary. After running the AT command, the module will reset itself and reboot with a completely different USB layout (and different vid:pid) that fwupd can detect as being the same device as before but in a different working mode. Once the device is in fastboot mode, fwupd will download and install the OTA file using the fastboot protocol, as defined in the “flashfile.xml” file provided in the CAB file:
<parts interface="AP">
  <part operation="flash" partition="ota" filename="T77W968.F1.2.2.2.2.AP.123_ota.bin" MD5="f1adb38b5b0f489c327d71bfb9fdcd12"/>
</parts>
Once the OTA file is completely downloaded and installed, fwupd will trigger a reset of the module also using the fastboot protocol, and the device will boot from scratch on the newly installed firmware version. During this initial boot, the module will report itself running in a “default” configuration not associated to any carrier, because the OTA file update process involves fully removing all installed carrier-specific MCFG files.
The second upgrade cycle performed by fwupd once the modem is detected again involves downloading all carrier-specific MCFG files one by one into the module using the QMI PDC protocol. Once all are downloaded, fwupd will activate the specific carrier configuration that was previously active before the download was started. E.g. if the module was running with the Vodafone-specific carrier configuration before the upgrade, fwupd will select the Vodafone-specific carrier configuration after the upgrade. The module would be reseted one last time using the QMI DMS protocol as a last step of the upgrade procedure.
5) fwupd removes device inhibition from ModemManager
The upgrade logic will finish by removing the device inhibition from ModemManager using InhibitDevice(FALSE) explicitly. At that point, ModemManager would re-detect and re-probe the modem from scratch, which should already be running in the newly installed firmware and with the newly selected carrier configuration.
]]>
I’ve been lately working on integrating ModemManager in OpenWRT, in order to provide a unique and consolidated way to configure and manage mobile broadband modems (2G, 3G, 4G, Iridium…), all working with netifd.
OpenWRT already has some support for a lot of the devices that ModemManager is able to manage (e.g. through the uqmi, umbim or wwan packages), but unlike the current solutions, ModemManager doesn’t require protocol-specific configurations or setups for the different devices; i.e. the configuration for a modem running in MBIM mode may be the same one as the configuration for a modem requiring AT commands and a PPP session.
Currently the OpenWRT package prepared is based on ModemManager git master, and therefore it supports: QMI modems (including the new MC74XX series which are raw-ip only and don’t support DMS UIM operations), MBIM modems, devices requiring QMI over MBIM operations (e.g. FCC auth), and of course generic AT+PPP based modems, Cinterion, Huawei (both AT+PPP and AT+NDISDUP), Icera, Haier, Linktop, Longcheer, Ericsson MBM, Motorola, Nokia, Novatel, Option (AT+PPP and HSO), Pantech, Samsung, Sierra Wireless (AT+PPP and DirectIP), Simtech, Telit, u-blox, Wavecom, ZTE… and even Iridium and Thuraya satellite modems. All with the same configuration.
Along with ModemManager itself, the OpenWRT feed also contains libqmi and libmbim, which provide the qmicli, mbimcli, and soon the qmi-firmware-update utilities. Note that you can also use these command line tools, even if ModemManager is running, via the qmi-proxy and mbim-proxy setups (i.e. just adding -p to the qmicli or mbimcli commands).
This is not the first time I’ve tried to do this; but this time I believe it is a much more complete setup and likely ready for others to play with it. You can jump to the modemmanager-openwrt bitbucket repository and follow the instructions to include it in your OpenWRT builds:
https://bitbucket.org/aleksander0m/modemmanager-openwrt
The following sections try to get into a bit more detail of which were the changes required to make all this work.
And of course, thanks to VeloCloud for sponsoring the development of the latest ModemManager features that made this integration possible 
udev vs hotplug
One of the latest biggest features merged in ModemManager was the possibility to run without udev support; i.e. without automatically monitoring the device addition and removals happening in the system.
Instead of using udev, the mmcli command line tool ended up with a new --report-kernel-event that can be used to report the device addition and removals manually, e.g.:
$ mmcli --report-kernel-event="action=add,subsystem=tty,name=ttyUSB0"
$ mmcli --report-kernel-event="action=add,subsystem=net,name=wwan0"
This new way of notifying device events made it very easy to integrate the automatic device discovery supported in ModemManager directly via tty and net hotplug scripts (see mm_report_event()).
With the integration in the hotplug scripts, ModemManager will automatically detect and probe the different ports exposed by the broadband modem devices.
udev rules
ModemManager relies on udev rules for different things:
- Blacklisting devices: E.g. we don’t want ModemManager to claim and probe the TTYs exposed by Arduinos or braille displays. The package includes a USB vid:pid based blacklist of devices that expose TTY ports and are not modems to be managed by ModemManager.
- Blacklisting ports: There are cases where we don’t want the automatic logic selection to grab and use some specific modem ports, so the package also provides a much shorter list of ports blacklisted from actual modem devices. E.g. the QMI implementation in some ZTE devices is so poor that we decided to completely skip it and fallback to AT+PPP.
- Greylisting USB serial adapters: The TTY ports exposed by USB serial adapters aren’t probed automatically, as we don’t know what’s connected in the serial side. If we want to have a serial modem, though, the
mmcli --scan-modemsoperation may be executed, which will include the probing of these greylisted devices. - Specifying port type hints: Some devices expose multiple AT ports, but with different purposes. E.g. a modem may expose a port for AT control and another port for the actual PPP session, and choosing the wrong one will not work. ModemManager includes a list of port type hints so that the automatic selection of which port is for what purpose is done transparently.
As we’re not using udev when running in OpenWRT, ModemManager includes now a custom generic udev rules parser that uses sysfs properties to process and apply the rules.
procd based startup
The ModemManager daemon is setup to be started and controlled via procd. The init script controlling the startup will also take care of scheduling the re-play of the hotplug events that had earlier triggered --report-kernel-event actions (they’re cached in /tmp); e.g. to cope with events coming before the daemon started or to handle daemon restarts gracefully.
DBus
Well, no, I didn’t port ModemManager to use ubus If you want to run ModemManager under OpenWRT you’ll also need to have the DBus daemon running.
netifd protocol handler
When using ModemManager, the user shouldn’t need to know the peculiarities of the modem being used: all modems and protocols (QMI, MBIM, Generic AT, vendor-specific AT…) are all managed via the same single DBus interfaces. All the modem control commands are internal to ModemManager, and the only additional considerations needed are related to how to setup the network interface once the modem is connected, e.g.:
- PPP: some modems require a PPP session over a serial port.
- Static: some modems require static IP configuration on a network interface.
- DHCP: some modems require dynamic IP configuration on a network interface.
The OpenWRT package for ModemManager includes a custom protocol handler that enables the modemmanager protocol to be used when configuring network interfaces. This new protocol handler takes care of configuring and bringing up the interfaces as required when the modem gets into connected state.
Example configuration
The following snippet shows an example interface configuration to set in /etc/config/network.
 config interface 'broadband'
   option device '/sys/devices/platform/soc/20980000.usb/usb1/1-1/1-1.2/1-1.2.1'
   option proto 'modemmanager'
   option apn 'ac.vodafone.es'
   option username 'vodafone'
   option password 'vodafone'
   option pincode '7423'
   option lowpower '1'
The settings currently supported are the following ones:
- device: The full sysfs path of the broadband modem device needs to be configured. Relying on the interface names exposed by the kernel is never a good idea, as these may change e.g. across reboots or when more than one modem device is available in the system.
- proto: As said earlier, the new modemmanager protocol needs to be configured.
- apn: If the connection requires an APN, the APN to use.
- username: If the access point requires authentication, the username to use.
- password: If the access point requires authentication, the password to use.
- pincode: If the SIM card requires a PIN, the code to use to unlock it.
- lowpower: If enabled, this setting will request the modem to go into low-power state (i.e. IMSI detach and RF off) when the interface is disconnected.
As you can see, the configuration can be used for any kind of modem device, regardless of what control protocol it uses, which interfaces are exposed, or how the connection is established. The settings are currently only IPv4 only, but adding IPv6 support shouldn’t be a big issue, patches welcome
SMS, USSD, GPS…
The main purpose of using a mobile broadband modem is of course the connectivity itself, but it also may provide many more features. ModemManager provides specific interfaces and mmcli actions for the secondary features which are also available in the OpenWRT integration, including:
- SMS messaging (both 3GPP and 3GPP2).
- Location information (3GPP LAC/CID, CDMA Base station, GPS…).
- Time information (as reported by the operator).
- 3GPP USSD operations (e.g. to query prepaid balance to the operator).
- Extended signal quality information (RSSI, Ec/Io, LTE RSRQ and RSRP…).
- OMA device management operations (e.g. to activate CDMA devices).
- Voice call control.
Worth noting that not all these features are available for all modem types (e.g. SMS messaging is available for most devices, but OMA DM is only supported in QMI based modems).
TL;DR?
You can now have your 2G/3G/4G mobile broadband modems managed with ModemManager and netifd in your OpenWRT based system.
]]> qmi-firmware-update
One of the key reasons to keep using the out-of-tree Sierra GobiNet drivers and GobiAPI was that upgrading firmware in the WWAN modules was supported out of the box, while we didn’t have any way to do so with qmi_wwan in the upstream kernel and libqmi.
I’m glad to say that this is no longer the case; as we already have a new working solution in the aleksander/qmi-firmware-update branch in the upstream libqmi git repository, which will be released in the next major libqmi release. Check it out!
The new tool is named, no surprise, qmi-firmware-update; and allows upgrading firmware for Qualcomm based Sierra Wireless devices (e.g. MC7700, MC7710, MC7304, MC7354, MC7330, MC7444…). I’ve personally not tested any other device or manufacturer yet, so won’t say we support others just yet.
This work wouldn’t have been possible without Bjørn Mork‘s swi-update program, which already contained most of the bits and pieces for the QDL download session management, we all owe him quite some virtual beers. And thanks also to Zodiac Inflight Innovations for sponsoring this work!
Sierra Wireless SWI9200 series (e.g. MC7700, MC7710…)
The upgrade process for Sierra Wireless SWI9200 devices (already flagged as EOL, but still used in thousands of places) is very straightforward:
- Device is rebooted in boot & hold mode (what we call QDL download mode) by running AT!BOOTHOLD in the primary AT port.
- A QDL download session is run to upload the firmware image, which is usually just one single file which contains the base system plus the carrier-specific settings.
- Once the QDL download session is finished, the device is rebooted in normal mode.
The new qmi-firmware-update tool supports all these steps just by running one single command as follows:
$ sudo qmi-firmware-update \
     --update \
     -d 1199:68a2 \
     9999999_9999999_9200_03.05.14.00_00_generic_000.000_001_SPKG_MC.cwe
Sierra Wireless SWI9x15 series (e.g. MC7304, MC7354…)
The upgrade process for Sierra Wireless SWI9x15 devices is a bit more complex, as these devices support and require the QMI DMS Set/Get Firmware Preference commands to initiate the download. The steps would be:
- Decide which firmware version, config version and carrier strings to use. The firmware version is the version of the system itself, the config version is the version of the carrier-specific image, and the carrier string is the identifier of the network operator.
- Using QMI DMS Set Firmware Preference, the new desired firmware version, config version and carrier are specified. When the firmware and config version don’t match the ones currently running in the device, it will reboot itself in boot & hold mode and wait for the new downloads.
- A QDL download session is run to upload each firmware image available. For these kind of devices, two options are given to the users: a pair of .cwe and .nvu images containing the system and carrier images separately, or a consolidated .spk image with both. It’s advised to always use the consolidated .spk image to avoid mismatches between system and config.
- Once the QDL download sessions are finished, the device is rebooted in normal mode.
Again, the new qmi-firmware-update tool supports all these steps just by running one single command as follows:
$ sudo qmi-firmware-update \
     --update \
     -d 1199:68c0 \
 9999999_9902574_SWI9X15C_05.05.66.00_00_GENNA-UMTS_005.028_000-field.spk
This previous commands will analyze each firmware image provided and will extract the firmware version, config version and carrier so that the user doesn’t need to explicitly provide them (although there are also options to do that if needed).
Sierra Wireless SWI9x30 series (e.g. MC7455, MC7430..)
The upgrade process for Sierra Wireless SWI9x30 devices is equivalent to the one used for SWI9x15. One of the main differences, though, is that SWI9x15 devices seem to only allow one pair of modem+pri images (system+config) installed in the system, while the SWI9x30 allows the user to download multiple images and then select them using the QMI DMS List/Select/Delete Stored Image commands.
The SWI9x30 modules may also run in MBIM mode instead of QMI. In this case, the firmware upgrade process is exactly the same as with the SWI9x15 series, but using QMI over MBIM. The qmi-firmware-update program supports this operation with the –device-open-mbim command line argument:
$ sudo qmi-firmware-update \
    --update \
    -d 1199:9071 \
    --device-open-mbim \
    SWI9X30C_02.20.03.00.cwe \
    SWI9X30C_02.20.03.00_Generic_002.017_000.nvu
Notes on device selection
There are multiple ways to select which device is going to be upgraded:
- vid:pid: If there is a single device to upgrade in the system, it usually is easiest to use the -d option to select it by vid:pid (or even just by vid). This is the way used by default in all previous examples, and really the easiest one if you just have one modem available.
- bus:dev: If there are multiple devices to upgrade in the same system, a more restrictive device selection can be achieved with the -s option specifying the USB device bus number plus device number, which is unique per physical device.
- /dev/cdc-wdm: A firmware upgrade operation may also be started by using the –cdc-wdm option (shorter, -w) and specifying a /dev/cdc-wdm device exposed by the module.
- /dev/ttyUSB: If the device is already in boot & hold mode, a QDL download session may be performed directly on the tty specified by the –qdl-serial (shorter, -q) option.
Notes on firmware images
Sierra Wireless provides firmware images for all their SWI9200, SWI9x15 and SWI9x30 modules in their website. Sometimes they do specify “for Linux” (and you would get .cwe, .nvu or .spk images) and sometimes they just provide .exe Windows OS binaries. For the latter, you can just decompress the .exe file e.g. using 7-Zip and get the firmware images that you would use with qmi-firmware-update, e.g.:
 $ 7z x SWI9200M_3.5-Release13-SWI9200X_03.05.29.03.exe
 $ ls *.{cwe,nvu,spk} 2>/dev/null
 9999999_9999999_9200_03.05.29.03_00_generic_000.000_001_SPKG_MC.cwe
[TL;DR?]
qmi-firmware-update now allows upgrading firmware in Sierra Wireless modems using qmi_wwan and libqmi.
]]>
No more “which is now the index of this modem…?”
DBus object path and index
When modems are detected by ModemManager and exposed in DBus, they are assigned an unique DBus object path, with a common prefix and a unique index number, e.g.:
/org/freedesktop/ModemManager1/Modem/0
This path is the one used by the mmcli command line tool to operate on a modem, so users can identify the device by the full path or just by the index, e.g. this two calls are totally equivalent:
$ mmcli -m /org/freedesktop/ModemManager1/Modem/0
$ mmcli -m 0
This logic looks good, except for the fact that there isn’t a fixed DBus object path for each modem detected: i.e. the index given to a device is the next one available, and if the device is power cycled or unplugged and replugged, a different index will be given to it.
EquipmentIdentifier
Systems like NetworkManager handle this index change gracefully, just by assuming that the exposed device isn’t the same one as the one exposed earlier with a different index. If settings need to be applied to a specific device, they will be stored associated with the EquipmentIdentifier property of the modem, which is the same across reboots (i.e. the IMEI for GSM/UMTS/LTE devices).
User-provided names
The 1.8 stable release of ModemManager will come with support for user-provided names assigned to devices. A use case of this new feature is for example those custom systems where the user would like to assign a name to a device based on the USB port in which it is connected (e.g. assuming the USB hardware layout doesn’t change across reboots).
The user can specify the names (UID, unique IDs) just by tagging in udev the physical device that owns all ports of a modem with the new ID_MM_PHYSDEV_UID property. This tags need to be applied before the ID_MM_CANDIDATE properties, and therefore the rules file should be named before the 80-mm-candidate.rules one, for example like this:
$ cat /lib/udev/rules.d/78-mm-naming.rules

ACTION!="add|change|move|bind", GOTO="mm_naming_rules_end"
DEVPATH=="/devices/pci0000:00/0000:00:1d.0/usb4/4-1/4-1.5/4-1.5.5",ENV{ID_MM_PHYSDEV_UID}="USB1"
DEVPATH=="/devices/pci0000:00/0000:00:1d.0/usb4/4-1/4-1.5/4-1.5.2",ENV{ID_MM_PHYSDEV_UID}="USB2"
DEVPATH=="/devices/pci0000:00/0000:00:1d.0/usb4/4-1/4-1.5/4-1.5.3",ENV{ID_MM_PHYSDEV_UID}="USB3"
DEVPATH=="/devices/pci0000:00/0000:00:1d.0/usb4/4-1/4-1.5/4-1.5.4",ENV{ID_MM_PHYSDEV_UID}="USB4"
LABEL="mm_naming_rules_end"
The value of the new ID_MM_PHYSDEV_UID property will be used in the Device property exposed in the DBus object, and can also be used directly in mmcli calls instead of the path or index, e.g.:
$ mmcli -m USB4
...
 -------------------------
 System | device: 'USB4'
        | drivers: 'qmi_wwan, qcserial'
        | plugin: 'Sierra'
        | primary port: 'cdc-wdm2'
...
Given that the same property value will always be set for the modem in a specific device path, this user provided names may unequivocally identify a specific modem even when the device is power-cycled, unplugged and replugged or even the whole system rebooted.
Binding the property to the device path is just an example of what could be done. There is no restriction on what the logic is to apply the ID_MM_PHYSDEV_UID property, so users may also choose other different approaches.
This support is already in ModemManager git master, and as already said, will be included in the stable 1.8 release, whenever that is.
TL;DR? ModemManager now supports assigning unique names to devices that stay even across full system reboots.
![]()
A quick reminder for students (*) in Spain interested in participating in this year’s CUSL, the deadline for the project proposals has been extended until December 1st:
https://www.concursosoftwarelibre.org/1516
You’re still on time to submit a proposal!
* Universidad, bachiller, ciclos de grado medio…
]]>
Your Dell modem not getting online?
It’s not uncommon to find weird mobile broadband modems that for one reason or another don’t end up working as expected with NetworkManager/ModemManager; but the new 3G/4G modems in Dell laptops are at a total different level. These Dell-branded devices are really Sierra Wireless powered modems, e.g. the Dell 5808 is a Sierra Wireless MC7355, or the Dell DW5570 is a Sierra Wireless MC8805.
[UPDATE]
Looks like not only Dell-branded modems are affected by this issue. According to some user reports HP-branded modems like the HP lt4111 (based on the Sierra Wireless EM7355) are also affected by the issue.
Late last year we started to receive several bugreports in the ModemManager and libqmi mailing lists for these kind of devices. Basically, the modem would never get to a proper online mode with the RF transceivers powered and therefore would never even get registered in the mobile network. This was happening to both QMI and MBIM based configurations, and the direct error message reported by libqmi when trying to get into online mode was just… not very very helpful.
  $ sudo qmicli -d /dev/cdc-wdm1 --dms-get-operating-mode

  [/dev/cdc-wdm1] Operating mode retrieved:

    Mode: 'low-power'

    HW restricted: 'no'
  $ sudo qmicli -d /dev/cdc-wdm1 --dms-set-operating-mode=online

  error: couldn't set operating mode: QMI protocol error (3): 'Internal'
The issue was reported to the kernel, assuming that this would likely be a new missing rfkill related setup in newer Dell laptops. One of the users reported in that same bugreport that actually using Sierra’s GobiNet driver instead of qmi_wwan would end up putting the modem in online mode, so just switching drivers during boot would make it work. WTF?
Digging in Sierra’s GobiNet QMI driver
Well, without much hope of finding anything, and given that I had just bought such a Dell modem myself for testing a new “Dell” plugin, I decided to dig into Sierra’s kernel driver sources. Apart from some already known things (e.g. they use the WDA service to set the net data format in new modems instead of the old CTL service), these lines popped:
  if (is9x15)

  {

    // Set FCC Authentication

    result = QMIDMSSWISetFCCAuth( pDev );

    if (result != 0)

    {

      return result;

    }

  }
The Sierra GobiNet driver is sending some magic “FCC auth” command during boot to the modem; which according to the driver sources maps to command 0x555F in the DMS service. Hey I should try that!
Adding the new command support in libqmi wasn’t difficult, so in some minutes I was ready to test it… and worked.
  $ sudo qmicli -d /dev/cdc-wdm1 --dms-get-operating-mode

  [/dev/cdc-wdm1] Operating mode retrieved:

    Mode: 'low-power'

    HW restricted: 'no'
  $ sudo qmicli -d /dev/cdc-wdm1 --dms-set-fcc-authentication

  [/dev/cdc-wdm1] Successfully set FCC authentication
  $ sudo qmicli -d /dev/cdc-wdm1 --dms-get-operating-mode

  [/dev/cdc-wdm1] Operating mode retrieved:

    Mode: 'online'

    HW restricted: 'no'
Support for this is already available automatically when using libqmi and ModemManager git master. It will hit the next stable releases likely as well.
[UPDATE]
These fixes have been already released in ModemManager 1.4.4 and libqmi 1.12.4.
MBIM?
Well, I don’t know if there is any command in MBIM to do the same operation (likely there is in a Sierra-specific service), but one thing we could anyway try to do is to use “QMI embedded in MBIM“, which Bjørn has already tested some times. I’ll try to test that some day, but I’ll need to get another modem as my DW5570 only comes up with a QMI configuration. For now, if you’re stuck with this problem using MBIM, you can likely just select USB configuration #1 using usb_modeswitch and get the modem switched to QMI mode.
[UPDATE]
If your modem is being managed in MBIM and not in QMI, you can now use Collin McMillan’s tool to issue the QMI FCC Auth command embedded in MBIM transactions.
TL;DR?
Dell-branded Sierra Wireless modems need the “FCC Auth” command (QMI DMS service, 0x555F) before they can be brought online; supported in libqmi and ModemManager already.
]]>http://2014.guadec.es/programa
Of course, non-Spanish-speaking people are also very welcome
See you there!

(*) Hoping not to make enemies: Zárágozá.
]]>
Introduction
Gobi chipsets are mobile broadband modems developed by Qualcomm, and they are nowadays used by lots of different manufacturers, including Sierra Wireless, ZTE, Huawei and of course Qualcomm themselves.
These devices will usually expose several interfaces in the USB layer, and each interface will then be published to userspace as different ‘ports’ (not the correct name, but I guess easier to understand). Some of the interfaces wil give access to serial ports (e.g. ttys) in the modem, which will let users execute standard connection procedures using the AT protocol and a PPP session. The main problem with using a PPP session over a serial port is that it makes it very difficult, if not totally impossible, to handle datarates above 3G, like LTE. So, in addition to these serial ports, Gobi modems also provide access to a control port (speaking the QMI protocol) and a network interface (think of it as a standard ethernet interface). The connection procedure then can be executed purely through QMI (e.g. providing APN, authentication…) and then userspace can use a much more convenient network interface for the real data communication.
For a long time, the only way to use such QMI+net pair in the Linux kernel was to use the out-of-tree GobiNet drivers provided by Qualcomm or by other manufacturers, along with user-space tools also developed by them (some of them free/open, some of them proprietary). Luckily, a couple of years ago a new qmi_wwan driver was developed by Bjørn Mork and merged into the upstream kernel. This new driver provided access to both the QMI port and the network interface, but was much simpler than the original GobiNet one. The scope was reduced so much, that most of the work that the GobiNet driver was doing in kernel-space, now it had to be done by userspace applications. There are now at least 3 different user-space implementations allowing to use QMI devices through the qmi_wwan port: ofono, uqmi and of course, libqmi.
The question, though, still remains. What should I use? The upstream qmi_wwan kernel driver and user-space utilities like libqmi? Or rather, the out-of-tree GobiNet driver and user-space utilities provided by manufacturers? I’m probably totally biased, but I’ll try to compare the two approaches by pointing out their main differences.
Note: you may want to read the ‘Introduction to libqmi‘ post I wrote a while ago first.
in-tree vs out-of-tree
The qmi_wwan driver is maintained within the upstream Linux kernel (in-tree). This, alone, is a huge advantage compared to GobiNet. Kernel updates may modify the internal interfaces they expose for the different drivers, and being within the same sources as all the other ones, the qmi_wwan driver will also get those updates without further effort. Whenever you install a kernel, you know you’ll have the qmi_wwan driver applicable to that same kernel version ready, so its use is very straightforward. The qmi_wwan driver also contains support for Gobi-based devices from all vendors, so regardless of whether you have a Sierra Wireless modem or a Huawei one (just to name a few), the driver will be able to make your device work as expected in the kernel.
GobiNet is a whole different story. There is not just one GobiNet: each manufacturer keeps its own. If you’re using a Sierra Wireless device you’ll likely want to use the GobiNet driver maintained by them, so that for example, the specific VID/PID pairs are already included in the driver; or going a bit deeper, so that the driver knows which is supposed to be the QMI/WWAN interface number that should be used (different vendors have different USB interface layouts). In addition to the problem of requiring to look for the GobiNet driver most suitable for your device, having the drivers maintained out-of-tree means that they need to provide a single set of sources for a very long set of kernel versions. The sources, therefore, are full of #ifdefs enabling/disabling different code paths depending on the kernel version targeted, so maintaining it gets to be much more complicated than if they just had it in-tree.
Note: Interestingly, we’ve already seen fixes that were first implemented in qmi_wwan ‘ported’ to GobiNet variants.
Complexity
The qmi_wwan driver is simple; it will just get a USB interface and split it into a QMI-capable /dev/cdc-wdm port (through the cdc-wdm driver) and a wwan network interface. As the kernel only provides basic transport to and from the device, it is left to user-space the need to manage the QMI protocol completely, including service client allocations/releases as well as the whole internal CTL service. Note, though, that this is not a problem; user-space tools like libqmi will do this work nicely.
The GobiNet driver is instead very complex. The driver also exposes a control interface (e.g. /dev/qcqmi) and a network interface, but all the work that is done through the internal CTL service is done at kernel-level. So all client allocations/releases for the different services are actually performed internally, not exposed to user-space. Users will just be able to request client allocations via ioctl() calls, and client releases will be automatically managed within the kernel. In general, it is never advisable to have such a complex driver. As complexity of a driver increases, so does the likelyhood of having errors, and crashes in a driver could affect the whole kernel. Quoting Bjørn, the smaller the device driver is, the more robust the system is.
Note: Some Android devices also support QMI-capable chipsets through GobiNet (everything hidden in the kernel and the RIL). In this case, though, you may see that shared memory can also be used to talk to the QMI device, instead of a /dev/qcqmi port.
Device initialization
One of the first tasks that is done while communicating with the Gobi device is to set it up (e.g. decide which link-layer protocol to use in the network interface) and make sure that the modem is ready to talk QMI. In the case of the GobiNet driver, this is all done in kernel-space; while in the case of qmi_wwan everything can be managed in user-space. The libqmi library allows several actions to be performed during device initialization, including the setting of the link-layer protocol to use. There are, for example, models from Sierra Wireless (like the new MC7305) which expose by default one QMI+network interface (#8) configured to use 802.3 (ethernet headers) and another QMI+network interface (#10) configured to use raw IP (no ethernet headers). With libqmi, we can switch the second one to use 802.3, which is what qmi_wwan expects, thus allowing us to use both QMI+net pairs at the same time.
Multiple processes talking QMI
One of the problems of qmi_wwan is that only one process is capable of using the control port at a given time. The GobiNet driver, instead, allows multiple processes to concurrently access the device, as each process would get assigned different QMI clients with different client IDs directly from the kernel, hence, not interfering with each other. In order to handle this issue, libqmi (since version 1.8) was extended to implement a ‘qmi-proxy’ process which would be the only one accessing the QMI port, but which would allow different process to communicate with the device concurrently (by sharing and synchronizing the CTL service among the connected peers).
User-space libraries
The GobiNet driver is designed to be used along with Qualcomm’s C++ GobiAPI library in user-space. On top of this library, other manufacturers (like Sierra Wireless) provide additional libraries to use specific features of their devices. This GobiAPI library will handle itself all the ioctl() calls required to e.g. allocate new clients, and will also provide a high level API to access the different QMI services and operations in the device.
In the case of the qmi_wwan driver, as already said, there are several implementations which will let you talk QMI with the device. libqmi, which I maintain, is one of them. libqmi provides a GLib-based C library, and therefore it exposes objects and interfaces which provide access to the most used QMI services in any kind of device. The CTL service, the internal one which was managed in the kernel by GobiNet, will be managed internally by libqmi and therefore mostly hidden to the users of the library.
Note: It is not (yet) possible to mix GobiAPI with qmi_wwan and e.g. libqmi with GobiNet. Therefore, it is not (yet) possible to use libqmi or qmicli in e.g. an Android device with a QMI-capable chipset.
User-space command line tools
I am no really aware of any general purpose command line tool developed to be used with the GobiNet driver (well, firmware loader applications, but those are not general purpose). The lack of command line tools may be likely due to the fact that, as QMI clients are released automatically by the GobiNet kernel, it is not easy (if at all possible) to leave a QMI client allocated and re-use it over and over by a command line tool which executes an action and exits.
With qmi_wwan, though, as clients are not automatically released, command line tools are much easier to handle. The libqmi project includes a qmicli tool which is able to execute independent QMI requests in each run of the program, even re-using the same QMI client in each of the runs if needed. This is especially important when launching a connection, as the WDS client which executes the “Start Network” command must be kept registered as long as the connection is open, or otherwise the connection will get dropped.
New firmware loading
The process of loading new firmware into a QMI-based device is not straightforward. It involves several interactions at QMI-level, plus a QDL based download of the firware to the device (kind of what gobi_loader does for Gobi 2K). Sadly, there is not yet a way to perform this operation when using qmi_wwan and its user-space tools. If you’re in the need of updating the firmware of the device, the only choice left is to use the GobiNet driver plus the vendor-provided programs.
[Update December 2016] Since libqmi 1.18.0, firmware update operations may be done with libqmi and qmi_wwan using the new qmi-firmware-update tool.
Support
One of the advantages of the GobiNet driver is that every manufacturer will (should) give direct support for their devices if that kernel driver is used. Actually, there are vendors which will only give support for the hardware if their driver is the one in use. I’m therefore assuming that GobiNet may be a good choice for companies if they want to rely in the vendor-provided support, but likely not for standard users which just happen to have a device of this kind in their systems.
But, even if it is not the official support, you can anyway still get in touch with the libqmi mailing list if you’re experiencing issues with your QMI device; or contact companies or individuals (e.g. me!) which provide commercial support for the qmi_wwan driver and libqmi/qmicli integration needs.
]]> The conference was really well organized [1], so kudos to all the local team!
After a quick sleep on Friday morning, I attended the development and documentation training sessions that Kat, André and Dave gave. They were quite interesting, especially since I’m not involved in the real user documentation that GNOME provides. I have to say that these guys do an amazing job, not only teaching during conferences, but also through the whole year.
There are, from my point of view, two main ways of learning new things:
- The ‘engineer’ way: Learning things as you need them, what you would do when you start writing an application and looking for examples of how to do what you want to do (autotools, anyone?). It is a very ‘engineer’ way, as you pick black boxes that you’ll use to build something bigger, while not fully understanding what the black box does inside.
- The ‘scientific’ way: When you learn something in order to fully understand it and be able to teach others. This approach takes a lot longer, as you need to make sure that everything you learn is accurate and you end up questioning the things that are not clear enough. Learning stuff to teach others is actually what you do in University; you’re learning things that will afterwards need to be explained in an exam to someone who knows more about the subject than you do.
Sure, both ways have their ups and downs, but if you want to write software you need to be able to switch between those two mindsets constantly. You’ll use the engineer way when reading API docs, looking for the bits and pieces that you need to build your stuff. You’ll use the ‘scientific’ way when you need to start learning a new technology, or when you need more detail on how to do things. While the API docs are taken care of by the library developers, it is the documentation team the one making sure that user guides, tutorials, and other developer resources are kept up to date, which are definitely some of the toughest and most important tasks done to help newcomers and other developers. So go on, go learn GNOME technologies and teach others, join the documentation team! 
GNOME Asia is not a usual conference. If you have attended a Desktop Summit, GUADEC or FOSDEM before, all those conferences are built by developers and for developers. The focus of those conferences is usually not (explicitly) to attract newcomers, but instead to be a show of the latest and shiniest things happening in the projects. Of course we also had part of that in Beijing, say Lennart’s talk about the status of systemd or Allan’s talk about application bundles. Those both were very good talks, but likely too specific for most of the audience. Instead, I chose to talk about something more basic, focused on attracting newcomers wanting to write applications, and so I gave an Introduction to D-Bus talk, including some examples. It is the same talk I gave last year in GUADEC-ES, but in English this time (my Mandarin is not good enough).
I would like to thank the GNOME Foundation for sponsoring the flight to Beijing, and of course to all the local team who, as I already said, did an amazing job.
![]()
[1] …except for the tea-less tea-breaks

As you probably know, Devhelp will show you the documentation of libraries installed in your system (usually only if you have the -devel or -docs package of the library installed). While this is already enough for most users, there is also the case where a developer wants to target a different version (older or newer) of the library than the one installed in the system.
A typical case for this is developing applications using GNOME’s jhbuild infrastructure, targeted either to a given GNOME release or to git master of the involved modules. In this case, if you want to use new methods of let’s say GTK+, you usually end up needing to fire up a web browser and looking for the latest GTK+ documentation either in developer.gnome.org or in your jhbuild’s ${prefix}/share/gtk-doc/html directory.
In order to avoid this, I’m prototyping some ideas to let the users switch between different profiles, e.g.:
- The ‘local’ profile, which is equivalent to what Devhelp currently shows.
- A user-defined ‘jhbuild’ profile, which could point to the install prefix of the jhbuild setup.
- Other user-defined profiles, which could point to other prefixes where the user has installed the newer (or older) libraries and their documentation.
- Profiles for each new GNOME release, e.g. 3.12, which could get downloaded from developer.gnome.org as a tarball containing all documentation for a given release.
The most challenging case is probably the last one, given that it would require some extra work in the website in order to make sure the documentation tarball is generated and published in every new release, plus of course client-side management of these downloaded profiles in Devhelp.
For now this is just a basic set of ideas, the final result may or may not be similar; we’re of course open to suggestions!
![]()
In ModemManager we had some unit testing support, but it was really only focused on making sure that our AT response parsers worked correctly. These tests are of course very important, not saying they aren’t, but they only cover a very small subset of the implementation.
Supporting completely different devices from multiple vendors with completely different behaviors, while still providing a unified interface for all of them is a very challenging task. In particular, making changes to fix the behavior of one device may lead to broken behavior with others, and the AT response parser unit tests really are not up to the task of finding those issues. So, in order to improve that, we have now included a nice black box system testing environment along with the common unit tests, which can not only simulate AT-based modems, but also let us play with the ModemManager DBus interface directly. And all this by just running make check!
Keep on reading if you want to know how all this was setup

Every test using the new black box system testing will run a common test setup method before the actual test (and a common teardown method after having run it). This setup method will take care of launching a private DBus session using the excellent GTestDBus implementation in GLib/GIO. Once the new bus is ready to use, the test setup will also request a Ping() to the standard org.freedesktop.DBus.Peer interface in ModemManager, which in turn will make the daemon get started by DBus. Once the test fixture is setup, the test itself will be able to make use of the ModemManager process running in the private session, without any interference with the ModemManager that may already be running in the standard system-level bus.

Each test will then setup the simulation of the modem, by launching a separate thread running a Unix-domain socket service. This socket will have an abstract address, and will allow other processes to get connected to send/receive data. In addition to the socket service, the simulator will also read a dictionary of AT requests and responses from a text file included in the test context. This pair of socket and AT chat build together the simulation of an AT port of a modem: AT requests will arrive through the socket, and the simulator will reply the corresponding AT response gathered from the AT chat dictionary. If the dictionary doesn’t have the response expected for a given request, it will just reply “ERROR”.

But the private ModemManager instance doesn’t know anything about the new modem simulator being available, as there is no real physical port being created that ModemManager could get notified about via udev. So, once the simulator is in place, the test will report the abstract address of the socket via the SetProfile() method in the new org.freedesktop.ModemManager.Test interface. This method will just tell ModemManager that a given new virtual AT port is available in a given abstract socket address, and ModemManager will go on creating a new AT virtual port object internally and treat it as if it were a new TTY reported by udev.

As soon as ModemManager knows about the new virtual AT port, it will start probing it and creating a whole Modem object internally. Of course, for this to work well, the simulated modem needs to be able to reply correctly to most AT requests sent by ModemManager. The current implementation provides a generic AT chat dictionary for 3GPP (GSM, UMTS, HSPA, LTE…) devices, and the overall idea is that tests can load first the generic one to get a basic subset of responses, and then load a vendor-specific one with vendor-specific responses (overriding the generic ones if needed).

And of course, the last step is the test itself. Once every previous step has been successfully executed, the tester can now play with the standard ModemManager interfaces in DBus, querying for modems, requesting PIN unlock, enabling or disabling the device, and so on.
The currently available setup is not fully featured yet, it just provides some basic building blocks to be able to extend the black box system tests further more. The real work comes now, adding new behavior tests and writing new AT chat dictionaries to simulate different devices. If you want to play yourself with this setup, get the latest code from git master!
]]>I’ve really been involved in pretty different things during my professional life… antivirus desktop applications and gateways, satellite orbit determination and time synchronization systems, VoIP-based push-to-talk server development, and of course NetworkManager, ModemManager, libqmi, libmbim, Tracker, OpenWRT or GTK+.
I would love to keep on working on all these Free Software projects, but I’m also open to exploring new technologies. Change is always good, they say.
So, if you’re looking for a passionate software engineer to develop, improve or integrate your system, just check my website and get in touch. I’d love to hear about your needs and issues and how we can solve them together

Third time in a row, I’ll also be giving a talk at FOSDEM this year:
LTE in your Linux based system
The talk is an introduction to QMI and MBIM devices, how they are exposed by the Linux kernel, and how you can use them from the command line through libqmi, libmbim and ModemManager.
See you there!
]]>In my case /var/log/Xorg.0.log just said:
[    56.343] (EE) NVIDIA: Failed to load the NVIDIA kernel module. Please check your

[    56.343] (EE) NVIDIA:     system's kernel log for additional error messages.

[    56.343] (EE) No devices detected.

[    56.343] (EE) Fatal server error:

[    56.343] (EE) no screens found(EE)
And fixed it just requesting an explicit rebuild of the akmod modules:
$ sudo /usr/sbin/akmods --force
Let this be a reminder to the future me for whenever I upgrade to F21
P.S.: yeah, I do need the nvidia driver as nouveau doesn’t seem to control the fan in graphics card… so nvidia is the only way to get a quiet hardware ![]()

Este fin de semana celebramos en Madrid la décima edición de GUADEC-ES, la version hispana de la conferencia europea para desarrolladores y usuarios de GNOME.
Si quieres asistir, sólo tienes que registrarte y pasarte el Viernes 18, Sábado 19 y Domingo 20 de Octubre por las estupendas instalaciones de MediaLab-Prado.
El Viernes a las 19:30 participaré en una mesa redonda junto a Juan José Marín y Florian Müllner, y el Sábado a las 18:15 daré una charla sobre D-Bus. Aparte de eso, si quieres saber más sobre ModemManager o Tracker, no dudes en buscarme y hablamos
¡Alli nos vemos!
]]>
The Mobile Radio Monitor is a new (GPLv3+ licensed) application I wrote this summer, which lets you grab signal and power information from QMI-powered modems, and displays it in time-based graphs. I really wanted to use some of the shiny new things available in GTK+ 3.9.x, so this application seemed a good excuse to play around with the GtkStack, GtkListBox, templates and such.
Internally, this application does not talk to ModemManager at all. The other thing that I wanted to try out with this application was the use of the ‘qmi-proxy‘ approach in libqmi, which lets you share a QMI port between different processes, and therefore this UI application can run alongside ModemManager without much collision between the two.
Launching
The Mobile Radio Application installs a desktop file, so it can be launched directly from the desktop shell. It needs to run as root, so “pkexec” takes care of requesting user authentication to gain privileges through polkit. The other option, of course is to just launch it from the command line using “sudo” or the like.
BTW, yes, the icon is the same one from gnome-system-monitor with just different colors. Quick and dirty hack, but looks good to me. Thanks to jimmac, who I think draw the icon originally
Device list
When the application starts you’ll be greeted with the QMI device list detected by the application. Unusable modems will be shown as deactivated items (e.g. when modem requires a SIM but there is no SIM inserted), and for the usable ones you’ll be able to insert the PIN if required.

Signal information
Once a device has been selected, the application will switch to the Signal information tab, where you can see graphs for things like RSSI, Ec/Io, S/N, RSRP and RSRQ…

Not every technology exposes all the previous values, though. GSM will only show RSSI, while UMTS/HSPA will show RSSI and Ec/Io. In addition to the graphs, the current instant value of each signal property is also given in the legend box.
Hiding/showing graphs based on the current used access technology was an idea, but I left it out because you can actually switch the preferred technology using e.g. qmicli’s --nas-set-system-selection-preference, and therefore you would be able to see graphs with both access technologies.
Power information
In addition to signal information, the application also exposes receiver and transmitter power values in the Power information tab.

Thanks to being able to have ModemManager running at the same time, you can actually get the modem connected and see how both the RX and TX power values go up and down.
Want to try it? (updated Feb 2015)
You can grab the sources from the following Bitbucket git repo:
https://bitbucket.org/aleksander0m/mobile-radio-monitor.
Or directly from the 1.0 tagged release here:
https://aleksander.es/software/mobile-radio-monitor-1.0.tar.xz
If you’re a brave Arch Linux user, you can also just get it built from AUR:
https://aur.archlinux.org/packages/mobile-radio-monitor/
As always, comments and patches welcome
I’ve blogged earlier about how the QMI protocol defines different services and allows to have multiple clients allocated for each service. Allowing multiple clients (i.e. QMI transactions with different client ids) was originally implemented in the protocol to allow multiple user-space applications to talk to the Gobi device, as the original Qualcomm kernel drivers allowed this. In these drivers, the management of client allocations and releases (through the implicit CTL service) was done by the kernel itself, and thus, multiple user-space applications could request new clients at the same time, leaving the work of managing the actual QMI communication with the device to the kernel.
But that is no longer the case with the ‘qmi_wwan‘ driver available in the upstream Linux kernel. In this case, the implicit CTL service is also managed in user-space, and there should be a single process involved in talking to the QMI port. The side effect of this behavior was that the whole client allocation logic didn’t make much sense any longer, as the process owning the port would be the only one being able to create clients.
Luckily, we designed the libqmi interface in a way that the CTL service was completely hidden to the user of the library. A user would just create a ‘QmiDevice‘ object, and afterwards allocate new ‘QmiClient‘ objects using the device object. All the internal CTL service communication between the user-space process and the actual modem device would be run internally by objects we created.
So, with the target of allowing multiple user-space processes to use the same QMI port in mind, a new ‘qmi-proxy‘ daemon was created in libqmi. Whenever a ‘QmiDevice‘ is opened with the new ‘QMI_DEVICE_OPEN_FLAGS_PROXY‘ flag, we will try to launch the ‘qmi-proxy’, which will be the only process talking to the actual QMI port. Every other process using the ‘QMI_DEVICE_OPEN_FLAGS_PROXY‘ flag, including the one which launched the proxy, will now send the QMI requests to the proxy, and receive the QMI responses and indications from the proxy.
Internals
In order to implement the proxy-based communication in libqmi’s ‘QmiDevice‘, we didn’t have to do many changes:
- We extended our implementation of the CTL service with a new ‘Internal Proxy Open’ command, which allows the application to tell the proxy which QMI port wants to use. This command uses the
0xFF00command id, far away from the current set of command ids currently available for the CTL service, so not likely to collide with any new update of the service ever. - All the communication from and to the proxy are plain QMI commands, including requests and responses in the CTL service. The only critical thing to do was to make sure that the ‘
QmiDevice‘-side CTL transaction ids (i.e. unique CTL transaction in a given process) were translated to the ‘qmi-proxy’-side CTL transaction ids (i.e. unique CTL transaction with the actual device). - The CTL service is the only one requiring the transaction id translation, as for every other service clients need to be explicitly allocated and released. In other words, different applications will allocate different clients with different client ids, and once they all have its own client id, they can just use the transaction id that they prefer.
- The ‘qmi-proxy’ only analyzes each transferred QMI message in very specific situations. In addition to the CTL transaction id translation mentioned above, the proxy will also take care of forwarding QMI indications (unsolicited messages) to the process owning the client id stated in the indication itself, or to all processes with a client for the service if the ‘broadcast’ client id is used. As an example, a process could request to get notified about signal quality updates via unsolicited “NAS signal info” messages, and the qmi-proxy will make sure that those indications are only sent to the specific process which requested them.
- In order not to use resources when not needed, the ‘qmi-proxy’ is automatically started when first requested, and will be automatically stopped 30s after the last process disappears or releases the last client. We are using a unix socket with an abstract name, so there are no worries of race conditions where proxies are launched at the same time, and no need to make sure that a socket file is never left in the filesystem when the ‘qmi-proxy’ crashes unexpectedly.
- To simplify the logic of the ‘qmi-proxy’, it will not take care of following which QMI ports are available in the system. As with the case of not using the proxy, each application needs to know which ports are available and can be requested to be open. If a port disappears and the proxy still receives requests to that port, it will just return a QMI error to the application which sent the request.
All the previous logic, as said earlier, is managed internally by libqmi and hidden to the user of the library. The key point is to modify your application to use the ‘QMI_DEVICE_OPEN_FLAGS_PROXY‘ flag.
ModemManager and qmicli
We also improved the ‘qmicli’ command line interface to allow a new ‘--device-open-proxy‘ argument (or the shorter ‘-p‘), which will make use of the new flag to request the ‘qmi-proxy’ to be used. And same for ModemManager; if the version of libqmi is >= 1.7 (currently git master), the new flag will be used by default. We can finally use both ‘qmicli’ and ModemManager at the same time, as ModemManager won’t be the only process owning the port.
Wait…
But why would anyone want to let other applications use the QMI port? Wouldn’t that collide with the logic of ModemManager?
Well, yes and no. It really depends on which kind of other applications you want to have running alongside ModemManager. If you want to run yet another connection manager, taking care of connecting and disconnecting the QMI port and such, then yes, it will likely collide with ModemManager’s own logic. But that should never be the case. The QMI protocol provides access to tons of features which are not handled by ModemManager, and that is where other applications will benefit from the proxy. Think of custom applications which want to get a deeper view of the status of the radio network using the NAS service, or a GPS application which wants more than what ModemManager provides, or a SIM browser application reading SIM files with the UIM service, or… well, you name it.
When will this be available?
The ‘qmi-proxy’ support is currently available in libqmi git master and is scheduled to be released in version 1.8 some day in the future. We just released 1.6 last week, so it may still take some time.
TL;DR
You can now write applications to use a QMI port with libqmi, even if ModemManager is running.
]]>
Dan’s images with lots of modems are boring, so here’s one with my tomatoes.
It took a bit more than 2 years since we started designing and implementing the new ModemManager1 interface, but here we are, finally releasing a new stable version of ModemManager with all the changes we’ve been doing in the past years; including QMI and MBIM modem support among other things.
Not much more to say here, just read the release announcement, download it, and have fun (or report bugs).
And of course, thanks to everyone involved in the new release!
]]>
ModemManager has always allowed to specify which ‘network type‘ to use; or, rather than network type, ‘allowed and preferred‘ modes as we name them. It basically is a way to tell your modem that you want to use one technology preferred over another (e.g. allow 2G and 3G, but prefer 3G), or even tell the modem to use only one technology type (e.g. 3G only). Even modern phones allow you to turn off 3G support and only use 2G, in order to save battery. The main problem with ModemManager’s way of handling this issue was that there was a predefined set of combinations to select (as exposed by the applet), and that not all combinations are supported by all modems. Even worse, ModemManager may not know how to use them, or the modem itself may not support mode switching at all (which was actually what was happening with my modem 4 years ago). Therefore, the UI would just try to show all the options and hope for the best when launching the mobile broadband connection. And there it comes the next issue; allowing to select mode preferences during the connection setup just makes the modem restart the whole radio stack, and the connection attempt may end up timing out, as the whole network registration process needs to be done from scratch before connecting…
Allowed and Preferred modes
In the new ModemManager interfaces, each Modem object will expose a “SupportedModes” property listing all the mode combinations (allowed + preferred) the modem actually supports. Graphical user interfaces will therefore be able to provide mode switching options listing only those combinations that will work. If a modem doesn’t support mode switching, no such list should be provided, and the user will not get confused. At any time, the Modem object will also expose a “CurrentModes” property, showing which is the currently selected combination of allowed and preferred modes. And the “SetCurrentModes()” method will allow to switch current modes, accepting as input only combinations which are given in “SupportedModes” (or the special allowed=ANY and preferred=NONE).
Also, changing current modes directly when calling Simple.Connect() will no longer be possible. This means that NetworkManager will never request allowed mode switching during a connection attempt (and hence no radio stack reloading in the modem causing timeouts). The logical place to put allowed mode switching is therefore a system configuration application like the GNOME Control Center or similar, which should allow mode switching at any time, not only just during a connection attempt. A good side effect of this change is that the NetworkManager connection settings now contain only connection-related configuration, which in the case of 3GPP devices can be linked to the SIM in use, leaving out all modem-specific configuration.
Capabilities
There was a time when modems were either 3GPP (GSM/GPRS/UMTS/HSPA…) or 3GPP2 (CDMA/EV-DO…). Nowadays, modems with multiple capabilities are pretty common, specially since LTE is around (LTE, even if 3GPP, is also 3GPP2’s blessed 4G technology, instead of the superhero named one which is forgotten by everyone already). ModemManager will now allow to change capabilities in addition to allowed and preferred modes; so a user with a modem which can work both in 3GPP and 3GPP2 networks will be able to switch from one to the other directly from the user interface. Of course, if the modem supports this (currently only QMI-based modems).
The new “SupportedCapabilities” property will expose all capability combinations supported by the modem, while “CurrentCapabilities” will expose which are the current ones being used at any given time. For example, a modem with “gsm-umts”, “cdma-evdo” and “lte” capabilities may support configuring only “cdma-evdo”, or “gsm-umts”+”lte”. Changing current capabilities is now possible through the “SetCurrentCapabilities()” method, which has a logic very similar to that of the “SetCurrentModes()” method. If a modem supports multiple capability combinations as exposed by “SupportedCapabilities”, this method will allow changing between them. The main difference with mode changing is that we will force a device power-cycle when this change is done, so the modem will disappear and reappear again with the new capabilities.
Capabilities and allowed/preferred modes have a lot in common, so much that there is a single interface in QMI based modems to change them. Therefore, when a modem allows changing capabilities, the list of allowed/preferred mode combinations may (and very likely will) be different depending on the current capabilities in the modem. For example, LTE-enabled QMI-powered modems will not be able to switch allowed/preferred modes when they have “lte” among the current capabilities, but they will be able if the capabilities are changed to only “gsm-umts”. This is not a big deal, as mode preference (e.g. 3G preferred) is not applicable when the modem does LTE (there is no way of saying allow 2G, 3G and 4G but prefer 3G).
Bands
ModemManager also allows to specify which frequency bands to use in the modem, but unlike with modes and capabilities, the “SupportedBands” property is not a list of all possible band combinations supported. Instead, it’s just a bitmask with all supported bands, without specifying whether an actual combination is going to work in “SetCurrentBands()” or not. Listing combinations instead of just the bitmask would be truly too much… But anyway, changing frequency bands is not a feature that a normal user should play with, so just don’t do it. I actually bricked a Pantech UML290 myself playing with this…
aleksander/api-breaks
All these updates, plus some other ones, are available in the ‘aleksander/api-breaks‘ branch in the ModemManager git repository, which should hit git master very soon, likely this week. These ones should be the last API breaks done before releasing the new ModemManager, and will be kept stable after that.
]]>http://www.freedesktop.org/software/libmbim/libmbim-1.0.0.tar.xz
If you want to easily talk to a MBIM device from a GLib-based application, you may want to check the libmbim API documentation.
libmbim is currently used by ModemManager (git master), but you can also now use it in standalone mode with either mbimcli (the command line utility) or mbim-network (a helper script to launch a connection):
# echo "APN=Internet" > /etc/mbim-network.conf


# mbim-network /dev/cdc-wdm0 start

Loading profile...

    APN: Internet

Starting network with 'mbimcli -d /dev/cdc-wdm0 --connect=Internet --no-close'...

Network started successfully


# mbim-network /dev/cdc-wdm0 status

Loading profile...

    APN: Internet

Getting status with 'mbimcli -d /dev/cdc-wdm0 --query-connection-state --no-close'...

Status: activated


# mbim-network /dev/cdc-wdm0 stop

Loading profile...

    APN: Internet

Stopping network with 'mbimcli -d /dev/cdc-wdm0 --disconnect'...

Network stopped successfully
As with libqmi’s qmi-network script, you’ll still need to run a DHCP client on the wwan interface after getting connected through MBIM. Note that your modem may not support DHCP… if that’s your case then patches are welcome to update the script to dump the IP configuration Or just use ModemManager, which works nicely with the static IP setup.
Enjoy!
]]>
(C) tasayu @ Flickr – CC by-nc-nd
MBIM!
Winter is over, Spring is here, and along with the heat, rains and insects, ModemManager arrives with support for modems using the new MBIM protocol, available through the new cdc-mbim kernel driver in Linux >= 3.8 and a preliminary version of libmbim.
The current implementation provides:
- PIN unlock/change/enable/disable capabilities
- 3GPP modem support (GSM, HSPA, LTE…)
- Basic connectivity support
It doesn’t provide yet most of the side-features available in other modems (e.g. SMS messaging, location…), but it is a good start. If you don’t want to use MBIM just yet, check Bjørn’s list of issues and alternatives.
Where do I get it?
The ‘libmbim’ library can be found in the following Lanedo-maintained gitorious repository:
We also released a tarball in libqmi’s release place:
http://www.freedesktop.org/software/libqmi/libmbim-0.0.1.tar.xz
If you’re part of the freedesktop.org sitewranglers group, please check the still open libmbim project request.
The support is already in ModemManager git master, and will be enabled if libmbim is found during configure. You can also explicitly request to use MBIM support with the new –with-mbim configure switch.
Thanks
Special thanks go to Lanedo for sponsoring the initial libmbim development, Bjørn Mork for his suggestions and tests with multiple MBIM-capable modems, and Huawei for sending me a E367 with MBIM firmware.
]]>OpenWRT has its own built-in support to handle mobile broadband modems of different types, mainly for AT-controlled modems, but also for QMI-controlled modems through libqmi and qmicli (now available in upstream OpenWRT). But hell, why not package ModemManager for that work, and provide a unified single DBus API to control any kind of mobile broadband modem in the same way?
ModemManager itself isn’t a very complex daemon, so it doesn’t have many dependencies, just: glib/gio, dbus, udev/gudev and libqmi. In the world of OpenWRT, though, none of these are blessed dependencies, as they have a lightweight replacement for everything: libubox (instead of glib), ubus (instead of dbus) and hotplug2 (instead of udev). These replacements target minimal embedded systems, and are perfectly integrated into OpenWRT and provide the building blocks of other core software like the netifd network interface daemon.
Still, having ModemManager available as a OpenWRT package seems like a good idea if you’re not very constrained by the hardware you’re going to use. If you are building a system which should support multiple broadband modems from different vendors, or just building a base system for one specific modem model but leaving the door open to change the model in the future, ModemManager seems a good choice.
systemd’s udev in OpenWRT
Since April 2012, udev sources are now integrated within the systemd source code. And that means that udev packages in OpenWRT would need to get updated in order to get built from that new repository. systemd provides some hints on what would be the best way of creating a minimal systemd build which can be used to gather just the udev-specific libraries and binaries. The easiest way involves compiling the whole systemd package with all optional features disabled, and that would get us not only systemd (which we won’t need), but also udevd and libudev. Easy, yes, but then we have some issues in the environment that we would need to handle…
In OpenWRT, the udev package is available in the trunk repository, where only the core OpenWRT packages are given. But in order to get the new udev compiled out of systemd we end up needing additional dependencies (dbus, libcap) which are only available in the packages repository. Moreover, if you also want to compile the glib-based gudev library, glib is also needed, which is also only available in the packages repository. And you cannot require a package from trunk to depend on a package from packages, so… ended up creating a new systemd-udev package within the packages repository.
As I was targeting the uClibc toolchain, I also ended up requiring some additional patches both in uClibc (e.g. to enable utmpx) and systemd to get the thing properly compiled. The patches applied in the systemd sources are just to handle missing features in uClibc (execvpe, secure_getenv…). Whenever uClibc includes those, we’ll be able to remove those patches.
ModemManager in OpenWRT
I prepared an easy setup of ModemManager packaging in OpenWRT, where all possible plugins get compiled. It wouldn’t have been difficult to allow selecting via configuration which plugins to get compiled, but didn’t want to spend time on that.
I sent the patches to the OpenWRT mailing list already, but if you want to give it a quick try, you can just clone the Lanedo OpenWRT repositories (trunk and packages) from gitorious.org:
$> git clone git://gitorious.org/lanedo/openwrt.git

$> git clone git://gitorious.org/lanedo/openwrt-packages.git
You’ll want both ‘modemmanager-support‘ branches in those git repositories.
ModemManager will be available under the ‘Network’ section in the OpenWRT build configuration; but only after explicitly selecting the following kernel modules (all under Kernel Modules/USB support):
- kmod-usb-net
- kmod-usb-serial
- kmod-usb-acm
Once all above are enabled, ModemManager can be selected, and it will itself pull all its other required dependencies (systemd-udev, glib, dbus, libqmi…).
No LuCI? No connection manager?
Well, not yet :). If you want to use ModemManager you still need to have your own connection manager software to manage the connectivity. ModemManager will get your mobile broadband modem connected, but you still need to either call pppd or setup the wwan interface yourself (depending on the data port type). This is really not a big deal; and you can just setup a shell script using the provided mmcli command line interface to talk to ModemManager.
]]>
Linux kernel 3.8 comes with a new ‘cdc-mbim‘ driver… let’s see what all this is about…
What is MBIM?
The Mobile Interface Broadband Model (MBIM) is a new standard developed by the USB Implementers Forum, specifically designed for high speed mobile broadband modem devices.
This new USB networking subclass defines two separate new features:
- A new MBIM USB device model, providing multiple IP connections over a single USB interface, and without the need of 802.3 frames (as was the case with ECM and NCM)
- A new MBIM control protocol to talk to modem devices
MBIM message types
The protocol defines different message types with different formats.
Some of them are used to establish the channel of communication with the modem:
- Open Message (Host->Modem): Initialization request.
- Open Done Message (Host<-Modem): Initialization response.
- Close Message (Host->Modem): Close request.
- Close Done Message (Host<-Modem): Close response.
Some of the messages are used to report errors in the protocol; which may be sent either from the host or from the modem:
- Host Error Message (Host->Modem): Host-reported error.
- Modem Error Message (Host<-Modem): Modem-reported error.
And finally, some messages provide access to the different CIDs (Command IDs) defined in each Service.
- Command Message (Host->Modem): Request of a given command.
- Command Done Message (Host<-Modem): Response to a given command.
- Indication Message (Host<-Modem): Unsolicited messages sent by the modem.
These last three messages support protocol-defined fragmentation. If the sender of the message finds out that the message is longer than the maximum control transfer size defined when the communication channel was opened (with an Open Message), it will be able to split it into sorted chunks and send them one by one over the wire. Each of these fragments specify the total amount of fragments expected, as well as the order in the sequence. The receiver of the fragments will therefore need to wait for all fragments to arrive – which should arrive in order – before processing the message.
MBIM services
The protocol defines a basic set of different Services:
- Basic Connect: Which provides the support for basic IP connectivity
- SMS: SMS messaging
- USSD: Unstructured Supplementary Service Data
- Phonebook: Handling contacts and such
- STK: SIM toolkit
- Authentication
- Device Service Stream
Only the Basic Connect one is mandatory in every MBIM device; others are optional. Vendors or even Network Operators can also extend the functionality of the device with other services; for example to support other protocols embedded within MBIM (e.g. QMI or AT within MBIM); or just to provide specific new features.
MBIM commands
For each service, MBIM defines a set of Commands (CIDs); and each command can then be divided into 3 actions:
- “Set“: An user-requested action to change the modem state or configuration
- “Query“: An user-requested action to query the modem state or configuration
- “Notification“: An unsolicited report of the modem state or configuration
Not every action is supported by every command. For example, the “Device Caps” command in the “Basic Connect” service only supports the “Query” action, while the “Radio State” command of the same service supports all “Set“, “Query” and “Notification“.
But how does this match with the message types defined before?
- Host-created “Set” and “Query” requests are sent using “Command Messages“.
- Modem-created “Set” and “Query” responses are sent using “Command Done Messages“.
- Modem-created “Notifications” are sent using “Indication Messages“.
MBIM basic types
The protocol not only defines which action is supported in each command; it also defines the contents of the request, response and indication messages. The contents of each message are composed of collections of basic types defined by the protocol:
- Unsigned 32bit integers: Even for the most simple values (e.g. booleans), little-endian 32 bit unsigned integers are used.
- Strings: UTF-16LE encoded strings are always used.
- UUIDs: The protocol defines a special 16-byte-long UUID type, e.g. to define Service IDs
- Arrays: Collection of N values of a given basic type.
- Structs: Sequence of other basic types, given in a specific order.
As you can see, there is not much effort (none, actually) into making the protocol efficient in terms of overhead introduced; more than half of the bytes in each message will very likely end up being NUL bytes. Also, it is assured that each field within a message is aligned in a 32bit boundary, which makes it easier to read independent fields directly from the binary stream.
How does this compare to QMI?
There are quite some differences between this protocol and QMI. To name a few:
- Less basic types in MBIM, specially regarding signed/unsigned integers. QMI defines many more integer types, of different sizes and with different sign.
- Basic strings are given in ASCII in QMI
- Struct types are re-used in MBIM, as opposed to QMI, where each TLV would define the struct contents as it needed.
- There is no ‘client allocation’ needed in MBIM, i.e. the process opening the MBIM port doesn’t need to allocate clients for the different services.
- Fragmentation is built-in in the MBIM protocol; QMI required special TLVs and logic to handle messages that may be longer than the standard message size (e.g. when transferring the PRL list).
- Binary representation of the message is completely different. In QMI you would have a list of TLVs, one after the other. In MBIM, the contents of the message are split into two different sections: one which contains the fixed-size values and one for the variable-size values. For example, a string in MBIM is defined by two values in the fixed-size region (offset and size), while the real string data is within the variable-size section.
libmbim
The ‘libmbim‘ library is an attempt to write a protocol support library, as previously done with ‘libqmi‘.
The current codebase, GLib/GObject/GIO based, is pretty similar to what libqmi provided, with a ‘MbimDevice‘ GObject to handle the communication through the /dev/cdc-wdm port, as well as ‘MbimMessage‘ types to handle the creation of commands. Given that there is no need for client allocations in MBIM, there is no ‘MbimClient‘ object needed. Also, given that the contents of each message are pre-defined, it wasn’t considered the need of input and output ‘bundles’ to handle collections of TLVs, as done in libqmi.
Fragmentation of incoming/outgoing messages is handled internally by the ‘MbimDevice‘, which is a nice thing to have, as it simplifies the usage of the API. The user just creates a message, as long as it needs it to be, and the ‘MbimDevice‘ will take care of splitting it into fragments. When receiving a message, the user will also receive already the full message, once all fragments have been combined internally.
The messages and the services are defined in a JSON dictionary, and as with libqmi, all the message handling code is auto-generated from there. The capabilities of the mbim-codegen are still not in pair with those in qmi-codegen yet, though. The generator doesn’t support e.g. “Set” requests with parameters, or “Indication” messages. As previously said, this currently is a proof-of-concept, someday we’ll support all those properly.
mbimcli
The project comes with a command line utility (mbimcli), which allows (will allow) running “Get” or “Set” commands directly from the shell. There aren’t many supported commands yet, so I cannot show many more examples than this one:
$ sudo mbimcli \

    -d /dev/cdc-wdm1 \

    --basic-connect-query-subscriber-ready-status
[/dev/cdc-wdm1] Subscriber ready status retrieved:
Ready state: 'device-locked'
Subscriber ID: 'unknown'
SIM ICCID: '984310311520086950F1'
Ready info: 'unknown'
Telephone numbers: ''
Hint: Using --verbose will show you the raw binary message contents!
Where do I get it?
The ‘libmbim’ library and the ‘mbimcli’ utility are managed in FreeDesktop.org:
Help! Contribute! Sponsor!
If you want to help, or sponsor further development in libmbim, mbimcli or the ModemManager integration, just let me know!
[UPDATE: Included freedesktop.org project link]
]]>
Location Indicator in gnome-shell
I’ve been wanting to try to write a gnome-shell extension from some time, and I ended up finding enough free time during the past weeks. So I ended up writing a gnome-shell extension which would show information about your current location as provided by your modem. Note that this information is not coming from GeoClue; the new ModemManager1 interface is not integrated yet there.
ModemManager exposes these types of information in the Location interface:
- 3GPP location, which is given as a set of 4 parameters, and specifies which is the current network cell which is giving mobile coverage to the modem:
- MCC/MNC: Identifies the ‘mobile country code’ and the ‘mobile network code’; i.e. country and operator.
- LAC and Cell ID: Identifies the ‘location area code’ and ‘cell id’ pair.
Once all these items are known, a query to an open database of cell IDs can give us the exact location of the tower giving us coverage, and therefore a good approximation of where we are located.
- GPS location, given if the modem has a built-in GPS. Currently Option/HSO modems are supported, as well as QMI-powered modems with the ‘PDS’ service implemented.
- CDMA Base Station location, given as Latitude/Longitude coordinates, and available in QMI-powered modems prepared for CDMA networks. As with the 3GPP one, this location information specifies where the station giving coverage to your modem is located, which is a good approximation of where you are located.
Beware! You’ll need ModemManager >= 0.7 (i.e. git master) in order for this extension to work.
You can download and install the extension in the following link:
https://extensions.gnome.org/extension/569/location-indicator
The sources are kept in a git repository in gitorious.org:
https://gitorious.org/aleksander/gnome-shell-location-indicator
If you find the extension itself mostly useless, you may still want to take a look at the source code to see yet another example of how to talk to DBus interfaces from within gnome-shell, including the use of the new standard ObjectManager interface with a Gio.DBusObjectManagerClient.
]]>
(C) allenran917@ Flickr – CC by-nc-nd
It was something like September 2011, shortly after the last Desktop Summit in Berlin, when I started the work improving ModemManager with the new DBus API, GDBus-based DBus support, port-type-agnostic implementations, dynamic DBus interfaces, built-in org.freedesktop.DBus.ObjectManager interface support, built-in org.freedesktop.DBus.Properties.PropertiesChanged signal support, the new libmm-glib client library, the new mmcli command line tool… Took me around half a year to port most of the core stuff, and some more months to port all the plugins we had. And then, suddenly, git master wasn’t that unfinished thing any more, and we were even implementing lots of new features like GPS support in the Location interface, improved SMS Messaging capabilities, ability to switch Firmware on supported modems, and last but definitely not least, support for new QMI-enabled modems through the just officially released libqmi…
And when I thought it was all done already, I woke up from my dream and realized that not even me was really using the new ModemManager as it wasn’t integrated in the desktop… not even in NetworkManager. So there I was again, with a whole new set of things to fix…
NetworkManager integration
There is already a set of patches available to include integration of the new ModemManager interface in NetworkManager; pending for review in the NM mailing list. This is the second iteration already, after having some of the patches from the first iteration already merged in git master.
This integration is probably the most complex one in the list, as it really has to deal with quite different DBus interfaces, but the overall look of it seems to be quite good from my point of view. With the patches on, NetworkManager exposes a new –with-modem-manager-1 configure switch which defaults to ‘auto’ (compile the MM1 support if libmm-glib found). Note that both the old and new ModemManager would be supported in this case, to easier fallback to the old version if the user experiences problems with the new ModemManager.
All in all, the required changes to NetworkManager are quite well defined, implemented mainly as a new ‘NMModemBroadband’ object and some additional bits to monitor added/removed modems through the org.freedesktop.DBus.ObjectManager interface.
gnome-shell integration
A proper integration in my desktop of choice (gnome-shell based GNOME 3) required to integrate the new interface in the Network indicator of the shell. As in every good day, I first had to deal with several issues I found, but I ended up submitting a patch that properly talks to the new ModemManager1 interface when needed. As with NetworkManager, this patch would support both the old and the new interfaces at the same time.
Not that this was a big change, anyway. The Network indicator only uses the ModemManager interface to grab Operator Name, MCCMNC and/or SID, and signal strength. Something that could even be included directly in the NMDevice exposed by NetworkManager actually…
Right now the only big issue pending here is to properly unlock the modem when it gets enabled, something that I still need to check how to do it or where to do it.
Truth be told, hacking the shell has ended up being quite nice, even with my total lack of knowledge in JavaScript. My only suggestion here would be: get a new enough distribution with a recent enough GNOME3 (e.g. the unreleased Fedora 18) and jhbuild buildone from there. I think I’ve never seen a clean jhbuild from scratch succeed… maybe it’s just bad luck.
And then came the applet…
network-manager-applet integration
Why the hell would Bluetooth DUN not work with my implementation, I was thinking, until I found that even if GNOME3 doesn’t rely on nm-applet, it still uses some of its functionality through libnm-gtk/libnma, like the code to decide which kind of modem we’re dealing with and launch the appropriate mobile connection wizard. Ended up also submitting patches to include the missing functionality in network-manager-applet.
For those not using GNOME3 and gnome-shell; note that I didn’t implement the support for the new ModemManager1 interface in the nm-applet itself; I just did the bluetooth-guess-my-modem-type bits required in libnma. If I feel in the mood I may even try to implement the proper support in the applet, but I wouldn’t mind some help with this… patches welcome! Same goes for other desktops relying on NetworkManager (KDE, xfce…); I wouldn’t mind to update those myself as well, but I truly don’t have that much free time.
gnome-control-center integration
Ok, so gnome-shell integration is more or less ready now; we should be finished, right? Well, not just yet. gnome-control-center also talks to ModemManager, in this case to get Operator Name and Equipment Identifier, which btw were not getting properly loaded and updated. Once that fixed, I finally got a new patch to have the control center talk to the new interface.
Fedora 18 packages
I bet you won’t go one by one to all the patches I linked before and apply them in your custom compiled NetworkManager, gnome-shell, network-manager-applet and gnome-control-center… but for all those brave Fedora 18 users, you can try with the 64-bit packages that I built for me, all available here:
If you want to rebuild these packages yourself, you’ll find the source tarballs here and the packaging repositories here. The packaging is really awful – I suck at it – so you’ll probably need to install the RPMs with –force Note that the git repo for packaging has several git submodules, one for each item packaged, so remember to “git submodule init” and “git submodule update“.
We done yet?
Are these all the patches needed to have the best ModemManager experience in GNOME3? No! The list of pending tasks for this purpose grows a bit every day…
- Common code to parse the mobile broadband providers database, exposed in libnm-gtk and used by the wizard, the control center and the shell
- Link mobile connection profiles to a specific SIM/modem
- Ensure modems are PIN-unlocked when they get enabled
- Rework the logic behind the Network indicator in gnome-shell, trying to make it easier to connect to a default connection profile. The same logic would then be need to be applied to the control center…
- Proper IPv6 support in mobile broadband connections
- Connection profiles with multiple APN/bearers
- SMS messaging
- Location information integration
- An independent UI application to manage advanced settings in ModemManager?
- …
Help!
Thanks
Special thanks go to my employer Lanedo GmbH, which sponsors quite a lot of the GNOME integration work; as well as to my girlfriend’s employer, which sends her 400km away from home from Monday to Thusday. Without them this job would have been impossible!
]]>
(C) josullivan.59 @ Flickr – CC by-nc-sa
Lots of new SMS-related features have landed in ModemManager this week, and as I have as much memory as a fish used to have, I need to write down all the commands I’ve used to test all this; hence this post.
Note that all the stuff I talk about here applies to both AT and QMI based modems.
Multiple storages
The current stable 0.5/0.6 releases will only use the core/plugin defined ‘default’ storages for reading and sending short messages. This means that if you happen to have stored SMS in another non-default storage ModemManager won’t show them to you.
In the new 0.7 codebase, ModemManager reads the messages from all the available storages. It is able to read not only DELIVER-type PDUs from received SMS, but also SUBMIT-type PDUs from user-created SMS which got stored. The “Sms.Store()” method in the interface now allows (optionally) specifying in which storage the SMS should be kept.
The following commands allow to create a new SMS and store it in the “sm” (SIM) storage:
$> sudo mmcli -m 0 \

              --messaging-create-sms="text='Hello world',number='+1234567890'

Successfully created new SMS:

    /org/freedesktop/ModemManager1/SMS/21 (unknown)


$> sudo mmcli -s 21 --store-in-storage="sm"

successfully stored the SMS


$> sudo mmcli -s 21

SMS '/org/freedesktop/ModemManager1/SMS/21'

  -----------------------------------

  Content    |              number: '+1234567890'

             |                text: 'Hello world'

  -----------------------------------

  Properties |            PDU type: 'submit'

             |               state: 'stored'

             |                smsc: 'unknown'

             |            validity: '0'

             |               class: '0'

             |             storage: 'sm'

             |     delivery report: 'not requested'

             |   message reference: '0'
Note that you can create, store and send SMS objects regardless of what storage you’re using for each, ModemManager will take care of properly synchronizing the access to each of them.
The Messaging interface also defines new properties to list all the supported storages and to specify which is the default storage being used for received messages (and for stored ones when no specific one given in “Sms.Store()“):
$> sudo mmcli -m 0 --messaging-status

/org/freedesktop/ModemManager1/Modem/0

  ----------------------------

  Messaging | supported storages: 'sm, me'

            |    default storage: 'me'
Text multipart SMS
We support receiving text multipart messages in ModemManager since some stable releases ago; but support for sending multipart messages was still missing. Not any more! Roberto Majadas of OpenShine started this work some months ago with a patch for MM 0.6, which I took over and ported to git master and the new 0.7 codebase.
Of course, we support both the default GSM 7-bit alphabet, as well as UCS-2:
- GSM 7 encoded multipart messages: If the message is less or equal than 160 septets a singlepart SMS will be used; otherwise the input text will be split into chunks of 153 septets and sent as a multipart message.
- UCS-2 encoded multipart messages: The GSM 7 alphabet and its extensions are not enough to cover all scripts available out there. Luckily, we can send PDUs with UCS-2 encoded text (UCS-2 covers all the basic plane of Unicode, and is equivalent to UTF-16 in that range). When using this encoding, if the input text is less or equal than 70 UCS-2 characters (140 bytes) a singlepart SMS will be used; otherwise the input text will be split into chunks of 67 UCS-2 characters (134 bytes) and sent as a multipart message. Note anyway that this doesn’t mean that we only allow 70-byte long input strings to fit into a singlepart message; as the conversion from the input UTF-8 text to UCS-2 isn’t always increasing the required number of bytes. As an example, we can now send 210 bytes of UTF-8 encoded chinese text into a single SMS with 140-bytes of UCS-2.
Note that from the API user’s point of view, the SMS objects are not considered multipart or singlepart; that is taken as internal information only required for the PDU-based implementation.
Multipart messages can be created by writing a long enough ‘text‘ value passed in the ‘--messaging-create-sms‘ command, as shown before.
Raw data multipart SMS
In addition to text short messages we now also properly support raw binary data singlepart and multipart messages (reported as 8bit encoded). This means that both the sender and receiver can agree in any text encoding to be used between them, or even send in one or more SMS whatever raw binary stream you have.
The ‘mmcli’ command line utility was improved with several commands to test this feature. For example, you can now send using just SMS messages whatever file you have in your system, just doing:
$> sudo mmcli -m 0 \

       --messaging-create-sms="number='+1234567890'" \

       --messaging-create-sms-with-data=/path/to/your/file

Successfully created new SMS:

    /org/freedesktop/ModemManager1/SMS/22 (unknown)


$> sudo mmcli -s 22 --send

successfully sent the SMS
When the receiver gets all the parts of the message, she can now recover the sent file with another ‘mmcli’ command in her ModemManager setup:
$> sudo mmcli -m 0 \

              --messaging-list-sms

Found 1 SMS messages:

    /org/freedesktop/ModemManager1/SMS/0 (received)


$> sudo mmcli -s 0 \

              --create-file-with-data=/path/to/the/output/file
But beware! The file is sent in chunks of 134 bytes, and there is a maximum of 255 parts in a given multipart SMS, so this leaves you with a maximum size of around 33 Kbytes And not only that, if you’re paying e.g. 0.10€ for each SMS sent, you would be paying more than 25€ for those 33 Kbytes. Yes, needless to say, this is therefore the most useless use case ever. But still, works as a proof of concept.
Delivery reports
Last and least, you can now also request delivery reports when sending an SMS, by passing the ‘delivery-report-request=yes‘ key/value pair in the ‘--messaging-create-sms‘ command.
$> sudo mmcli -m 0 \

           --messaging-create-sms="text='你好',\

                                   number='+1234567890',\

                                   delivery-report-request=yes"

Successfully created new SMS:

  /org/freedesktop/ModemManager1/SMS/0 (unknown)


$> sudo mmcli -s 0 --send

successfully sent the SMS


$> sudo mmcli -m 0 --messaging-list-sms

Found 21 SMS messages:

  /org/freedesktop/ModemManager1/SMS/0 (sent)

  /org/freedesktop/ModemManager1/SMS/1 (received)


$> sudo mmcli -s 1

SMS '/org/freedesktop/ModemManager1/SMS/1'

  -----------------------------------

  Content    |              number: '+1234567890'

  -----------------------------------

  Properties |            PDU type: 'status-report'

             |               state: 'received'

             |                smsc: '+9876543210'

             |            validity: '0'

             |               class: '0'

             |             storage: 'unknown'

             |   message reference: '137'

             |           timestamp: '120914120619+02'

             |      delivery state: 'temporary-error-sc-specific-reason' (0x30)

             | discharge timestamp: '120914120619+02'
You can then match the delivery report with the message sent by using the ‘message reference‘ value, which should be the same in both. This also applies to multipart messages, where the ‘message reference’ of our SMS object is the one reported when sending the last part, and therefore we only request the delivery report in the last part sent.
Enjoy!
]]>When I started to develop the QMI support in OpenWRT, latest trunk was based on the 3.2 kernel series. By the time you read this, OpenWRT may already have a recent enough kernel (>= 3.4), so this custom setup may not be needed any more, so keep it just for reference.
The ‘v3.2.5-qmi’ branch in the Lanedo stable kernel tree contains a set of patches on top of the 3.2.5. Linux kernel release. These patches add support for QMI ports (updated ‘cdc-wdm’ and new ‘qmi_wwan’ driver) in the 3.2 stable series:
git://gitorious.org/lanedo/linux-stable.git
OpenWRT with QMI support
The same set of patches was then added to the ‘qmi-support’ branch of the Lanedo openwrt tree, enabling OpenWRT builds with QMI support:
git://gitorious.org/lanedo/openwrt.git
When you compile this OpenWRT build, make sure you configure the kernel with the QMI-specific requirements enabled:
CONFIG_PACKAGE_kmod-qmi-wwan=m

CONFIG_PACKAGE_kmod-usb-wdm=m

...
For reference, you can find here the .config I used for the ar71xx-nand builds (installable in a RouterBoard 433UAH).
libqmi-glib and qmi4g
‘libqmi-glib’ and ‘qmi4g’ are two new packages added to the ‘qmi-support’ branch of the Lanedo openwrt-packages tree:
git://gitorious.org/lanedo/openwrt-packages.git
This repository can be added to your OpenWRT build by creating a new ‘feeds.conf‘ with the following contents:
src-git packages git://gitorious.org/lanedo/openwrt-packages.git;qmi-support
The new packages, in detail:
- libqmi-glib: This package provides a preliminary version of
libqmi-glib, as released unofficially by me. This package will provide thelibqmi-gliblibrary, theqmiclicommand line utility and theqmi-networkscript. - qmi4g: This package registers a new ‘
qmi4g‘ network protocol, which takes care of launching the network start/stop requests through QMI.
If you’re using the precompiled OpenWRT images I gave above, you can just install these packages using ‘opkg’ once you’ve added the ‘latest’ Lanedo repository.
Configuring qmi4g
Once the qmi4g package is installed, you are then allowed to include the
following configuration under /etc/config/network:
config 'interface' 'broadband'

        option 'ifname' 'wwan0'

        option 'proto' 'dhcp'

        option 'auto' '0'
config 'interface' 'wdm0'
option 'proto' 'qmi4g'
option 'wdmif' '/dev/cdc-wdm0'
option 'wwanif' 'broadband'
The configuration is split into 2 interfaces:
- First, the configuration for the ‘
wwan0‘ interface. This interface needs to be set with ‘auto‘ equal to ‘0‘, so that it is never brought up automatically; and with ‘dhcp‘ as the protocol to be used. You should never ifup/ifdown this interface manually. - Second, a virtual interface using the new ‘
qmi4g‘ protocol, which needs 2 options set: ‘wdmif‘ with the cdc-wdm port to use for the QMI protocol, and ‘wwanif‘ with the uci-interface-name of the wwan iface to use.
Start/Stop the network
Once the qmi4g setup is added in /etc/config/network, you can now then just:
$> ifup wdm0
That command will internally first launch the network start QMI command, and if succeeds it will itself ifup wwan0. The wwan interface can be used as any other eth-based interface now, it can be added as part of multiwan or in a vlan or in a bonding, or anything.
Once the connection is no longer wanted, you can just:
$> ifdown wdm0
That command will stop the network with QMI and also ifdown wwan0.
LUCI
Once the network configuration is in place, the connection can also be started via web. Just log in to LUCI, go to Network interfaces and you’ll see both the wwan interface (“broadband“) and the virtual “wdm0“. Starting/Stopping the “wdm0” interface via LUCI should work. As said before, you shouldn’t touch the wwan interface directly.
Enjoy!
]]>QMI is a binary protocol designed to replace the AT command based communication with modems, and is available in devices with Qualcomm chipsets from multiple vendors (Novatel, Huawei, Sierra Wireless, ZTE… and of course Qualcomm itself).
The protocol defines different ‘services‘, each of them related to different actions that may be requested to the modem. For example, the ‘DMS’ (Device Management) service provides actions to load device information; while the ‘NAS’ (Network Access) service provides actions to register in the network. Similarly, other services will allow the user to request data connections (WDS), setup GPS location reporting (PDS), or manage internals of the user identity module (UIM service). The user needs to handle the creation of ‘clients’ for those services by allocating/deallocating ‘client IDs’ using the generic always-on ‘control’ (CTL) service.
Each service in the protocol defines ‘Request and Responses‘ as well as ‘Indications‘. Each pair of request/response has a maching ID which lets the user concatenate multiple requests and get out-of-order responses that can be afterwards matched through the common ID. Indications arrive as unsolicited messages, sent either to a specific client or as a broadcast message to all the clients of a given service. Usually the user needs to request the enabling of the indications to receive via some request/response.
Finally, each message in the protocol defines a set of input (in requests) and output (in responses and indications) arguments, which we name as TLVs. Some of these are defined to be mandatory, others are optional, and others are only mandatory if some other argument is available and has a given value. For example, some output arguments in response messages are only mandatory if the result of the response (given as a TLV) is SUCCESS.
Using the QMI protocol
This protocol is easily accessible in recent enough Linux kernels (>= 3.4), through the cdc-wdm and qmi_wwan drivers. Once these drivers are in place and the modem gets plugged in, the kernel will expose a new /dev/cdc-wdm device which can talk QMI, along with a wwan interface associated to each QMI port.
libqmi
libqmi is an on-going effort to get a library providing easy access to Qualcomm’s ‘QMI’ protocol. The current libqmi available is based on the GLib/GObject/GIO-powered ‘libqmi-glib’. libqmi tries to ease the use of the protocol by providing:
- A ‘
QmiDevice‘ object to control the access to the /dev/cdc-wdm device. This object allows creating new per-service ‘QmiClient’s. It also hides the use of the implicit ‘CTL’ service client. - The ‘
QmiClient‘ object provides an interface to the set of request/responses of a given service. Users of the library will just need to execute a GIO-asynchronous method to send the request and get the processed response. - The ‘
QmiClient‘ object also provides signals for each of the indications given in the service. - The input and output arguments needed in requests, responses and indications are compiled into ‘bundles’. These bundles are opaque structs with accessors for their elements, which allow us to add new TLVs to a given message in the future without breaking API/ABI.
The protocol is written in the library as a JSON dictionary of rules, and most of the code to handle the protocol in the library is autogenerated during compilation. If you want to take a look at the currently available interface, check the gtk-doc documentation at: http://www.freedesktop.org/software/libqmi/libqmi-glib/latest/
qmicli
The libqmi project comes with a command line utility (qmicli) primarily used as a developer tool for testing the libqmi-glib library. Just run the program with ‘--help-all‘ to get all possible actions it can run. A quick example of usage:
$> sudo qmicli -d /dev/cdc-wdm0 --dms-get-manufacturer

[/dev/cdc-wdm0] Device manufacturer retrieved:

Manufacturer: 'Qualcomm Incorporated'
Hint: If you compile the project passing -DMESSAGE_ENABLE_TRACE to CFLAGS, it will dump as DEBUG logs the content and translation of all the QMI messages passed in both directions. You’ll also need ‘--verbose‘ or just ‘-v‘ to show the debug logs when running qmicli.
Other utilities
The project also comes with a small bash script called ‘qmi-network‘, which allows you to launch a broadband connection using libqmi-glib and qmicli. This script requires two arguments; first the cdc-wdm device to talk to, and secondly the action (start|stop|status) to execute. The script can definitely be improved in multiple ways (e.g. send PIN), so if anyone wants to do it patches are very welcome.
Where do I get it?
The project is currently available in the freedesktop.org infrastructure:
- git: http://cgit.freedesktop.org/libqmi
- mailing list: http://lists.freedesktop.org/mailman/listinfo/libqmi-devel
- bugzilla: https://bugs.freedesktop.org/buglist.cgi?product=libqmi
ModemManager
ModemManager has QMI support through libqmi-glib since release 1.0.
Help! Contribute! Sponsor!
If you want to help, or sponsor further development in libqmi, qmicli or the ModemManager integration, just let me know!
[UPDATE] Links updated, along with ModemManager related info.
]]>
Finally back home after attending GNOME.Asia 2012 and some vacation time afterwards.

CC BY-NC-SA 2.0, Sammy Fung
The conference started on Friday afternoon, with a design workshop managed by Allan Day, Jakub Steiner and William Jon McCann. It was pretty interesting, truth be told, and I particularly enjoyed how Jakub played with Inkscape to create the icon of “GNOME Ball” (now we just need a program for the icon). I truly want to spend more time with Inkscape now, and try to draw something better than my previous attempts to draw an icon/logo.

CC BY-NC-SA 2.0, Sammy Fung
I gave two talks during the first day of the conference, one about Tracker (slides here) and another one about ModemManager (slides here). The talks were recorded, but official videos of the talks are not yet available on the Internet.

Thanks to the usual jet lag, I also found time to develop the application-menu support for Devhelp during my stay in Hong Kong. The code is currently available in the ‘application-menu’ branch in the gnome git repo, and tracked at GB#677927.

Finally, thanks to my employer, Lanedo GmbH, for sponsoring my attendance to this great conference!
]]>ModemManager (a.k.a “MM“) is a small daemon which takes care of controlling your broadband devices in your GNU/Linux system. We currently don’t have a logo for ModemManager, so if you’re a designer with some free time, share your ideas! Something simple, similar to the NetworkManager logo would be great, actually.
]]>
According to the current schedule I’ll be giving two talks on Saturday June 9th:
-
An introduction to Tracker, SPARQL and whatnot:
Tracker is not (only) a search engine: it is a semantic data storage, powered by RDF ontologies, Nepomuk, and the SPARQL protocol. Tracker is one of the core building blocks of the MeeGo Harmattan operating system; and since release 2.30, it is also a blessed external dependency in GNOME. But it wasn’t until GNOME 3 and the first release of GNOME Documents that it started to get some really good attention… and there is more to come!
-
ModemManager revamped: now supporting LTE/4G modems:
ModemManager, along with NetworkManager, provides easy-to-use broadband modem connections in the GNOME desktop. With new requirements coming along with the new LTE (4G) communication standards, ModemManager got not only a face-lift, but also a deep surgery to improve its codebase and the way it supports vendor-specific plugins.The new ModemManager comes with a new GDBus-powered interface; built-in support for LTE and mixed CDMA+LTE devices; dynamic interfaces and per-interface state machines; helper libmm-common and libmm-glib libraries; a handy “mmcli” command line interface utility; and a new plugin development strategy which is port-type agnostic and based on GIO async calls.
This talk is an introduction to ModemManager, with special focus on LTE and all the new details and features coming with the new codebase.
Thanks to my employer, Lanedo GmbH, for sponsoring my attendance!
]]>The flight started from the small town of Camarenilla, and we ended up flying over the beautiful city of Toledo, one of the former capitals of the Spanish Empire.
This short video comes with the original audio:
This long video comes with music, and includes the recording of most of the trip, including landing.
Since MM 0.5 at least, ModemManager comes with a Location interface which is defined to expose not only 3GPP-specific location information (operator MMC/MNC + Location area code + Cell ID), but also GPS-specific location information (cached NMEA traces and raw location information). In MM 0.7, this Location interface will actually work for GPS location, at least for Option modems with GPS capabilities.
The HSO plugin
The High-Speed Option plugin is probably one of the most complex plugins being handled in ModemManager. In the new ModemManager 0.7 codebase, HSO modems (MMBroadbandModemHso) are implemented as a subclass of the standard Option modems (MMBroadbandModemOption), as they share lots of common features (allowed modes management, access technology and signal quality reporting…); but they also implement lots of connection related HSO-specific features (e.g. success of a connection establishment gets notified via unsolicited messages), which are most of them handled in a new HSO-specific bearer. Some of these advanced Option modems come with additional surprises: GPS-specific ports (AT port for control, raw serial port for NMEA traces).
The HSO modems provide detailed information about the type of each port being exposed in the USB interface; and so during the probing phase we are able to easily grab the GPS-control AT port and the additional serial port for NMEA traces (handled by a new MMGpsSerialPort port type). Once the HSO modem knows it has these two ports, it will allow to enable or disable any of the two GPS-specific location sources (NMEA or raw), or both at the same time. The NMEA location source will enable the modem to expose the last cached NMEA traces; while the raw location source will tell the modem to just expose generic location information such as time, latitude, longitude and altitude. In the case of the HSO modem (and possibly in every other case), both location sources are actually implemented based on the same NMEA traces received (raw information is parsed from $GTGGA traces). In addition to the core GPS location handling and the HSO-specific implementation, libmm-glib and mmcli where also improved to easily play with the new features.
Trying the GPS location retrieval with your Option modem
If you want to give a quick try to these capabilities, grab ModemManager git master, compile, install and plug in your modem. You first need to check whether the modem has GPS-specific location capabilities. Note that we’ll assume the modem is exposed as index 0; if you have more than one modem, just use --list-modems to check the proper modem index:
$ mmcli -m 0 --location-status

/org/freedesktop/ModemManager1/Modem/0

  ----------------------------

  Location | capabilities: '3gpp-lac-ci, gps-raw, gps-nmea'

           |      enabled: 'none'

           |      signals: 'no'
The output says that the modem supports 3GPP Location area code/Cell ID, GPS raw and GPS-NMEA location sources. None is enabled yet, as we didn’t enable the modem, which we can do issuing:
$ sudo mmcli -m 0 --enable

successfully enabled the modem
$ mmcli -m 0 --location-status
/org/freedesktop/ModemManager1/Modem/0
----------------------------
Location | capabilities: '3gpp-lac-ci, gps-raw, gps-nmea'
| enabled: '3gpp-lac-ci'
| signals: 'no'
The 3GPP location source will always be enabled by default if it is supported by the modem, while the GPS-specific ones will always be disabled by default. The reasoning behind this is that the 3GPP LAC/CI comes for free in C(G)REG notifications when C(G)REG=2 is supported, while the GPS location is usually an additional module in the modem, with high power consumption. Using mmcli, we can now enable both GPS raw and NMEA location sources:
$ sudo mmcli -m 0 \

             --location-enable-gps-raw \

             --location-enable-gps-nmea

successfully setup location gathering
If we do check again the status, we’ll see the GPS-specific locations are enabled:
$ mmcli -m 0 --location-status

/org/freedesktop/ModemManager1/Modem/0

  ----------------------------

  Location | capabilities: '3gpp-lac-ci, gps-raw, gps-nmea'

           |      enabled: '3gpp-lac-ci, gps-raw, gps-nmea'

           |      signals: 'no'
Once they are enabled, ModemManager will start receiving NMEA traces in the GPS raw port, and will start to cache and process them. mmcli allows to show location-source-specific information with --location-get-3gpp, --location-get-gps-nmea and --location-get-gps-raw; but it also allows to query for all at the same time:
$ sudo mmcli -m 0 --location-get

/org/freedesktop/ModemManager1/Modem/0

  -------------------------

  3GPP location   | Mobile country code: '214'

                  | Mobile network code: '3'

                  |  Location area code: '21071'

                  |             Cell ID: '7033737'

  -------------------------

  GPS NMEA traces | $GPGGA,,,,,,0,,,,,,,,*66

                  | $GPRMC,,V,,,,,,,,,,N*53

                  | $GPGSA,A,1,,,,,,,,,,,,,,,*1E

                  | $GPGSV,4,1,16,24,,,,29,,,,05,,,,18,,,*7A

                  | $GPGSV,4,2,16,22,,,,14,,,,11,,,,17,,,*7B

                  | $GPGSV,4,3,16,03,,,,12,,,,30,,,,13,,,*78

                  | $GPGSV,4,4,16,23,,,,15,,,,27,,,,07,,,*79

                  | $GPVTG,,T,,M,,N,,K,N*2C

  -------------------------

  Raw GPS         | Not available
Note that ModemManager will expose only the last received NMEA traces of each kind, except for those ($GPGSV here) that are actually building a sequence.
Once the GPS module fixes a position, we’ll process the $GPGGA NMEA trace to get valid GPS location information:
$ sudo mmcli -m 0 --location-get-gps-raw

/org/freedesktop/ModemManager1/Modem/0

  -------------------------

  Raw GPS         |  UTC time: '155142.2'

                  | Longitude: '-3.513941'

                  |  Latitude: '40.502603'

                  |  Altitude: '18.000000'
What about other modems?
Well, if the modem exposes GPS-specific ports in the same USB interface, it shouldn’t be difficult to add support for them, specially now that all the core/libmm-glib/mmcli work is already available.
A special case is when the modem exposes a single AT port via USB and the GPS port via RS232 (e.g. Sierra Wireless FXT009 with GPS extension). This case is a bit more tricky as there is no easy way for ModemManager to tell that the RS232 port is to be managed by the same modem object created after grabbing the AT port. In this case, the user may need to explicitly set some magic udev tags to let ModemManager handle the needed logic, but that also may get tricky if the user has more than one such modem plugged in (not sure for what, but anyway).
]]>![]()
After a bit more than 7 years online, it was time to prepare some charts showing the evolution in the number of images published. The following graph shows the number of images of Jupiter available since year 2000 (PVOL inherited the images already available in the previous IOPW page).

And the 2011-2012 apparition of Jupiter didn’t even finish yet!
So, thanks to the growing community of amateur astronomers (260 listed today) publishing images in the PVOL, and special thanks to the Planetary Sciences Group of the UPV-EHU for the great work they’re doing managing the system.
]]>[MM 0.6] Documentation
If you have free time, basic GLib/GIO development knowledge, and a broadband modem (either USB dongle or internal) to play with, ModemManager developers will thank you [2] if you port any of the missing plugins to the new codebase in the 06-api branch:
[MM 0.6] Plugins
If you have free time, NetworkManager installed [3] and basic GLib/GIO development knowledge, ModemManager developers will thank you [4] if you help providing support for the new ModemManager1 interface in NetworkManager:
[MM 0.6] NM integration
[1] You’ll get one beer for free if we ever meet.
[2] You’ll get two beers for free if we ever meet.
[3] This already leaves out Jose, Luca and Alfred.
[4] You’ll get three! beers for free if we ever meet.
For anyone interested, I’ll be giving a talk about LTE and ModemManager in the Telephony devroom (room H.2213), in the best time slot possible: Sunday 5th at 09:00 am. If you wake up that early just to attend the talk, you’ll get cookies for free!! [2].
Some GNU hackers will also attend the conference, but this year there won’t be a GNU devroom. If you want to suggest a place for dinner on Friday or Saturday, please do so in the ghm-discuss mailing list.
Cheers and see you there!
[1] (and every)
[2] no, this is not true
Carlos Garnacho, another Lanedian, will be giving a talk about Theming GTK+ applications with CSS, which you shouldn’t miss.
So, if you are interested in developing custom GTK+, LibreOffice, NetworkManager, ModemManager or Tracker features; or any other services provided by Lanedo GmbH, just email me and we’ll be able to talk in Göteborg.
See you there!
]]>One of the things you may also want to do is to try new or modified kernels in your MeeGo images. You can do this either installing RPMs or directly compiling the kernel yourself. The following steps will cover this last case.
1. Where to compile the kernel
No, do not try to compile the kernel directly in a raw image launched within KVM/QEMU.
The easiest way to compile your own kernel is to prepare a loop image and chroot into it (See section “6. Create a loop image and chroot into it” in Your custom MeeGo builds).
Note: In order to completely compile the kernel, you will need quite a lot of empty space in the chroot. In order to easily get this, just use a big enough root partition size (given in MBytes) in the Kickstart file used to create the loop image.
2. Get into the chroot
Assuming meego-core-ia32.img is a loop image created, just:
$> sudo mic-chroot meego-core-ia32.img
3. Ensure only one kernel is available
The MeeGo Image Creation tools will expect to have exactly only one kernel available. Therefore, if you just created the loop image, you will need to remove the default kernel RPM installed.
# rpm -e kernel
4. Install the MeeGo kernel source and build dependencies
You will need to enable the source repositories in zypper first:
First, list the available repositories in zypper:
# zypper lr -u
Note that these repositories were initially configured in the Kickstart file used to create the loop image.
Then, enable the source repositories if not already done.
# zypper mr -e 1.2.0-non-oss-source

# zypper mr -e 1.2.0-oss-source

# zypper mr -e 1.2.0-updates-non-oss-source

# zypper mr -e 1.2.0-updates-oss-source
Once you have these enabled, you can install the kernel source, and all the build dependencies will also get installed:
# zypper si kernel
Install additional required packages which were not listed in the build dependencies (not sure why not listed).
# zypper in gcc
5. Get your new kernel, configure, compile and install
First, download the tarball and decompress it:
# cd /root

# wget http://www.kernel.org/pub/linux/kernel/v3.0/linux-3.0.4.tar.bz2

# tar -jxvf linux-3.0.4.tar.bz2 -C /usr/src
Prepare the kernel configuration file, based on the one from the MeeGo kernel packaging. In this case we’re using a newer kernel version, so you will be prompted for the values of the new configuration parameters. You can just try use the default ones if you don’t know what they mean.
# cd /usr/src/linux-3.0.4

# cat /root/rpmbuild/SOURCES/config-generic /root/rpmbuild/SOURCES/config-x86 > .config

# make oldconfig
Note: Of course, you can fully skip using the MeeGo kernel configuration file and fully configure it yourself with, for example, make menuconfig.
Then, compile the new kernel and the kernel modules, and install them.
# make -j8

# make -j8 modules

# make modules_install

# make install
Note: In addition to the specific kernel configuration, MeeGo packaging also provides several kernel patches. In this case, we are not including them.
6. Make the kernel bootable
In order to make the kernel bootable in the image, you will need to create an initial ramdisk under /boot. But you shouldn’t use mkinitrd for that, use the provided mkliveinitrd instead:
# /usr/libexec/mkliveinitrd -f /boot/initrd.img-3.0.4 3.0.4
Once done, just exit the chroot:
# exit
7. Create a LiveUSB image to test the new kernel
The steps to convert a loop image to a LiveUSB image and write it into an external USB disk are explained in my previous post about Your custom MeeGo builds, so I won’t explain much more about it.
Just a warning: always make sure that you have ONLY ONE kernel available under /boot. If you happen to have more than one, for example when make install-ing twice (old ones get renamed with a .old extension), mic-image-convertor won’t like it and will exit with an error message like this one:
Error: Unable to copy valid kernels or initrds, please check the repo
These steps shown here are the minimum set required in an Ubuntu 11.04 host to be able to create MeeGo images easily. They do not try to be extensive, or very explanatory, these are just my personal notes on how to do it
1. Install MeeGo Image Creator
Include the MeeGo tools and SDK repositories to your APT configuration, by adding the following lines to your /etc/apt/sources.list:
deb http://repo.meego.com/MeeGo/tools/repos/ubuntu/10.10/ /

deb http://repo.meego.com/MeeGo/sdk/host/repos/ubuntu/10.10/ /
Add the MeeGo repository key:
$> gpg --keyserver subkeys.pgp.net --recv 0BC7BEC479FC1F8A

$> gpg --export --armor 0BC7BEC479FC1F8A | sudo apt-key add -
Update the APT cache:
$> sudo apt-get update
Install the mic2 package:
$> sudo apt-get install mic2
Note: ‘mic2’ is also in natty/universe, just not the latest version.
2. Prepare a MIC bootstrap
In order to be able to create images from within your Ubuntu 11.04, you will need to use a MIC bootstrap. If you’re using one of the supported platforms (Ubuntu 10.10 for example), you can possibly skip using it. The generated bootstrap will be a chroot-able location which contains MIC and all its exact dependencies.
$> sudo mic-create-bootstrap \

-n trunk \

-k /opt/meego/repo-cache \

-r http://repo.meego.com/MeeGo/builds/trunk/latest/repos/oss/ia32/packages \

-o /opt/meego/ia32-bootstrap
This previous command will create a trunk named bootstrap in /opt/meego/ia32-bootstrap using /opt/meego/repo-cache as path to store cached packages.
3. Prepare a kickstart file
Kickstart files are the ones defining the contents of the image to be built. Not only what packages will be installed, but also which default users will be created, the default root password, the default locale settings, the default keyboard layout…
Preparing a new kickstart file is best done by taking an officially used one, and modifying it as you like (a.k.a. the autotools way):
http://repo.meego.com/MeeGo/releases/1.2.0/builddata/image-configs/
The kickstart files I’ve been using are based on the upstream official ones, but with updated repo URLs and bigger root partition sizes. You can find them here:
- http://www.lanedo.com/~aleksander/meego/meego-core-ia32-1.2.0.ks (Core)
- http://www.lanedo.com/~aleksander/meego/meego-netbook-ia32-1.2.0.ks (Netbook)
Note: If you want to know more about the format of kickstart files, what they do and such, just check the Fedora wiki.
4. Create a raw image and launch it under KVM
The MeeGo Image Creator can build ‘raw’ images which can be then launched under QEMU/KVM. The following command will build one of such ‘raw’ images, using the previously created bootstrap and one of the kickstart files we prepared. Note that the command also defines a cache path, where the RPMs downloaded from the MeeGo online repos will be stored (and therefore available for new images created afterwards).
$> sudo mic-image-creator \

--bootstrap=/opt/meego/ia32-bootstrap \

--format=raw \

--config=meego-core-ia32-1.2.0.ks \

--cache=/opt/meego/repo-cache
You can then use mic-vm-launcher as follows to launch the image under QEMU/KVM:
$> sudo mic-vm-launcher meego-core-ia32-raw/meego-core-ia32-sda.raw
Or call kvm directly and tweak the parameters used to launch the image:
$> sudo kvm \

-s \

-m 1024 \

-hda meego-core-ia32-raw/meego-core-ia32-sda.raw \

-vga std
Note: Ensure that virtualization is enabled in your BIOS, or KVM won’t be able to work properly. You can use ‘$> sudo kvm-ok‘ to check whether it is enabled or not.
5. Create a LiveUSB image and write it to a USB dongle
You will probably want to test your MeeGo build in the real hardware, and for that using LiveUSB images is one of the best options. The MeeGo Image Creator also allows building LiveCD and LiveUSB images directly from kickstart files; again, just changing the ‘format‘ argument:
$> sudo mic-image-creator \

--bootstrap=/opt/meego/ia32-bootstrap \

--format=liveusb \

--config=meego-core-ia32-1.2.0.ks \

--cache=/opt/meego/repo-cache
Once you get the image, you can use ‘mic-image-writer‘ to directly copy it to a connected USB disk. This tool will scan all available external disks, and prompt a menu to select the one where you want to write the image to. The ‘-c‘ switch (--console) just tells the tool to avoid launching any GUI, and present the menu directly in the console. During this step, the USB disk is also prepared with sysconfig/isolinux to boot the newly written image.
$> sudo mic-image-writer -c meego-core-ia32.usbimg
Now you’re ready to boot your hardware with the LiveUSB image.
6. Create a loop image and chroot into it
With the MeeGo Image Creator, you can also build loop images, just changing the ‘format‘ parameter in the call to mic-image-creator:
$> sudo mic-image-creator \

--bootstrap=/opt/meego/ia32-bootstrap \

--format=loop \

--config=meego-core-ia32-1.2.0.ks \

--cache=/opt/meego/repo-cache
Once you have the loop image built, you can chroot into it:
$> sudo mic-chroot meego-core-ia32.img
While in the chroot, you can remove or update existing packages, and even add new ones. When you are done, just type $> exit to leave the chroot.
Note: If you want to use zypper inside the chroot, ensure that you included ‘@MeeGo Base Development’ group of packages in your kickstart file.
7. Convert loop images to LiveUSB images
Once you have your loop image modified as you wanted, you can then convert it to a LiveUSB image so that it can be written to an external USB disk, as in the previous step. Converting between image types is done with the ‘mic-image-convertor‘ tool:
$> sudo mic-image-convertor \

--source-image=meego-core-ia32.img \

--target-format=liveusb
Additional notes
- Be careful with
mic-chroot. - The Meego Image Creation set of tools make a hard use of disk space under
/var/tmp. If you (like me) usually don’t have much space left in your root partition, you’d better symlink that path to a partition without disk space worries. - I’ve found several times that when I try to build new images, the tools tell me that the packages downloaded in the cache are corrupted, and need to be re-downloaded. Just make sure you have a good connection
- Again, visit http://wiki.meego.com/Image_Creation if you want to have further details on these tools.
-
]]>
One of the features supported in Tracker is doing FTS searches for words without considering ‘accents’. Of course, we’re not talking about accent as in the specific pronunciation of words relative to a location or nation. Our ‘unaccenting’ mechanism, as we call it, refers to the process of removing combining diacritical marks from characters, so that users can look for words with or without these marks. Therefore, this ‘unaccenting’ applies not only to diacritics in Latin alphabets, but also to other alphabets like Arabic, Greek, Hebrew or Korean which also have special combining diacritical marks.
In the previous 0.8 stable series of Tracker, the unaccenting mechanism was completely done by the ‘unac’ library. We were not really convinced that unac was a good option in our case, as it involved extra conversions from UTF-8 to UTF-16 and back, and measurements showed that it was one of the most time consuming steps during FTS parsing. In order to improve the situation, and as we already did ourselves some Unicode normalization work before passing the work to unac, we ended up writing our own unaccenting mechanism in Tracker for 0.10.
The method is applied to all our three Unicode-support backends (GNU libunistring, ICU and GLib), and roughly involves just two steps:
- Apply a compatibility decomposition to the word (NFKD normalization).
- Remove all combining diacritical marks, this is, all Unicode points within the following ranges:
- Basic range: [U+0300,U+036F]
- Supplement: [U+1DC0,U+1DFF]
- For Symbols: [U+20D0,U+20FF]
- Half marks: [U+FE20,U+FE2F]
Instead of NFKD, NFD decomposition can also be used in the method, but as the main purpose of the unaccenting is a Full Text Search in Tracker, compatibility of Unicode points is also a desired feature which we could get in the same step.
Looking at an example may explain it easier. Consider the French word “école”, which has a diacritic on top of the first ‘e’ character. This accented ‘e’ character can be encoded in UTF-8 in either a composed or decomposed way:
- (NFC, composed) [0xC3 0xA9] 0x63 0x6F 0x6C 0x65
- (NFD, decomposed) 0x65 [0xCC 0x81] 0x63 0x6F 0x6C 0x65
The UTF-8 encoding of the composed way (NFC or NFKC) will (probably) always need less bytes than the decomposed (NFD or NFKD) counterpart. This is because the accented ‘e’ character will be represented in composed way as a single Unicode point: ‘é’ U+00E9 (UTF-8: [0xC3 0xA9]). In the decomposed way, the same accented ‘e’ character is represented as a base character ‘e’ U+0065 (UTF-8: 0x65) plus a combining mark ‘ ́ ‘ U+0301 (UTF-8: [0xCC 0x81]).
For either of the previous two representations of ‘école’, the removal of combining diacritical marks is as we have already described:
- First, get the word NFKD-normalized (or NFD if point compatibility is not needed):
- (NFC) [0xC3 0xA9] 0x63 0x6F 0x6C 0x65 —>
(NFKD) 0x65 [0xCC 0x81] 0x63 0x6F 0x6C 0x65 - (NFD) 0x65 [0xCC 0x81] 0x63 0x6F 0x6C 0x65 —>
(NFKD) 0x65 [0xCC 0x81] 0x63 0x6F 0x6C 0x65
- (NFC) [0xC3 0xA9] 0x63 0x6F 0x6C 0x65 —>
- Once we have the word decomposed, we can now just walk each unicode point found in the string, and remove those which end up falling into one of the ranges applicable to diacritics. In this case, only the accent on top of the ‘e’ character is found and removed: U+0301 (UTF-8: [0xCC 0x81]):
- (NFKD) 0x65 [0xCC 0x81] 0x63 0x6F 0x6C 0x65 —>
(unaccented) 0x65 0x63 0x6F 0x6C 0x65
- (NFKD) 0x65 [0xCC 0x81] 0x63 0x6F 0x6C 0x65 —>
This new method not only worked perfectly in all the test cases we could think of, it was even much faster than using the unac library (up to 73% faster in the best case, and same speed in more complex cases).
]]>I recently sent a new ‘iridium’ plugin for review upstream, this time for Iridium modems. The plugin was developed using a Iridium 9522B Satellite Transceiver modem connected through RS232, properly handled by ModemManager’s plugin system thanks to the extended RS232 support available in git master. The ‘iridium’ plugin handles these modems as any other GSM modem, even if it has nothing to do with GSM technologies.
Iridium is a constellation of 66 active (plus spares) LEO satellites orbiting at an altitude of 781 km, which gives phone and network coverage to every point in Earth. It was initially thought to be a constellation of 77 satellites, therefore named ‘Iridium’ after the chemical element with atomic number 77. The name didn’t change to ‘Dysprosium‘ when it was redesigned to maintain only 66 active satellites, no wonder why.
Even if the Iridium modems expose a GSM-modem like AT command set, several special things needed to be considered. For example, IP address setup via PPP needed more than the 20s hardcoded in NetworkManager, due to the extreme latency of the satellite network. Therefore, NM was also updated to allow ModemManager plugins to specify a specific ‘IpTimeout’ value.
See my email to the NM mailing list for further information on how to use ModemManager with Iridium support.
Ammonit Measurement GmbH sponsoring some hardware for ModemManager development
In Lanedo we have worked with Ammonit Measurement GmbH to help them with the improvement of ModemManager to handle Wavecom, Cinterion and Iridium modems. The guys at Ammonit were kind enough to sponsor some modems, so that I can spend my free time in developing and improving ModemManager, as well as in testing the modems before stable releases (Dan will probably be happy for that):
- Sierra Wireless Fastrack Xtend FXT009 (GPRS modem, USB, handled by the ‘wavecom’ plugin)
- Cinterion TC63i (GPRS modem, RS232, handled by the ‘cinterion’ plugin)
So, thanks Ammonit!
]]>GNU PDF
After more than 2 months and tons of hours spent in trying not to break the thing (and fixing it when I did break it), I finally finished refactoring the API of the Streams module in GNU PDF in order to use the new error reporting methods. Jose is still reviewing the branch with the changes, so meanwhile I started refactoring the API of the Filesystem module. The Filesystem module is supposed to be just a small layer of abstraction on top of different filesystem backends, but not even the disk backend is fully implemented yet, with some basic pieces still missing. So as part of the API rework, I’ll try to include all missing bits in both the disk and http filesystem backends. Luckily, we got quite a lot of new people coming around the mailing list and providing patches and useful comments for these tasks, so it should be just a matter of time.
ModemManager
Another month hacking ModemManager, working on a new Cinterion plugin. After several changes in the generic code base of the daemon, plugins can now also implement specific features for RS232 modems. The new Cinterion plugin is not available in git master yet, so if you want to give it a try with Cinterion/Siemens USB or RS232 modems, get the following git repo: git://gitorious.org/lanedo/modemmanager.git and checkout the ‘plugin-cinterion’ branch from there.
MeeGo Conference 2011
Lanedo GmbH was one of the sponsors of the MeeGo Conference 2011 in San Francisco, so I had the opportunity to visit the US(of)A again. And I was not the only Spanish guy around: Luis de Bethencourt (Collabora), Iago del Toral (Igalia) and Quim Gil (Nokia) where also in the conference. With Nokia focusing on “that Harmattan thing” as some call it, Intel seems to be the one pushing MeeGo forward (even if not all decisions taken are shared by everyone). It is nice to see that the world didn’t end neither on February 11th (Elopocalypse) nor on May 21st (The Judgment Day, which now seems postponed until October)
Oh, I also turned 30 this past month… I keep on trying to forget it.
]]>Ended up writing a new wavecom plugin for this purpose (Wavecom was bought by Sierra Wireless in 2009), which Dan already merged in the master branch of ModemManager.
The changes in the new wavecom plugin with respect to the generic GSM plugin are:
- AT+CPIN? replies are not ended with OK. A custom regex match was added to support CPIN? replies without OK (also had to hack the generic MM code to handle plugin-provided regular expressions).
- Disabled default power-up comand, AT+CFUN=1. This command does a full software reset in the device, including the USB stack, so the connection is closed. No additional command seems to be needed, as the modem wakes up by default in CFUN=1 (full functionality) mode. Anyway, an additional check was added during initialization so that this mode is ensured.
- Enabled RTS/CTS instead of XOFF/XON flow control.
- Implemented access technology retrieval using AT+WGPRS=9,2 to query network capabilities
- Ensure the modem uses the highest possible mobile class. These modems can be configured to use different mobile classes. For each kind of modem, the best mobile class is the highest one available, in the following order:
- Class A (3G only mode)
- Class B (PS or CS, GPRS/EDGE or GSM)
- Class CG (PS only, GPRS/EDGE)
- Class CC (CS only, GSM)
- Implemented setting and getting allowed mode, for both 2G and 3G based modems (using AT+WWSM command in the 3G case).
- Implemented setting and getting frequency bands for 2G modems (with AT+WMBS) and 3G modems (with AT+WUBS).
Still, the plugin could be improved even more. For example, there is no secondary port handling in the current plugin implementation, which means that signal strength value will not be updated while the modem is in connected state. This kind of modems support setting up virtual ports by multiplexing the serial channel (CMUX), but ModemManager doesn’t handle this yet.
If anyone has one of this Wavecom/SierraWireless modems at home, please test it with latest ModemManager and report any errors found.
]]>Quoting from the Gentoo Linux documentation for ––as–needed [1]:
The –as-needed flag is passed to the GNU linker (GNU ld). The flag tells the linker to link in the produced binary only the libraries containing symbols actually used by the binary itself. This binary can be either a final executable or another library.
In a brief, this means that if you pass unneeded libraries to link to when linking your program, the linker will skip those dependencies when that flag is used.
Example, without ––as–needed
Imagine an example where you want to have a “libb.so” shared library, which needs glib-2.0. You’re lazy, and you don’t want to check whether that library will need gthread-2.0, gio-2.0 or gmodule-2.0, so you just compile and link assuming they are used:
$> gcc `pkg-config --cflags glib-2.0 gthread-2.0 gio-2.0 gmodule-2.0` -c src/libb/b.c -fPIC -DPIC -o b.o


$> gcc -shared b.o `pkg-config --libs glib-2.0 gthread-2.0 gio-2.0 gmodule-2.0` -o libb.so
Where “b.c” just contains:
#include "glib.h"

int

test_b (int number)

{

  g_debug ("Hello world from libb: %d", number);

}
If you now show all unused direct dependencies of libb.so, with ldd, you get all unneeded ones:
$> ldd -u -r libb.so

Unused direct dependencies:

  /usr/lib/libgio-2.0.so.0

  /usr/lib/libgobject-2.0.so.0

  /usr/lib/libgthread-2.0.so.0

  /usr/lib/libgmodule-2.0.so.0

  /lib/librt.so.1

  /lib/libpthread.so.0
Example, with ––as–needed
Lets compile and link now with the ––as–needed linker flag (note that you need to tell gcc to pass the option to the linker, so you’ll need to use “–Wl,––as–needed“):
$> gcc `pkg-config --cflags glib-2.0 gthread-2.0 gio-2.0 gmodule-2.0` -c src/libb/b.c -fPIC -DPIC -o b.o

$> gcc -shared -Wl,--as-needed b.o `pkg-config --libs glib-2.0 gthread-2.0 gio-2.0 gmodule-2.0` -o libb.so
And check the list of unused dependencies:
$> ldd -u -r libb.so

Unused direct dependencies:

  /lib/libpthread.so.0
So it really seems that the ––as–needed linker option worked here and cleaned up all unneeded dependencies, nice!
But wait! Be careful with this statement in the GNU Linker manpage [2]:
This option affects ELF DT_NEEDED tags for dynamic libraries mentioned on the command line after the ––as–needed option.
You should thus, consider ––as–needed not as a global option to the GNU Linker, but as a specific option for specific dependencies. You could for example apply the option only to some of the libraries you’re linking to:
$> gcc -shared b.o -pthread -Wl,--export-dynamic -lgio-2.0 -lgobject-2.0 -Wl,--as-needed -lgthread-2.0 -lgmodule-2.0 -lrt -lglib-2.0 -o libb.so


$> ldd -u -r libb.so

Unused direct dependencies:

  /usr/lib/libgio-2.0.so.0

  /usr/lib/libgobject-2.0.so.0

  /lib/libpthread.so.0
Example, with autotools
You probably don’t compile and link your libraries using plain gcc, and instead use some GNU automagic (autoconf, automake, libtool…). If that is the case, and following the previous example, you would probably use PKG_CHECK_MODULES in your configure.ac:
[configure.ac]

...

PKG_CHECK_MODULES(GLIB,

                  [glib-2.0 gthread-2.0 gmodule-2.0 gio-2.0])
And you’ll probably create your shared library using libtool, so in your Makefile.am you will have:
[Makefile.am]

lib_LTLIBRARIES = lib/libb.la


lib_libb_la_SOURCES = src/libb/b.c

lib_libb_la_CFLAGS = $(GLIB_CFLAGS)

lib_libb_la_LIBADD = $(GLIB_LIBS)
If you compile this autotools project without any additional option, you will end up having “ldd -u -r” report the same unused dependencies as before (gio, gobject, gthread…)
Example, with autotools and ––as–needed
Once you have your autotools project ready, you can try to enable the ––as–needed linker flag passing it in LDFLAGS during configure:
$> ./configure LDFLAGS="-Wl,--as-needed"
This should pass LDFLAGS during the linking operation while running `make’ … and it does pass it, but in a way where it doesn’t have any effect… libtool will call gcc like this:
libtool: link: gcc -shared .libs/lib_libb_la-b.o /usr/lib/libgio-2.0.so /usr/lib/libgobject-2.0.so /usr/lib/libgmodule-2.0.so /usr/lib/libgthread-2.0.so -lrt /usr/lib/libglib-2.0.so -pthread -Wl,--as-needed -pthread -Wl,--export-dynamic -pthread -Wl,-soname -Wl,libb.so.0 -o lib/.libs/libb.so.0.0.0
As you can see, ––as–needed is given after all libraries to link to, which is like doing nothing. If you check for unused dependencies in the generated shared library, you will get:
$> ldd -u -r lib/.libs/libb.so

Unused direct dependencies:

  /usr/lib/libgio-2.0.so.0

  /usr/lib/libgobject-2.0.so.0

  /usr/lib/libgmodule-2.0.so.0

  /usr/lib/libgthread-2.0.so.0

  /lib/librt.so.1

  /lib/libpthread.so.0
Now, what is the correct way then to enable ––as–needed in this project? Said previously that this option shouldn’t be considered global, and thus passing it in LDFLAGS when running configure doesn’t seem to be a good choice.
This issue is an already known bug in GNU Libtool [4], and while some projects patch their ltmain.sh [5], there are already efforts to push a patch upstream [6].
What about ––as–needed when linking programs?
This is a whole different story. Assume we also have a “a.c” program which uses “libb.so”, and which also has all previous glib, gio and friends as dependencies (but doesn’t use them):
[Makefile.am]

bin_PROGRAMS = bin/a


bin_a_SOURCES = src/a/a.c

bin_a_CPPFLAGS = -I$(top_srcdir)/src/libb

bin_a_CFLAGS = $(GLIB_CFLAGS)

bin_a_LDADD = lib/libb.la $(GLIB_LIBS)
We do again try to pass the linker option in LDFLAGS during configure:
$> ./configure LDFLAGS="-Wl,--as-needed"
We check how libtool passes the option when linking:
libtool: link: gcc -pthread -I/usr/include/glib-2.0 -I/usr/lib/glib-2.0/include -g -O2 -Wl,--as-needed -o bin/.libs/a bin_a-a.o -pthread -Wl,--export-dynamic lib/.libs/libb.so /usr/lib/libgio-2.0.so /usr/lib/libgobject-2.0.so /usr/lib/libgmodule-2.0.so /usr/lib/libgthread-2.0.so -lrt /usr/lib/libglib-2.0.so -pthread
In this case, the option is passed before all linking dependencies, so ––as–needed should take effect. We check with ldd the unused dependencies in the generated binary program:
$> ldd -u -r bin/.libs/a

Unused direct dependencies:

  /lib/libpthread.so.0
So, even if we couldn’t tell the linker to remove all unused dependencies from the generated shared libraries, the removal takes place in case of generated programs.
You could arguably say that you don’t need to remove unneeded dependencies on shared libraries that you compile, as the programs linking with your library may really need them. In this example, if a program links to our “libb.so” and the program needs gio libraries, if we didn’t remove the unneeded dependencies in “libb.so”, the program would satisfy the gio dependency directly from “libb.so”. But that is definitely not the way to go, if the program needs gio because it uses some of its symbols, it should explicitly link to it, not assume that “libb.so” will force the dependency.
References:
[1] Gentoo Linux documentation for ––as–needed
[2] ld(1) GNU Linker
[3] Full autotools-based example
[4] GNU libtool bug report for –as-needed failing with libraries
[5] Meego libcontentaction patch and Meego Tracker patch
[6] Debian bug #347650
![]()
We currently have more than 200 registered contributors (50 of them allowed to directly publish new images), more than 9200 images of Jupiter (first one from year 2000) and more than 1800 images of Saturn. Last image received was just from yesterday:

Good news is that not only amateur observers are publishing lots of new images of Giant Planets every day (mainly Jupiter and Saturn), but also that two of the guys in the Planetary Sciences Group also wrote an article about the PVOL system and how it helps on the research of the atmospheres of these planets. The publication is not available online, it seems, so if you want to take a look at it you’ll need to buy the magazine (Spanish only):
“Pequeños telescopios al estudio de los planetas gigantes“, por Jon Legarreta y Ricardo Hueso, AstronomíA, November 2010.
]]>SQLite provides the sqlite3_threadsafe() method to check whether the library was compiled thread-safe, but if your application really needs a thread-safe SQLite, you don’t want to check it during runtime. Thus, I wrote a small m4 macro that you can use in your configure.ac to check it when running ./configure
Just add this file in your m4 directory:
http://es.gnu.org/~aleksander/sqlite/sqlite-threadsafe.m4
And then, in your configure.ac:
AX_SQLITE_THREADSAFE

if test "x$ax_cv_sqlite_threadsafe" != "xyes"; then

  AC_MSG_ERROR([sqlite3 is not compiled thread-safe])

fi
This new release of Trisquel is based on Ubuntu 10.04 “Lucid”, and provides a fully-free distribution of GNU/Linux, running the 100% free Linux-libre 2.6.32 kernel. This release comes in two different primary versions, the “Standard Edition” and the “Mini Edition”.
The “Standard Edition” is meant for standard desktop computers, and includes:
- GNOME 2.30
- OpenOffice.org 3.2
- Gimp 2.6
- ABrowser 3.6.9 (Firefox-based web browser)
The “Mini Edition”, focused on computers with CPU/RAM limitations like Netbooks, includes:
- LXDE 0.5
- Midori 0.2
I’ve been using Trisquel Taranis Standard Edition since some months ago, while it was not even in beta stage; but also wanted to check the look and feel and performance of the Mini version, so I decided to try it in a VM.
The boot menu when installing Trisquel Taranis is really appealing:

Remember that you can try Trisquel GNU/Linux without installing it!
This is the initial look and feel of Trisquel Taranis Mini after installing it and logging in the user account. Note to Windows users, what’s the difference between a fresh Windows installation and a GNU/Linux installation? Just check the image…

Answer: The “welcome” popup in GNU/Linux tells you about new software updates, it doesn’t tell you “Your computer is at risk!!!” because you didn’t install the antivirus or whatever. GNU/Linux doesn’t need an antivirus, and a fresh install is just SECURE, not like a Windows one.
The lightweight Mini edition will use only ~90MB of RAM when booted, which makes it perfect for netbooks and laptops without much memory:

So, if you want to give it a try, Download Trisquel Taranis! And if you like it, you can also Donate to the project, or buy some nice Trisquel Merchandise…
]]>
This is the first version of the Octopus Library, a C library providing advanced file system crawling and monitoring capabilities on top of GLib’s GIO. This library, released under the LGPLv3+, is a full rewrite of some of the features provided by Gnome Tracker‘s libtracker-miner library.
Online documentation is available in:
http://es.gnu.org/~aleksander/octopus/doc
The sources can be downloaded from:
http://es.gnu.org/~aleksander/octopus/releases/octopus-0.0.1.tar.gz
The mdsum is:
cca4e5152e9586abc57d330bad7bee09 octopus-0.0.1.tar.gz
This release is also GPG signed. You can download the signature from:
http://es.gnu.org/~aleksander/octopus/releases/octopus-0.0.1.tar.gz.sig
Some of the features provided by this new library are:
* Recursive crawling on a set of configured directories. For example, it may be configured to recursively crawl /home and /media.
* Directories inside the tree to recurse can be set to be ignored. For example, it may be configured to recursively crawl /home/user but not /home/user/.private.
* Directories may be configured to be crawled, but not recursively. For example, /home may be configured to be non-recursively crawled.
* Any possible combination of crawled, recursively-crawled and ignored is supported, as long as the same path is not added with different options.
* For every file or directory found during the crawling operation, a new event will be notified to configured signal listeners.
* During the filesystem crawling, monitors may be enabled in directories.
* Event merging; so that multiple events of the same type on the same file are all combined in a single event. Event merging will also act on different event types, trying to combine them in the best possible way. For example, if a file is CREATED, UPDATED and then REMOVED no event will be notified.
* Real-Time event notification. Both merged or raw events can be set to be notified in real-time.
* On-Demand iteration of events. If enabled, the monitor will store all received events in a proper order, so that afterwards they can be iterated. You could for example, configure a timeout every 30 minutes to iterate all raw or merged events which happened since the last iteration.
* Proper order of events. When notifying or iterating events the order may not be exactly the same as the one in the original events, but it is assured that if followed all events in the order given by the Octopus Monitor, the result is exactly the same as if followed in the original order.
In the roadmap for next versions:
* Asynchronous API will be available in release 0.0.2.
* A ‘database’ of already crawled directories will be optional, storing mtimes of each found file, so that when the program starts and re-crawls a common directory structure, it will check if the files in the tree changed since the last time crawled. This will be available in release 0.0.3.
Please send bug reports and suggestions to aleksander (at) gnu.org or aleksander (at) lanedo.com
]]>I’ve been lately packaging the latest releases of several programs for Ubuntu Lucid (or Trisquel Taranis), mainly due to our bleeding-edge requirements in Tracker. You can find them in my personal PPAs in Launchpad:
- SQLite 3.7.1 (enabling Write-Ahead logging):
https://launchpad.net/~aleksander-m/+archive/sqlite3 - dbus 1.3.1 (enabling file descriptor passing):
https://launchpad.net/~aleksander-m/+archive/dbus-development
The real packaging work was done by the Debian guys, of course (kudos to them!); I just prepared the necessary bits to make them get compiled as Ubuntu packages.
GNU Psychosynth
In addition to this, during the last GNU Hackers Meeting in The Hague, I also changed the Ubuntu packaging of GNU Psychosynth, the most entertaining music synthesizer I’ve ever played with. The latest packages are now available in the GNU Psychosynth Team’s PPA, and right now only Ubuntu versions >= Lucid will be supported (as they no longer require Andrew Fenn’s Ogre Development PPA).
More information in: http://www.psychosynth.com/index.php/Ubuntu_Repository
Oh, and Juan Pedro was able to do another demonstration of GNU Psychosynth during the meeting, which got recorded, so that you can understand what this great program does… watch it and enjoy!
http://audio-video.gnu.org/video/ghm2010/GNU_Psycosynth.ogv

This last week, the german online magazine ScienceGarden contacted me for exactly the same reason, but they chose different pictures:


So, if any other person wants to publish more images of Aspen, feel free, and a reference is always appreciated!
]]>It was great to work with everyone in Azetti Networks. Keep Jardin and Waterfall alive!
I also hacked a new feature for Gnome Devhelp, the possibility of enabling or disabling specific books, which was integrated into git master last week, and will make it for the 3.0 release.
Oh, and I’ll be attending both the GHM and GUADEC in The Hague!
]]>Now, I can listen to it from anywhere using Gnome’s Rhythmbox and the Shoutcast live stream. Just add a new radio station in Rhythmbox with this URL:
http://yp.shoutcast.com/sbin/tunein-station.pls?id=77647
And enjoy!
]]>The PDF is available in the following URL:
http://es.gnu.org/~aleksander/valgrind/valgrind-memcheck.pdf
And the simple C tester to generate each type of memory leak (cases 1 to 9 in the Valgrind Manual) is available here:
http://es.gnu.org/~aleksander/valgrind/valgrind-memcheck.c
Comments, fixes, whatever… highly appreciated. You could even send me a diff file to the original LaTeX source, available in:
http://es.gnu.org/~aleksander/valgrind/valgrind-memcheck.tex
The document is licensed under the GFDL 1.3, and the tester is published in the public domain.
]]>But here is what it came up after a couple of hours… (click image to see it bigger).

The Pirate Banana
Licensed under the Creative Commons Attribution-Share Alike 3.0 License
]]>See you there!
]]>(From Wikipedia) The Knight’s Tour is a mathematical problem involving a knight on a chessboard. The knight is placed on the empty board and, moving according to the rules of chess, must visit each square exactly once. A knight’s tour is called a closed tour if the knight ends on a square attacking the square from which it began (so that it may tour the board again immediately with the same path). Otherwise the tour is open.
Just developed my brute-force algorithm implementation, using GLib and based on a simple recursive function.
As an example of result, this is the open Knight’s Tour found by the algorithm in a 5×5 board, starting from position [0,0]:
[0,0][1,2][2,4][4,3][3,1][1,0][2,2][0,3][1,1][3,0][4,2][3,4][1,3][0,1][2,0][4,1][3,3][1,4][0,2][2,1][4,0][3,2][4,4][2,3][0,4]
And this one, the first Knight’s Tour found by the algorithm in a 8×8 board, starting from position [0,0]:
[0,0][1,2][2,4][3,6][5,7][7,6][6,4][7,2][6,0][4,1][5,3][6,5][7,7][5,6][7,5][6,3][7,1][5,0][6,2][7,4][5,5][6,7][4,6][5,4][6,6][4,5][3,3][5,2][7,3][6,1][4,0][2,1][4,2][3,0][1,1][0,3][2,2][0,1][2,0][3,2][4,4][2,3][0,4][1,6][3,7][2,5][1,7][0,5][1,3][3,4][1,5][0,7][2,6][4,7][3,5][2,7][0,6][1,4][0,2][1,0][3,1][4,3][5,1][7,0]
Both examples above show open Knight’s Tours.
]]>You can download the source LaTeX template here!
And get a PDF using GNU Texinfo..
$> texi2pdf book_template.tex
Resulting PDF can be seen here!
]]>]]>Just wanted to tell you that you are sooooo wrong in most of the things
you say… and that it is very very funny how you say you can remove all
GNU apps from several distros.Did you remove GNU coreutils? Then how can you for example do a simple
“ls” in the command line?Oh, and do you know what the “G” means in GNOME?
http://en.wikipedia.org/wiki/GNOMEGlib? GTK+? All GNU packages.
And you’re part of an Ubuntu LoCo team —> What about Bazaar, widely
used in Ubuntu, as it is written by Canonical people… Also a GNU
package!!
https://lists.ubuntu.com/archives/bazaar-announce/2008-February/000135.htmlTell me now what you get if you remove all GNU packages from Ubuntu (if
theoretically possible). Including GLib, GTK+ (and of course all their
dependencies); including coreutils, bash, gdb, gcc… including the
glibc (GNU C library)!Now what you will probably get?
Probably *nothing*. Even the Linux kernel depends on the glibc.
Now, next time, I would suggest you just read a little bit more and
understand what GNU means, before writing such wrong post.Check which is the whole list of GNU packages here:
http://directory.fsf.org/GNU
Now, after re-reading carefully the GLib Reference Manual, I see that it is quite clearly explained the difference between g_source_destroy() and g_source_unref(). So the typical suggestion is still the best one: RTFM!!
In our applications, we usually need to attach timeout operations to the context of an specific thread, not to the main thread context. Thus, we cannot use g_timeout_add() or the pretty new g_timeout_add_seconds().
For example, you could create a GThreadPool, and in the function to be executed in each thread, you could create a specific context for the thread, plus a main loop in the context:
    /* Create a GLib Main Context */
    context = g_main_context_new();

    /* Create a Main Loop in the context*/
    main_loop = g_main_loop_new(context,
                                FALSE);
Once you have a new context and main loop, you can just create a new GSource, and attach it to the main loop. As soon as you create the GSource, its reference count is 1, and as soon as you attach it to the main loop, its reference count will be 2.
    /* Create new timeout source to be called
     * every 5 seconds.
     * Reference count of source is 1 once created */
    source = g_timeout_source_new(TIMEOUT_MSECS);

    /* Set callback to be called in each timeout */
    g_source_set_callback(source,
                          (GSourceFunc)__timeout_func,
                          main_loop,
                          NULL);

    /* Attach the GSource in the GMainContext.
     * Reference count of source is 2 after this call */
    g_source_attach(source,
                    context);
Of, course, you will be now running the main loop:
    /* Run the main loop, until it is stopped */
    g_main_loop_run(main_loop);
The key now is how to destroy the GSource properly. When calling g_source_destroy(), you are doing 2 things: first, telling the main loop to forget about the GSource; and second, decrementing the reference count of the GSource. Then, you still need to call g_source_unref() to fully decrement the reference counter so that the GSource is disposed.
    /* We did an attach() with the GSource, so we need to
     * destroy() it */
    g_source_destroy(source);

    /* We need to unref() the GSource to end the last reference
     * we got */
    g_source_unref(source);
To end the example, once the main loop is stopped, you will also need to properly dispose the GMainContext and GMainLoop objects:
    /* The main loop should be destroyed before the context */
    g_main_loop_unref(main_loop);

    /* Finally, destroy the context */
    g_main_context_unref(context);
This is just one way of keeping the GSource references properly managed:
- You get one reference when you create the GSource
- You get a new reference when you attach it in the context
- You release one reference when you destroy it from the context
- You release last reference when you unref the final one
Of course, you could also choose to avoid storing the “extra” reference, and leave alive only the one inside the main context:
- You get one reference when you create the GSource
- You get a new reference when you attach it in the context
- You release one reference when you unref the the GSource —> Now, the only reference is inside the GMainContext
- You release last reference when you destroy it from the context
You can check this simple example in the following program I prepared, released into public domain:
http://es.gnu.org/~aleksander/glib/test-gsource.c
Hope it helps someone out there to fully understand the difference between g_source_destroy() and g_source_unref().
As last comment… I would really rename the following functions in the library, so that no one else is confused with the “unref” and “destroy” terms:
- Rename g_source_attach() to g_source_attach_to_context()
- Rename g_source_destroy() to g_source_destroy_from_context()
The main reason is that these two operations actually act on the GMainContext, while the name of the functions do not suggest that fact.
]]>select() to poll a given file descriptor. In El Jardin library, we used to use select() to see if incoming data was available for reading in a given socket. Using select() allows to have a maximum wait time so that the execution in the thread is not blocked until the data arrives. The code was just something like this (assuming “fd” an integer specifying the file descriptor number in the process):
fd_set rset;
struct timeval tv;

/* Initialize the array of flags, specifying the
 * FD we want to monitor */
FD_ZERO(&rset);
FD_SET(fd, &rset);

/* Set max wait time to 1 second */
tv.tv_sec = 1;
tv_tv_usec = 0;

/* Run select! */
if(select(fd+1, &rset, NULL, NULL, &tv) < 0)
{
    /* Check errno */
}
You may see this kind of code in lots of examples of usage for select(). But please, read the constraints carefully also! Some things you need to understand:
fd_setis an array of bits, ofFD_SETSIZEelements.FD_ZEROis a macro clearing (setting to ‘0’ all bits in thefd_setarray).FD_SETis a macro setting to ‘1’ the bit for the specific file descriptor you wantselect()to check.
And the most important thing once you understood the previous ones:
FD_SETSIZEis usually defined to 1024 in GNU/Linux systems
This clearly means that the maximum file descriptor number to be used in select() must be 1024.
The GNU C Library documentation actually explains it perfectly:
The value of this macro is the maximum number of file descriptors
that afd_setobject can hold information about. On systems with
a fixed maximum number,FD_SETSIZEis at least that number. On
some systems, including GNU, there is no absolute limit on the
number of descriptors open, but this macro still has a constant
value which controls the number of bits in anfd_set; if you get
a file descriptor with a value as high asFD_SETSIZE, you cannot
put that descriptor into anfd_set.
Now, if you actually do what the GNU C Library documentation tells you not to do (using a FD with value higher than 1024 in this case), what you get 100% sure is a stack corruption. Why?
- In the above example, the
fd_setarray is in the stack FD_SETmacro apparently doesn’t know about theFD_SETSIZEvalue, so even if you pass a FD greater than 1024, it will actually set to “1” the corresponding bit in thefd_setarray of bits, which actually is OUTSIDE the array. Thus, corrupting the stack.
Did it happen this to you?
- In our case, we first noticed using the GNU Debugger that some pointers in the stack magically changed their value, and only in a single bit (new address was previous address plus a multiple of 2). Also, that bit was different in different core files analyzed (depending on the FD number being used).
- In some other cases, the stack was so corrupted that GDB was not even able of showing a proper backtrace
But anyway, this problem was not only because of an improper use of select(). We also discovered a FD leak (socket open, never closed) which was making the FD number go up and up until being greater than 1024 after some hours. So best suggestion in this case: use Valgrind and track FDs:
# valgrind --track-fds=yes ./my-program
In El Jardin, we solved it (LP#497570) avoiding the use of select(), and using poll() instead, which doesn’t have this hard-coded limit of 1024. Other options are using epoll(), or defining your own FD_SETSIZE value after having included the system headers.
Go download it!
http://www.gnewsense.org/
In order to have all components working perfectly, Wireless networking among them, I needed to download latest linux-libre kernel. This kernel doesn’t ship any proprietary type of driver, not even those trying to seem free software but hiding the real source code into unintelligible hex characters, which are the ones GPL-ed.
Free your server!!
]]>————–
Por fin, Ya.Com no me da servicio de internet. Y digo por fin porque llevaba desde comienzos de Enero con un servicio de ADSL pésimo. Un resumen (casi) corto:
* Comienzos de Enero: Mi ADSL de repente se comporta de forma extraña. El enlace cae constantemente, intenta sincronizar a velocidades altas (tenía contrato hasta 20 Mbps), y vuelve a caer, con lo que intenta sincronizar a menor velocidad. Y así, hasta que el enlace cae a 300/400 Kbps (a veces hasta 1Mbps como máximo).
* Como mi contrato es de 20Mbps, el mínimo por ley que te deben garantizar es el 10%, esto es, 2Mbps.
* Llamo al servicio de Ya.Com. Después de 1 hora de charla, el técnico llega a la conclusión de que el problema es del router, que hay que comprar uno nuevo.
* Como el router originalmente era el que me mandó Ya.Com, intento que Ya.Com me mande uno nuevo, ya que ese era defectuoso, según el técnico. El técnico me asegura que no será ningún problema que me den un router nuevo.
* Tras 4 días esperando a que alguien se decida a llamarme, llamo de nuevo. No hay router nuevo. Sólo me lo dan con un contrato de permanencia de 12 meses.
* Llamo al teléfono de bajas de Ya.Com y digo que me quiero dar de baja. Oh, sorpresa, me ofrecen 6 meses a mitad de precio si me quedo, y que me pasarán con un técnico de nivel 2. Consejo: si alguna vez os dicen eso, daros por engañados. Después de minutos de espera con una música horrible, el técnico te descuelga, dice cuatro palabras y la comunicación se corta. Esto es más que común. En tres meses de llamadas me ha pasado día sí y día también.
* Consiguen convencerme con lo de la oferta a mitad de precio y el técnico de nivel 2. Se ve que si no les pasan un técnico de nivel 2 al momento a la gente de bajas, te dicen que te llaman ellos y que te pasan al técnico. Mira, esto sí es verdad. La gente del departamento de bajas te llama, y te dice que te pasa con el técnico de nivel 2. Y hasta ahi. Pasan minutos de música y cuando el técnico de nivel 2 te coge, dice 4 palabras y te cuelga. Oh, sorpresa.
* Como el servicio ténico era imposible, decidí comprar un router nuevo. El primer técnico que me atendió estaba bastante seguro de que era el problema… así que me compré uno nuevo (más de 100 euros), lo enchufo, lo configuro y… voilá! Pasa lo mismo… intentos de sincronización de ADSL hasta que se queda estable en menos de 1Mbps…
* Más llamadas al servicio técnico. Que mirarán en la central y me llaman. Que harán una prueba conjunta con Telefónica (la que me daba la línea) y me llaman…
* Más llamadas al servicio técnico, me dicen que no ven ningún problema en la central, y que confirman que la sincronización de ADSL se reintenta hasta que queda estable por debajo de 1Mbps. Si configuro el router para no utilizar ADSL2+, sino sólo ADSL2 es más estable, pero la velocidad no supera 1Mbps.
* Cambio cables de telefonía. Desde enero el router estaba directamente empalmado al PTR de Telefónica, para asegurarnos que no era la instalación interna.
* Finalmente me llama un técnico muy agradable. Mira oye, que va a ser problema del PTR de Telefónica, que llame a Telefónica para que me lo cambien y que no me cobrarán nada. Que en Ya.Com han hecho ya todo todo lo que estaba en sus manos, y que ellos no pueden hacer más, que es el PTR fijo. Lo que nos faltaba, vamos. Se ve que les dan un curso de forwardear marrones a los técnicos de Ya.Com.
* Telefónica viene y me planta un PTR nuevo. Y, oh sorpresa, sigue pasando lo mismo…
* Después de alguna semana más, me llama una técnica y me planta lo siguiente: Que la solución para mi problema es que cambie mi contrato de 20Mbps a 10Mbps, y entonces se soluciona todo. Parece razonable? No. Recordemos que por ley te deben garantizar el 10% de lo contratado. Con mi contrato de 20Mbps estaban fastidiados porque el 10% eran 2Mbps, y desde Enero mi conexión no superaba 1Mbps. No tiene sentido que por un simple cambio de contrato, los problemas en la línea se solucionen. Yo le dije que si esa era la solución, primero me diesen 10Mbps, que yo los vea, y luego me cambiaba de contrato. Insistía que eso no podía ser, que primero era el cambio de contrato (algo absurdo). O sea, que me cambio a 10Mbps y se me solucionan los problemas? Mejor dicho, se les solucionan a ellos! Si paso a 10Mbps de contrato, por ley me tienen que garantizar 1Mbps, cosa que sí tenía! Tócate los pies!!! Si me llego a cambiar de contrato, ellos ya se lavan las manos con mi problema.
* Relleno el formulario para darme de baja en la web de Ya.Com, espero 24h, y llamo al departamento de bajas para confirmarlo (después de 3 meses estos pasos ya los tenía claros).
* Hoy, más de 3 meses después de empezar con los problemas, y tras decenas de llamadas, he visto que la luz de sincronización en el router estaba fija, y la de datos apagada. El router de Jazztel lo tienen todavía en Seur, así que como ya tengo uno en casa, he llamado a Jazztel para que me den los datos de conexión (PPPoE en este caso necesita usuario y password, no como en Ya.Com).
* Después de 5 minutos con el servicio técnico de Jazztel, ya tengo internet. Y no sólo eso… la conexión de Ya.Com, en su mejor momento me sincronizaba a 13Mbps… la conexión de Jazztel me sincroniza a 20Mbps! Estupendo vamos.
En resumen: Si dudas entre Ya.Com y Jazztel… mi experiencia es que Jazztel mejor… (por ahora! cruzo dedos…)
]]>In most GNU/Linux systems (all of those I personally have used, at least), core dump files generated after an uncaught signal in a process (as a SIGSEGV or SIGQUIT), are generated in the base directory where the program was executed, and named as “core” or “core.PID”.
For example:
$> cd /home/user

$> ulimit -c unlimited

$> kill -s SIGSEGV $$
This will trigger a segmentation fault in your current shell (you probably guessed it after seeing that the shell session where you executed it was closed), and generate a core file in:
/home/user/core
Now… is it possible to change where that file is generated by default instead of the current directory? And is it possible to change the name of that generated file? The answer is YES! to both. Let’s see how we can get this.
2. The Core Pattern in Kernel
Since some years ago, the kernel configuration includes a file named “core_pattern”:
/proc/sys/kernel/core_pattern
In my system, that file contains just this single word:
core
As expected, this pattern shows how the core file will be generated. Two things can be understood from the previous line: The filename of the core dump file generated will be “core”; and second, the current directory will be used to store it (as the path specified is completely relative to the current directory).
Now, if we change the contents of that file… (as root, of course)
$> mkdir -p /tmp/cores

$> chmod a+rwx /tmp/cores

$> echo "/tmp/cores/core.%e.%p.%h.%t" > /proc/sys/kernel/core_pattern
And we run the same as before:
$> cd /home/user

$> ulimit -c unlimited

$> $> kill -s SIGSEGV $$
We get… voilá!
/tmp/cores/core.bash.8539.drehbahn-mbp.1236975953
Not only the program name (“bash“) or the PID (“8539“), but also the hostname (“drehbahn-mbp“) and the unix time (“1236975953“) are appended in the name of the core file!! And of course, it is stored in the absolute path we specified (“/tmp/cores/“).
You can use the following pattern elements in the core_pattern file:
%p:       pid

%:   '%' is dropped

%%:       output one '%'

%u:       uid

%g:       gid

%s:       signal number

%t:       UNIX time of dump

%h:       hostname

%e:       executable filename

%: both are dropped
Isn’t is great?! Imagine that you have a cluster of machines and you want to use a NFS directory to store all core files from all the nodes. You will be able to detect which node generated the core file (with the hostname), which program generated it (with the program name), and also when did it happen (with the unix time).
3. Configure it forever
The changes done before are only applicable until the next reboot. In order to make the change in all future reboots, you will need to add the following in “/etc/sysctl.conf“:
# Own core file pattern...

kernel.core_pattern=/tmp/cores/core.%e.%p.%h.%t
sysctl.conf is the file controlling every configuration under /proc/sys
]]>
auto lo

iface lo inet loopback


iface wlan0 inet dhcp

wireless-key s:your_f****_password_here

wireless-essid your_f****_essid_here
I wanted the same in my home Fedora 10 server, but as you already may know, Fedora 10 is based on Red Hat, so forget about the debian-like network configuration, and welcome to the system-config-* scripts!
You can edit your system-level network configuration, executing, as root:
$> system-config-network
(or clicking on System->Administration->Network)
In the Wireless Settings tab you should select “Managed” mode, and I also specified the correct SSID of my home wireless network. Be really careful if adding the WEP key in HEX, as you must prepend “0x” to the whole key or it won’t work.
I thought that this would be enough, but nope. NetworkManager is launched by default at system startup, not the /etc/init.d/network script, which is disabled by default. You just need to disable NetworkManager, and enable the standard “network” script in order to have the system-level wireless configuration, executing, as root:
$> service NetworkManager stop

$> chkconfig --level 35 NetworkManager off

$> service network start

$> chkconfig --level 35 network on
I really like chkconfig, but not sure if the “service” command is a needed replacement of executing the script from /etc/init.d directly.
]]>Atheros Communications Inc. AR242x 802.11abg Wireless PCI Express Adapter
Other distros I have tried in the Asus PX24 are:
* Ubuntu 8.04 Hardy Heron [Doesn’t work]
* OpenSUSE-11.1-GNOME [Doesn’t work]
* Debian 5.0 Lenny [Doesn’t work]
* Ubuntu 9.04 Jaunty Jackalope Alpha-5 [Works]
I was a Kubuntu fan until release 8.10, which completely destroyed the usability and stability of the distribution when shipping a non-stable version of KDE4. Switched then back to Gnome in Ubuntu 8.10, far more stable than the KDE counterpart. So now that I know that next stable version of Ubuntu also makes the Wireless networking work out-of-the-box, I thought of changing the PX24 back to Ubuntu.
But I won’t… I want to try yum, RH’s system-config-whatever scripts, SELinux… all those things that are not available in Ubuntu.
]]>Save a tree: Think before you print this email
Usually, that text is included along with some big JPEG image included within an HTML-formatted colourful email, which of course, takes its time to render in my email desktop application or even worse, shown as attached image in GMail interface.
Now I am thinking in adding this other text after my signature in the emails:
Save my time & bandwidth: Think before you reply to this email in HTML
This program is supposed to work in the following Nokia phones: Nokia E50, E60, E61, E61i, E62, E66, E70, E71, E90 Communicator, N71, N73, N77, N75, N76, N80, N91, N91 8GB, N92, N93, N95, 3250, 5500 Sport, 5700 XpressMusic, and 6290.
I downloaded it and installed, and voilà, now I have my phone’s address book (only that in the SIM card, anyway), accessible from the controls in my car! So even if the N78 is not in the list provided in Nokia’s website, I can confirm it works nice.
]]>A couple of weeks ago, ARTE was released licensed under the GPLv3+ license, fully copyrighted by Panda Security S.L..
I now started to improve ARTE, with better documentation and based on GLib library. ARTE is hosted in SourceForge, and you can download the first stable release here.
]]>One day, you find yourself in a holiday trip flying in a big A380, and both main pilots get ill and can’t pilot the aircraft. You are an experienced pilot of small aeroplanes, so you decide to pilot the huge A380 yourself.
Now, what do you do?
- Ask for help to the people in the airport to guide you with the aeroplane details and how to pilot it
- RTFM, even if you know it may take some time to learn it
- Fuck everything! You are a pilot! You have done it tons of times! This big A380 shouldn’t be too different, right?
Oh, alright, you chose last option, hum? Then, as it is normal, your experience with the small aeroplanes has nothing to do with the A380. Even if at the end the result is the same (an aeroplane flies), they are different in nature. Engines are different, power is different, size is different, everything is different. So the plane starts to go down, and you continue trying different things… you press this button, then that one, oh shit… it’s going down… then you push that lever, nothing, oh maybe that red button there…
Shit it doesn’t work! Do I have a manual? Oh yes, there it is… ok… where is the chapter “how to start the propellers”? Humm.. where is it? Humm… Can’t find it!!! How is this possible! There is no chapter where it explains how to start the propellers!!?
Nice, so you realized it doesn’t work the way you thought it should (A380 doesn’t have propellers, among others). Again, what do you do?
- Ask for help to the people in the airport to guide you with the aeroplane details and how to pilot it
- RTFM carefully, not only looking for the chapter explaining how to start the propellers, as you already noticed that maybe the A380 doesn’t have propellers
- Blame every engineer who built the aircraft
- Blame not only every engineer who built it, but also the one who wrote the manual
- Blame every engineer who built it, the one who wrote the manual AND also say that your small aeroplane is also much much better than this A380 you don’t understand
How will this end? Of course, not well.
What’s the moral in this? If you don’t know how to do something, even if you think you know it, better ask someone or read the manual carefully.
Now, why this post? Because of this one: Having fun with bzr
And yes I know that Git is not a small aeroplane and neither GNU Bazaar a huge A380. But no one can say that Git is easier to understand than Bazaar. You just need to understand that even if both are Distributed VCS, their way to work is different, their interface is different… in a brief, they are completely different VCS.
P.S.: The command you were looking for so desperately was “branch”, neither “get” nor “waldo” nor any other thing. A380 doesn’t have propellers! Don’t look for how to start them in the manual!
P.P.S.: Also, the URL of the repository you were using was probably not the good one: http://www.mega-nerd.com/Bzr/libsndfile-pub/ doesn’t exist (404 Not Found). A good choice would have been to go to an upper directory and look for the existing URLs… http://www.mega-nerd.com/Bzr
]]>Debian GNU/Linux [3] uses a complete different approach. There are always 3 main version of Debian available at any time: stable, testing and unstable [4]. The stable version contains what the developers consider is a real stable version. The testing version contains usually latest releases of the upstream packages, and this version will be the one converting itself into stable in the next step. The unstable release contains all the testing-pending packages submitted by the Debian developers. In this approach, you always know that stability is assured in every stable release of Debian.

Lenny, from Toy Story
This is the main reason why a new stable version of Debian, like the Debian 5.0 codenamed lenny [5] is always a special event: it happens only when it must happen, and never before.
References:
]]>There are several ways to achieve this, and one of them is the recommended one in GObject’s tutorial [1], which uses the G_TYPE_INSTANCE_GET_PRIVATE [2] macro to get the glib-instantiated private structure. This private structure, allocated for each instance of the object, is specified in the Class initialization function with g_type_class_add_private(), and allocated every time a new GObject instance is created.
Usually, you will have a macro for your specific GObject which will call G_TYPE_INSTANCE_GET_PRIVATE:
#define MY_GOBJECT_GET_PRIVATE(o) \
    (G_TYPE_INSTANCE_GET_PRIVATE((o), MY_GOBJECT_TYPE, MyGObjectPrivate))
This seems a good way of doing it, and quite simple to use. Glib will take care of allocating and deallocating that private structure for us… so why avoid it?
Well… if you ever tried to run Valgrind’s callgrind tool to measure how much time your program spends in a given function, you will see the reason. Other people already did that and published results on the web, so go and check them [3] or just try it with your application:
$> valgrind --tool=callgrind /usr/local/bin/your_program</span
Now, an easy way of getting the same result, with a little bit more of work but achieving the best performance, is just using an opaque pointer in the GObject’s public structure and define, allocate and deallocate it yourself in the source file (so also can be treated as private, as the users of the API don’t know the internals of the structure).
These are the basic changes you need to do to avoid calling G_TYPE_INSTANCE_GET_PRIVATE():
**** In the HEADER of the GObject, when the struct defining the Object is specified, add a “gpointer priv” variable.
struct _MyGObject
{
    /** Parent object */
    GObject parent;
    /** Private data pointer */
    gpointer priv;
}
**** Then, in the SOURCE of the GObject, modify the GET_PRIVATE macro so that instead of doing the standard GObject lookup for the correct type, we just get the opaque “priv” pointer defined in the header, and we cast it to the correct type.
#define MY_GOBJECT_GET_PRIVATE(o) \
    ((MyGObjectPrivate *)((MY_GOBJECT(o))->priv))
**** As we won’t use the automatic allocation of the Private data structure, we need to allocate it ourselves in the _init() function.
static void
my_gobject_init(MyGObject *self)
{
    /* Allocate Private data structure */
    (MY_GOBJECT(self))->priv = \
        (MyGObjectPrivate *) g_malloc0(sizeof(MyGObjectPrivate));
    /* If correctly allocated, initialize parameters */
    if((MY_GOBJECT(self))->priv != NULL)
    {
        MyGObjectPrivate *priv = MY_GOBJECT_GET_PRIVATE(self);
        /* Initialize private data, if any */
    }
}
**** And finally, the last change is just de-allocating the structure when no more needed in the _dispose() function.
static void
my_gobject_dispose(GObject *object)
{
    MyGObject *self = (MyGObject *)object;
    MyGObjectPrivate *priv = MY_GOBJECT_GET_PRIVATE(self);
    /* Check if not NULL! To avoid calling dispose multiple times */
    if(priv != NULL)
    {
        /* Deallocate contents of the private data, if any */
        /* Deallocate private data structure */
        g_free(priv);
        /* And finally set the opaque pointer back to NULL, so that
         *  we don't deallocate it twice. */
        (MY_GOBJECT(self))->priv = NULL;
    }
}
References:
]]>So happy 1234567890s!
You can use the `date’ command from GNU coreutils to know when will it happen in your specific timezone:
$> date -d @1234567890]]>
GLib 2.19.1 is now available for download at:
ftp://ftp.gtk.org/pub/glib/2.19/
http://download.gnome.org/sources/glib/2.19/glib-2.19.1.tar.bz2 md5sum: 9309139a515408d9c99558d051c18302
glib-2.19.1.tar.gz md5sum: eab90f5965f3d004b8787989be5cca85This is the second development release leading up to GLib 2.20.
It’s great they include the changelog with fixed bugs:
* Bugs fixed:
562538 GObject interface tutorial shouldn’t finalise with
“Please forget everything”
This one is great (among others, including multiple mem-leaks fixed).
Until this last release, the GObject tutorial had the following comment at the end of the “Non-instantiable classed types: interfaces” section:
“Now that you have read this section, you can forget about it. Please, forget it as soon as possible. “
What I am not sure about is: did they remove it because now interfaces are great? or just to skip publishing the idea that even GObject developers think that interfaces suck? Who knows…
Previous documentation:
http://library.gnome.org/devel/gobject/2.18/gtype-non-instantiable-classed.html
Latest documentation:
http://library.gnome.org/devel/gobject/unstable/gtype-non-instantiable-classed.html

Broken Windows in new PC
I was looking for a new PC to be used as a server at home (running GNU/Linux, of course), when I discovered this nice Packard Bell laptop with pre-installed and pre-broken Windows.
This is really nice. Why wait to break the OS yourself when you can already buy it broken? And it’s only 699€! I want three of this!
]]>I made a simple test to see how well or bad it works, with definitely lost and still reachable memory leaks. The test goes as follows:
#include <stdio.h>

#include <string.h>

/* Global string, still-reachable */

static char *global_str;

int main(int argc, char **argv)

{

  /* Function-local string,

   *  definitely-lost */

  char *str = NULL;

  /* These are 10+1 bytes leaked */

  str = strdup("1234567890");

  /* These are 15+1 bytes leaked */

  global_str = strdup("123456789012345");

  return 0;

}
We compile it…
$> gcc -o test test.c
Now, let’s see if this valgrind port catches our memory leaks.
$> valgrind --show-reachable=yes --leak-check=full --leak-resolution=high ./test
Well, valgrind runs and we start checking its output:
==13340== LEAK SUMMARY:

==13340== definitely lost: 11 bytes in 1 blocks.

==13340== possibly lost: 0 bytes in 0 blocks.

==13340== still reachable: 316 bytes in 8 blocks.

==13340== suppressed: 0 bytes in 0 blocks.
We were only expecting 11 bytes definitely lost (local-function pointer) and 16 bytes still reachable (global pointer), but we have lots more still reachable. Let’s see the detailed results:
==13340== ERROR

==13340== 11 bytes in 1 blocks are definitely lost in loss record 1 of 4

==13340==    at 0x22E53: malloc+99 (in /usr/local/lib/valgrind/x86-darwin/vgpreload_memcheck.so)

==13340==    by 0x21A3D1: strdup+33 (in /usr/lib/libSystem.B.dylib)

==13340==    by 0x1FBB: main+33 (in ./test)

==13340==

==13340== ERROR

==13340== 16 bytes in 1 blocks are still reachable in loss record 2 of 4

==13340==    at 0x22E53: malloc+99 (in /usr/local/lib/valgrind/x86-darwin/vgpreload_memcheck.so)

==13340==    by 0x21A3D1: strdup+33 (in /usr/lib/libSystem.B.dylib)

==13340==    by 0x1FCC: main+50 (in ./test)
Ok, here are our memory leaks. Let’s see what is the other stuff.
==13340== ERROR

==13340== 60 bytes in 1 blocks are still reachable in loss record 3 of 4

==13340==    at 0x22E53: malloc+99 (in /usr/local/lib/valgrind/x86-darwin/vgpreload_memcheck.so)

==13340==    by 0x1F7E89: get_or_create_key_element+157 (in /usr/lib/libSystem.B.dylib)

==13340==    by 0x1F7DBB: _keymgr_get_and_lock_processwide_ptr_2+21 (in /usr/lib/libSystem.B.dylib)

(.....)

==13340== ERROR

==13340== 240 bytes in 6 blocks are still reachable in loss record 4 of 4

==13340==    at 0x24DD9: calloc+105 (in /usr/local/lib/valgrind/x86-darwin/vgpreload_memcheck.so)

==13340==    by 0x1F79D9: dwarf2_unwind_dyld_add_image_hook+40 (in /usr/lib/libSystem.B.dylib)

==13340==    by 0x8FE03D61: dyld::registerAddCallback(void (*)(mach_header const*, long))+145 (in /usr/lib/dyld)

(.....)
As expected (Greg already warned about it) we are getting some leak reports of system libraries, as being still reachable. The “still reachable” means that when the program ended some allocations were done previously using pointers that are ‘global’ to the program, so still reachable when program ended. In other words, valgrind found pointers to allocated memory in the context when the program ended, and the only context available in that time is the global one. All the other contexts (different functions called, even main()) dissappear when the program ends, and pointers declared in those functions which are used to allocate memory are the “definitely lost” ones.
Well, I would say that there is still work to be done, but I don’t see having these system library allocation leak reports a real problem. Once you have linked your programs against Glib, you will get used to see this kind of error reports, but multiplied by 1000. Glib does lots of memory allocations in g_type_init() that are not deallocated with a g_type_deinit() (there is no such function), so they are deallocated by the OS when the program ends. To deal with the ones from Glib, it’s usual to skip using
leak-resolution=high and use Valgrind suppression files.
Probably these reported errors are not comparable to the ones from Glib, but the way to deal with them should be really similar. So, good job Greg! and let’s see if this port can be improved until it’s completely included in Valgrind sources.
]]>I already have a dual boot in my Mac Book Pro, with Kubuntu GNU/Linux available in a 15GB partition. When I installed it, it was basically because most of the programs I was using for development were not available in Mac OS X (valgrind, electric fence, meld, those are essential!). Then, I realized that I was going back again to the years when I had a dual boot with Windows XP and GNU/Linux. In those years, I needed Windows XP to play games, and for nothing else. So here I am again in th same situation. But… wait… the question is… why do I need Mac OS X now?
This is the list of programs I normally use which are available in both Mac OS X and GNU/Linux:
- GNU emacs
- GNU compiler collection (gcc)
- GNU debugger (gdb)
- Mozilla Firefox
- Mozilla Thunderbird
- VLC
- GNU image manipulation program (gimp)
- CVS, Subversion & GNU Bazaar
- OpenVPN
- glib
I also use other programs in Mac OS X which have a perfect replacement in GNU/Linux:
- iTunes -> Amarok, which is even better, free software, and doesn’t support DRM [1]
- NetNewsWire (free as in free beer)-> Akregator. An RSS reader, free as in freedom.
- Colloquy -> Konversation. An IRC client.
- Adium -> Kopete. An instant messenger.
- Disk Utility -> K3b. Probably one of the bests CD burning programs.
This is the list of programs I use and which are only available in GNU/Linux:
- Meld
- Valgrind (there seems to be a non-complete port of Valgrind for Mac OS X. Didn’t check it) [2]
- Electric fence
- Yakuake
This is the list of programs I use and which are only available in Mac OS X:
- <yes, it’s empty>
This change back to GNU/Linux could be understood as just based on my needs at a given moment, which in part is true, but I also want to use a Free Software operating system, and Free Software programs. At the end, it’s all about Freedom [3].
References
]]>Once you have found the perfect emacs configuration stuff for you, you don’t usually want to change it. But it can happen that you want to use the same dot emacs configuration in different computers or even different systems.
I use emacs at home (Mac OS X and Ubuntu) and also at work (Kubuntu). It happens that when I write ChangeLog entries (C-x 4 a) I usually want to have different email addresses in the entries (my work email in the computers I use at work, and my GNU email in the computers I use at home). In the same way, I have a specific font type configuration for my GNU systems, but I keep the default one in my Mac O X emacs.
So basically you just need to detect different systems and computers, and apply specific configurations.
2. Get system type and system name
To detect different systems, you can use the ‘system-type‘ variable, and to detect different computers (with different hostnames, of course), you can use the ‘system-name‘ variable.
The following defuns show how you can know wich system type and name you have in each machine:
;; Get current system's name

(defun insert-system-name()

(interactive)

"Get current system's name"

(insert (format "%s" system-name))

)
;; Get current system type

(defun insert-system-type()

(interactive)

"Get current system type"

(insert (format "%s" system-type))

)
Those previous commands are interactive, so you can just type ‘M-x insert-system-name‘ or ‘M-x insert-system-type‘ to test them.
3. Configuration depending on the system type
In order to include system-type based configurations, you can define functions to check if the current system is the one you are looking for. Check these two functions to check if system is Mac OS X (darwin) or GNU (gnu/linux).
;; Check if system is Darwin/Mac OS X

(defun system-type-is-darwin ()

(interactive)

"Return true if system is darwin-based (Mac OS X)"

(string-equal system-type "darwin")

)
;; Check if system is GNU/Linux

(defun system-type-is-gnu ()

(interactive)

"Return true if system is GNU/Linux-based"

(string-equal system-type "gnu/linux")

)
Once you have these functions, you can put the system-dependent configuration:
;; disable closing emacs in Mac OS X

(if (system-type-is-darwin)

(global-unset-key "\C-z")

)
Note that ‘darwin‘ is the default system name for Mac OS X systems, and ‘gnu/linux‘ is the default system name for GNU/Linux systems.
3. Configuration depending on the system name
Now, you also want to put machine-dependent configuration, so you can define functions like this to detect in which machine you are currently located:
;; Check if the system is my Kubuntu GNU/Linux at work

(defun system-is-my-workpc ()

(interactive)

"Return true if the system we are running on is my PC at work"

(string-equal system-name "dev002.workplace.com")

)
And then you just need to use the previous function in the specific configurations (note that I’m using the hostname of my PC at work. Use your own hostname for you functions, dude).
;; For my machine in my worplace, setup my work email address

(if (system-is-my-workpc)

(setq user-mail-address "[email protected]")

)
Imagine that you’re a developer in a company which distributes program binaries which are stripped before being delivered to the end users (you probably don’t need too much imagination for this). Of course, that evil company doesn’t distribute the source code of the program.
One of your users experiences a problem with your program. You tell him to run:
ulimit -c unlimited
This will tell the system that the size allowed for the core files generated is unlimited. These core files are generated when some unhandled signals are received in the program, like SIGSEGV when a segmentation fault occurs, and include a complete dump of the program’s memory, program stack and such when the crash occured.
If you don’t get a core file after a segmentation fault and you already executed the ulimit command, it may be due to different reasons, like these:
- Kernel limitation (there’s a specific maximum size for the core files)
- Available disk space (you don’t have enough disk space to store your core file).
- …
If you got a complete valid core file after a program crash, you may want to debug it with the GNU Debugger gdb. Of course, you don’t want the user of the program to know the internals of the code (remember that the company is evil and doesn’t distribute the source code), so in order to debug the core file generated by the user’s execution, you need your symbol file for that specific compilation of the program.
gdb ./myprogram corefile
Once you have started the GNU debugger with the previous command, you are able to investigate what happened in the program abort. If you don’t have debugging symbols in the binary, you will get a backtrace equivalent to this one:
Core was generated by `./myprogram'.

Program terminated with signal 11, Segmentation fault.

[New process 8986]

#0  0x080483dd in myfunction ()

(gdb) bt

#0  0x080483dd in myfunction ()

#1  0x080483d1 in myfunction ()

#2  0x080483d1 in myfunction ()

#3  0x080483d1 in myfunction ()

#4  0x080483d1 in myfunction ()

#5  0x080483d1 in myfunction ()

#6  0x080483d1 in myfunction ()

#7  0x080483d1 in myfunction ()

#8  0x080483d1 in myfunction ()

#9  0x080483d1 in myfunction ()

#10 0x080483d1 in myfunction ()

#11 0x0804840e in main ()
Not really useful isn’t it? That’s the maximum information your user will know about the problem.
But you are the developer and when you compiled the program, and before you redistributed it, you stripped the binary and stored the debugging information in an external symbol file. So you just need to tell gdb where that file is:
(gdb) symbol-file myprogram.debug

Reading symbols from /home/drehbahn/myprogram.debug...done.
And magic happens. Now you can get a pretty backtrace of the program stack:
(gdb) bt

#0  0x080483dd in myfunction (value=10) at myprogram.c:26

#1  0x080483d1 in myfunction (value=9) at myprogram.c:20

#2  0x080483d1 in myfunction (value=8) at myprogram.c:20

#3  0x080483d1 in myfunction (value=7) at myprogram.c:20

#4  0x080483d1 in myfunction (value=6) at myprogram.c:20

#5  0x080483d1 in myfunction (value=5) at myprogram.c:20

#6  0x080483d1 in myfunction (value=4) at myprogram.c:20

#7  0x080483d1 in myfunction (value=3) at myprogram.c:20

#8  0x080483d1 in myfunction (value=2) at myprogram.c:20

#9  0x080483d1 in myfunction (value=1) at myprogram.c:20

#10 0x080483d1 in myfunction (value=0) at myprogram.c:20

#11 0x0804840e in main () at myprogram.c:33
And you can step into the first frame to see the real details of the problem which caused the segfault:
(gdb) fr 0

#0  0x080483dd in myfunction (value=10) at myprogram.c:26

26	        char character = *ptr; /* oops */

(gdb) list

21	    }

22	    else

23	    {

24	        /* Create nice segfault... */

25	        char *ptr = NULL;

26	        char character = *ptr; /* oops */

27	        printf("Did I really arrive here?\n");

28	    }

29	}

30
So, yes, it’s easy to debug a program with a separate symbol file created with objcopy.
And even better, you don’t need to be an evil company which doesn’t publish the source code of their apps to use this approach. Stripping binaries before shipping the programs is quite common in the world of Free Software, as size of the binaries really matters. The difference is that in this case you can always download not only the original source code that was used to generate the binary, but also the specific symbol files for direct debugging with the GNU Debugger.
[References]
[See also]
]]>
;; Key modifiers for Mac OS X Emacs.app in spanish MBP keyboard

(global-set-key (kbd "M-1") "|")

(global-set-key (kbd "M-2") "@")

(global-set-key (kbd "M-3") "#")

(global-set-key (kbd "M-º") "\\")

(global-set-key (kbd "M-ç") "}")

(global-set-key (kbd "M-+") "]")
Add it to your .emacs!
;; Insert date string

(defun insert-date-string ()

"Insert a nicely formated date string."

(interactive)

(insert (format-time-string "%a %b %d %H:%M:%S %Y")))
One of the typical purposes of modifying binary files after they have been compiled is to separate the debugging symbols and sections and the real executable. If you compiled you binary with debugging information (option ‘-g’ in gcc), the size of the binary will grow a lot due to the extra symbols, sections and human-readable stuff stored within the binary. That information is really useful when you are debugging your app, anyway, so you don’t really want to completely get rid of it.
So, we can use objcopy to move all the debugging information from the binary to another file, so that:
- Binary is smaller
- Binary does not include any ‘human-readable’ information of the program
- Debugging information can be kept by the developers, so that if any ‘core’ file is received for that specific binary, debugging with GDB is possible.
[Step 1] Copy the binary to another file, keeping only the debugging information. This will create the symbol file for the binary, and will be kept by the developers of the program for debugging purposes:
objcopy --only-keep-debug $BINARY_PATH $DEBUG_INFO_FILE
[Step 2] Once you have created the symbol file, you can now remove all the debugging information from the binary itself:
objcopy --strip-debug $BINARY_PATH
[Step 3] After you have created both files, an extra optional option is to add a debug-link to the binary, to specify which is the exact file containing the debug information for that binary:
objcopy --add-gnu-debuglink=$DEBUG_INFO_FILE $BINARY_PATH
Please note that this third step is optional, as we can use specific GDB commands when debugging a core file to specify in which file the debug information is located.
[References]
]]>