The post Textual – Creating a Custom Checkbox appeared first on Mouse Vs Python.
]]>You can use many different widgets in Textual. However, the widget you will be focusing on in this tutorial is the humble checkbox.
Checkboxes are used for Boolean choices. They return a True if checked and a False if unchecked. You can use a checkbox as a clear visual cue to indicate whether one or more options are enabled or disabled.
In this tutorial, you will learn the following:
- How to create a standard checkbox
- How to customize the checkbox widget
Let’s get started!
How to Create a Standard Checkbox
You should always start with the default widget to see if it works for you. With that in mind, open up your favorite Python IDE and create a new file with the following code in it:
from textual.app import App, ComposeResult
from textual.containers import VerticalScroll
from textual.widgets import Checkbox


class CheckboxApp(App[None]):

    def compose(self) -> ComposeResult:
        with VerticalScroll():
            yield Checkbox("Mike")

    def on_checkbox_changed(self, event: Checkbox.Changed) -> None:
        self.notify(f"Checkbox value: {event.value}")


if __name__ == "__main__":
    CheckboxApp().run()
The example above is based on a code example from the Textual documentation. You don’t have to use a VerticalScroll container here, but it is convenient when adding a series of widgets to the container.
Your main focus should be on the Checkbox itself. Here, you simply yield it from compose(), and then you catch the Checkbox.Changed event. When the event is fired, you display a notification to the user indicating that they have changed the checkbox value.
When you run this code, you will see something like this:
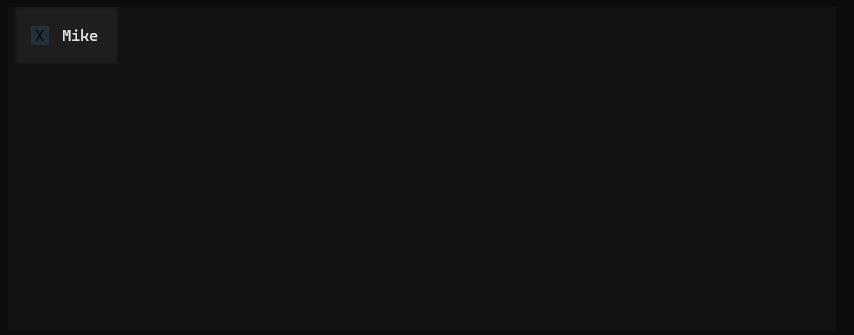
However, if you want to make the widget’s borders always visible, then you’ll need to add a border to the widget.
But what if you want the checkbox to be completely empty, too, rather than a greyed-out “X”? That is what you will learn how to do in the next section!
How to Customize the Checkbox Widget
Having a greyed out “X” isn’t necessarily bad thing if you have set up your Textual application to have a lighter background. But if you are using a default or dark background, then you will have some contrast issues.
Many GUI toolkits will show a checkbox as empty for its False state, though, while Textual defaults to a greyed-out “X.” If you want to change the character that is shown or make it an empty box like other toolkits, then you will need to learn how to customize the widget itself.
Fortunately, making a custom widget in Textual is very straightforward. Create a new Python file in your IDE and enter the following code:
from textual.app import App, ComposeResult
from textual.containers import VerticalScroll
from textual.widgets import Checkbox

class CustomCheck(Checkbox):
    BUTTON_INNER = " "

    def toggle(self) -> None:
        if self.value:
            CustomCheck.BUTTON_INNER = " "
        else:
            CustomCheck.BUTTON_INNER = "X"
        self.value = not self.value
        return self


class CheckboxApp(App[None]):
    #CSS_PATH = "checkbox.tcss"

    def compose(self) -> ComposeResult:
        check = CustomCheck("Mike")

        with VerticalScroll():
            yield check

    def on_checkbox_changed(self, event: Checkbox.Changed) -> None:
        self.notify(f"Checkbox value: {event.value}")


if __name__ == "__main__":
    CheckboxApp().run()
When you want to customize a pre-existing widget in Textual, you will almost always subclass it. So here, you subclass the Checkbox class to create a new CustomCheck class. Next, you override the BUTTON_INNER class attribute as well as the toggle() method.
If you go looking at the source code, you will find that BUTTON_INNER defaults to the “X” so here you are defaulting it to an empty string. Then you update toggle() to swap the “X” in when it is checked, and swap it back out when it is unchecked.
The other change is to use the new widget class in your application code.
To increase the widget’s visibility, you can add a border using Textual CSS. Create a new file called checkbox.tcss and add the following code to it:
CustomCheck {
    border: round green;
}
Make sure you save this file in the same folder as your Python file.
Now, when you run this code, you will see the following:
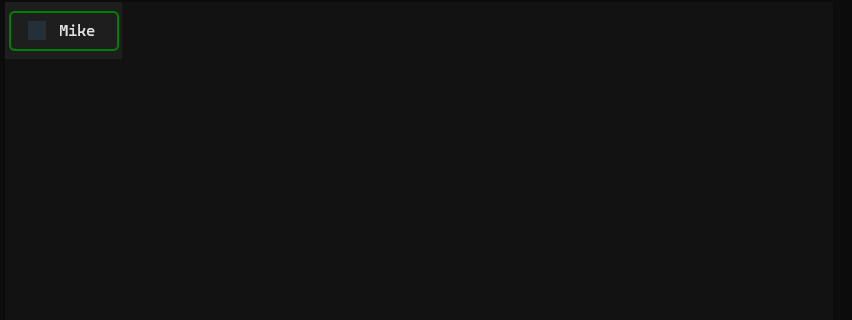
Good job! You now have a custom checkbox.
Wrapping Up
Textual is a great way for you to create beautiful user interfaces in your terminal. In this tutorial, you learned how to create a regular checkbox widget and then learned how to create a custom checkbox.
You can apply this knowledge to customize other widgets in Textual. You will need to study the widget’s code closely to understand how it works so you can modify it successfully. You may have to go through several iterations to get exactly what you want.
Don’t give up! You’ll get there eventually, and then you will be proud of yourself for sticking to it!
Learn More
If you thought this article was interesting you and you want to learn more about Textual, check out the following links:
- The Textual website
- Creating TUI Applications with Textual and Python (book)
The post Textual – Creating a Custom Checkbox appeared first on Mouse Vs Python.
]]>The post Python Typing Book Kickstarter appeared first on Mouse Vs Python.
]]>You will also learn how to use Python type checkers, configure them, and set them up in pre-commit or GitHub Actions. This knowledge will give you the power to check your code and your team’s code automatically before merging, hopefully catching defects before they make it into your products.
What You’ll Learn
You will learn all about Python’s support for type hinting (annotations). Specifically, you will learn about the following topics:
- Variable annotations
- Function annotations
- Type aliases
- New types
- Generics
- Hinting callables
- Annotating TypedDict
- Annotating Decorators and Generators
- Using Mypy for type checking
- Mypy configuration
- Using ty for type checking
- ty configuration
- and more!
Rewards to Choose From
There are several different rewards you can get in this Kickstarter:
- A signed paperback copy of the book (See Stretch Goals)
- An eBook copy of the book in PDF and ePub
- A t-shirt with the cover art from the book (See Stretch Goals)
- Other Python eBooks
The post Python Typing Book Kickstarter appeared first on Mouse Vs Python.
]]>The post New Book: Vibe Coding Video Games with Python appeared first on Mouse Vs Python.
]]>
In this book, you will learn how to use artificial intelligence to create mini-games. You will attempt to recreate the look and feel of various classic video games. The intention is not to violate copyright or anything of the sort, but instead to learn the limitations and the power of AI.
Instead, you will simply be learning about whether or not you can use AI to help you know how to create video games. Can you do it with no previous knowledge, as the AI proponents say? Is it really possible to create something just by writing out questions to the ether?
You will use various large language models (LLMs), such as Google Gemini, Grok, Mistral, and CoPilot, to create these games. You will discover the differences and similarities between these tools. You may be surprised to find that some tools give much more context than others.
AI is certainly not a cure-all and is far from perfect. You will quickly discover AI’s limitations and learn some strategies for solving those kinds of issues.
What You’ll Learn
You’ll be creating “clones” of some popular games. However, these games will only be the first level and may or may not be fully functional.
- Chapter 1 – The Snake Game
- Chapter 2 – Pong Clone
- Chapter 3 – Frogger Clone
- Chapter 4 – Space Invaders Clone
- Chapter 5 – Minesweeper Clone
- Chapter 6 – Luna Lander Clone
- Chapter 7 – Asteroids Clone
- Chapter 8 – Tic-Tac-Toe
- Chapter 9 – Pole Position Clone
- Chapter 10 – Connect Four
- Chapter 11 – Adding Sprites
Where to Purchase
The post New Book: Vibe Coding Video Games with Python appeared first on Mouse Vs Python.
]]>The post How to Type Hint a Decorator in Python appeared first on Mouse Vs Python.
]]>Functions can be used just like any other data type in Python. A function can be passed to a function or returned from a function, just like a string or integer.
If you have jumped on the type-hinting bandwagon, you will probably want to add type hints to your decorators. That has been difficult until fairly recently.
Let’s see how to type hint a decorator!
Type Hinting a Decorator the Wrong Way
You might think that you can use a TypeVar to type hint a decorator. You will try that first.
Here’s an example:
from functools import wraps
from typing import Any, Callable, TypeVar


Generic_function = TypeVar("Generic_function", bound=Callable[..., Any])

def info(func: Generic_function) -> Generic_function:
    @wraps(func)
    def wrapper(*args: Any, **kwargs: Any) -> Any:
        print('Function name: ' + func.__name__)
        print('Function docstring: ' + str(func.__doc__))
        result = func(*args, **kwargs)
        return result
    return wrapper

@info
def doubler(number: int) -> int:
    """Doubles the number passed to it"""
    return number * 2

print(doubler(4))
If you run mypy —strict info_decorator.py you will get the following output:
info_decorator.py:14: error: Incompatible return value type (got "_Wrapped[[VarArg(Any), KwArg(Any)], Any, [VarArg(Any), KwArg(Any)], Any]", expected "Generic_function")  [return-value]
Found 1 error in 1 file (checked 1 source file)
That’s a confusing error! Feel free to search for an answer.
The answers that you find will probably vary from just ignoring the function (i.e. not type hinting it at all) to using something called a ParamSpec.
Let’s try that next!
Using a ParamSpec for Type Hinting
typing module. Here’s what the docstring says about ParamSpec:
class ParamSpec(object):
  """ Parameter specification variable.

  The preferred way to construct a parameter specification is via the
  dedicated syntax for generic functions, classes, and type aliases,
  where the use of '**' creates a parameter specification::

      type IntFunc[**P] = Callable[P, int]

  For compatibility with Python 3.11 and earlier, ParamSpec objects
  can also be created as follows::

      P = ParamSpec('P')

  Parameter specification variables exist primarily for the benefit of
  static type checkers.  They are used to forward the parameter types of
  one callable to another callable, a pattern commonly found in
  higher-order functions and decorators.  They are only valid when used
  in ``Concatenate``, or as the first argument to ``Callable``, or as
  parameters for user-defined Generics. See class Generic for more
  information on generic types.

  An example for annotating a decorator::

      def add_logging[**P, T](f: Callable[P, T]) -> Callable[P, T]:
          '''A type-safe decorator to add logging to a function.'''
          def inner(*args: P.args, **kwargs: P.kwargs) -> T:
              logging.info(f'{f.__name__} was called')
              return f(*args, **kwargs)
          return inner

      @add_logging
      def add_two(x: float, y: float) -> float:
          '''Add two numbers together.'''
          return x + y

  Parameter specification variables can be introspected. e.g.::

      >>> P = ParamSpec("P")
      >>> P.__name__
      'P'

  Note that only parameter specification variables defined in the global
  scope can be pickled.
   """
In short, you use a ParamSpec to construct a parameter specification for a generic function, class, or type alias.
To see what that means in code, you can update the previous decorator to look like this:
from functools import wraps
from typing import Callable, ParamSpec, TypeVar


P = ParamSpec("P")
R = TypeVar("R")

def info(func: Callable[P, R]) -> Callable[P, R]:
    @wraps(func)
    def wrapper(*args: P.args, **kwargs: P.kwargs) -> R:
        print('Function name: ' + func.__name__)
        print('Function docstring: ' + str(func.__doc__))
        return func(*args, **kwargs)
    return wrapper

@info
def doubler(number: int) -> int:
    """Doubles the number passed to it"""
    return number * 2

print(doubler(4))
Here, you create a ParamSpec and a TypeVar. You tell the decorator that it takes in a Callable with a generic set of parameters (P), and you use TypeVar (R) to specify a generic return type.
If you run mypy on this updated code, it will pass! Good job!
What About PEP 695?
PEP 695 adds a new wrinkle to adding type hints to decorators by updating the parameter specification in Python in 3.12.
The main thrust of this PEP is to “simplify” the way you specify type parameters within a generic class, function, or type alias.
In a lot of ways, it does clean up the code as you no longer need to import ParamSpec of TypeVar when using this new syntax. Instead, it feels almost magical.
Here’s the updated code:
from functools import wraps
from typing import Callable


def info[**P, R](func: Callable[P, R]) -> Callable[P, R]:
    @wraps(func)
    def wrapper(*args: P.args, **kwargs: P.kwargs) -> R:
        print('Function name: ' + func.__name__)
        print('Function docstring: ' + str(func.__doc__))
        return func(*args, **kwargs)
    return wrapper

@info
def doubler(number: int) -> int:
    """Doubles the number passed to it"""
    return number * 2

print(doubler(4))
Notice that at the beginning of the function you have square brackets. That is basically declaring your ParamSpec implicitly. The “R” is again the return type. The rest of the code is the same as before.
When you run mypy against this version of the type hinted decorator, you will see that it passes happily.
Wrapping Up
Type hinting can still be a hairy subject, but the newer the Python version that you use, the better the type hinting capabilities are.
Of course, since Python itself doesn’t enforce type hinting, you can just skip all this too. But if your employer like type hinting, hopefully this article will help you out.
Related Reading
- Learn all about decorators in this sister article
The post How to Type Hint a Decorator in Python appeared first on Mouse Vs Python.
]]>The post How to Switch to ty from Mypy appeared first on Mouse Vs Python.
]]>Microsoft also has a Python type checker that you can use in VS Code called Pyright, and then there’s the lesser-known Pyrefly type checker and language server.
The newest type checker on the block is Astral’s ty, the maker of Ruff. Ty is another super-fast Python utility written in Rust.
In this article, you will learn how to switch your project to use ty locally and in GitHub Actions.
Installation
You can run ty with uvx if you do not want to install it by using the following command in your terminal: uvx ty
To install ty with uv, run the following:
uv tool install ty@latest
If you do not want to use uv, you can use the standalone installer. Instructions vary depending on your platform, so it is best to refer to the documentation for the latest information.
Note: Technically, you can use pip or pipx to install ty as well.
Running ty Locally
Running with uv
uv run ty
Running without Installation
uvx ty
Running ty Directly
ty check
Configuring ty
- pyproject.toml
- ty.toml
There are many rules that you can change. Check out the documentation for full details.
In general, if you run mypy in strict mode, then running ty without changing any of its settings is very similar. However, ty currently does not highlight missing type hints. If you need to enforce adding type hints, you can use Ruff’s flake8-annotations.
Here is how to enable the flak8-annotations in your pyproject.toml file:
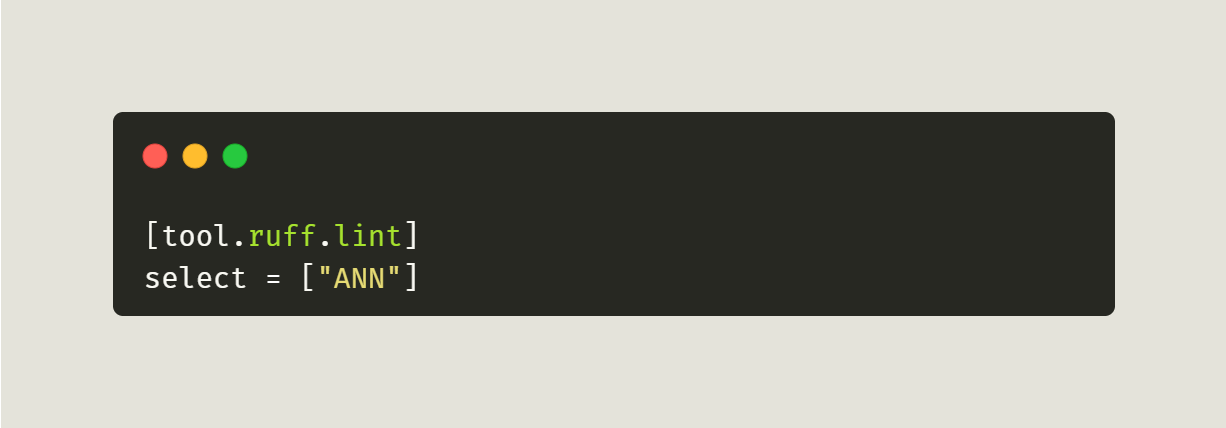
If you have other rules already selected, you can add “ANN” to the end of the list to enable it.
Running ty in GitHub Actions
.github/workflows/ty.yml
Make sure you include the leading period!
Next, inside your yaml file, you will add the following code:
name: ty
on:
  pull_request:
    types: [opened, synchronize, reopened, ready_for_review]
  workflow_dispatch:
jobs:
  build:
    if: github.event.pull_request.draft == false
    runs-on: self-hosted
    steps:
      - uses: actions/checkout@v3
      - name: Install Python
        uses: actions/setup-python@v4
        with:
          python-version: “3.12”
      - name: Install dependencies
        run: |
          python -m pip install --upgrade pip
          pip install ty==0.0.7
      - name: Run ty
        run: ty check
        continue-on-error: false
Now, when your team opens a new PR in your project, it will automatically run ty against it. Feel free to update the Python version to the one you are using. Also note that this GitHub Action sets the ty version to 0.0.7, which you may need to update as newer releases become available.
Using ty with pre-commit
- https://github.com/NSPC911/ty-pre-commit
- https://github.com/JacobCoffee/ty-pre-commit
- https://github.com/hoxbro/ty-pre-commit
- https://github.com/allganize/ty-pre-commit
- https://foundry.fsky.io/vel/ty-pre-commit
When Astral supports pre-commit itself, you should update your pre-commit configuration accordingly.
However, for this tutorial, you can use that first link which tells you to add the following to your .pre-commit-config.yaml:
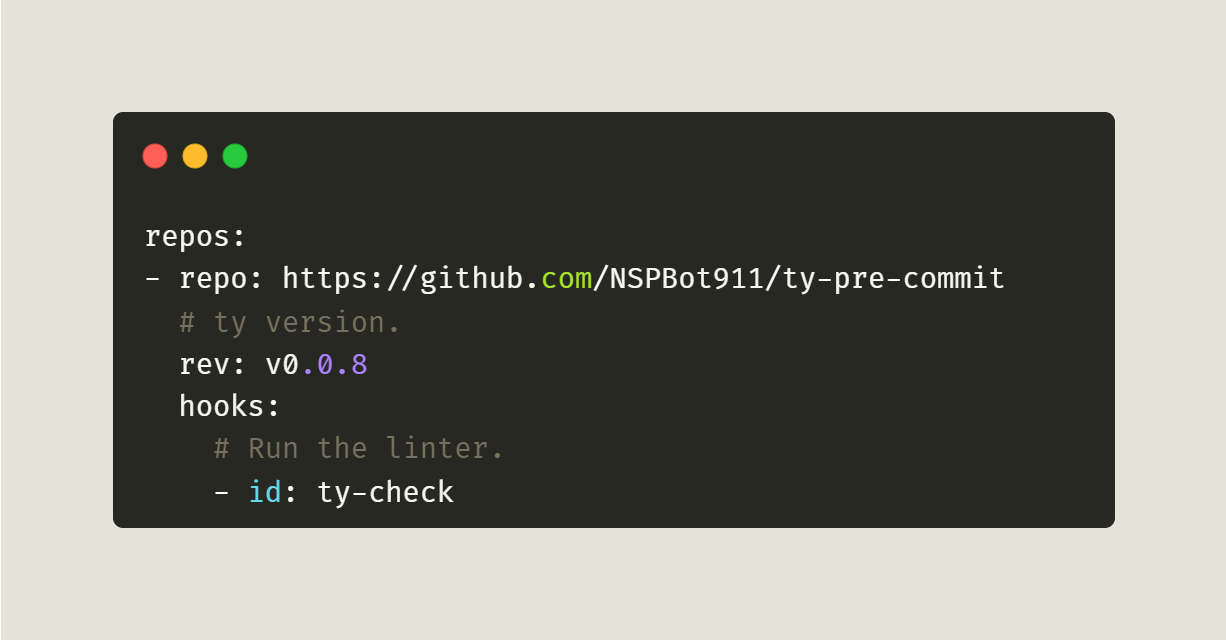
Now, when you commit a file locally, pre-commit will run ty to check it for you automatically.
Wrapping Up
Type checkers can be really helpful in finding subtle bugs in your Python code. However, remembering to run them before pushing your code can be difficult, so make your life easier by adding the type checker to your CI!
Have fun and happy coding!
The post How to Switch to ty from Mypy appeared first on Mouse Vs Python.
]]>The post ANN: Vibe Coding Video Games with Python appeared first on Mouse Vs Python.
]]>Welcome to Vibe Coding Video Games with Python. In this book, you will learn how to use artificial intelligence to create mini-games. You will attempt to recreate the look and feel of various classic video games. The intention is not to violate copyright or anything of the sort, but instead to learn the limitations and the power of AI.
Instead, you will simply be learning about whether or not you can use AI to help you know how to create video games. Can you do it with no previous knowledge, as the AI proponents say? Is it really possible to create something just by writing out questions to the ether?
Release date: January 2026 (eBook) / March 2026 (paperback)
You will be using various large language models (LLMs) such as Google Gemini, Grok, Mistral, CoPilot, and others to create these games. You will discover the differences and similarities between these tools. You may be surprised to find that some tools give much more context than others.
AI is certainly not a cure-all and is far from perfect. You will quickly discover AI’s limitations and learn some strategies for solving those kinds of issues.

Here are some examples of what you will be creating in this book:
Lune Lander Clone
Asteroids Clone
Pong Clone
What You’ll Learn
You’ll be creating “clones” of some popular games. However, these games will only be the first level and may or may not be fully functional.
- Chapter 1 – The Snake Game
- Chapter 2 – Pong Clone
- Chapter 3 – Frogger Clone
- Chapter 4 – Space Invaders Clone
- Chapter 5 – Minesweeper Clone
- Chapter 6 – Luna Lander Clone
- Chapter 7 – Asteroids Clone
- Chapter 8 – Tic-Tac-Toe
- Chapter 9 – Pole Position Clone
- Chapter 10 – Connect Four
- Chapter 11 – Intro to Sprites
Rewards to Choose From
There are several different rewards you can get in this Kickstarter:
- A signed paperback copy of the book
- An eBook copy of the book in PDF and ePub
- A t-shirt with the cover art from the book
- Other Python eBooks
Support the Kickstarter Today
The post ANN: Vibe Coding Video Games with Python appeared first on Mouse Vs Python.
]]>The post Black Friday Python Deals Came Early appeared first on Mouse Vs Python.
]]>The following links already have the discount applied:
Python eBooks
- Python 101
- Python 201: Intermediate Python
- The Python Quiz Book
- Automating Excel with Python
- Python Logging
- Pillow: Image Processing with Python
- Creating GUI Applications with wxPython
- JupyterLab 101
- Creating TUI Applications with Textual and Python
Python Courses
- Python 101 Video Series
- Automating Excel with Python Video series + eBook
- Python Logging Video Course
The post Black Friday Python Deals Came Early appeared first on Mouse Vs Python.
]]>The post An Intro to Python 3.14’s New Features appeared first on Mouse Vs Python.
]]>As with most Python releases, backwards compatibility is rarely broken. However, there has been a push to clean up the standard library, so be sure to check out what was removed and what has been deprecated. In general, most of the items in these lists are things the majority of Python users do not use anyway.
But enough with that. Let’s learn about the big changes!
Release Changes in 3.14
The biggest change to come to Python in a long time is the free-threaded build of Python. While free-threaded Python existed in 3.13, it was considered experimental at that time. Now in 3.14, free-threads are officially supported, but still optional.
Free-threaded Python is a build option in Python. You can turn it on if you want to when you build Python. There is still debate about turning free-threading on by default, but that has not been decided at the time of writing of this article.
Another new change in 3.14 is an experimental just-in-time (JIT) compiler for MacOS and Windows release binaries. Currently, the JIT compiler is NOT recommended in production. If you’d like you test it out, you can set PYTHON_JIT=1 as an environmental variable. When running with JIT enabled, you may see Python perform 10% slower or up to 20% faster, depending on workload.
Note that native debuggers and profilers (gdp and perf) are not able to unwind JIT frames, although Python’s own pdb and profile modules work fine with them. Free-threaded builds do not support the JIT compilter though.
The last item of note is that GPG (Pretty Good Privacy) signatures are not provided for Python 3.14 or newer versions. Instead, users must use Sigstore verification materials. Releases have been signed using Sigstore since Python 3.11.
Python Interpreter Improvements
There are a slew of new improvements to the Python interpreter in 3.14. Here is a quick listing along with links:
- PEP 649 and PEP 749: Deferred evaluation of annotations
- PEP 734: Multiple interpreters in the standard library
- PEP 750: Template strings
- PEP 758: Allow except and except* expressions without brackets
- PEP 765: Control flow in finally blocks
- PEP 768: Safe external debugger interface for CPython
- A new type of interpreter
- Free-threaded mode improvements
- Improved error messages
- Incremental garbage collection
Let’s talk about the top three a little. Deferred evaluation of annotations refers to type annotations. In the past, the type annotations that are added to functions, classes, and modules were evaluated eagarly. That is no longer the case. Instead, the annotations are stored in special-purpose annotate functions and evaluated only when necessary with the exception of if from __future__ import annotations is used at the top of the module.
the reason for this change it to improve performance and usability of type annotations in Python. You can use the new annotationlib module to inspect deferred annotations. Here is an example from the documentation:
>>> from annotationlib import get_annotations, Format
>>> def func(arg: Undefined):
...    pass
>>> get_annotations(func, format=Format.VALUE)
Traceback (most recent call last):
  ...
NameError: name 'Undefined' is not defined
>>> get_annotations(func, format=Format.FORWARDREF)
{'arg': ForwardRef('Undefined', owner=<function func at 0x...>)}
>>> get_annotations(func, format=Format.STRING)
{'arg': 'Undefined'}
Another interesting change is the addition of multiple interpreters in the standard library. The complete formal definition of this new feature can be found in PEP 734. This feature has been available in Python for more than 20 years, but only throught the C-API. Starting in Python 3.14, you can now use the new concurrent.interpreters module.
Why would you want to use multiple Python interpreters?
- They support a more human-friendly concurrency model
- They provide a true multi-core parallelism
These interpreters provide isolated “processes” that run in parallel with no sharing by default.
Another feature to highlightare the template string literals (t-strings). Full details can be found in PEP 750. Brett Cannon, a core developer of the Python language, posted a good introductory article about these new t-strings on his blog. A template string or t-string is a new mechanism for custom string processing. However, unlike an f-string, a t-string will return an object that represents the static and the interpolated parts of the string.
Here’s a quick example from the documentation:
>>> variety = 'Stilton'
>>> template = t'Try some {variety} cheese!'
>>> type(template)
<class 'string.templatelib.Template'>

>>> list(template)
['Try some ', Interpolation('Stilton', 'variety', None, ''), ' cheese!']
You can use t-strings to sanitize SQL, improve logging, implement custom, lightweight DSLs, and more!
Standard Library Improvements
Python’s standard library has several significant improvements. Here are the ones highlighted by the Python documentation:
- PEP 784: Zstandard support in the standard library
- Asyncio introspection capabilities
- Concurrent safe warnings control
- Syntax highlighting in the default interactive shell, and color output in several standard library CLIs
If you do much compression in Python, then you will be happy that Python has added Zstandard support in addition to the zip and tar archive support that has been there for many years.
Compressing a string using Zstandard can be accomplished with only a few lines of code:
from compression import zstd
import math

data = str(math.pi).encode() * 20
compressed = zstd.compress(data)
ratio = len(compressed) / len(data)
print(f"Achieved compression ratio of {ratio}")
Another neat addition to the Python standard library is asyncio introspection via a new command-line interface. You can now use the following command to introspect:
- python -m asyncio ps PID
- python -m asyncio pstree PID
The ps sub-command will inspect the given process ID and siplay information about the current asyncio tasks. You will see a task table as output which contains a listing of all tasks, their names and coroutine stacks, and which tasks are awaiting them.
The pstree sub-command will fetch the same information, but it will render them using a visual async call tree instead, which shows the coroutine relationships in a hierarcical format. Ths pstree command is especiialy useful for debugging stuck or long-running async programs.
One other neat update to Python is that the default REPL shell now highlights Python syntax. You can change the color theme using an experimental API _colorize.set_theme() which can be called interactively or in the PYTHONSTARTUP script. The REPL also supports impor tauto-completion, which means you can start typing the name of a module and then hit tab to get it to complete.
Wrapping Up
Python 3.14 looks to be an exciting release with many performance improvements. They have also laid down more framework to continue improving Python’s speed.
The latest version of Python has many other imrpovements to modules that aren’t listed here. To see all the nitty gritty details, check out the What’s New in Python 3.14 page in the documentation.
Drop a comment to let us know what you think of Python 3.14 and what you are excited to see in upcoming releases!
The post An Intro to Python 3.14’s New Features appeared first on Mouse Vs Python.
]]>The post Erys – A TUI for Jupyter Notebooks appeared first on Mouse Vs Python.
]]>Erys is written using the fantastic Textual package. While Textual handles the front-end in much the same way as your browser would normally do, the jupyter-client handles the backend, which executes your code and manages your kernel.
Let’s spend a few moments learning more about Erys and taking it for a test drive.
Installation
The recommended method of installing Erys is to use the uv package manager. If you have uv installed, you can run the following command in your terminal to install the Erys application:
$ uv tool install erys
Erys also supports using pipx to install it, if you prefer.
Once you have Erys installed, you can run it in your terminal by executing the erys command.
Using Notebooks in Your Terminal
When you run Erys, you will see something like the following in your terminal:
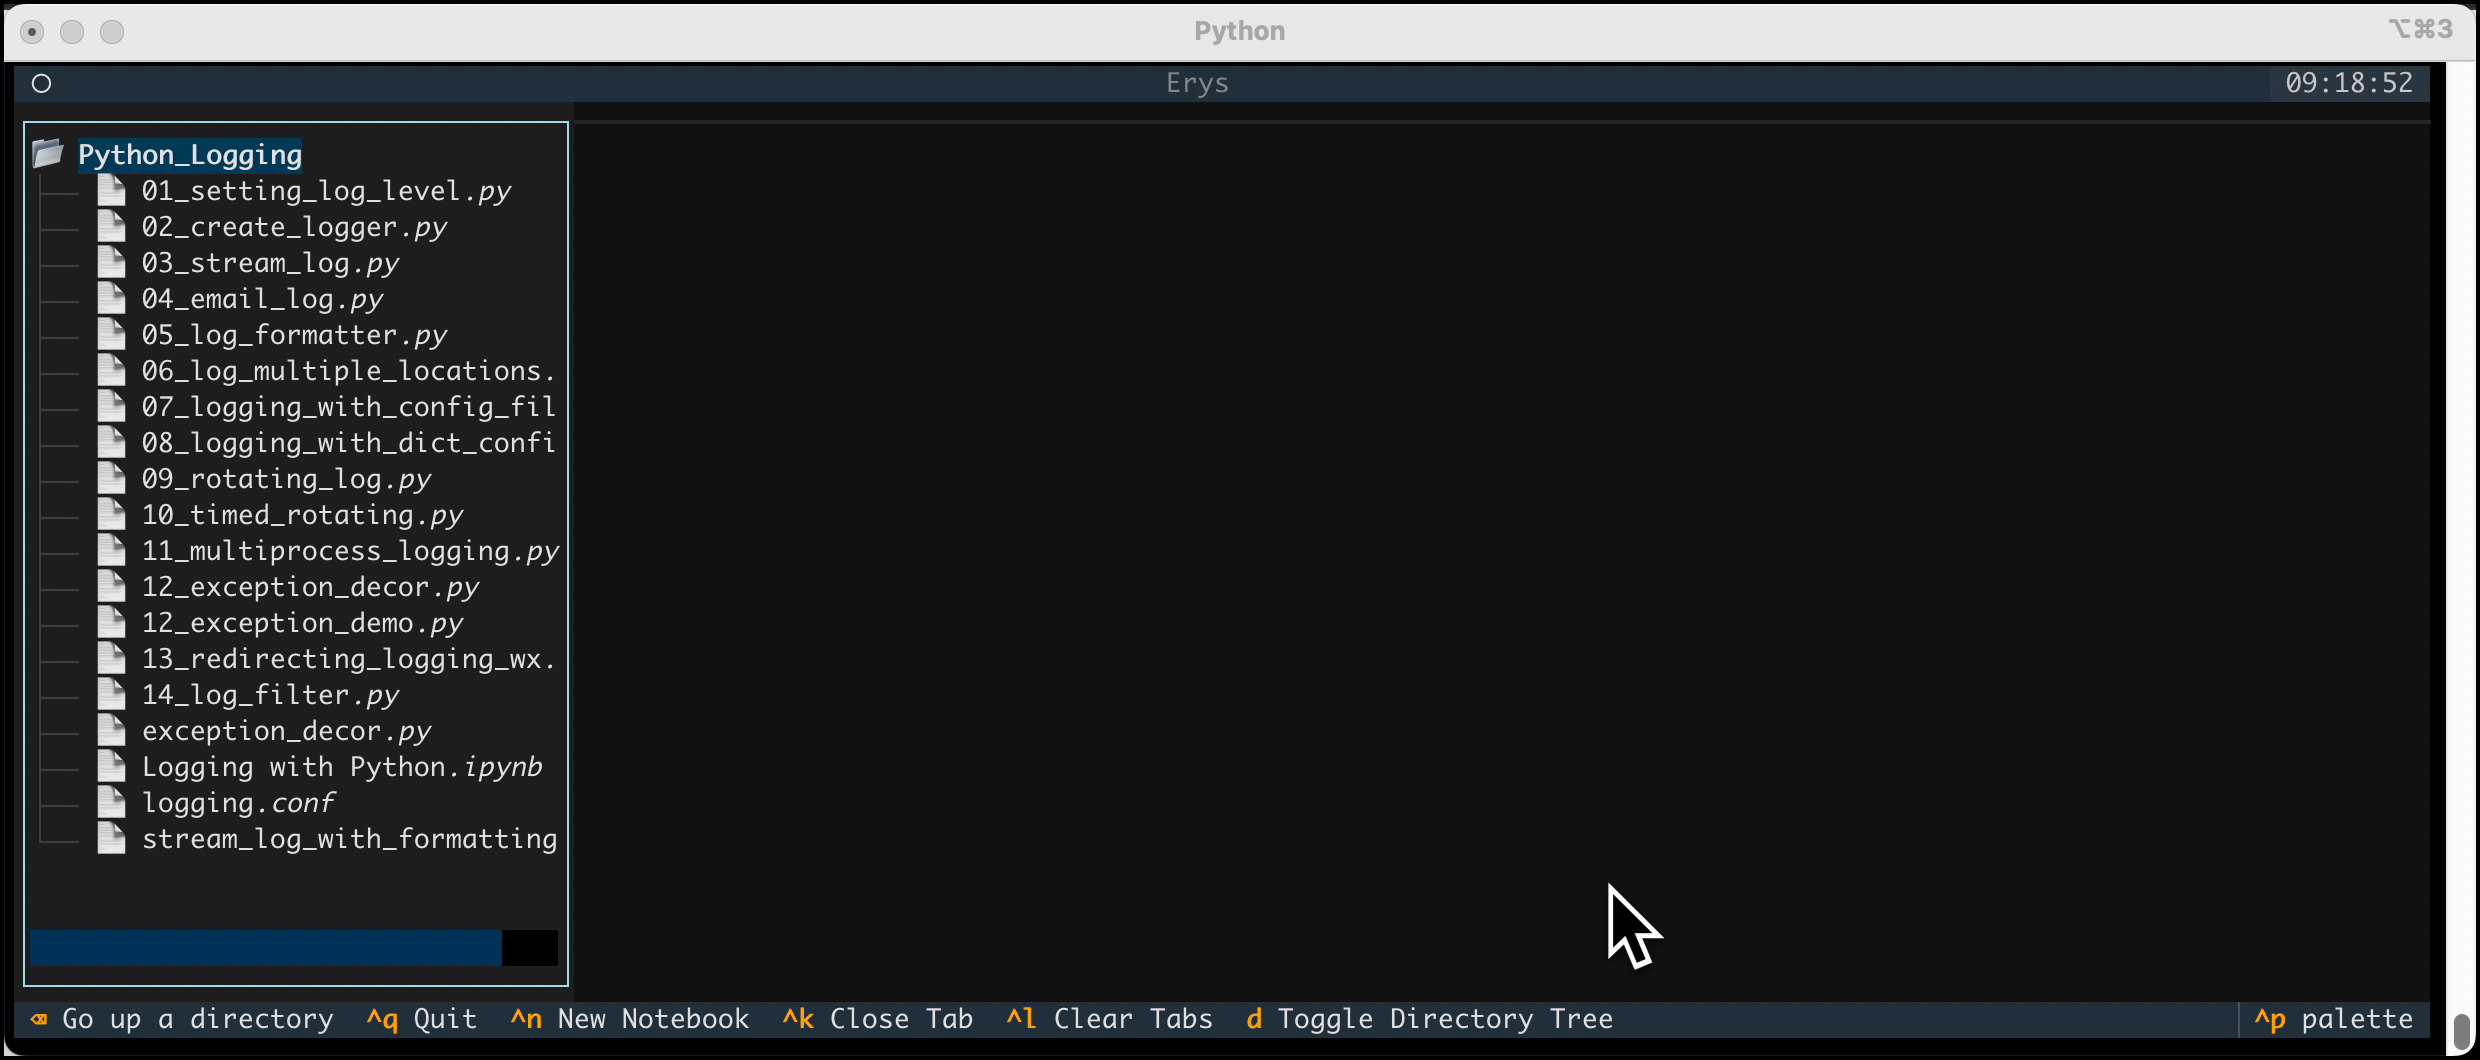
This is an empty Jupyter Notebook. If you would prefer to open an existing notebook, you would run the following command:
erys PATH_TO_NOTEBOOK
If you passed in a valid path to a Notebook, you will see one loaded. Here is an example using my Python Logging talk Notebook:
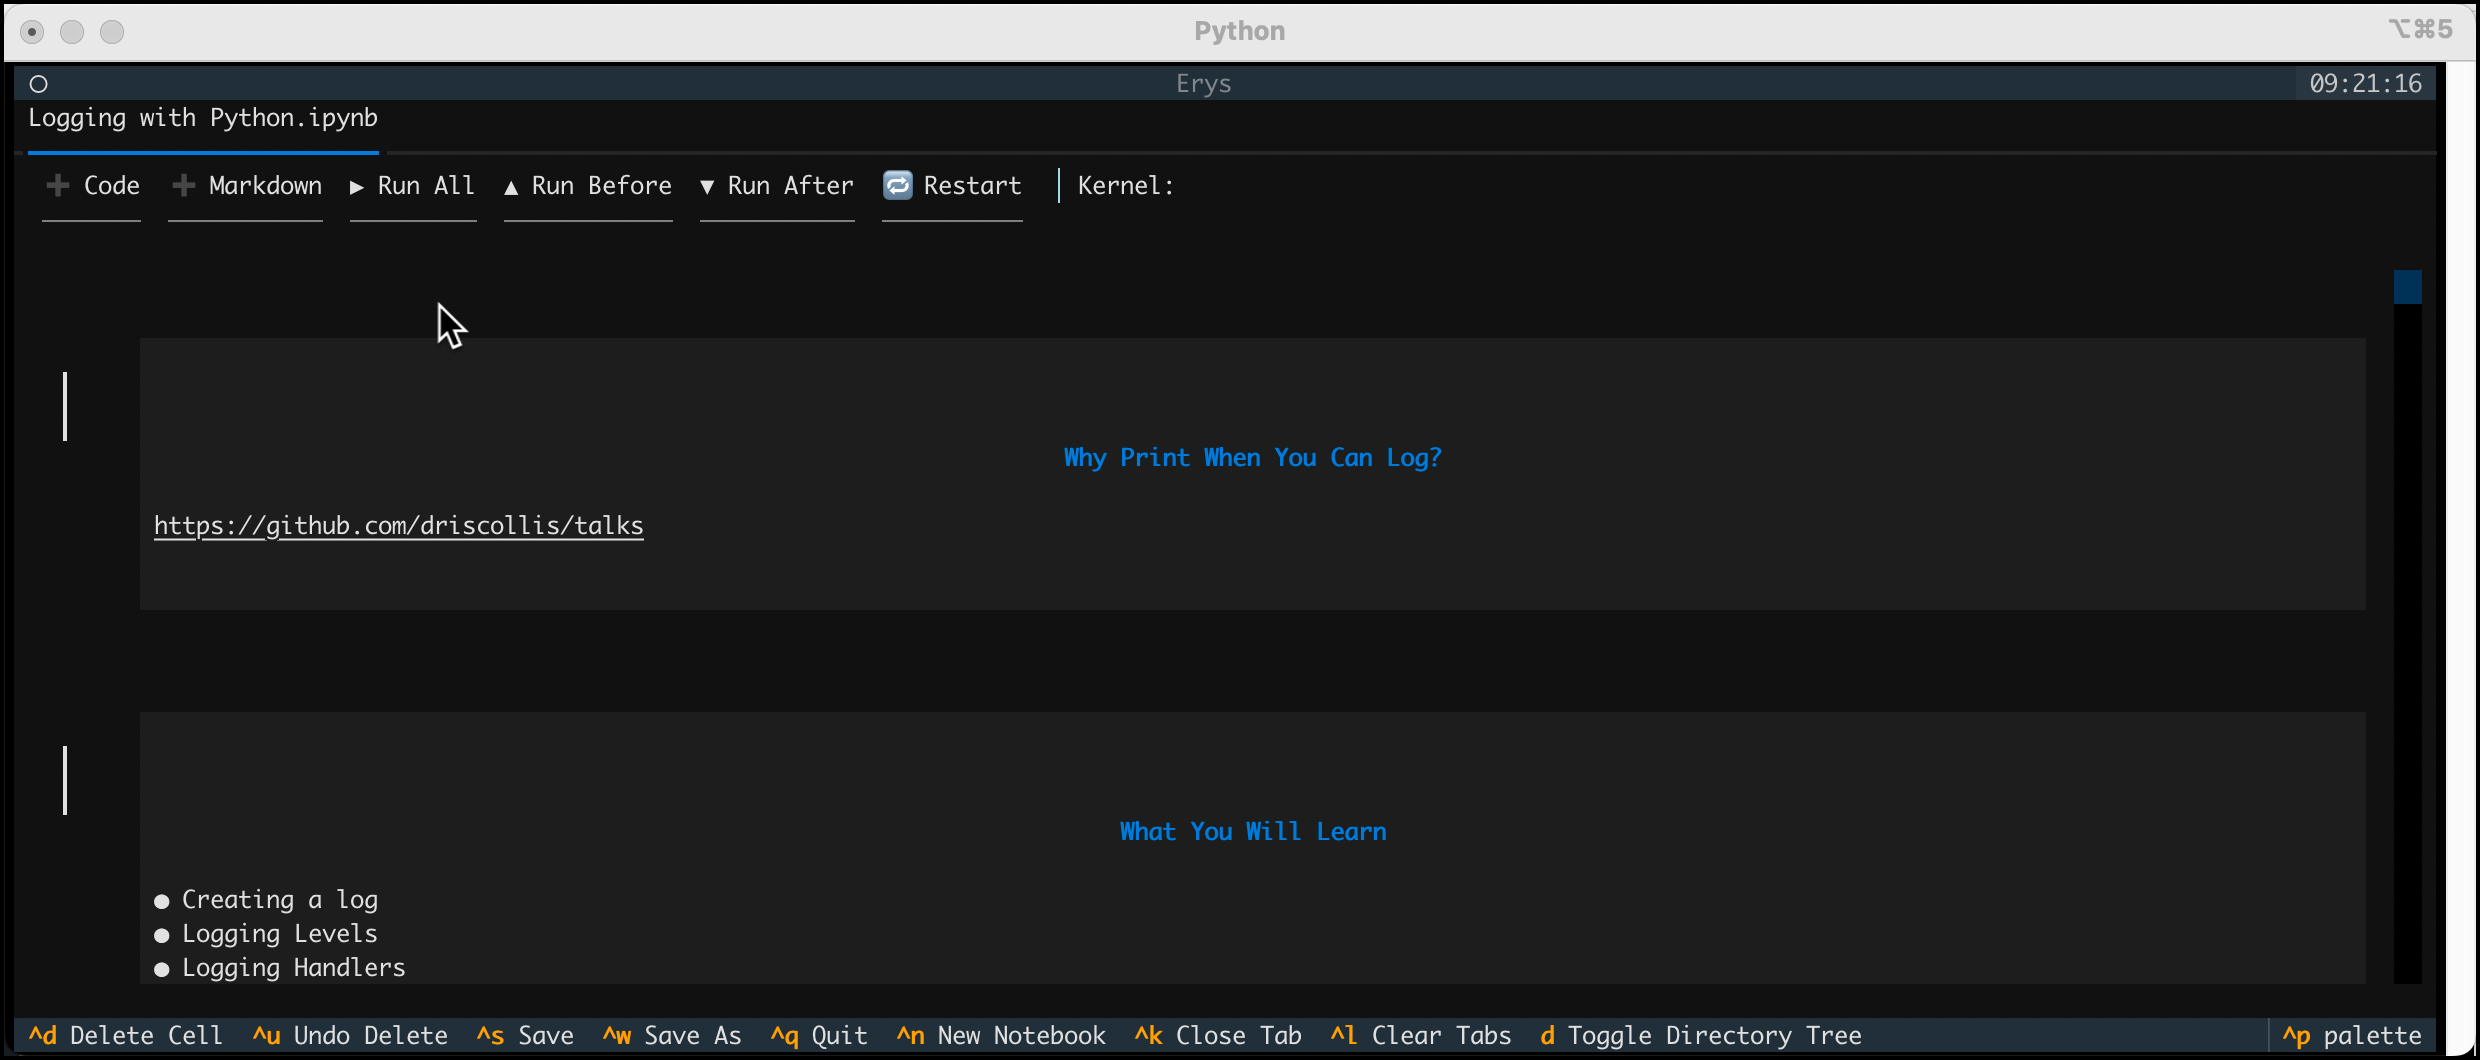
You can now run the cells, edit the Notebook and more!
Wrapping Up
Erys is a really neat TUI application that gives you the ability to view, create, and edit Jupyter Notebooks and other text files in your terminal. It’s written in Python using the Textual package.
The full source code is on GitHub, so you can check it out and learn how it does all of this or contribute to the application and make it even better.
Check it out and give it a try!
The post Erys – A TUI for Jupyter Notebooks appeared first on Mouse Vs Python.
]]>The post Ep 55 – The Python Show Podcast – The Python Documentary with Paul Everitt appeared first on Mouse Vs Python.
]]>We chat about Python – the documentary, Paul’s start in programming as well as with Python, and much, much more!
Links
- Python: The Documentary
- Paul’s GitHub page
- Paul’s X account
- How Python Grew From a Language to a Community – The New Stack
The post Ep 55 – The Python Show Podcast – The Python Documentary with Paul Everitt appeared first on Mouse Vs Python.
]]>The post Python Books and Courses – Back to School Sale appeared first on Mouse Vs Python.
]]>
My books and course cover the following topics:
- Beginner Python (Python 101)
- Intermediate Python
- Creating GUIs with wxPython
- Working with Excel
- Image Processing
- Creating PDFs with Python
- Working with JupyterLab
- Creating TUIs with Python and Textual
- Python Logging
Start learning Python or widen your Python knowledge today!
The post Python Books and Courses – Back to School Sale appeared first on Mouse Vs Python.
]]>The post Python 101: Reading TOML with Python appeared first on Mouse Vs Python.
]]>tomllib module in the standard library. However, unlike some of Python’s other standard libraries, such as jsonor its XML-related libraries, the tomllib library is only for reading, not writing. To create TOML documents in Python, you will need a third-party TOML package, such as tomlkit or toml.
Many Python developers use TOML as their configuration format of choice. In fact, you will find that most popular Python packages use a file called pyproject.toml for configuration. You can even use that file as a replacement for requirements.txt. Mypy, Flake8, and other tools can also be configured using pyproject.toml. You can learn more about that file and how it is formatted in the Python packaging guide.
In this tutorial, you will focus only on what Python itself provides for TOML support.
Let’s get started!
Getting Started
Python’s tomllib is based on the tomli package. You can read all about the implementation details and why TOML support was added to Python in PEP 680.
The nice thing about having TOML support built-in to Python is that you do not need to install anything other than Python itself. However, if you need to be able to create or edit a TOML document, then you will need a third-party package as tomllib is read-only.
Reading TOML with Python
To really understand what happens when you use the tomllib module, you need a TOML file. You can pick your favorite Python package and grab a TOML file from it. For the purposes of this tutorial, you can use the Squall package’s TOML file. Squall is a TUI for viewing and editing SQLite databases.
Here’s what the TOML looks like:
[project]
name = "squall_sql"
dynamic = [
    "version",
]
description = "Squall - SQLite Editor"
readme = "README.md"
requires-python = ">=3.11"
authors = [
    { name = "Mike Driscoll", email = "[email protected]" },
]
maintainers = [
    { name = "Mike Driscoll", email = "[email protected]" },
]
classifiers = [
    "License :: OSI Approved :: MIT License",
    "Environment :: Console",
    "Development Status :: 4 - Beta",
    "Intended Audience :: Developers",
    "Intended Audience :: End Users/Desktop",
    "Intended Audience :: Other Audience",
    "Programming Language :: Python :: 3",
    "Programming Language :: Python :: 3.11",
    "Programming Language :: Python :: 3.12",
    "Programming Language :: Python :: 3.13",
    "Operating System :: MacOS",
    "Operating System :: Microsoft :: Windows :: Windows 10",
    "Operating System :: Microsoft :: Windows :: Windows 11",
    "Operating System :: POSIX :: Linux",
    "Topic :: Software Development :: Libraries :: Python Modules",
    "Typing :: Typed",
]
keywords = [
    "tui",
    "sql",
    "sqlite",
    "terminal",
]
dependencies = [
    "rich>=13.9.4",
    "SQLAlchemy>=2.0.38",
    "textual>=2.1.1",
]
packages = [
    "src/squall",
]

[project.license]
file = "LICENSE"

[project.urls]
Homepage = "https://github.com/driscollis/squall"
Documentation = "https://github.com/driscollis/squall/blob/main/README.md"
Repository = "https://github.com/driscollis/squall"
Issues = "https://github.com/driscollis/squall/issues"
Discussions = "https://github.com/driscollis/squall/discussions"
Wiki = "https://github.com/driscollis/squall/wiki"

[project.scripts]
squall = "squall.squall:main"

[build-system]
requires = [
    "hatchling",
    "wheel",
]
build-backend = "hatchling.build"

[dependency-groups]
dev = [
    "build>=1.2.1",
    "ruff>=0.9.3",
    "pyinstrument>=5.0.1",
    "textual-dev>=1.7.0",
]

[tool.hatch.version]
path = "src/squall/__init__.py"

[tool.hatch.build.targets.wheel]
packages = [
    "src/squall",
]
include = [
    "py.typed",
    "**/*.py",
    "**/*.html",
    "**/*.gif",
    "**/*.jpg",
    "**/*.png",
    "**/*.md",
    "**/*.tcss",
]

[tool.hatch.build.targets.sdist]
include = [
    "src/squall",
    "LICENSE",
    "README.md",
    "pyproject.toml",
]
exclude = [
    "*.pyc",
    "__pycache__",
    "*.so",
    "*.dylib",
]

[tool.pytest.ini_options]
pythonpath = [
  "src"
]
The next step is to write some Python code to attempt to read in the TOML file above. Open up your favorite Python IDE and create a file. You can call it something like pyproject_parser.pyif you want.
Then enter the following code into it:
import tomllib

from pathlib import Path
from pprint import pprint


pyproject = Path("pyproject.toml")

with pyproject.open("rb") as config:
    data = tomllib.load(config)

pprint(data)
Here you open the TOML file from Squall and load it using the tomllib module. You use Python’s pprintmodule to print it out. The nice thing about the tomllibmodule is that it returns a dictionary.
Of course, the dictionary doesn’t print nicely without using pretty print, which is why you use the pprintmodule here.
The following is the output you will get if you run this code:
{'build-system': {'build-backend': 'hatchling.build',
                  'requires': ['hatchling', 'wheel']},
 'dependency-groups': {'dev': ['build>=1.2.1',
                               'ruff>=0.9.3',
                               'pyinstrument>=5.0.1',
                               'textual-dev>=1.7.0']},
 'project': {'authors': [{'email': '[email protected]',
                          'name': 'Mike Driscoll'}],
             'classifiers': ['License :: OSI Approved :: MIT License',
                             'Environment :: Console',
                             'Development Status :: 4 - Beta',
                             'Intended Audience :: Developers',
                             'Intended Audience :: End Users/Desktop',
                             'Intended Audience :: Other Audience',
                             'Programming Language :: Python :: 3',
                             'Programming Language :: Python :: 3.11',
                             'Programming Language :: Python :: 3.12',
                             'Programming Language :: Python :: 3.13',
                             'Operating System :: MacOS',
                             'Operating System :: Microsoft :: Windows :: '
                             'Windows 10',
                             'Operating System :: Microsoft :: Windows :: '
                             'Windows 11',
                             'Operating System :: POSIX :: Linux',
                             'Topic :: Software Development :: Libraries :: '
                             'Python Modules',
                             'Typing :: Typed'],
             'dependencies': ['rich>=13.9.4',
                              'SQLAlchemy>=2.0.38',
                              'textual>=2.1.1'],
             'description': 'Squall - SQLite Editor',
             'dynamic': ['version'],
             'keywords': ['tui', 'sql', 'sqlite', 'terminal'],
             'license': {'file': 'LICENSE'},
             'maintainers': [{'email': '[email protected]',
                              'name': 'Mike Driscoll'}],
             'name': 'squall_sql',
             'packages': ['src/squall'],
             'readme': 'README.md',
             'requires-python': '>=3.11',
             'scripts': {'squall': 'squall.squall:main'},
             'urls': {'Discussions': 'https://github.com/driscollis/squall/discussions',
                      'Documentation': 'https://github.com/driscollis/squall/blob/main/README.md',
                      'Homepage': 'https://github.com/driscollis/squall',
                      'Issues': 'https://github.com/driscollis/squall/issues',
                      'Repository': 'https://github.com/driscollis/squall',
                      'Wiki': 'https://github.com/driscollis/squall/wiki'}},
 'tool': {'hatch': {'build': {'targets': {'sdist': {'exclude': ['*.pyc',
                                                                '__pycache__',
                                                                '*.so',
                                                                '*.dylib'],
                                                    'include': ['src/squall',
                                                                'LICENSE',
                                                                'README.md',
                                                                'pyproject.toml']},
                                          'wheel': {'include': ['py.typed',
                                                                '**/*.py',
                                                                '**/*.html',
                                                                '**/*.gif',
                                                                '**/*.jpg',
                                                                '**/*.png',
                                                                '**/*.md',
                                                                '**/*.tcss'],
                                                    'packages': ['src/squall']}}},
                    'version': {'path': 'src/squall/__init__.py'}},
          'pytest': {'ini_options': {'pythonpath': ['src']}}}}
Awesome! You can now read a TOML file with Python and you get a nicely formatted dictionary!
Wrapping Up
The TOML format is great and well established, especially in the Python world. If you ever plan to create a package of your own, you will probably need to create a TOML file. If you work in dev/ops or as a system administrator, you may need to configure tools for CI/CD in the pyproject.toml file for Mypy, Flake8, Ruff, or some other tool.
Knowing how to read, write and edit a TOML file is a good tool to have in your kit. Check out Python’s tomllib module for reading or if you need more power, check out tomlkit or toml.
Related Reading
- Python and TOML: New Best Friends – Real Python
- PEP 680 – tomllib: Support for Parsing TOML in the Standard Library
The post Python 101: Reading TOML with Python appeared first on Mouse Vs Python.
]]>The post Creating a Simple XML Editor in Your Terminal with Python and Textual appeared first on Mouse Vs Python.
]]>In this article, you will learn how that experiment went and see the results. Here is a quick outline of what you will cover:
- Get the packages you will need
- Create the main UI
- Creating the edit XML screen
- The add node screen
- Adding an XML preview screen
- Creating file browser and warning screens
- Creating the file save screen
Let’s get started!
Getting the Dependencies
You will need Textual to be able to run the application detailed in this tutorial. You will also need lxml, which is a super fast XML parsing package. You can install Textual using pip or uv. You can probably use uv with lxml as well, but pip definitely works.
Here’s an example using pip to install both packages:
python -m pip install textual lxml
Once pip has finished installing Textual and the lxml package and all its dependencies, you will be ready to continue!
Creating the Main UI
The first step in creating the user interface is figuring out what it should look like. Here is the original Boomslang user interface that was created using wxPython:
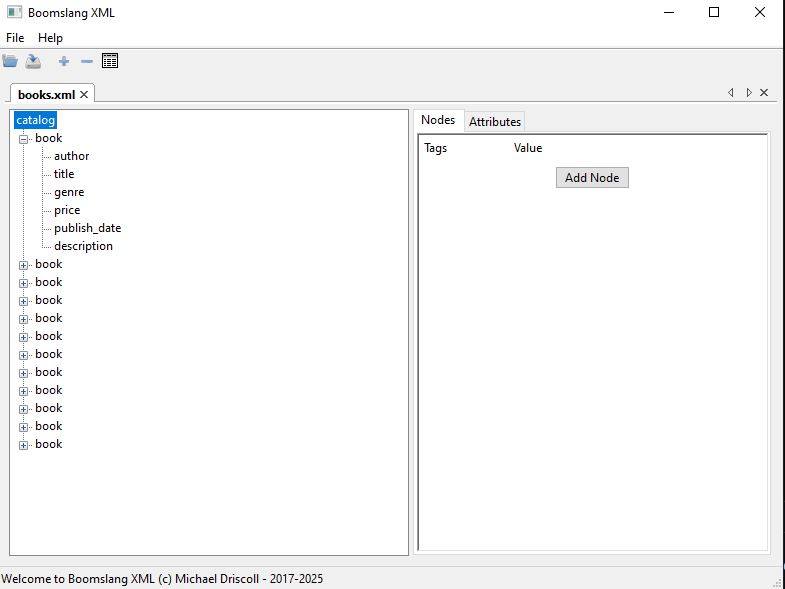
You want to create something similar to this UI, but in your terminal. Open up your favorite Python IDE and create a new file called boomslang.py and then enter the following code into it:
from pathlib import Path

from .edit_xml_screen import EditXMLScreen
from .file_browser_screen import FileBrowser

from textual import on
from textual.app import App, ComposeResult
from textual.containers import Horizontal, Vertical
from textual.widgets import Button, Header, Footer, OptionList


class BoomslangXML(App):
    BINDINGS = [
        ("ctrl+o", "open", "Open XML File"),
    ]
    CSS_PATH = "main.tcss"

    def __init__(self) -> None:
        super().__init__()
        self.title = "Boomslang XML"
        self.recent_files_path = Path(__file__).absolute().parent / "recent_files.txt"
        self.app_selected_file: Path | None = None
        self.current_recent_file: Path | None = None

    def compose(self) -> ComposeResult:
        self.recent_files = OptionList("", id="recent_files")
        self.recent_files.border_title = "Recent Files"
        yield Header()
        yield self.recent_files
        yield Vertical(
            Horizontal(
                Button("Open XML File", id="open_xml_file", variant="primary"),
                Button("Open Recent", id="open_recent_file", variant="warning"),
                id="button_row",
            )
        )
        yield Footer()

    def on_mount(self) -> None:
        self.update_recent_files_ui()

    def action_open(self) -> None:
        self.push_screen(FileBrowser())

    def on_file_browser_selected(self, message: FileBrowser.Selected) -> None:
        path = message.path
        if path.suffix.lower() == ".xml":
            self.update_recent_files_on_disk(path)
            self.push_screen(EditXMLScreen(path))
        else:
            self.notify("Please choose an XML File!", severity="error", title="Error")

    @on(Button.Pressed, "#open_xml_file")
    def on_open_xml_file(self) -> None:
        self.push_screen(FileBrowser())

    @on(Button.Pressed, "#open_recent_file")
    def on_open_recent_file(self) -> None:
        if self.current_recent_file is not None and self.current_recent_file.exists():
            self.push_screen(EditXMLScreen(self.current_recent_file))

    @on(OptionList.OptionSelected, "#recent_files")
    def on_recent_files_selected(self, event: OptionList.OptionSelected) -> None:
        self.current_recent_file = Path(event.option.prompt)

    def update_recent_files_ui(self) -> None:
        if self.recent_files_path.exists():
            self.recent_files.clear_options()
            files = self.recent_files_path.read_text()
            for file in files.split("\n"):
                self.recent_files.add_option(file.strip())

    def update_recent_files_on_disk(self, path: Path) -> None:
        if path.exists() and self.recent_files_path.exists():
            recent_files = self.recent_files_path.read_text()
            if str(path) in recent_files:
                return

            with open(self.recent_files_path, mode="a") as f:
                f.write(str(path) + "\n")

            self.update_recent_files_ui()
        elif not self.recent_files_path.exists():
            with open(self.recent_files_path, mode="a") as f:
                f.write(str(path) + "\n")

def main() -> None:
    app = BoomslangXML()
    app.run()

if __name__ == "__main__":
    main()
That’s a good chunk of code, but it’s still less than a hundred lines. You will go over it in smaller chunks though. You can start with this first chunk:
from pathlib import Path

from .edit_xml_screen import EditXMLScreen
from .file_browser_screen import FileBrowser

from textual import on
from textual.app import App, ComposeResult
from textual.containers import Horizontal, Vertical
from textual.widgets import Button, Header, Footer, OptionList


class BoomslangXML(App):
    BINDINGS = [
        ("ctrl+o", "open", "Open XML File"),
    ]
    CSS_PATH = "main.tcss"

    def __init__(self) -> None:
        super().__init__()
        self.title = "Boomslang XML"
        self.recent_files_path = Path(__file__).absolute().parent / "recent_files.txt"
        self.app_selected_file: Path | None = None
        self.current_recent_file: Path | None = None
You need a few imports to make your code work. The first import comes from Python itself and gives your code the ability to work with file paths. The next two are for a couple of small custom files you will create later on. The rest of the imports are from Textual and provide everything you need to make a nice little Textual application.
Next, you create the BoomslangXML class where you set up a keyboard binding and set which CSS file you will be using for styling your application.
The __init__() method sets the following:
- The title of the application
- The recent files path, which contains all the files you have recently opened
- The currently selected file or None
- The current recent file (i.e. the one you have open at the moment) or None
Now you are ready to create the main UI:
def compose(self) -> ComposeResult:
    self.recent_files = OptionList("", id="recent_files")
    self.recent_files.border_title = "Recent Files"
    yield Header()
    yield self.recent_files
    yield Vertical(
            Horizontal(
                Button("Open XML File", id="open_xml_file", variant="primary"),
                Button("Open Recent", id="open_recent_file", variant="warning"),
                id="button_row",
            )
        )
    yield Footer()
To create your user interface, you need a small number of widgets:
- A header to identify the name of the application
- An OptionList which contains the recently opened files, if any, that the user can reload
- A button to load a new XML file
- A button to load from the selected recent file
- A footer to show the application’s keyboard shortcuts
Next, you will write a few event handlers:
def on_mount(self) -> None:
    self.update_recent_files_ui()

def action_open(self) -> None:
    self.push_screen(FileBrowser())

def on_file_browser_selected(self, message: FileBrowser.Selected) -> None:
    path = message.path
    if path.suffix.lower() == ".xml":
        self.update_recent_files_on_disk(path)
        self.push_screen(EditXMLScreen(path))
    else:
        self.notify("Please choose an XML File!", severity="error", title="Error")
The code above contains the logic for three event handlers:
on_mount()– After the application loads, it will update the OptionList by reading the text file that contains paths to the recent files.action_open()– A keyboard shortcut action that gets called when the user presses CTRL+O. It will then show a file browser to the user so they can pick an XML file to load.on_file_browser_selected()– Called when the user picks an XML file from the file browser and closes the file browser. If the file is an XML file, you will reload the screen to allow XML editing. Otherwise, you will notify the user to choose an XML file.
The next chunk of code is for three more event handlers:
@on(Button.Pressed, "#open_xml_file")
def on_open_xml_file(self) -> None:
    self.push_screen(FileBrowser())

@on(Button.Pressed, "#open_recent_file")
def on_open_recent_file(self) -> None:
    if self.current_recent_file is not None and self.current_recent_file.exists():
        self.push_screen(EditXMLScreen(self.current_recent_file))

@on(OptionList.OptionSelected, "#recent_files")
def on_recent_files_selected(self, event: OptionList.OptionSelected) -> None:
    self.current_recent_file = Path(event.option.prompt)
These event handlers use Textual’s handy @ondecorator, which allows you to bind the event to a specific widget or widgets.
on_open_xml_file()– If the user presses the “Open XML File” button, this method is called and it will show the file browser.on_open_recent_file()– If the user presses the “Open Recent” button, this method gets called and will load the selected recent file.on_recent_files_selected()– When the user selects a recent file in the OptionList widget, this method gets called and sets thecurrent_recent_filevariable.
You only have two more methods to go over. The first is for updating the recent files UI:
def update_recent_files_ui(self) -> None:
    if self.recent_files_path.exists():
        self.recent_files.clear_options()
        files = self.recent_files_path.read_text()
        for file in files.split("\n"):
            self.recent_files.add_option(file.strip())
Remember, this method gets called by on_mount()and it will update the OptionList, if the file exists. The first thing this code will do is clear the OptionList in preparation for updating it. Then you will read the text from the file and loop over each path in that file.
As you loop over the paths, you add them to the OptionList. That’s it! You now have a recent files list that the user can choose from.
The last method to write is for updating the recent files text file:
def update_recent_files_on_disk(self, path: Path) -> None:
    if path.exists() and self.recent_files_path.exists():
        recent_files = self.recent_files_path.read_text()
        if str(path) in recent_files:
            return

        with open(self.recent_files_path, mode="a") as f:
            f.write(str(path) + "\n")

        self.update_recent_files_ui()
    elif not self.recent_files_path.exists():
        with open(self.recent_files_path, mode="a") as f:
            f.write(str(path) + "\n")
When the user opens a new XML file, you want to add that file to the recent file list on disk so that the next time the user opens your application, you can show the user the recent files. This is a nice way to make loading previous files much easier.
The code above will verify that the file still exists and that your recent files file also exists. Assuming that they do, you will check to see if the current XML file is already in the recent files file. If it is, you don’t want to add it again, so you return.
Otherwise, you open the recent files file in append mode, add the new file to disk and update the UI.
If the recent files file does not exist, you create it here and add the new path.
Here are the last few lines of code to add:
def main() -> None:
    app = BoomslangXML()
    app.run()

if __name__ == "__main__":
    main()
You create a main()function to create the Textual application object and run it. You do this primarily for making the application runnable by uv, Python’s fastest package installer and resolver.
Now you’re ready you move on and add some CSS styling to your UI.
Your XML editor doesn’t require extensive styling. In fact, there is nothing wrong with being minimalistic.
Open up your favorite IDE or text editor and create a new file named main.tcssand then add the following code:
BoomslangXML {
    #button_row {
        align: center middle;
    }

    Horizontal{
        height: auto;
    }

    OptionList {
        border: solid green;
    }

    Button {
        margin: 1;
    }
}
Here you center the button row on your screen. You also set the Horizontalcontainer’s height to auto, which tells Textual to make the container fit its contents. You also add a border to your OptionListand a margin to your buttons.
The XML editor screen is fairly complex, so that’s what you will learn about next.
Creating the Edit XML Screen
The XML editor screen is more complex than the main screen of your application and contains almost twice as many lines of code. But that’s to be expected when you realize that most of your logic will reside here.
As before, you will start out by writing the full code and then going over it piece-by-piece. Open up your Python IDE and create a new file named edit_xml_screen.pyand then enter the following code:
import lxml.etree as ET
import tempfile
from pathlib import Path

from .add_node_screen import AddNodeScreen
from .preview_xml_screen import PreviewXMLScreen

from textual import on
from textual.app import ComposeResult
from textual.containers import Horizontal, Vertical, VerticalScroll
from textual.screen import ModalScreen
from textual.widgets import Footer, Header, Input, Tree
from textual.widgets._tree import TreeNode


class DataInput(Input):
    """
    Create a variant of the Input widget that stores data
    """

    def __init__(self, xml_obj: ET.Element, *args, **kwargs) -> None:
        super().__init__(*args, **kwargs)
        self.xml_obj = xml_obj


class EditXMLScreen(ModalScreen):
    BINDINGS = [
        ("ctrl+s", "save", "Save"),
        ("ctrl+a", "add_node", "Add Node"),
        ("p", "preview", "Preview"),
        ("escape", "esc", "Exit dialog"),
    ]
    CSS_PATH = "edit_xml_screens.tcss"

    def __init__(self, xml_path: Path, *args, **kwargs):
        super().__init__(*args, **kwargs)
        self.xml_tree = ET.parse(xml_path)
        self.expanded = {}
        self.selected_tree_node: None | TreeNode = None

    def compose(self) -> ComposeResult:
        xml_root = self.xml_tree.getroot()
        self.expanded[id(xml_root)] = ""
        yield Header()
        yield Horizontal(
            Vertical(Tree("No Data Loaded", id="xml_tree"), id="left_pane"),
            VerticalScroll(id="right_pane"),
            id="main_ui_container",
        )
        yield Footer()

    def on_mount(self) -> None:
        self.load_tree()

    @on(Tree.NodeExpanded)
    def on_tree_node_expanded(self, event: Tree.NodeExpanded) -> None:
        """
        When a tree node is expanded, parse the newly shown leaves and make
        them expandable, if necessary.
        """
        xml_obj = event.node.data
        if id(xml_obj) not in self.expanded and xml_obj is not None:
            for top_level_item in xml_obj.getchildren():
                child = event.node.add_leaf(top_level_item.tag, data=top_level_item)
                if top_level_item.getchildren():
                    child.allow_expand = True
                else:
                    child.allow_expand = False
            self.expanded[id(xml_obj)] = ""

    @on(Tree.NodeSelected)
    def on_tree_node_selected(self, event: Tree.NodeSelected) -> None:
        """
        When a node in the tree control is selected, update the right pane to show
        the data in the XML, if any
        """
        xml_obj = event.node.data
        right_pane = self.query_one("#right_pane", VerticalScroll)
        right_pane.remove_children()
        self.selected_tree_node = event.node

        if xml_obj is not None:
            for child in xml_obj.getchildren():
                if child.getchildren():
                    continue
                text = child.text if child.text else ""
                data_input = DataInput(child, text)
                data_input.border_title = child.tag
                container = Horizontal(data_input)
                right_pane.mount(container)
            else:
                # XML object has no children, so just show the tag and text
                if getattr(xml_obj, "tag") and getattr(xml_obj, "text"):
                    if xml_obj.getchildren() == []:
                        data_input = DataInput(xml_obj, xml_obj.text)
                        data_input.border_title = xml_obj.tag
                        container = Horizontal(data_input)
                        right_pane.mount(container)

    @on(Input.Changed)
    def on_input_changed(self, event: Input.Changed) -> None:
        """
        When an XML element changes, update the XML object
        """
        xml_obj = event.input.xml_obj
        # self.notify(f"{xml_obj.text} is changed to new value: {event.input.value}")
        xml_obj.text = event.input.value

    def action_esc(self) -> None:
        """
        Close the dialog when the user presses ESC
        """
        self.dismiss()

    def action_add_node(self) -> None:
        """
        Add another node to the XML tree and the UI
        """

        # Show dialog and use callback to update XML and UI
        def add_node(result: tuple[str, str] | None) -> None:
            if result is not None:
                node_name, node_value = result
                self.update_xml_tree(node_name, node_value)

        self.app.push_screen(AddNodeScreen(), add_node)

    def action_preview(self) -> None:
        temp_directory = Path(tempfile.gettempdir())
        xml_path = temp_directory / "temp.xml"
        self.xml_tree.write(xml_path)
        self.app.push_screen(PreviewXMLScreen(xml_path))

    def action_save(self) -> None:
        self.xml_tree.write(r"C:\Temp\books.xml")
        self.notify("Saved!")

    def load_tree(self) -> None:
        """
        Load the XML tree UI with data parsed from the XML file
        """
        tree = self.query_one("#xml_tree", Tree)
        xml_root = self.xml_tree.getroot()
        self.expanded[id(xml_root)] = ""

        tree.reset(xml_root.tag)
        tree.root.expand()

        # If the root has children, add them
        if xml_root.getchildren():
            for top_level_item in xml_root.getchildren():
                child = tree.root.add(top_level_item.tag, data=top_level_item)
                if top_level_item.getchildren():
                    child.allow_expand = True
                else:
                    child.allow_expand = False

    def update_tree_nodes(self, node_name: str, node: ET.SubElement) -> None:
        """
        When adding a new node, update the UI Tree element to reflect the new element added
        """
        child = self.selected_tree_node.add(node_name, data=node)
        child.allow_expand = False

    def update_xml_tree(self, node_name: str, node_value: str) -> None:
        """
        When adding a new node, update the XML object with the new element
        """
        element = ET.SubElement(self.selected_tree_node.data, node_name)
        element.text = node_value
        self.update_tree_nodes(node_name, element)
Phew! That seems like a lot of code if you are new to coding, but a hundred and seventy lines of code or so really isn’t very much. Most applications take thousands of lines of code.
Just the same, breaking the code down into smaller chunks will aid in your understanding of what’s going on.
With that in mind, here’s the first chunk:
import lxml.etree as ET
import tempfile
from pathlib import Path

from .add_node_screen import AddNodeScreen
from .preview_xml_screen import PreviewXMLScreen

from textual import on
from textual.app import ComposeResult
from textual.containers import Horizontal, Vertical, VerticalScroll
from textual.screen import ModalScreen
from textual.widgets import Footer, Header, Input, Tree
from textual.widgets._tree import TreeNode
You have move imports here than you did in the main UI file. Here’s a brief overview:
- You import lxml to make parsing and editing XML easy.
- You use Python’s
tempfilemodule to create a temporary file for viewing the XML. - The
pathlibmodule is used the same way as before. - You have a couple of custom Textual screens that you will need to code up and import.
- The last six lines are all Textual imports for making this editor screen work.
The next step is to subclass the Inputwidget in such a way that it will store XML element data:
class DataInput(Input):
    """
    Create a variant of the Input widget that stores data
    """

    def __init__(self, xml_obj: ET.Element, *args, **kwargs) -> None:
        super().__init__(*args, **kwargs)
        self.xml_obj = xml_obj
Here you pass in an XML object and store it off in an instance variable. You will need this to make editing and displaying the XML easy.
The second class you create is the EditXMLScreen:
class EditXMLScreen(ModalScreen):
    BINDINGS = [
        ("ctrl+s", "save", "Save"),
        ("ctrl+a", "add_node", "Add Node"),
        ("p", "preview", "Preview"),
        ("escape", "esc", "Exit dialog"),
    ]
    CSS_PATH = "edit_xml_screens.tcss"

    def __init__(self, xml_path: Path, *args, **kwargs):
        super().__init__(*args, **kwargs)
        self.xml_tree = ET.parse(xml_path)
        self.expanded = {}
        self.selected_tree_node: None | TreeNode = None
The EditXMLScreenis a new screen that holds your XML editor. Here you add four keyboard bindings, a CSS file path and the __init__()method.
Your initialization method is used to create an lxml Element Tree instance. You also create an empty dictionary of expanded tree widgets and the selected tree node instance variable, which is set to None.
Now you’re ready to create your user interface:
def compose(self) -> ComposeResult:
    xml_root = self.xml_tree.getroot()
    self.expanded[id(xml_root)] = ""
    yield Header()
    yield Horizontal(
        Vertical(Tree("No Data Loaded", id="xml_tree"), id="left_pane"),
        VerticalScroll(id="right_pane"),
        id="main_ui_container",
    )
    yield Footer()

def on_mount(self) -> None:
    self.load_tree()
Fortunately, the user interface needed for editing XML is fairly straightforward:
- You create a new header to add a new title to the screen.
- You use a horizontally-oriented container to hold your widgets.
- Inside of the container, you have a tree control that holds the DOM of the XML on the left.
- On the right, you have a vertical scrolling container.
- Finally, you have a footer
You also set up the first item in your “expanded” dictionary, which is the root node from the XML.
Now you can write your first event handler for this class:
@on(Tree.NodeExpanded)
def on_tree_node_expanded(self, event: Tree.NodeExpanded) -> None:
    """
    When a tree node is expanded, parse the newly shown leaves and make
    them expandable, if necessary.
    """
    xml_obj = event.node.data
    if id(xml_obj) not in self.expanded and xml_obj is not None:
        for top_level_item in xml_obj.getchildren():
            child = event.node.add_leaf(top_level_item.tag, data=top_level_item)
            if top_level_item.getchildren():
                child.allow_expand = True
            else:
                child.allow_expand = False
        self.expanded[id(xml_obj)] = ""
When the user expands a node in the tree control, the on_tree_node_expanded()method will get called. You will extract the node’s data, if it has any. Assuming that there is data, you will then loop over any child nodes that are present.
For each child node, you will add a new leaf to the tree control. You check to see if the child has children too and set the allow_expandflag accordingly. At the end of the code, you add then XML object to your dictionary.
The next method you need to write is an event handler for when a tree node is selected:
@on(Tree.NodeSelected)
def on_tree_node_selected(self, event: Tree.NodeSelected) -> None:
    """
    When a node in the tree control is selected, update the right pane to show
    the data in the XML, if any
    """
    xml_obj = event.node.data
    right_pane = self.query_one("#right_pane", VerticalScroll)
    right_pane.remove_children()
    self.selected_tree_node = event.node

    if xml_obj is not None:
        for child in xml_obj.getchildren():
            if child.getchildren():
                continue
            text = child.text if child.text else ""
            data_input = DataInput(child, text)
            data_input.border_title = child.tag
            container = Horizontal(data_input)
            right_pane.mount(container)
        else:
            # XML object has no children, so just show the tag and text
            if getattr(xml_obj, "tag") and getattr(xml_obj, "text"):
                if xml_obj.getchildren() == []:
                    data_input = DataInput(xml_obj, xml_obj.text)
                    data_input.border_title = xml_obj.tag
                    container = Horizontal(data_input)
                    right_pane.mount(container)
Wben the user selects a node in your tree, you need to update the righthand pane with the node’s contents. To do that, you once again extract the node’s data, if it has any. If it does have data, you loop over its children and update the right hand pane’s UI. This entails grabbing the XML node’s tags and values and adding a series of horizontal widgets to the scrollable container that makes up the right pane of your UI.
If the XML object has no children, you can simply show the top level node’s tag and value, if it has any.
The next two methods you will write are as follows:
@on(Input.Changed)
def on_input_changed(self, event: Input.Changed) -> None:
    """
    When an XML element changes, update the XML object
    """
    xml_obj = event.input.xml_obj
    xml_obj.text = event.input.value

def on_save_file_dialog_dismissed(self, xml_path: str) -> None:
    """
    Save the file to the selected location
    """
    if not Path(xml_path).exists():
        self.xml_tree.write(xml_path)
        self.notify(f"Saved to: {xml_path}")
The on_input_changed() method deals with Inputwidgets which are your special DataInputwidgets. Whenever they are edited, you want to grab the XML object from the event and update the XML tag’s value accordingly. That way, the XML will always be up-to-date if the user decides they want to save it.
You can also add an auto-save feature which would also use the latest XML object when it is saving, if you wanted to.
The second method here, on_save_file_dialog_dismissed(), is called when the user dismisses the save dialog that is opened when the user presses CTRL+S. Here you check to see if the file already exists. If not, you create it. You could spend some time adding another dialog here that warns that a file exists and gives the option to the user whether or not to overwrite it.
Anyway, your next step is to write the keyboard shortcut action methods. There are four keyboard shortcuts that you need to create actions for.
Here they are:
def action_esc(self) -> None:
    """
    Close the dialog when the user presses ESC
    """
    self.dismiss()

def action_add_node(self) -> None:
    """
    Add another node to the XML tree and the UI
    """

    # Show dialog and use callback to update XML and UI
    def add_node(result: tuple[str, str] | None) -> None:
        if result is not None:
            node_name, node_value = result
            self.update_xml_tree(node_name, node_value)

    self.app.push_screen(AddNodeScreen(), add_node)

def action_preview(self) -> None:
    temp_directory = Path(tempfile.gettempdir())
    xml_path = temp_directory / "temp.xml"
    self.xml_tree.write(xml_path)
    self.app.push_screen(PreviewXMLScreen(xml_path))

def action_save(self) -> None:
    self.app.push_screen(SaveFileDialog(), self.on_save_file_dialog_dismissed)
The four keyboard shortcut event handlers are:
action_esc()– Called when the user pressed the “Esc” key. Exits the dialog.action_add_node()– Called when the user presses CTRL+A. Opens theAddNodeScreen. If the user adds new data, theadd_node()callback is called, which will then callupdate_xml_tree()to update the UI with the new information.action_preview()– Called when the user presses the “p” key. Creates a temporary file with the current contents of the XML object. Then opens a new screen that allows the user to view the XML as a kind of preview.action_save– Called when the user presses CTRL+S.
The next method you will need to write is called load_tree():
def load_tree(self) -> None:
    """
    Load the XML tree UI with data parsed from the XML file
    """
    tree = self.query_one("#xml_tree", Tree)
    xml_root = self.xml_tree.getroot()
    self.expanded[id(xml_root)] = ""

    tree.reset(xml_root.tag)
    tree.root.expand()

    # If the root has children, add them
    if xml_root.getchildren():
        for top_level_item in xml_root.getchildren():
            child = tree.root.add(top_level_item.tag, data=top_level_item)
            if top_level_item.getchildren():
                child.allow_expand = True
            else:
                child.allow_expand = False
The method above will grab the Treewidget and the XML’s root element and then load the tree widget with the data. You check if the XML root object has any children (which most do) and then loop over the children, adding them to the tree widget.
You only have two more methods to write. Here they are:
def update_tree_nodes(self, node_name: str, node: ET.SubElement) -> None:
    """
    When adding a new node, update the UI Tree element to reflect the new element added
    """
    child = self.selected_tree_node.add(node_name, data=node)
    child.allow_expand = False

def update_xml_tree(self, node_name: str, node_value: str) -> None:
    """
    When adding a new node, update the XML object with the new element
    """
    element = ET.SubElement(self.selected_tree_node.data, node_name)
    element.text = node_value
    self.update_tree_nodes(node_name, element)
These two methods are short and sweet:
update_tree_nodes()– When the user adds a new node, you call this method which will update the node in the tree widget as needed.update_xml_tree()– When a node is added, update the XML object and then call the UI updater method above.
The last piece of code you need to write is the CSS for this screen. Open up a text editor and create a new file called edit_xml_screens.tcss and then add the following code:
EditXMLScreen {
    Input {
        border: solid gold;
        margin: 1;
        height: auto;
    }
    Button {
        align: center middle;
    }
    Horizontal {
        margin: 1;
        height: auto;
    }
}
This CSS is similar to the other CSS file. In this case, you set the Input widget’s height to auto. You also set the margin and border for that widget. For the buttons, you tell Textual to center all of them. Finally, you also set the margin and height of the horizontal container, just like you did in the other CSS file.
Now you are ready to learn about the add node screen!
The Add Node Screen
When the user wants to add a new node to the XML, you will show an “add node screen”. This screen allows the user to enter a node (i.e., tag) name and value. The screen will then pass that new data to the callback which will update the XML object and the user interface. You have already seen that code in the previous section.
To get started, open up a new file named add_node_screen.pyand enter the following code:
from textual import on
from textual.app import ComposeResult
from textual.containers import Horizontal, Vertical
from textual.screen import ModalScreen
from textual.widgets import Button, Header, Footer, Input


class AddNodeScreen(ModalScreen):
    BINDINGS = [
        ("escape", "esc", "Exit dialog"),
    ]
    CSS_PATH = "add_node_screen.tcss"

    def __init__(self, *args, **kwargs):
        super().__init__(*args, **kwargs)
        self.title = "Add New Node"

    def compose(self) -> ComposeResult:
        self.node_name = Input(id="node_name")
        self.node_name.border_title = "Node Name"
        self.node_value = Input(id="node_value")
        self.node_value.border_title = "Node Value"

        yield Vertical(
            Header(),
            self.node_name,
            self.node_value,
            Horizontal(
                Button("Save Node", variant="primary", id="save_node"),
                Button("Cancel", variant="warning", id="cancel_node"),
            ),
            Footer(),
            id="add_node_screen_ui",
        )

    @on(Button.Pressed, "#save_node")
    def on_save(self) -> None:
        self.dismiss((self.node_name.value, self.node_value.value))

    @on(Button.Pressed, "#cancel_node")
    def on_cancel(self) -> None:
        self.dismiss()

    def action_esc(self) -> None:
        """
        Close the dialog when the user presses ESC
        """
        self.dismiss()
Following is an overview of each method of the code above:
__init__()– Sets the title of the screen.compose()– Creates the user interface, which is made up of twoInputwidgets, a “Save” button, and a “Cancel” button.on_save()-Called when the user presses the “Save” button. This will save the data entered by the user into the two inputs, if any.on_cancel()– Called when the user presses the “Cancel” button. If pressed, the screen exits without saving.action_esc()– Called when the user presses the “Esc” key. If pressed, the screen exits without saving.
That code is concise and straightforward.
Next, open up a text editor or use your IDE to create a file named add_node_screen.tcsswhich will contain the following CSS:
AddNodeScreen {
    align: center middle;
    background: $primary 30%;

    #add_node_screen_ui {
            width: 80%;
            height: 40%;
            border: thick $background 70%;
            content-align: center middle;
            margin: 2;
        }

    Input {
        border: solid gold;
        margin: 1;
        height: auto;
    }

    Button {
        margin: 1;
    }

    Horizontal{
        height: auto;
        align: center middle;
    }
}
Your CSS functions as a way to quickly style individual widgets or groups of widgets. Here you set it up to make the screen a bit smaller than the screen underneath it (80% x 40%) so it looks like a dialog.
You set the border, height, and margin on your inputs. You add a margin around your buttons to keep them slightly apart. Finally, you add a height and alignment to the container.
You can try tweaking all of this to see how it changes the look and feel of the screen. It’s a fun way to explore, and you can do this with any of the screens you create.
The next screen to create is the XML preview screen.
Adding an XML Preview Screen
The XML Preview screen allows the user to check that the XML looks correct before they save it. Textual makes creating a preview screen short and sweet.
Open up your Python IDE and create a new file named preview_xml_screen.pyand then enter the following code into it:
from textual import on
from textual.app import ComposeResult
from textual.containers import Center, Vertical
from textual.screen import ModalScreen
from textual.widgets import Button, Header, TextArea


class PreviewXMLScreen(ModalScreen):
    CSS_PATH = "preview_xml_screen.tcss"

    def __init__(self, xml_file_path: str, *args: tuple, **kwargs: dict) -> None:
        super().__init__(*args, **kwargs)
        self.xml_file_path = xml_file_path
        self.title = "Preview XML"

    def compose(self) -> ComposeResult:
        with open(self.xml_file_path) as xml_file:
            xml = xml_file.read()
        text_area = TextArea(xml)
        text_area.language = "xml"
        yield Header()
        yield Vertical(
            text_area,
            Center(Button("Exit Preview", id="exit_preview", variant="primary")),
            id="exit_preview_ui",
        )

    @on(Button.Pressed, "#exit_preview")
    def on_exit_preview(self, event: Button.Pressed) -> None:
        self.dismiss()
There’s not a lot here, so you will go over the highlights like you did in the previous section:
__init__()– Initializes a couple of instance variables:xml_file_path– Which is a temporary file pathtitle– The title of the screen
compose()– The UI is created here. You open the XML file and read it in. Then you load the XML into aTextAreawidget. Finally, you tell Textual to use a header, the text area widget and an exit button for your interface.on_exit_preview()– Called when the user presses the “Exit Preview” button. As the name implies, this exits the screen.
The last step is to apply a little CSS. Create a new file named preview_xml_screen.tcssand add the following snippet to it:
PreviewXMLScreen {
    Button {
        margin: 1;
    }
}
All this CSS does is add a margin to the button, which makes the UI look a little nicer.
There are three more screens yet to write. The first couple of screens you will create are the file browser and warning screens.
Creating the File Browser and Warning Screens
The file browser is what the user will use to find an XML file that they want to open. It is also nice to have a screen you can use for warnings, so you will create that as well.
For now, you will call this file file_browser_screen.pybut you are welcome to separate these two screens into different files. The first half of the file will contain the imports and the WarningScreenclass.
Here is that first half:
from pathlib import Path

from textual import on
from textual.app import ComposeResult
from textual.containers import Center, Grid, Vertical
from textual.message import Message
from textual.screen import Screen
from textual.widgets import Button, DirectoryTree, Footer, Label, Header


class WarningScreen(Screen):
    """
    Creates a pop-up Screen that displays a warning message to the user
    """

    def __init__(self, warning_message: str) -> None:
        super().__init__()
        self.warning_message = warning_message

    def compose(self) -> ComposeResult:
        """
        Create the UI in the Warning Screen
        """
        yield Grid(
            Label(self.warning_message, id="warning_msg"),
            Button("OK", variant="primary", id="ok_warning"),
            id="warning_dialog",
        )

    def on_button_pressed(self, event: Button.Pressed) -> None:
        """
        Event handler for when the OK button - dismisses the screen
        """
       self.dismiss()
       event.stop()
The warning screen is made up of two widgets: a label that contains the warning message and an “OK” button. You also add a method to respond to the buton being pressed. You dismiss the screen here and stop the event from propagating up to the parent.
The next class you need to add to this file is the FileBrowserclass:
class FileBrowser(Screen):
    BINDINGS = [
        ("escape", "esc", "Exit dialog"),
    ]

    CSS_PATH = "file_browser_screen.tcss"

    class Selected(Message):
        """
        File selected message
        """

        def __init__(self, path: Path) -> None:
            self.path = path
            super().__init__()

    def __init__(self) -> None:
        super().__init__()
        self.selected_file = Path("")
        self.title = "Load XML Files"

    def compose(self) -> ComposeResult:
        yield Vertical(
            Header(),
            DirectoryTree("/"),
            Center(
                Button("Load File", variant="primary", id="load_file"),
            ),
            id="file_browser_dialog",
        )

    @on(DirectoryTree.FileSelected)
    def on_file_selected(self, event: DirectoryTree.FileSelected) -> None:
        """
        Called when the FileSelected Message is emitted from the DirectoryTree
        """
        self.selected_file = event.path

    def on_button_pressed(self, event: Button.Pressed) -> None:
        """
        Event handler for when the load file button is pressed
        """
        event.stop()

        if self.selected_file.suffix.lower() != ".xml" and self.selected_file.is_file():
            self.app.push_screen(WarningScreen("ERROR: You must choose a XML file!"))
            return

        self.post_message(self.Selected(self.selected_file))
        self.dismiss()

    def action_esc(self) -> None:
        """
        Close the dialog when the user presses ESC
        """
        self.dismiss()
The FileBrowserclass is more complicated because it does a lot more than the warning screen does. Here’s a listing of the methods:
__init__()– Initializes the currently selected file to an empty path and sets the title for the screen.compose()– Creates the UI. This UI has a header, aDirectoryTreefor browsing files and a button for loading the currently selected file.on_file_selected()– When the user selected a file in the directory tree, you grab the path and set theselected_fileinstance variable.on_button_pressed()– When the user presses the “Load File” button, you check if the selected file is the correct file type. If not, you should a warning screen. If the file is an XML file, then you post a custom message and close the screen.action_esc()– Called when the user presses theEsckey. Closes the screen.
The last item to write is your CSS file. As you might expect, you should name it file_browser_screen.tcss. Then put the following CSS inside of the file:
FileBrowser {
    #file_browser_dialog {
            width: 80%;
            height: 50%;
            border: thick $background 70%;
            content-align: center middle;
            margin: 2;
            border: solid green;
        }
    Button {
        margin: 1;
        content-align: center middle;
    }
}
The CSS code here should look pretty familiar to you. All you are doing is making the screen look like a dialog and then adding a margin and centering the button.
The last step is to create the file save screen.
Creating the File Save Screen
The file save screen is similar to the file browser screen with the main difference being that you are supplying a new file name that you want to use to save your XML file to.
Open your Python IDE and create a new file called save_file_dialog.pyand then enter the following code:
from pathlib import Path

from textual import on
from textual.app import ComposeResult
from textual.containers import Vertical
from textual.screen import Screen
from textual.widgets import Button, DirectoryTree, Footer, Header, Input, Label


class SaveFileDialog(Screen):
    CSS_PATH = "save_file_dialog.tcss"

    def __init__(self) -> None:
        super().__init__()
        self.title = "Save File"
        self.root = "/"

    def compose(self) -> ComposeResult:
        yield Vertical(
            Header(),
            Label(f"Folder name: {self.root}", id="folder"),
            DirectoryTree("/"),
            Input(placeholder="filename.txt", id="filename"),
            Button("Save File", variant="primary", id="save_file"),
            id="save_dialog",
        )

    def on_mount(self) -> None:
        """
        Focus the input widget so the user can name the file
        """
        self.query_one("#filename").focus()

    def on_button_pressed(self, event: Button.Pressed) -> None:
        """
        Event handler for when the load file button is pressed
        """
        event.stop()
        filename = self.query_one("#filename").value
        full_path = Path(self.root) / filename
        self.dismiss(f"{full_path}")

    @on(DirectoryTree.DirectorySelected)
    def on_directory_selection(self, event: DirectoryTree.DirectorySelected) -> None:
        """
        Called when the DirectorySelected message is emitted from the DirectoryTree
        """
        self.root = event.path
        self.query_one("#folder").update(f"Folder name: {event.path}")
The save file dialog code is currently less than fifty lines of code. Here is a breakdown of that code:
__init__()– Sets the title of the screen and the default root folder.compose()– Creates the user interface, which consists of a header, a label (the root), the directory tree widget, an input for specifying the file name, and a “Save File” button.on_mount()– Called automatically by Textual after thecompose()method. Sets the input widget as the focus.on_button_pressed()– Called when the user presses the “Save File” button. Grabs the filename and then create the full path using the root + filename. Finally, you send that full path back to the callback function viadismiss().on_directory_selection()– Called when the user selects a directory. Updates therootvariable to the selected path as well as updates the label so the user knows which path is selected.
The last item you need to write is the CSS file for this dialog. You will need to name the file save_file_dialog.tcssand then add this code:
SaveFileDialog {
    #save_dialog {
            width: 80%;
            height: 50%;
            border: thick $background 70%;
            content-align: center middle;
            margin: 2;
            border: solid green;
        }
    Button {
        margin: 1;
        content-align: center middle;
    }
}
The CSS code above is almost identical to the CSS you used for the file browser code.
When you run the TUI, you should see something like the following demo GIF:
Wrapping Up
You have now created a basic XML editor and viewer using Python and Textual. There are lots of little improvements that you can add to this code. However, those updates are up to you to make.
Have fun working with Textual and create something new or contribute to a neat Textual project yourself!
Get the Code
The code in this tutorial is based on version 0.2.0 of BoomslangXML TUI. You can download the code from GitHub or from the following links:
The post Creating a Simple XML Editor in Your Terminal with Python and Textual appeared first on Mouse Vs Python.
]]>The post Announcing Squall: A TUI SQLite Editor appeared first on Mouse Vs Python.
]]>Here is what Squall looks like using the Chinook database:
Currently, there is only one command-line option: -f or --filename, which allows you to pass a database path to Squall to load.
Example Usage:
squall -f path/to/database.sqlite
The instructions assume you have uv or pip installed.
uv tool install squall_sql
uv tool install git+https://github.com/driscollis/squall
If you want to upgrade to the latest version of Squall SQL, then you will want to run one of the following commands.
uv tool install git+https://github.com/driscollis/squall -U --force
pip install squall-sql
If you have cloned the package and want to run Squall, one way to do so is to navigate to the cloned repository on your hard drive using your Terminal. Then run the following command while inside the src folder:
python -m squall.squall
The post Announcing Squall: A TUI SQLite Editor appeared first on Mouse Vs Python.
]]>The post An Intro to Asciimatics – Another Python TUI Package appeared first on Mouse Vs Python.
]]>While Asciimatics is not as full-featured and slick as Textual is, you can do quite a bit with Asciimatics. In fact, there is a special kind of charm to the old-school flavor of the TUIs that you can create using Asciimatics.
In this tutorial, you will learn the basics of Asciimatics:
- Installation
- Creating a Hello World application
- Creating a form
The purpose of this tutorial is not to be exhaustive, but to give you a sense of how easy it is to create a user interface with Asciimatics. Be sure to read the complete documentation and check out their examples to learn more.
For now, let’s get started!
Installation
Asciimatics is a third-party Python package. What that means is that Asciimatics is not included with Python. You will need to install it. You should use a Python virtual environment for installing packages or creating new applications.
Whether you use the virtual environment or not, you can use pip to install Asciimatics:
python -m pip install asciimatics
Once Asciimatics is installed, you can proceed to creating a Hello World application.
Creating a Hello World Application
Creating a simple application is a concrete way to learn how to use an unfamiliar package. You will create a fun little application that “prints” out “Hello from Asciimatics” multiple times and in multiple colors.
Open up your favorite Python IDE or text editor and create a new file called hello_asciimatics.py and then add the following code to it:
from random import randint
from asciimatics.screen import Screen

def hello(screen: Screen):
    while True:
        screen.print_at("Hello from ASCIIMatics",
                        randint(0, screen.width), randint(0, screen.height),
                        colour=randint(0, screen.colours - 1),
                        bg=randint(0, screen.colours - 1)
                        )
        key = screen.get_key()
        if key in (ord("Q"), ord("q")):
            return
        screen.refresh()

Screen.wrapper(hello)
This codfe takes in an Asciimatics Screen object. You draw your text on the screen. In this case, you use the screen’s print_at() method to draw the text. You use Python’s handy random module to choose random coordinates in your terminal to draw the text as well as choose random foreground and background colors.
You run this inside an infinite loop. Since the loop runs indefinitely, the text will be drawn all over the screen and over the top of previous iterations of the text. What that means is that you should see the same text over and over again, getting written on top of previous versions of the text.
If the user presses the “Q” button on their keyboard, the application will break out of the loop and exit.
When you run this code, you should see something like this:
Isn’t that neat? Give it a try on your machine and verify that it works.
Now you are ready to create a form!
Creating a Form
When you want to ask the user for some information, you will usually use a form. You will find that this is true in web, mobile and desktop applications.
To make this work in Asciimatics, you will need to create a way to organize your widgets. To do that, you create a Layoutobject. You will find that Asciimatics follow an hierarchy of Screen -> Scene -> Effects and then layouts and widgets.
All of this is kind of abstract though. So it make this easier to understand, you will write some code. Open up your Python IDE and create another new file. Name this new file ascii_form.pyand then add this code to it:
import sys

from asciimatics.exceptions import StopApplication
from asciimatics.scene import Scene
from asciimatics.screen import Screen
from asciimatics.widgets import Frame, Button, Layout, Text

class Form(Frame):
    def __init__(self, screen):
        super().__init__(screen,
                         screen.height * 2 // 3,
                         screen.width * 2 // 3,
                         hover_focus=True,
                         can_scroll=False,
                         title="Contact Details",
                         reduce_cpu=True)
        layout = Layout([100], fill_frame=True)
        self.add_layout(layout)

        layout.add_widget(Text("Name:", "name"))
        layout.add_widget(Text("Address:", "address"))
        layout.add_widget(Text("Phone number:", "phone"))
        layout.add_widget(Text("Email address:", "email"))

        button_layout = Layout([1, 1, 1, 1])
        self.add_layout(button_layout)
        button_layout.add_widget(Button("OK", self.on_ok), 0)
        button_layout.add_widget(Button("Cancel", self.on_cancel), 3)
        self.fix()

    def on_ok(self):
        print("User pressed OK")

    def on_cancel(self):
        sys.exit(0)
        raise StopApplication("User pressed cancel. Quitting!")


def main(screen: Screen):
    while True:
        scenes = [
            Scene([Form(screen)], -1, name="Main Form")
        ]
        screen.play(scenes, stop_on_resize=True, start_scene=scenes[0], allow_int=True)

Screen.wrapper(main, catch_interrupt=True)
The Form is a subclass of Frame which is an Effect in Asciimatics. In this case, you can think of the frame as a kind of window or dialog within your terminal.
The frame will contain your form. Within the frame, you create a Layoutobject and you tell it to fill the frame. Next you add the widgets to the layout, which will add the widgets vertically, from top to bottom.
Then you create a second layout to hold two buttons: “OK” and “Cancel”. The second layout is defined as having four columns with a size of one. You will then add the buttons and specify which column the button should be put in.
To show the frame to the user, you add the frame to a Scene and then you play() it.
When you run this code, you should see something like the following:
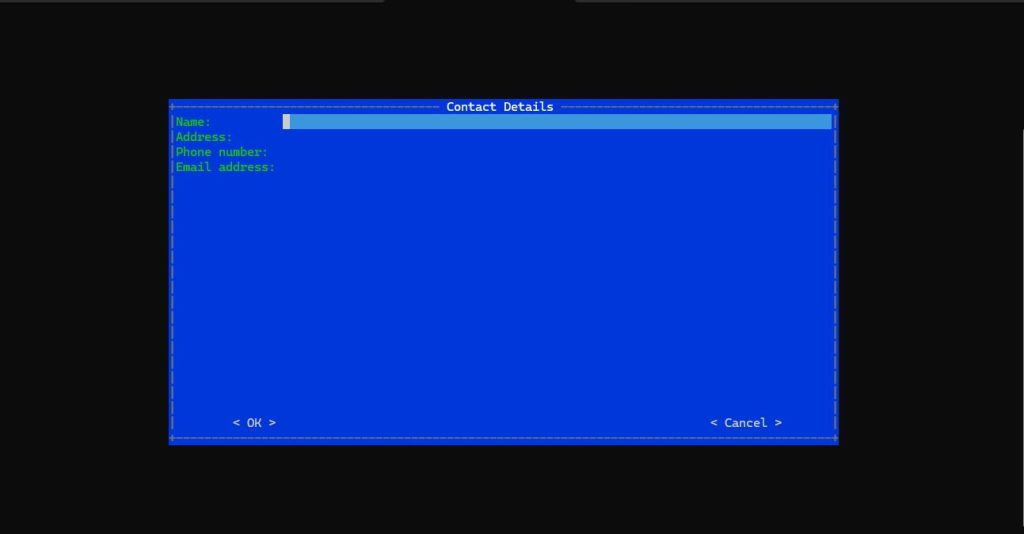
Pretty neat, eh?
Now this example is great for demonstrating how to create a more complex user interface, but it doesn’t show how to get the data from the user as you haven’t written any code to grab the contents of the Text widgets. However, you did show that when you created the buttons, you can bind them to specific methods that get called when the user clicks on those buttons.
Wrapping Up
Asciimatics makes creating simple and complex applications for your terminal easy. However, the applications have a distincly retro-look to them that is reminiscent to the 1980’s or even earlier. The applications are appealing in their own way, though.
This tutorial only scratches the surface of Asciimatics. For full details, you should check out their documentation.
If you wamt to create a more modern looking user interface, you might want to check out Textual instead.
Related Reading
Want to learn how to create TUIs the modern way? Check out my book: Creating TUI Applications with Textual and Python.

Available at the following:
The post An Intro to Asciimatics – Another Python TUI Package appeared first on Mouse Vs Python.
]]>