The post Top 7 Bot Blockers in 2025: Challenges for Modern Web Scraping appeared first on ScraperAPI.
]]>Watching your painstakingly written script fail repeatedly can be a frustrating ordeal. You spend hours refining your selectors and logic, only to get hit with more 403 Forbidden errors.
The reality is the web isn’t as open as it used to be. Most major websites are now protected by sophisticated bot blockers designed to aggressively filter out anything that doesn’t look or act human.
While these measures are meant to stop malicious bot traffic and bad bots, the unfortunate side effect is that legitimate crawlers and scrapers often get caught in the crossfire. These bot protection systems aren’t just checking user agents anymore, but they are monitoring non-linear browsing behaviors, fingerprinting your TLS handshake, and banning suspicious IP addresses instantaneously.
When you hit these walls, you generally have two choices: You can spend valuable development time engineering complex workarounds for proxy rotations and headless browsers, or you can offload that headache to a tool built to handle it for you, like ScraperAPI.
In this guide, I discuss the seven toughest bot detection providers and why they’re so hard to bypass. Then, you’ll see how ScraperAPI bypasses them automatically, with ease.
TL;DR: Bot Blockers Difficulty Breakdown
The table below gives a quick overview of each bot blocker, highlighting the detection system used, the difficulty level, and the specific technical hurdles associated with each:
| Bot Blocker | Detection Type | Difficulty Level | Primary Obstacle |
| Akamai | Sensor Data and Edge Reputation |  Extreme Extreme |
TLS Fingerprinting (JA3). Mimics the cryptographic “handshake” of a real browser, causing standard HTTP requests to fail instantly. |
| DataDome | Real-time AI and Device Analysis | Very Hard |
Hardware Consistency. Detects mismatches between your declared User-Agent and actual hardware. |
| PerimeterX | Behavioral Biometrics |  Hard Hard |
“Humanlike” Checks. Requires generating “randomness” (like variable delays) to pass behavioral analysis. |
| Cloudflare | Global Threat Intelligence | Hard (Enterprise tier) |
Uses global IP address reputation and TLS fingerprinting. Enterprise Turnstile performs browser-side checks (JS challenges, device signals). |
| Fastly | VCL Edge Logic | Medium |
Protocol Strictness. Signals like header order or formatting anomalies supplement bot scoring and TLS checks. |
| Amazon WAF | Infrastructure and Static Rules | Medium |
Rate Limiting. Main defense is usually volume-based; bypassing often requires simple IP rotation and request throttling. |
| open-appsec | Contextual Machine Learning | Variable |
Unpredictability. Unlike rule-based blockers, it uses a probabilistic ML engine. It may ignore standard scraping for hours, then trigger blocks based on subtle behavioral anomalies (like request timing) rather than clear violations. |
Evaluating Bot Blockers
When I call a blocker “tough”, I mean more than “it threw a few 403s.” That is why this ranking is based on three things:
- How deeply the detection really penetrates
- How often you run into it in real traffic
- How much effort it takes to build and keep a stable bypass
For points two and three, we’re using our internal metrics to rank bot blockers by how often our customers encounter them, and by the complexity of bypassers our dev team needs to build and maintain to keep scrapers unnoticed.
The 7 Top Bot Blockers Scrapers Need to Know
Not all bot blockers are as impenetrable as they seem. Some are like speed bumps that require you to go around them slowly using proxies, while others are full-blown fortresses that analyze your mouse movements, TLS fingerprints, and employ all sorts of sophisticated mechanisms to block your scrapers.
Below are 7 providers that give devs the biggest headaches. I’ve ranked them based on the sophistication level of their detection methods and the engineering effort required to get past them.
1. Akamai
Akamai powers the infrastructure for many major banks, airlines, and eCommerce platforms, and sees enough global traffic to spot anomalies with unmatched precision. It doesn’t just check what you are requesting, but also how your device built the connection.
- Standout Features: Akamai utilizes deep “sensor data”, which is an encrypted payload that checks everything from your battery status to canvas rendering. It also uses JA3/JA4 fingerprinting to analyze the specific cryptographic “handshake” your browser makes.
- Performance: It’s extremely aggressive yet accurate. Their low false-positive rate allows admins to block suspicious traffic instantly without fear of rejecting legitimate users.
- Challenge of Bypassing: Standard automation tools (Puppeteer/Selenium) are dead on arrival here. Success requires pristine residential IP addresses and specialized clients that perfectly mimic a real browser’s TLS fingerprint. If your request data feels even slightly synthetic, you’re blocked.
|
Additional resources:
|
2. DataDome
DataDome focuses on bot mitigation (not a CDN add-on), making it highly reactive to threats. Chances are, if you do find a workaround, its machine learning engine will patch the breach, globally, within a short period.
- Standout Features: DataDome specializes in mapping mismatches between declared specs and your actual hardware. It’s like when you set your scraper’s User-Agent to say: “I am a generic Android phone,” but DataDome queries for the hardware specs and sees a device with 64 CPU cores. No Android phone has 64 cores; consequently, you get blocked.
- Performance: It blocks threats in real-time (milliseconds) and has a dashboard that gives admins real-time overview of “attacks”, encouraging them to be aggressive with blocking rules.
- Challenge of Bypassing: Data Center IP addresses are banned instantly. To pass, you typically need high-quality 4G/5G mobile proxies (which share IPs with real humans) and a browser automation setup that completely hides the “WebDriver” property.
|
Additional resources:
|
3. PerimeterX (HUMAN)
PerimeterX (now part of HUMAN) cares less about your network settings and more about your “human nature”. It obsesses over user behavior – how you interact with the page before you even click a button.
- Standout Features: The “Human Challenge” involves tracking the trajectory of your mouse, scroll speed, and keystroke micro-timing to build a behavioral fingerprint. And, because it integrates via JavaScript SDKs into websites it protects, it has full visibility into client-side execution, allowing it to flag perfect traffic that lacks the messy, chaotic movement of a real human.
- Performance: PerimeterX is mainly optimized for modern web apps and eCommerce platforms. While most security providers (like Cloudflare) check your ID at the front door, PerimeterX lets traffic flow until a critical action (like “Add to Cart”) occurs, then clamps down if the bot activity looks robotic.
- Challenge of Bypassing: The real challenge is being convincing enough for the system to pass off your requests as “authentically human. Because real human engagements are often messy, your bot can’t simply teleport the mouse to a button; it has to inject calculated noise to mimic the friction of a human hand. Even this may not be enough.
|
Additional resources:
|
4. CloudFlare
Cloudflare sits in front of millions of sites, from hobby blogs to large enterprises, which gives it very broad visibility into IP and bot behavior across the web. Their protection ranges from free Bot Fight Mode to enterprise-grade Bot Management.
- Standout Features: It relies on the “Turnstile” challenge and rigorous TLS fingerprinting. If an IP address acts suspiciously on one Cloudflare site, it immediately loses reputation across the entire Cloudflare network.
- Performance: Detection occurs at the network edge, making it very fast. CloudFlare frequently uses “waiting rooms” to stall and frustrate bots without explicitly blocking them.
- Challenge of Bypassing: For Enterprise-protected sites, the primary blocker is the TLS handshake. Standard Python libraries get detected immediately. You’d want to use tools (like curl_cffi or specialized browsers) that can spoof the cryptographic handshake of a real web browser, if you want to even attempt breaking through.
|
Additional resources:
|
5. Fastly
Fastly is a high-performance edge platform. Their security relies on strict adherence to web protocols rather than black box AI behavior tracking.
- Standout Features: It uses VCL (Varnish Configuration Language) to enforce logic at the edge. It’s particularly strict about HTTP request header ordering and formatting. It also supports aggressive rate limiting logic custom-written by the site admin.
- Performance: Very low latency. Because the security logic runs directly on the caching servers, it has minimal impact on site speed or user experience.
- Challenge of Bypassing: Fastly blocks based on technical protocol violations. If your scraper sends headers in the wrong order (for example, sending Accept before Host when a real browser does the opposite), it will block you. Bypassing Fastly is less about mimicking user behavior and more about ensuring your HTTP request is structurally perfect. Still, it doesn’t necessarily make it easier.
|
Additional resources:
|
6. Amazon WAF
Amazon WAF is more of an infrastructure, rather than a managed service (unless you pay extra). Out of the box, it is a set of tools that you’d have to configure yourself.
- Standout Features: The major plus is that it integrates naturally with AWS services. While they offer a Bot Control managed rule set, it is expensive, so many site owners rely on simple rate-limiting rules instead.
- Performance: Highly scalable, but the detection logic is often static (blocking an IP address after an X number of requests) rather than purely behavioral.
- The Challenge: Generally, I consider it one of the easiest to bypass on this list. Unless the administrator can write super complex rules. Standard IP rotation and respecting rate limits are usually sufficient to bypass it.
|
Additional resources:
|
7. open-appsec
open-appsec is an open-source web application and API security engine that relies on machine learning rather than static signatures to protect client websites. It does this by building an understanding of how your specific application normally behaves and uses that context to flag abnormal or risky traffic.
- Standout Features: open-appsec combines a supervised ML model (trained offline on millions of benign and malicious requests) with an online, environment-specific model that learns from your live traffic. This dual approach helps it detect both known and emerging attacks with fewer false positives and less manual tuning than a traditional WAF (Web Application Firewall).
- Performance: It is built for cloud-native, containerized environments, with automation that fits CI/CD workflows and infrastructure-as-code. The ML engine evaluates HTTPS requests in real time and is engineered to provide preemptive protection with little configuration overhead.
- Challenge of bypassing: Because enforcement is driven by a contextual ML model rather than a fixed signature set, there isn’t a simple list of rules for you to study and evade. The engine weighs multiple signals (request content, behavior patterns, and application context) and continuously refines its understanding of “normal,” so simple tricks like minor header tweaks or basic IP address rotation won’t slip past it.
Bot Blockers vs. Web Scraping: How to Navigate Each?
Modern bot blockers are combining machine learning, advanced fingerprinting, and all sorts of sophisticated behavior analysis to spot scrapers in real time.
Traditional scraping scripts, regardless of the language or stack, fail because they cannot mimic the full biometric and cryptographic profile of a human user. Even the engineering overhead required to maintain a bypasser for Akamai or DataDome can often exceed the value of the data itself. The problem then isn’t code logic, but infrastructure maintenance.
There are also issues of ethical compliance and legal barriers that can arise. The solution is to simplify web scraping using compliant tools by letting a dedicated scraping API handle proxies, browser behavior, JavaScript rendering, and CAPTCHAs for you.
ScraperAPI is built exactly for this use case. It gives you a single endpoint that handles complete bypassing, so you can focus on data, not defense systems.
Here is how ScraperAPI resolves the detection hurdles of each bot blocker.
Real-Time ML Blockers (DataDome, HUMAN)
Our API routes your requests through a massive pool of premium residential and mobile proxies. This ensures no single IP generates enough volume to trigger a flag. Crucially, we handle the “identity management” as well, automatically handling CAPTCHAs and managing session cookies so every request appears as a unique, legitimate user with a consistent hardware profile.
Edge and CDN-Based Systems (Akamai, Fastly, Cloudflare)
ScraperAPI manages the TLS fingerprinting and header ordering to strictly match real browser standards (like Chrome or Safari). Our global proxy network ensures your requests originate from the correct geolocations to bypass regional locks. We handle the “waiting rooms” and interstitial challenges (e.g., Cloudflare’s Turnstile) on our end, so your pipeline receives only the successful, clean HTML response.
Behavior and Fingerprint Analysis (PerimeterX)
Here, we manage the full browser lifecycle behind the scenes. From JavaScript execution and cookie persistence, injecting the necessary behavioral signals to pass humanity checks, etc. You don’t need to engineer complex mouse movements or worry about header consistency; our rendering engine ensures your request passes the behavioral audit before the data is ever sent back to you.
Cloud-Native and Open-Source Security (open-appsec, Amazon WAF)
ScraperAPI integrates seamlessly with any tech stack (Python, Node.js, Java, Ruby, Go, PHP, R) to standardize your request volume. We automatically handle retries and pace your requests to keep your scraping activity within compliant usage thresholds. This prevents your IPs from being burned by static firewall rules, allowing for consistent, long-term data extraction.
Unblock your data pipelines with ScraperAPI
Whether you’re fighting Akamai’s fingerprinting or DataDome’s device checks, maintaining a DIY bypass solution is a full-time job that drains engineering resources.
ScraperAPI simplifies that battle into a simple API call. We manage the proxies, the browsers, the CAPTCHAs, and the TLS fingerprints, so you can stop debugging multiple errors and focus on the only thing that matters: the data.
Create a free account today and get 5,000 free API credits to test our solution against your toughest targets.
For large-scale projects requiring custom unblocking strategies or higher throughput, contact our sales team to discuss enterprise options.
The post Top 7 Bot Blockers in 2025: Challenges for Modern Web Scraping appeared first on ScraperAPI.
]]>The post How to Build an Amazon Image Search Engine with LangChain & ScraperAPI appeared first on ScraperAPI.
]]>Image search has become an intuitive way to browse the internet. Tools like Google Lens and even Amazon reverse image search can find identical items on a website based on an uploaded photo, which is useful but generic.
If you live in the UK or Canada and just want search results of product listings from your local Amazon marketplace or some other local online retailer, the breadth of results Google Lens returns can be overwhelming, time-wasting, and mostly useless. Oftentimes, it will return similar items, just not readily accessible items.
Given Amazon’s scale and inventory depth, a focused search that goes straight to the right marketplace is the most efficient approach.
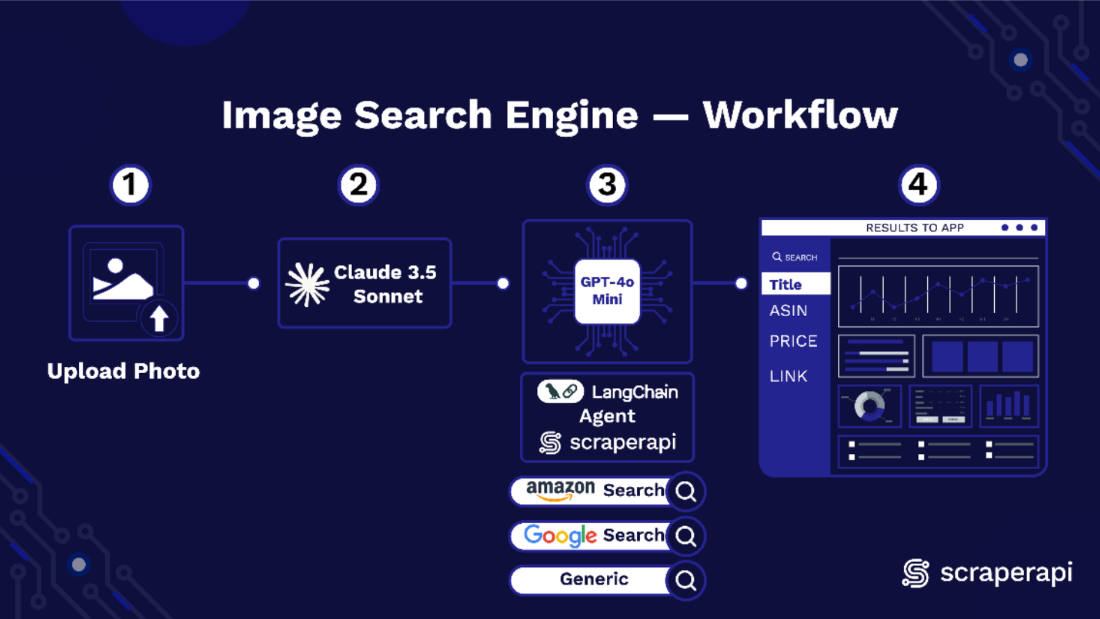
In this tutorial, we will build an Amazon image search engine using ScraperAPI, LangChain, Claude 3.5 Sonnet, GPT-4o mini, and Streamlit.
Our project enables image search, particularly for Amazon Marketplaces in any region of the world, using two separate large language models (LLMs) to analyze uploaded images and generate shopping queries.
These queries are passed to a reasoning model that uses the ScraperAPI LangChain agent to search Amazon and return structured results. To build a user interface and host our app for free, we use Streamlit.
Let’s get started!
TL;DR: What we will build at a glance:
| The Project | The Tech Stack | Supported Marketplaces | Ideal Use Cases |
| An Image search engine that maps uploaded images to exact purchasable products on local Amazon marketplaces. | Python, Streamlit, LangChain, ScraperAPI, Claude 3.5 Sonnet (Vision), GPT-4o mini (Reasoning). | US, UK, Germany, Denmark, France, Italy, Spain, Canada. | High-precision e-commerce search, affiliate link generation, and competitive price monitoring. |
Why Build an Amazon Image Search Engine?
When you run a visual search on a specific Logitech mouse you intend to buy, Google Lens returns a series of PC accessories pages: a Pinterest board, an eBay listing, an Instagram vendor in Portugal, etc. It casts a wide net, which is not always what you want.
Usually, your intent is more focused: “Show me online stores within my locale where I can purchase this specific mouse”. An Amazon image search tool bridges that gap for you, omitting results that are insignificant to your query, and personalizes the results you get back down to the very color.
Here are a few advantages to building an Amazon Product Search Tool:
1. Leveraging Specialized APIs
Don’t waste valuable time filtering through tons of generic results, when you can utilize a specialized Amazon product search API that gives you exactly what you need. Pairing a visual recognition model with the ScraperAPI Amazon Search Tool, can match visual features to live product ASINs, turning a simple image query into a structured data pipeline, returning prices, reviews, and availability instantly.
2. Reasoning and Context
Even a standard Amazon reverse image search is still static. An Agent adds a layer of reasoning to the process. If the image is blurry or ambiguous, it can infer context or ask clarifying questions before executing the search. And that’s how you can transform a static lookup into an intelligent Amazon product discovery tool that understands intent better than a generic algorithm.
3. Global Marketplace Precision
Generic tools often default to the US market (Amazon.com), which renders them useless for international data. A custom solution allows for localized Amazon marketplace results, tailored to specific locations you prefer.
Understanding the Amazon Image Search Engine’s Workflow
There are three core components of our Image Search engine that work in sequence. Claude 3.5 Sonnet reads the uploaded photo and writes a short shopping caption that captures distinct attributes of the item.
GPT 4o Mini takes that caption, chooses the right Amazon marketplace, and forms a neat query. The ScraperAPI LangChain agent then runs the query against Amazon and returns structured results containing title, ASIN, price, URL link, and image, which the app shows instantly.
Let’s take a closer look at how each of these components functions:
LangChain and ScraperAPI
LangChain agents connect a reasoning model to external tools, so the model can act, not just chat. Integrating ScraperAPI as an external tool enables the agent to crawl and fetch real-time data from the web without getting blocked.
The package exposes whatever reasoning model (an LLM) you pair with the agent through three distinct ScraperAPI endpoints: ScraperAPIAmazonSearchTool, ScraperAPIGoogleSearchTool, and ScraperAPITool.
With just a prompt and your ScraperAPI key, the agent issues a tool call and ScraperAPI handles bypassing, protection, and extraction, returning clean formatted data. For Amazon, the data usually comes back as a structured JSON field containing title, ASIN, price, image, and URL link.
Claude 3.5 Sonnet and GPT 4o Mini
In this project, Claude 3.5 Sonnet, a multimodal LLM, converts each uploaded photo into a short descriptive caption that captures the key attributes of that item.
The caption becomes the query, and GPT 4o Mini, the reasoning model paired to our agent, then interprets the caption, selects the correct Amazon marketplace, and calls the ScraperAPI LangChain tool to run the search.
The tool returns structured results that the app can display directly. Splitting the work this way keeps each model focused on what it does best.
Claude Vision extracts the right details from the image. GPT 4o Mini handles reasoning and tool use. ScraperAPI provides stable access and structured data.
Obtaining Claude 3.5 Sonnet and GPT4o Mini from OpenRouter
Our setup uses two separate large language models arranged in a multi-flow design. You can access LLMs from platforms like Hugging Face, Google AI Studio, AWS Bedrock, or locally via Ollama.
However, I used OpenRouter because it’s simpler to set up and supports many models through a single API, which is ideal for multi-flow LLM setups.
Here’s a guide on how to access Claude 3.5 Sonnet from OpenRouter:
- Log in to OpenRouter, sign up, and create a free account:

- After verifying your email, log in and search for Claude models (or any other LLM of our choice) in the search bar:

- Select Claude 3.5 Sonnet and click on the “Copy” icon just below the model’s name:

- Click on “API” to create a personal API access key for your model.

- Select “Create API Key” and then copy and save your newly created API key.

- You do not have to repeat the entire process to access GPT 4o Mini. Simply copy and paste the model link highlighted below into the code, and your single API key will be able to access both LLMs.

Do not share your API key publicly!
Getting Started with ScraperAPI
- If you don’t have a ScraperAPI account, go to scraperapi.com, and click “Start Trial” to create one or “Login” to access an existing account.:

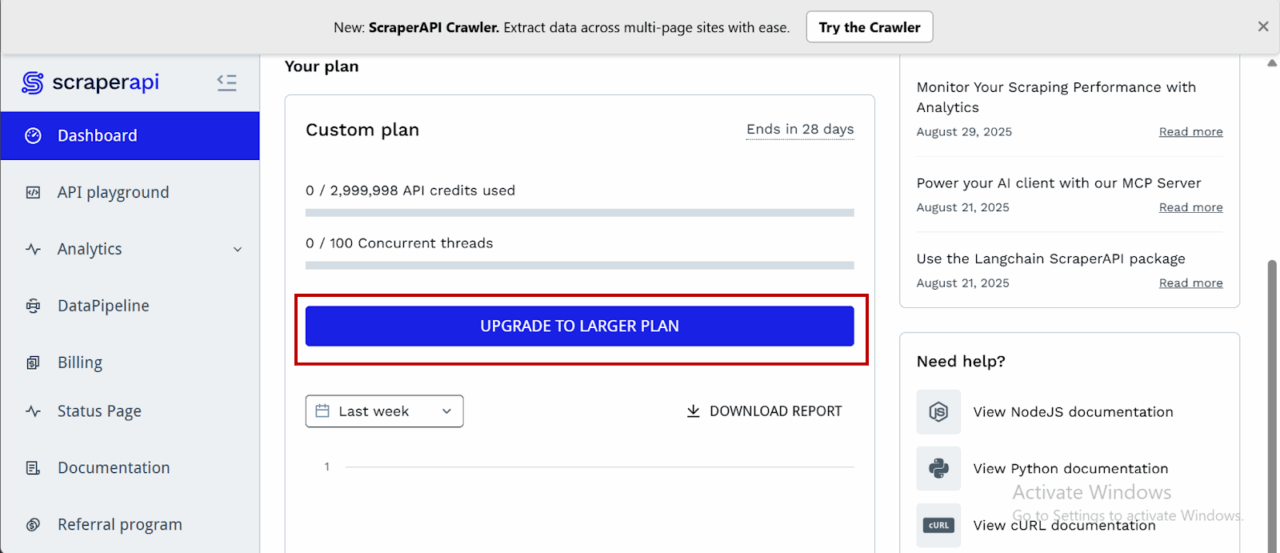
- After creating your account, you’ll have access to a dashboard providing you with an API key, access to 5000 API credits (7-day limited trial period), and information on how to get started scraping.

- To access more credits and advanced features, scroll down and click “Upgrade to Larger Plan.”
- ScraperAPI provides documentation for various programming languages and frameworks, such as PHP, Java, and Node.js, that interact with its endpoints. You can find these resources by scrolling down on the dashboard page and clicking “View All Docs”:

Now we’re all set, let’s start building our tool.
Prerequisites and Tools Used
To build this Amazon visual search engine, we need to utilize tools that can facilitate computer vision, logic orchestration, and anti-bot evasion.
Here is the breakdown of our toolkit:
- Python 3.8+: The latest versions of Python we’ll need to build with.
- Streamlit: For building the frontend and deploying it as a fully interactive web UI in Python without needing HTML/CSS knowledge.
- LangChain: This is the orchestration layer. We will use it to build an autonomous agent that connects our LLM “brain” to our search tools.
- ScraperAPI: Our tool for data extraction. We’re using the langchain-scraperapi package to access ScraperAPI’s Amazon Search Tool, which then handles CAPTCHAs, IP rotation, and HTML parsing automatically.
- OpenRouter: We need this to access the specific model types in this tutorial: a Vision Model (Claude 3.5 Sonnet) to visually interpret the product, and a Reasoning Model (GPT-4o) to execute the search logic.
- Pillow (PIL): A lightweight library to process the raw image data uploaded by a user.
- Required API Keys: To follow along, you will need to grab credentials from ScraperAPI (for the Amazon data) and OpenRouter (for the models).
Building the Image Search Engine for Amazon
Step 1: Setting Up the Project
Create a new project folder, a virtual environment, and install the necessary dependencies.
```bash
mkdir amzn_image_search  # Creates the project folder
cd amzn_image_search # Moves you inside the project folder```
Set up a virtual environment
```bash
python -m venv venv```
Activate the environment:
- Windows:
```bash
venv\Scripts\activate```
- macOS/Linux:
```bash
source venv/bin/activate```
Now, install the dependencies we’ll need:
```bash
pip install streamlit Pillow requests aiohttp openai langchain-openai langchain langchain-scraperapi python-dotenv```
The key dependencies and their functions are:
- streamlit: The core library for building and running the app’s UI.
- openai: To interact with OpenRouter’s API, which is compatible with the OpenAI library’s structure.
- langchain-openai: Provides the LangChain integration for using OpenAI-compatible models (like those on OpenRouter) as the “brain” for our agent.
- langchain-scraperapi: Provides the pre-built
ScraperAPIAmazonSearchToolthat our LangChain agent will use to perform searches on Amazon. - langchain: The framework that allows us to chain together our language model (the brain) and tools (the search functionality) into an autonomous agent.
- Pillow: A library for opening, manipulating, and saving many different image file formats. We use it to handle uploaded images.
- requests & aiohttp: Underlying HTTP libraries used by the other packages to make API calls.
Step 2: Keys, Environment, and Model Selection
Let’s set up the necessary API keys and define which AI models will be used for different tasks.
In a file .env, add:
SCRAPERAPI_API_KEY="Your_SCRAPERAPI_API_Key"
In a file main.py, add the following code:
```python
import os, io, base64, json
import streamlit as st
from PIL import Image
from openai import OpenAI

from langchain_openai import ChatOpenAI
from langchain.agents import AgentExecutor, create_tool_calling_agent
from langchain_core.prompts import ChatPromptTemplate, MessagesPlaceholder
from langchain_core.tools import StructuredTool
from langchain_scraperapi.tools import ScraperAPIAmazonSearchTool
from dotenv import load_dotenv
load_dotenv()

# secure api keys from .env using os
SCRAPERAPI_KEY = os.environ.get("SCRAPERAPI_API_KEY")
OPENROUTER_API_KEY_DEFAULT = os.environ.get("OPENROUTER_API_KEY")

if SCRAPERAPI_KEY:
    os.environ["SCRAPERAPI_API_KEY"] = SCRAPERAPI_KEY
else:
    print("Warning: SCRAPERAPI_API_KEY environment variable not set.")

# allocating models as per their tasks
CAPTION_MODEL = "anthropic/claude-3.5-sonnet"  # vision model for captioning
AGENT_MODEL = "openai/gpt-4o-mini" # reasoning model (cheaper alternative to claude```
Here’s a breakdown of what the code above does:
- Imports: All the necessary libraries for the application are imported at the top, including
StructuredToolwhich we’ll use to create a custom, reliable search tool. - API Keys: The script handles API key management by using
load_dotenv()to retrieve keys from a.envfile and assigns them to variables:SCRAPERAPI_KEYandOPENROUTER_API_KEY_DEFAULT. - Environment Setup:
os.environ["SCRAPERAPI_API_KEY"] = SCRAPERAPI_KEYis a crucial line. LangChain tools often look for API keys in environment variables, so this makes ourSCRAPERAPI_KEYavailable to theScraperAPIAmazonSearchTool. - Model Selection: Since we’re using two different models for two distinct tasks, the
CAPTION_MODELwill be Claude 3.5 Sonnet due to its multimodal capabilities. TheAGENT_MODELis GPT-4o mini because it’s cheaper and very efficient at understanding instructions and using tools, which is exactly what the agent needs to do.
Step 3: App Configuration and UI Basics
Here we’ll configure the Streamlit page and set up some basic data structures and titles. Add this to your file:
```python
st.set_page_config(page_title=" Amazon Visual Match", layout="wide")
st.title("Amazon Visual Product Search Engine")```
Here’s what this code achieves:
- st.set_page_config(…): Sets the browser tab title and uses a “wide” layout for the app.
- st.title(…): Displays the main title on the web page.
- AMZ_BASES: This dictionary is essential. It maps a marketplace name ( “ES (.es)”) to the two codes ScraperAPI needs: the
tld(top-level domain, likees) and thecountrycode for that domain. Providing both is critical to ensuring we search the correct local marketplace.
Step 4: Adding Support for Amazon US, UK, DE, FR, IT, ES, and CA marketplaces
To enable purchasing items and extracting data internationally from local Amazon marketplaces. Our Amazon image search engine supports scraping data from:
- amazon.com
- amazon.co.uk
- amazon.de
- amazon.fr
- amazon.it
- amazon.es
- amazon.ca.
Allowing us to find products not only within the US, but also in the UK, Germany, France, Italy, Spain, and Canada:
```python

AMZ_BASES = {
   "US (.com)": {"tld": "com", "country": "us"},
   "UK (.co.uk)": {"tld": "co.uk", "country": "gb"},
   "DE (.de)": {"tld": "de", "country": "de"},
   "FR (.fr)": {"tld": "fr", "country": "fr"},
   "IT (.it)": {"tld": "it", "country": "it"},
   "ES (.es)": {"tld": "es", "country": "es"},
   "CA (.ca)": {"tld": "ca", "country": "ca"},
}```
The code above achieves this:
- AMZ_BASES: It maps a marketplace name ( “ES (.es)”) to the two codes ScraperAPI needs: the tld (top-level domain, like es) and the country code for that domain. Providing both is critical to ensuring we search the correct local marketplace.
Step 5: Creating the Image Captioning Function
This is the first major functional part of the app. It defines the logic for sending an image to the vision LLM (Claude 3.5 Sonnet) to get a descriptive caption. Continue in your file by adding this:
```python

# captioning stage
def caption_with_openrouter_claude(
       pil_img: Image.Image,
       api_key: str,
       model: str = CAPTION_MODEL,
       max_tokens: int = 96,
) -> str:
   if not api_key:
       raise RuntimeError("Missing OpenRouter API key.")
   client = OpenAI(base_url="https://openrouter.ai/api/v1", api_key=api_key)

   b64 = _image_to_b64(pil_img)
   prompt = (
       "Describe this product in ONE concise shopping-style sentence suitable for an Amazon search. "
       "Include brand/model if readable, color, material, and 3-6 search keywords. "
       "No commentary, just the search-style description."
   )

   resp = client.chat.completions.create(
       model=model,
       temperature=0.2,
       max_tokens=max_tokens,
       messages=[{
           "role": "user",
           "content": [
               {"type": "text", "text": prompt},
               {"type": "image_url", "image_url": {"url": f"data:image/png;base64,{b64}"}}
           ],
       }],
   )
   return resp.choices[0].message.content.strip()```
Let’s break this down:
_image_to_b64: A helper function that takes an image opened by the Pillow library and converts it into a Base64 string. This is the standard format for embedding image data directly into an API request.caption_with_openrouter_claude: Initializes theOpenAIclient, pointing it to OpenRouter’s API endpoint and instructs the vision model on exactly how to describe the image: as a single, concise sentence suitable for a product search.- Finally, it sends the request and returns the clean text response from the AI model.
Step 6: Initializing the LangChain Agent
This function builds the agent that will perform the Amazon search. To make our agent robust, we won’t give it the ScraperAPIAmazonSearchTool directly. Instead, we’ll wrap it in a custom StructuredTool to “lock” the marketplace settings. This prevents the agent from getting confused and defaulting to the US marketplace: amazon.com
First, we define a function to create this “locale-locked” tool.
```python

def make_amazon_search_tool(tld: str, country_code: str) -> StructuredTool:
   base_tool = ScraperAPIAmazonSearchTool()

   def _search_amazon(query: str) -> str:
       return base_tool.invoke({
           "query": query,
           "tld": tld,
           "country_code": country_code,
           "output_format": "json",
       })

   return StructuredTool.from_function(
       name="scraperapi_amazon_search",
       func=_search_amazon,
       description=(
           f"Search products on https://www.amazon.{tld} "
           f"(locale country_code={country_code}). "
           "Input: a plain natural-language product search query."
       ),
   )```
Now, we create the agent initializer, which uses the helper function above.
```python

# langchain agent setup
def initialize_amazon_agent(openrouter_key: str, tld: str, country_code: str) -> AgentExecutor:
   llm = ChatOpenAI(
       openai_api_key=openrouter_key,
       base_url="https://openrouter.ai/api/v1",
       model=AGENT_MODEL,
       temperature=0,
   )

   amazon_tool = make_amazon_search_tool(tld=tld, country_code=country_code)
   tools = [amazon_tool]

   prompt = ChatPromptTemplate.from_messages([
       (
           "system",
           "You are an Amazon product search assistant. "
           "You MUST use the `scraperapi_amazon_search` tool for every search. "
           "Return ONLY the JSON from the tool. Do not invent or change tld/country."
       ),
       ("human", "{input}"),
       MessagesPlaceholder(variable_name="agent_scratchpad"),
   ])

   agent = create_tool_calling_agent(llm, tools, prompt)
   return AgentExecutor(agent=agent, tools=tools, verbose=True)```
The code achieves the following:
- make_amazon_search_tool: This wrapper function takes the
tldandcountry_codefrom the dropdown selection box and creates a new, simple tool for the agent. When the agent uses this tool, it only provides the search query. Thetldandcountry_codeare hard-coded into the tool’s_search_amazonfunction, guaranteeing it searches the correct marketplace. - LLM Initialization: It sets up the
ChatOpenAIobject, configuring it to use theAGENT_MODEL(GPT-4o mini) via OpenRouter. Thetemperature=0makes the model’s responses highly predictable. - Agent Creation: It assembles the final agent using our special
amazon_tooland a system prompt that explicitly tells the agent to only return the JSON from the tool. This, combined with the wrapper tool, makes parsing the results reliable. - The
AgentExecutoris the runtime that executes the agent’s tasks.verbose=Trueis helpful for debugging, as it prints the agent’s thought process to the console.
Step 7: Building the User Input Interface
Now let’s build the interactive sidebar and main input column within our Streamlit app.
```python

with st.sidebar:
   st.subheader("LLM Configuration")
   openrouter_key = st.text_input(
       "OPENROUTER_API_KEY (Unified Key)",
       type="password",
       value=OPENROUTER_API_KEY_DEFAULT,
       help="Used for both caption + agent models.",
   )
   st.markdown(f"**Vision Caption Model:** `{CAPTION_MODEL}`")
   st.markdown(f"**Agent Reasoning Model:** `{AGENT_MODEL}`")

col_l, col_r = st.columns([1, 1.25])

with col_l:
   region_label = st.selectbox("Marketplace", list(AMZ_BASES.keys()), index=0)
   selected_market = AMZ_BASES[region_label]
   marketplace_tld = selected_market["tld"]
   country_code = selected_market["country"]

   uploaded = st.file_uploader("Upload a product photo", type=["png", "jpg", "jpeg"])
   manual_boost = st.text_input(
       "Optional extra keywords",
       help="e.g. brand/model/color to append to the caption",
   )
   run_btn = st.button("Search Amazon")

with col_r:
   st.info(
       f"Flow: (1) Caption image with **{CAPTION_MODEL}** "
       f"(2) Agent with **{AGENT_MODEL}** calls ScraperAPI Amazon Search locked to "
       f"**amazon.{marketplace_tld}** (3) Display JSON results."
   )```
Here’s what the code does:
- Sidebar: A sidebar is created to hold the configuration. It includes a password input for the OpenRouter API key and displays the names of the two models being used.
- Main Columns: The main area is split into a left column (
col_l) and a right column (col_r). col_lcontains all the user inputs: the marketplace dropdown, file uploader, optional keyword box, and the search button.- Most importantly, when a marketplace is selected, we now pull both
marketplace_tldandcountry_codefrom theAMZ_BASESdictionary. col_rcontains anst.infobox that clearly explains the app’s workflow to the user, dynamically showing which marketplace (amazon.{marketplace_tld}) is being searched.
Step 8: The Main Application Logic and Search Execution
Now to the heart of the application, where everything is tied together. This block of code runs when a user clicks the “Search Amazon” button.
   ```python

if run_btn:
   if not uploaded:
       st.warning("Please upload a photo first.")
       st.stop()
   if not openrouter_key:
       st.error("Please paste your OPENROUTER_API_KEY.")
       st.stop()

   img = Image.open(io.BytesIO(uploaded.read())).convert("RGB")
   st.image(img, caption="Uploaded photo", use_container_width=True)

   with st.spinner(f"Describing your image via {CAPTION_MODEL}..."):
       try:
           caption = caption_with_openrouter_claude(img, openrouter_key)
       except Exception as e:
           st.error(f"Captioning failed: {e}")
           st.stop()

   query = f"{caption} {manual_boost}".strip()
   st.success(f"Caption: _{caption}_")
   st.write("**Agent Query:**", query)

   agent_executor = initialize_amazon_agent(
       openrouter_key,
       tld=marketplace_tld,
       country_code=country_code,
   )

   with st.spinner(
           f"Searching amazon.{marketplace_tld}"
   ):
       try:
           result = agent_executor.invoke({"input": f"Search for: {query}"})
       except Exception as e:
           st.error(f"LangChain Agent execution failed: {e}")
           st.stop()

   agent_output_str = result.get("output", "").strip()
   if not agent_output_str:
       st.error("Agent returned empty output.")
       st.stop()

   json_start_brace = agent_output_str.find('{')
   json_start_bracket = agent_output_str.find('[')

   if json_start_brace == -1 and json_start_bracket == -1:
       st.error("Agent output did not contain any valid JSON.")
       with st.expander("Debug: Raw agent output"):
           st.code(agent_output_str)
       st.stop()

   if json_start_brace == -1:
       json_start_index = json_start_bracket
   elif json_start_bracket == -1:
       json_start_index = json_start_brace
   else:
       json_start_index = min(json_start_brace, json_start_bracket)

   cleaned_json_str = agent_output_str[json_start_index:]

   try:
       decoder = json.JSONDecoder()
       raw_data, _ = decoder.raw_decode(cleaned_json_str)
   except json.JSONDecodeError as e:
       st.error(f"Failed to parse JSON from agent output: {e}")
       with st.expander("Debug: Raw agent output (before clean)"):
           st.code(agent_output_str)
       with st.expander("Debug: Sliced/Cleaned string that failed"):
           st.code(cleaned_json_str)
       st.stop()

   items = []
   if isinstance(raw_data, dict) and isinstance(raw_data.get("results"), list):
       items = raw_data["results"]
   elif isinstance(raw_data, list):
       items = raw_data
   else:
       st.warning("Unexpected JSON shape from tool. See raw output below.")
       with st.expander("Debug: Raw JSON"):
           st.json(raw_data)
       st.stop()```
Let’s break it down below:
- Input Validation: It first checks if an image has been uploaded and if an API key is present.
- Image Processing: It opens the uploaded image file, displays it, and prepares it for captioning.
- Caption Generation: It calls the
caption_with_openrouter_claudefunction inside anst.spinner. - Query Construction: It creates the final search query by combining the AI-generated caption with any optional keywords.
- Agent Execution: This is the key update. It now initializes the agent by passing both the
marketplace_tldandcountry_codeto ourinitialize_amazon_agentfunction. - Robust JSON Parsing: This is the second critical part. The agent’s raw output can sometimes be messy (invisible characters or extra text after the JSON ends).
- We first find the start of the JSON (
{or[) to trim any leading junk. - We then use
json.JSONDecoder().raw_decode(). to ignore any “extra data” that might come after it. Thereby solving parsing errors. - It then safely extracts the list of products from the
"results"key.
- We first find the start of the JSON (
Step 9: Displaying the Search Results
The final step is to take the list of product items extracted in the previous step and render it in a user-friendly format. Add:
```python

    if not items:
       st.warning(f"No items found on amazon.{marketplace_tld} for that query.")
       with st.expander("Debug: Raw JSON"):
           st.json(raw_data)
       st.stop()

   st.subheader(f"Results ({len(items)}) from amazon.{marketplace_tld}")

   for it in items[:24]:
       with st.container(border=True):
           c1, c2 = st.columns([1, 2])
           with c1:
               if it.get("image"):
                   st.image(it["image"], use_container_width=True)
           with c2:
               st.markdown(f"**{it.get('name', 'No Title')}**")
               asin = it.get("asin")
               if asin:
                   st.write(f"ASIN: `{asin}`")
               price = it.get("price_string")
               if price:
                   st.write(f"Price: {price}")
               url = it.get("url")
               if url:
                   st.link_button("View on Amazon", url)```
The code does the following:
- No Results Check: It first checks if the
itemslist is empty and informs the user. - Results Header: It displays a subheader announcing how many results were found and from which marketplace (
amazon.{marketplace_tld}). - Loop and Display: It loops through the first 24 items (
items[:24]) and displays each product in a structured, two-column layout with its image, title, ASIN, price, and a direct link to the product page.
Step 10: Running Your Application
With the entire script in place, you can now run the application from your terminal. Make sure your virtual environment is still active.
```bash

streamlit run main.py```
Your web browser should automatically open and load up the Application. “main.py” simply references your script’s file name, the one housing the code within your IDE. So, substitute accordingly.
Here’s a snippet of what the tool’s UI looks like:

Deploying the Image Search Engine App Using Streamlit
Follow the steps below to deploy your Image Search Engine on Streamlit for free:
Step 1: Set Up a GitHub Repository
Streamlit requires your project to be hosted on GitHub.
1. Create a New Repository on GitHub
Create a new repository on GitHub and set it as public.
2. Push Your Code to GitHub
Before doing anything else, create a .gitignore file to avoid accidentally uploading sensitive files like. Add the following to it:
```bash

.env
__pycache__/
*.pyc
*.pyo
*.pyd
.env.*
.secrets.toml```
If you haven’t already set up Git and linked your repository, use the following commands in your terminal from within your project folder:
```bash

git init
git add .
git commit -m "Initial commit"
git branch -M main
# With HTTPS
git remote add origin https://github.com/YOUR_USERNAME/your_repo.git
# With SSH
git remote add origin [email protected]:YOUR_USERNAME/your-repo.git

git push -u origin main```
If it’s your first time using GitHub from this machine, you might need to set up an SSH connection. Here is how.
Step 2: Define Dependencies and Protect Your Secrets!
Streamlit needs to know what dependencies your app requires.
1. In your project folder, automatically create a requirements file by running:
```bash
pip freeze > requirements.txt```
2. Commit it to GitHub:
```bash

git add requirements.txt
git commit -m "Added dependencies”
git push origin main```
Step 3: Deploy on Streamlit Cloud
1. Go to Streamlit Community Cloud.
2. Click “Sign in with GitHub” and authorize Streamlit.
3. Click “Create App.”
4. Select “Deploy a public app from GitHub repo.”
5. In the repository settings, enter:
- Repository:
YOUR_USERNAME/Amazon-Image-Search-Engine - Branch:
main - Main file path:
main.py(or whatever your Streamlit script is named)
6. Click “Deploy” and wait for Streamlit to build the app.
7. Go to your deployed app dashboard, find your app, and find “Secrets” in “Settings”. Add your environment variables (your API keys) just as you have them locally in your .env file.
Step 4: Get Your Streamlit App URL
After deployment, Streamlit will generate a public URL (e.g., https://your-app-name.streamlit.app). You can now share this link to allow others to access your app!
Here’s a short YouTube video demonstrating the Image Search Engine in action.
Conclusion
Congratulations. You just built an Image Search engine for Amazon. Your tool converts uploaded photos into search queries that yield targeted results based on visual similarities.
We achieved this using the ScraperAPI-Langchain agent for real-time web scraping, Claude 3.5 Sonnet for image captioning, GPT-4o Mini as a reasoning model for our agent, and Streamlit for building the UI and free cloud hosting.
The result is a fast, intuitive, and relevant tool that helps consumers find Amazon products instantly, even when they are unable to provide written search queries, thereby reducing the time to purchase and improving customer satisfaction.
The post How to Build an Amazon Image Search Engine with LangChain & ScraperAPI appeared first on ScraperAPI.
]]>The post The Ultimate Guide to Bypassing Anti-Bot Detection appeared first on ScraperAPI.
]]>You set up your scraper, press run, and the first few requests succeed. The data comes back exactly as you hoped, and for a moment, it feels like everything is working. Then the next request fails: a 403 Forbidden appears. Soon after, you are staring at a wall of CAPTCHAs. In some cases, there is not even an error message, and your IP is silently throttled until every request times out.
If you’ve ever tried scraping at scale, you’ve probably run into this. It’s frustrating, but it isn’t random. The web has become a tug of war between site owners and developers. On one side are businesses trying to protect their content and infrastructure. On the other hand are researchers, engineers, and companies that need access to that content. Anti-bot systems are designed for this fight, and they have grown into complex defenses that use IP reputation, browser fingerprinting, behavioral analysis, and challenge tests to block automation.
In this guide, you will learn what those defenses look like, why scrapers get blocked, and the strategies that actually make a difference. The goal is not to hand out short-term fixes, but to give you a clear understanding of the systems you are up against and how to build scrapers that last longer in production.
Ready? Let’s get started!

Chapter 1: Know Your Enemy: The Anatomy of a Modern Bot Blocker
If you want to bypass anti-bot systems, you first need to understand them. Bot blockers are built to detect patterns that real users rarely produce. They don’t rely on a single check but layer multiple defenses together. The more signals they collect, the more confident they become that the traffic is automated.
The easiest way to make sense of these systems is to break them down into four core pillars: IP reputation, browser fingerprinting, behavioral analysis, and active challenges. Each pillar covers a different angle of detection, and together they form the backbone of modern anti-bot defenses.
The Four Pillars of Detection
IP Reputation and Analysis
The first thing any website learns about you is your IP address. A server always sees a source IP; you can’t make requests without exposing a source IP, and though you can proxy/relay it, it is often the very first filter that anti-bot systems apply. If your IP does not look trustworthy, you will be blocked before the site even checks your browser fingerprint, your behavior, or whether you can solve a CAPTCHA.
Why IP Type Matters
Websites classify IP addresses by their origin, and this classification has a direct impact on your chances of being blocked.
- Datacenter IPs are those owned by cloud providers such as Amazon Web Services, Google Cloud, or DigitalOcean. They are attractive because they are cheap, fast, and easy to acquire, but they are also the most heavily scrutinized. Their ranges are publicly known, and many sites blacklist them pre-emptively. Even a brand-new IP from a datacenter can be flagged without ever being used for abuse.
- Residential IPs come from consumer internet providers and are assigned to everyday households. Because they blend into the regular traffic of millions of users, they are much harder to detect and block. This is why residential proxy services are valuable, although they are also costly. However, once a proxy provider is identified, its pool of residential IPs can still be marked as suspicious.
- Mobile IPs belong to carrier networks. They are the hardest to blacklist consistently, because thousands of users often share the same public address through carrier-grade NAT (Network Address Translation). These IPs also change frequently as devices move across cell towers. That churn makes them appear fresh and unpredictable, but it also means that abusive traffic from one user can create problems for everyone else on the same IP. Still, even when shared, extreme abuse on one IP can still trigger blocks for others on the same address.
The type of IP you use shapes your reputation before anything else is considered. A datacenter IP may be treated as suspicious even before it makes its first request. At the same time, a residential or mobile IP may earn more trust simply by belonging to a consumer or carrier network.
How Reputation Scores Are Built
Identifying your IP type is only the starting point. Websites and security providers maintain live databases of IP reputation that go far deeper. These systems assign a score to each address based on both historical evidence and real-time traffic.
Some of the most essential signals include:
- Network ownership: An Autonomous System Number (ASN) identifies which organization owns a block of IPs. If the ASN belongs to a hosting provider, that alone can raise suspicion.
- Anonymity markers: IPs known to be used by VPNs, Tor, or open proxy services are treated as risky.
- Abuse history: If an IP has been linked to spam, scraping, or fraud in the past, that history follows it.
- Request velocity: A human cannot make hundreds of requests in a second. High-volume activity is one of the clearest signs of automation.
- Geographic consistency: A user’s IP location should align with their browser settings and session history. If someone appears in Canada one minute and Singapore the next, something is wrong.
The resulting score dictates how a website responds. Low-risk IPs may be allowed through without friction. Medium-risk IPs may see throttling or occasional CAPTCHA. High-risk IPs are blocked outright with errors like 403 Forbidden or 429 Too Many Requests.
When a website detects suspicious traffic, it rarely stops at blocking just your IP. Most anti-bot systems are designed to think in groups, not individuals, which means the actions of one scraper can end up tainting an entire neighborhood of addresses.
At the smaller scale, this happens with subnets. A subnet is simply a slice of a larger network, carved out so that routers can manage traffic more efficiently. You’ll often see subnets written in a format like 192.0.2.0/24. This notation tells you that all the addresses from 192.0.2.0 through 192.0.2.255 are part of the same group. If a handful of those addresses start showing abusive behavior, it is much easier for a website to restrict the entire /24 block than to chase individual offenders.
At a larger scale, blocking does not just target individual IP addresses. It can happen at the level of an entire autonomous system (AS). The internet is made up of thousands of these systems, which are large networks run by internet service providers, mobile carriers, cloud companies, universities, or government agencies. Each one manages its own pool of IP addresses, known as its “address space.” To keep things organized, every AS is assigned a unique identifier called an autonomous system number (ASN). For example, Cloudflare operates under ASN 13335, while Amazon Web Services uses several different ASNs for its various regions.
Why does this matter? Because if one AS is consistently associated with scraping or fraud, websites can enforce rules across every IP inside it. That could mean millions of addresses flagged with a single policy update. This is especially common with cloud providers, since entire data center networks are publicly known and widely targeted by scrapers.
Browser Fingerprinting
Once websites confirm your IP looks safe, the next step is to examine your browser. This process, known as browser fingerprinting, involves collecting numerous small details about your browser to create a unique profile. Unlike cookies, which you can delete or block, fingerprinting does not rely on stored data. Instead, it takes advantage of the information your browser naturally exposes every time it loads a page.
What a Fingerprint Contains
A browser fingerprint is a collection of attributes that describe how your system looks and behaves. No single attribute is unique on its own, but when combined, they can create a profile that is very unlikely to match anyone else’s. Common components include:
- User-Agent and headers: The User-Agent is a string that tells websites which browser and operating system you are using (for example, Chrome on Windows or Safari on iOS). Other headers can reveal your preferred language, supported file formats, or device type.
- Screen and system settings: Your screen resolution, color depth, time zone, and whether your device supports touch input are all easy to read and can help distinguish you from others.
- Graphics rendering: Websites use APIs such as Canvas and WebGL to draw hidden images in your browser. Because the result depends on your graphics card, drivers, and fonts, the output is slightly different for each machine.
- Audio processing: Through the AudioContext API, sites can generate sounds that your hardware processes in unique ways. These differences become another signal in your fingerprint.
- Fonts and layout: The fonts you have installed, and how your system renders text, vary across devices.
- Plugins and media devices: Browsers can reveal what extensions are installed, and whether a camera, microphone, or other media device is available.
When all of these signals are combined, the result is usually distinctive enough to identify one device out of millions.
How Fingerprints Are Collected
Some of these values, like the User-Agent, are shared automatically every time your browser makes a request. Others are gathered using JavaScript that runs quietly in the background. For instance, a script may tell your browser to draw a hidden image on a canvas, then read back the pixel data to see how your system rendered it. Because hardware and software vary, the results form part of a unique signature.
These details are then combined into a hash, a short code that represents the overall configuration. If the same hash appears across visits, the system knows it is dealing with the same client, even if the IP has changed or cookies have been cleared.
Why Automation Tools Struggle
This is also the stage where automation platforms are exposed. Headless browsers such as Puppeteer, Playwright, and Selenium are designed to load and interact with web pages without a visible window. Although they are helpful for scraping, they often fail fingerprinting checks because they leak signs of automation.
- A property called
navigator.webdriveris usually set to true, which immediately signals automation. - Rendering in headless environments is often handled by software libraries like SwiftShader instead of a GPU, which produces outputs that differ from typical human-operated devices and can be fingerprinted.
- Many browser APIs return incomplete or default values instead of realistic ones.
- HTTP headers may be sent in an unusual order that does not match the patterns of real browsers.
Together, these inconsistencies make the fingerprint look unnatural. Even if your IP is clean, the browser itself gives you away.
Stability and the Growing Scope of Fingerprinting
Fingerprinting is not only about how unique a setup looks but also about how consistent it appears over time. Real users typically keep the same configuration for weeks or months, only changing after a software update or hardware replacement. Scrapers, on the other hand, often shift profiles from one session to the next. A client that looks like Chrome on Windows in one request and Safari on macOS in the next is unlikely to be genuine. Even minor mismatches, such as a User-Agent string reporting one browser version while WebGL capabilities match another, can be enough to raise suspicion.
To make detection harder to evade, websites continue expanding the range of signals they collect. In the past, some sites used the Battery Status API to collect signals like charge level and charging state, but browser vendors have since restricted or disabled this feature due to privacy concerns. Others use the MediaDevices API to identify how many microphones, speakers, or cameras are connected. WebAssembly can be used to run timing tests that expose subtle CPU characteristics, although modern browsers now limit timer precision to prevent microsecond-level leaks.
Even tools designed to protect privacy can make things worse. Anti-fingerprinting extensions often create patterns that stand out precisely because they look unusual. Instead of blending in, they can make a browser seem more suspicious.
This is why fingerprinting remains such a powerful defense. It does not depend on stored data and cannot be reset as easily as an IP address. It relies on the information your browser naturally reveals, which is very difficult to disguise. Even with a clean IP, an unstable or unrealistic fingerprint can expose a scraper before it ever reaches the target data. Managing fingerprints so that they appear natural and consistent is as essential as proxy rotation. Without it, no other bypass technique will succeed.
Behavioral Analysis (The “Turing Test”)
Even if your IP looks safe and your browser fingerprint appears realistic, websites can still catch you by looking at how you behave. This approach is known as behavioral analysis, and it is designed to spot the difference between natural human activity and automated scripts. Think of it as a digital version of the Turing Test: the site is silently asking, “Does this visitor actually move, click, and type like a person?”
People rarely interact with websites in predictable, machine-like ways. A human visitor might move the mouse in uneven arcs, scroll back and forth while reading, pause unexpectedly, or type in bursts with pauses between words. These slight irregularities form a behavioral signature.
Bots often fail at this. Many scripts execute actions with mechanical precision: clicks happen instantly, scrolling is smooth and perfectly uniform, and typing may occur at an inhumanly consistent speed. Some bots even skip interaction entirely, jumping directly to the data source they want.
Behavioral analysis systems compare these patterns to baselines collected from regular users. If your activity deviates significantly from typical patterns, the site may flag you as a bot, even if your IP and fingerprint appear legitimate.
Key Behavioral Signals
Websites collect a wide range of behavioral signals. The most common include:
- Mouse movements and clicks: Human mouse paths contain tiny hesitations, jitters, and corrections. Bots either skip this step or simulate perfectly straight, robotic lines.
- Scrolling behavior: Real users scroll unevenly, sometimes stopping midway, changing direction, or adjusting speed. Scripts often scroll in a linear, predictable way or avoid scrolling entirely.
- Typing rhythm: Known as keystroke dynamics, this measures the timing of each keystroke. Humans type in bursts with natural pauses, while bots often fill fields instantly or type at an impossibly steady rhythm.
- Navigation flow: A genuine visitor usually enters through the homepage or a category page, spends time browsing, and then reaches the data-heavy endpoint. Bots often go straight to the target URL within seconds.
- Session activity: Humans vary in how long they stay on pages. Bots typically request content instantly and leave without hesitation. This makes session length a valuable signal.
TLS and JA3 Fingerprinting
Behavioral analysis is not limited to on-page actions. It also examines how your connection behaves.
Every HTTPS connection begins with a TLS handshake (Transport Layer Security handshake). This is the negotiation where your browser and the server agree on encryption methods before any content is exchanged. Each browser, operating system, and networking library has a slightly different way of performing this handshake.
JA3 fingerprinting is a technique that takes the details of this handshake, including supported ciphers, extensions, and protocol versions, and generates a hash that uniquely identifies the client. If your scraper presents itself as Chrome but uses a handshake typical of Python’s requests library, the mismatch is easy to detect.
This means that even before a single page loads, your connection can betray whether you are really using the browser you claim.
Why Behavioral Analysis Is Effective
Behavioral analysis is more complex to evade than other defenses because it measures live activity rather than static attributes. You can rent residential proxies or spoof browser fingerprints, but replicating the subtle quirks of human movement, scrolling, and typing takes much more effort.
Even advanced bots that try to simulate user actions can be exposed when their patterns are compared across multiple signals. For example, mouse movement may look natural, but the navigation flow might still be too direct. Or the keystroke dynamics might be convincing, but the TLS handshake does not match the claimed browser.
This multi-layered approach is what makes behavioral analysis one of the most resilient forms of bot detection.
Behavioral analysis acts as the final checkpoint. It catches bots that slip through IP and fingerprint filters, but still fail to behave like real users. For scrapers, bypassing anti-bot systems requires more than just technical camouflage. To succeed, your traffic must not only appear legitimate on the surface but also behave in a manner that closely mirrors human browsing patterns. Without that, even the most advanced proxy rotation or fingerprint spoofing will not be enough.
Challenges & Interrogation
Even if your IP looks clean and your browser fingerprint appears consistent, websites often add one final test: an active challenge. These are designed to confirm that there is a real user on the other end before granting access.
From CAPTCHA to Risk Scoring
The earliest challenges were simple CAPTCHA. Sites showed distorted text or numbers that humans could solve, but automated scripts could not. Over time, this expanded to image grids, such as “select all squares with traffic lights.”
Today, many sites use more subtle methods, like Google’s reCAPTCHA v2, which introduced the “I’m not a robot” checkbox and occasional image puzzles. reCAPTCHA v3 shifted further, assigning an invisible risk score in the background so most users never see a prompt. hCaptcha followed a similar model, with a stronger emphasis on privacy and flexibility for site owners.
Invisible and Scripted Tests
Modern challenges increasingly happen behind the scenes. Cloudflare’s Turnstile runs lightweight checks in the browser, only interrupting the user if something looks suspicious. It’s Managed Challenges adapt in real time, deciding whether to show a visible test or resolve quietly based on signals like IP reputation and session history.
Websites also use JavaScript challenges, which run small scripts inside the browser. These might:
- Draw hidden graphics with Canvas or WebGL to confirm rendering quirks
- Measure how code executes to verify real hardware is present
- Check for storage, cookies, and header consistency
Passing such tests generates a short-lived token that the server validates before letting requests continue.
The Push Toward Privacy
The newest trend moves away from puzzles entirely. Private Access Tokens, based on the Privacy Pass standard, allow trusted devices to prove they are legitimate without exposing identity. Instead of clicking boxes or solving images, the browser presents a cryptographic token issued by a trusted provider. Apple and Cloudflare are leading this move, aiming to remove CAPTCHA altogether for supported platforms.
Challenges and interrogation catch automated clients that may have passed IP and fingerprint checks, but still cannot prove they are genuine. The direction is clear: fewer frustrating puzzles, more invisible checks, and an emphasis on privacy-preserving tokens. For scrapers, this is often the most rigid barrier to overcome, because failing a challenge does not just block access, it also signals to the site that automation is in play.

Chapter 2: The Rogues’ Gallery: A Deep Dive into Major Bot Blockers
Anti-bot vendors use the same four pillars of detection, but each adds its own methods and scale. Knowing how the big players operate helps explain why some scrapers fail instantly while others last longer.
Cloudflare
Cloudflare is the most widely deployed bot management solution, acting as a reverse proxy for millions of websites. A reverse proxy sits between a user and the website’s server, meaning Cloudflare can filter, inspect, or block traffic before the target site ever receives it.
Cloudflare uses multiple layers of defense:
- I’m Under Attack Mode (IUAM): This feature activates when a site is experiencing unusual traffic. Visitors are shown a temporary interstitial page for about five seconds. During that pause, Cloudflare runs JavaScript code that collects information about the browser and verifies whether it looks legitimate. A standard browser passes automatically, while bots that cannot execute JavaScript are stopped immediately.
- Turnstile: Unlike traditional puzzles, Turnstile performs background checks (for example, analyzing browser behavior and TLS handshakes) to verify real users invisibly. Only high-risk traffic sees explicit challenges, which reduces friction for humans while raising the bar for bots.
- Shared IP Reputation: Cloudflare leverages its enormous footprint across the internet. If an IP is flagged for suspicious activity on one site, that information can be used to block it on others. This network effect makes Cloudflare particularly powerful at tracking abusers across domains.
- Browser and TLS Fingerprinting: Beyond JavaScript challenges, Cloudflare inspects the TLS handshake (the initial negotiation that establishes an encrypted HTTPS connection). If your client claims to be Chrome but its TLS handshake matches known automation fingerprints (like those from Python libraries), it is easily exposed.
For scrapers, Cloudflare’s greatest difficulty lies in its scale and speed. Even if you rotate IPs or patch fingerprints, once a signal is flagged on one site, it can follow you everywhere Cloudflare operates.
Akamai
Akamai is one of the oldest and largest Content Delivery Networks (CDNs), and its bot management is among the most advanced. Unlike simple IP filtering, Akamai emphasizes behavioral data collection, sometimes referred to as sensor data.
What makes Akamai stand out:
- Browser Sensors: JavaScript embedded in protected sites records subtle human signals: mouse movements, keystroke timing, scroll depth, and tab focus. These are compared against large datasets of genuine user activity. Bots typically generate movements that are too perfect, too fast, or missing altogether.
- Session Flow Tracking: Instead of looking at single requests, Akamai evaluates the entire browsing journey. Humans usually navigate step by step: homepage, category page, product page, while bots often jump directly to data endpoints. This difference in flow is a strong detection signal.
- Edge-Level Integration: Because Akamai runs at the CDN edge, it can correlate behavioral insights with network-level data:
- ASN ownership: Is the traffic coming from a consumer ISP or a known hosting provider?
- Velocity: Are requests being made faster than a human could reasonably click?
- Geolocation: Does the user’s IP location align with their browser settings and session history?
Akamai is difficult to evade because it does not rely on just one layer of detection. To succeed, a scraper must mimic both the technical footprint and the organic, sometimes messy, flow of human browsing.
PerimeterX (HUMAN Security)
PerimeterX, now rebranded under HUMAN Security, is known for its client-side detection model. Instead of relying entirely on server-side logs, PerimeterX embeds sensors that run directly in the user’s browser session.
These sensors collect thousands of attributes in real time:
- Deep Fingerprinting: WebGL rendering results, Canvas image outputs, installed fonts, available plugins, and even motion data from mobile devices all contribute to a unique profile. Unlike a simple User-Agent string, these combined values are difficult to spoof convincingly.
- Automation Framework Detection: Popular scraping tools often leave behind subtle flags. For example, Selenium sets navigator.webdriver = true in most configurations, which is a dead giveaway. Puppeteer in headless mode often uses SwiftShader for rendering, which can differ from physical GPU outputs. Even the order in which HTTP headers are sent can expose a headless browser.
- Ongoing Validation: Many systems check once per session, but PerimeterX continues to validate throughout. If your scraper passes the first test but shows suspicious behavior five minutes later, it can still be flagged.
Because PerimeterX looks so deeply into browser environments, it is particularly good at catching advanced bots that use headless browsers. Evading it requires not just patched fingerprints but also realistic rendering outputs and consistent session behavior over time.
DataDome
DataDome emphasizes AI-driven detection across websites, mobile apps, and APIs. Unlike older providers that focus mainly on web traffic, DataDome has built systems to secure modern app ecosystems where bots target APIs and mobile endpoints.
Its system relies on:
- AI and Machine Learning Models: Every request is scored against patterns learned from billions of data points. This scoring happens in under two milliseconds, fast enough to avoid slowing down user experience.
- Cross-Platform Protection: Bots are not limited to browsers. Many now use mobile emulators or modified SDKs to attack APIs directly. DataDome covers all these channels, analyzing whether the client environment matches expected behavior.
- Adaptive Learning: Models are updated continuously to reflect new bot behaviors, ensuring the system evolves rather than relying on static rules.
- Multi-Layered Analysis: Attributes like IP reputation, HTTP headers, TLS fingerprints, and on-page behavior are combined into a holistic risk score.
For scrapers, the key challenge is the breadth of coverage. Even if you disguise your browser, an API request from the same session may expose automation. And because detection happens in real time, there is little room for trial and error before blocks are enforced.
AWS WAF
Amazon Web Services provides a Web Application Firewall (WAF) that customers can configure to block unwanted traffic. Unlike Cloudflare or Akamai, AWS WAF is not a dedicated anti-bot product but a toolkit that site owners adapt to their own needs. Its strength lies in flexibility, which means scrapers can face very different levels of difficulty depending on how it is deployed.
Typical anti-bot rules in AWS WAF include:
- Managed Rule Groups: AWS and partners provide prebuilt rules that block common malicious traffic, including known scrapers and impersonators of Googlebot.
- Datacenter IP Blocking: Site owners often deny requests from IP ranges associated with cloud providers. Since many scrapers rely on these datacenter IPs, this is a simple but effective filter.
- Rate Limiting: Rules can cap the number of requests a single client can send in a given timeframe. Humans rarely send more than a handful of requests per second, so exceeding those limits is suspicious.
- Custom Filters: Organizations can create their own detection logic, such as flagging mismatched geolocations, odd header values, or repeated patterns of failed requests.
Because AWS WAF is configurable, its effectiveness varies. Some sites may implement only the most basic rules, which are easy to bypass with proxies, while others, especially large enterprises, may deploy complex rule sets that combine multiple signals, creating protection comparable to dedicated bot management platforms.
Each provider applies the same pillars of detection in different ways:
- Cloudflare leverages scale and global IP reputation.
- Akamai focuses on behavioral signals and session flow.
- PerimeterX (HUMAN Security) digs deeply into client-side fingerprints and automation leaks.
- DataDome uses real-time AI analysis across browsers, apps, and APIs.
- AWS WAF relies on site-specific configurations that range from simple to highly sophisticated.
For scrapers, this means there is no single bypass strategy; you need to understand each system on its own terms, and your scraper’s resilience requires a layered approach that addresses IP, fingerprints, behavior, and challenges simultaneously.

Chapter 3: The Scraper’s Toolkit: Core Techniques for Bypassing Detection
Anti-bot systems combine multiple signals to tell humans and automation apart. That means no single trick is enough to bypass them. You need a toolkit, a set of layered techniques that work together. Each one addresses a different pillar of detection: proxies manage your IP reputation, fingerprints protect your browser identity, CAPTCHA solutions handle active challenges, and human-like behavior makes your traffic believable. The goal is not to imitate these techniques halfway but to apply them consistently, because detection systems compare multiple signals at once. A clean IP with a broken fingerprint will still be blocked. A perfect fingerprint with robotic timing will also fail. The techniques below are the foundation of any resilient scraping operation.
Technique 1: Proxy Management Mastery
Proxies are the foundation of every serious scraping project. Each request you send is tied to an IP address, and websites judge those addresses long before they examine your browser fingerprint or behavior. Without proxies, you are limited to a single identity that will almost always get flagged. With them, you can multiply your presence across thousands of identities, but only if you use them correctly.
Choosing the Right Proxy
Datacenter proxies
Datacenter IPs come from cloud providers and hosting companies. They are designed for scale, which makes them cheap and extremely fast. When you need to collect data from sites that have weak or no anti-bot defenses, datacenter proxies can get the job done at a fraction of the cost of other options.
The problem is reputation. Because datacenter ranges are publicly known, websites can block entire chunks of them in advance. A site that wants to protect itself from automated scraping can blacklist entire subnets or even autonomous systems belonging to providers like AWS or DigitalOcean. That means even a “fresh” datacenter IP may already be treated with suspicion before it makes its first request. If your target is sensitive, such as e-commerce, ticketing, or finance, datacenter traffic will often be blocked at the door.
Residential proxies
Consumer internet service providers issue Residential IPs, the same ones that power ordinary households. From a website’s perspective, traffic from these IPs looks just like regular user activity. That natural cover gives residential proxies a much higher trust level. They are particularly effective when scraping guarded pages, logged-in content, or platforms that rely heavily on IP reputation.
The trade-off is speed and cost. Residential IPs tend to respond more slowly than datacenter IPs, and most providers charge by bandwidth rather than per IP, so costs add up quickly on large projects. They can also be targeted if abuse is concentrated. If too many suspicious requests originate from the same provider or subnet, websites can extend blocks across that range, reducing the reliability of the pool.
Mobile proxies
Mobile IPs are routed through carrier networks. Here, thousands of users share the same public IP address, and devices constantly switch towers as they move. That constant churn makes mobile IPs nearly impossible to blacklist consistently. If a site blocked one, it could accidentally cut off thousands of legitimate mobile users at once.
This makes mobile proxies one of the most potent tools for scraping heavily protected content. However, they are also the most expensive and the least predictable. Because you are sharing the address with many strangers, your session can suddenly inherit the consequences of someone else’s abusive activity. Frequent IP changes mid-session can also disrupt multi-step flows like checkouts or form submissions.
In practice, few scrapers rely on a single category. Datacenter proxies deliver speed and scale where defenses are weak, residential proxies strike a balance of cost and reliability for most guarded content, and mobile proxies are reserved for the hardest restrictions where stealth is non-negotiable.
Rotation that Feels Human
Choosing the right proxy type is only the first step. The next challenge is using those proxies in ways that resemble real browsing. Websites do not just look at which IP you use; they observe how long you use it, how often it appears, and whether its behavior aligns with a human pattern.
Rotation strategies help you manage this.
- Sticky sessions: Instead of switching IPs on every request, keep the same one for a cluster of related actions. A real user browsing a shop will log in, click around, and add something to their cart without changing IP midway. Holding onto the same proxy for these flows makes your traffic believable.
- Rotating sessions: For bulk crawls, such as collecting thousands of product listings, swap IPs every few requests or pages. This spreads out the workload and prevents any single IP from carrying too much risk.
- Geographic alignment: If your proxy is in Germany, for example, your headers, cookies, and time zone should tell the same story. Sudden jumps from one country to another in the middle of a session are easy for defenses to spot.
- Request budgets: Every IP has a lifespan. If you push it too hard with hundreds of rapid requests, it will get flagged. Assign a realistic budget of requests per IP, retire it once that limit is reached, and reintroduce it later.
The trick is balance. People do not change IPs every second, but they also do not hammer a website with thousands of requests from the same address. Rotation that feels human is about pacing and continuity, not random churns.
Keeping the Pool Healthy
Even the best proxy rotation plan will fail if the pool itself is weak. Some IPs will perform flawlessly, while others will either slow down or burn out quickly. Managing a proxy pool means constantly monitoring, pruning, and replenishing.
Metrics worth tracking include:
- Block signals such as 403 Forbidden, 429 Too Many Requests, and CAPTCHA challenges
- Connection health, like timeouts, TLS handshake failures, and dropped sessions
- Latency and response times, which can reveal throttling or overloaded providers
When you spot problems, isolate them. Quarantine flagged IPs or entire subnets to avoid poisoning the rest of your traffic. Replace weak providers with stronger ones, and always spread your pool across multiple vendors so that one outage does not bring everything down.
A healthy pool is a constantly moving target that requires maintenance. Skipping this step is the fastest way to turn a strong setup into a fragile one.
Putting it All Together
Mastering proxy management is about combining all three layers: choosing the right proxy type, rotating them in ways that mimic human behavior, and keeping the pool clean. Datacenter, residential, and mobile proxies each have their place, and their strengths complement one another when used strategically. Rotation rules make those IPs look natural, and pool maintenance ensures you always have healthy addresses ready.
Without this foundation, none of the other bypass techniques, like fingerprint spoofing, behavior simulation, or CAPTCHA solving, will matter. If your proxies fail, everything else falls apart.
Technique 2: Perfecting Your Digital Identity (Fingerprint & Headers)
Proxies may give you a new address on the internet, but they do not tell the whole story. Once a request reaches a website, the browser itself comes under scrutiny. This is where many scrapers fail. They might be using a clean IP, but the headers, rendering outputs, or session data they present do not resemble a real person. Fingerprinting closes that gap. To pass this test, you need to create an identity that not only looks consistent but also behaves as if it belongs to a real browser in a real location.
Choosing A Realistic Baseline
The first decision is what identity to copy. Defenders have massive datasets of how common browsers look and behave, so straying too far from the norm is risky.
A good approach is to anchor your setup in a widely used combination: for example, Chrome 115 on Windows 10, or Safari on iOS. These represent large segments of real users. If you instead show up as a rare Linux build with an unusual screen resolution, you instantly stand out. This choice becomes your baseline. Everything else, such as headers, rendering results, fonts, and media devices, must align with it.
Making Fingerprints And Networks Agree
An IP address already reveals a lot about where traffic is coming from. If your fingerprint tells a different story, detection is almost guaranteed.
- Time zone, locale, and
Accept-Languageshould reflect the region of your proxy. - A German IP, for instance, should not be paired with a US English-only browser and a Pacific time zone.
- Currency, local domains, and even keyboard layouts can reinforce or break this alignment.
Think of this as storytelling. The IP and the fingerprint are two characters. If they contradict each other, the plot falls apart.
Building Headers That Match Real Traffic
Headers are often overlooked, yet they are one of the most powerful indicators of authenticity. Websites check not only the values but also whether the set of headers and their order match what real browsers send.
- A User-Agent string must match the exact browser and version you claim.
Accept,Accept-Language,Accept-Encoding, and the newerSec-CH-UAheaders should all be present and correct.- The order matters. Real browsers send them in consistent sequences that defenders log and compare against.
Rotating only the User-Agent is a common beginner mistake. Without updating the entire header set to match, the disguise falls apart instantly.
Closing The Gaps In Headless Browsers
Automation tools like Puppeteer, Playwright, and Selenium are designed for control, not invisibility. Out of the box, they leak signs of automation.
navigator.webdriveris automatically set to true, which flags the browser as automated.- Properties like
navigator.pluginsornavigator.languagesoften return empty or default values, unlike real browsers. - Graphics rendered with SwiftShader in headless mode can be different from outputs produced by a physical GPU.
- Headers may be sent in unnatural orders or with missing fields.
To avoid instant detection, you need to patch or disguise these gaps. Stealth plugins and libraries exist for this, but they still require careful testing and validation.
Making Rendering Outputs Believable
Fingerprinting relies heavily on how your system draws graphics and processes audio.
- Canvas and WebGL outputs should align with the GPU and operating system you claim. A Windows laptop should not render like a mobile device.
- Fonts must match the declared platform. A Windows profile with macOS-only fonts raises alarms.
- AudioContext results must remain stable across a session, since real hardware does not change its sound processing randomly.
These details are subtle, but together they form a signature that is hard to fake and easy to check. Defenders know what standard systems look like; if yours has capabilities that are too empty or too crowded, suspicion rises.
A laptop typically reports a single microphone and webcam, so having none or a dozen looks strange. Browser features should match the version you present. For example, an older version of Chrome should not claim to support APIs that were only introduced later. Even installed extensions can betray you. A completely empty profile is just as suspicious as one with twenty security tools.
Maintaining Stability Over Time
One of the strongest signals websites check is stability. Real users do not constantly switch between different devices or browser versions. They use the same setup until they update or replace their hardware.
- Maintain the same fingerprint within a sticky session, particularly for high-volume flows such as logins or carts.
- Change versions only when it makes sense, such as after a scheduled browser update.
- Avoid rapid platform switches, such as transitioning from Windows to macOS between requests.
Stability tells defenders that you are a steady, consistent user, not a bot cycling through different disguises.
Cookies, localStorage, and sessionStorage are not just technical details but they are part of what makes a session feel real. A genuine browser carries state forward across visits.
- Let cookies accumulate naturally, including authentication tokens and consent banners.
- Reuse them for related requests rather than wiping them clean each time.
- Preserve session history so that the browsing pattern looks continuous.
Without a state, every request looks like a first-time visitor, which is rarely how real users behave.
Measuring And Adjusting
Finally, you cannot perfect a fingerprint once and forget it. Websites change what they check, and even minor mismatches can appear over time.
- Track how often you face CAPTCHA, blocks, or unusual error codes.
- Log the outputs of your own Canvas, WebGL, and AudioContext to catch instability.
- Compare your profile to real browser captures using tools like CreepJS or FingerprintJS.
This feedback loop helps you correct mistakes before they burn your entire setup.
Fingerprint management is about coherence. Your IP, headers, rendering, devices, and behavior all need to tell the same story. A clean IP without a matching fingerprint will still be blocked. A patched fingerprint without stability will still look wrong. Only when all parts are aligned do you create an identity that can survive in production.
Technique 3: Solving the CAPTCHA Conundrum
Even if you have clean IPs and fingerprints that look human, websites often add one more obstacle before granting access: a challenge-response test known as CAPTCHA. The acronym stands for Completely Automated Public Turing test to tell Computers and Humans Apart. Put simply, it is a puzzle designed to be easy for people but difficult for bots.
CAPTCHA is not new, but they have evolved into one of the toughest barriers scrapers face. To deal with them effectively, you need to understand what you are up against and choose a strategy that balances cost, speed, and reliability.
Understanding the Different Forms of CAPTCHA
Not all CAPTCHAs look the same. Over the years, defenders have introduced new formats to stay ahead of automation tools.
- Text-based CAPTCHAs: These were the earliest form, where users had to type distorted letters or numbers. They are now largely phased out because machine learning models can solve them with high accuracy.
- Image selection challenges: These ask the user to click on all images containing an object, such as traffic lights or crosswalks. They rely on human visual recognition, which is still harder to automate consistently.
- reCAPTCHA v2: Google’s version that often shows up as the “I’m not a robot” checkbox. If the system is suspicious, it escalates to an image challenge.
- reCAPTCHA v3: A behind-the-scenes version that scores visitors silently based on their behavior, only serving challenges if the score is too low.
- hCaptcha and Cloudflare Turnstile: Alternatives that serve similar roles, often preferred by sites that want to avoid sending user data to Google. Turnstile is especially tricky because it can run invisible checks without showing the user anything.
Each type has its own level of difficulty. The simpler ones can be solved automatically, but the more advanced forms often require external help.
The CAPTCHA Solving Ecosystem
Because scrapers cannot always solve CAPTCHA on their own, an entire ecosystem of third-party services exists to handle them. These services usually fall into two categories:
- Human-powered solvers: Companies employ workers who receive CAPTCHA images and solve them in real time. You send the challenge through an API, they solve it within seconds, and you get back a token to submit with your request.
- Machine-learning solvers: Some services attempt to solve CAPTCHA with automated models. They can be faster and cheaper but are less reliable against newer and more complex challenges.
Popular providers include 2Captcha, Anti-Captcha, and DeathByCaptcha. They integrate easily into scraping scripts by exposing simple APIs where you post a challenge, wait for the solution, and then continue your request.
CAPTCHA solving introduces trade-offs that you have to plan for:
- Cost: Each solve costs money, often fractions of a cent, but this adds up at scale. For scrapers making millions of requests, solving CAPTCHA manually can become the most significant expense.
- Latency: Human solvers take time. Even the fastest services usually add a delay of 5–20 seconds. This may be acceptable for occasional requests, but it slows down large crawls.
- Reliability: Solvers are not perfect. Sometimes they return incorrect answers or time out. Building in error handling and retries is essential.
This is why many teams mix strategies: using solvers only when necessary, while trying to minimize how often challenges are triggered in the first place.
Reducing CAPTCHA Frequency
The best way to handle CAPTCHAs is not to see them often. Careful planning can keep challenges rare:
- Maintain good IP hygiene: Residential or mobile proxies with low abuse history face fewer CAPTCHAs.
- Keep fingerprints consistent: Browsers that look real and stable raise fewer red flags.
- Pace your requests: Sudden bursts of traffic are more likely to trigger challenges.
- Reuse cookies and sessions: A returning user with a history of normal browsing behavior is less likely to be tested.
By reducing how suspicious your traffic looks, you can push CAPTCHAs from being constant roadblocks to occasional speed bumps.
When a CAPTCHA does appear, you have three main options:
- Bypass entirely by preventing triggers with a good proxy, fingerprint, and behavior management.
- Outsource solving to a third-party service, accepting the cost and delay.
- Combine approaches, using solvers only when absolutely necessary while optimizing your setup to minimize their frequency.
Managing CAPTCHAs is less about brute force and more about strategy. If you rely on solving them at scale, your scraper will be slow and expensive. If you invest in preventing them, solvers become a rare fallback instead of a dependency.
Technique 4: Mimicking Human Behavior
At this point, you have clean IPs, fingerprints that look real, and a strategy for dealing with CAPTCHAs. But if your scraper still moves through a website like a robot, detection systems will notice. This is where behavioral mimicry comes in. The goal is not only to send requests that succeed, but to make your traffic look like it belongs to a person sitting at a screen.
Websites have spent years fine-tuning their ability to distinguish humans from bots. They know that people pause, scroll unevenly, misclick, and browse in messy and unpredictable ways. A scraper that always requests the next page instantly, scrolls in perfect increments, or never makes mistakes stands out. Mimicking human behavior makes your automation blend in with the natural noise of real users.
Building Human-Like Timing
One of the easiest giveaways of a bot is timing. Real users never click or type with machine precision.
- Delays between actions: Instead of firing requests back-to-back, add short pauses that vary randomly. For example, wait 2.4 seconds after one click, then 3.1 seconds after the next.
- Typing simulation: When filling forms, stagger keypresses to mimic natural rhythm. People often type in bursts, with slight pauses between words.
- Warm-up navigation: Before going straight to the target data page, let your scraper visit the homepage or a category page. Real users rarely jump to deep links without a path.
These adjustments slow down your scraper slightly but dramatically reduce how robotic it looks.
Making Navigation Believable
Beyond timing, websites watch where you go and how you get there.
- Session flow: Humans often wander. They may open a menu, check an unrelated page, or click back before moving on. Adding a few detours creates a more realistic flow.
- Scrolling behavior: People scroll unevenly, sometimes stopping mid-page, then continuing. Scripts can replicate this by scrolling in variable increments and pausing at random points.
- Mouse movement: While many scrapers skip this entirely, some detection systems check for mouse events. Simulating small, imperfect arcs and jitter makes interaction data look genuine.
Managing Cookies and Sessions
Humans carry baggage from one visit to the next in the form of cookies and session history. A scraper that always starts fresh looks suspicious.
- Persist cookies: Store and reuse cookies so your scraper appears as the same user returning.
- Maintain sessions: Use sticky proxies to hold an IP across several requests, keeping the identity consistent.
- Align browser state: Headers like “Accept-Language” and time zone settings should match the location of the IP you are using.
This continuity creates the impression of a long-term visitor rather than disposable traffic.
Balancing Scale and Stealth
The challenge is that human-like behavior is slower by design. If you are scraping millions of pages, adding pauses and navigation steps can cut throughput. The solution is to parallelize: run more scrapers in parallel, each moving at a believable pace, instead of trying to push one scraper at unnatural speed.
Mimicking human behavior is about creating noise and imperfection. A successful scraper does not just move from point A to point B as fast as possible. It hesitates, scrolls, and carries history just like a person would. Combined with strong IP management and consistent fingerprints, this makes your automation much harder to distinguish from a real visitor.

Chapter 4: The Strategic Decision: When to Build vs. When to Buy
Every technique we have covered so far—proxy management, fingerprint alignment, behavioral simulation, and solving challenges—can be built and maintained by a dedicated team. Many developers start this way because it offers maximum control and transparency. Over time, however, the reality of maintaining an unblocking system at scale forces a bigger decision: should you continue to invest in building internally, or should you adopt a managed solution that handles these defenses for you?
The True Cost of an In-House Solution
On paper, building in-house combines the right tools: a proxy provider, a CAPTCHA solver, and some logic to manage requests. In practice, it evolves into a complex system that must adapt to every change in how websites block automation.
Maintaining such a system requires constant investment in four areas:
- Engineering capacity: Developers spend a significant amount of time patching scripts when sites update their defenses, rewriting fingerprint logic, and building monitoring tools to catch failures.
- Proxy infrastructure: Residential and mobile proxies are indispensable for challenging targets, but they come with high recurring costs. Pools degrade as IPs are flagged, requiring continuous replacement and vendor management.
- Challenge solving: CAPTCHA and some client-side JavaScript puzzles add direct costs per request. Even with solvers, failure rates introduce retries that inflate both costs and delays.
Monitoring and updates: Sites rarely stay static. What works one month may fail the next, and every update to defenses requires a response. The system becomes a moving target.
Introducing the Managed Solution: Scraping APIs
A managed scraping API abstracts these same components into a single request. Instead of provisioning proxies, patching fingerprints, or integrating solver services yourself, the API handles those tasks automatically and delivers the page content.
The core benefit is focus. Firefighting bot detection updates no longer consume development time. Teams can focus on extracting insights from the data instead of maintaining the pipeline. Costs are generally easier to predict because many managed APIs bundle infrastructure, rotation logic, and solver fees, although high volumes or specialized targets can still increase expenses.
This does not make managed services universally superior. For small-scale projects with limited targets, a custom in-house setup can be cheaper and more flexible. However, for projects that require consistent, large-scale access, the stability of a managed API often outweighs the control of building everything yourself.
The Trade-Off
The choice is not between right and wrong, but between two different ways of investing resources:
- Build if you have strong technical expertise, modest scale, and the need for complete control over how every request is managed.
- Buy if your goal is long-term stability, predictable costs, and freeing engineers from the ongoing work of keeping up with anti-bot systems.
At its core, this is not a technical question but a strategic one. The defenses used by websites will continue to evolve. The real decision is whether your team wants to be in the business of keeping pace with those defenses, or whether you would rather rely on a service that does it for you.
Conclusion: The End of the Arms Race?
Bypassing modern anti-bot systems is not about finding a single trick or loophole. It requires a layered strategy that addresses every stage of detection. At the network level, your IP reputation must be managed with care. At the browser level, your fingerprint must look both realistic and consistent. At the interaction level, your behavior has to resemble the irregular patterns of human browsing. And when those checks are not enough, you must be prepared to solve active challenges like CAPTCHA or JavaScript puzzles.
Taken together, these defenses form a system designed to catch automation from multiple angles. To succeed, your scrapers need to look convincing in all of them at once. That is why the most resilient strategies focus on combining proxies, fingerprints, behavioral design, and rotation into one coherent approach rather than relying on isolated fixes.
There are two ways to get there. One approach is to build and maintain an in-house stack, thereby absorbing the costs and complexities associated with staying ahead of detection updates. The other option is to adopt a managed service that handles the unblocking for you, enabling your team to focus on extracting and utilizing the data. The right choice depends on scale, resources, and priorities.
What will not change is the direction of this contest. Websites will continue to develop more advanced defenses, and scrapers will continue to adapt. The arms race may never truly end, but access to web data will remain essential for research, business intelligence, and innovation. The organizations that thrive will be those that treat anti-bot systems not as an impenetrable wall, but as a challenge that can be met with the right mix of strategy, tools, and discipline.
The post The Ultimate Guide to Bypassing Anti-Bot Detection appeared first on ScraperAPI.
]]>The post How to Integrate ScraperAPI’s MCP Server with Claude appeared first on ScraperAPI.
]]>MCP servers extend an LLM’s reach by connecting it to external tools and data sources. In practice, an LLM is only as capable as the quality of external tools behind it. ScraperAPI is a powerful scraping tool that can extract data from heavily protected, JavaScript-heavy websites that many scraping providers can’t access.
In this guide, you’ll learn how to connect ScraperAPI’s MCP server to Claude Desktop App and scrape web data in real-time.
How does it work?
When you start your prompts with “scrape …,” Claude automatically launches the local ScraperAPI MCP Server and invokes its scrape tool. It then forwards your parameters; ScraperAPI handles proxies, rendering, and anti-bot, then returns the response (HTML, JSON, etc.) directly in the same conversation for parsing, summarizing, or extraction. There are no webhooks or polling, just a config file and a prompt.
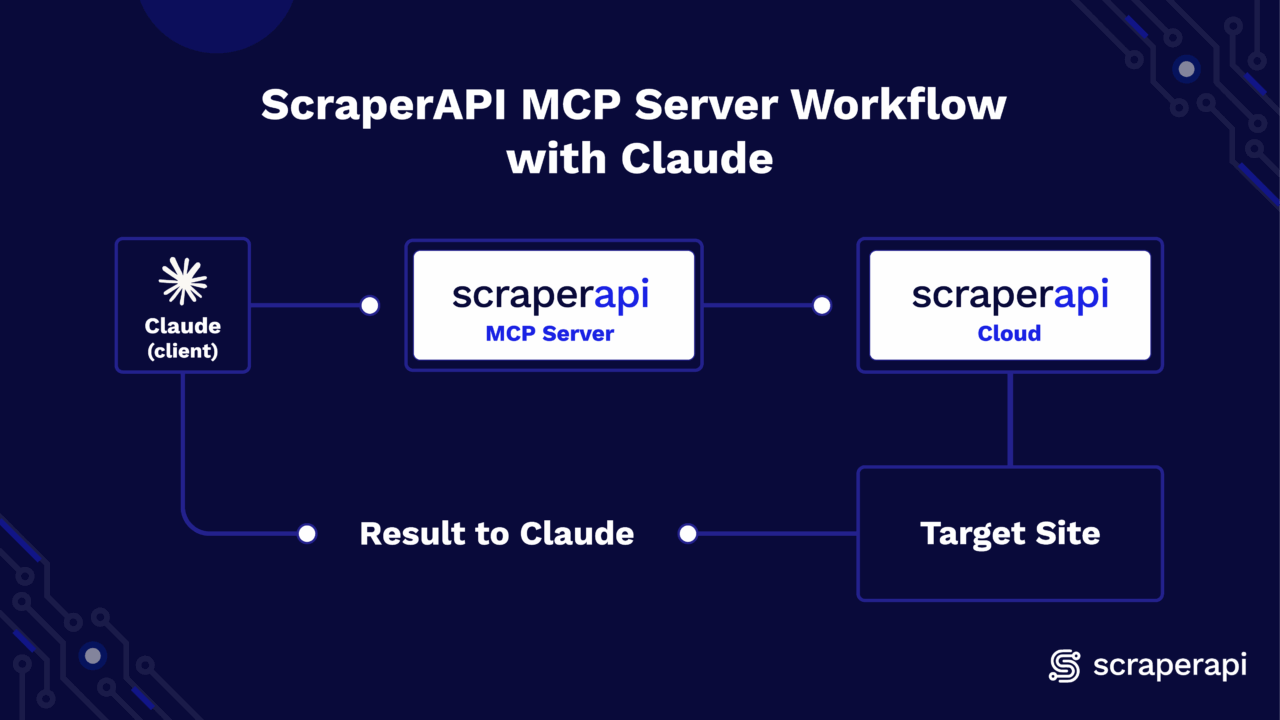
Getting Started
Setting up the ScraperAPI MCP server on Claude is easy and straightforward. Just follow the steps below:
1. Prerequisites
- Python 3.11+
- A Claude account (Desktop app used in this guide)
- A ScraperAPI account and API key
2. Installation & Setup
Open your IDE terminal and install the scraperapi-mcp-server using pip. If you don’t have an account yet, create one on scraperapi.com and copy your API key from the Dashboard.
pip install scraperapi-mcp-server
3. Configure Claude (Desktop)
- Download and open Claude Desktop on your computer.
- Toggle the sidebar at the top-left corner
- Click on your profile icon at the bottom
- Go to Settings
- Click on Developer
- Select Edit Config
- Open the
claude_desktop_config.jsonfile and paste one of the following JSON blocks below (next section) - Quit and reopen Claude Desktop
4. Paste JSON Block to Client
The JSON block below registers and launches the ScraperAPI MCP Server via Claude.
{
  "mcpServers": {
    "ScraperAPI": {
      "command": "python",
      "args": ["-m", "scraperapi_mcp_server"],
      "env": {
        "API_KEY": "<YOUR_SCRAPERAPI_API_KEY>"
      }
    }
  }
}
Please note: If you are using an environment, make sure to point Claude to its Python library in your JSON config: "command": "/Users/you/scraperapi-mcp/.venv/bin/python" |
That’s it, the MCP Server is fully configured. Include the keyword scrape in a prompt, and the LLM will automatically use ScraperAPI to retrieve the data you need.
Developer Workflows
If you want to run the MCP server locally, the steps below cover setup, debugging, and advanced customization:
1. Local setup
1. Clone the repository:
git clone https://github.com/scraperapi/scraperapi-mcp
cd scraperapi-mcp
2. Install dependencies and run the package locally
# Create virtual environment and activate it
python -m venv .venv
source .venv/bin/activate # MacOS/Linux
# OR
.venv/Scripts/activate # Windows

# Install the local package in editable mode
pip install -e .
2. Run the server
export API_KEY=<YOUR_SCRAPERAPI_API_KEY> # Export your API key to the environment
python -m scraperapi_mcp_server
3. Debug
python3 -m scraperapi_mcp_server --debug
4. Testing
In this project, we will use pytest for testing.
- Install
pytest
# Install pytest and pytest-mock plugin
pip install pytest
pip install pytest-mock
- Install Test Dependencies
# Install the package with test dependencies
pip install -e ".[test]"
- Running Tests
# Run All Tests
pytest

# Run Specific Test
pytest <TEST_FILE_PATH>
Using the MCP Server
ScraperAPI’s MCP server exposes access to the following parameters when you call the scrape function:
Parameters:
url(string, required): The target URL to scrape.render(boolean, optional): Enables JavaScript rendering for dynamic pages.country_code(string, optional): ISO-2 code for geo-targeting (e.g., “us” for the United States and “gb” for Great Britain).premium(boolean, optional): Activate Premium residential/mobile IPs.ultra_premium(boolean, optional): Enhanced anti-blocking; cannot be combined withpremium.device_type(string, optional): Set request to use “mobile” or “desktop” user agents.
Prompt Templates
As a reference, here are some prompt templates you can try out and tweak with your own URLs:
- “scrape
<URL>. If you receive a 500 or a geo-block, retry with the appropriatecountry_code. If blocking persists, setpremium=true. For continued failures, escalate toultra_premium=true. Return the final result in JSON.” - “Scrape
<URL>and extract<SPECIFIC_DATA>. If the data is missing or incomplete, re-run withrender=trueto enable JavaScript rendering.”
Here’s a visual of the results of the first prompt tested on an actual eBay URL:


Conclusion
With the MCP server installed and Claude configured, you’re just a prompt away from scraping websites directly in Claude. Start simple with scrape <URL>, then add parameters like country_code, render, or premium options if the page requires them.
The post How to Integrate ScraperAPI’s MCP Server with Claude appeared first on ScraperAPI.
]]>The post Integrating Splash with ScraperAPI appeared first on ScraperAPI.
]]>In this guide, you will learn how you can easily integrate ScraperAPI with Splash to handle JavaScript-heavy websites that require browser rendering. I will walk you through the recommended integration methods and show you how to leverage both Splash’s rendering capabilities and ScraperAPI’s proxy infrastructure.
Recommended Method: Route Splash through ScraperAPI Proxy
To get full rendering with ScraperAPI’s rotating proxies, simply run Splash with ScraperAPI’s proxy configured.
Requirements
- Python
- Splash (via Docker)
requests(Python HTTP library)- Docker (for running Splash)
- ScraperAPI & API key (store this in a
.envfile)
1. Install and run Splash
Install your requirements (requests is the only one you need to install explicitly via pip). If you don’t have Docker installed, download and install it here. After installing, make sure it’s running before continuing.
Start Splash via Docker:
pip install requests
docker run -p 8050:8050 scrapinghub/splash
If you receive an error stating that port 8050 is already in use, it means another Splash container is already running.
To fix this:
- Find the container using port 8050
Run this in your terminal:
docker ps
- You’ll see something like:
CONTAINER ID   IMAGE                PORTS
abc123         scrapinghub/splash   0.0.0.0:8050->8050/tcp
- Stop the container with the container ID from the previous step:
docker stop abc123
Replace abc123 with your actual container ID and run your Splash container again.
2. Splash Request Example (Basic Integration)
If you haven’t already, create an account on ScraperAPI and get your API key.
Create a .env file to securely store your ScraperAPI key:
SCRAPERAPI_KEY=your_scraperapi_key_here
In your root folder, create a Python file and paste the following:
import os
import requests
from dotenv import load_dotenv
import time

# Load the ScraperAPI key from .env file
load_dotenv()
API_KEY = os.getenv("SCRAPERAPI_KEY")
SPLASH_EXECUTE_URL = "http://localhost:8050/execute"

# Optimized Lua script for ScraperAPI proxy
LUA_SCRIPT = """
function main(splash)
   splash.private_mode_enabled = false
   splash:on_request(function(request)
       request:set_header('User-Agent', 'Mozilla/5.0 (Windows NT 10.0; Win64; x64) AppleWebKit/537.36')
       -- Set longer timeout for proxy connections
       request:set_timeout(45)
   end)

   -- Set page load timeout
   splash:set_viewport_size(1920, 1080)
   splash:set_viewport_full()

   local ok, reason = splash:go{
       splash.args.url,
       baseurl=splash.args.url,
       http_method="GET",
       headers={
           ["Accept"] = "text/html,application/xhtml+xml,application/xml;q=0.9,*/*;q=0.8",
           ["Accept-Language"] = "en-US,en;q=0.5",
           ["Accept-Encoding"] = "gzip, deflate",
           ["DNT"] = "1",
           ["Connection"] = "keep-alive",
           ["Upgrade-Insecure-Requests"] = "1",
       }
   }

   if not ok then
       if reason:find("timeout") then
           return {error = "Page load timeout", reason = reason}
       else
           return {error = "Page load failed", reason = reason}
       end
   end

   -- Wait for JavaScript to load
   splash:wait(3)

   -- Check if page loaded successfully
   local title = splash:evaljs("document.title")
   if not title or title == "" then
       splash:wait(2)  -- Wait a bit more
   end

   return {
       html = splash:html(),
       title = splash:evaljs("document.title"),
       url = splash:url(),
       status = "success"
   }
end
"""

def scrape_with_splash_scraperapi(url, retries=3):
   proxy = f"http://scraperapi:{API_KEY}@proxy-server.scraperapi.com:8001"
   print(f"🔍 Fetching with Splash + ScraperAPI: {url}")

   for attempt in range(retries):
       print(f"🔄 Attempt {attempt + 1}/{retries}")

       try:
           response = requests.post(SPLASH_EXECUTE_URL, json={
               "lua_source": LUA_SCRIPT,
               "url": url,
               "proxy": proxy,
               "timeout": 180,  # 3 minutes for Splash
               "resource_timeout": 60,  # 1 minute per resource
               "wait": 0.5,
               "html": 1,
               "har": 0,  # Disable HAR to reduce overhead
               "png": 0,  # Disable PNG to reduce overhead
           }, timeout=200)  # 200 seconds for the entire request

           if response.status_code == 200:
               try:
                   result = response.json()
                   if isinstance(result, dict) and "html" in result:
                       html_content = result["html"]
                       if len(html_content) > 1000:
                           with open("output.html", "w", encoding="utf-8") as f:
                               f.write(html_content)
                           print(f"✅ Success! HTML saved to output.html")
                           print(f"📄 Page title: {result.get('title', 'N/A')}")
                           print(f"🔗 Final URL: {result.get('url', 'N/A')}")
                           return True
                       else:
                           print(f"⚠️ HTML content too short ({len(html_content)} chars)")
                   else:
                       # Fallback for plain HTML response
                       if len(response.text) > 1000:
                           with open("output.html", "w", encoding="utf-8") as f:
                               f.write(response.text)
                           print("✅ HTML saved to output.html (fallback)")
                           return True
               except:
                   # If JSON parsing fails, treat as plain HTML
                   if len(response.text) > 1000:
                       with open("output.html", "w", encoding="utf-8") as f:
                           f.write(response.text)
                       print("✅ HTML saved to output.html (plain text)")
                       return True
           else:
               print(f"❌ HTTP {response.status_code}")
               error_text = response.text[:500]
               print(f"Error: {error_text}")

               # Check for specific timeout errors
               if "timeout" in error_text.lower() or "504" in error_text:
                   print("⏰ Timeout detected, retrying with longer timeout...")
                   time.sleep(5)  # Wait before retry
                   continue

       except requests.exceptions.Timeout:
           print(f"⏰ Request timeout on attempt {attempt + 1}")
           if attempt < retries - 1:
               print("🔄 Retrying in 10 seconds...")
               time.sleep(10)
       except requests.exceptions.RequestException as e:
           print(f"🚨 Request failed: {e}")
           if attempt < retries - 1:
               print("🔄 Retrying in 5 seconds...")
               time.sleep(5)

   print("❌ All attempts failed")
   return False

def test_splash_connection():
   try:
       res = requests.get("http://localhost:8050", timeout=5)
       return res.status_code == 200
   except:
       return False

def test_scraperapi_key():
   if not API_KEY:
       print("❌ SCRAPERAPI_KEY not found in .env file")
       return False
   print(f"✅ ScraperAPI key loaded: {API_KEY[:8]}...")
   return True

if __name__ == "__main__":
   print("🚀 Starting Splash + ScraperAPI test...")

   if not test_scraperapi_key():
       exit(1)

   if not test_splash_connection():
       print("❌ Splash is not running. Start with:")
       print("docker run -p 8050:8050 scrapinghub/splash --max-timeout 300 --slots 5 --maxrss 4000")
       exit(1)

   print("✅ Splash is running")

   # Test with a simpler site first
   test_url = "http://quotes.toscrape.com/js"
   success = scrape_with_splash_scraperapi(test_url)

   if success:
       print("🎉 Test completed successfully!")
   else:
       print("💥 Test failed. Try restarting Splash with higher limits:")
       print("docker run -p 8050:8050 scrapinghub/splash --max-timeout 300 --slots 5 --maxrss 4000")
This script sends a request to Splash. It goes through ScraperAPI’s rotating proxy. This helps bypass blocks and load content that uses a lot of JavaScript. It then saves the HTML locally for inspection and confirms if the integration works successfully.
While Docker is running, run your Python script:
python your_script.py

Then open the output:
open output.html
Final Output Preview

Alternative Method: Proxy Inside Lua Script (Not Recommended)
Some devs may try injecting the proxy directly into the Lua script:
splash:set_proxy('scraperapi:[email protected]:8001')
This method often fails with errors like:
attempt to call method 'set_proxy' (a nil value)
Why it fails:
- Some Splash builds don’t support
set_proxy - Proxy commands in Lua are not as stable
- Debugging Lua stack traces is harder than using standard Python errors
Common Challenges
Here are some issues you might run into:
| Problem | Cause | Solution |
|---|---|---|
port is already allocated |
Docker port conflict on 8050 | Kill the process using lsof -i :8050 and kill -9 <PID> |
set_proxy Lua errors |
Your Splash build doesn’t support set_proxy |
Use the "proxy" field in the JSON request instead of scripting it in Lua |
504 timeout |
Splash didn’t finish rendering within the timeout | Increase timeout with --max-timeout 300 when running the Docker container |
400 malformed request |
Missing or incorrect ScraperAPI key | Store key in .env and load it with dotenv in your script |
urllib3 LibreSSL warning |
macOS ships with LibreSSL instead of OpenSSL | Use pyenv to install Python with OpenSSL 1.1+ for better compatibility |
Using ScraperAPI Features
Premium Proxies & Geotargeting
Use special headers to customize ScraperAPI behavior:
Example:
headers = {
   'X-ScraperAPI-Premium': 'true',
   'X-ScraperAPI-Country': 'us',
   'X-ScraperAPI-Session': '123'
}

response = requests.get(SPLASH_URL, params={
   'url': target_url,
   'wait': 1,
}, headers=headers, proxies={
   'http': f'http://scraperapi:{API_KEY}@proxy-server.scraperapi.com:8001',
   'https': f'http://scraperapi:{API_KEY}@proxy-server.scraperapi.com:8001',
})
Handling Retries
Add retry logic for failed requests:
import time

def fetch_with_retry(url, max_retries=3):
   for attempt in range(max_retries):
       try:
           res = requests.get(SPLASH_URL, params={
               'url': url,
               'wait': 1,
           }, proxies={
               'http': f'http://scraperapi:{API_KEY}@proxy-server.scraperapi.com:8001',
               'https': f'http://scraperapi:{API_KEY}@proxy-server.scraperapi.com:8001',
           }, timeout=60)

           if res.status_code == 200:
               return res.text
       except Exception as e:
           print(f"Attempt {attempt+1} failed: {e}")
           time.sleep(2)
   return None

html = fetch_with_retry('http://quotes.toscrape.com/js')
print(html)
Concurrent Scraping
Scale up with multiple threads:
from concurrent.futures import ThreadPoolExecutor

API_KEY = 'YOUR_API_KEY'
SPLASH_URL = 'http://localhost:8050/render.html'

def scrape_page(url):
   response = requests.get(SPLASH_URL, params={
       'url': url,
       'wait': 1,
   }, proxies={
       'http': f'http://scraperapi:{API_KEY}@proxy-server.scraperapi.com:8001',
       'https': f'http://scraperapi:{API_KEY}@proxy-server.scraperapi.com:8001',
   }, timeout=60)

   return response.text if response.status_code == 200 else None

urls = [
   'http://quotes.toscrape.com/js/page/1/',
   'http://quotes.toscrape.com/js/page/2/',
   'http://quotes.toscrape.com/js/page/3/',
]

# Use max_workers equal to your ScraperAPI concurrent limit
with ThreadPoolExecutor(max_workers=5) as executor:
   results = list(executor.map(scrape_page, urls))

for i, html in enumerate(results):
   if html:
       print(f"Page {i+1}: {len(html)} characters")
Configuration Tips
Timeout Settings
Set appropriate timeouts for ScraperAPI processing:
response = requests.get(SPLASH_URL, params={
   'url': target_url,
   'wait': 2,
   'timeout': 90,  # Allow time for ScraperAPI retries
}, proxies={
   'http': f'http://scraperapi:{API_KEY}@proxy-server.scraperapi.com:8001',
   'https': f'http://scraperapi:{API_KEY}@proxy-server.scraperapi.com:8001',
}, timeout=120)
Resource Filtering
Optimize performance by disabling unnecessary resources:
response = requests.get(SPLASH_URL, params={
   'url': target_url,
   'wait': 1,
   'images': 0,      # Disable images
   'filters': 'easylist',  # Block ads
}, proxies={
   'http': f'http://scraperapi:{API_KEY}@proxy-server.scraperapi.com:8001',
   'https': f'http://scraperapi:{API_KEY}@proxy-server.scraperapi.com:8001',
})
Final Notes
- Proxy routing through ScraperAPI is the preferred method; it keeps Splash stable and functional.
- Avoid proxy logic in Lua scripts to reduce the risk of errors.
- Set timeouts generously; both Splash and ScraperAPI benefit from >90s.
- Store API keys in
.env, never hardcode.
More Resources:
The post Integrating Splash with ScraperAPI appeared first on ScraperAPI.
]]>The post How to Use ScraperAPI with Cypress for Web Scraping and Testing appeared first on ScraperAPI.
]]>Use ScraperAPI with Cypress to scrape JavaScript-heavy sites and run end-to-end tests. It’s perfect for dynamic pages that regular scraping tools can’t handle.
Getting started
This basic Cypress test works fine for static sites, but it breaks on pages that load content with JavaScript:
// Basic Cypress Test Without ScraperAPI
describe('Plain Cypress scraping', () => {
   it('visits a page', () => {
     cy.visit('https://example.com')
     cy.get('h1').should('contain.text', 'Example Domain')
   })
 })
To scrape JavaScript-heavy pages, use ScraperAPI with cy.request() and DOM parsing instead.
Recommended Method: Custom Command + DOM Injection + ScraperAPI
ScraperAPI handles rendering, proxies, CAPTCHAs, and retries for you. Cypress fetches the HTML, injects it into a DOM node, and lets you query it easily.
Requirements
- Cypress for running scraping tests
npm, the package manager to install Cypress and dependenciesnodejs/nodeto run Cypress and npmcypress-dotenvto keep your credentials secure- ScraperAPI and the given API key for scraping
Step 1: Set Up Your Node.js Project
Begin by moving to your project folder and installing Node.js and npm.
# For Ubuntu
sudo apt update
sudo apt install nodejs npm

 # For macOS (includes npm)
brew install node

 # For Windows
 # Download and install Node.js (which includes npm) from the official website (https://nodejs.org/en/download/) and follow the installer steps.
Initialize your Node.js project and download Cypress by running:
npm init -y
npm install cypress --save-dev
Step 2: Add a Custom Command
First off, generate a Cypress folder structure by running this in your terminal from the root of your project:
npx cypress open
If it’s the first time you do this, Cypress will create its default folder structure.
Now you can navigate to cypress/support/commands.js and create a reusable Cypress command that integrates with ScraperAPI to fetch and parse HTML from JavaScript-heavy websites.
// cypress/support/commands.js
Cypress.Commands.add('scrapeViaScraperAPI', (targetUrl) => {
 const scraperUrl = `http://api.scraperapi.com?api_key=${Cypress.env('SCRAPER_API_KEY')}&url=${encodeURIComponent(targetUrl)}&timeout=60000`;

 return cy.request(scraperUrl).then((response) => {
   return cy.document().then((document) => {
     const container = document.createElement('div');
     container.innerHTML = response.body;
     const titles = Array.from(container.querySelectorAll('.product_pod h3 a')).map(el =>
       el.getAttribute('title')
     );
     return titles;
   });
 });
});
Use an environment variable setup to store your ScraperAPI Key. You can get your API key here.
Install cypress-dotenv, then create a .env file in your project root:
npm install -D cypress-dotenv
touch .env
nano .env
# .env
SCRAPER_API_KEY=your_scraper_api_key
Update your cypress.config.js as follows:
// cypress.config.js
const { defineConfig } = require("cypress");
require('dotenv').config();

module.exports = defineConfig({
 e2e: {
   setupNodeEvents(on, config) {
     config.env.SCRAPER_API_KEY = process.env.SCRAPER_API_KEY;
     return config;
   },
   supportFile: "cypress/support/commands.js"
 }
});
Step 3: Use the Command in Your Test
In your cypress/ folder, create a new folder e2e and a file scraperapi.cy.js:
mkdir e2e
touch e2e/scraperapi.cy.js
In the file, paste the custom command in a Cypress test that displays the scraped data inside a browser DOM.
// cypress/e2e/scraperapi.cy.js
describe('Scrape Books to Scrape with ScraperAPI + Cypress', () => {
 it('gets product titles and displays them', () => {
   cy.visit('cypress/fixtures/blank.html'); // Load static HTML file

   cy.scrapeViaScraperAPI('http://books.toscrape.com/catalogue/page-1.html').then((titles) => {
     cy.document().then((doc) => {
       const container = doc.getElementById('results');
       const list = doc.createElement('ul');

       titles.forEach(title => {
         const item = doc.createElement('li');
         item.innerText = title;
         list.appendChild(item);
       });

       container.appendChild(list);
     });

     cy.screenshot('scraped-book-titles'); // Take screenshot after injecting
   });
 });
});
Step 4: Create the blank.html file and run your Cypress test
In your project folder, create the folder cypress/fixtures if it doesn’t exist yet:
mkdir -p cypress/fixtures
Inside, create the blank.html with the following minimal code (or similar!):
<!DOCTYPE html>
<html lang="en">
<head>
  <meta charset="UTF-8" />
  <title>Blank Page</title>
</head>
<body>
  <div id="results"></div>
</body>
</html>
You can now run your tests from the project root folder (the one where your package.json lives).
npx cypress run
This method works because:
- ScraperAPI handles the proxying and geo-routing
- Cypress injects the content into the browser DOM
- You get full control using native DOM APIs
Alternative: cy.request without ScraperAPI
You can call cy.request() directly, but it won’t render JS or rotate IPs:
describe('Simple cy.request test', () => {
   it('should load example.com and check the response', () => {
     cy.request('https://example.com').then((response) => {
       expect(response.status).to.eq(200);
       expect(response.body).to.include('Example Domain');
     });
   });
 });
This method is not ideal because:
- It exposes your IP to bot protection.
- It doesn’t bypass CAPTCHAs or rotate proxies.
- It fails on sites that require geolocation or JavaScript rendering.
Prefer ScraperAPI for anything beyond basic scraping.
ScraperAPI Parameters That Matter
ScraperAPI supports options via query parameters:
const scraperUrl = `http://api.scraperapi.com?api_key=YOUR_KEY&url=https://target.com&render=true&country_code=us&session_number=555`
| Parameter | What It Does | When to Use It |
|---|---|---|
render=true |
Tells ScraperAPI to load JavaScript | Use this for dynamic pages or SPAs |
country_code=us |
Uses a U.S. IP address | Great for geo-blocked content |
premium=true |
Solves CAPTCHAs and retries failed requests | Needed for hard-to-scrape sites |
session_number=555 |
Keeps the same proxy IP across multiple requests | Use it when you need to maintain a session |
These three are all you need in most cases. For more, check the ScraperAPI docs.
Test Retries
Improve stability with test retries:
// cypress.config.js
export default {
 e2e: {
   retries: {
     runMode: 2,
     openMode: 0,
   },
 },
}
This helps when pages load slowly or throw rate errors.
Visualize the Scraped Data in the DOM
To see the data you’re scraping, run your test using:
npx cypress open
Then select scraperapi.cy.js in the Cypress UI. You should get these results:
- The static HTML page load (
Ready for Scraped Data) - Scraped book titles dynamically injected into the DOM
- A screenshot saved as
scraped-book-titles.png

The post How to Use ScraperAPI with Cypress for Web Scraping and Testing appeared first on ScraperAPI.
]]>The post How to Use ScraperAPI with HtmlUnit in Java appeared first on ScraperAPI.
]]>ScraperAPI is a powerful scraping tool that handles proxies, browsers, and CAPTCHAs automatically. In this guide, you’ll learn how to integrate ScraperAPI with HtmlUnit, a fast and lightweight headless browser for Java.
Getting Started
Before we integrate ScraperAPI, here’s a basic HtmlUnit scraping example:
import com.gargoylesoftware.htmlunit.WebClient;
import com.gargoylesoftware.htmlunit.BrowserVersion;
import com.gargoylesoftware.htmlunit.html.HtmlPage;

public class BasicHtmlUnit {
   public static void main(String[] args) throws Exception {
       WebClient client = new WebClient(BrowserVersion.CHROME);
       client.getOptions().setCssEnabled(false);
       client.getOptions().setJavaScriptEnabled(false);

       HtmlPage page = client.getPage("https://httpbin.org/ip");
       System.out.println(page.asNormalizedText());
       client.close();
   }
}
This works for basic scraping but does not solve problems like IP bans or captchas.
Integration Methods
Recommended: API Endpoint Method
The best way to use ScraperAPI with HtmlUnit is to call the API endpoint directly and pass the target URL as a query parameter. This ensures your request routes through ScraperAPI’s proxy network with built-in CAPTCHA handling.
Required Setup
1. Install Java (if not already installed)
# Ubuntu
sudo apt-get update
sudo apt-get install default-jdk

# MacOS
brew install openjdk@2
Then add to your shell config (e.g. .zshrc or .bash_profile):
export JAVA_HOME="/Library/Java/JavaVirtualMachines/temurin-21.jdk/Contents/Home"
export PATH="$JAVA_HOME/bin:$PATH"

echo 'export JAVA_HOME="/Library/Java/JavaVirtualMachines/temurin-21.jdk/Contents/Home"' >> ~/.bash_profile
echo 'export PATH="$JAVA_HOME/bin:$PATH"' >> ~/.bash_profile
Reload your shell:
source ~/.zshrc
# or
source ~/.bash_profile
Confirm Java is installed:
java -version
2. Install Maven
# Ubuntu
sudo apt update
sudo apt install maven

# MacOS
brew install maven
Check:
mvn -v
3. Set Up Project Structure
Create a folder and initialize the Maven project:
mkdir htmlunit-scraperapi && cd htmlunit-scraperapi
Inside, create the structure:
src/
 main/
   java/
     MarketPrice.java
4. Add Dependencies in pom.xml
At the root of your project folder, create a file pom.xml and paste the following:
<project xmlns="http://maven.apache.org/POM/4.0.0"
        xmlns:xsi="http://www.w3.org/2001/XMLSchema-instance"
        xsi:schemaLocation="http://maven.apache.org/POM/4.0.0
        http://maven.apache.org/xsd/maven-4.0.0.xsd">

   <modelVersion>4.0.0</modelVersion>
   <groupId>com.scraperapi</groupId>
   <artifactId>htmlunit-scraperapi</artifactId>
   <version>1.0-SNAPSHOT</version>

   <dependencies>
       <!-- HtmlUnit for headless browser -->
       <dependency>
           <groupId>net.sourceforge.htmlunit</groupId>
           <artifactId>htmlunit</artifactId>
           <version>2.70.0</version>
       </dependency>

       <!-- Java dotenv to read .env variables -->
       <dependency>
           <groupId>io.github.cdimascio</groupId>
           <artifactId>java-dotenv</artifactId>
           <version>5.2.2</version>
       </dependency>
   </dependencies>

   <build>
       <plugins>
           <!-- Plugin to run Java classes with main method -->
           <plugin>
               <groupId>org.codehaus.mojo</groupId>
               <artifactId>exec-maven-plugin</artifactId>
               <version>3.1.0</version>
               <configuration>
                   <mainClass>MarketPrice</mainClass>
               </configuration>
           </plugin>
       </plugins>
   </build>
</project>
5. Add .env File in Root
In the same folder, create a .env file:
SCRAPERAPI_KEY=your_api_key_here
You can get your ScraperAPI key here.
Full Working Code
Paste this inside MarketPrice.java:
import com.gargoylesoftware.htmlunit.BrowserVersion;
import com.gargoylesoftware.htmlunit.WebClient;
import com.gargoylesoftware.htmlunit.html.DomNode;
import com.gargoylesoftware.htmlunit.html.DomNodeList;
import com.gargoylesoftware.htmlunit.html.HtmlElement;
import com.gargoylesoftware.htmlunit.html.HtmlPage;
import io.github.cdimascio.dotenv.Dotenv;

import java.io.IOException;

public class MarketPrice {
   public static void main(String[] args) throws IOException {
       // Load ScraperAPI key from .env
       Dotenv dotenv = Dotenv.load();
       String apiKey = dotenv.get("SCRAPERAPI_KEY");

       if (apiKey == null || apiKey.isEmpty()) {
           System.err.println("SCRAPERAPI_KEY is missing in your .env file.");
           return;
       }

       // Target a real HTML site
       String targetUrl = "https://quotes.toscrape.com";
       String scraperApiUrl = String.format("http://api.scraperapi.com?api_key=%s&url=%s",
               apiKey, targetUrl);

       // Initialize headless browser
       WebClient webClient = new WebClient(BrowserVersion.CHROME);
       webClient.getOptions().setUseInsecureSSL(true);
       webClient.getOptions().setCssEnabled(false);
       webClient.getOptions().setJavaScriptEnabled(false);
       webClient.getOptions().setThrowExceptionOnFailingStatusCode(false);
       webClient.getOptions().setThrowExceptionOnScriptError(false);

       // Fetch and parse page
       HtmlPage page = (HtmlPage) webClient.getPage(scraperApiUrl);

       DomNodeList<DomNode> quoteBlocks = page.querySelectorAll(".quote");

       System.out.println("\n📌 Scraped Quotes from https://quotes.toscrape.com:\n");

       for (DomNode quote : quoteBlocks) {
           String text = quote.querySelector(".text").asNormalizedText();
           String author = quote.querySelector(".author").asNormalizedText();
           DomNodeList<DomNode> tags = quote.querySelectorAll(".tags .tag");

           System.out.println("📝 Quote: " + text);
           System.out.println("👤 Author: " + author);
           System.out.print("🏷️  Tags: ");
           for (DomNode tag : tags) {
               System.out.print(tag.asNormalizedText() + " ");
           }
           System.out.println("\n------------------------------------------\n");
       }

       webClient.close();
   }
}
Make sure to set your API key in the environment variable SCRAPERAPI_KEY.
Not Recommended: Proxy Mode
HtmlUnit allows proxy configuration, but ScraperAPI uses query string authentication, which doesn’t work with HtmlUnit’s proxy model.
Why It Fails
- ScraperAPI needs the API key in the URL query.
- HtmlUnit proxy setup expects a static IP or basic authentication.
Error Output:
Use the API Endpoint method instead.
Optional Parameters
ScraperAPI supports various options via query parameters:
{
   Render = true,           // Load JavaScript
   CountryCode = "us",      // Use US IP
   Premium = true,          // Enable CAPTCHA solving
   SessionNumber = 123      // Maintain session across requests
};
| Parameter | What It Does | When to Use It |
render=true |
Tells ScraperAPI to execute JavaScript | Use for SPAs and dynamic content |
country_code=us |
Routes requests through US proxies | Great for geo-blocked content |
premium=true |
Enables CAPTCHA solving and advanced anti-bot measures | Essential for heavily protected sites |
session_number=123 |
Maintains the same proxy IP across requests | Use when you need to maintain login sessions |
These parameters cover most scraping scenarios. Check the ScraperAPI documentation for additional options.
Example:
String scraperApiUrl = String.format("http://api.scraperapi.com?api_key=%s&url=%s&render=true&country_code=us", apiKey, java.net.URLEncoder.encode(targetUrl, "UTF-8"));
Best Practices
- Always store your ScraperAPI key in an environment variable
- Use
render=truewhen targeting JavaScript-heavy sites - Avoid using proxy settings in HtmlUnit
- Implement retry logic when scraping large datasets
- Disable JavaScript/CSS for better performance on static pages
Run the Scraper
Run your MarketPrice.java file using:
mvn compile exec:java -Dexec.mainClass=MarketPrice
Expected Output:
Your terminal should display structured quote data like this:

This confirms ScraperAPI handled the request and routed it through its network.
The post How to Use ScraperAPI with HtmlUnit in Java appeared first on ScraperAPI.
]]>The post How to Use ScraperAPI with Ferrum(Ruby) to Scrape Websites appeared first on ScraperAPI.
]]>This guide shows you how to integrate ScraperAPI with Ferrum, a headless browser tool for Ruby. You’ll learn how to set up Ruby and Ferrum on your machine, connect through ScraperAPI’s proxy, and scrape dynamic websites that load content with JavaScript. The goal is to get real, usable data, fast and clean.
Getting Started with Ferrum (No Proxy)
Here’s what a basic Ferrum script looks like without ScraperAPI:
require 'ferrum'

browser = Ferrum::Browser.new
browser.goto('https://example.com')
puts browser.current_title
browser.quit
This works fine for simple pages. But when you try this on sites that block scraping, use JavaScript to render content, or throw CAPTCHAs, you’ll hit a wall. Ferrum doesn’t rotate IPs or handle advanced blocking on its own.
That’s where ScraperAPI comes in.
Recommended Method: Use ScraperAPI as a Proxy
This method sends all your Ferrum traffic through ScraperAPI’s proxy. It gives you IP rotation, country targeting, CAPTCHA bypass, and support for JS-heavy sites.
Requirements
- Ruby (v2.6 or later)
- Bundler (
gem install bundler) - Chrome or Chromium installed on your system
- ScraperAPI Key (you can get one by signing up!)
- Ferrum
Installation and Setup
If you don’t have it already, install Ruby and bundler:
sudo apt update
sudo apt install ruby-full -y
sudo gem install bundler
Create a Gemfile in your project folder:
touch Gemfile
And add the following:
# Gemfile
source 'https://rubygems.org'

gem 'ferrum'

gem 'dotenv'
Then run:
bundle install
This installs the required gems using Bundler.
.env File
In your project folder, create a .env file with the following:
SCRAPERAPI_KEY=your_api_key_here
Your Script
In a file test_scraper.rb, paste the following:
require 'ferrum'
require 'dotenv/load'

SCRAPERAPI_KEY = ENV['SCRAPERAPI_KEY']
proxy_url = "http://api.scraperapi.com:8001?api_key=#{SCRAPERAPI_KEY}&render=true"

browser = Ferrum::Browser.new(browser_options: { 'proxy-server': proxy_url })

browser.goto('https://news.ycombinator.com/')

puts "\nTop 5 Hacker News Headlines:\n\n"

browser.css('.athing .titleline a').first(5).each_with_index do |link, index|
 puts "#{index + 1}. #{link.text.strip}"
end

# Save output to HTML file for browser inspection
File.write('output.html', browser.body)
puts "\nSaved result to output.html"

browser.quit

# Optional: open the file in Chrome
system("open -a 'Google Chrome' output.html")
The script above uses Ferrum to visit a site that relies on JavaScript. It sends the request through ScraperAPI with render=true to load dynamic content. It scrapes the top 5 headlines from Hacker News, saves the full HTML, and lets you open it in Chrome to check the results.
Save your script as test_scraper.rb, then run it:
ruby test_scraper.rb

It should load on Chrome like this:

This confirms that ScraperAPI is handling the request.
Optional Parameters
ScraperAPI lets you pass additional options via query params:
{
   Render = true,           // Load JavaScript
   CountryCode = "us",      // Use US IP
   Premium = true,          // Enable CAPTCHA solving
   SessionNumber = 123      // Maintain session across requests
};
| Parameter | What It Does | When to Use It |
render=true | Tells ScraperAPI to execute JavaScript | Use for SPAs and dynamic content |
country_code=us | Routes requests through US proxies | Great for geo-blocked content |
premium=true | Enables CAPTCHA solving and advanced anti-bot measures | Essential for heavily protected sites |
session_number=123 | Maintains the same proxy IP across requests | Use when you need to maintain login sessions |
These parameters cover most scraping scenarios. Check the ScraperAPI documentation for additional options.
Example
proxy_url = "http://api.scraperapi.com:8001?api_key=#{SCRAPERAPI_KEY}&render=true&country_code=us&session_number=123"
Configuration & Best Practices
Concurrency
Use threads to run multiple Ferrum sessions:
threads = 5.times.map do
 Thread.new do
   browser = Ferrum::Browser.new(...)
   browser.goto('https://httpbin.org/ip')
   puts browser.body
   browser.quit
 end
end

threads.each(&:join)
Retry Logic
Wrap unstable requests in retry blocks:
begin
 browser.goto('https://targetsite.com')
rescue Ferrum::StatusError => e
 sleep 1
 retry
end
For more information, you can check ScraperAPI Documentation.
The post How to Use ScraperAPI with Ferrum(Ruby) to Scrape Websites appeared first on ScraperAPI.
]]>The post How to Use ScraperAPI with Playwright appeared first on ScraperAPI.
]]>Getting Started
Before integrating ScraperAPI, here’s a typical Playwright request:
const { chromium } = require('playwright');

(async () => {
 const browser = await chromium.launch();
 const page = await (await browser.newContext()).newPage();

 await page.goto('https://httpbin.org/ip');
 const content = await page.textContent('body');
 console.log(content);

 await browser.close();
})();
The code above opens a browser, navigates to the page, and logs the response. But it doesn’t block IPs or handle captchas and geo-targeting. That’s where ScraperAPI comes in.
Integration Methods
Recommended: API Endpoint Method
The most reliable and straightforward way to use ScraperAPI with Playwright is to send a request directly to the ScraperAPI endpoint. This method ensures proper authentication and handles JavaScript rendering as well as proxy management effectively.
Requirements
- Node.js v18 or later
playwrightdotenv
Set up
Initialize a Node.js project:
npm init -y
Then install the dependencies:
npm install playwright dotenv
Install npm if you don’t have it yet, too:
# For Ubuntu
sudo apt update
sudo apt install nodejs npm

 # For macOS (includes npm)
brew install node

 # For Windows
 # Download and install Node.js (which includes npm) from the official website (https://nodejs.org/en/download/) and follow the installer steps.
.env File
Create an .env file in your project folder and place your ScraperAPI key in there. If you don’t have one, you can get it by creating an account.
SCRAPERAPI_KEY=your_api_key_here
Make sure there are no quotes around the key!
Your script
In a file scraperapi-playwright.js, paste the following:
const { chromium } = require('playwright');
require('dotenv').config();

const SCRAPERAPI_KEY = process.env.SCRAPERAPI_KEY;
const targetUrl = 'https://httpbin.org/ip';
const scraperApiUrl = `https://api.scraperapi.com?api_key=${SCRAPERAPI_KEY}&url=${encodeURIComponent(targetUrl)}`;

(async () => {
 const browser = await chromium.launch();
 const context = await browser.newContext();
 const page = await context.newPage();

 await page.goto(scraperApiUrl, { waitUntil: 'domcontentloaded' });

 const content = await page.textContent('body');
 console.log('IP Details:', content);

 await browser.close();
})();
The code above loads your API key from a .env file. It builds a ScraperAPI URL that wraps the target site (https://httpbin.org/ip). Then it launches a Chromium browser with Playwright, opens a new page, visits the ScraperAPI URL, and prints the IP address it receives.
Optional Parameters
ScraperAPI lets you pass additional options via query params:
render=true– Enable JavaScript renderingcountry_code=us– Use a US-based IPsession_number=123– Stick to a proxy sessionpremium=true– Use premium proxies
Example:
const scraperApiUrl = `https://api.scraperapi.com?api_key=${SCRAPERAPI_KEY}&render=true&country_code=us&url=${encodeURIComponent(targetUrl)}`;
Not Recommended: Proxy Mode
You might be tempted to use ScraperAPI’s proxy port (proxy-server.scraperapi.com:8001) directly in Playwright’s launch() options. However, this method fails because Playwright doesn’t support query string authentication in proxy URLs.
Why It Fails
- ScraperAPI requires the API key to be passed as a query parameter.
- Playwright’s proxy configuration expects Basic Auth or IP auth, not query strings.
Error Output:
IP Details: Proxy Authentication Required
Best Practices
- Always store your API key in an environment variable using .env
- Use
render=truewhen you intend to target JS-heavy sites - Avoid Playwright proxy settings when using ScraperAPI
- Respect rate limits and concurrency
Run the Code:
After saving your script as scraperapi-playwright.js, then run it:
node scraperapi-playwright.js
If everything works, your terminal will show your IP address like this:

This confirms that ScraperAPI is handling the request.
For more information, you can check this guide
The post How to Use ScraperAPI with Playwright appeared first on ScraperAPI.
]]>The post How to Use ScraperAPI with Chromedp for Web Scraping in Go appeared first on ScraperAPI.
]]>You’ll learn how to load JavaScript-heavy pages, render content, and store your API key securely using environment variables.
Getting Started: chromedp without Scraper API
Before integrating ScraperAPI, here’s a simple chromedp script that fetches the HTML of a webpage:
package main

import (
   "context"
   "fmt"
   "github.com/chromedp/chromedp"
)

func main() {
   ctx, cancel := chromedp.NewContext(context.Background())
   defer cancel()

   var res string
   err := chromedp.Run(ctx,
       chromedp.Navigate("https://example.com"),
       chromedp.OuterHTML("html", &res),
   )

   if err != nil {
       fmt.Println("Error:", err)
       return
   }

   fmt.Println(res)
}
This works for simple sites. But it fails when sites use CAPTCHAs, blocks, or anti-bot protection. That’s where ScraperAPI helps.
Integration Methods
Recommended: API Endpoint Method
This is the best way to use ScraperAPI with chromedp. You send a regular GET request to the ScraperAPI endpoint Instead of using it as a proxy. ScraperAPI renders the page and returns clean HTML, which you can load into chromedp if needed.
Why This Works Best
- Avoids proxy issues and browser flags
- Easy to set up and debug
- Works well with most websites
Requirements
To run this guide, you’ll need the following:
- Go 1.20 or higher installed
chromedpgodotenv
Install the Dependencies
In your project folder, initialize a Go module:
go mod init your-project
Then run these commands to install the dependencies:
go get -u github.com/chromedp/chromedp
go get -u github.com/joho/godotenv
Set Up Your .env FileCreate an .env file in the root of your project:
SCRAPERAPI_KEY=your_api_key_here
Your Script
In a file scraperapi-chromedp.go, paste:
package main

import (
   "context"
   "fmt"
   "io"
   "net/http"
   "os"
   "time"

   "github.com/chromedp/chromedp"
   "github.com/joho/godotenv"
)

func main() {
   err := godotenv.Load()
   if err != nil {
       fmt.Println("Error loading .env file")
       return
   }

   apiKey := os.Getenv("SCRAPERAPI_KEY")
   if apiKey == "" {
       fmt.Println("Missing SCRAPERAPI_KEY")
       return
   }

   // Use API instead of proxy
   targetURL := "https://httpbin.org/ip"
   scraperURL := fmt.Sprintf("https://api.scraperapi.com?api_key=%s&url=%s&render=true", apiKey, targetURL)

   // Step 1: Fetch pre-rendered HTML from ScraperAPI
   resp, err := http.Get(scraperURL)
   if err != nil {
       fmt.Println("HTTP request failed:", err)
       return
   }
   defer resp.Body.Close()

   bodyBytes, err := io.ReadAll(resp.Body)
   if err != nil {
       fmt.Println("Failed to read response:", err)
       return
   }

   // Step 2: Load the HTML into a data URL for chromedp to parse
   htmlContent := string(bodyBytes)
   dataURL := "data:text/html;charset=utf-8," + htmlContent

   // Step 3: Use chromedp to parse/extract from the static HTML
   ctx, cancel := chromedp.NewContext(context.Background())
   defer cancel()

   ctx, cancel = context.WithTimeout(ctx, 20*time.Second)
   defer cancel()

   var parsed string
   err = chromedp.Run(ctx,
       chromedp.Navigate(dataURL),
       chromedp.Text("body", &parsed),
   )

   if err != nil {
       fmt.Println("Scraping failed:", err)
       return
   }

   fmt.Println("Parsed response:\n", parsed)
}
This code above uses ScraperAPI to fetch and render a webpage, then uses chromedp to parse the HTML content in Go.
Not Recommended: Using ScraperAPI as a Proxy in chromedp
You can try to use ScraperAPI as a proxy in chromedp, but it’s not reliable. We tested this method and ran into issues like:
net::ERR_INVALID_ARGUMENTnet::ERR_NO_SUPPORTED_PROXIES
Why You Should Avoid It
- Proxy settings in Chrome are tricky to configure in Go
- TLS and authentication often fail silently
- Debugging is harder and less consistent
This method may work for some users, but we don’t recommend it unless you know how to handle Chrome proxy flags in headless mode.
Advanced Usage
Session ManagementYou can opt to keep the same session across pages by updating your scraperURL like so:
scraperURL := fmt.Sprintf("https://api.scraperapi.com?api_key=%s&session_number=1234&url=%s", apiKey, targetURL)
Country Targeting
To use IPs from a specific country:
scraperURL := fmt.Sprintf("https://api.scraperapi.com?api_key=%s&url=%s&country_code=us", apiKey, targetURL)
Best Practices
Store API Key Securely
Use a .env file and godotenv to load your key instead of hardcoding it.
Use Timeouts
Avoid long waits by setting a timeout:
ctx, cancel := context.WithTimeout(context.Background(), 30*time.Second)

defer cancel()
Retry Logic
Simple retry pattern:
for i := 0; i < 3; i++ {

   err := chromedp.Run(...)

   if err == nil {

       break

   }

   time.Sleep(2 * time.Second)

}
Run the Code
Save your code as scraperapi-chromedp.go, then run:
go run scraperapi-chromedp.go

If you test it with https://httpbin.org/ip, the IP should reflect ScraperAPI’s proxy server, the one that ScraperAPI assigned.

This confirms that ScraperAPI is handling the request.
For more, visit ScraperAPI Documentation
The post How to Use ScraperAPI with Chromedp for Web Scraping in Go appeared first on ScraperAPI.
]]>