![]()
![]()
![]()
![]()
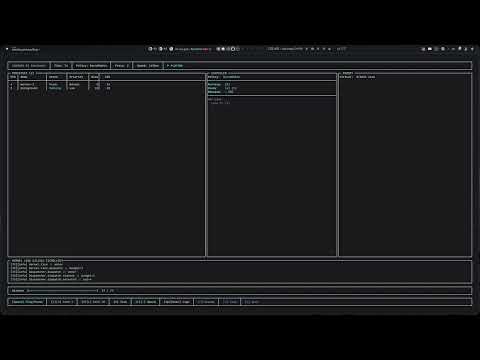
Contur 2 is an educational OS-kernel simulator written in C++20. The project models core kernel subsystems such as processes and scheduling, memory management, synchronization, IPC, syscalls, and a simple file system.
Execution modes
- Interpreted mode — step-by-step execution of the educational bytecode.
- Native mode — managing real host processes through platform abstractions (not ready yet).
Who this is for
- Students and instructors learning OS concepts.
- Engineers experimenting with scheduling and memory-management algorithms.
Watch a short demo of Contur 2:
This section covers dependencies, build and test workflows for local development.
The project depends on the following tools:
llvm(includesclang) — REQUIREDcmake— REQUIREDninja— REQUIREDgit— REQUIRED (used to resolve cmake dependencies)conan— REQUIRED (used to resolve cmake dependencies)doxygen— optional (for generated API docs)gcc— optional (commonly used on Linux/macOS)Python 3.11— REQUIRED on Windows only (required by LLVM for the build on Windows)
Note:
Python 3.11 is a Windows-only dependency required by LLVM for the build on Windows;
Linux and macOS do not require Python for the standard build flow.
Installation examples:
Linux (Debian / Ubuntu, apt):
sudo apt update
sudo apt install -y build-essential cmake ninja-build git llvm python3-pip pipx
# Conan (recommended via pipx on Debian/Ubuntu)
pipx install conan
# optional: doxygen
sudo apt install -y doxygen
Linux (Arch / Manjaro, pacman):
sudo pacman -Syu
sudo pacman -S --needed base-devel cmake ninja git llvm
# Conan (AUR)
yay -S conan-bin
# optional: doxygen
sudo pacman -S doxygen
macOS (Homebrew):
brew update
brew install llvm cmake ninja doxygen
# If you installed llvm from Homebrew, consider adding its bin to PATH:
# echo 'export PATH="/opt/homebrew/opt/llvm/bin:$PATH"' >> ~/.zshrc
Windows (winget):
winget install --id LLVM.LLVM -e
winget install --id Kitware.CMake -e
winget install --id Ninja.MSBuild -e
winget install --id=JFrog.Conan -e
winget install --id Python.Python.3.11 -e
# optional: Doxygen
winget install --id Doxygen.Doxygen -e
If Conan has not been used on this machine before, create a default profile once:
conan profile detect --forceTwo supported workflows: VSCode tasks (recommended) and CLI scripts.
Via VSCode tasks (open the command palette Ctrl+Shift+P → Tasks: Run Task):
Build contur2 (Debug)Build contur2 (Release)
These tasks call CMake with the debug and release presets respectively.
Via CLI scripts:
Linux / macOS (bash):
# Debug
bash src/build.sh debug src
# Release
bash src/build.sh release src
Windows (PowerShell / pwsh):
# Debug
pwsh ./src/build.ps1 debug src
# Release
pwsh ./src/build.ps1 release srcProject tests use CTest / GoogleTest. Use either VSCode tasks or the CLI.
Via VSCode tasks (Ctrl+Shift+P → Tasks: Run Task):
Run Tests (Debug)Run Tests (Release)
Via CLI (from the repository root):
# Debug (Linux / macOS)
ctest --preset debug --output-on-failure src

# Release (Linux / macOS)
ctest --preset release --output-on-failure src

# Debug (Windows)
ctest --preset win-debug --output-on-failure ./src

# Release (Windows)
ctest --preset win-release --output-on-failure ./srcYou can generate API documentation with the provided task or using the scripts + CMake target.
Via VSCode tasks (Ctrl+Shift+P → Tasks: Run Task):
Generate Doxygen Docs (Debug)Generate Doxygen Docs (Release)
Via CLI (from the repository root):
# Debug (Linux / macOS)
bash -c "src/build.sh debug . && cmake --build --preset debug --target docs"

# Release (Linux / macOS)
bash -c "src/build.sh release . && cmake --build --preset release --target docs"

# Debug (Windows)
pwsh -c "./src/build.ps1 debug .; cmake --build --preset win-debug --target docs"

# Release (Windows)
pwsh -c "./src/build.ps1 release .; cmake --build --preset win-release --target docs"Useful (but not all) build outputs and generated artifacts are placed under src/build/<preset>/, where <preset> is debug or release.
- Application:
src/build/<preset>/app/ - Demos:
src/build/<preset>/demos/ - Tests:
src/build/<preset>/tests/ - Test results / CTest data:
src/build/<preset>/Testing/ - Generated HTML documentation:
src/build/<preset>/html/(targetdocs)
- Install the LLDB extension for VSCode: https://marketplace.visualstudio.com/items?itemName=vadimcn.vscode-lldb
- The workspace already includes a preconfigured
.vscode/launch.jsonthat uses LLDB and launches the application built fromsrc/app/main.cpp. No manuallaunch.jsonedits are required :D, enjoy your debugging!
- Project documentation website: https://contur.yudashkin-dev.ru/
- VSCode LLDB extension: https://marketplace.visualstudio.com/items?itemName=vadimcn.vscode-lldb